Generally, when a device goes to the background mode, the application logic gets paused.
In this tutorial, we will demonstrate how you can keep application logic working when in the background mode.
Part 1. Importing Plug-ins
First of all, let's import a custom Cordova plug-in that will be used in the app.
Importing cordova-plugin-local-notifications
- Go to the Resources > Cordova plugins tab.
- Click Import Cordova plugin and select the From Git tab.
- Enter https://github.com/katzer/cordova-plugin-local-notifications.git in the Repository URL field.
- Enter master in the Repository branch field and click the Import plugin button.
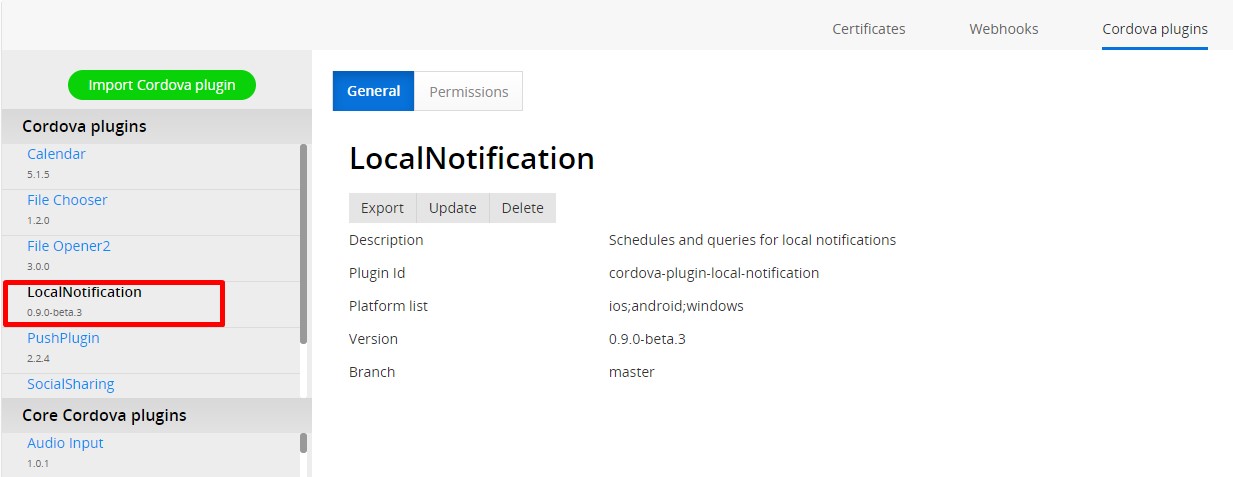
Check now - the plug-in should be added to the Cordova plug-ins list:
Part 2. Creating App
- Go to the Apps tab and click Create new app.
- Select Ionic 4 > Ionic 4 Blank for the application type, enter the app name, for example BackgroundNotificationsApp, and click Create.
Adding Dependencies
Adding Cordova Dependency
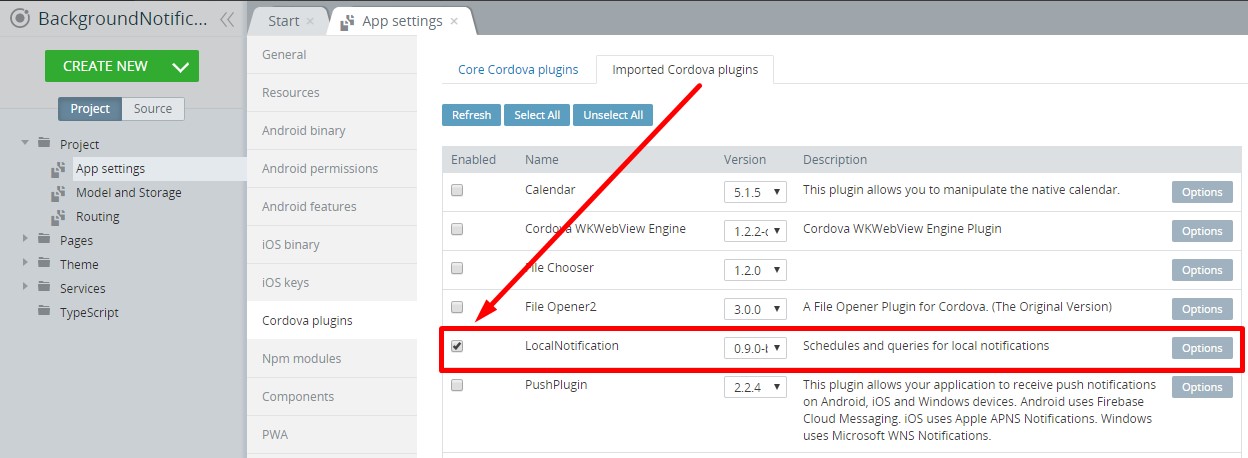
- Inside the app, navigate to Project > App Settings > Cordova plugins.
- Select the Imported Cordova plugins tab, then select the LocalNotification plug-in and click the SAVE button at the top:
Adding Ionic Native Dependency
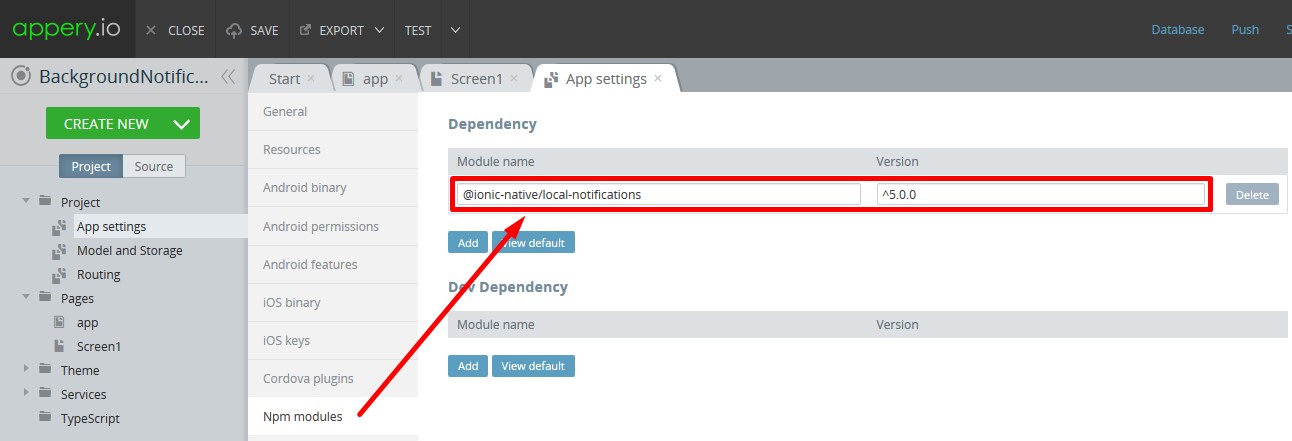
- Now, switch to Project > App settings > Npm modules and add a new Dependency: @ionic-native/local-notifications.
- For its version field, enter ^5.0.0:
Adding Dependency to App Module
- Unfold the Pages folder and choose the app page.
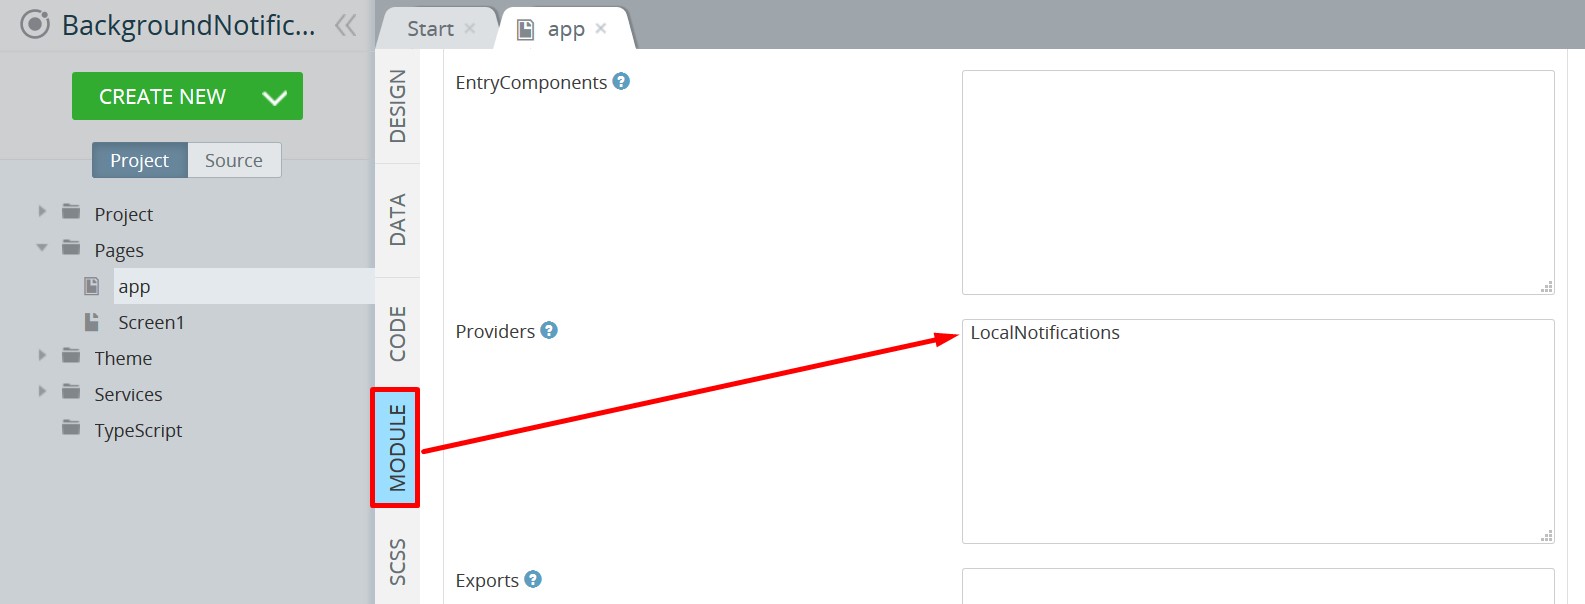
- Go to the page MODULE panel. In the Imports section, enter the following code:
import { LocalNotifications } from '@ionic-native/local-notifications/ngx';

- In the NgModule Settings > Providers section, enter LocalNotifications:
Creating Local Notifications
- In Appery.io Visual Editor, open Pages > Screen1 and switch to its CODE panel.
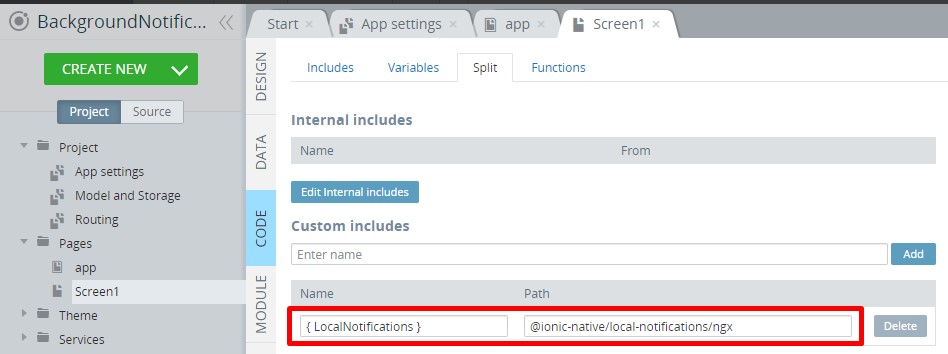
- In the Custom includes section, enter { LocalNotifications } and click Add.
- Type @ionic-native/local-notifications/ngx for the Path field:
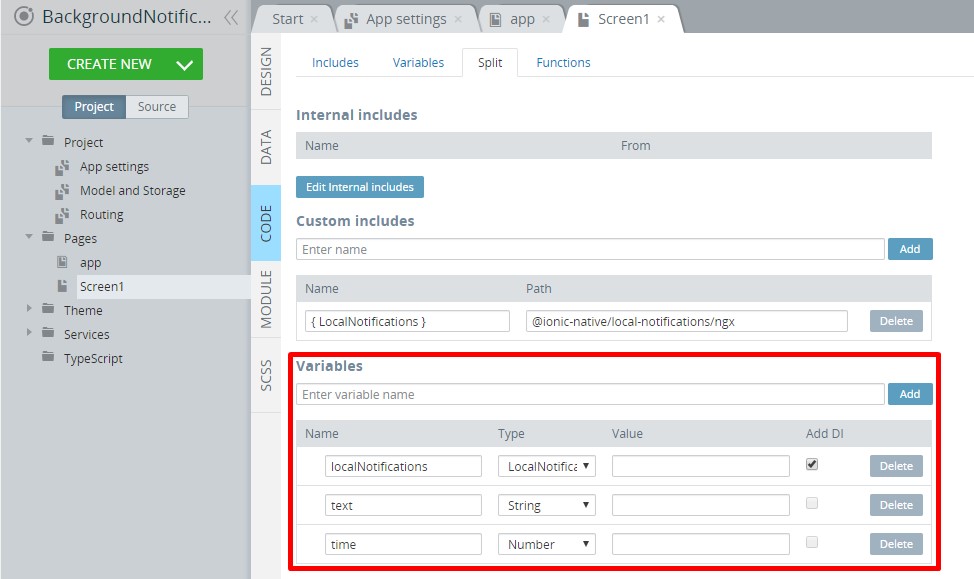
- Under Variables, add a new variable, localNotifications with type LocalNotifications and make sure that the Add DI checkbox is checked.
- Add two new variables: text of String type and time of Number type:
Creating App UI
- Go to the DESIGN tab and, under the PROPERTIES panel, set the Footer property to False, then select the Header ToolbarTitle element and change its Text property to Remind me.
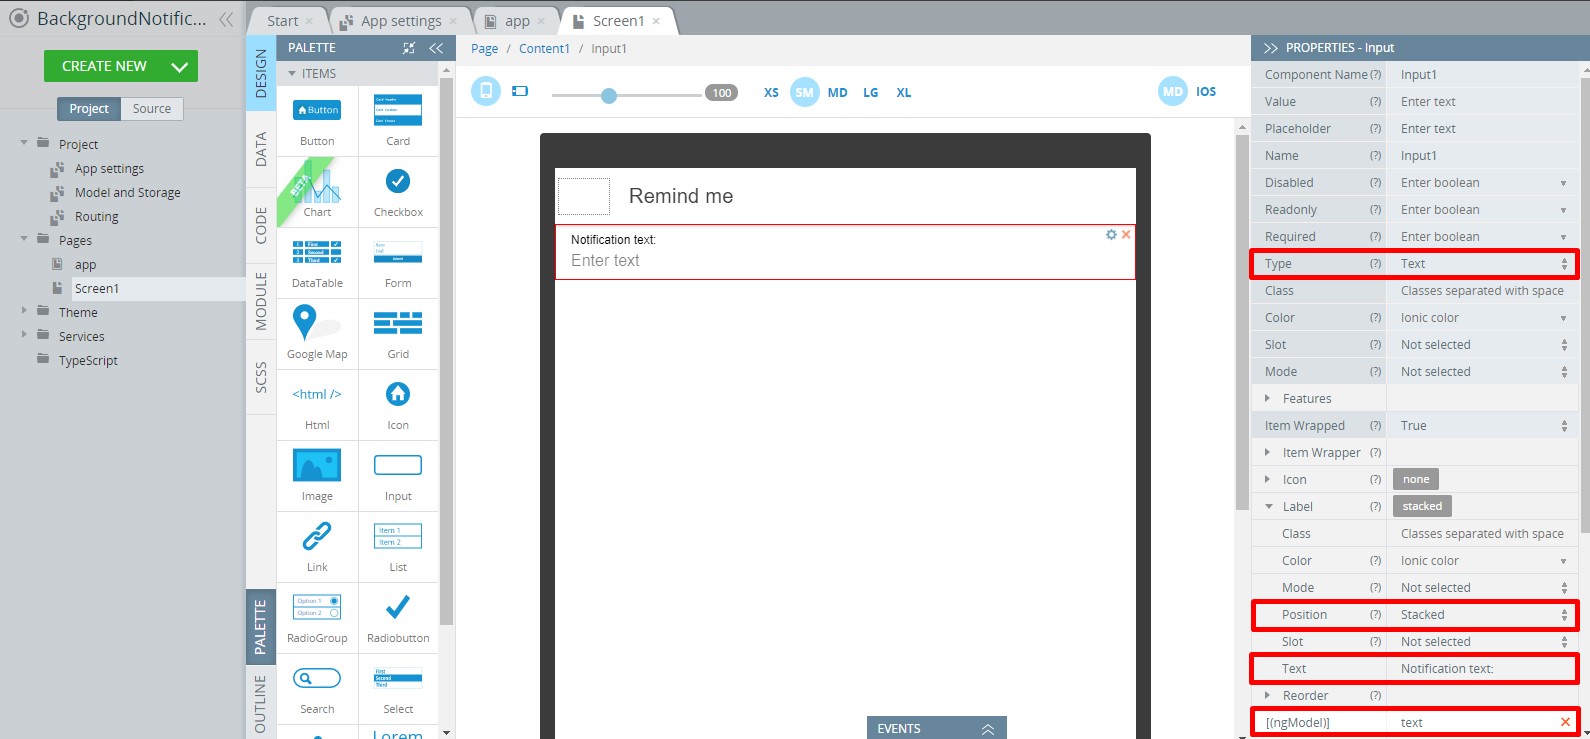
- Drag & drop an Input component to the screen and define it with the following properties:
- Type = Text
- Label > Position = Stacked
- Label > Text = Notification text:
- [(ngModel)] = text.
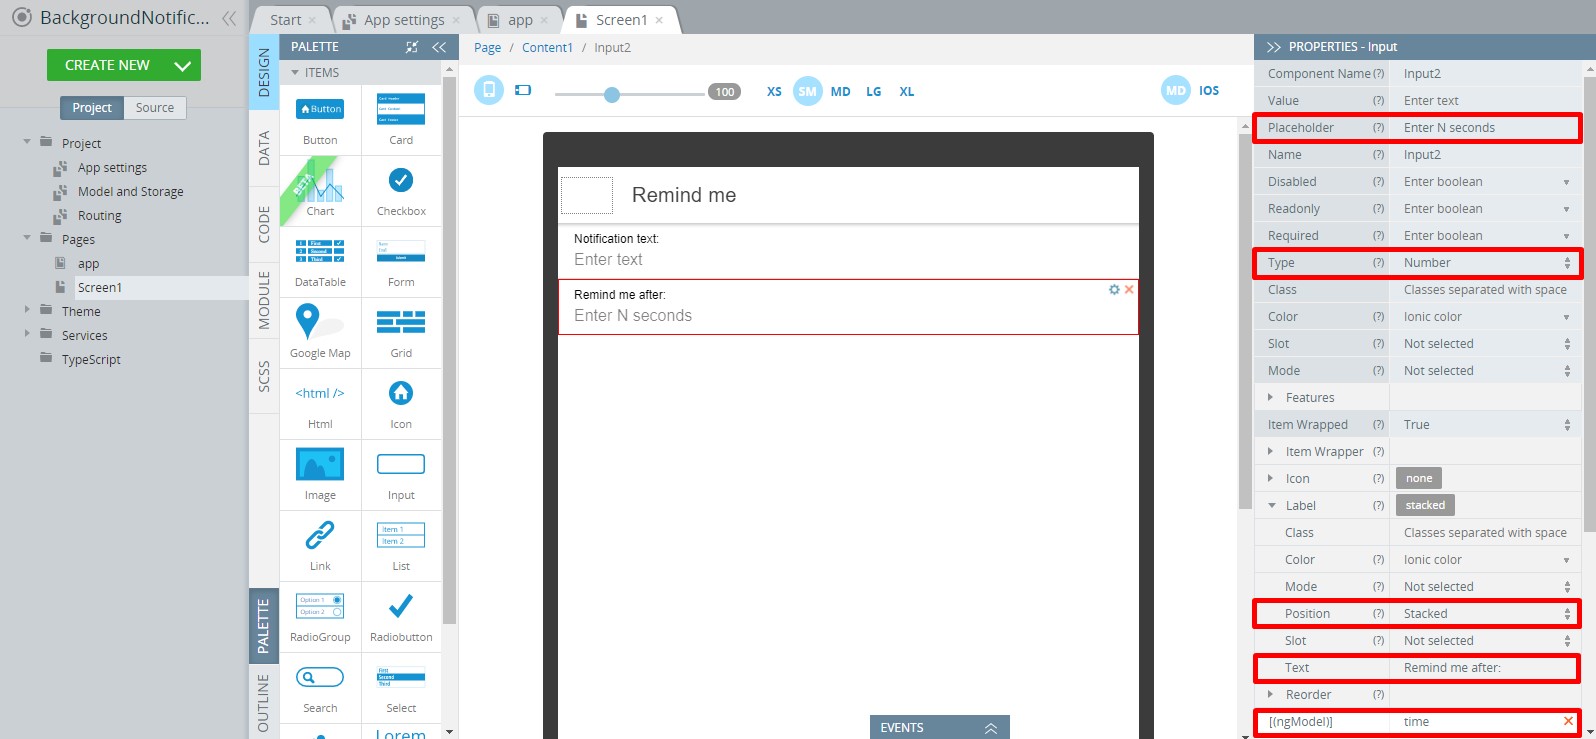
- Drag & drop another Input from PALETTE to the screen and update it with the following properties:
- Placeholder = Enter N seconds
- Type = Number
- Label > Position = Stacked
- Label > Text = Remind me after:
- [(ngModel)] = time.
-
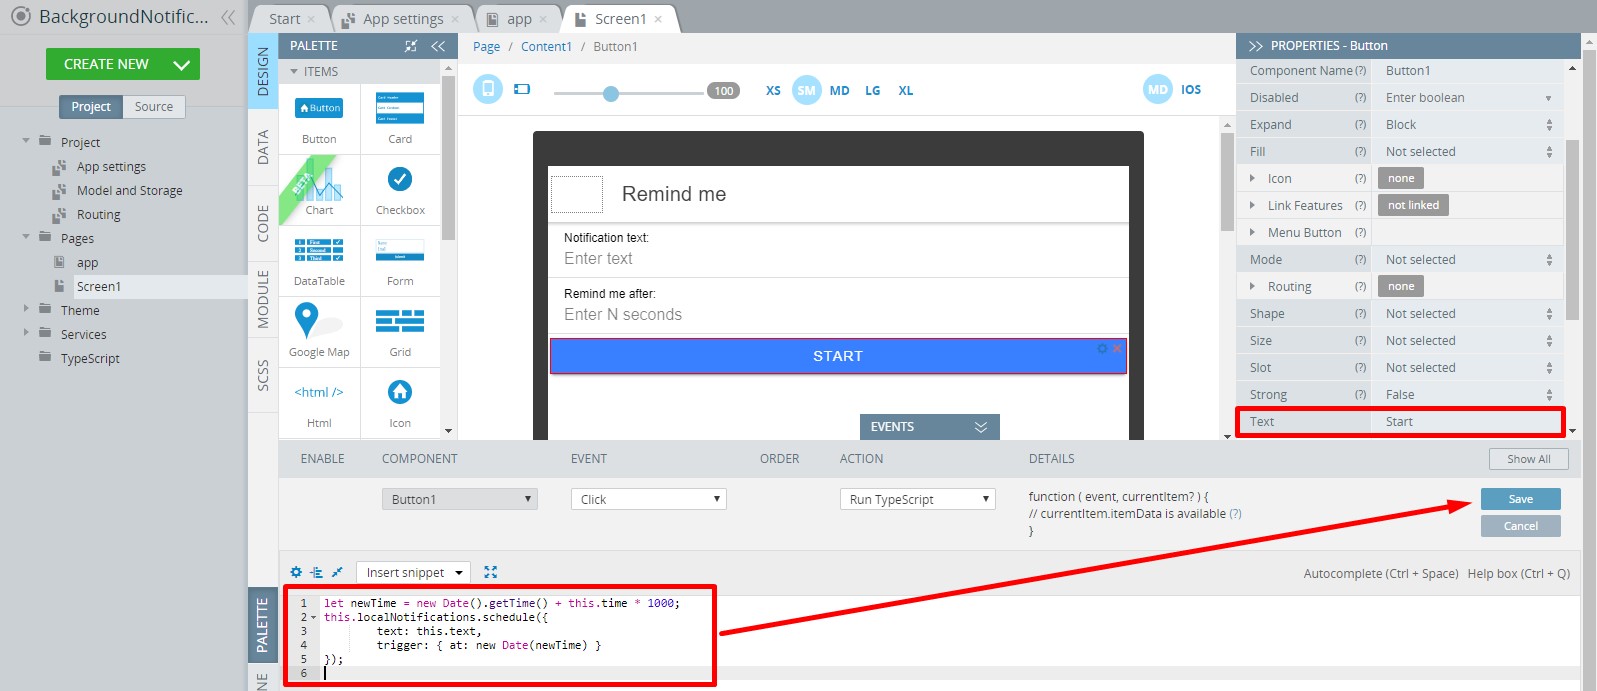
Now, drag & drop a Button from PALETTE, set its Text proprty to START, and expand the EVENTS tab. Then select the Click event for the button and set Run TypeScript for its action.
-
Enter the following code into the code editor and save:
let newTime = new Date().getTime() + this.time * 1000;
this.localNotifications.schedule({
        text: this.text,
        trigger: { at: new Date(newTime) }
});
- Save the project.
The event should look like this:
If you would like to modify notifications, please check the documentation below:
https://github.com/katzer/cordova-plugin-local-notifications.
Testing Application
- Click the EXPORT button in the top menu of the Appery.io Visual Editor.
- Select Binary and wait a bit while the app is being built.
- When the app is ready, install it on your device, then run it, and enter test values.
Please check this document to learn how to build an iOS binary and this document to learn how to build an Android binary.
Here is how it should look on an Android device:
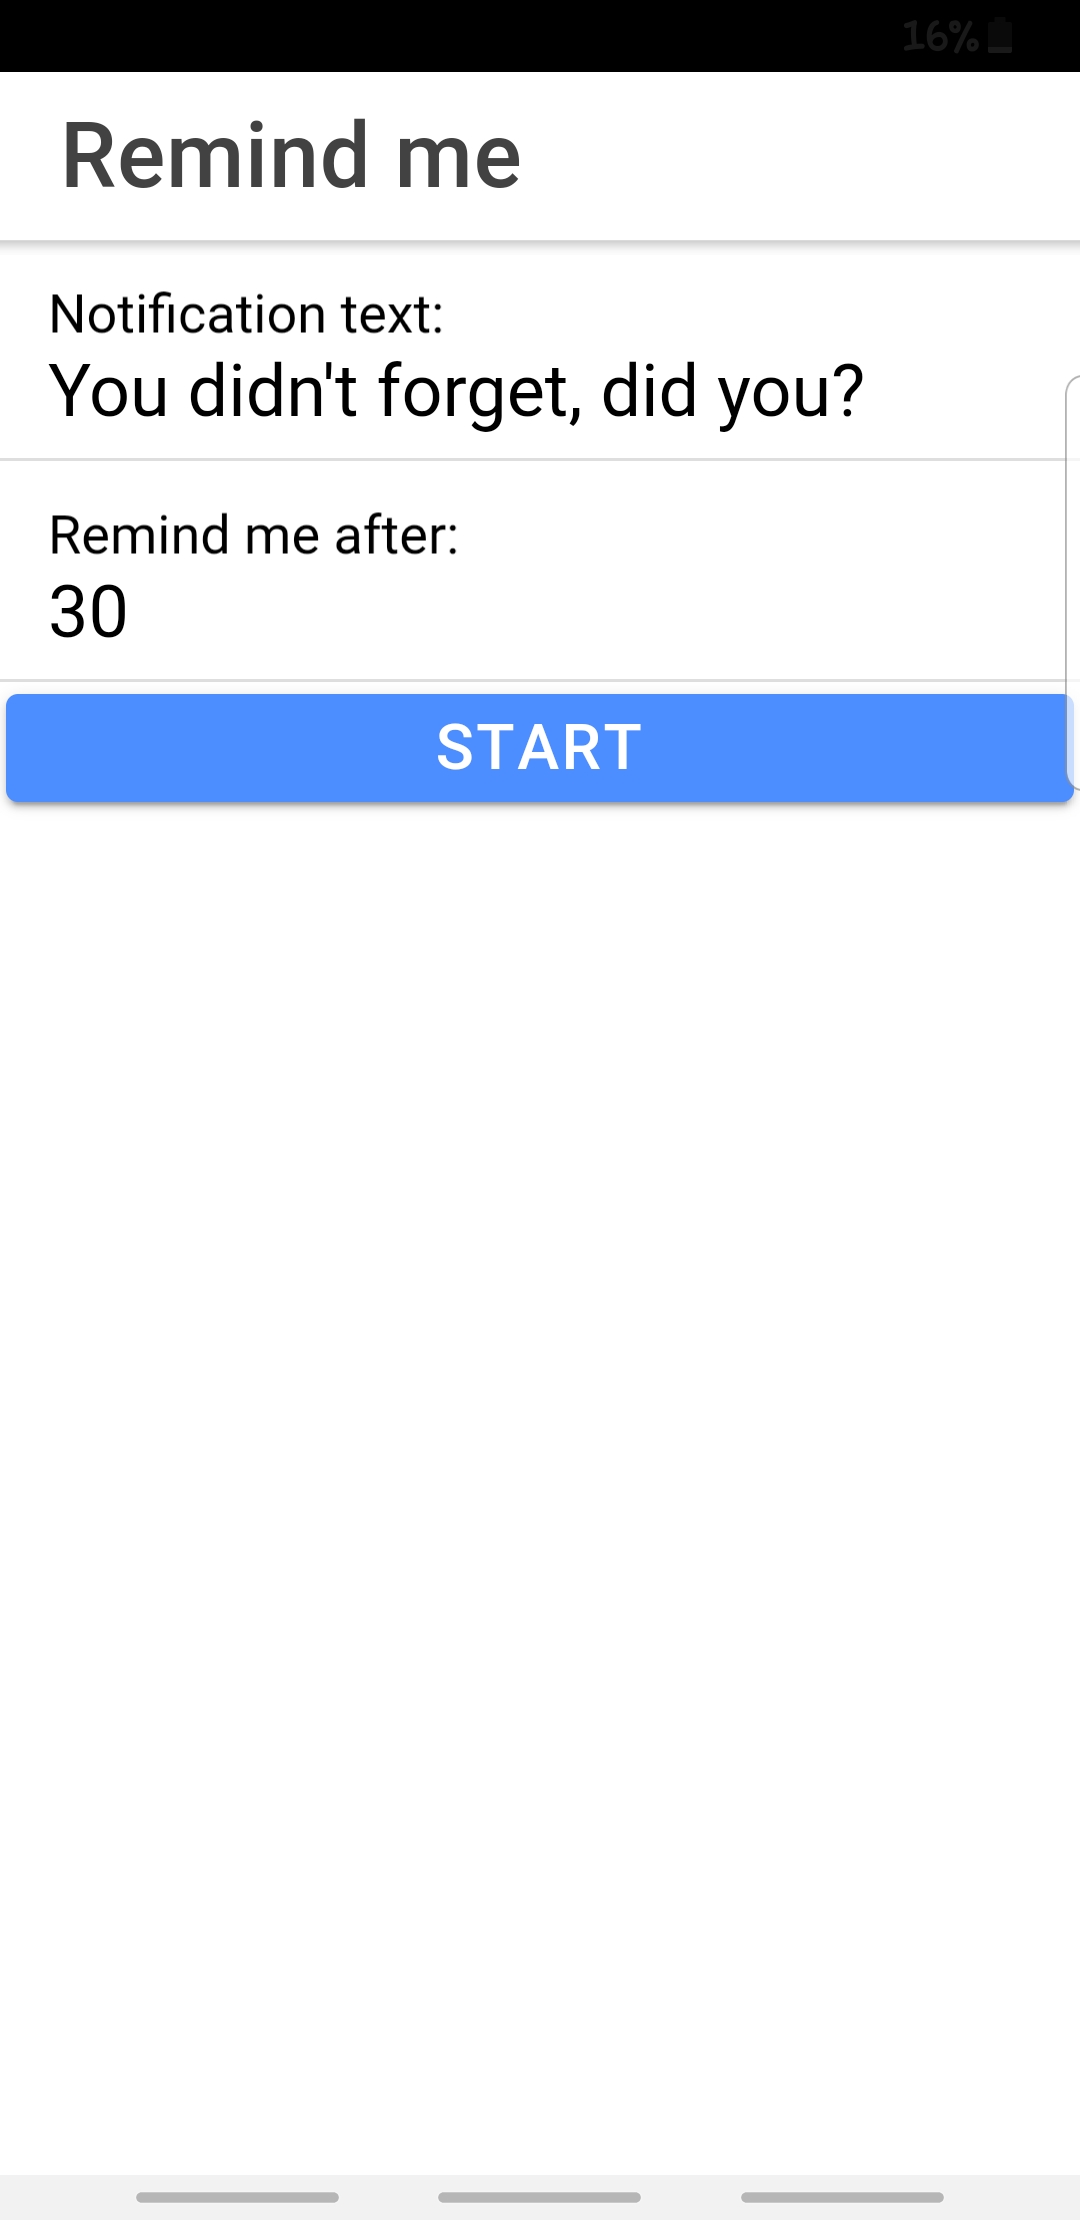
And this is the app in action on an iOS device:
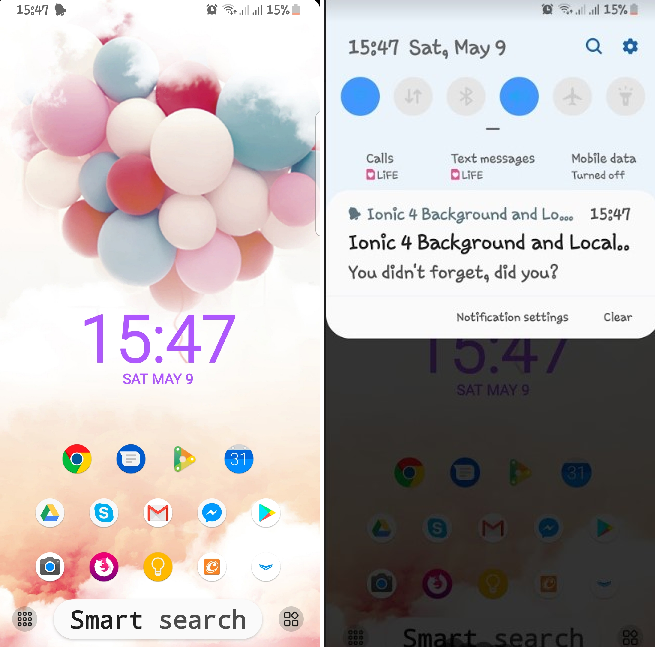
Click the ‘START’ button and click the hardware ‘Power’ button of the device to move the device in background mode. Now application shouldn’t be paused and ‘background mode’ plugin keeps application work in background. That means when the entered time expires, the Local Notification plugin will show the native notification.
For Android:
For iOS:
