Using Secure Proxy
Introduction
Appery.io Proxy – is a service that can be used for testing in desktop browsers to avoid cross-domain security problems. When using the proxy, the request is first sent to the proxy server, and then from the server, the request is made to the service. Because the request is sent from the server and not from the page, cross-domain security is not triggered.
Under the Secure Proxy tab, you can find the list of created proxies:
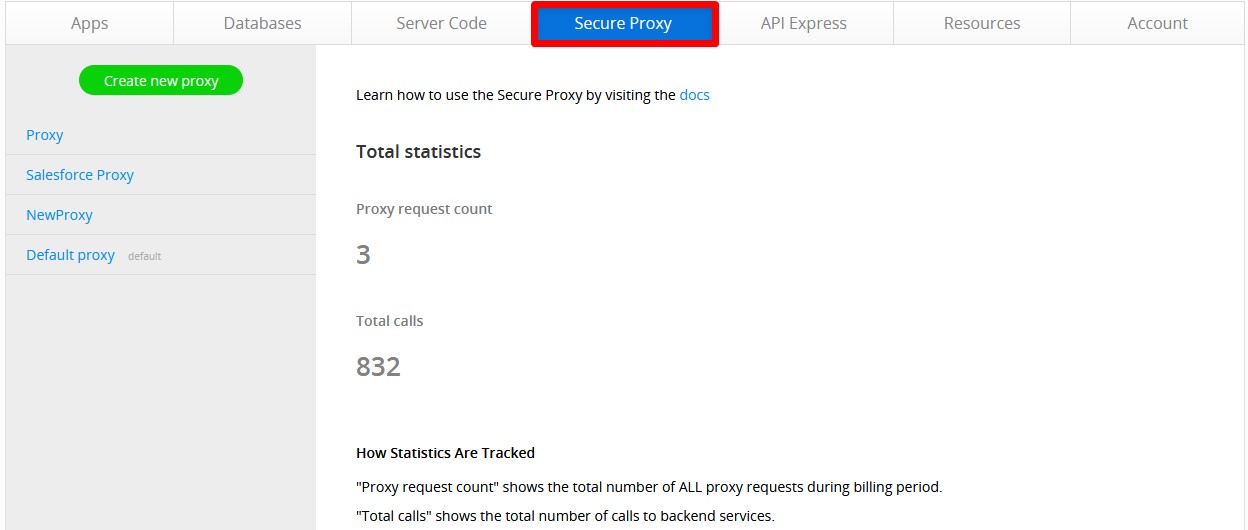
Appery.io provides two kinds of proxies – simple and secure proxies.
The Secure Proxy feature allows keeping your secret keys, credentials, or other data safe from being accessed by app users additionally.
Secure Proxy works in the following way:
- You store your secret data in a database under key names.
- Then you create a secure proxy for replacing the key names with secret data.
- In the app, you use key names and define the proxy that should be used.
- The app invokes a REST service that contains key names, and on the server-side key names are replaced with its appropriate values.
Using the app, you can find the key and proxy names, but you have no access to the secured data.
Creating Appery.io Simple Proxy
Default Proxy
Every user has predefined simple "Default Proxy" that could be used in projects.
- Switch to the Secure Proxy tab.
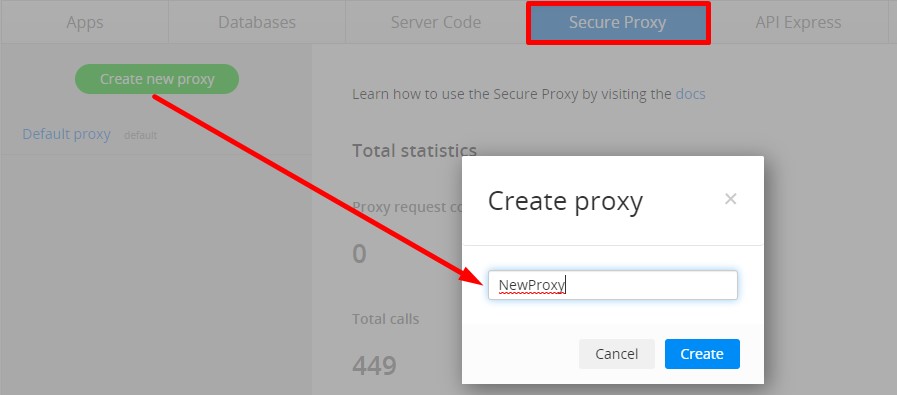
- To create a new proxy, click Create new proxy. Enter the proxy name:
- Then, select the proxy type to be created:
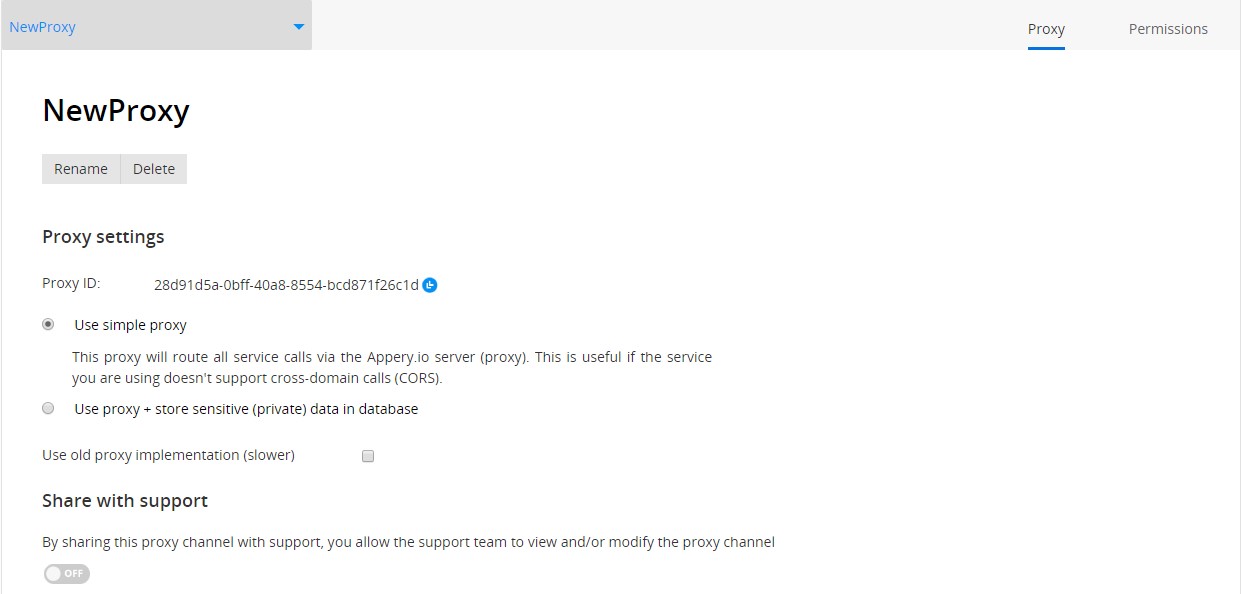
- The Proxy ID and Proxy name are unique values. A proxy name is used to define the proxy channel in the app.
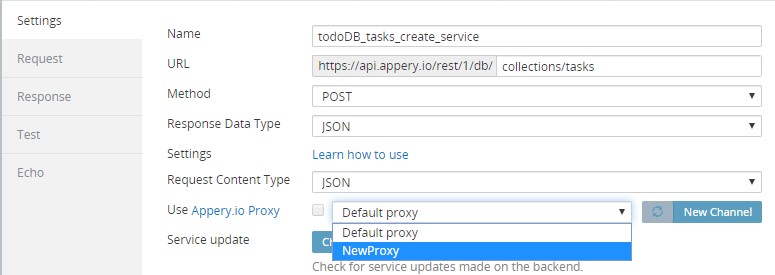
- When created, the proxy can be chosen from the Appery.io App Builder:
Note
If you set Response Data Type to JSONP, Appery.io proxy cannot be used.
After that, using the proxy will be automatically enabled for this REST service.
Create Proxy from Appery.io Builder
Proxies can also be created from inside the Appery.io App Builder:
- Click “New Channel” on the Settings tab of any REST Service.
- Enter a name for a new proxy and click “Create”.
Once the new proxy is created, using the proxy for this service will be automatically enabled with it:

Note
Only the simple proxy can be created from the App Builder.
Using Secure Proxy
As mentioned above, by using Secure Proxy you can secure sensitive data by keeping it only in the database. In this case, only the keys (not their values) will be used inside the app.
Storing Private Data in Database
- Open the Appery.io Databases tab.
- Create a new database or use an existing one.
- Create a new collection, and enter any name (for example, secretKeys).
- Add two columns: keyName and secretValue. Use any names, but note that these names should be easily identifiable.
- Enter your data. Key names are used in the app. You can use letters, numbers, and spaces in key names:
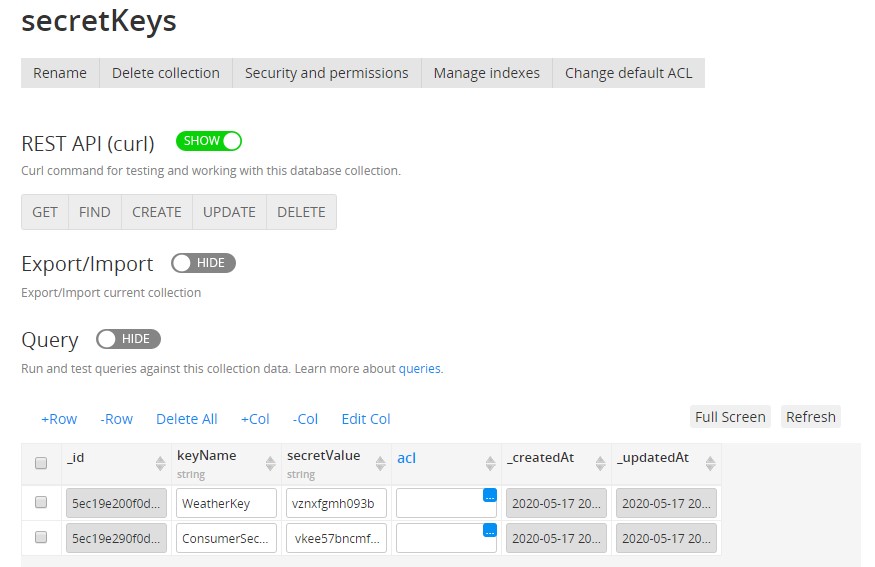
You can create a unique collection for each app, or you can create one database collection that stores private data for all your apps.
Configuring Secure Proxy
- To use Secure Proxy, switch to the Secure Proxy > Proxy tab, open the created proxy and check Use proxy + store sensitive (private) data in database.
- In the opened drop-down menus, select the needed parameters:
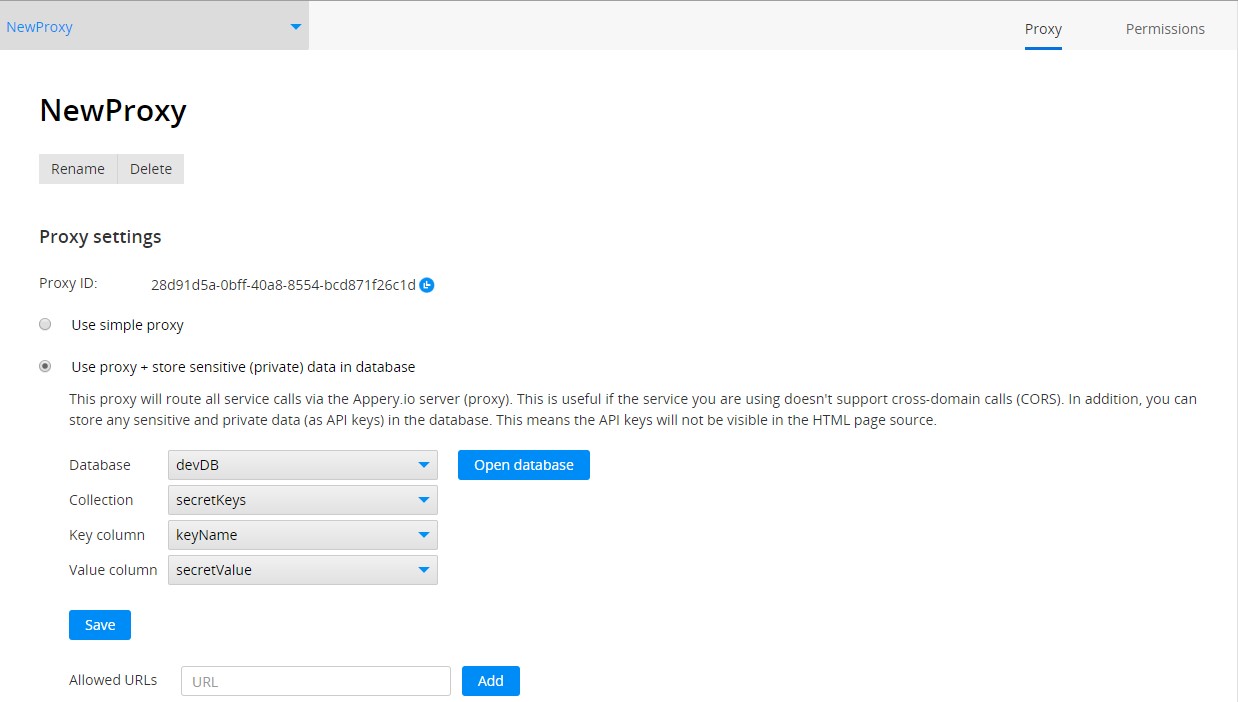
- Click “Save”.
Important
If you have edited the column names in the database, you should define new names for the proxy channel.
One database can be used in different proxies, just as one proxy can be used for different apps, and in one app, you can use several proxies.
Using Secure Proxy in App
- Open your Appery.io app and go to the REST service that should use the Secure Proxy features.
- On the Settings tab of that service, select the created Secure Proxy from the list:
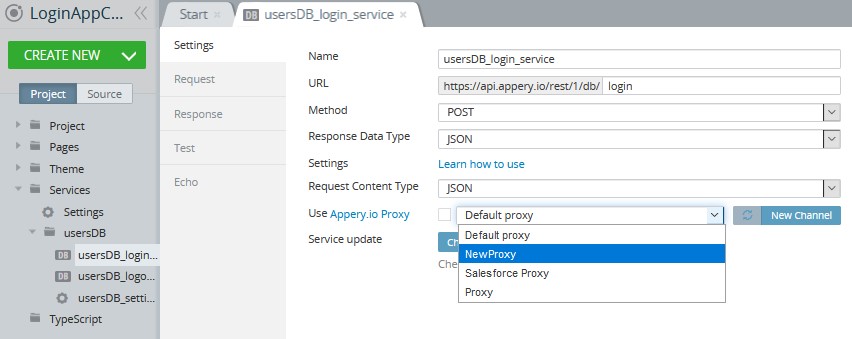
- In the Request view, set the key name from the database in braces {KeyName} as the default value for the corresponding input parameters:

- Test the app in the browser and invoke the needed REST Service. No actual data will be sent from the app:
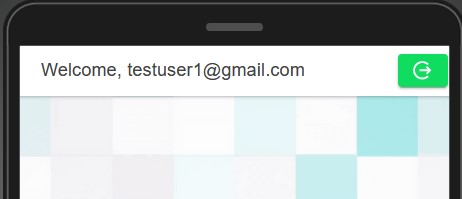
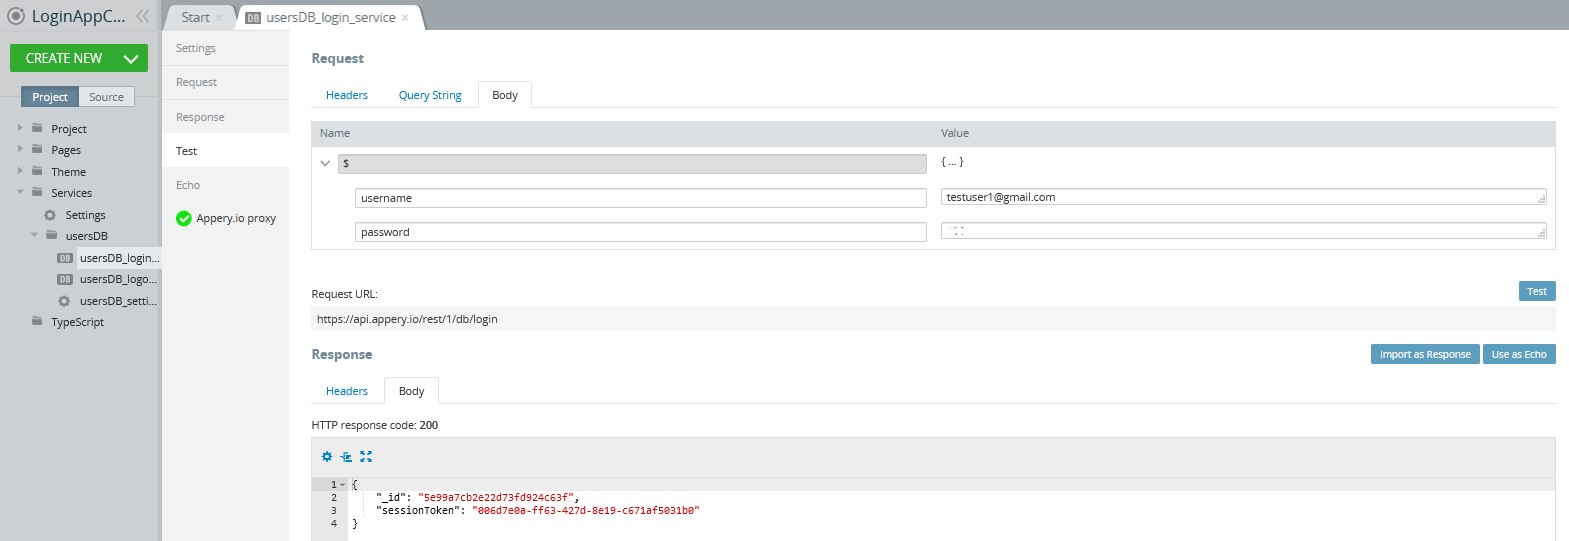
- When testing the service on the Test tab of the REST Service, enter the actual data instead of the key names; otherwise, the test will fail:
Restricting URLs Access
Using Secure Proxy also allows creating a list of allowed URLs. This way, you can restrict all URLs except the ones you need. Be sure that your requests will not be redirected for hacking purposes.
Note
You can’t use the Allowed URLs feature without specifying Database, Collection, Key column and Value column.
- Go to the Secure Proxy tab and open your proxy.
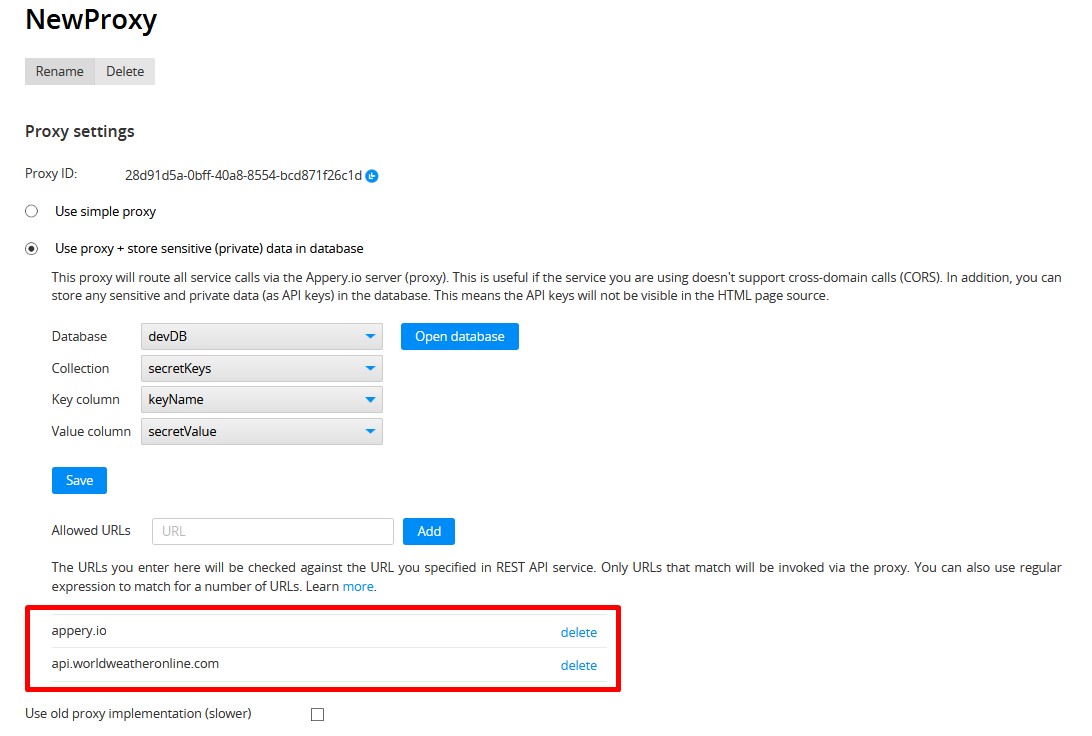
- Find the Allowed URLs title and add URLs by typing them into the text field to the right and clicking Add. Here is how you can allow access only to the appery.io and api.worldweatheronline.com:
All other URLs will not be accessible through the REST service that uses this proxy and the following error will be returned:
{"code":"PTCT036","description":"Specified URL is not allowed"}
You can use the asterisk symbol as mask to replace any number of characters in the URL. For example: https://*.worldweatheronline.com.
The asterisk symbol is also automatically added to the end of every URL.
Note
Applying changes for allowed URLs takes 1 minute.
Using Old Proxy Implementation
Proxy implementation was updated and all of your proxies were automatically switched to the new version. The new implementation is faster, and it’s strongly recommended that you use it. The old proxy implementation will be deprecated after a while.
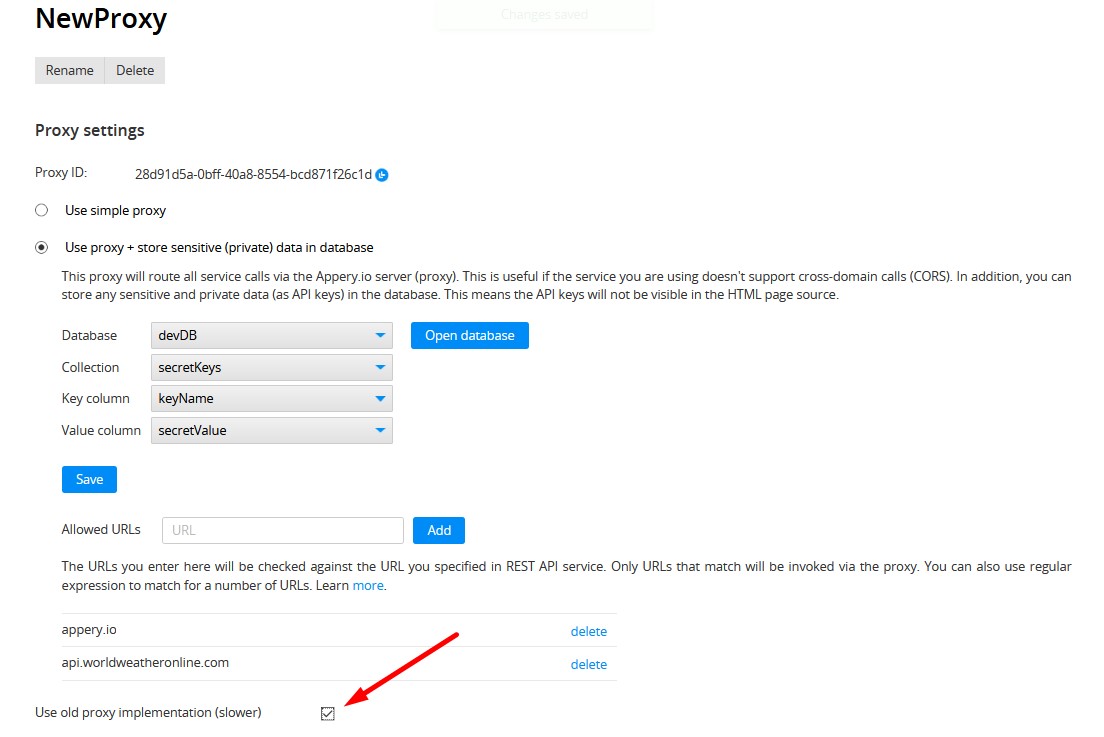
However, if you’re facing any problems with the new proxy implementation, you can switch back to the old version by checking Use old proxy implementation (slower) on the proxy page:
The under-the-hood library in the old proxy implementation supports providing username:password directly in the URL, e.g.: http://user:[email protected].
The section Share with support is placed at the bottom of the page. When a user enables sharing (turns the toggle on), the specified resource appears in the admin section. This feature can be used by the support team for viewing and accessing all resources (apps, databases, server scripts, etc) shared.
If you experience problems with the new proxy, please contact Appery.io support.
HTTP Basic Authentication
Some REST API services use HTTP basic authentication to authenticate users. One such service is the Twilio API. You would provide the username and password in the URL. For example: http://username:[email protected]/.
This approach is being phased out by most modern browsers. You can find more information on it for each browser: Chrome and Firefox.
The under-the-hood library that we use for the new Appery.io Proxy doesn’t support this authentication method (it’s not a bug, the creators of the library decided not to support this). The solution to this problem is to switch to Basic header-based authentication.
Basic Header-Based Authentication
Switching to Basic header-based authentication is very simple. You need to complete the following steps (from MDN):
- Username and password are combined into a string
username:password. - The resulting string literal is then encoded using Base64.
- The authorization method and space, i.e. Basic is then put before the encoded string.
- A header is added to a service in the following form: Authorization Basic
For example, if the username is: my_user and the password is: my big secret, then the header and the encoded string would look like this:
Authorization: Basic bXlfdXNlcjpteSBiaWcgc2VjcmV0
Encoding a string into Base64 string can be easily done with the browser’s built-in function window.btoa(string). For example, you can run this from browser’s console:
window.btoa("my_user:my big secret");
Which will result in bXlfdXNlcjpteSBiaWcgc2VjcmV0.
When you test service in Appery.io, you can set the entire string as Authentication header default value: Basic bXlfdXNlcjpteSBiaWcgc2VjcmV0.
Alternatively, you can run a JavaScript function during mapping:
return "Basic " + window.btoa(username+":"+password);
This approach will allow you to use the new proxy (or the old proxy).
Important
To make Secure proxy work, you need to write into the database already encoded content of Authorization header and in the service value field specify something like
Basic {auth_data}.
Permissions Tab
On the Permissions tab, you can specify the access permissions (View, Edit or Delete) you give the users of your team:

Note
Only your team users may access your resources. Information on how to enable or change the permission options for them can be found here.
The user the proxy was shared with will see it under the Secure Proxy tab.
The user the proxy was shared with can open it to view or edit, delete or clone it (if granted such rights).
Note
Editing the proxy will cause the original proxy to change. To edit the shared secure proxy without affecting its original, use the Clone feature to make a unique copy of it.
Updated 12 months ago
