File Picker: How To
How to set up File Picker for your mobile app
In this document, you will learn how to set up the File Picker component for your mobile app.
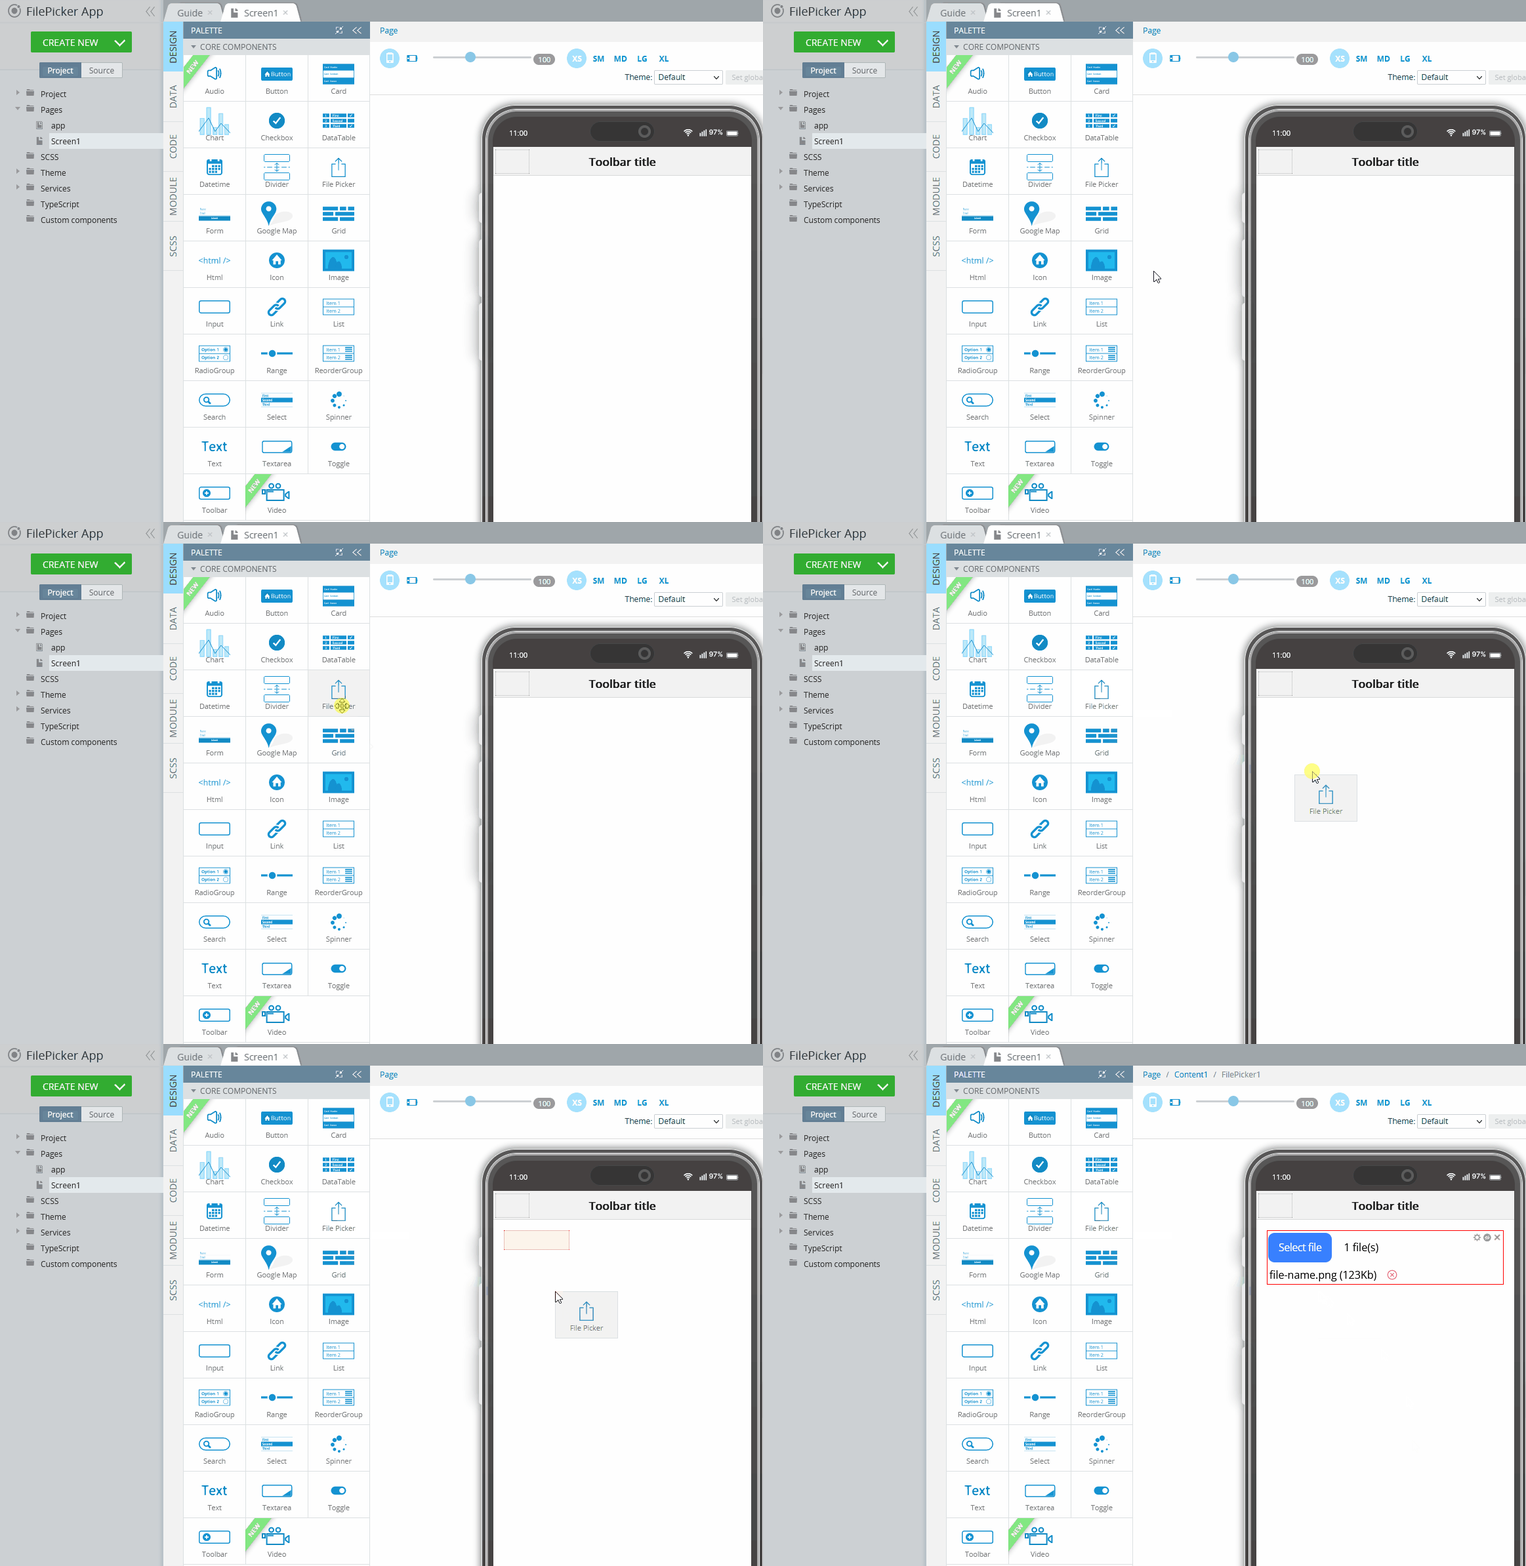
- Drag the File Picker component to the needed app page (here, Screen1):
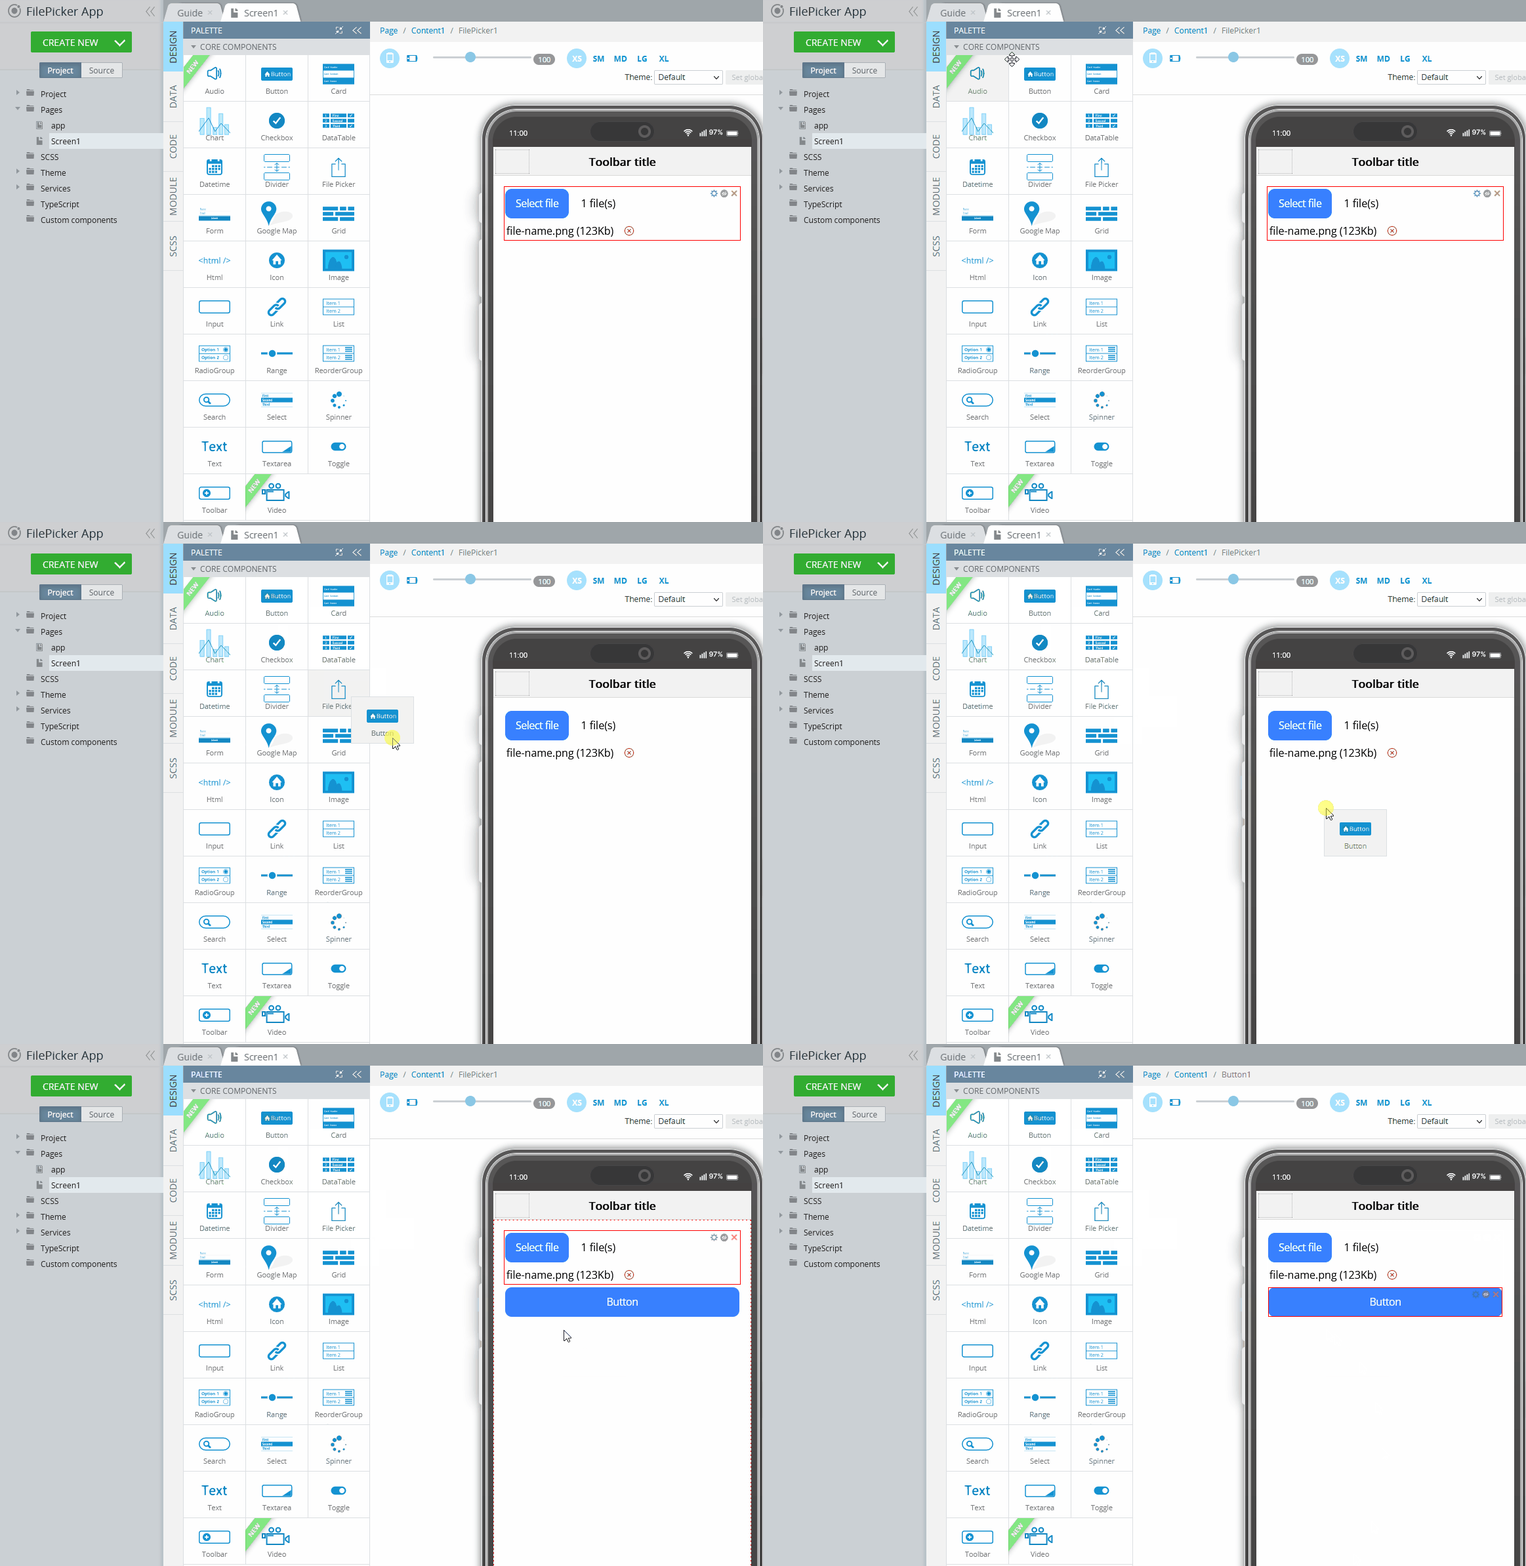
- Drag the Button component and place it below the File Picker:
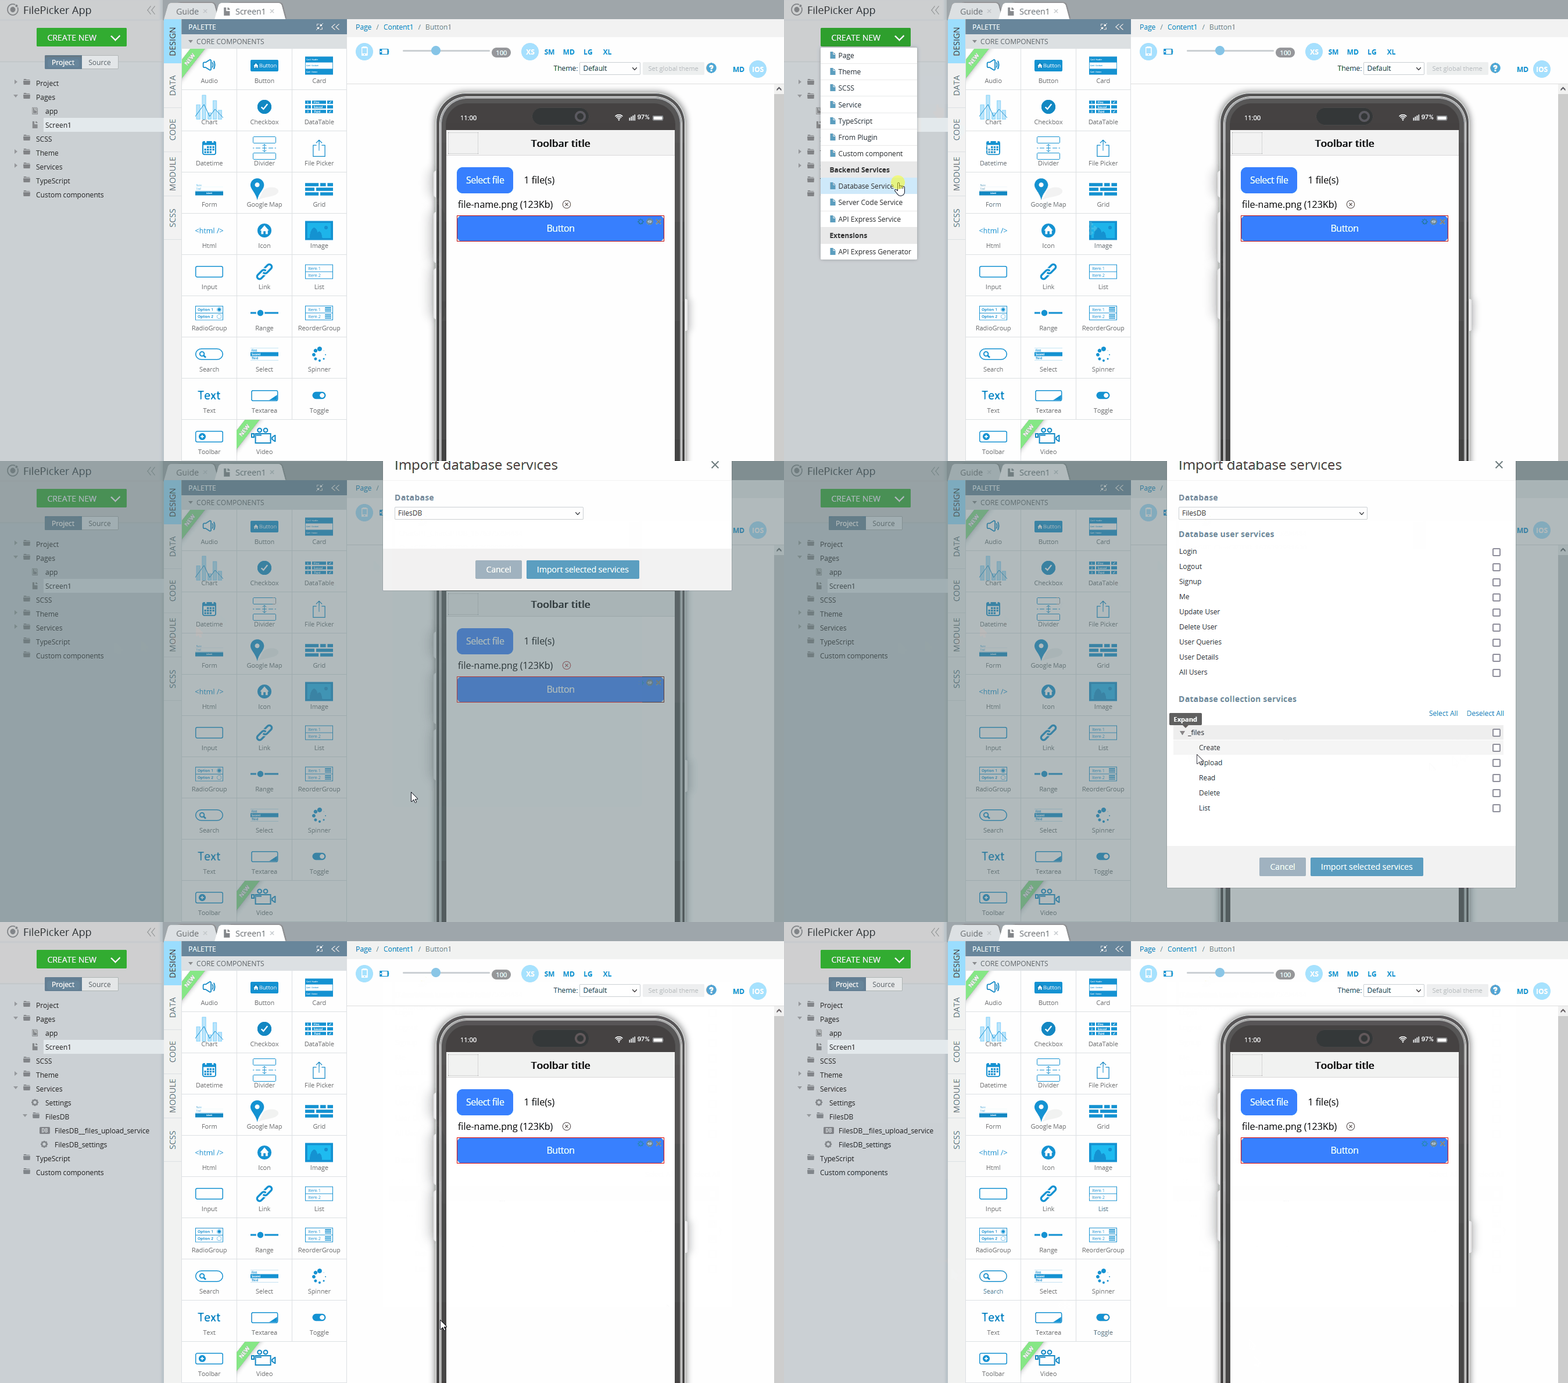
Now, let's import the database service to add the file upload capability.
3. For this, click CREATE NEW > Database Service and select the FilesDB database from the drop-down. Expand the list of the tasks collection services and select the Upload service. Click Import selected services:
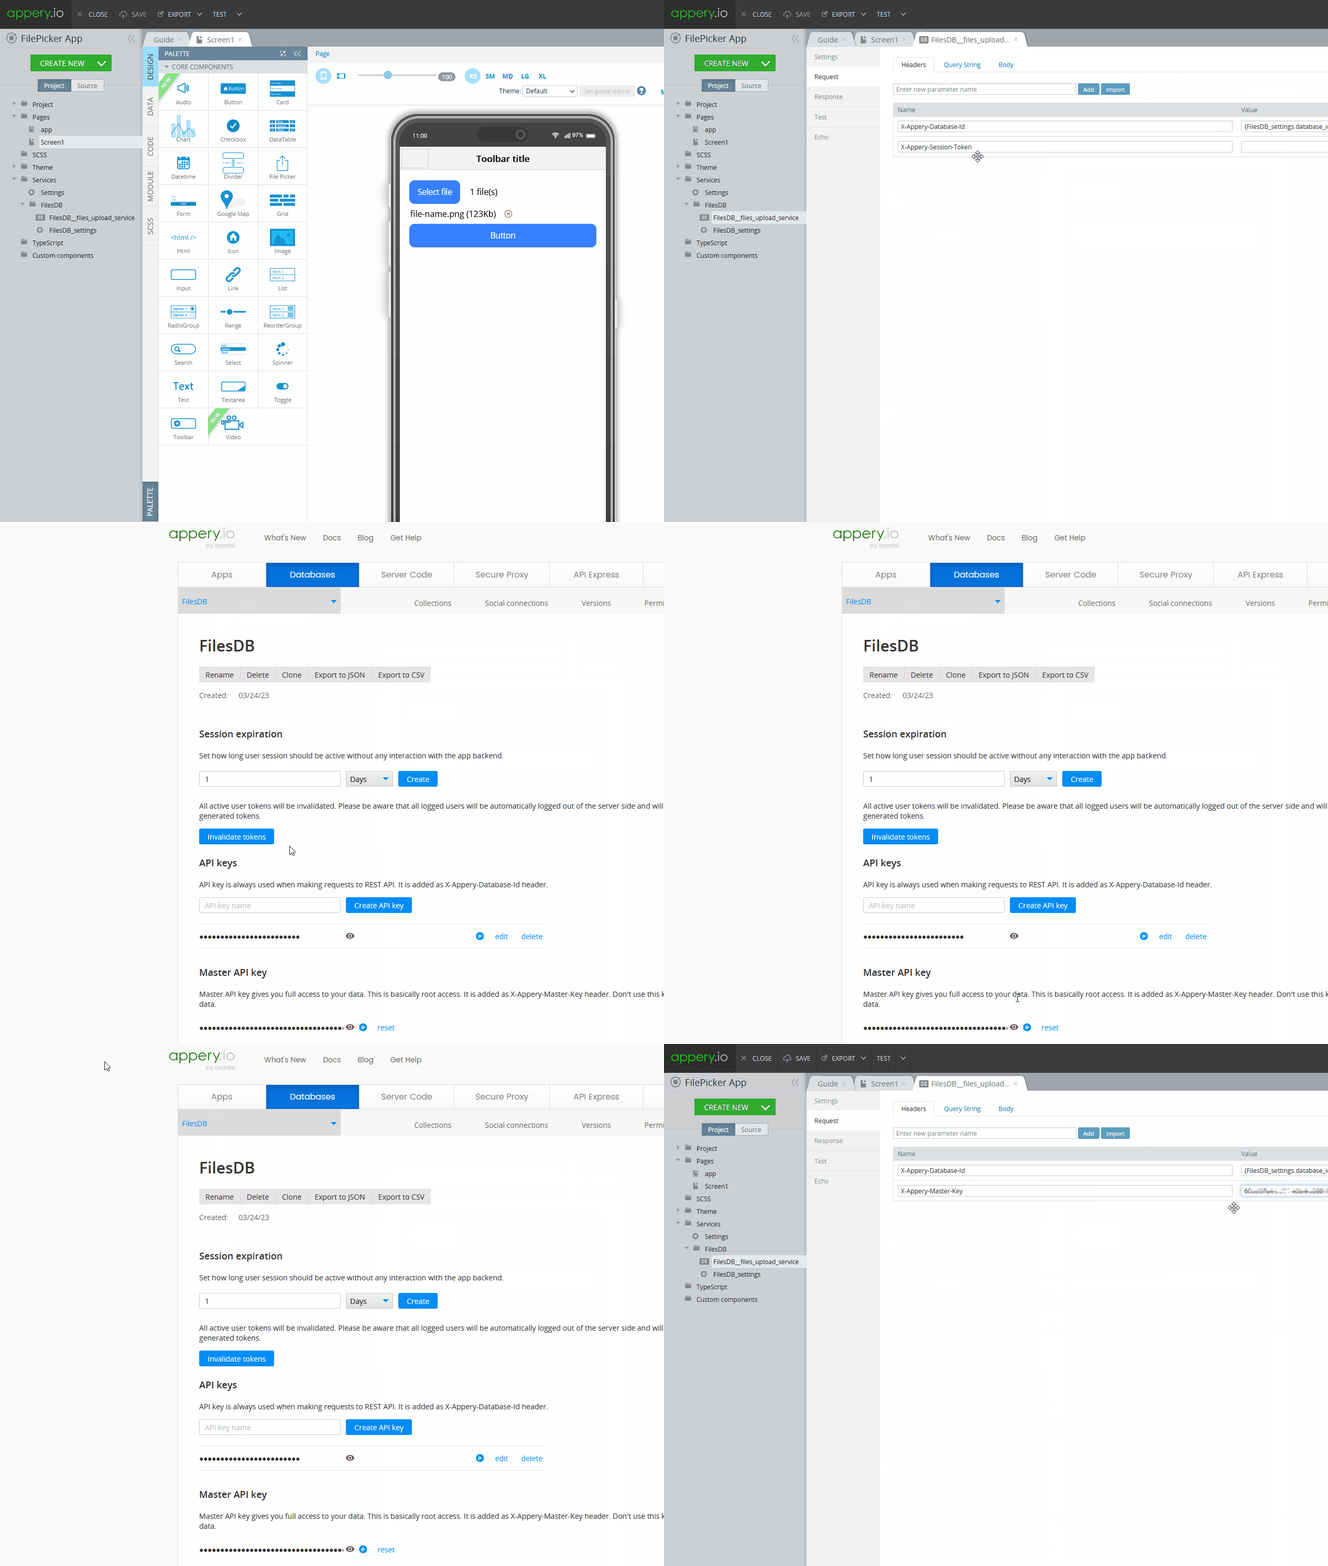
- In the left navigation menu open the settings of the service you just created. Open its Request tab and replace the X-Appery-Session-Token property with X-Appery-Master-Key in the Headers section.
Then, switch to the page with your database settings and copy its master key. After that, go back to the Builder and paste the master key value you just copied:
- Open the Screen1 DATA panel and add the upload service to the page. Then, click the Mapping button of the Before send event to open the Mapping editor:
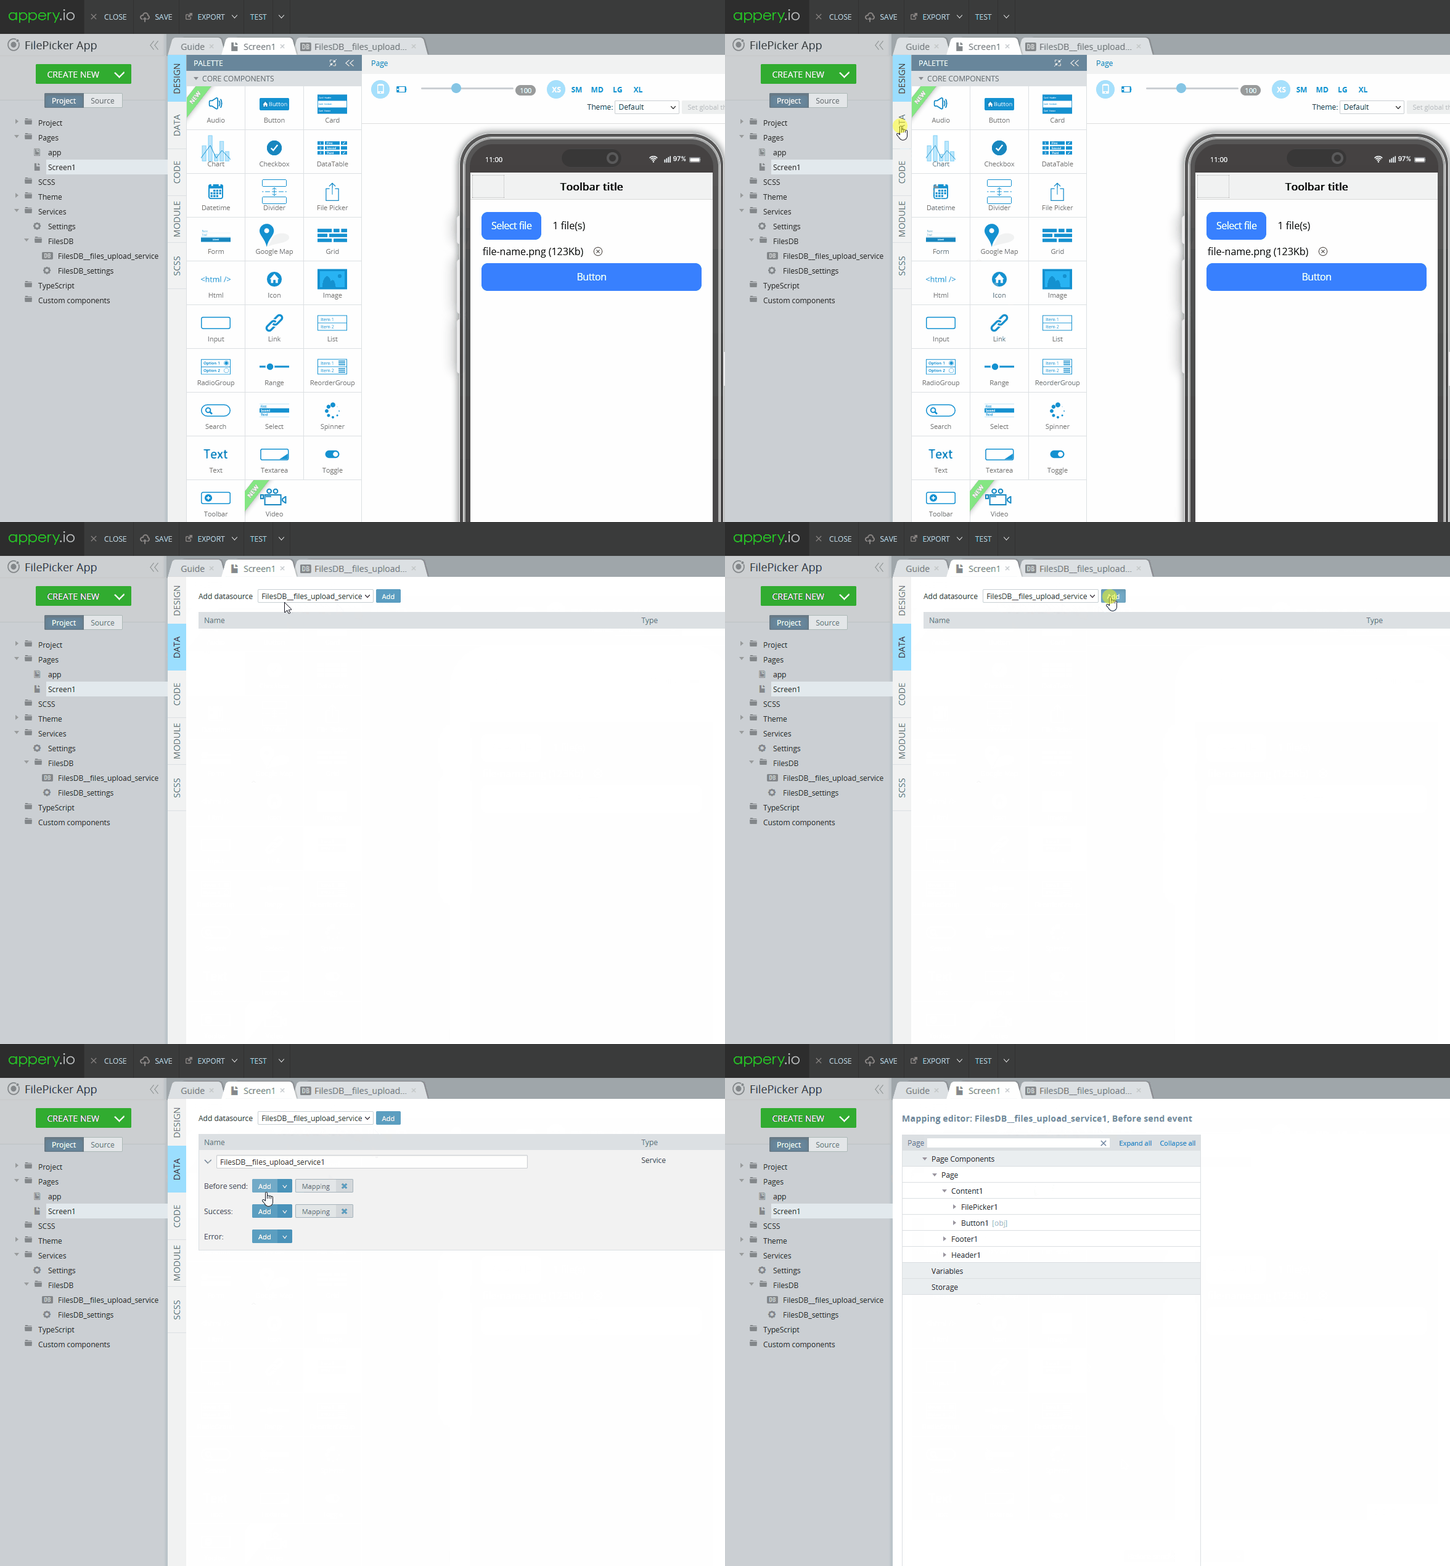
- In the Mapping editor, map the page FilePicker > Value to the Service request body > data as shown below by using drag-and-drop. Save the mapping:

- Go back to the page DESIGN panel and replace the default button text with, for example, Upload. This can be done right in the mobile frame:
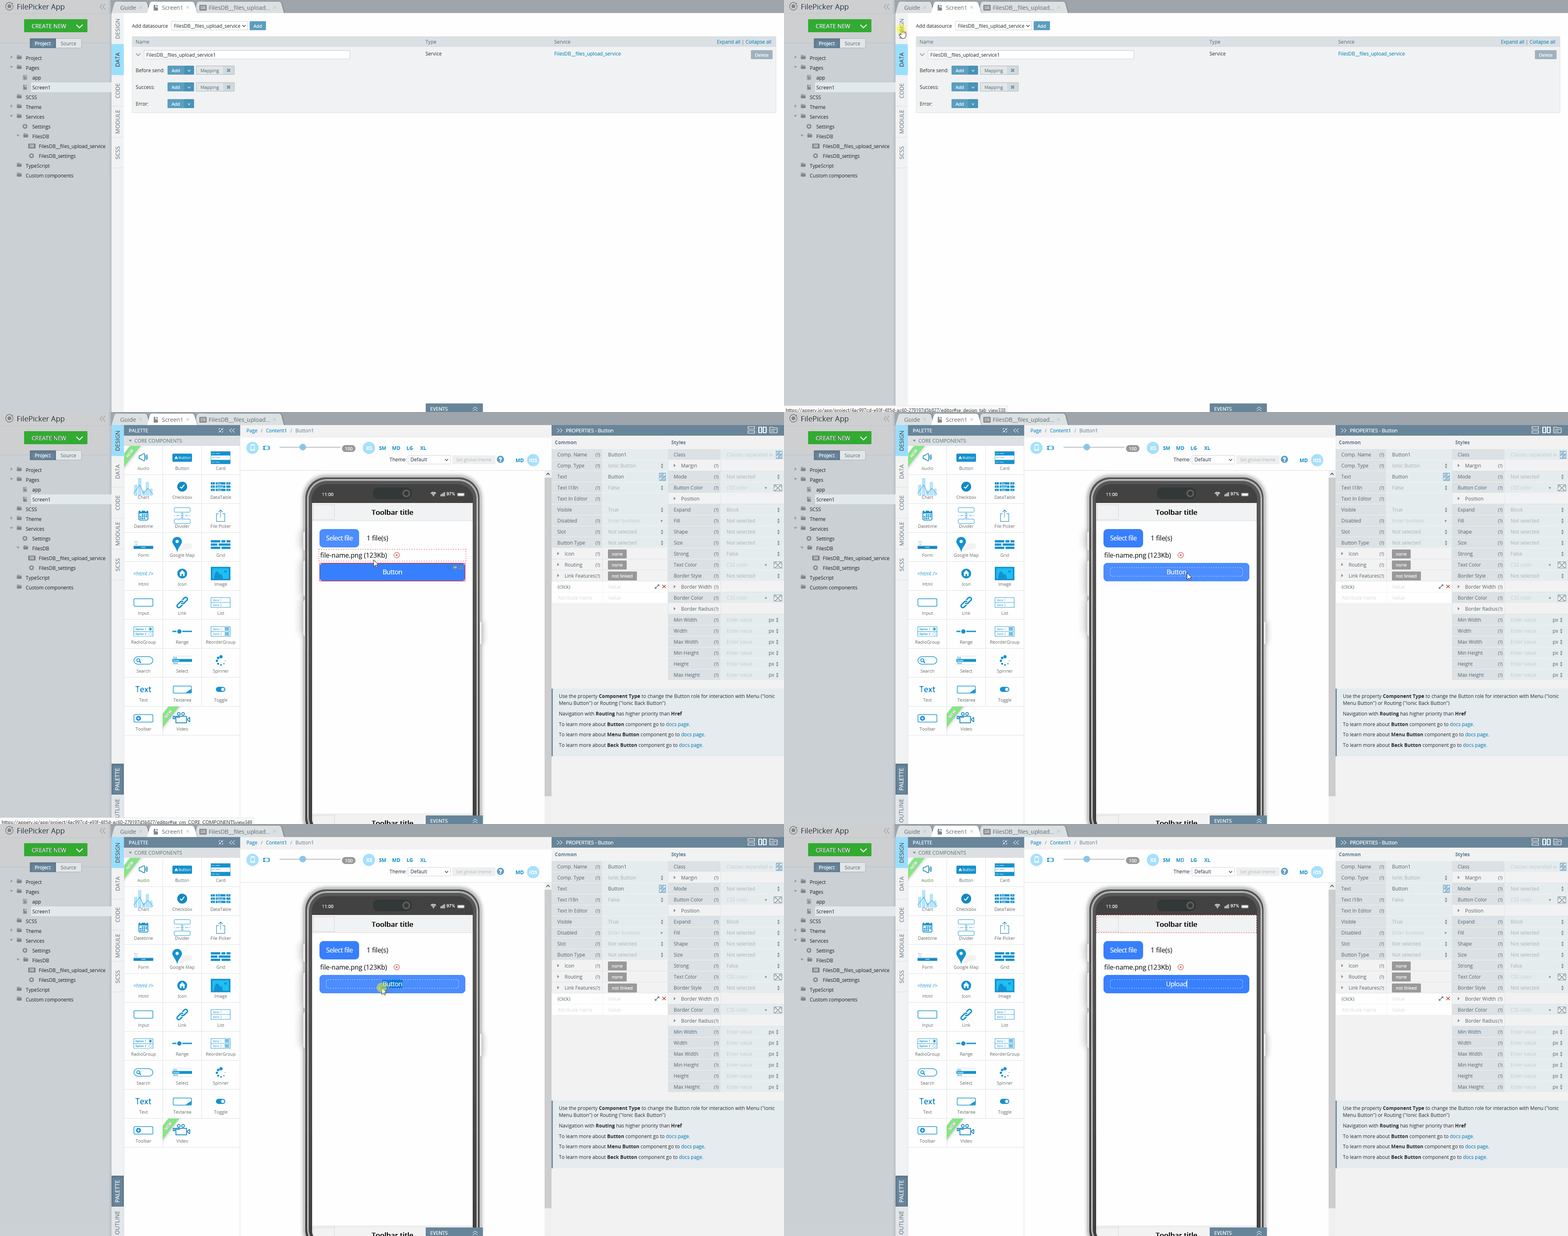
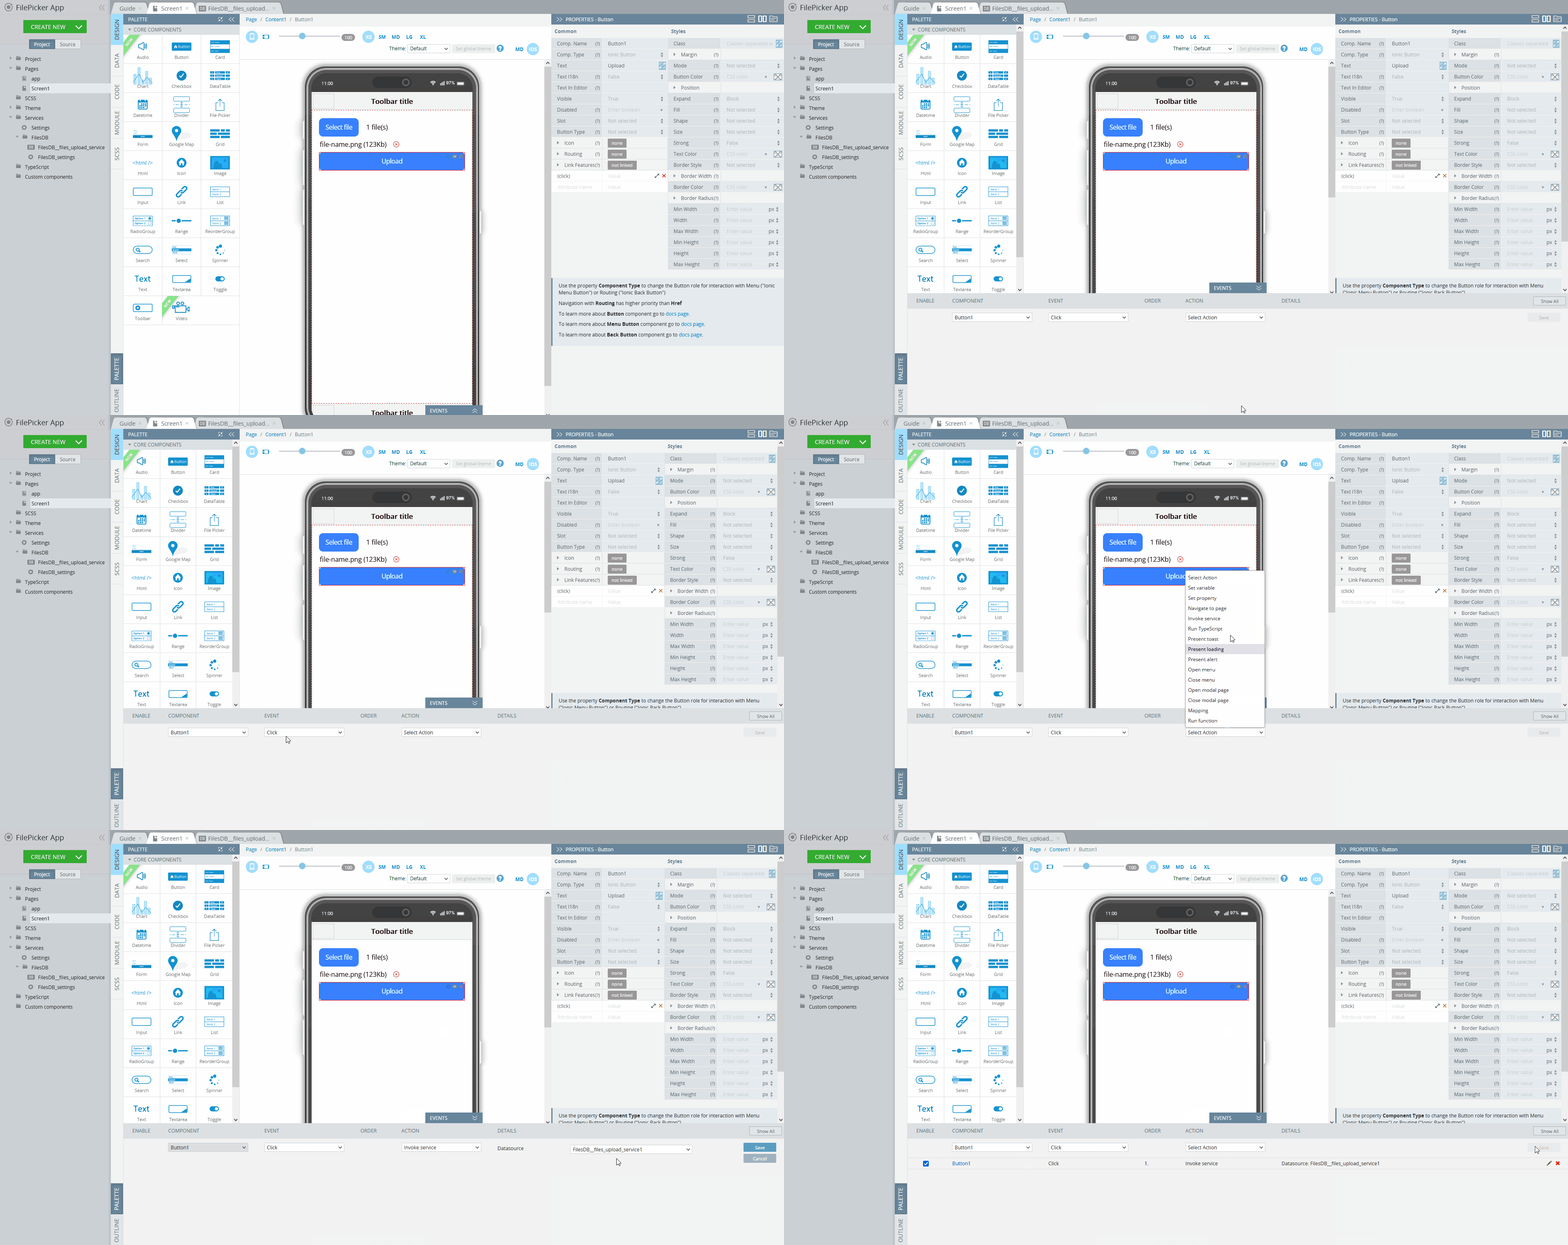
- Now, unfold the page EVENTS tab.
By default, the button is selected with its Click event enabled. Select the Invoke service action with the added upload service as a datasource and save the event:
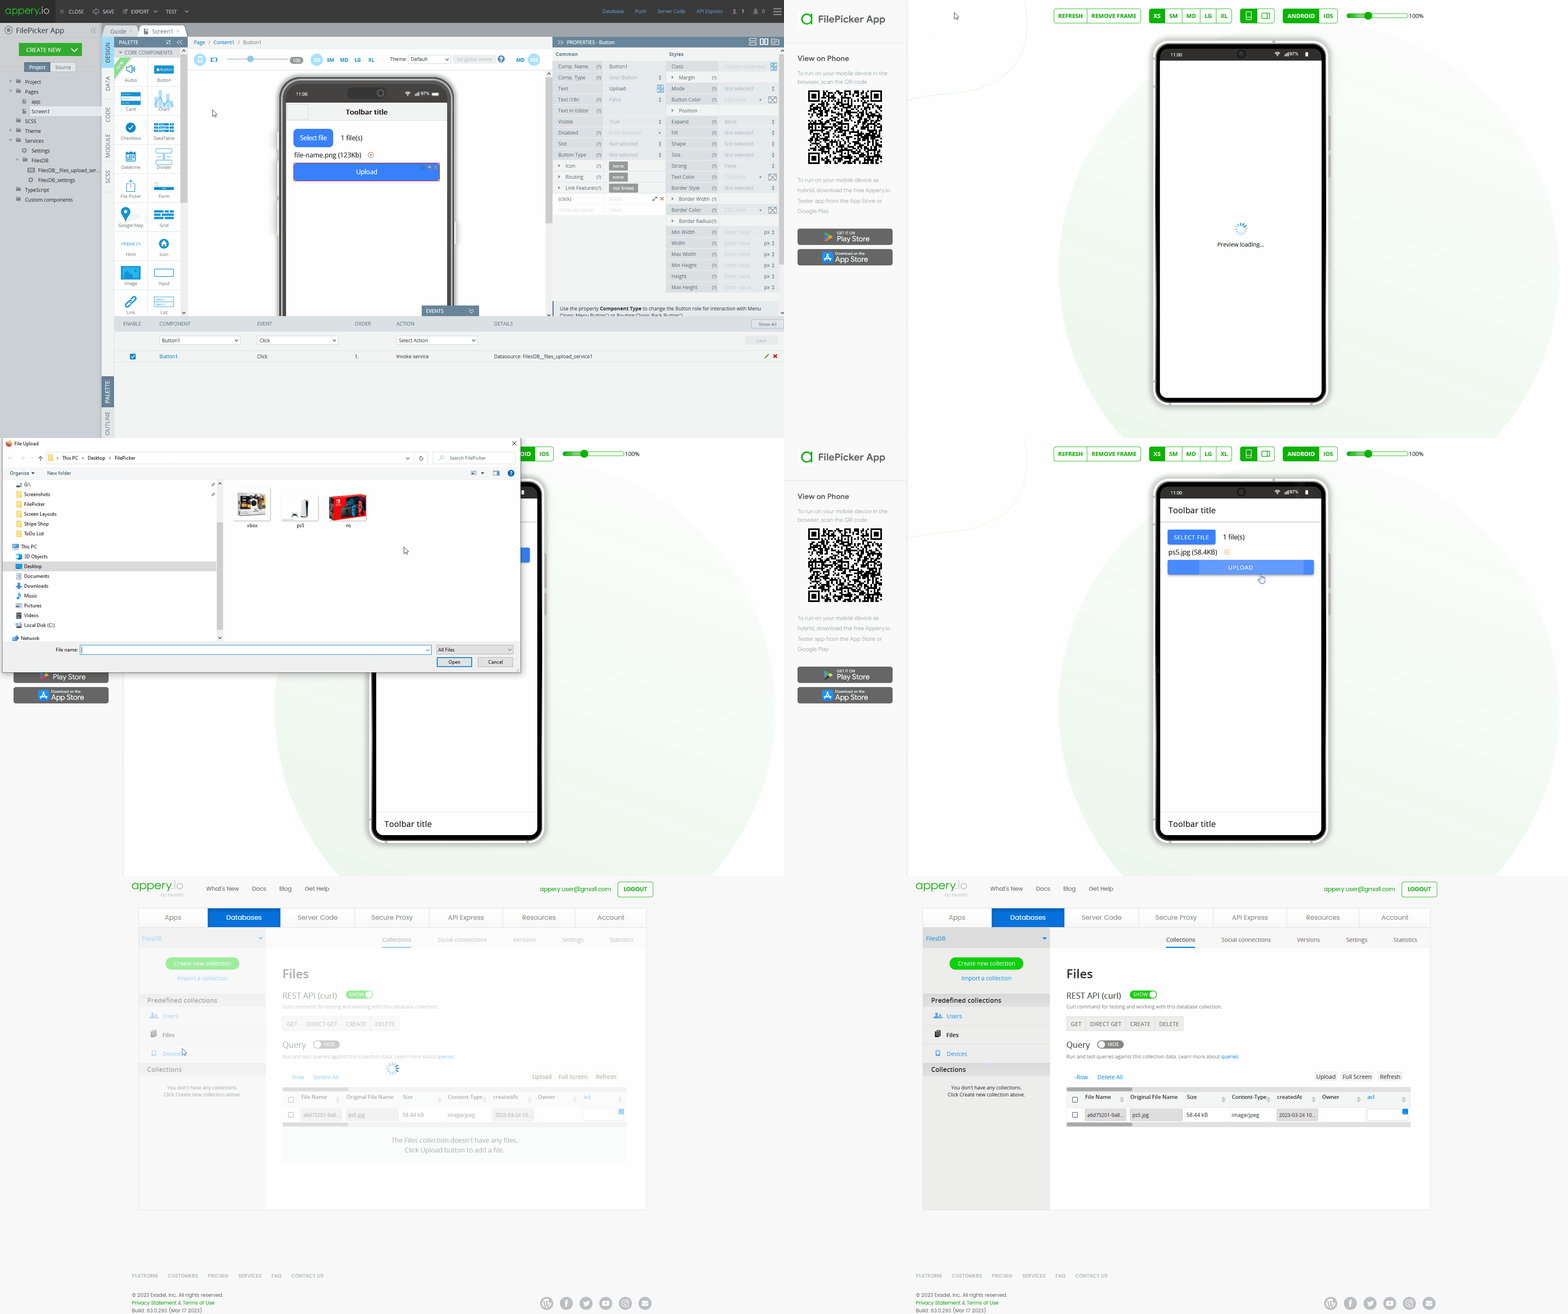
- Save the project and click TEST to open the App preview page.
There, you can test the app by selecting the file on your drive and clicking the Upload button.
Then, open the Databases page to check if the uploaded file appears in the database default Files collection:
Updated 12 months ago
