Ionic App Templates
When creating a new Ionic app you can create an app based on the out-of-the-box templates:
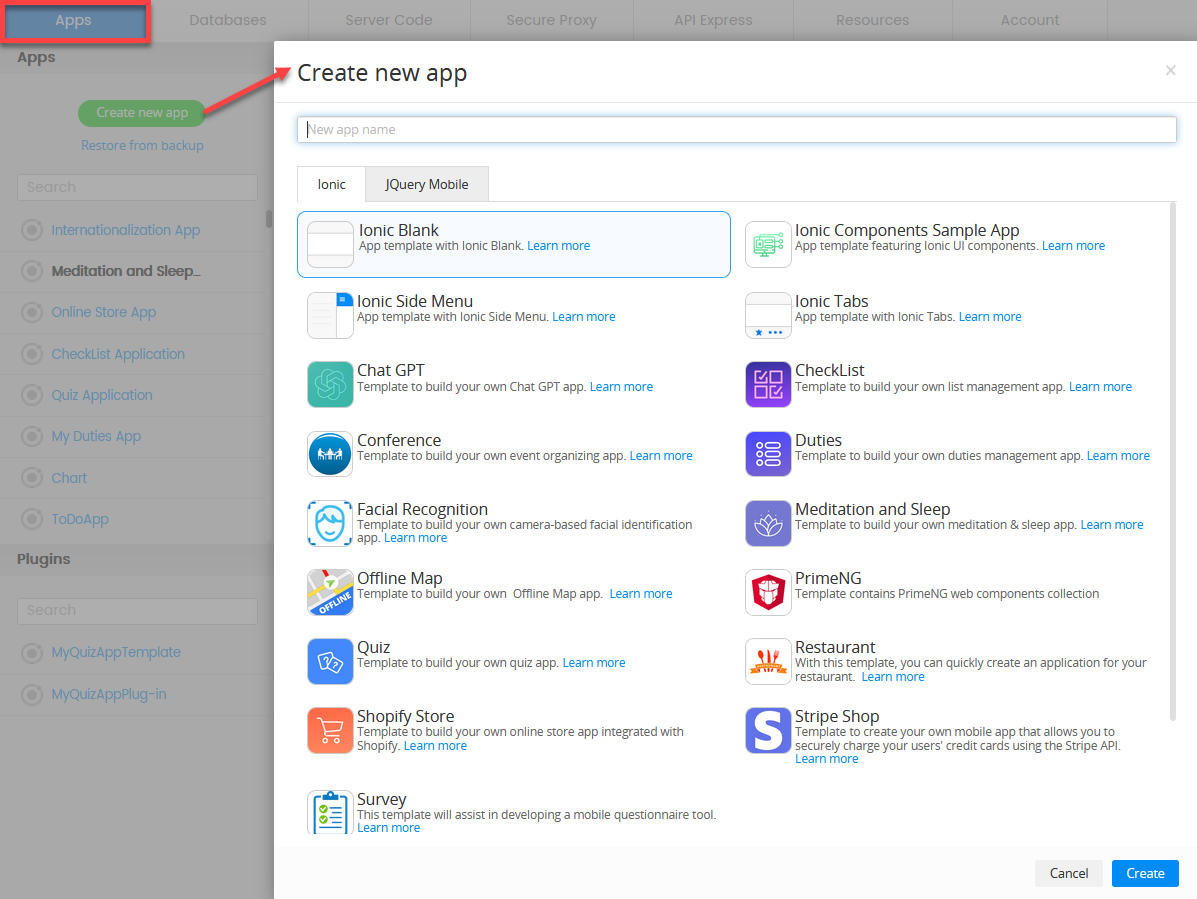
- Ionic Blank - a blank Ionic app template so you can build anything you want.
- Ionic Components Sample App - an app template featuring Ionic UI components.
- Ionic Side Menu - an app template with the Ionic side Menu component preconfigured.
- Ionic Tabs - an app template with the Ionic Tabs component preconfigured.
- Appery.io Templates that are ready-to-go-with and fully functioning apps available to all Appery.io users and can be easily customized according to your personal preferences.
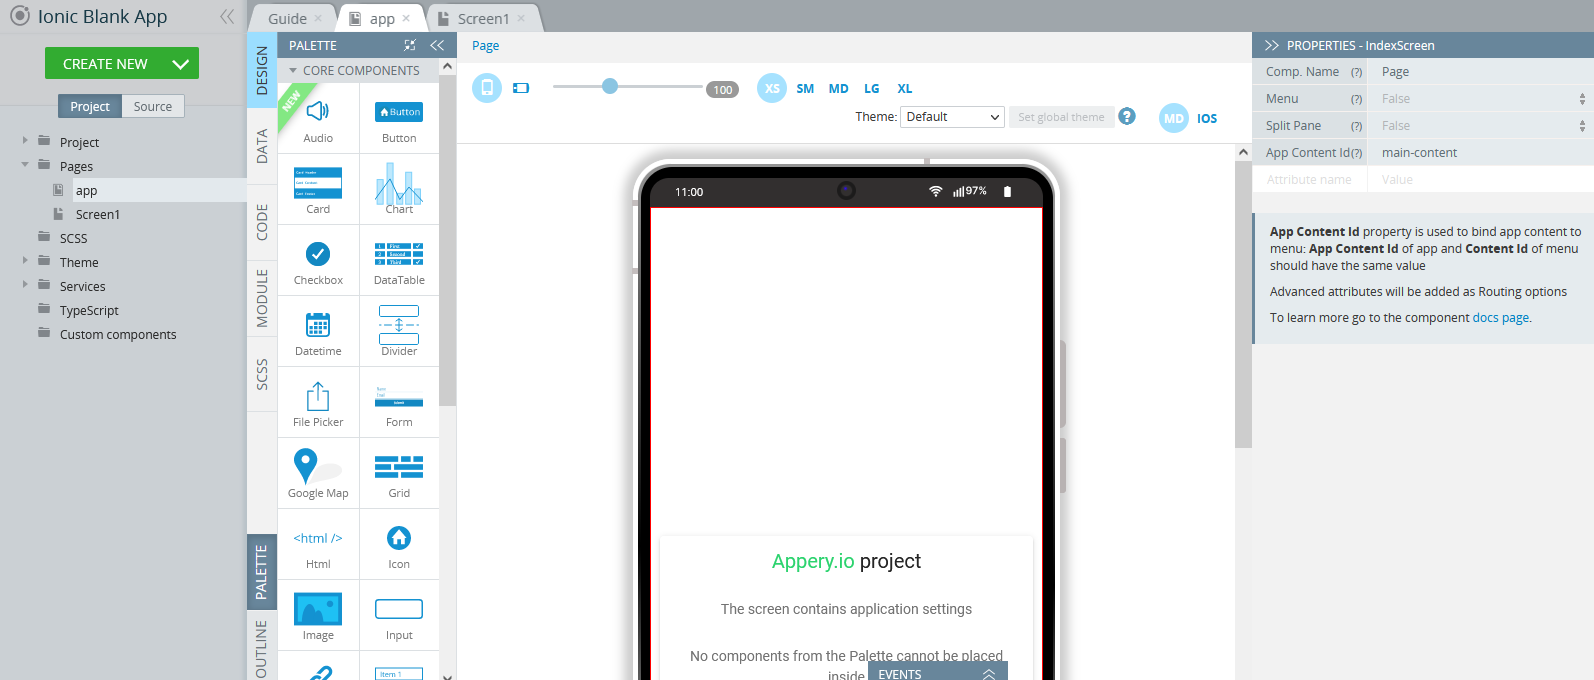
Ionic Blank
This simplest template start with the Guide page open and contains a blank app page and one Screen1 page with ion-content. Both pages have no specific settings.
NEW: One-Click Template Installation!You can now enjoy the one-click-away option of installing the blank Ionic app: simply click the button below and in a moment, your app is ready to start! There’s no need to go to the Create new app dialog or download the template backup with further installing it.
Also, to create a new app based on the Ionic Blank template, you can traditionally select it in the Create new app dialog.
- From the Apps page, click Create new app > Ionic Blank App.
- Click the Create button.
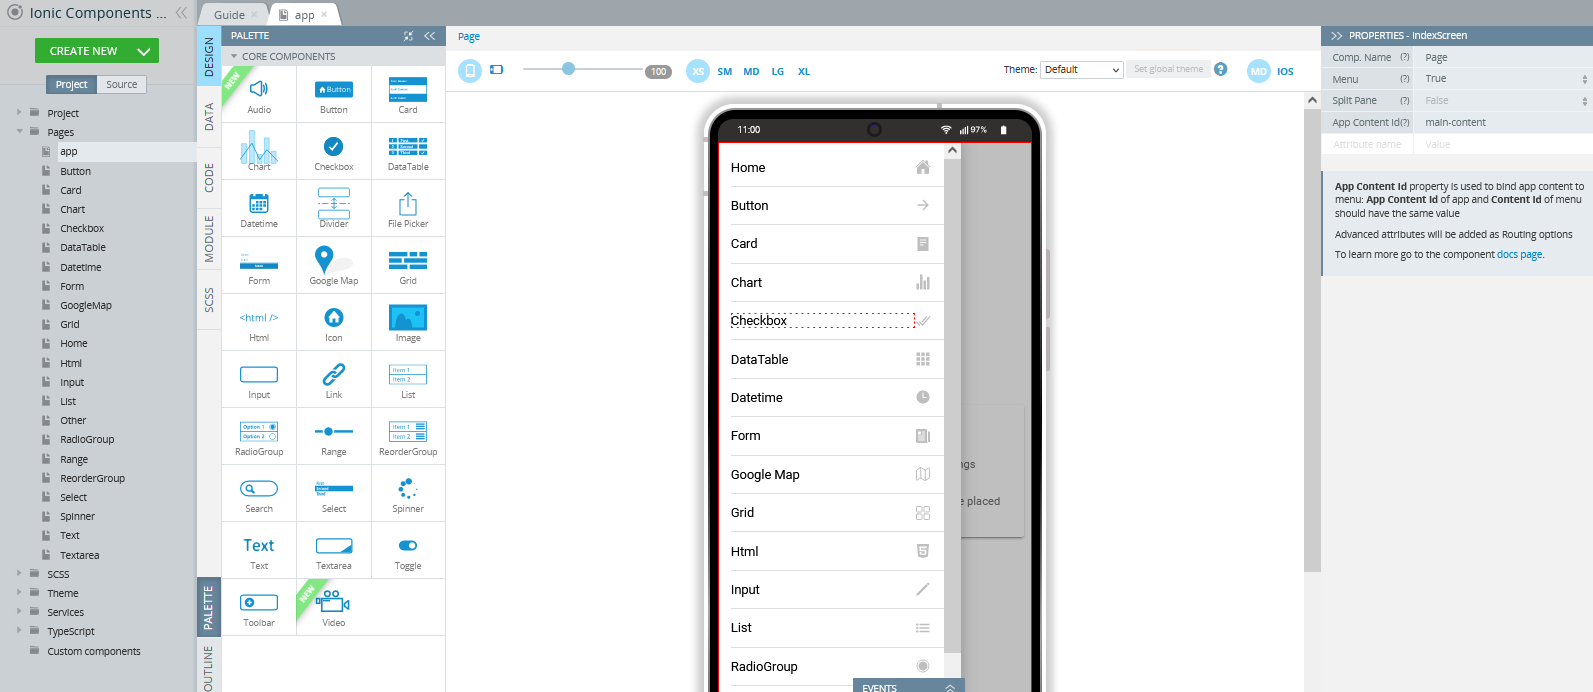
Ionic Components Sample App
Check our Ionic Components Sample App template to learn about the Ionic UI components and their properties available in the Visual App Builder.
NEW: One-Click Template Installation!You can now enjoy the one-click-away option of installing the template app: simply click the button below and in a moment, your app is ready to start! There’s no need to go to the Create new app dialog or download the template backup with further installing it.
Also, to create a new app based on the Ionic Components Sample App template, you can traditionally select it in the Create new app dialog.
Ionic Side Menu
You can create a new app from the Ionic Side Menu template and use the Ionic Menu for navigation purposes:
To create a new app based on the Ionic Side Menu template, select it in the Create new app dialog.
Video Tutorial: Adding Side Menu to Ionic AppYou can also check out this video guide for detailed instructions on how to add a side menu to your Ionic application:
The template contains the following:
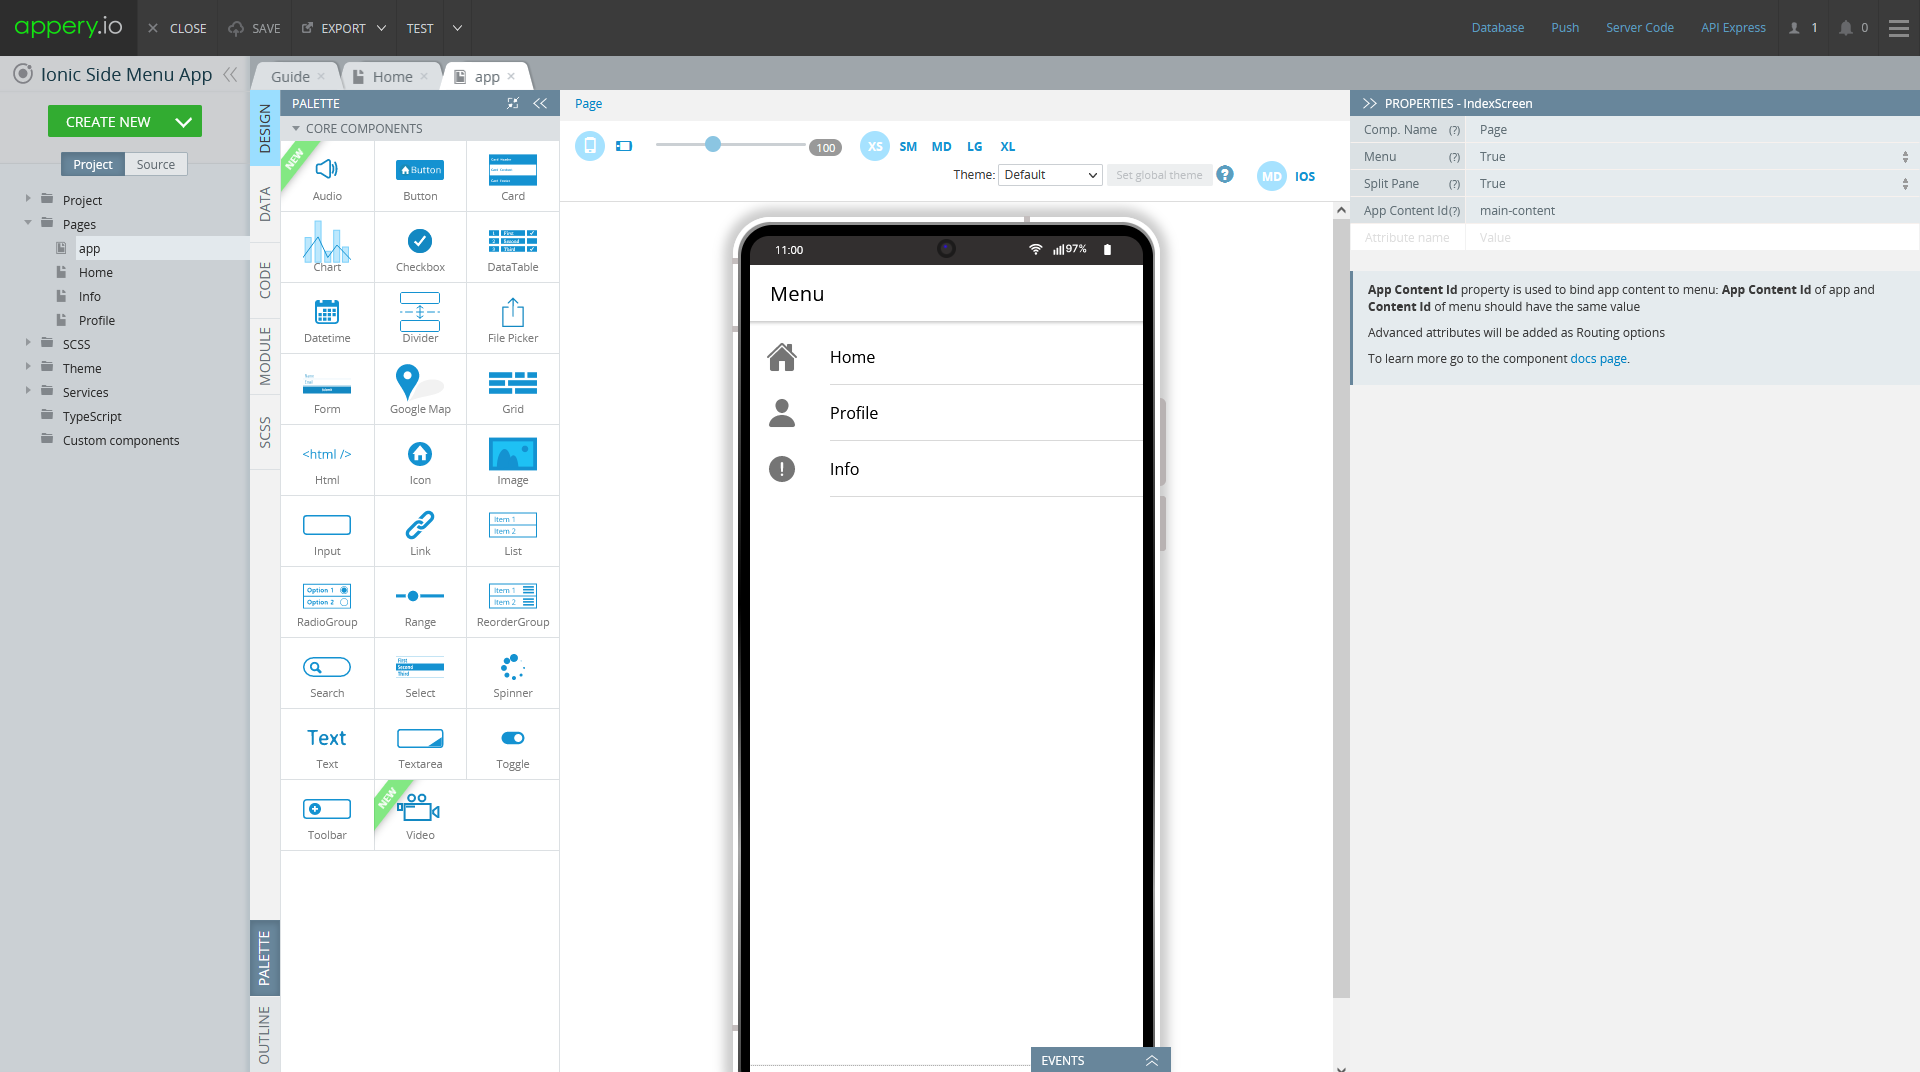
Ionic Side Menu Template UI
The following section describes how the template was created.
Screen Pages Design Tab
- Three Screen pages (renamed to Home, Info and Profile) have similar UI: their Header Toolbar title properties are set to True and their Text properties are defined as Home, Info, and Profile, respectively.
- Also, per one Button component is added to the Header > Toolbar >Toolbar Buttons component of every page. Every Button has its Component Type property defined as Ionic Back Button.
app Page Design Tab
- Side Menu was enabled on the app Page > PROPERTIES - IndexScreen by setting the Menu property to True.
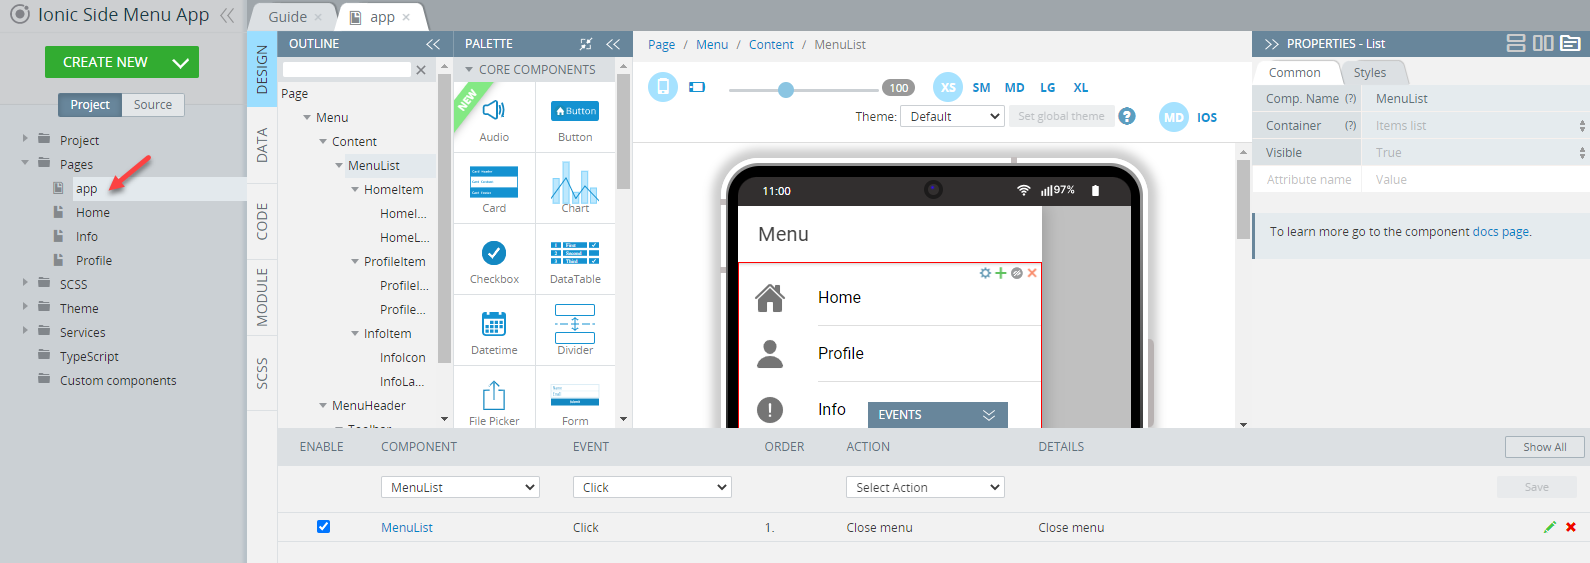
- The Menu Content contains the MenuList of three List Iitem components for navigation: HomeItem, ProfileItem, and InfoItem.
- For MenuList, the Container property is set to Items list and defined with the Click action for which the Close menu action is added:
- Every List Item contains an Icon and a Label that are called respectively: HomeIcon and HomeLabel, ProfileIcon and ProfileLabel, InfoItem and InfoLabel. To allow labels, the Label property should be set to True for every List Item.
- The Text properties of every Label are defined as Home, Info, and Profile, correspondingly.
- The corresponding icon styles are applied to all three List Items' icons as their Name property and their Slot properties are set to Start.
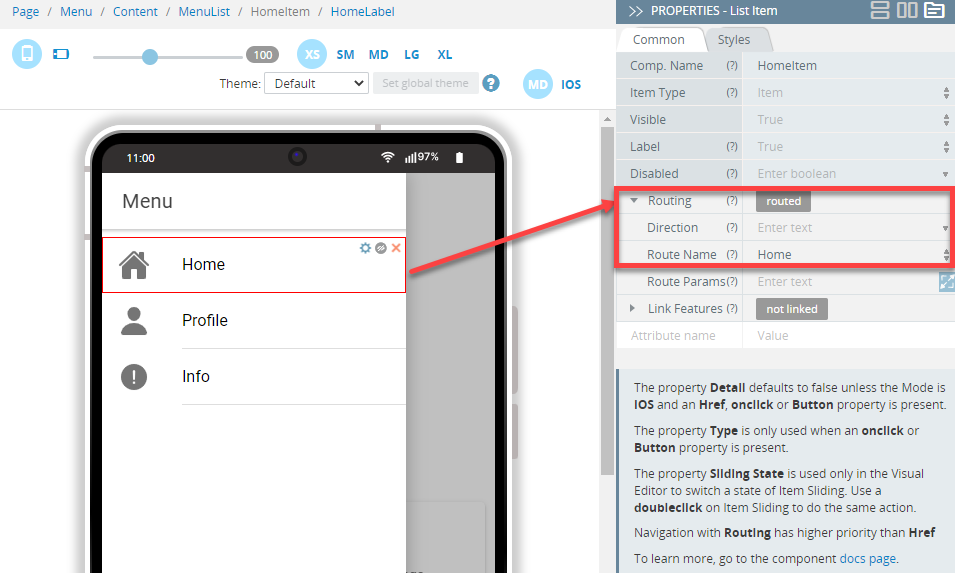
- The page navigation for List Items is defined under PROPERTIES > Routing: HomeItem routes to Home, ProfileItem routes to Profile and InfoItem routes to Info:
Extending Template
This section covers how to extend or modify this app template.
Showing Side Menu on All Screen Sizes
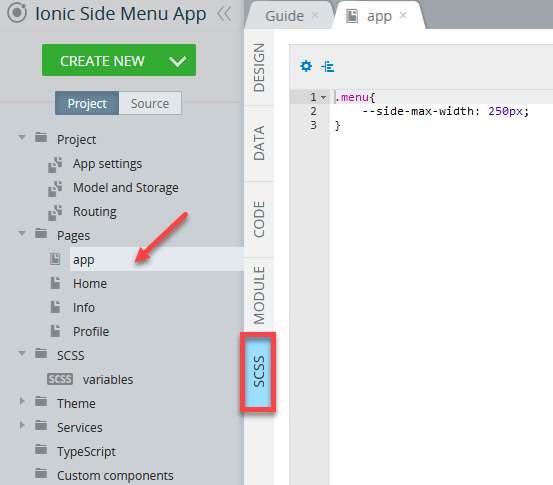
By default, the side menu is shown on devices with screen sizes XS, SM, and MD. This behavior is defined under the page SCSS panel:
But you can change this behavior for any app page of your choice. For example, you can modify it to show the side menu on the Info page for any screen size.
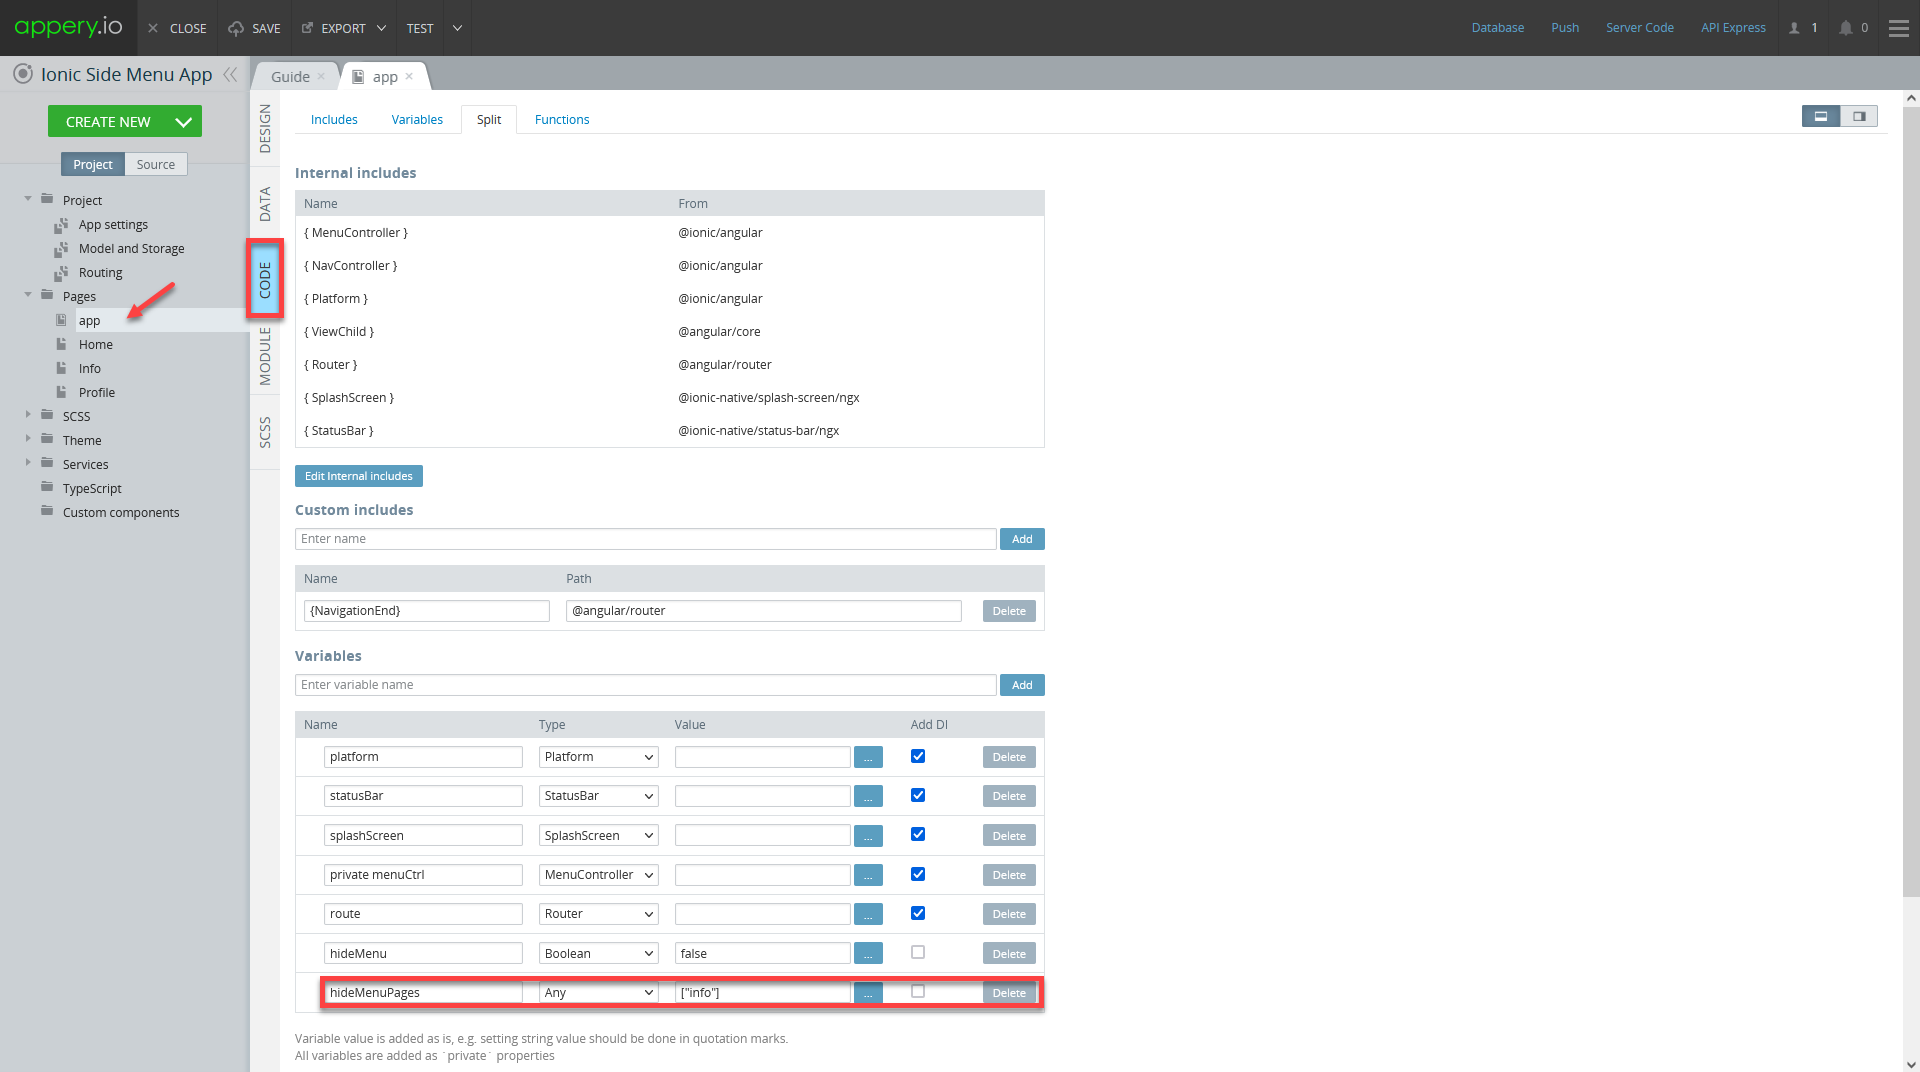
For this, switch to the page CODE panel where the needed function, includes, and variables are added.
Now, define the hideMenuPages variable value as the string array with the indication of the needed page (like it appears under the app Routing page):
As a result, the side menu will be always shown for the Info page regardless of the screen size:
Adding New Page
For adding a new page, do the following:
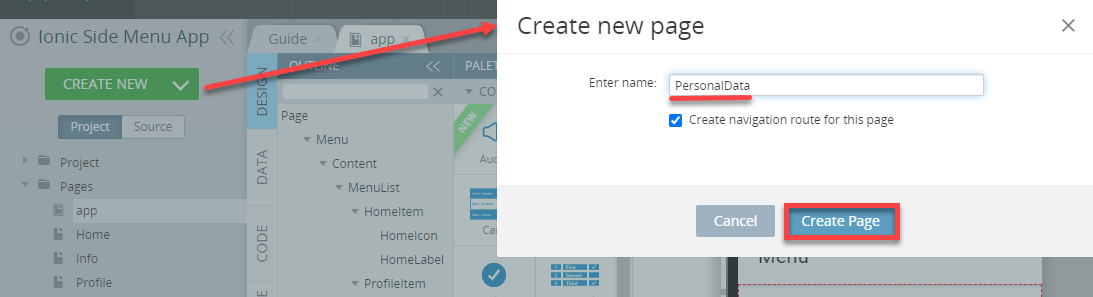
- Create a new page and name it (the Create navigation route for this page check box should be selected):
- For the created page, provide the Text value for the Header Toolbar Title and drag & drop a Button to the Header > Toolbar > Toolbar Buttons component. For its Component property, select Ionic Back Button from the drop-down.
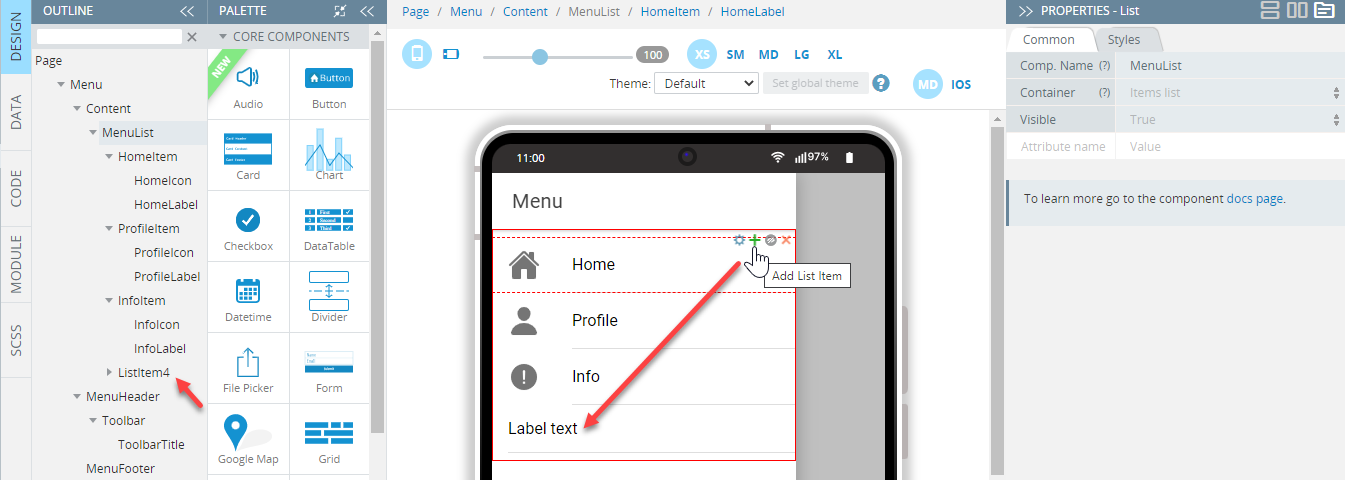
- Now, go to the app page and use the project OUTLINE view to select the List component.
- Add a new List Item by clicking the green + sign:
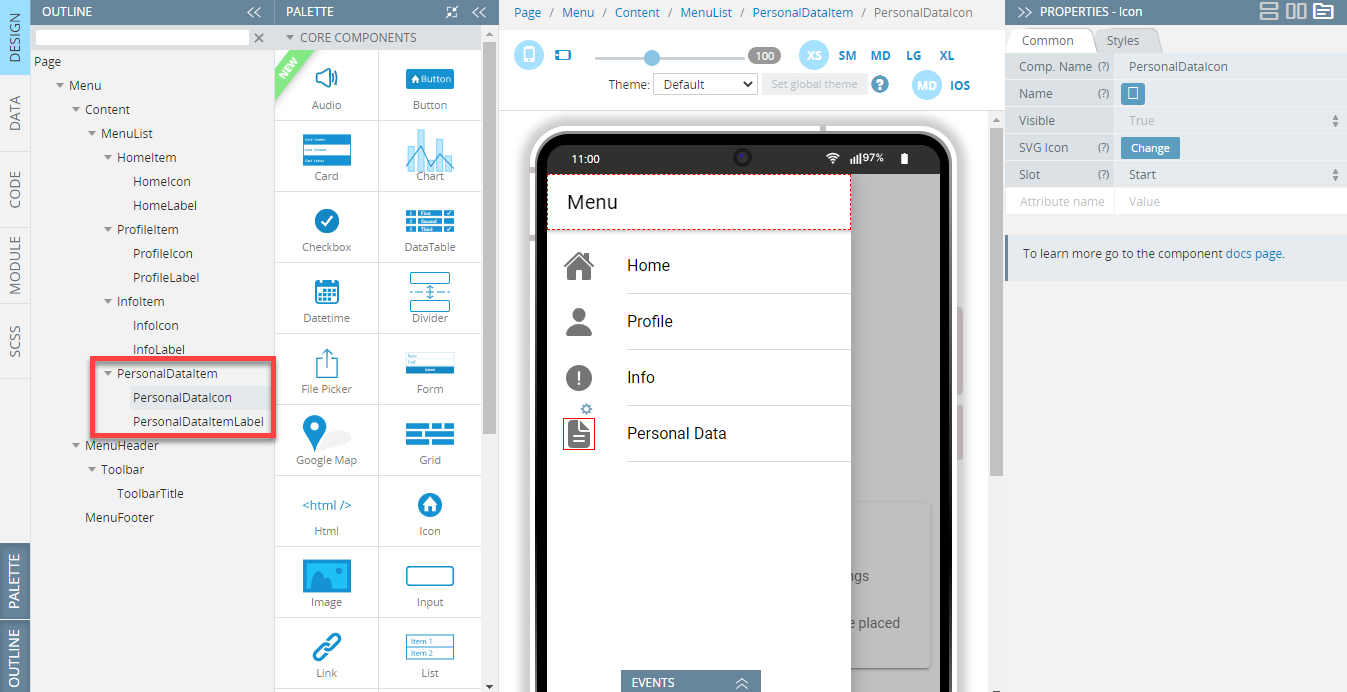
- Rename the component, and define the Routing property so that its Route Name sub-property be linked to the newly created page.
- Select the List Item's Label, rename the component, and provide a new value for its Text property.
- Add an Icon to the new List Item. Define its Component name property, and select the needed icon to define the Name property, and set Slot to Start:
Deleting Existing Page
To delete the existing page:
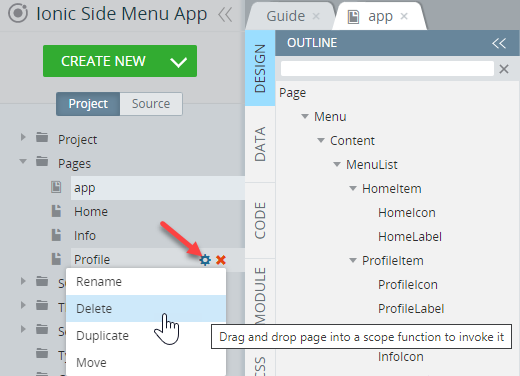
- Delete the page using its page context menu:
- It is recommended that the existing route to the page in the Routing section be deleted.
- Delete the corresponding list item on the side menu list.
Note!You can also check this tutorial to learn how to create a simple Ionic mobile application with a menu in Appery.io.
Ionic Tabs
You can use our Ionic Tabs template to add Tabs to your app for navigation purposes.
To create a new app based on the Ionic Tabs template, select it in the Create new app dialog.
The project based on this template contains:
- Blank app page.
- Three Screen pages: Home, Info, Profile.
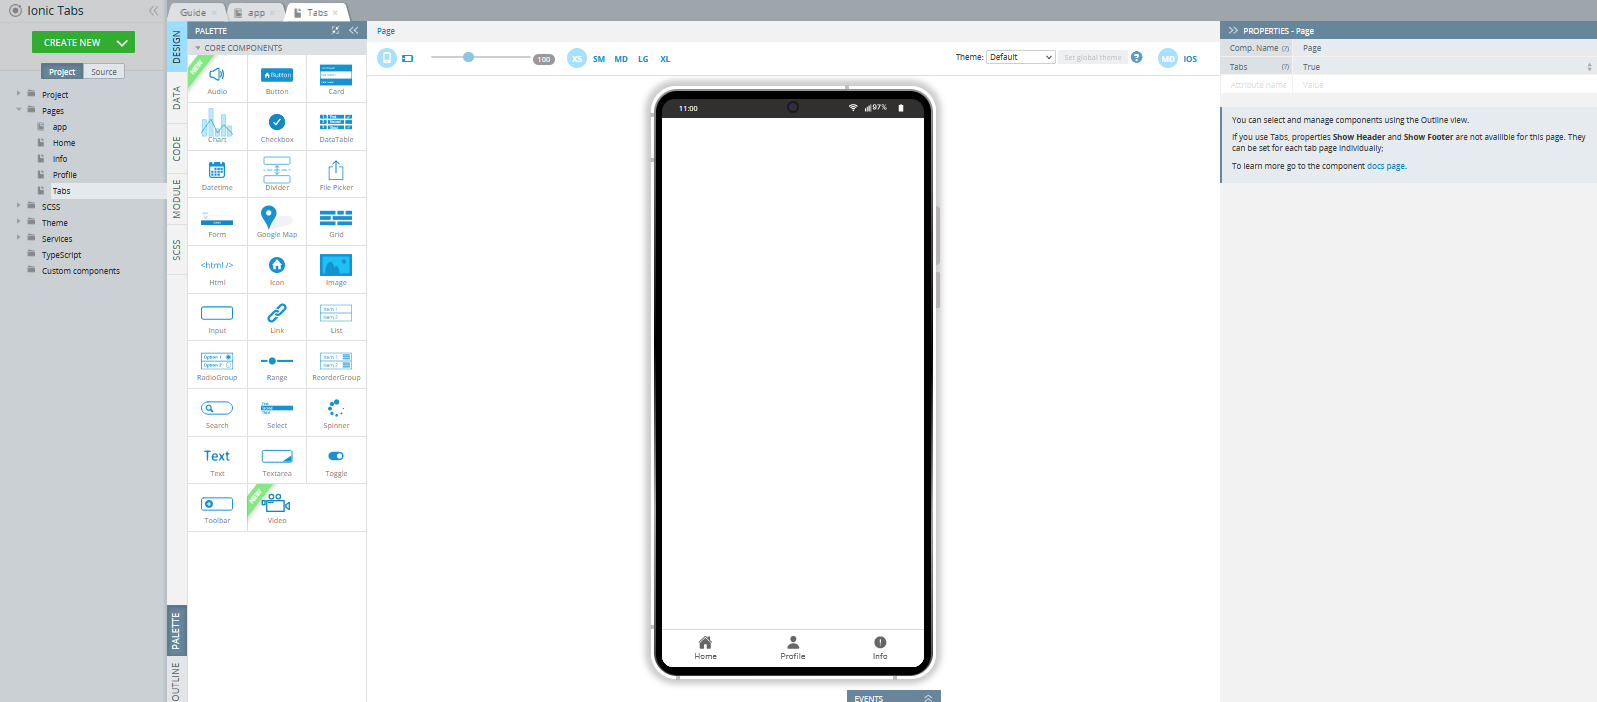
- Tabs page with three bottom navigation tabs.
Ionic Tabs Template UI
This section describes how the template was created.
Screen Pages Design Tab
- Three Screen pages (renamed to Home, Info and Profile) have similar UI: their HeaderToolbar Title properties are set to True and their Text properties are defined as Home, Info, and Profile, correspondingly.
- The Footer Toolbar is disabled by setting the page Footer property to False.
Tabs Page Design Tab
How the page is designed.
- The tabs functionality is enabled by setting the page Tabs property to True.
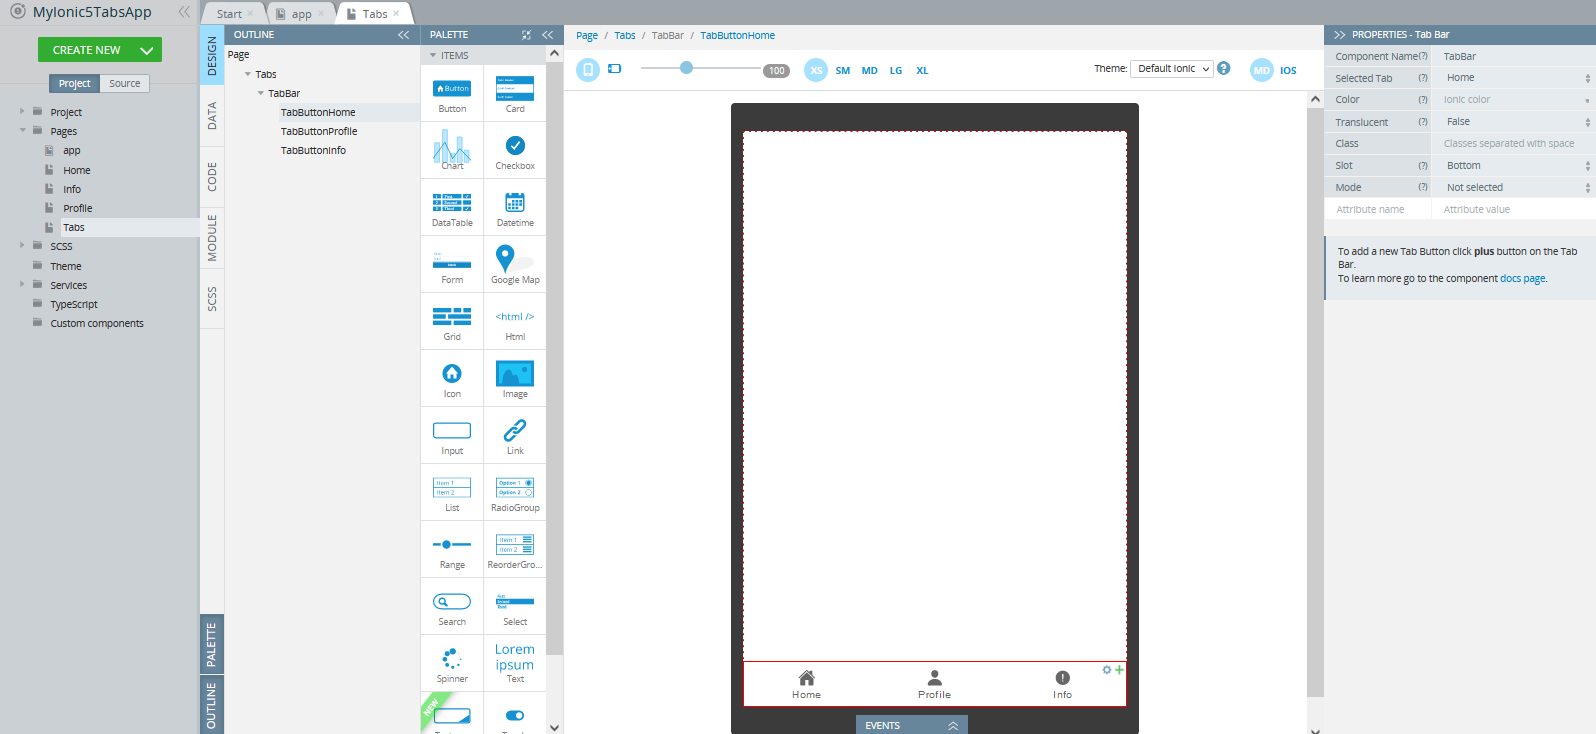
- The Tab Bar contains three Tab Buttons Home, Info, Profile. To define the Tab Bar position, set its Slot property to Bottom.
- The Label > Text properties for all Tab Buttons are defined as follows: Home, Profile, and Info.
- To change the icon style of the bottom tabs, the Icon > Style property is used.
- To define the proper routing, every Tab Button has its Tab property defined accordingly.
Under the Routing tab, enable Tabs as the Default route:

Extending Project
This section describes how to customize the tabbed app template.
Want to know more?In this document, you can find how to arrange for navigation from Tabs to child pages.
Adding New Page
For adding a new page, do the following:
- Create a new page and name it (the Create navigation route for this page check box should be selected).
- For the created page, provide the Text value for the Header Toolbar Title and disable the Footer Toolbar by setting the page Footer property to False.
- Now, go to the Tabs page and use the project OUTLINE view to select the Tab Bar component.
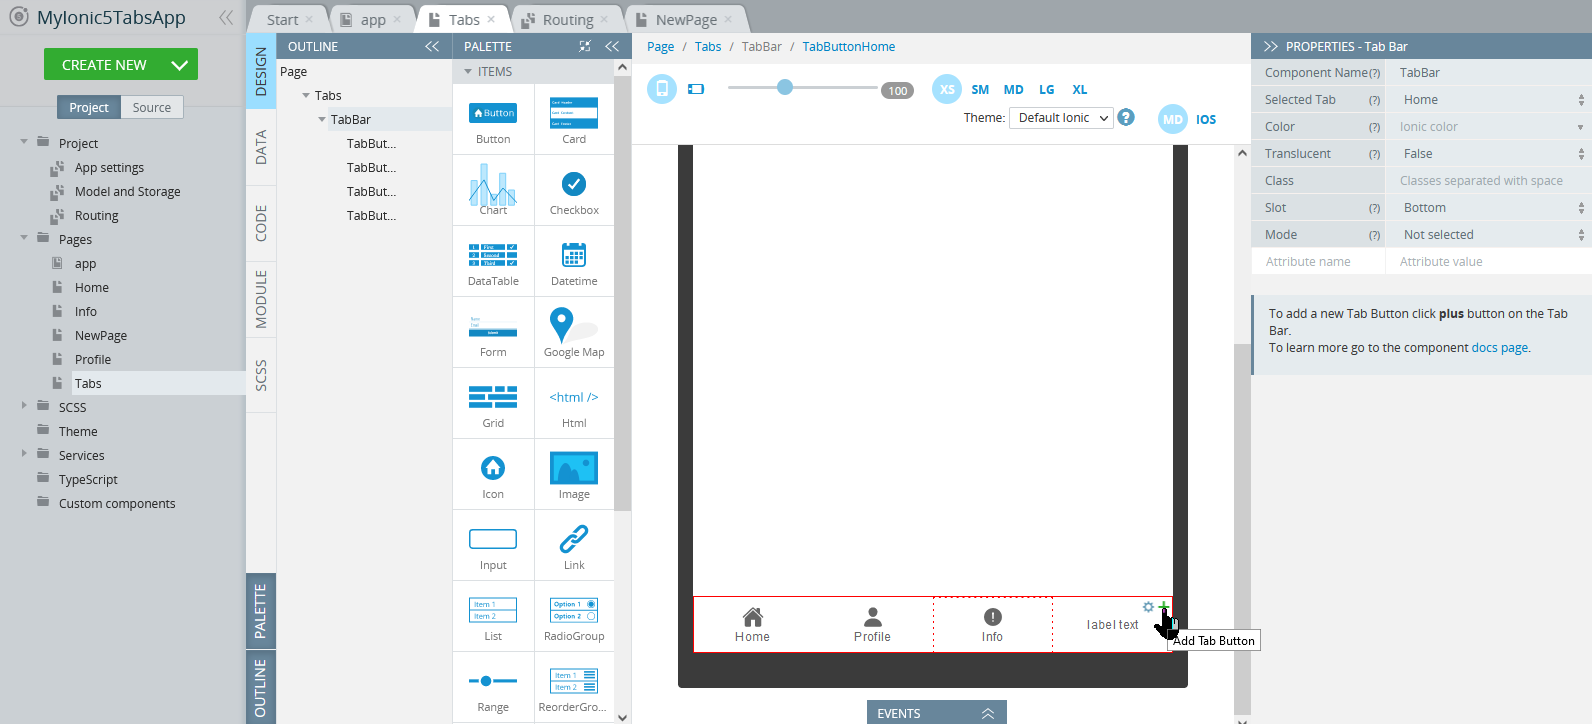
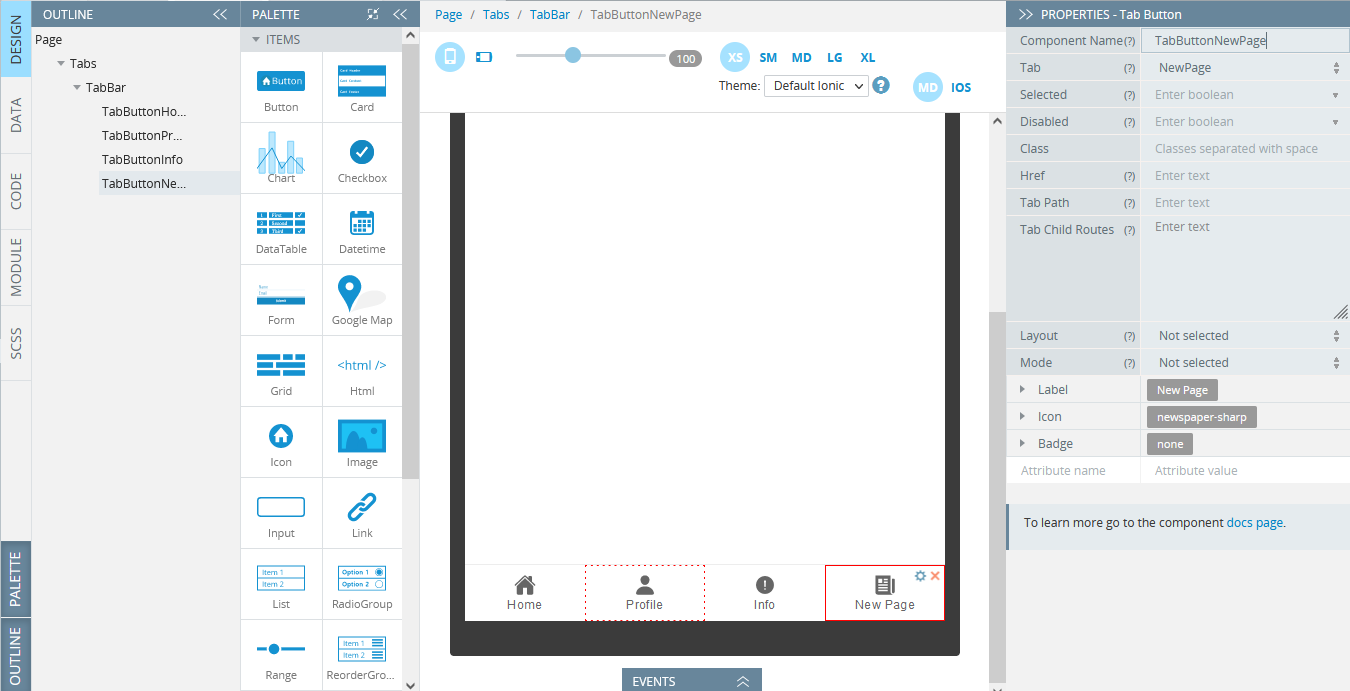
- Add a new Tab Button by clicking the green + sign inside the Tab Bar:
- For its Tab property, select the corresponding page value from the drop-down.
- Under its PROPERTIES panel, expand the Icon property and set the needed Style icon, then expand the Label property and define its Text:
Renaming Existing Page
How to rename the existing page:
- In the Project view, click the cog icon to invoke the context menu. From the drop-down, select Rename:
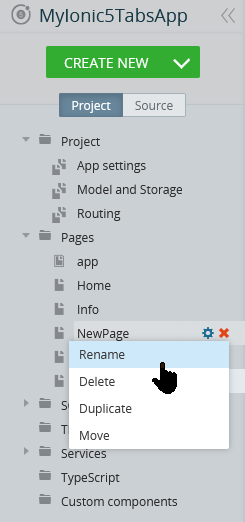
Then provide a new page name and confirm.
- Go to the page and change its HeaderToolbar Title Text.
- You can also rename the route of the page under Project >Routing, but these changes don't affect the UI.
- Now, switch to the Tabs page, select the corresponding tab item and make sure that the corresponding Tab property is updated.
Deleting Existing Page
How to delete the existing page:
- Delete the page using its context menu.
- It is recommended that the existing route to the page in the Routing section be deleted.
- Delete the corresponding tab button item in the Tab Bar.
Want to know more?You can also check this Appery.io Community video to learn how to create an Ionic app with tabs using the Appery.io platform:
Updated 4 months ago