Login-registration sample app built with Ionic 4.
Important Note!Note that the option of creating new apps with the Ionic 4 framework was removed and we no longer support the projects that were created with it earlier.
Moreover, you are free to effortlessly migrate your Ionic 4 project(s) to their Ionic version with keeping both apps active.
Please check this page to learn how to do it.
Ionic Database Login and Signup Plug-in AppWe strongly recommend that you check our upgraded Ionic Database Login and Signup Plug-in App created with Ionic here!
This sample app shows the following features:
- User registration.
- User login.
- Ionic 4.
- Database.
The first step is to get the app backend. The app backend consists of the database for storing users and user data.
Want to know more?You might also like this Appery.io Community video showing how to easily create an Ionic 4 application with login/signup functionality and storing users in an Appery.io database by adding the Appery.io Simple Login and Signup plug-in:
Creating Database
In this step, you are going to create the app database to store user and user data.
The first step is to create a new database and one new collection inside the database.
- Go to the Databases page and click Create new database button.
- Name the database: UserDB. The new database has a built-in Users collection where the users will be stored.
- Let's create a custom collection that will hold additional user information. Click Create new collection button. Name the collection: UserProfile and click Add.
- Inside the collection create two new columns: email and country, both String type. To create a new column, click the +Col link:

Linking UserProfile with User Collection
Next, you need to link the Users collection with the UserProfile collection using the Pointer data type.
- Open the Users collection.
- Click +Col to add a new column.
- Name the column: toProfile, set it's type to Pointer. From the Collection list, select UserProfile and click Create column. This column will hold a reference to more information (UserProfile) for this user.
Configuring Security
When a new user is created and the information is saved into the UserProfile collection, only the registered users should have access to this information. This can be done via ACL (Access Control List).
- Open the UserProfile collection.
- Select the Change default ACL panel.
- Inside the input field, type: @Creator, click Add User. This means that the user who created the entry (currently registered user) only has access to this row in the UserProfile collection.
- Click Save and Close.
Good, you are done with the database setup. Next, you are going to set up the Server Code scripts that provide the logic between the app and the database.
Getting the Ionic 4 App
Getting the Ionic 4 app is really fast and easy as the app is available as a plug-in inside the App Builder.
- Go to the Apps tab.
- Click the Create new app button.
- Select Ionic 4, then select the Ionic 4 Blank template. Name the app and click the Create button.
- When the visual App Builder loads, click Create New > From Plugin.
- Under Appery.io Examples, select Database Login and Signup.
- Click Import selected plugins:

After the plug-in is imported, several default pages (Home, Login, PrivacyPolicy, Screen1, SignUp, and TermsOfService), app page and the needed services are added to the app.
7. Now, for Default routing, under the Routing tab, select the Login page.
If you test the app now, you will get an alert notifying you that no database ID has been specified:
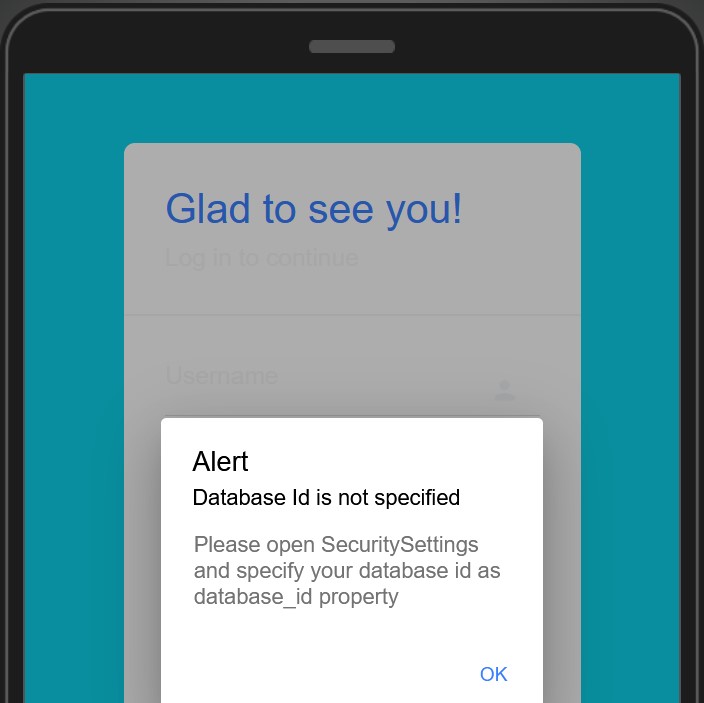
So, let's proceed with specifying it.
Configuring App Logic
The services that talk to the backend are already in the app but you also need to set the database ID for these services to be linked.
- Go back to the Databases tab and copy the UserDB ID from the URL to clipboard.
- In the Projects view, unfold the Services > SecurityServices and locate the SecuritySettings service.
- Insert the copied database ID into the value field.
- Click Save to save all changes.
App Testing
You are now ready to test the app. Click the TEST button in the App Builder to launch the app in the browser.
This time, the Sign In page shows up as expected but before a user can successfully log in, he has to be registered:

So, proceed with user registration by clicking the Sign up link and entering necessary data on the Sign Up page that opens:

Testing on Device
Want to know more?You might also like this Community video instruction to learn how you can easily build an Appery.io Ionic 4 app that allows login by using your Apple ID:
Want to know more?Please check our instructional video that shows how to add the Google login feature to Android and iOS applications built with Ionic 4 from Appery.io: