Creating APIs for Relational Database (jQM App)
Exposing a relational database via REST APIs in a jQuery Mobile application
Introduction
Important Note!The option of creating new apps with the jQuery Mobile framework was removed but we still support the projects that were created with it earlier.
In this tutorial, you are going to learn how to expose a relational database via REST APIs. Once a database is exposed via APIs you can easily use them in a mobile app. This tutorial uses HostBuddy hosting and MySQL database. You can use any other relational database with API Express.
The purpose of this tutorial is to show you how fast it is to expose a relational database via REST APIs for using in a jQM app.
Custom SQL QueryIf you would like to write a custom SQL query and expose it via a REST API, use the SQL component to do that.
Creating Database
API Express can connect to any SQL database. In this tutorial, we will use an SQL database from HostBuddy.
Alternatively, you can setup a database a Postgres Database On Heroku.
To set up your database, follow these steps:
- Go to the HostBuddy website and click Start Free Trial. A credit card is not required for the trial, so just enter your credentials, such as login name, email, password, and click Sign Up to continue.
- You will shortly receive an email from HostBuddy, so click on the activation link provided there.
- Sign in to the HostBuddy website and click Try Now to start using the free trial. No need to change anything, just click Next, Submit, wait a little, while your hosting is prepared.
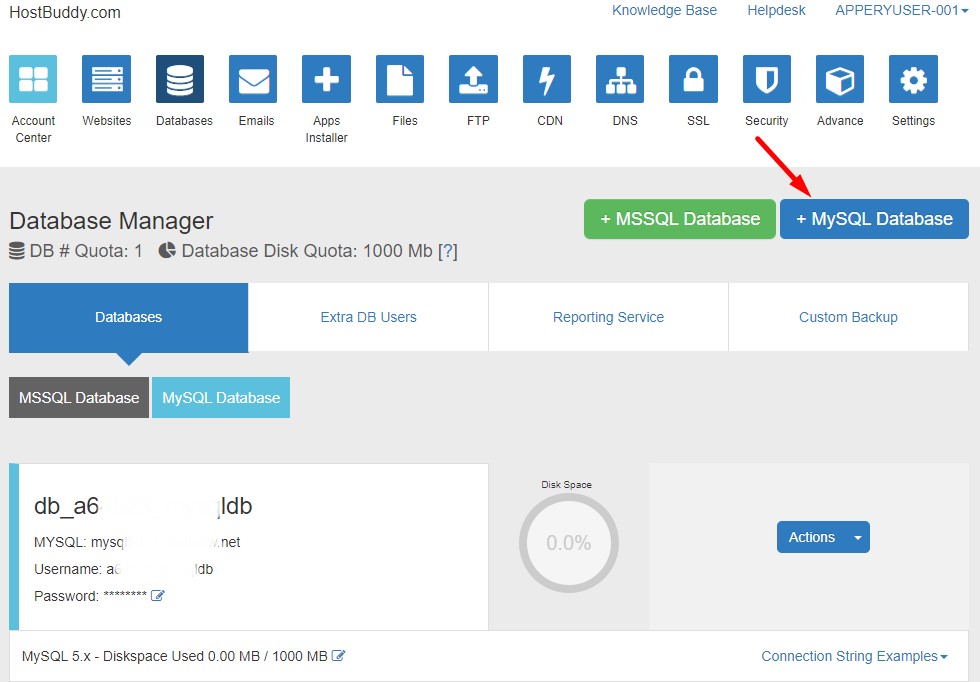
- Once it’s ready, you’ll see a HostBuddy Account Center page. Click Databasesto open the Database Manager.
- Click +MySQL Database, type in the database name and password, and confirm. Your database is ready to be filled up with data: DB name, MYSQL Server, and Username with Password (you will need it in the next step):
Creating Database Table
In this step, you are going to create a database table.
- For the database you have just created, click the Actions button on the right and select phpMyAdmin from the drop-down list.
- Once the phpMyAdmin dashboard opens, input the server, username, and password. Click Go.
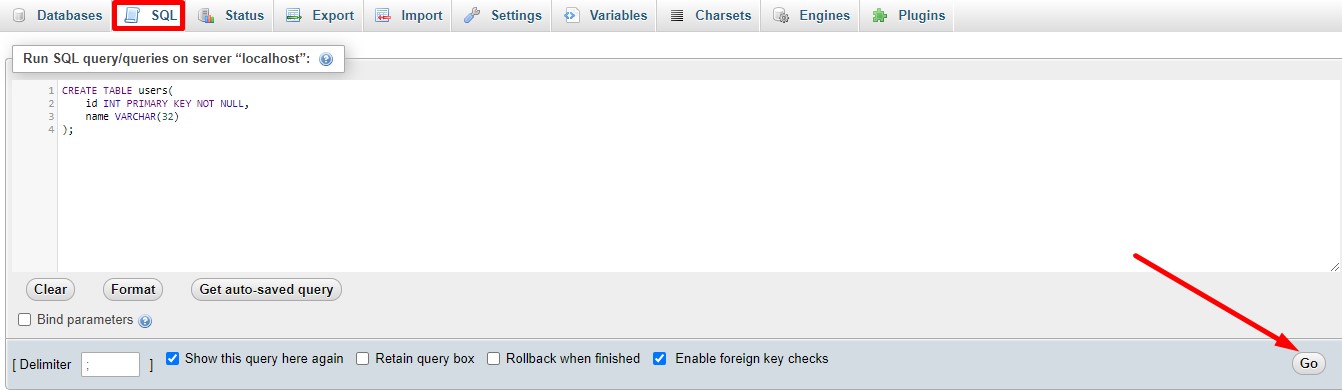
- To create a new table, go to the SQL tab in the top menu bar, select the database on the left, and paste the code below:
CREATE TABLE users(
    id INT PRIMARY KEY NOT NULL,
    name VARCHAR(32)
);- Click Go:
A database with one table will be created.
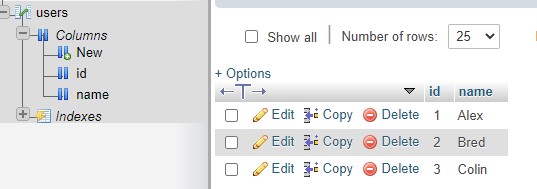
- Select the newly created table users on the left (under your database) and click SQL in the top toolbar.
- Replace the default code in the SQL editor with the following SQL query to insert three users and click the Go button.
INSERT INTO users(id, name) VALUES (1, 'Alex'), (2, 'Bred'), (3, 'Colin');You should now see that 3 rows have been inserted: the three created users can be seen when you select the users collection:
Now, that the database is ready, we can proceed with creating a database connection for API Express.
API Express
There are two general steps in working with this database and exposing it via REST APIs in API Express:
- Create a database connection.
- Automatically generate REST APIs for a database table.
Let's start with the first step: creating a database connection.
How to Add API Express into Ionic Mobile ApplicationYou might also like this video for detailed instructions on how to:
- create a Database connection to a relational DB,
- expose the relational DB data as a REST service and
- use this functionality in an Appery.io Ionic mobile app:
Creating Database Connection
To create a new database connection, go to API Express > Create new DB connection. Enter the required credentials. For HostBuddy, you can find them under MySQL Manager. For example:
| Parameter name | Parameter value |
|---|---|
| Database connection name | mysqlhosting |
| Connection type | Relational database |
| Database type | MySQL |
| Host | mysqlxxxx.site4now.net. This value can be found under Database Manager > MySQL Database, as MYSQL of the needed database table. |
| Port | 3306 |
| Database name | db_xxxxx_mysqldb. This value can be found Database Manager > MySQL Database of the needed database table.. |
| Username | xxxxxx_mysqldb. This value can be found under Database Manager > MySQL Database, as Username of the needed database table. |
| Password | The password you typed in when creating the corresponding MySQL database. |
Click the Save button to save the connection.
Testing Connection
Once you are done entering all the connection values you can test the connection to ensure it works correctly. Simply click the Test button. You should see the Test successful message.
Creating API Express Project with APIs
Now that the database connection is created, you need to create an API Express project that will hold the actual APIs.
- From the Connection tab, open the connection list and select Back to list.
- In the Projects section, click Create new project.
- Enter a project name: MyDatabaseAPIs and optionally enter a description. Then click Create.
- From the API tab, click the project new service link.
- For Service group name enter: people. Keep Generate REST API checked.
- Click the Create button.
- On the next page, for Database connection, select the connection you just created (mysqlhosting).
- For Table select the users table.
- For Actions keep all the default values.
- Click the Generate service button to save and generate the APIs.
When the APIs are generated you should see the following page:

REST APIs.
Congratulations, you have just exposed a relational database via REST APIs!
Testing APIs
To test any API, click the test link on the right. On the Service test page, you can test any of the API generated:

Service test - GET
App (client)
Now that you have exposed a database via REST APIs (created the app backend), the next step is to create a mobile app that will use these APIs. In this tutorial, you have the option to create a jQuery Mobile app.
Building JQM App
In this section, you are going to build a jQuery Mobile app that uses the API you just created.
Creating New App
- Go to the Apps page.
- Click the Create new app button.
- Select the JQuery Mobile tab and enter DatabaseApp for the app name.
- Select the Blank template and click Create.
Designing App UI
The app UI will be very simple and consist of just the List component.
- When the App Builder loads the new app, open Pages > startScreen.
- Drag & drop the List component into the page.
- This component has three items. As you will be loading the data from an API you only need one item. So, select item 3 and item 2 and remove them by hovering over the list item and clicking the red
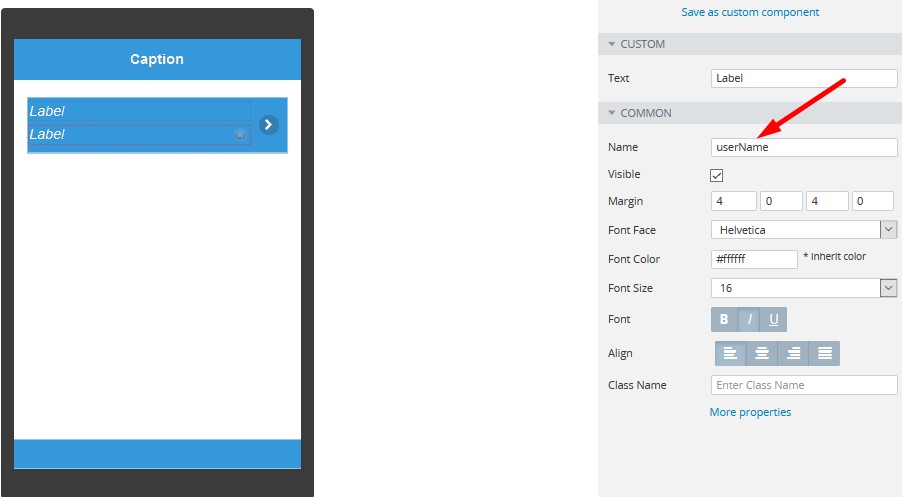
xicon. - Drop two Label components to the list. For the first label, set userID for the Name field under the PROPERTIES panel, for the second one, set userName for the Name property:
- Click on the Save button on the top left side.
Importing API Services
Next, you are going to import the API services.
- In the App Builder, select CREATE NEW > API Express Generator.
- Keep Appery.io for the domain and click Next.
- Select the API Express project you have just created (MyDatabaseAPIs) and click Select.
- Click the generate link on the right, then the generate button (keep the Service Name default).
- After generating the service, click the Refresh button.
All the generated services should now be listed under the Services folder:

Defining Service
- Select startScreen and open its DATA panel.
- Select the Service type, then and select people_find from the drop-down list for a new datasource. Click the Add button to add this service. You can rename to what is needed.
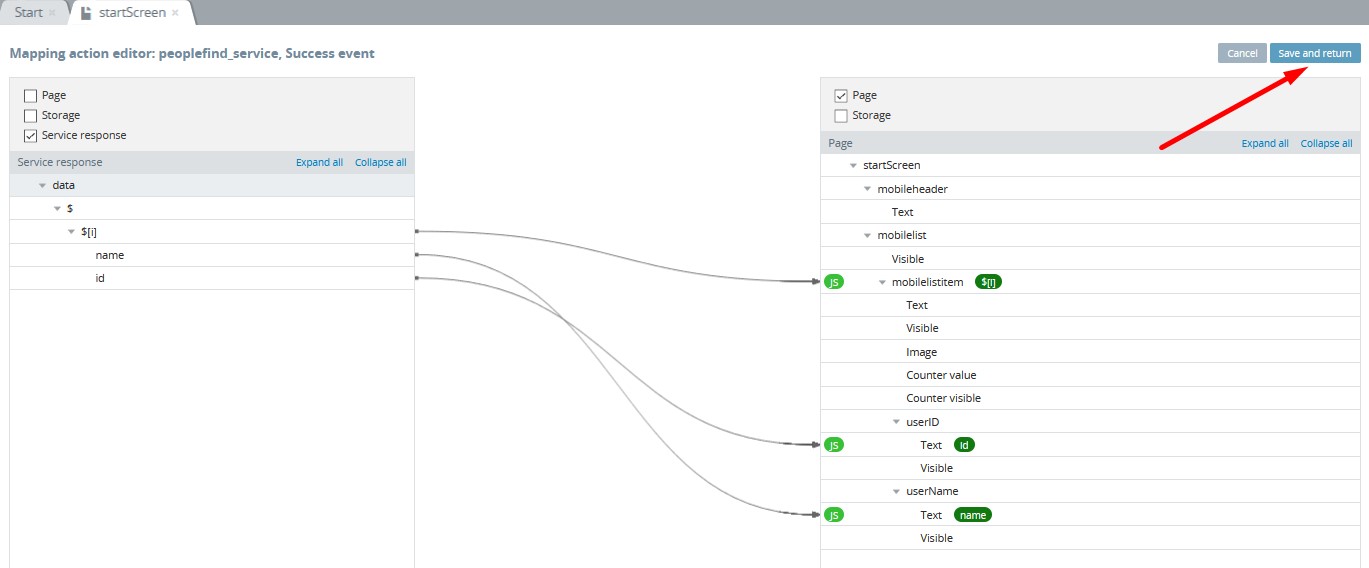
- Click Mapping for the Success event, click Expand all for both Service response and Page panels.
- Map the items by dragging and connecting elements on either side:
- $[i] to mobilelistitem (the name of this item may be like mobilelistitem_X)
- id to userID >Text
- name to userName >Text.
- Click Save and return:
Invoking Service
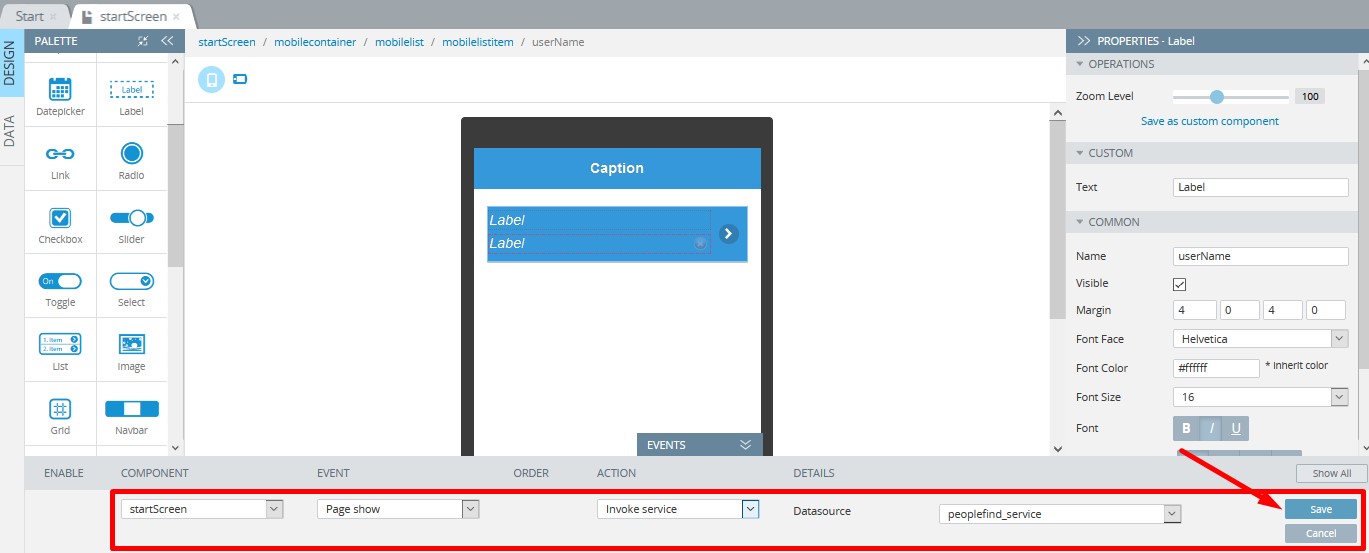
- Switch to the startScreen > DESIGN panel and unfold the EVENTS tab from the bottom.
- For the COMPONENT, select startScreen.
- For the EVENT, set Page show.
- For the ACTION > Invoke service, select your service, and click on the Save button under the EVENTS tab:
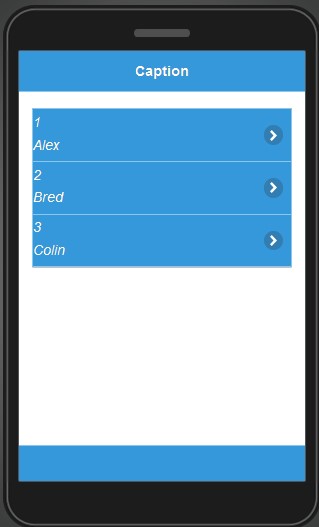
Testing App
To test the app, simply click the Test button inside the App Builder. The app will launch in the browser and you should see the users' records from the database:
Want to know more?To learn how to expose a relational database via REST APIs and use it an Ionic Mobile application, check this document or watch the video tutorial about How to Build an App with API Express and External REST API for JQM framework.
Updated about 1 year ago