Ionic: Uploading Multiple Files to Appery.io Database
Ionic mobile app for uploading files to the Appery.io Database
Introduction
In this tutorial, you’ll learn how to build an Ionic mobile app that uploads files to the Appery.io database.
Getting Database Master API Key
Important Pre-condition!First of all, create an Appery.io database (you are also free to use an existing database) and name it myFilesDB.
For this app, we will use the Master API Key of the created database that can be found under the Databases > Settings tab:
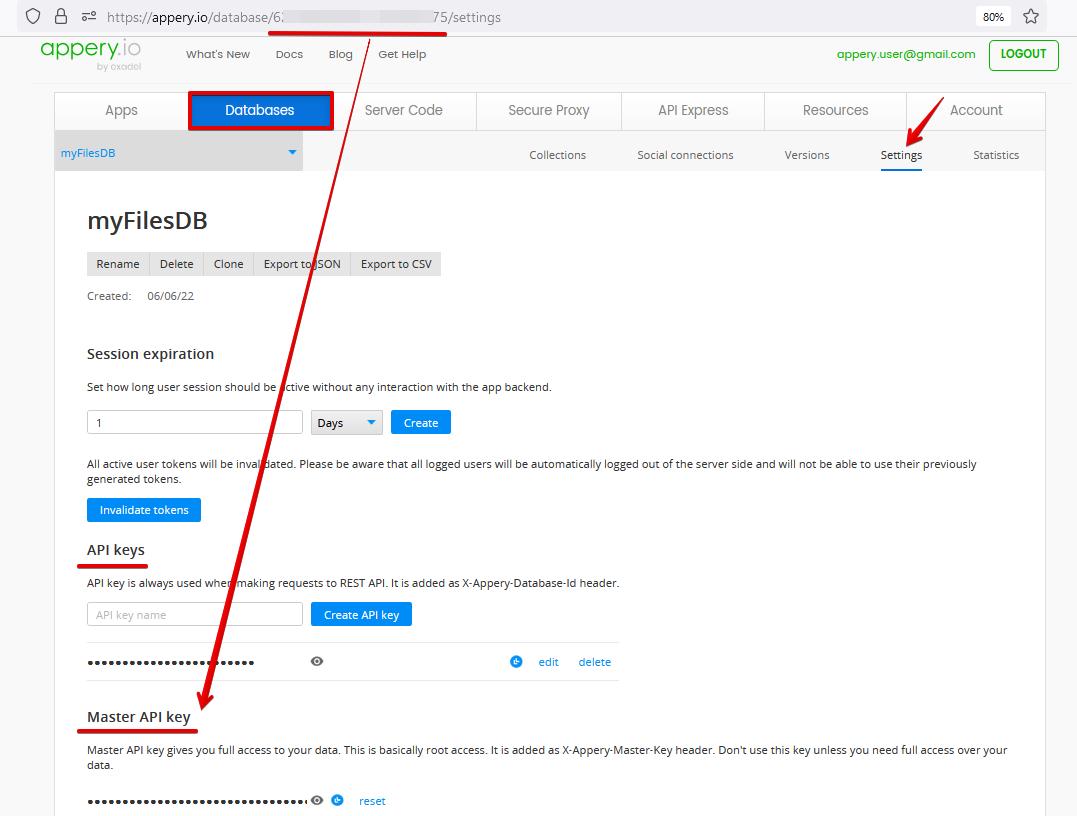
API keyA database API key is always used when making requests to REST API. It is added as X-Appery-Database-Id header (can also be found in the browser address bar).
Important Security IssuePlease be informed that using the database X-Appery-Master-Key can be insecure as it gives full access to the database, so it is recommended that you use X-Appery-Session-Token instead if you need to add extra protection to your data.
Creating New App
- To create a new Ionic app, under the Apps tab of the Appery.io platform, click the Create new app button.
- In the new window, provide the new app's name, for example, Ionic Multiple Files Upload App (or any other name you like), and confirm by clicking Create.
- After the App Builder loads, open Pages >Screen1 in the Project view tree, select Toolbar Title of the screen Header and change its Common > Text property to Multiple Files Upload App:

Tip!Using the OUTLINE view can be helpful in locating the needed component and/or arranging UI components on the screen.
- Now, select the Page component from the breadcrumbs (you can also use the OUTLINE view to locate the needed component) and set the page Footer property to False as we will not use it in the app (you will also be asked to confirm changing the property):

Now, when the app and database are created, you can move to add the File Select option and File Upload services.
Adding File Select Option
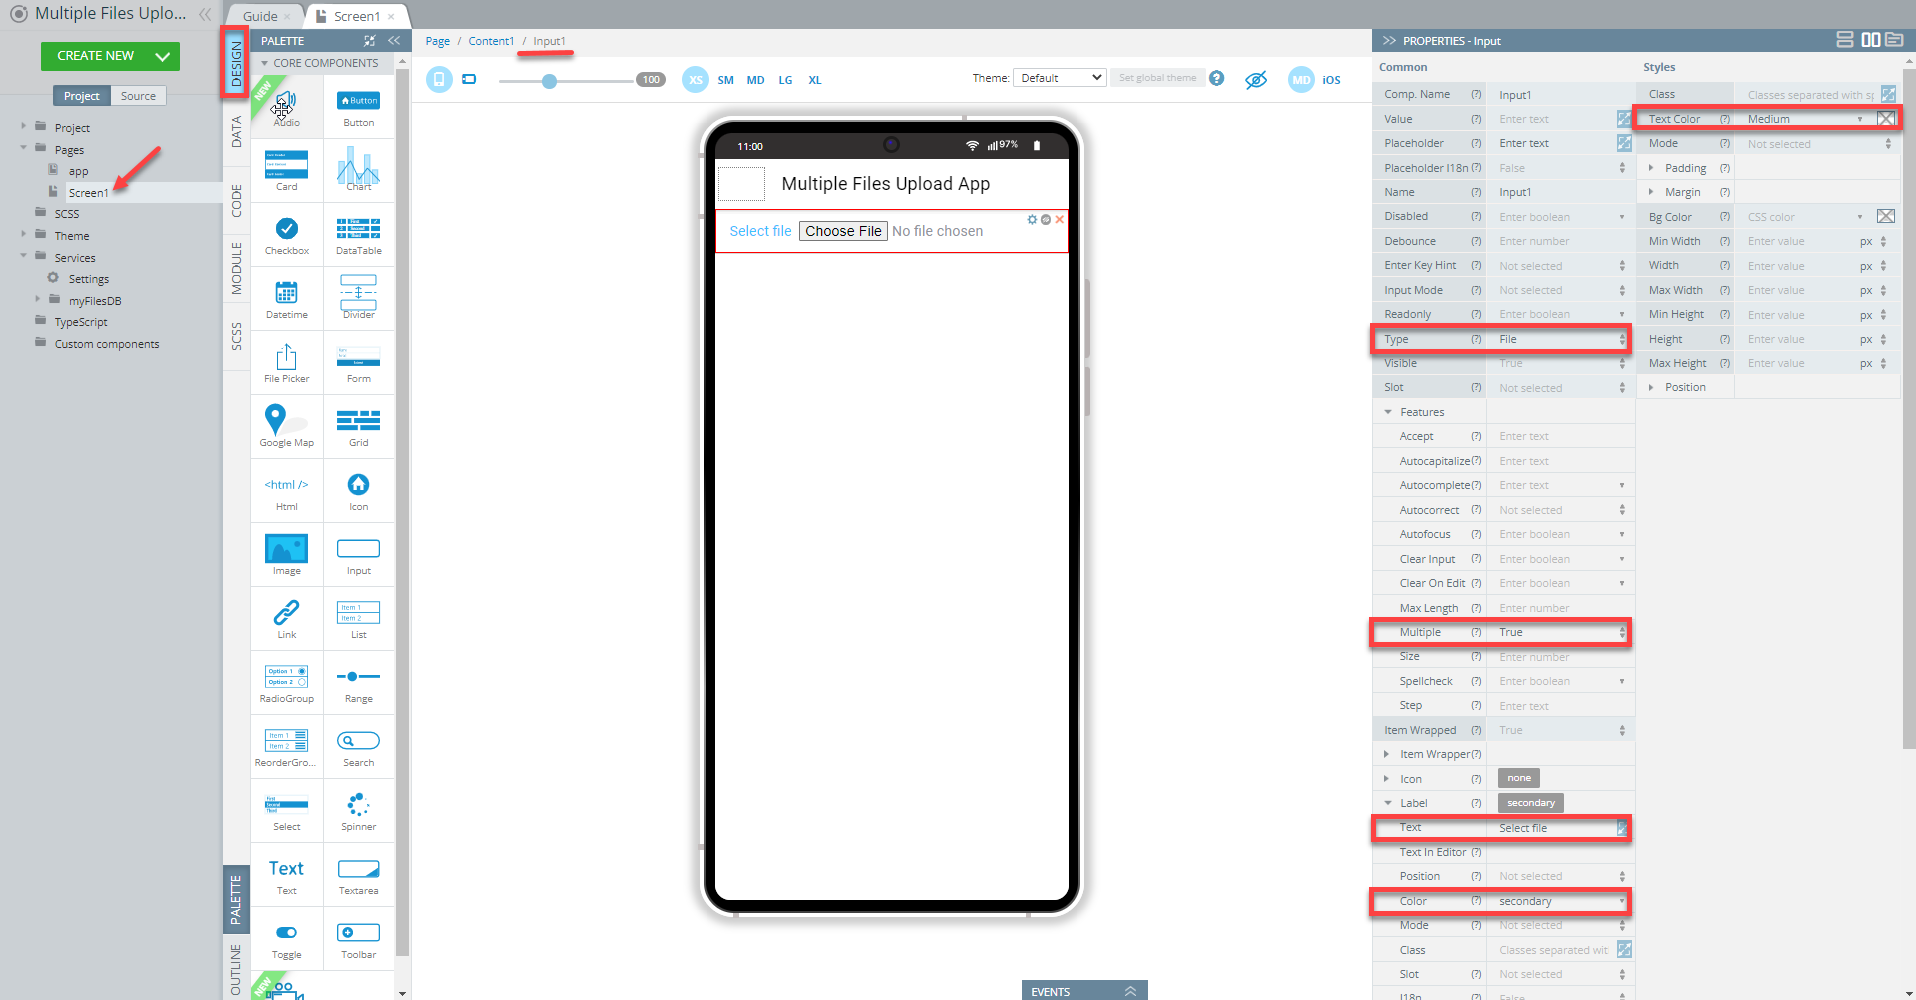
- Drag the Input component from PALETTE to the Content area of the Screen1 page and modify its common properties as follows:
- Type = File;
- Features > Multiple = True;
- Label > Text = Select file;
- Label > Color = secondary.
Under the Styles tab, set Text Color to Medium:
That's it for the Input component.
Note!In different browsers, page components might look slightly different. For example, if you work in Mozi;;a Firefox you will notice that the predefined selection button text is Browse..., not Choose File:
- In this step, you can already test your app: click the TEST button in the App Builder Toolbar to run the app in the preview and then click the Browse.../Choose File to select the needed file on your drive and the corresponding entry will be instantly shown.
Adding File Upload Option
Actually, when you have got a needed file, you would naturally like to store it in the Appery.io database that we defined in the very beginning (in this case, it's myFilesDB).
- So, first of all, let's add a button that will be used for activating the file upload service:
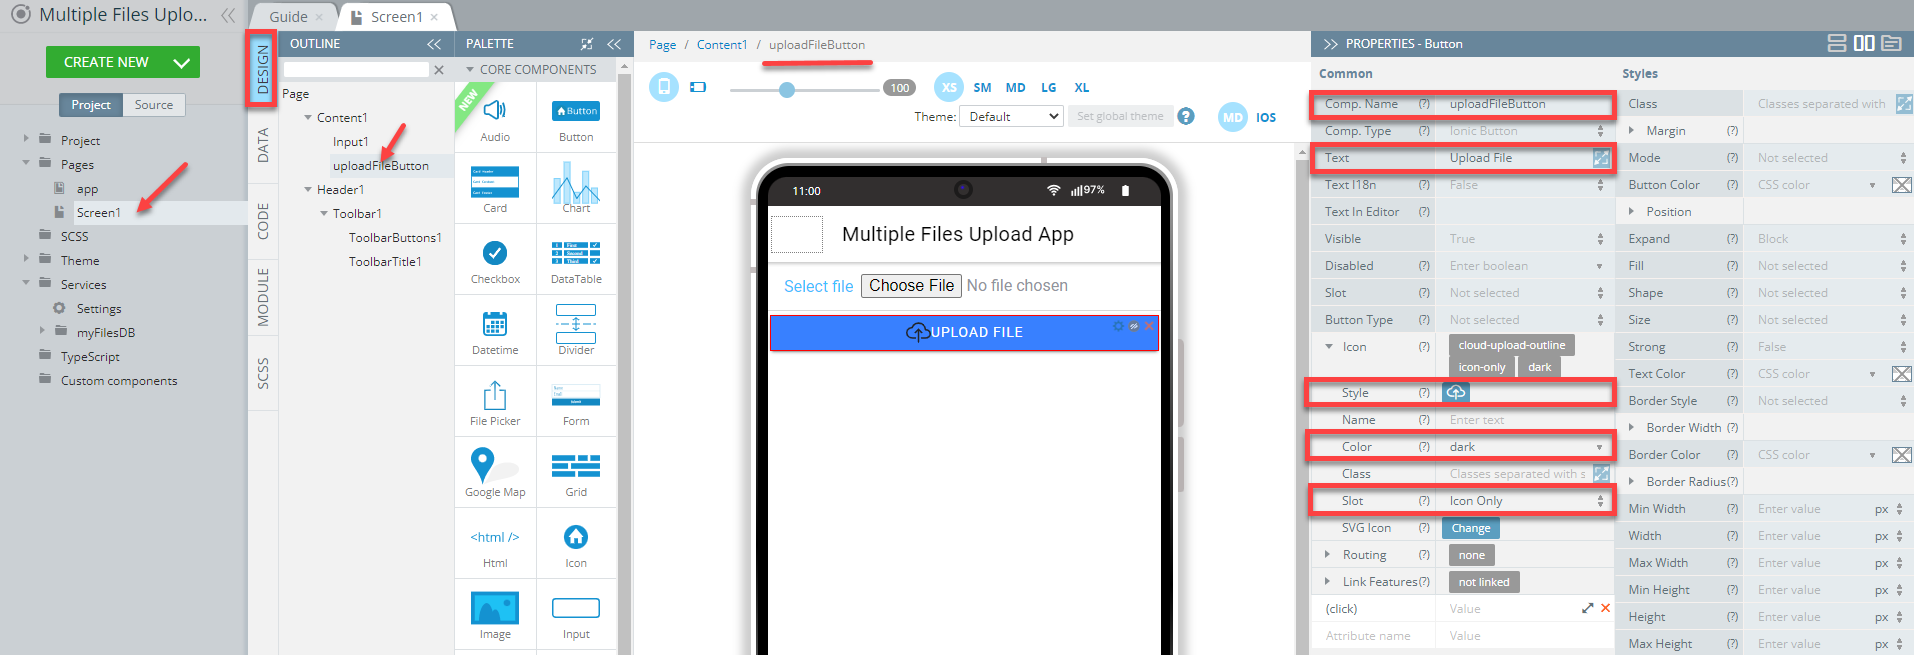
Drag & drop the Button component from PALETTE to the Content area and modify its properties under the Common tab:
- Comp. Name = uploadFileButton;
- Text = Upload File;
- Icon > Style = cloud-upload-outline (to open the icon selection window click the No icon button);
- Icon > Color = Dark;
- Icon > Slot = Icon Only:
- For uploading files to the database, we will need to link this database by importing the corresponding service.
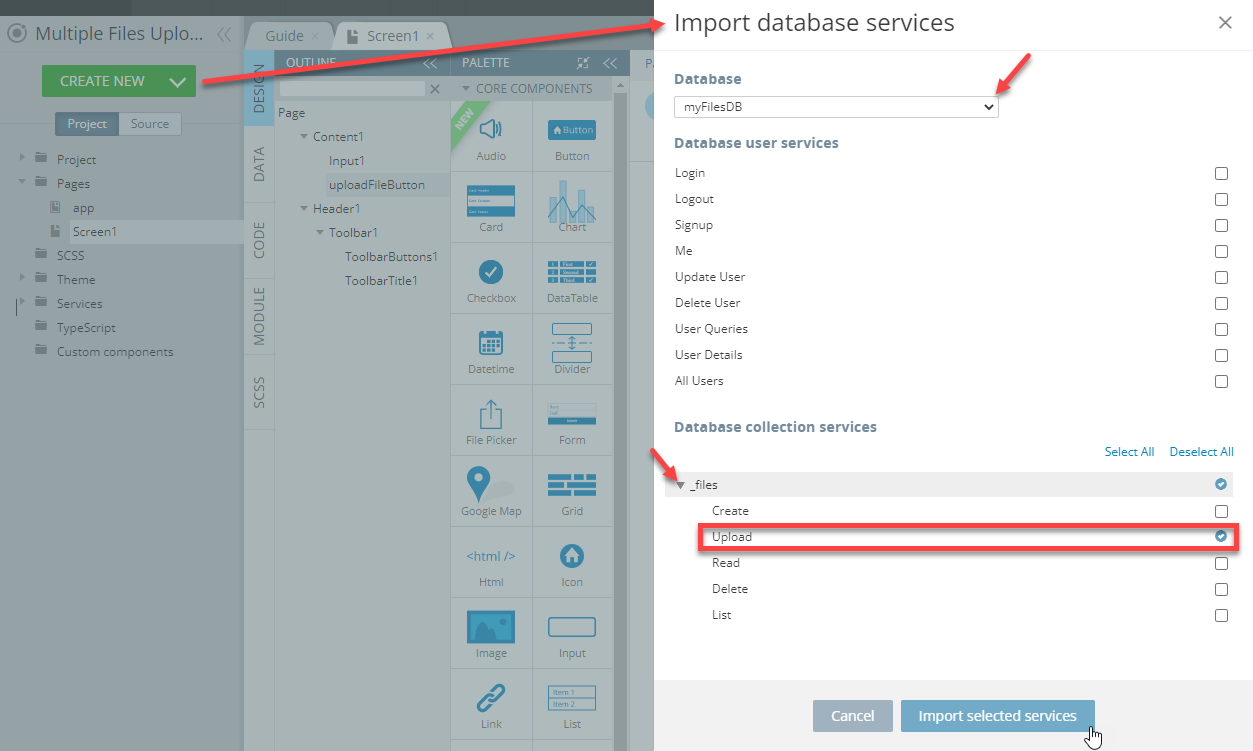
To import the needed database service (here, Upload) click CREATE NEW > Database Service, select the needed database from the list (here, myFilesDB) select the _files > Upload option and confirm by clicking Import selected services:
- Two database services will be instantly imported into the Services > MyFilesDB folder under the App Builder Project view tree: myFilesDB_files_upload_service and myFilesDB_settings:

Since we are not planning to integrate any login functionality into this particular app, we will use the database X-Appery-Master-Key.
Important Security IssuePlease be informed that using the database X-Appery-Master-Key can be insecure as it gives full access to the database, so it is recommended that you use X-Appery-Session-Token instead if you need to add extra protection to your data.
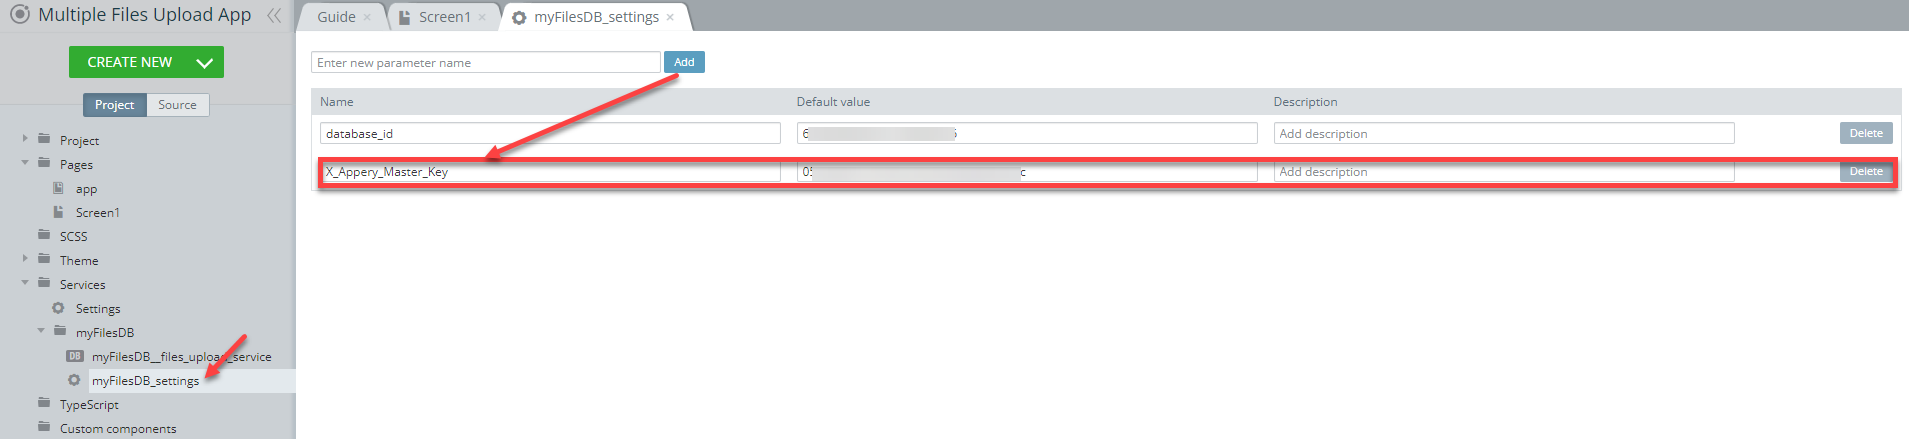
- First, open the myFilesDB_settings file, add the X_Appery_Master_Key parameter (click the Add button) and define it with the X-Appery-Master-Key value of your database (can be found on the Databases > Settings page):
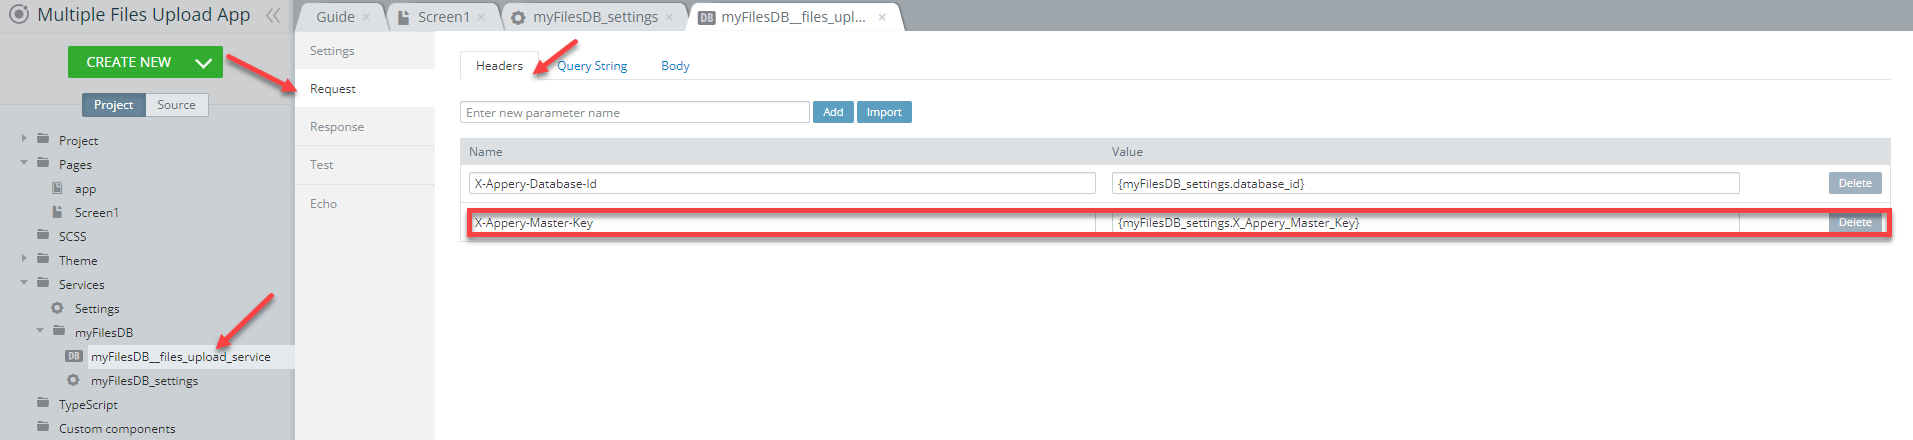
- Now, go to the Request > Headers tab of myFilesDB__files_upload_service and edit its X-Appery-Session-Token request header name by replacing it with X-Appery-Master-Key.
- Now, provide the service X-Appery-Master-Key value as {myFilesDB_settings.X_Appery_Master_Key}:
Now, let's open the Screen1 DATA panel and define the added service.
- For the datasource, select myFilesDB__files_upload_service and click Add:

- Now, rename the service to fileUploadSrv and define its Before send mapping as follows:
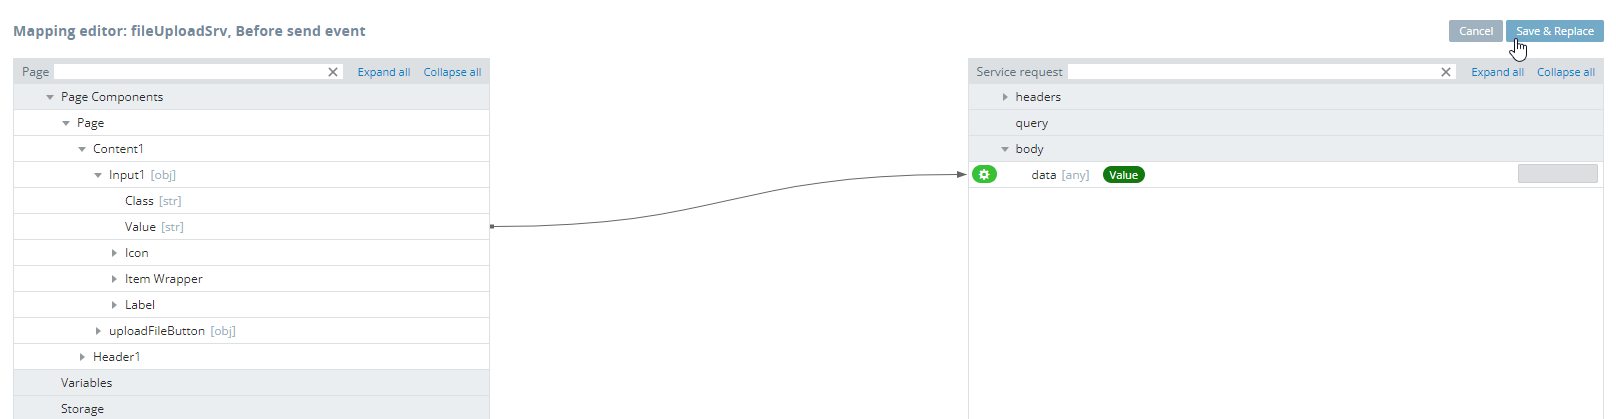
- Click Save & Replace; also, delete the Success mapping button since it will not be used in the app.
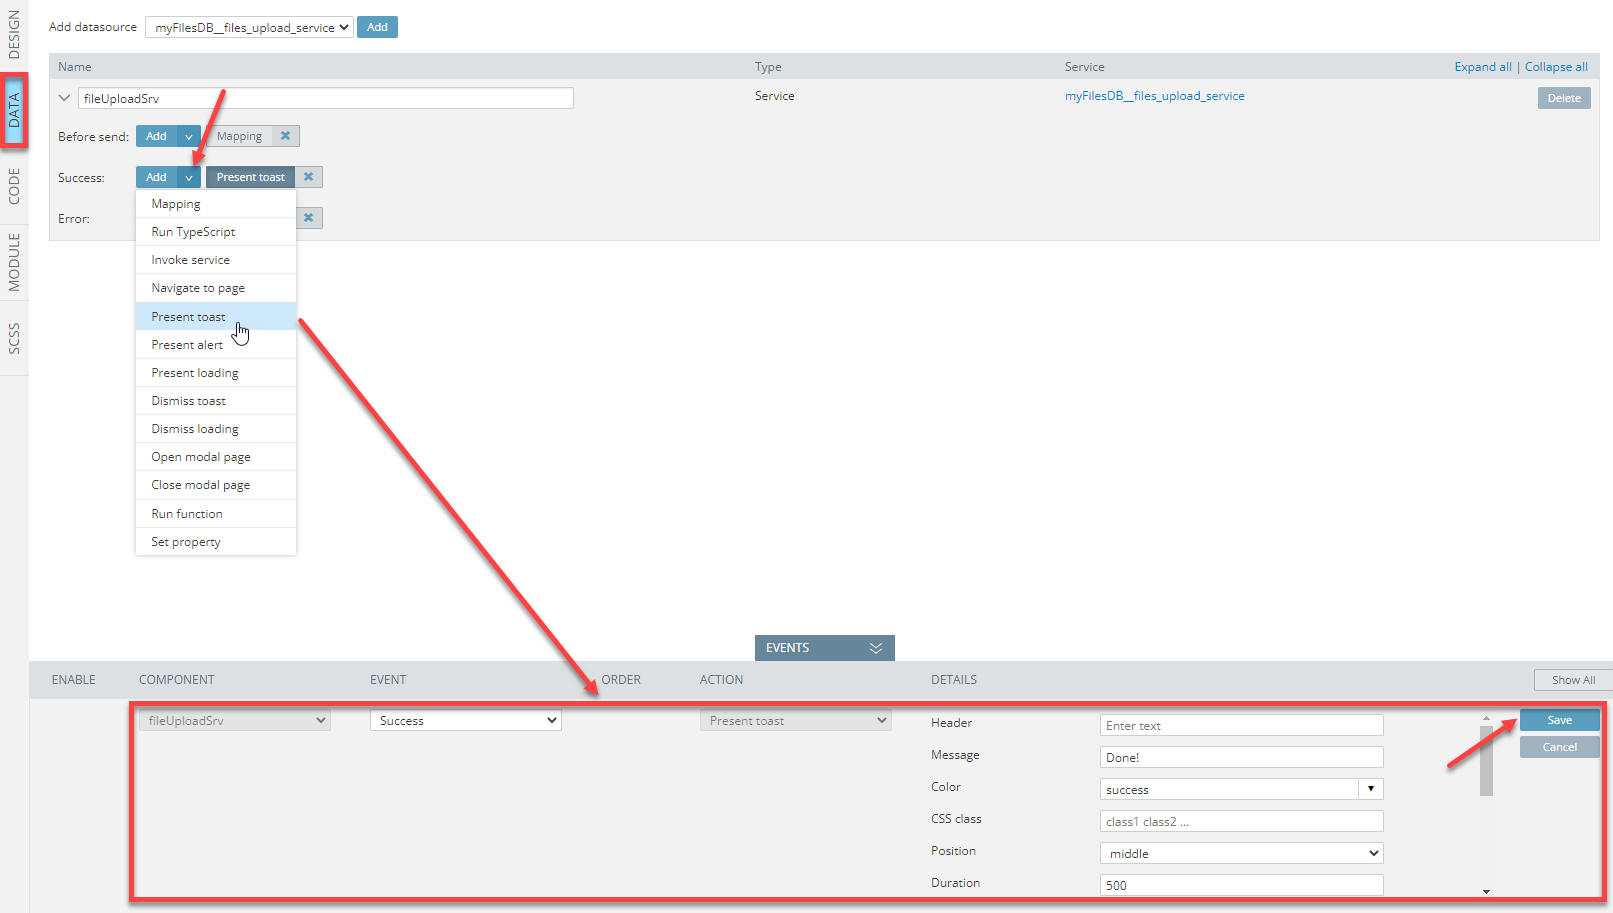
Now, let's add some success toasts instead. - To add the toast indicating the successful file upload, click the arrow button next to the service Success event and select the Present toast action from the list. Then define the action like the following:
- Message = Done!;
- Color = success;
- Position = middle;
- Duration = 500.
Click Save and the event will be instantly added:
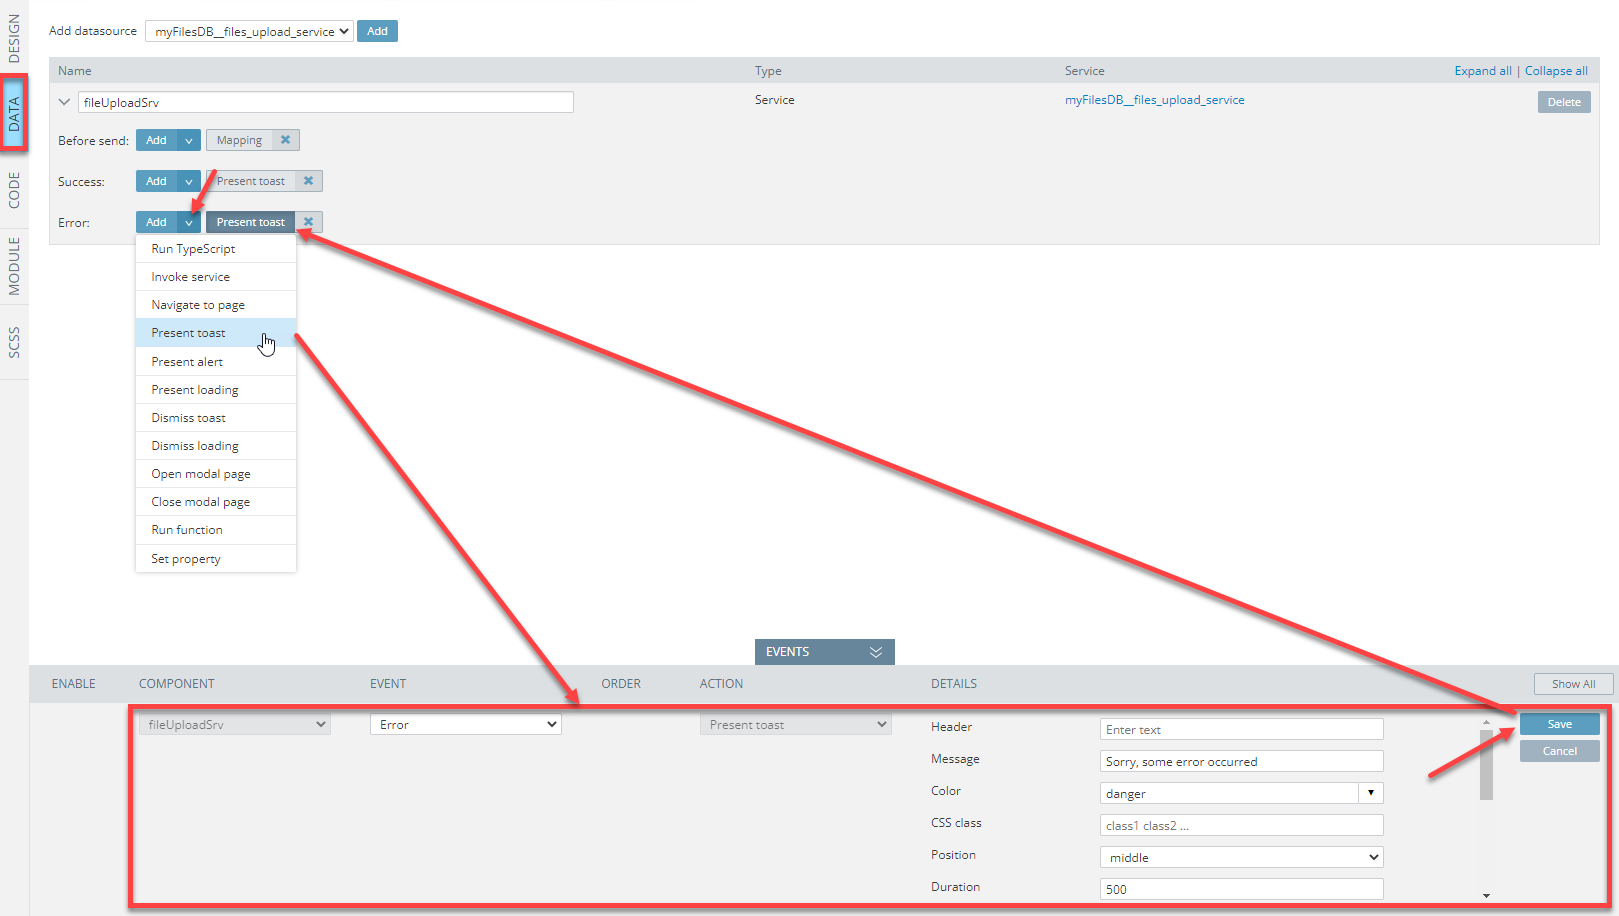
- Similarly, add the Present toast action to the Error event to show an error message about an unsuccessful upload defined like this:
- Message = Sorry, some error occurred;
- Color = danger;
- Position = middle;
- Duration = 500:
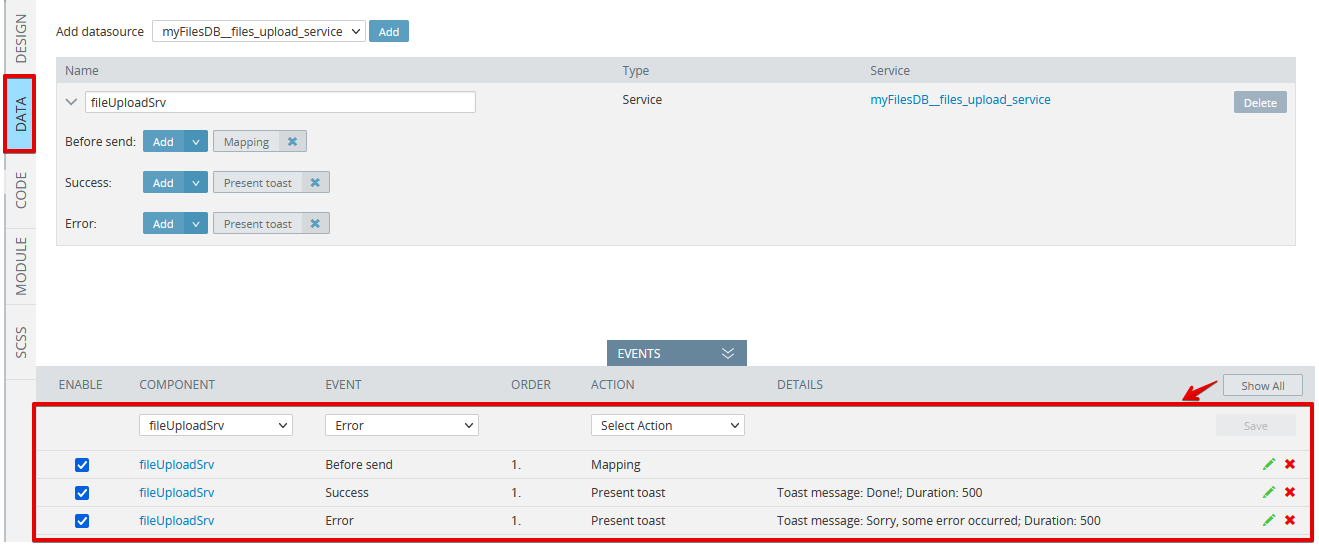
Here is how the DATA panel with all the events defined should look like (click Show all):
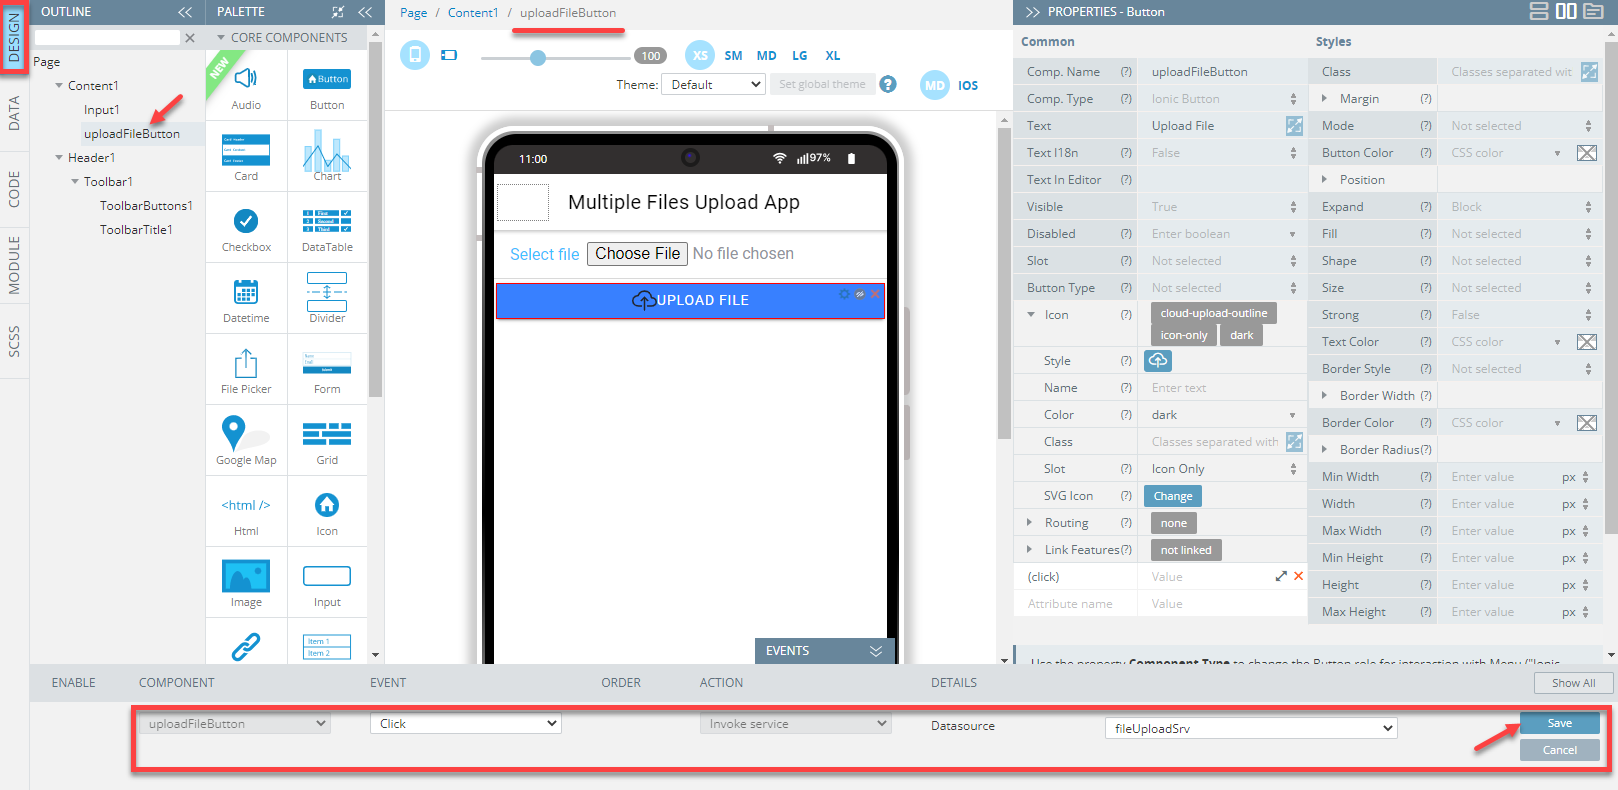
- Finally, go back to the DESIGN panel, select the UPLOAD FILE button and for its Click event select the Invoke service action defined with the fileUploadSrv service:
Testing App
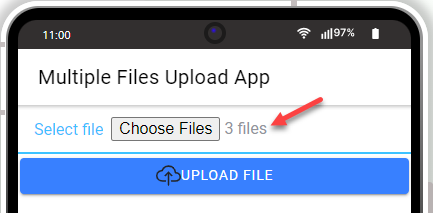
Now, when you have defined the service that can upload files to your database and doesn't need authentication, you can test the app in preview: click the TEST button on the App BuilderToolbar, then select the file and hit the UPLOAD FILE button:
Since the Multiple check box is selected in the Input PROPERTIES panel, you can choose multiple files at once:
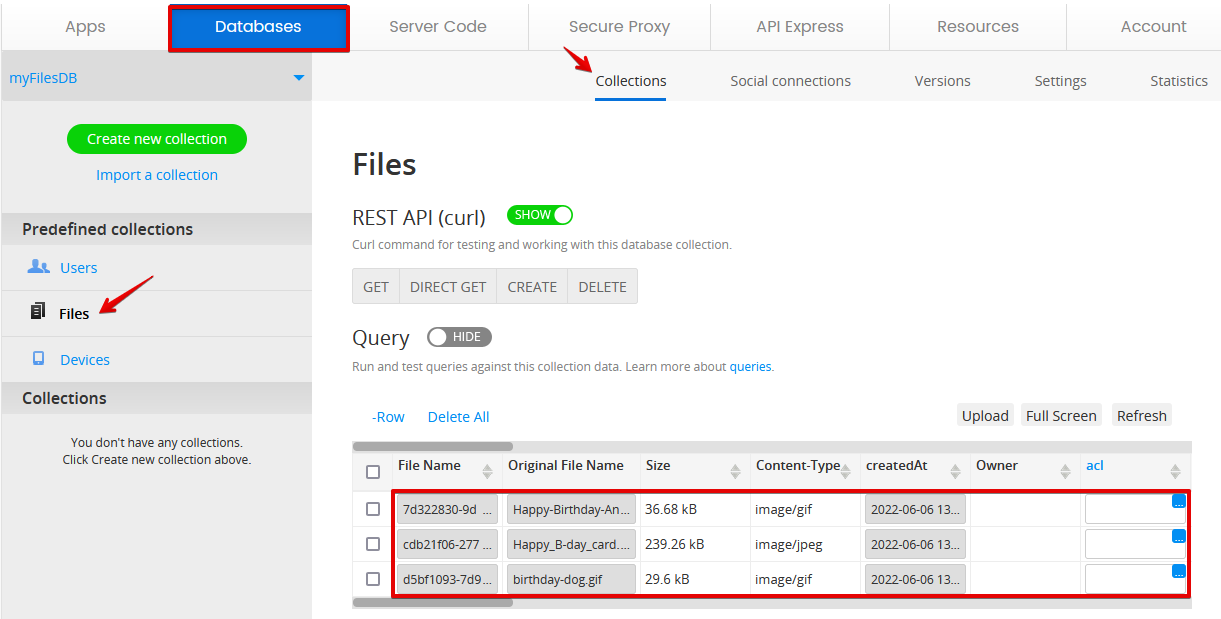
In a moment, you can open your database (here, it's myFilesDB) to check its Files collection and make sure that new file entries are already there (you may need to click the Refresh button to update the list):
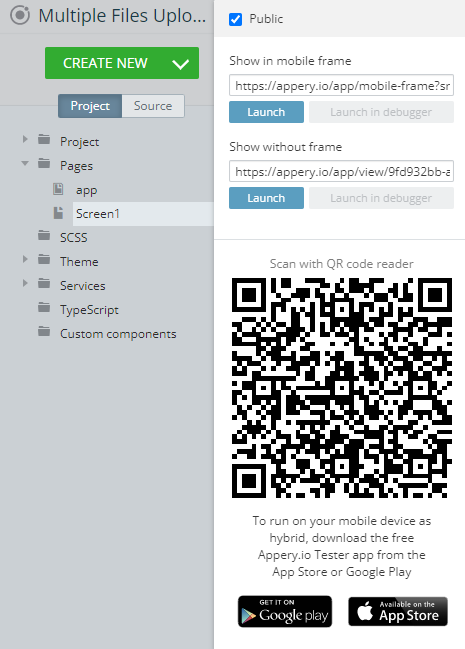
Testing on Device
When your app version is ready, you might also like to test it on the device.
Appery.io Tester AppA great option to quickly test the app on the device is to use our Appery.io Tester app.
The app is free and available for both iOS and Android.
You can check out this page to learn more about using the Appery.io Tester app.
Want to know more?You can also check out our Ionic Camera and File Upload Plug-ins App and/or Ionic File Upload to Firebase tutorials to learn more!
Updated about 1 year ago