Ionic Google AdMob Plugin Tutorial
Using Google AdMob is one of the easiest ways to potentially make money from your app. In this tutorial, you will learn how to integrate AdMob advertisements into your Appery.io Ionic app.
Part 1. Setting up AdMob Account
-
Create a new Google AdMob account or use an existing account if you already have one. Navigate to the AdMob console to start.
-
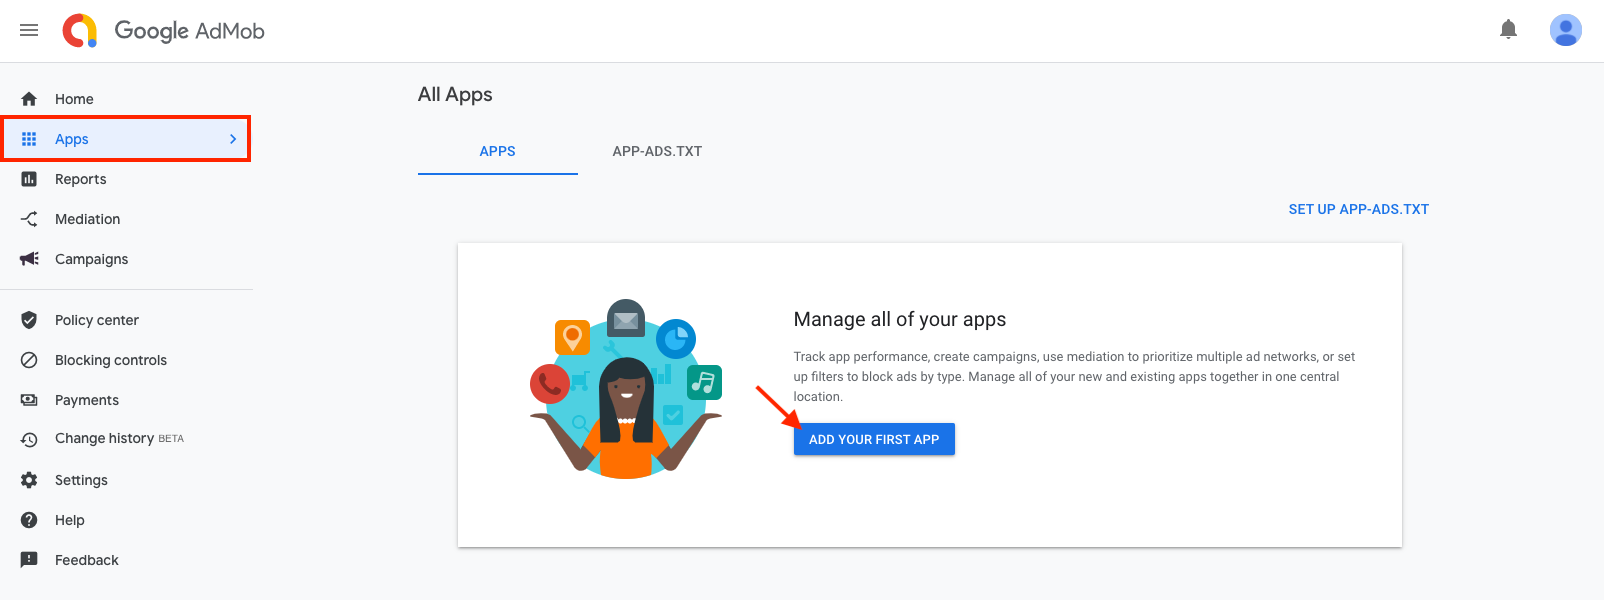
In the left panel, click Apps > ADD YOUR FIRST APP (or Apps > ADD APP if you already have some apps in your account):
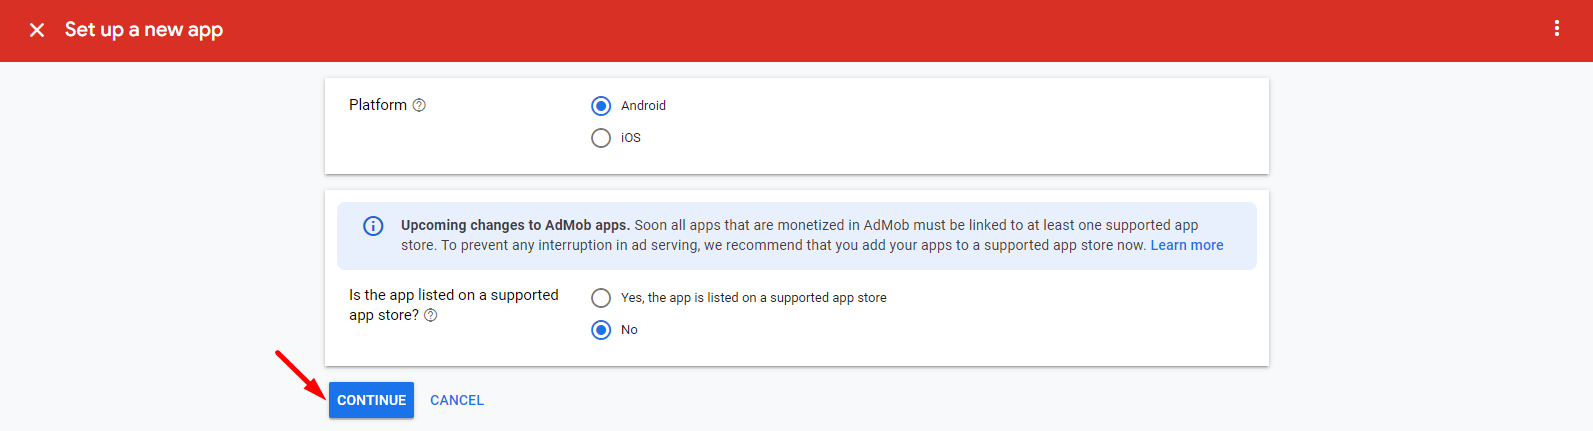
- In the new window, provide the app name and the platform (Android or iOS), and select Yes, the app is listed on a supported app store if your app has been published on Google Play or the App Store. Otherwise, click No, Click CONTINUE:
AdMob for iOSIf you plan to use AdMob for iOS devices, you will need to create another app under your AdMob account.
- In the next step, name your app and confirm adding it:

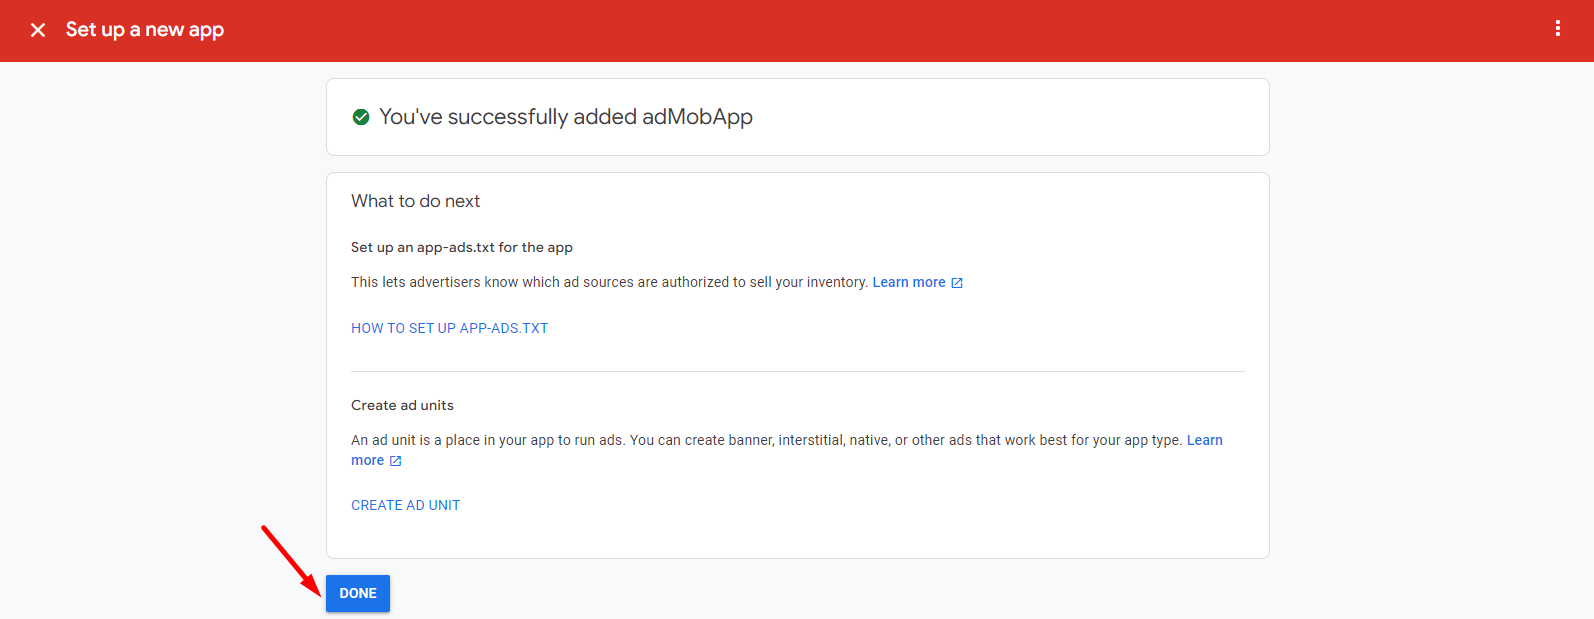
- You will see a message saying that your app has been added to AdMob. You can select to go to the CREATE AD UNIT link or click the DONE button to do the same:
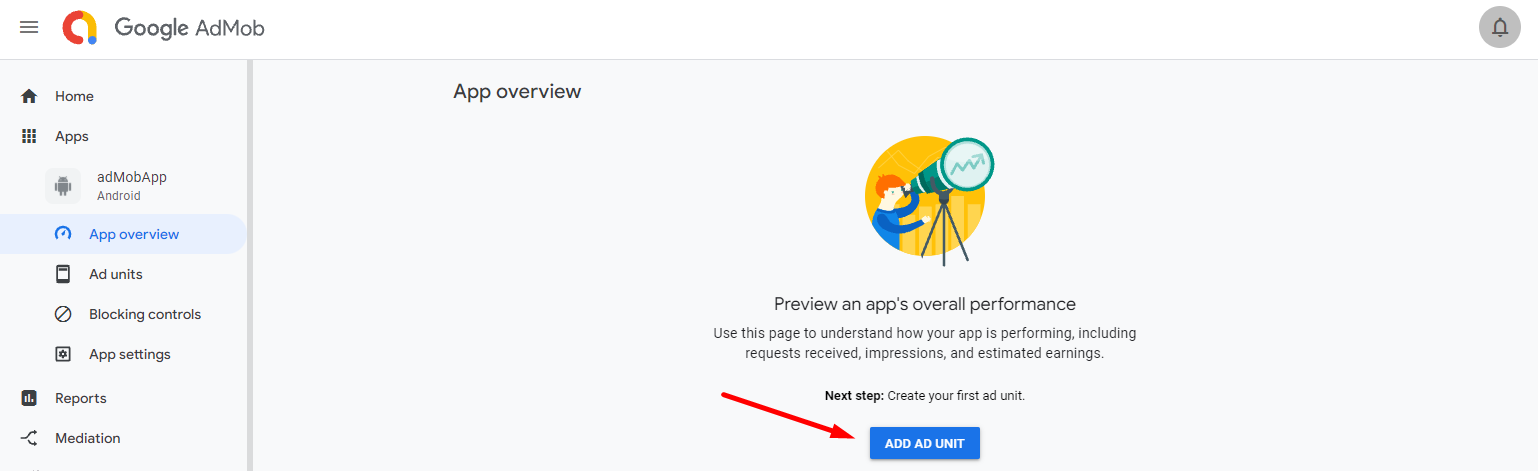
- Next, create a new ad unit by clicking the ADD AD UNIT button:
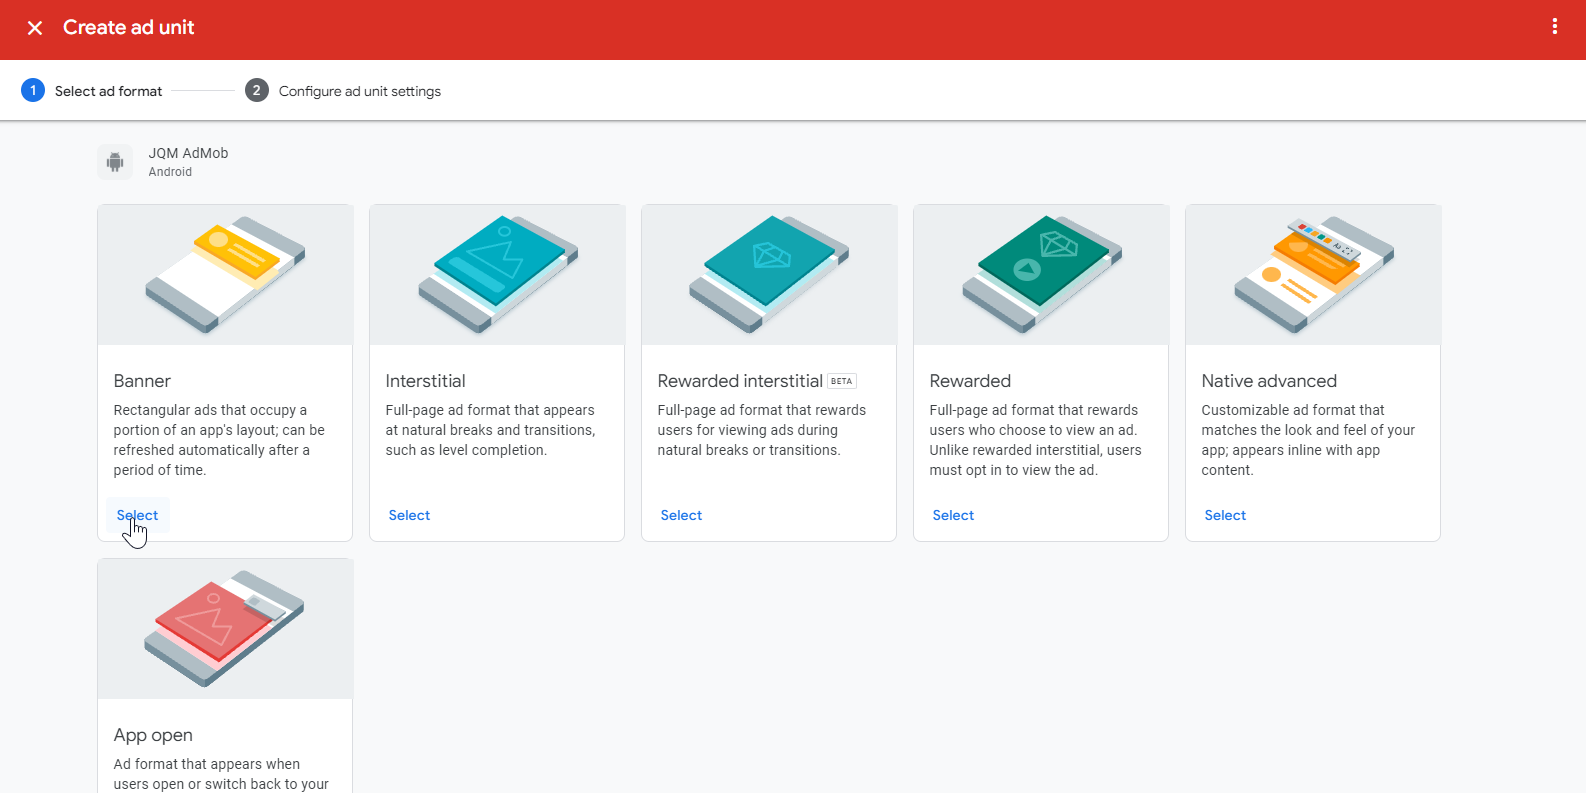
- Select the ad unit type from Banner, Interstitial, Rewarded interstitial, Rewarded, Native Advanced, or App open. You can create an ID for each ad type. For example, let's create a Banner:
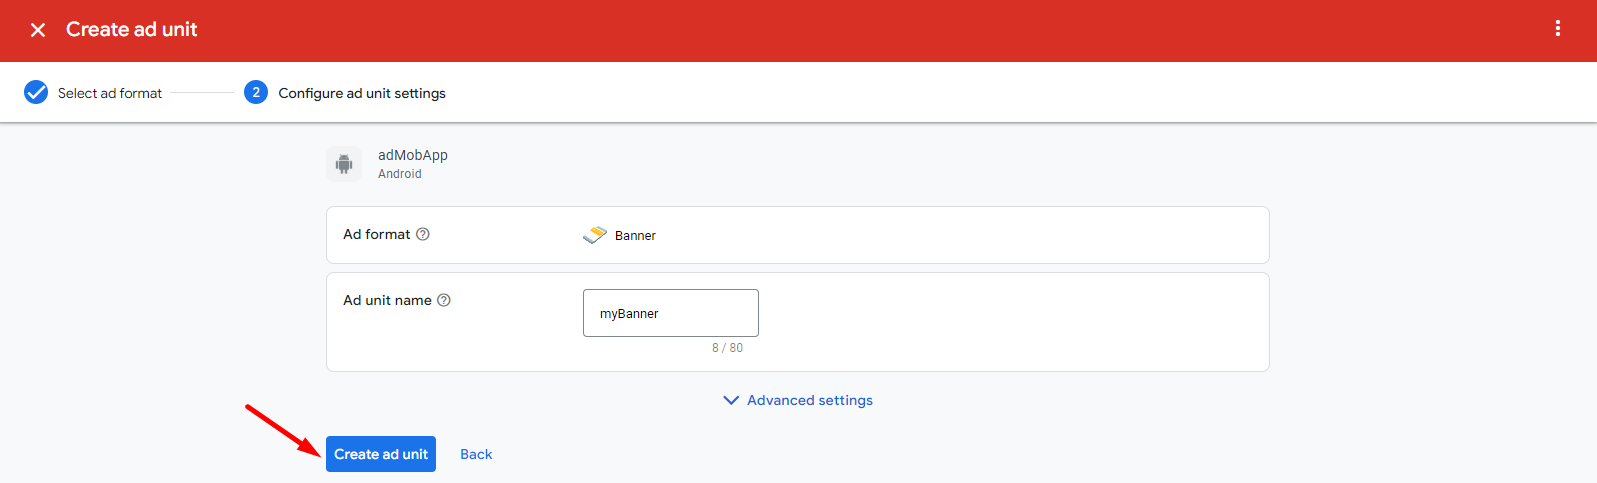
- Next, select a name for the banner and click Create ad unit:
- As a result, you will be provided with the App ID. The second ID is the Ad Unit ID. We will need both these IDs later:

1 - App ID, 2 - Ad Unit ID
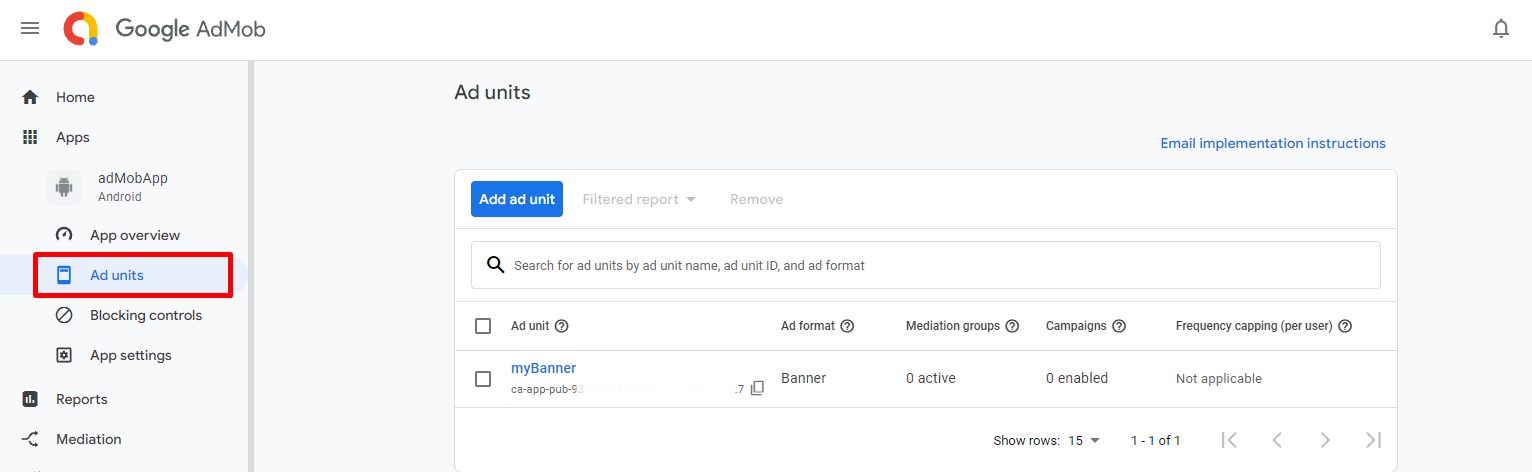
Note!All your ad units details can be found under Apps > Ad units:
Verifying your AdMob accountPlease note that production ads will only appear after your AdMob account is verified. Your AdMob account will get verified only after you enter all information about you, including payment information.
Using Sample Ad IDs for Testing
You can use sample ads units for development purposes.
More information about using test ads and the full list of Google-provided test ad IDs can be found in this article.
Here are the test IDs that will be used in our tutorial:
| Ad format | Sample ad unit ID |
|---|---|
| Banner | ca-app-pub-3940256099942544/6300978111 |
| Interstitial | ca-app-pub-3940256099942544/1033173712 |
| Rewarded Video | ca-app-pub-3940256099942544/5224354917 |
Important!If you need to show ads in your production app, you will need to create real ad units.
Part 2. Creating App
-
From the Apps tab, click Create new app.
-
Select Ionic> Ionic Blank for the application type, enter adMobApp for the app name, and click Create. You will be navigated to the app's dashboard.
Adding Dependencies
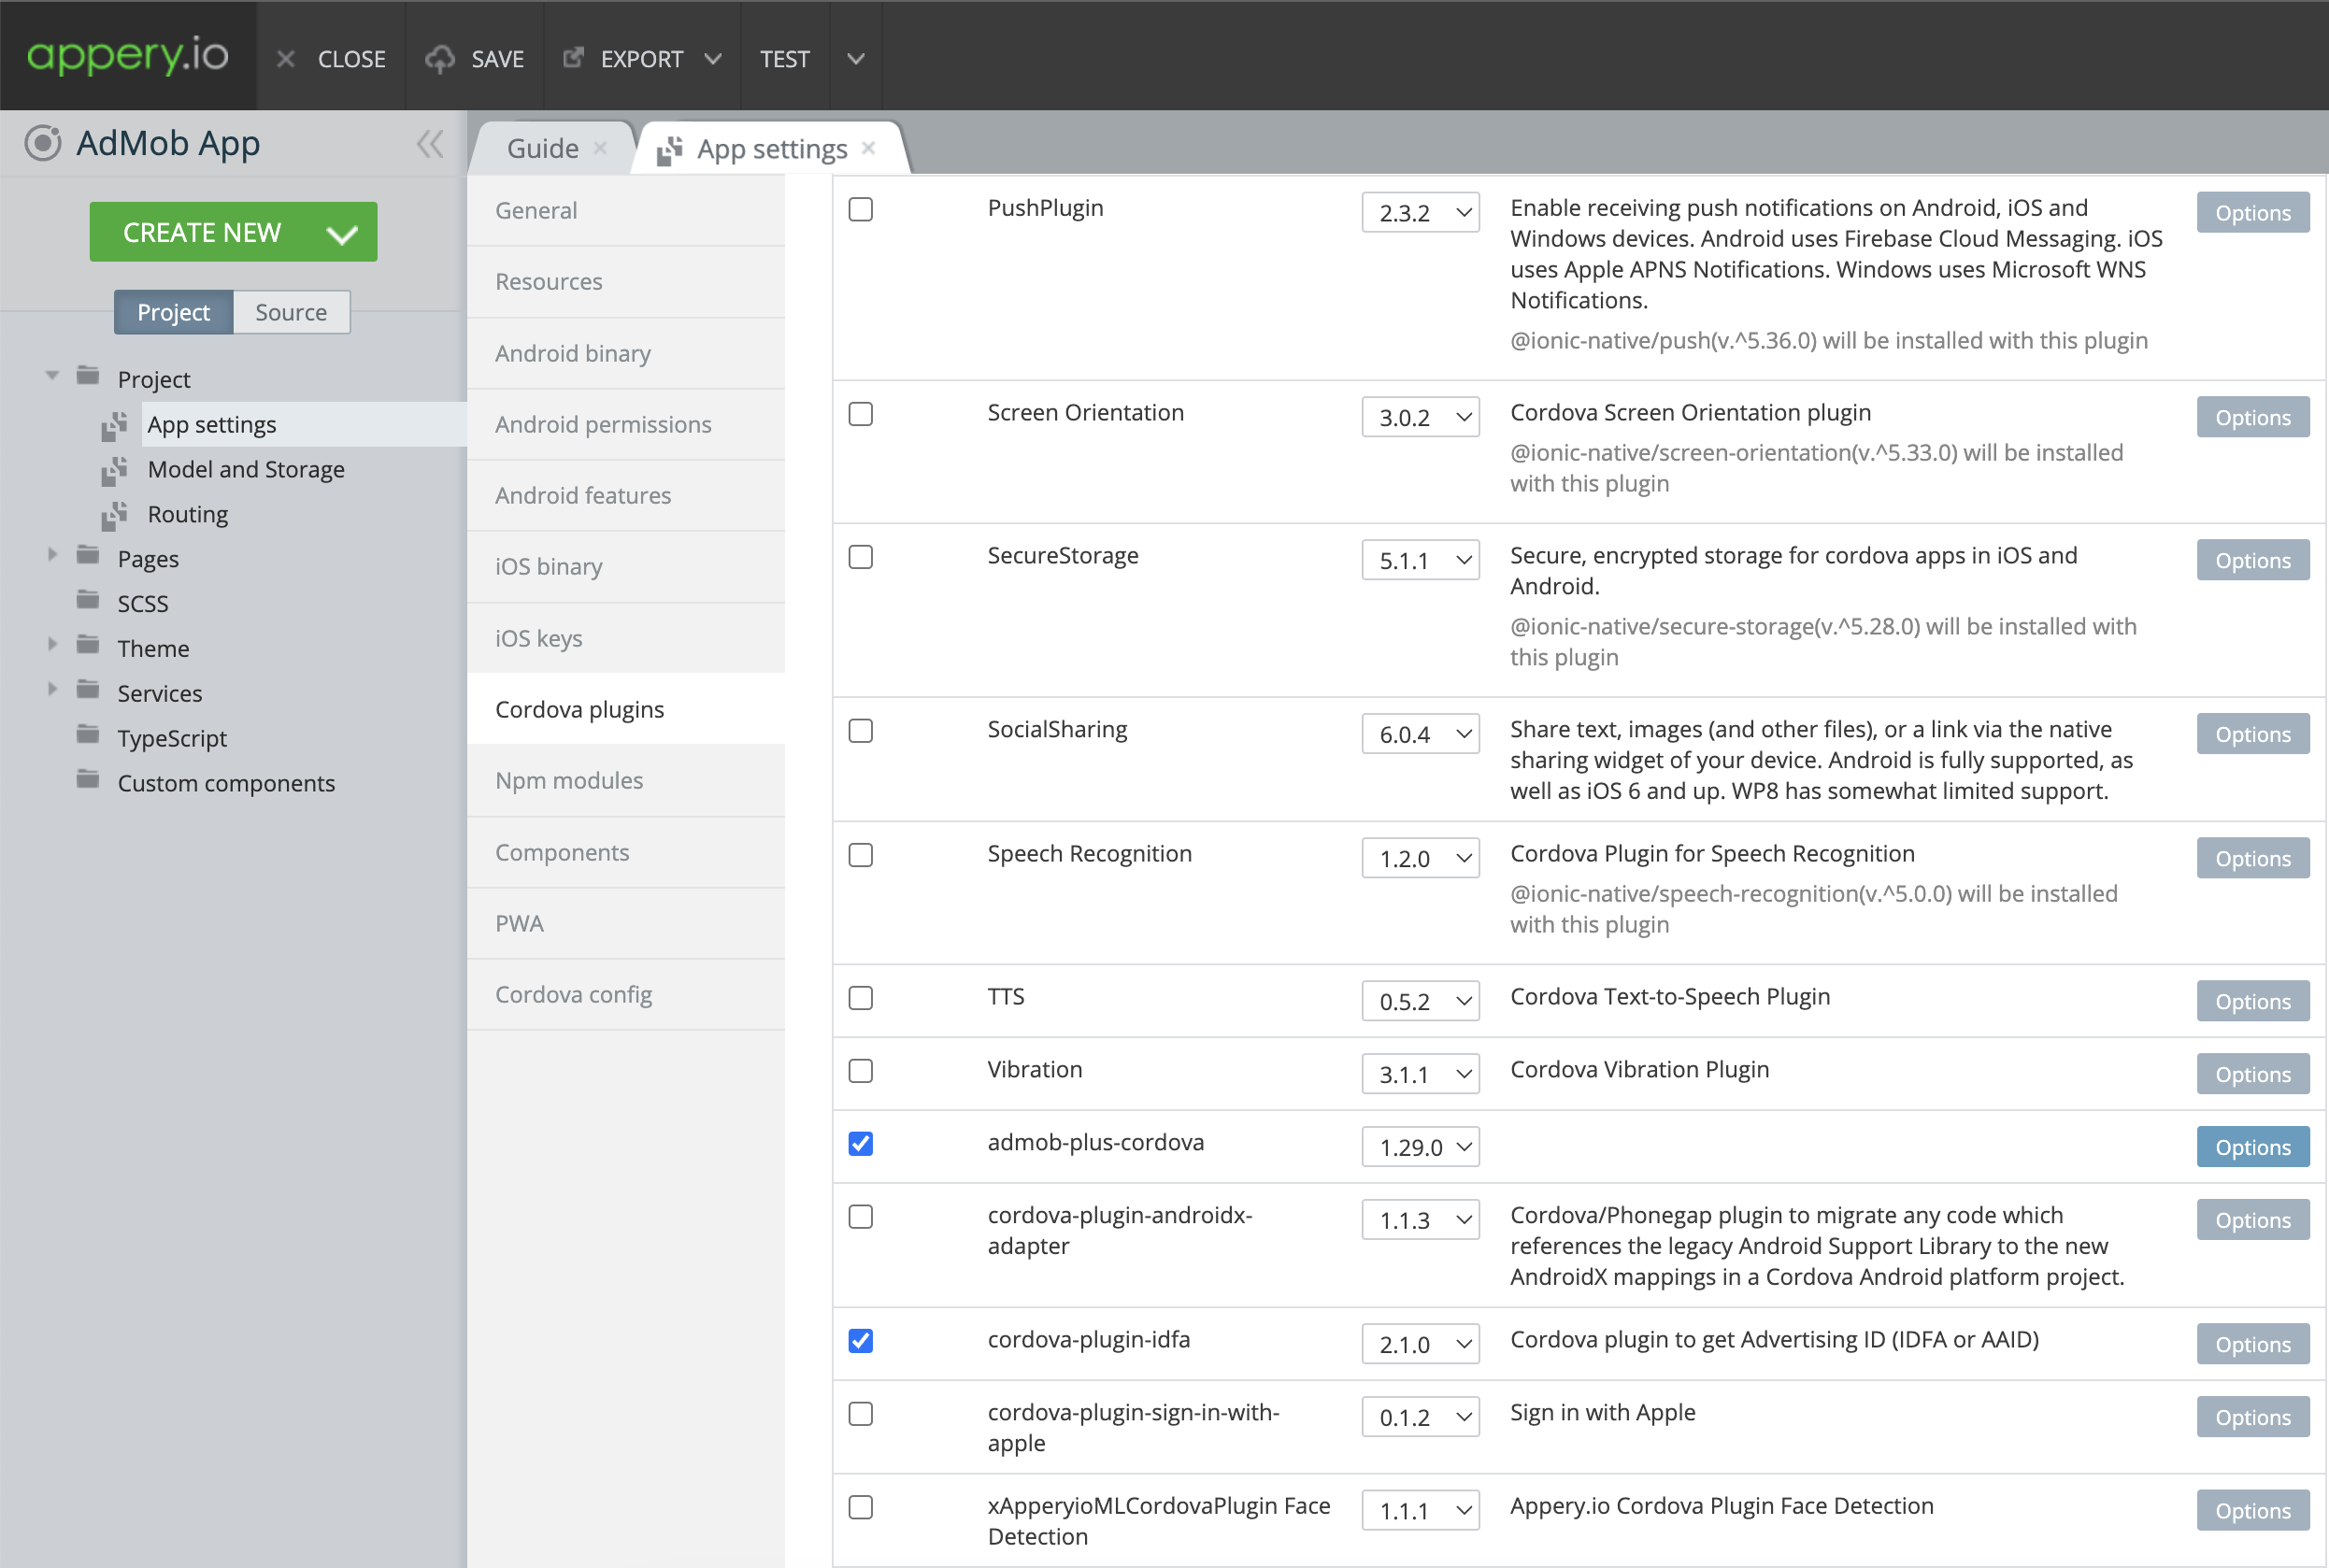
- Inside the app, navigate to Project > App Settings > Cordova plugins. Here, go to the Core Cordova Plugins tab and enable the admob-plus-cordova and cordova-plugin-idfa plugins:
- From the AdMob console, go to Apps > VIEW ALL APPS to find the AdMob App IDs:
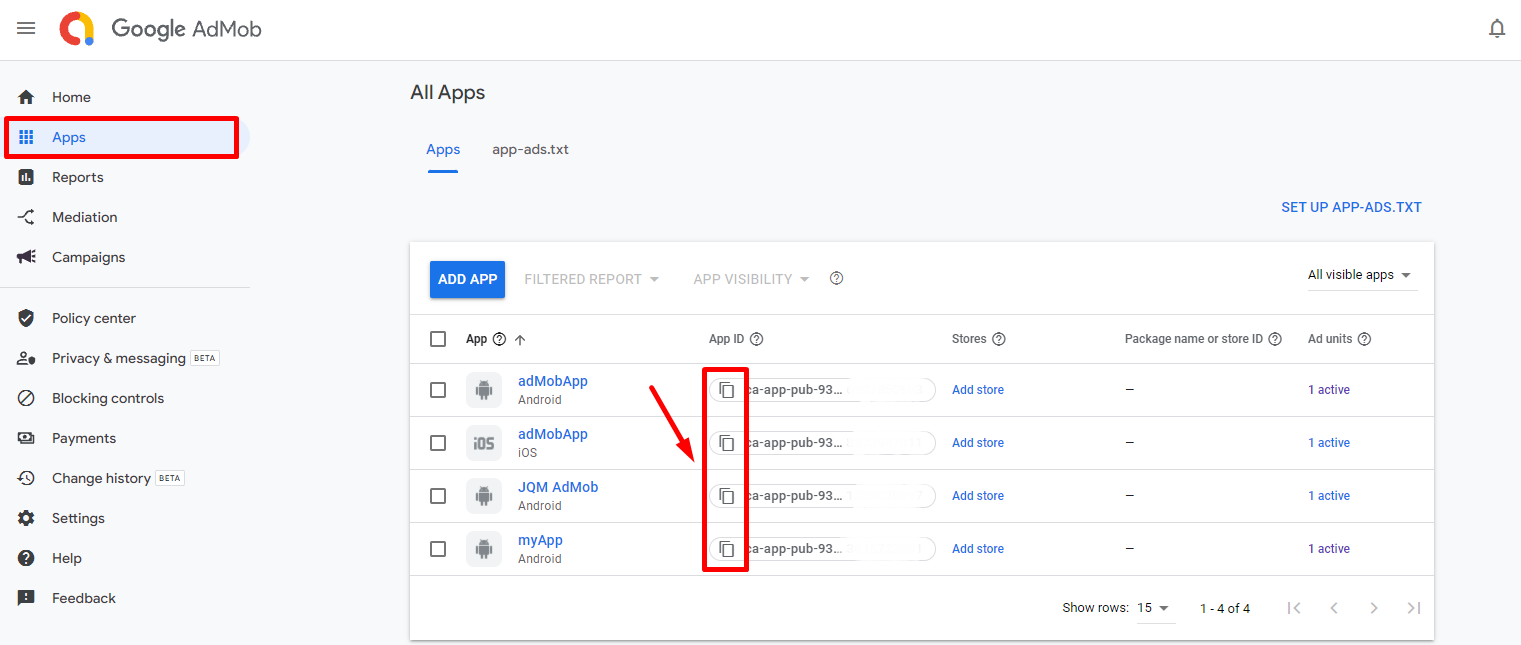
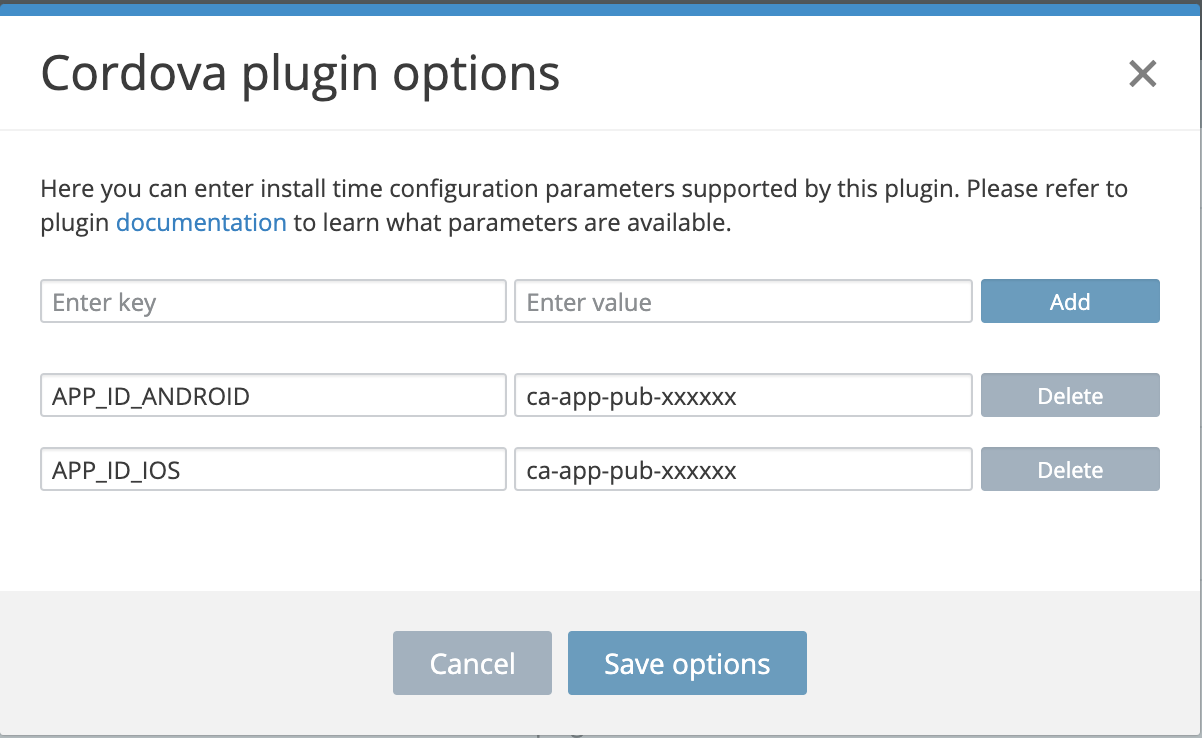
- Copy the Android & iOS AdMob App IDs to the clipboard and go back to the Appery.io App Builder. Click the Options button next to the admob-plus-cordova and add a new options APP_ID_ANDROID & APP_ID_IOS. As a keys use copied App IDs as its values. Then click the Save options button:
- Go to App Settings->Cordova Config and open iOS tab. Add the following code to the Custom config section:
<edit-config target="NSUserTrackingUsageDescription" file="*-Info.plist" mode="merge">
    <string>App would like to access IDFA for tracking purpose</string>
</edit-config>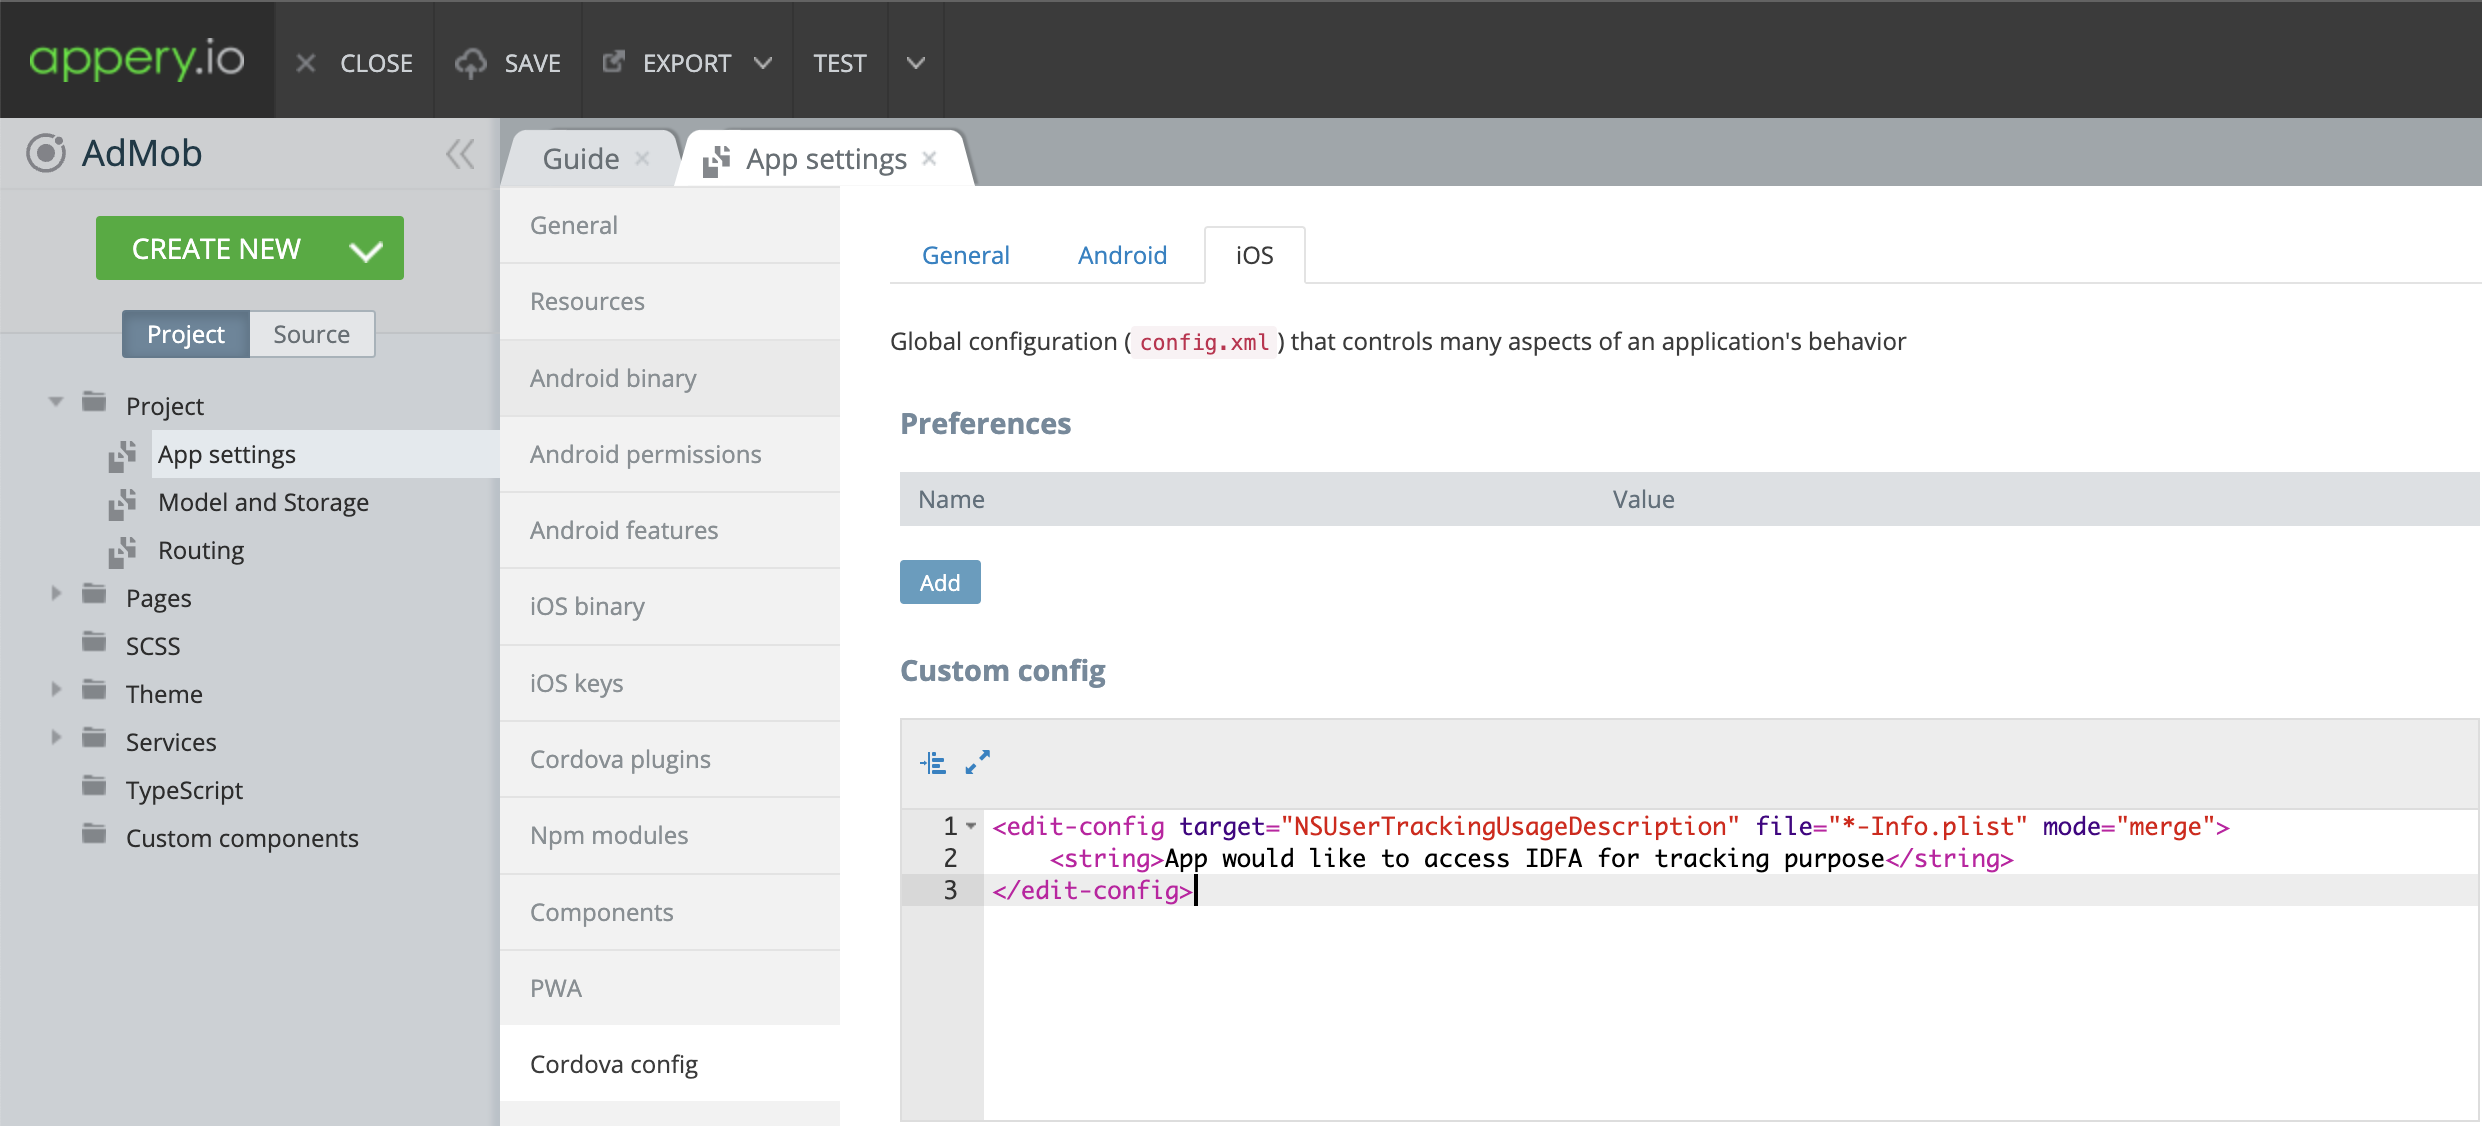
Displaying AdMob Advertisements
Now let's use simple methods to show different types of AdMob ads.
Important!In this tutorial, we will be using the sample App IDs for testing purposes provided in this section. But if you need to show ads in your production app, you will need to create real ad units.
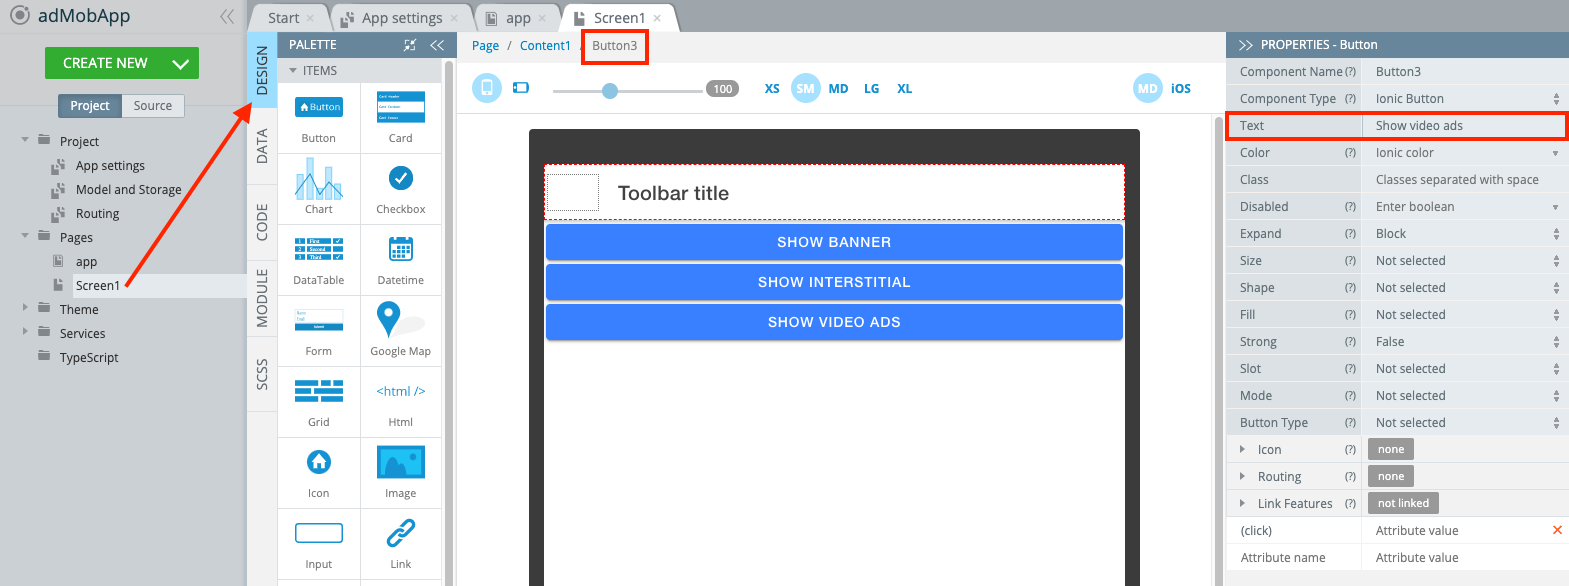
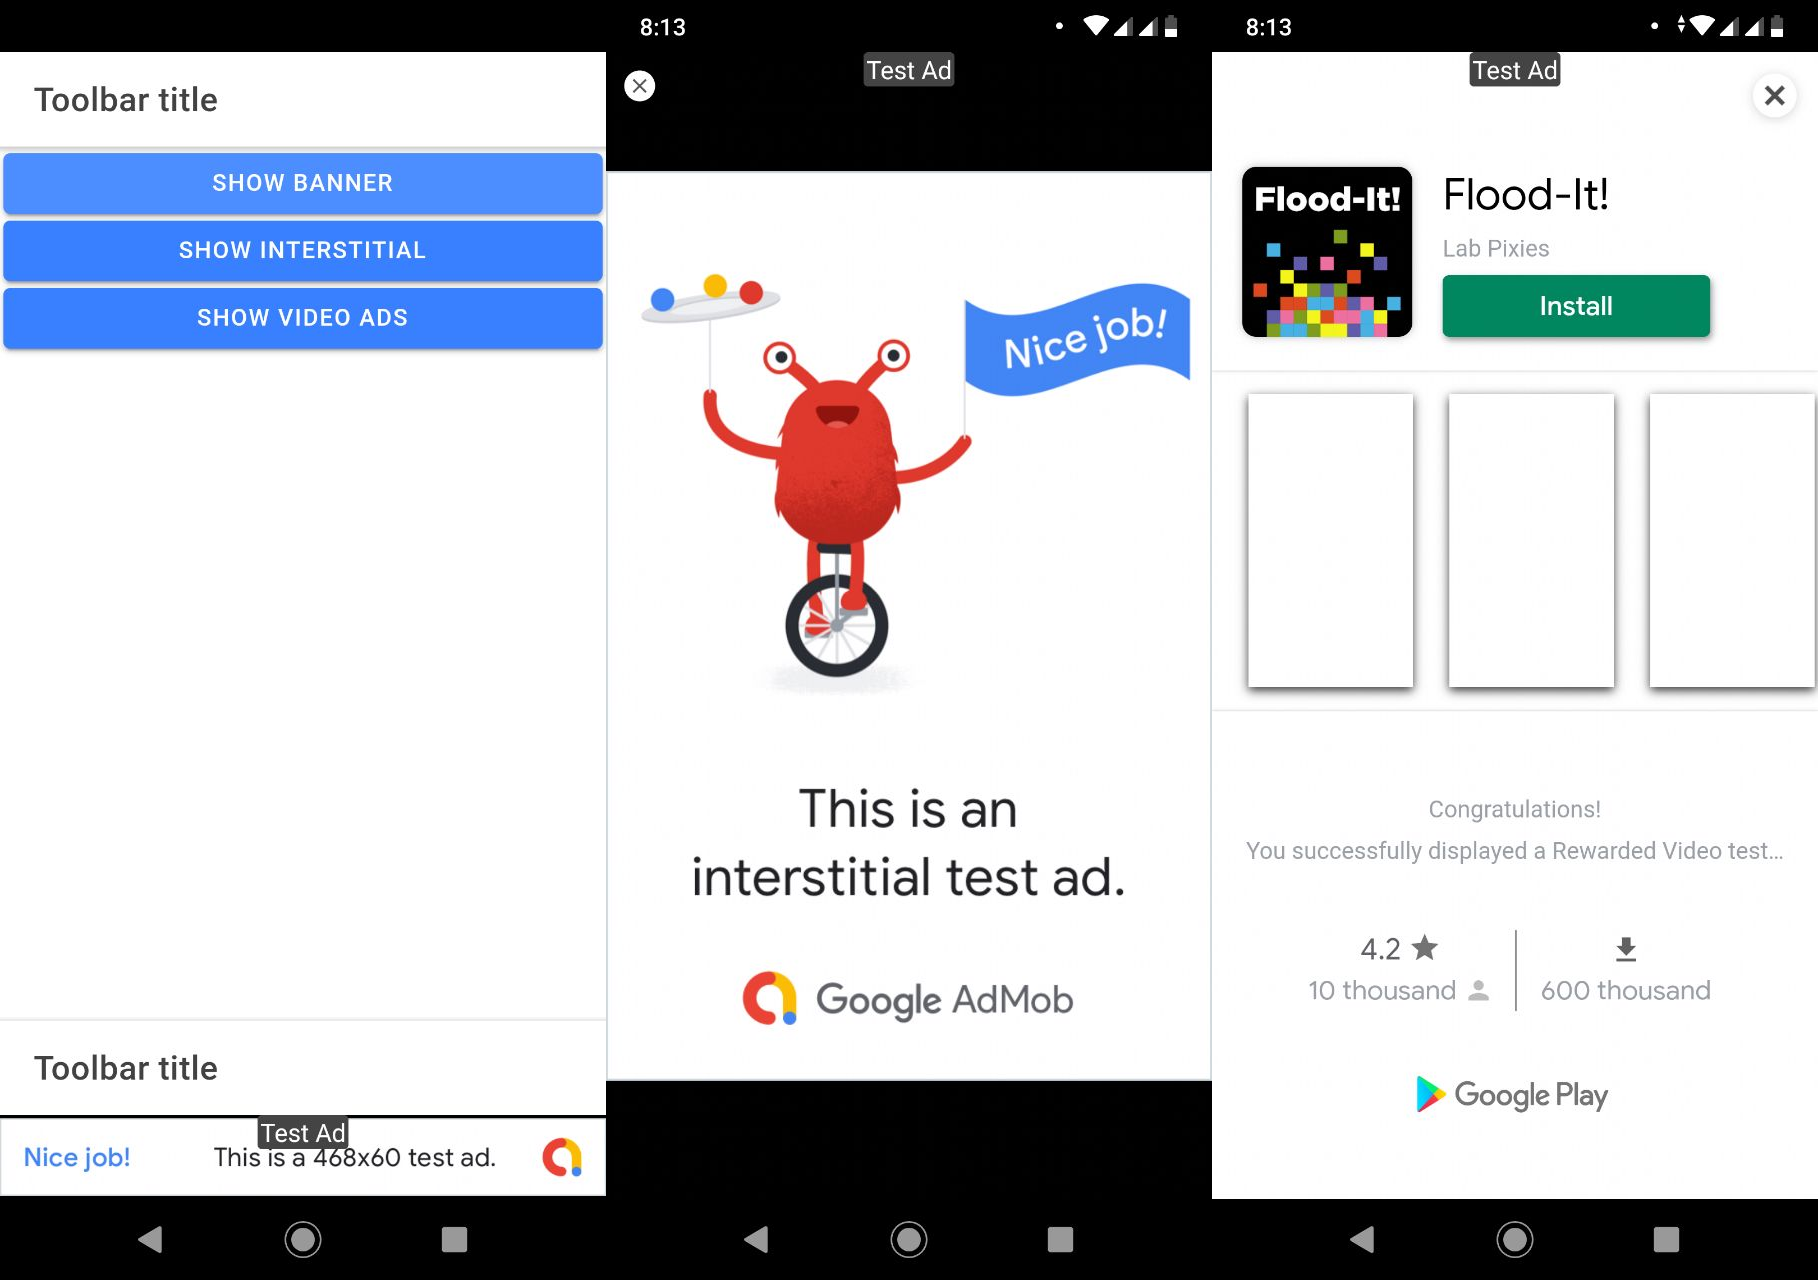
- Switch to the DESIGN panel in Screen1 page. Place three Buttons on the screen. Change their Text properties to Show banner, Show interstitial and Show video ads accordingly:
- Select the first, Show banner, button. Unfold the EVENTS tab from the bottom and create a new Click event for this button with Run TypeScript for the Action and type in the following code and save:
const banner = new window.admob.BannerAd({
    adUnitId: 'ca-app-pub-3940256099942544/6300978111'
});

banner.show();
Banner AdsClicking the first button will display a banner. Banner is a basic ad format that appears at the top or bottom of the device screen. Let's add a banner ad unit.
- Then select the second, Show interstitial, button. From the EVENTS tab, create a new Click event for this button with Run TypeScript for the Action and type in the following code and save:
const interstitial = new window.admob.RewardedAd({
    adUnitId: 'ca-app-pub-3940256099942544/1033173712',
})

interstitial.on('load', (evt) => {
    interstitial.show();
});

interstitial.load();
Interstitial AdsClicking the second button will display an Interstitial Ad. An interstitial ad is a full-page ad appearing at natural breaks and page transitions. It supports showing video content.
- Finally, select the third, Show video ads, button. From the EVENTS panel, create a new Click event for this button. Select Run TypeScript as its Action and type in the following code:
const rewarded = new window.admob.RewardedAd({
    adUnitId: 'ca-app-pub-3940256099942544/5224354917'
})

rewarded.on('load', (evt) => {
    rewarded.show();
})

rewarded.load();
Rewarded Video AdsClicking the third button will display a Rewarded Video Ads. Rewarded Video Ads reward users for watching short videos and interacting with playable ads and surveys. It also supports video content.
Ad Unit IDsMake sure you have replaced the sample Ad Unit IDs with the correct Ad Unit IDs for all three buttons in your production app!
Save all app changes.
Adding IDFA / AAID permission request
IDFA or AAIDThe Identifier for Advertisers plays a crucial role in publishing an app with AD integration to app stores. Learn more about Identifier for Advertisers.
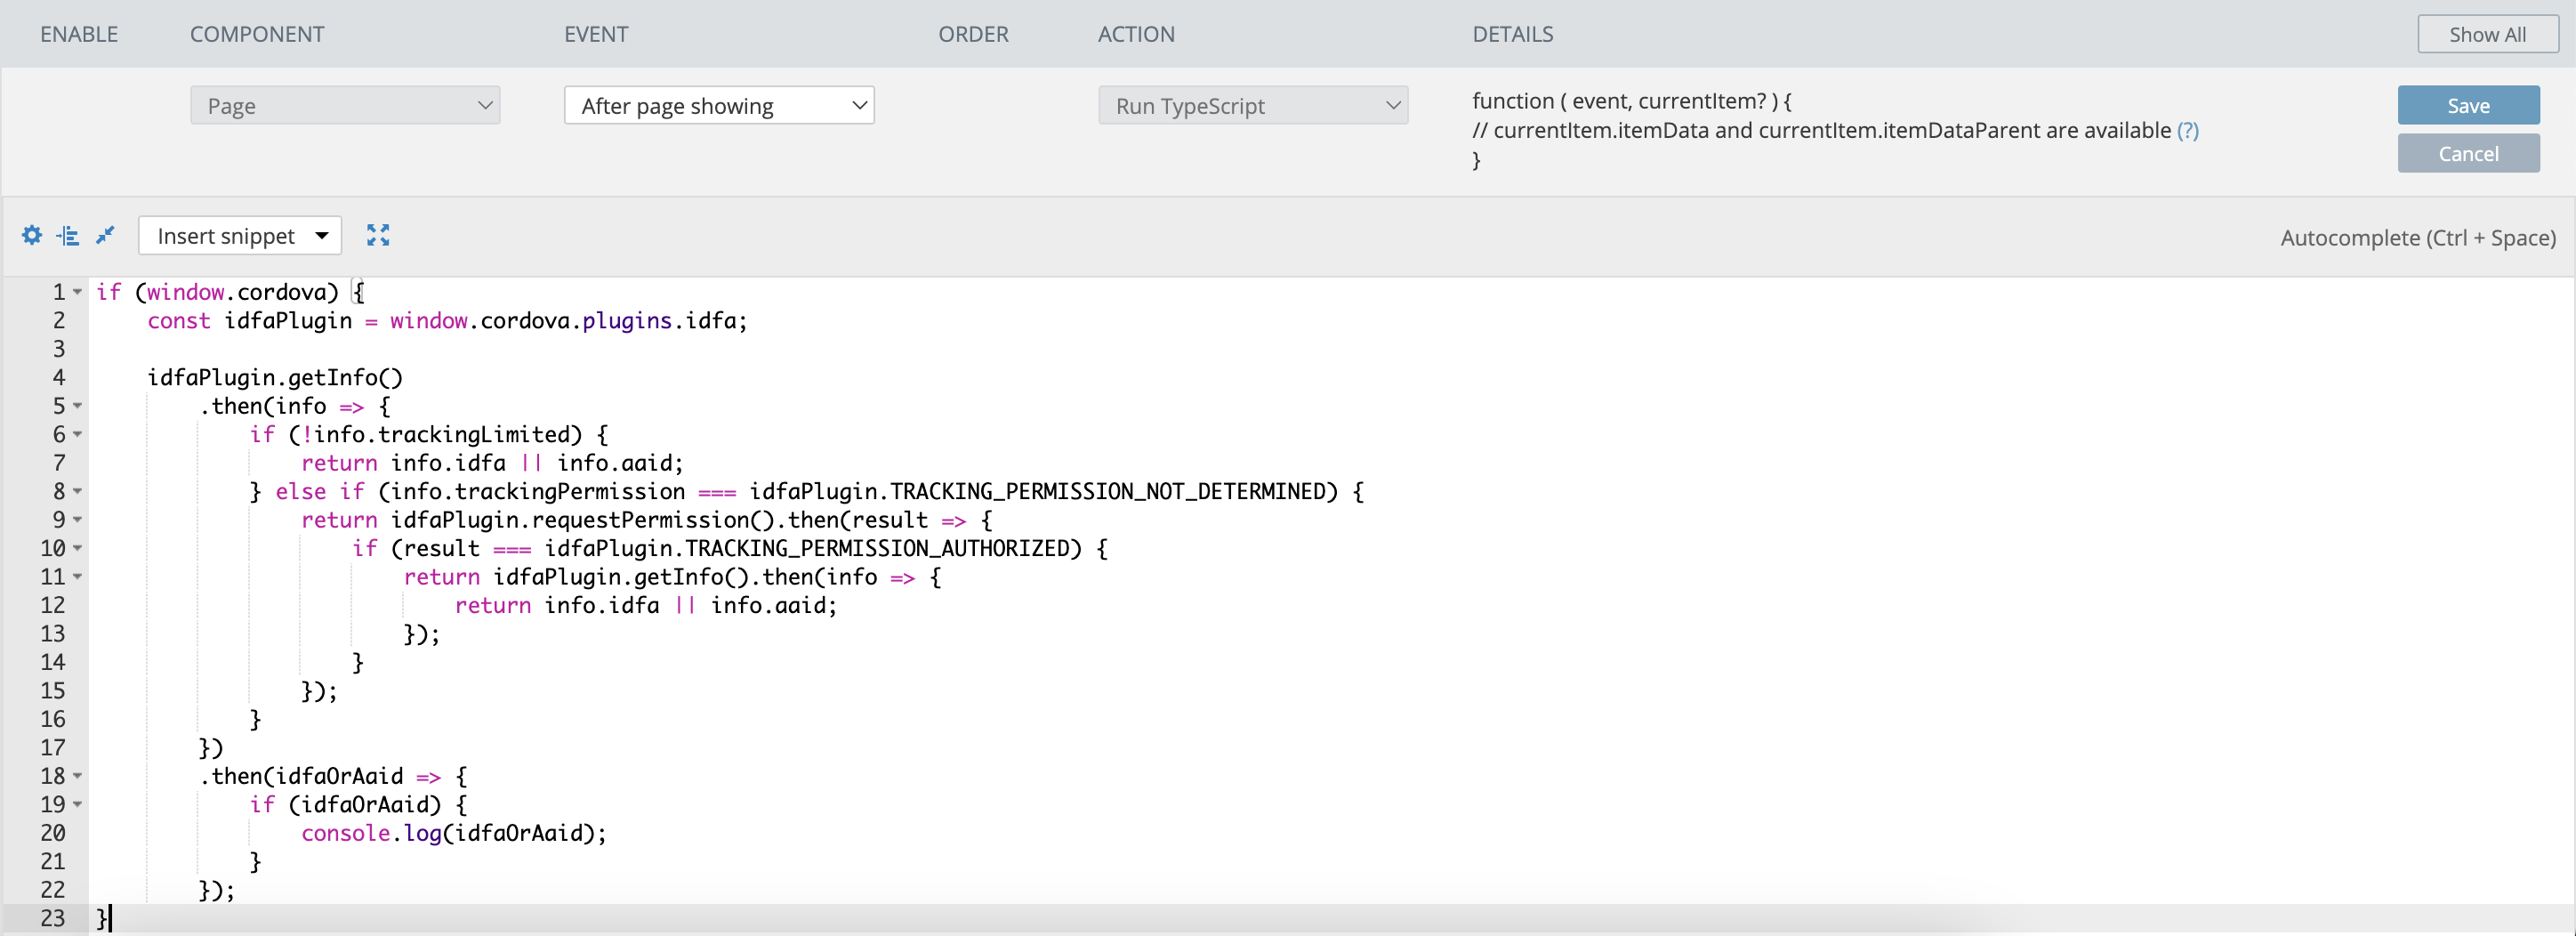
- In Screen1 page from the EVENTS panel, select Page component. Select After page showing as event and choose Run TypeScript from the action dropdown list. Type the following code:
if (window.cordova) {
    const idfaPlugin = window.cordova.plugins.idfa;

    idfaPlugin.getInfo()
        .then(info => {
            if (!info.trackingLimited) {
                return info.idfa || info.aaid;
            } else if (info.trackingPermission === idfaPlugin.TRACKING_PERMISSION_NOT_DETERMINED) {
                return idfaPlugin.requestPermission().then(result => {
                    if (result === idfaPlugin.TRACKING_PERMISSION_AUTHORIZED) {
                        return idfaPlugin.getInfo().then(info => {
                            return info.idfa || info.aaid;
                        });
                    }
                });
            }
        })
        .then(idfaOrAaid => {
            if (idfaOrAaid) {
                console.log(idfaOrAaid);
            }
        });
}
Save all app changes.
App Testing
Congratulations! You are ready to test the app.
Note that to use the AdMob plug-in, you need to run the app on the device. So, first of all, export the app and install it on your device.
Click the buttons one by one to test different ad types:
iOS Certificate GenerationPlease note that you will need to generate the iOS certificate with In-App Purchase capability to build an
.ipafile.
Updated about 1 year ago