Ionic SendGrid Email Sample App
Sending email from an Ionic app with SendGrid.
This example uses SendGrid API to send emails from an Ionic app.
This sample app uses and demonstrates:
- Ionic.
- Appery.io Server Code.
- Invoking an external REST API.appery.user@
Important Note!Our SendGrid Email Sample App contains ready to use services and the UI that makes it easy to use.
Note that you will need to add your actual SendGrid Account to make it work.
Getting App Backend
Importing SendGridEmail plugin
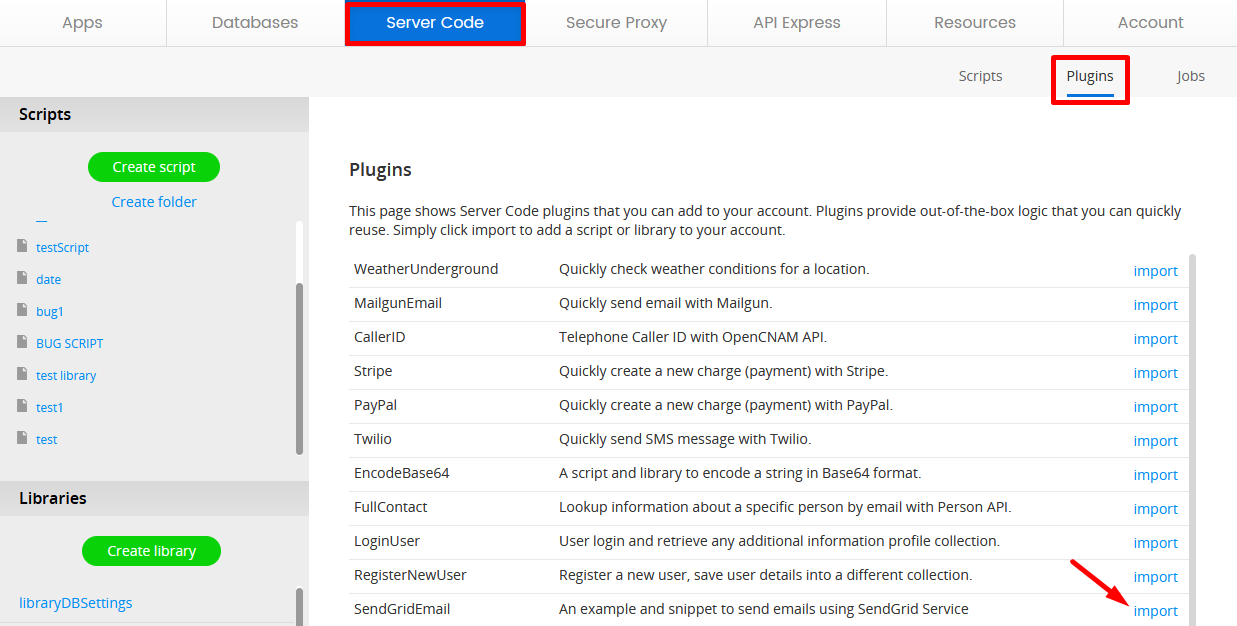
- Go to the Server Code page.
- Open the Plugins tab.
- Import the SendGridEmail plugin:
SendGrid Account
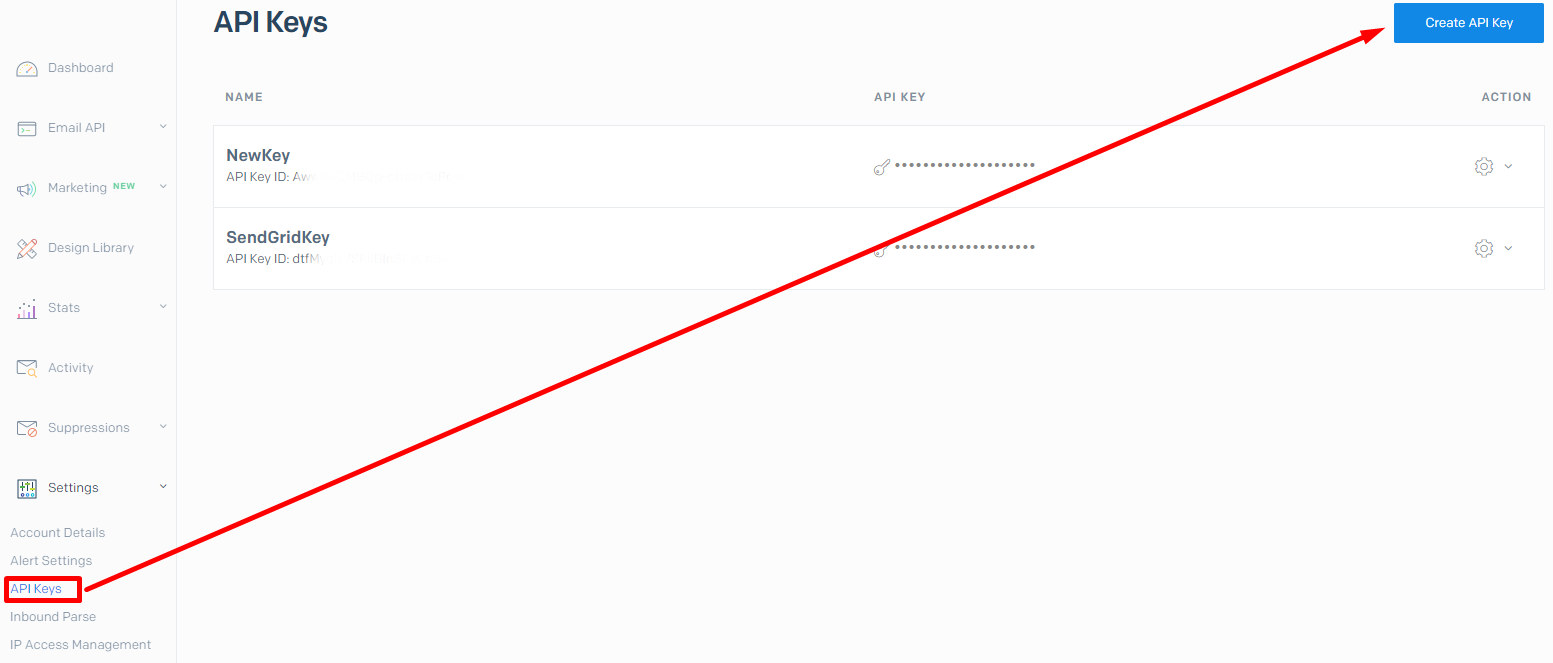
You also need to create a SendGrid account to get an API key to send emails. After you sign up for an account, get the API key:
- From the main dashboard page, expand Settings (bottom left).
- Click API Keys.
- Then, click Create API Key:
- Give the key a name and then check Full Access for API Key Permissions selection:
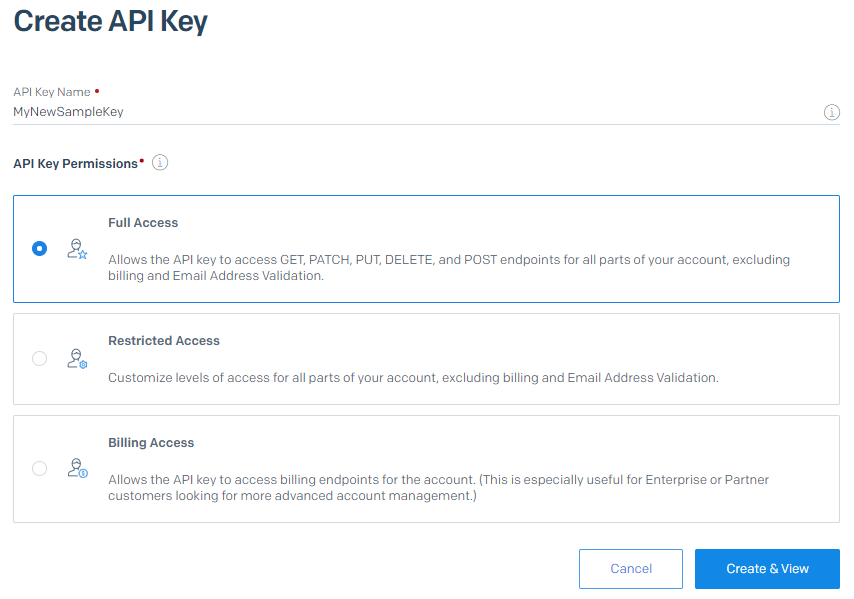
- Click Create & View. The generated key will be shown on the next page. You should copy and save this key.
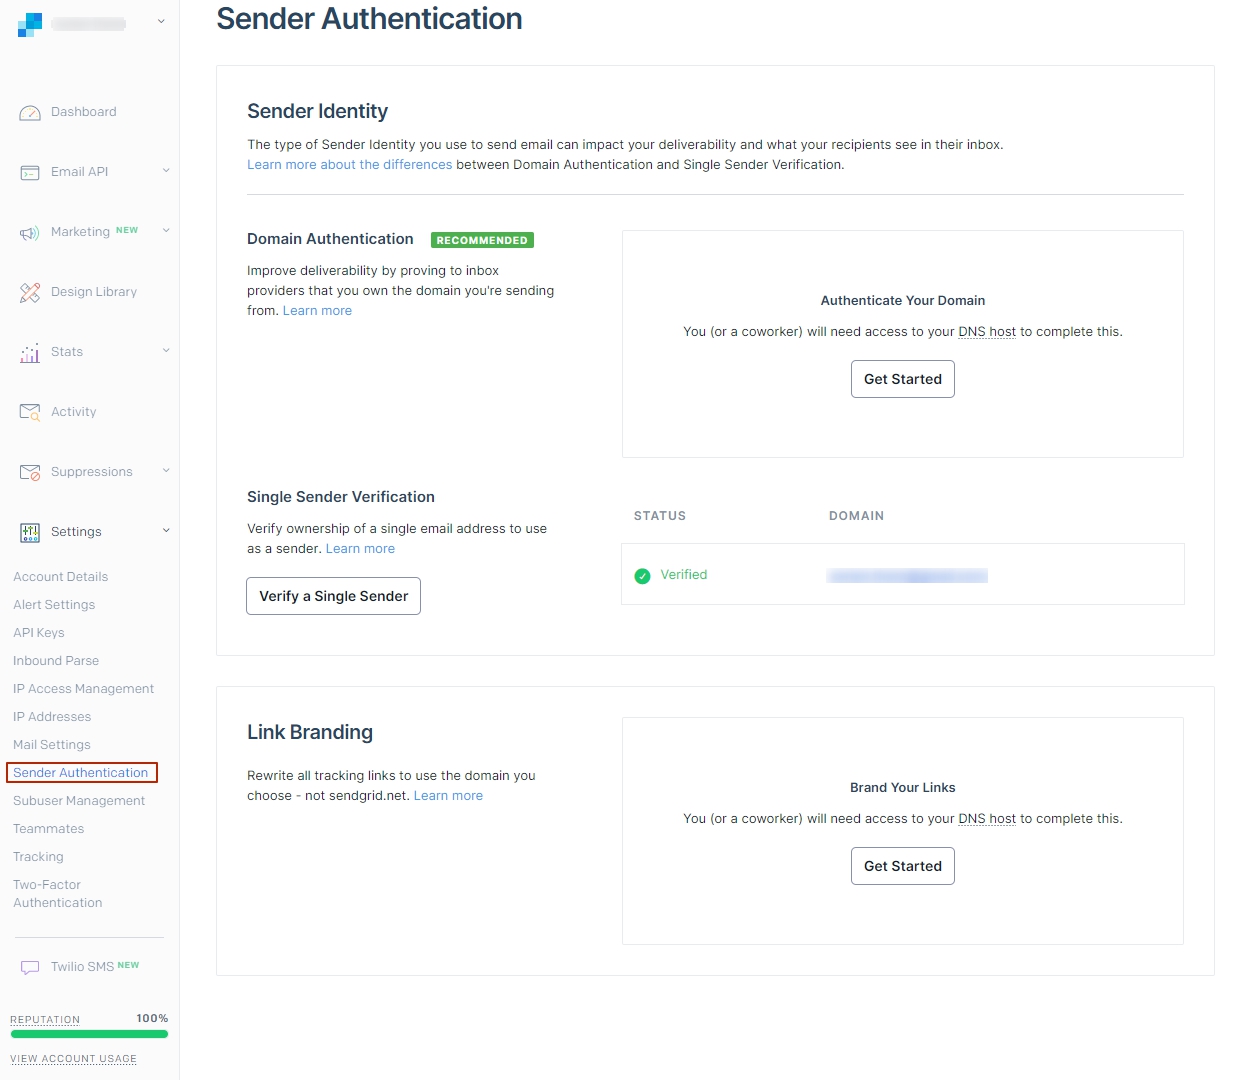
Important!Note that before you can send emails using the SendGrid API, you need to make sure the domain you're sending from is authenticated under Settings > Sender Authentication:
Creating App
NEW: One-Click Template Installation!You can now enjoy the one-click-away option of installing the template app: simply click the button below and in a moment, your app is ready to start! There’s no need to go to the Create new app dialog or download the template backup with further installing it.
You can also create this app by using our Create new app dialog like described in the sections below.
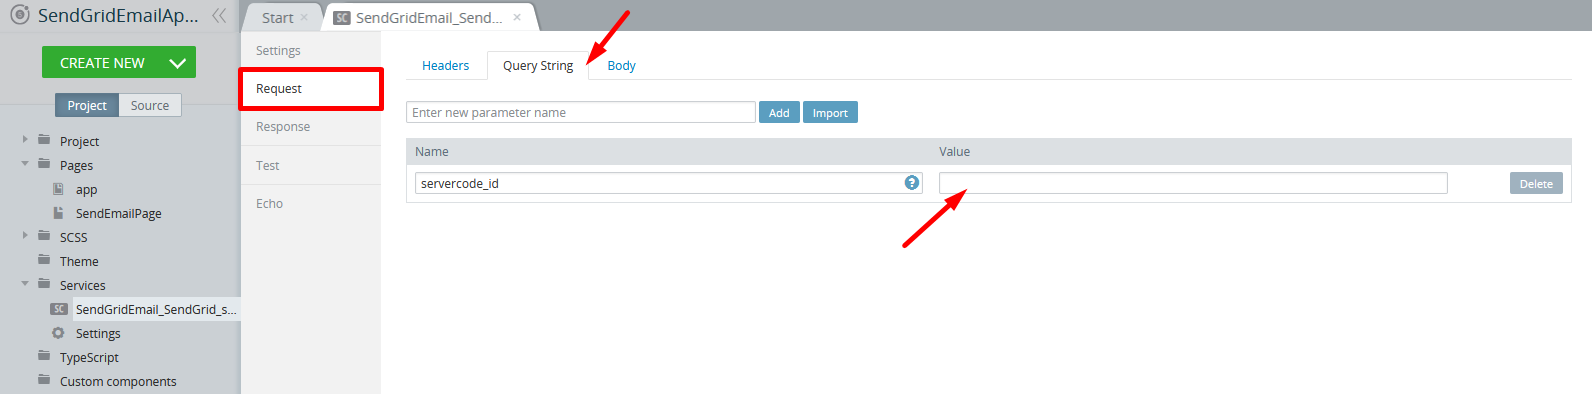
Important!Note that if you decide to follow the one-click template installation procedure, you will need to edit the service URL servercode_id parameter under the Request > Query String tab:
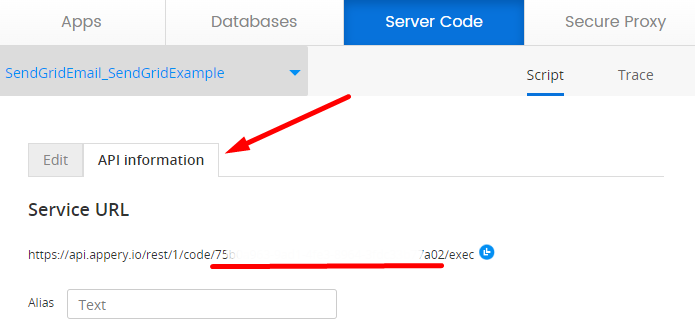
Server Code Script Service URLTo locate the Server Code Script Service URL, go to the Server Code tab, select the needed script from the drop-down Scripts list on the left, then switch to the script API information tab:
Once done with this, your app is ready to go and you can skip the sections below proceed with testing the app in preview
However, if you are interested in the details, please follow the instructions on creating the app from scratch below.
Creating App UI
- From the Apps page, click Create new app > Ionic Blank.
- Name it SendGridEmail App and confirm.
- After the App Builder loads, open Pages >Screen1 in the Project view tree, select Toolbar Title of the screen Header and change its Text property to SendGridEmail App.
- For this app, you will need two Input, one Textarea, and one Button components.
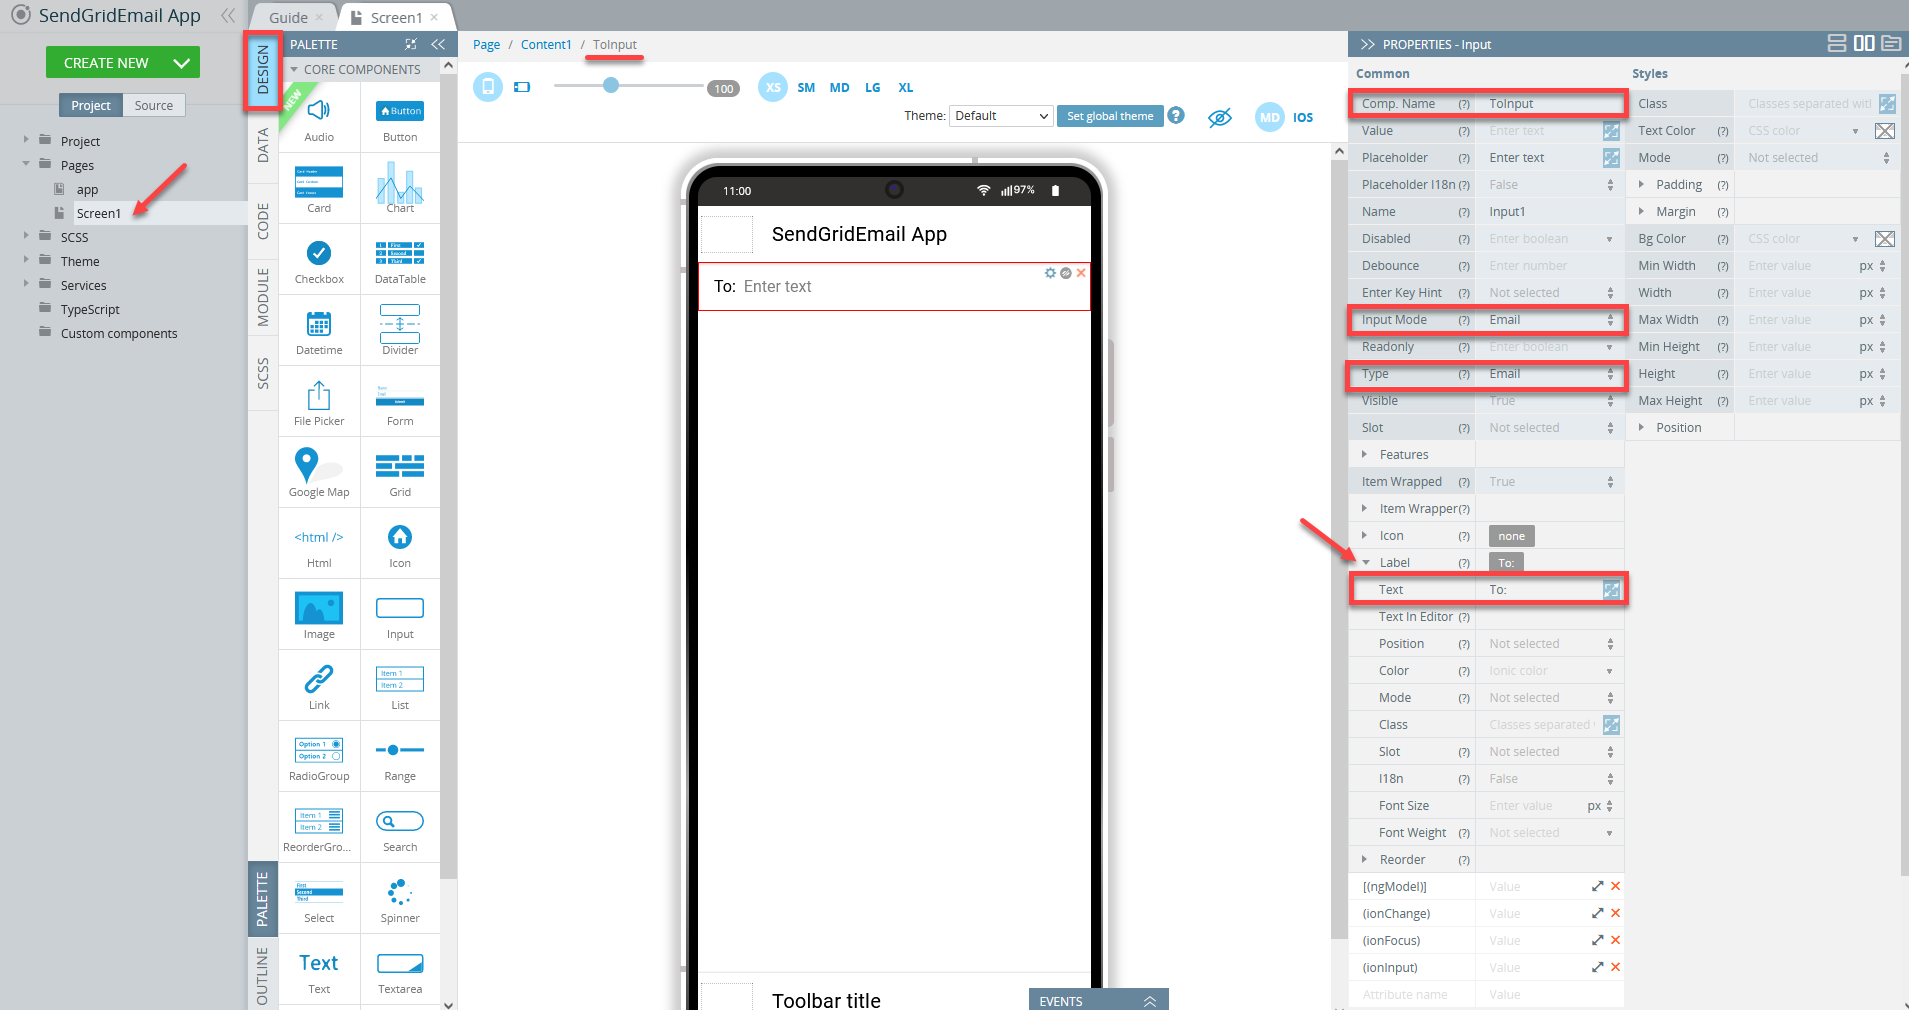
So, drag the first Input from PALETTE to the Content area of the Screen1 page and modify its properties as follows:
- Comp. Name = ToInput;
- Input Mode = Email;
- Type = Email;
- Label > Text = To::

- Comp. Name = SubjectInput;
- Label > Text = Subject::
- Next, drag the TextArea component and drop it to the screen; then set up its properties as follows:
- Comp. Name = MessageTextarea;
- Label > Text = Message::

- Finally, add the Button component to the page and define it like this:
- Comp. Name = SendButton;
- Text = Send Email:

Configuring Server Code Script
Now, you need to configure the needed Server Code script.
So let's first add the imported Server Code script to the app.
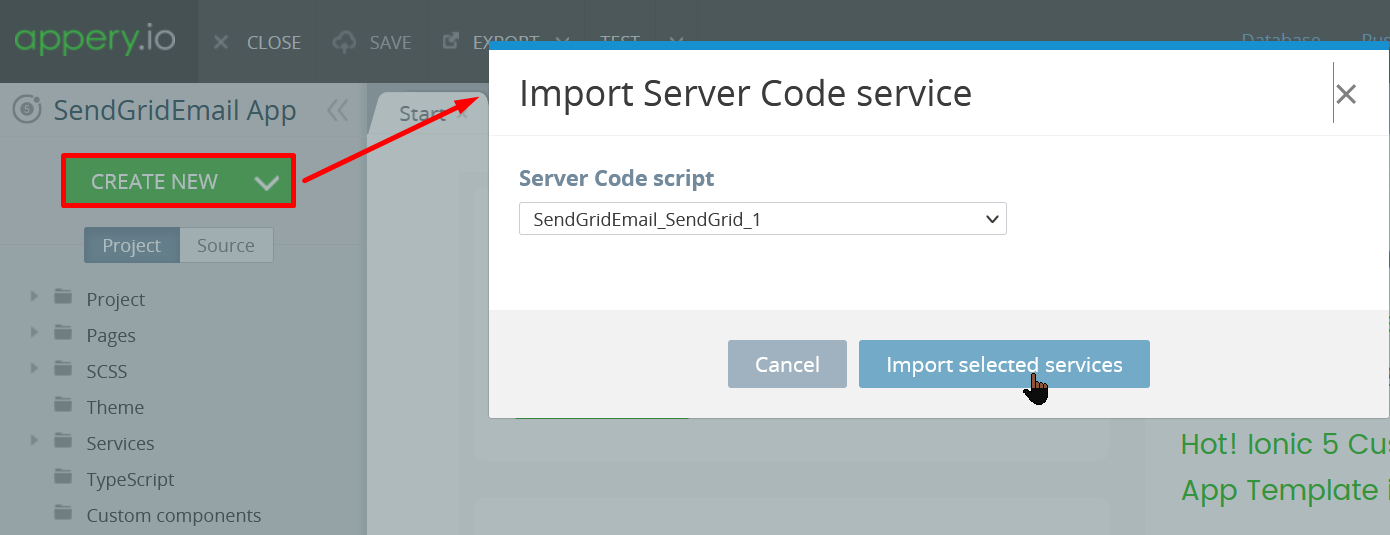
- Click Create New > Server Code Service, select your SendGridEmail script, and confirm the operation to import the selected service to the app:
- The service will be instantly imported into the Services folder inside the App Builder Project view tree.
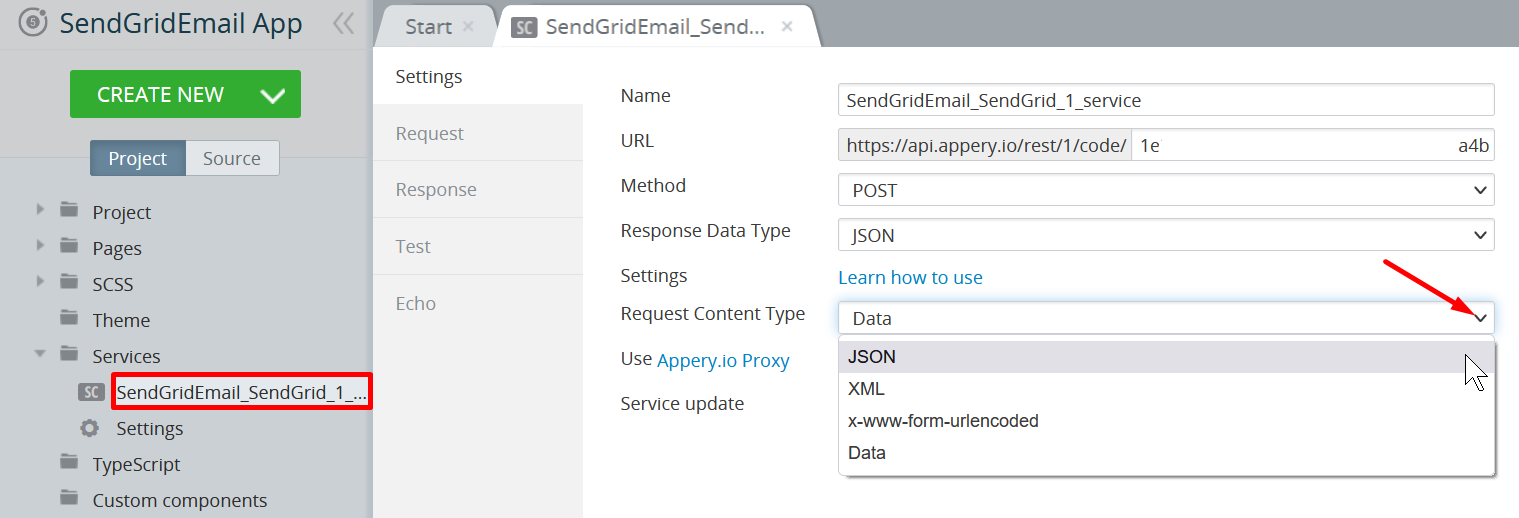
Click the imported service and set its Request Content Type parameter to JSON:
- Then open the Request > Body tab, click the Import button, and import the next request structure:
{"to": "[email protected]", "subject":"Appery.io test", "body":"Hello World!"}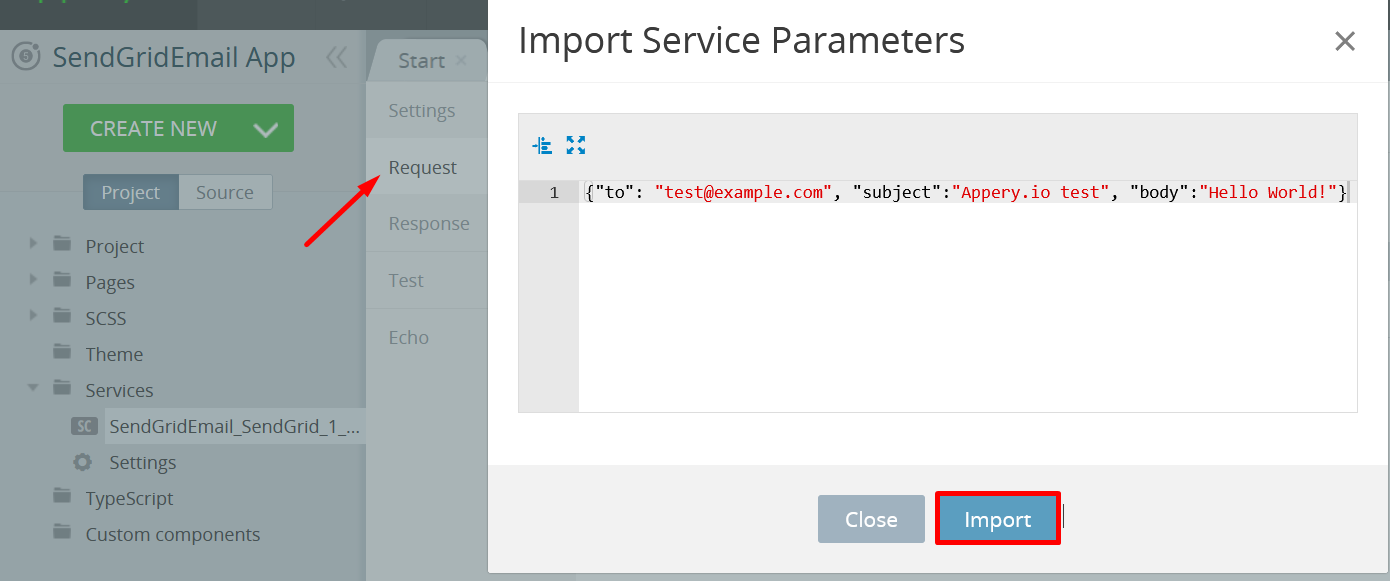
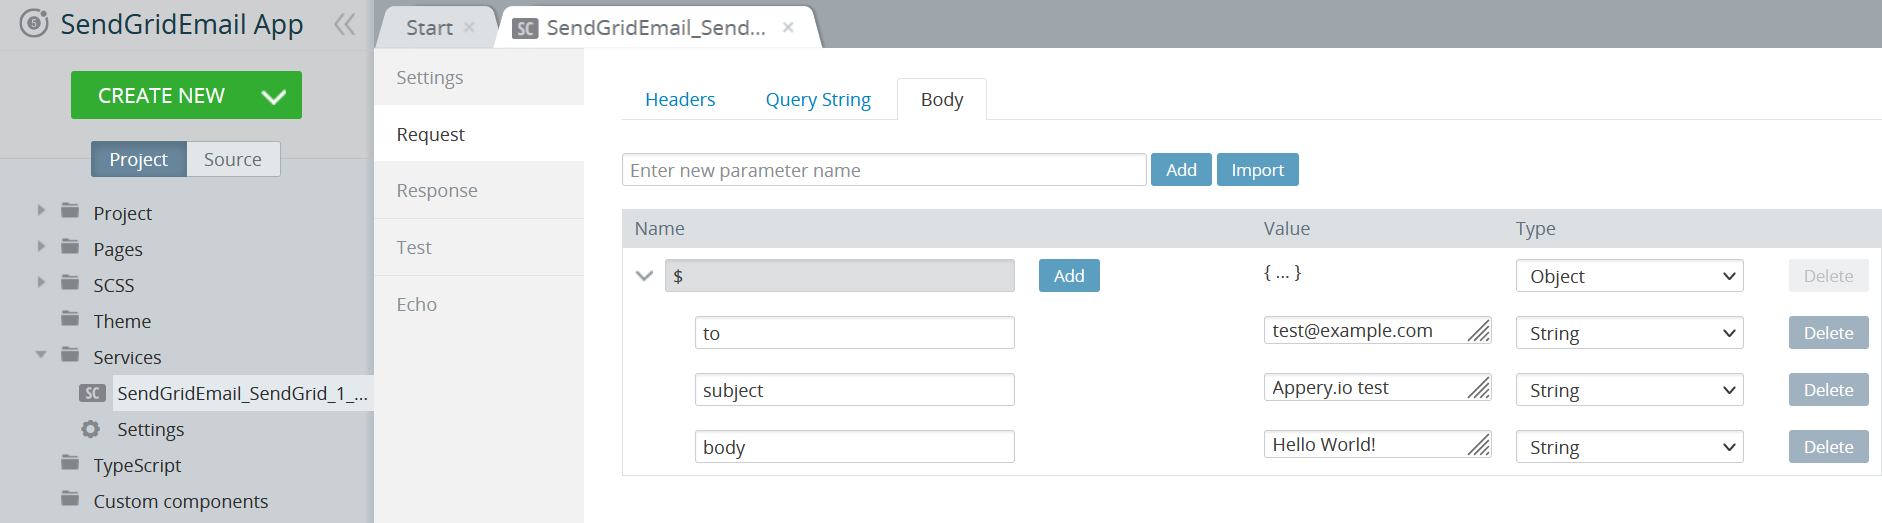
Here is how the Body Request tab should look like:
That's all you need to do to configure this script.
Defining App Logic
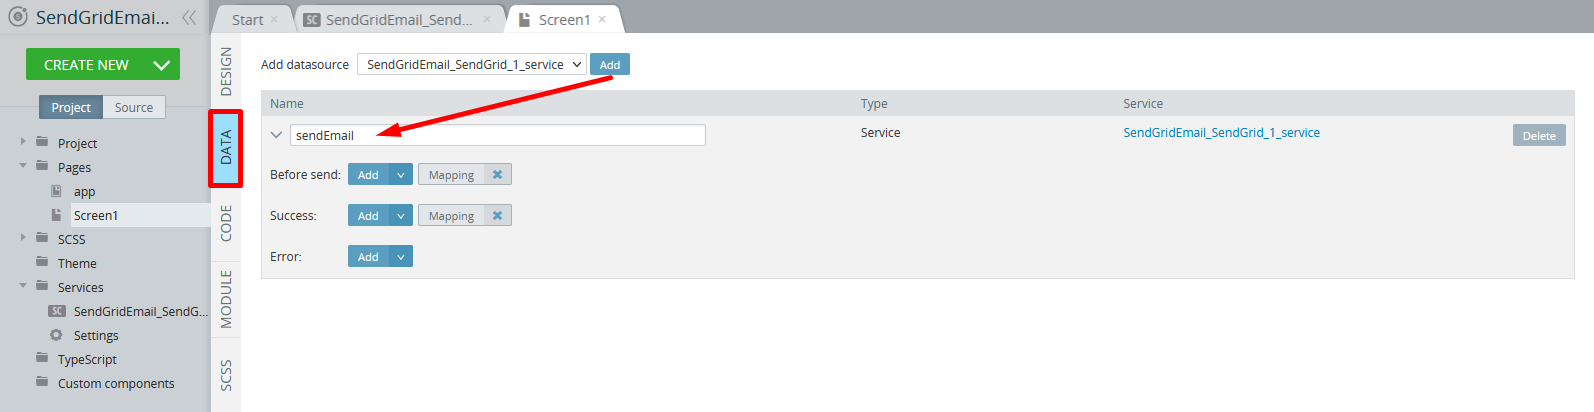
- Go to the Screen 1DATA panel and add a datasource for the SendGridEmail service; name it to sendEmail:
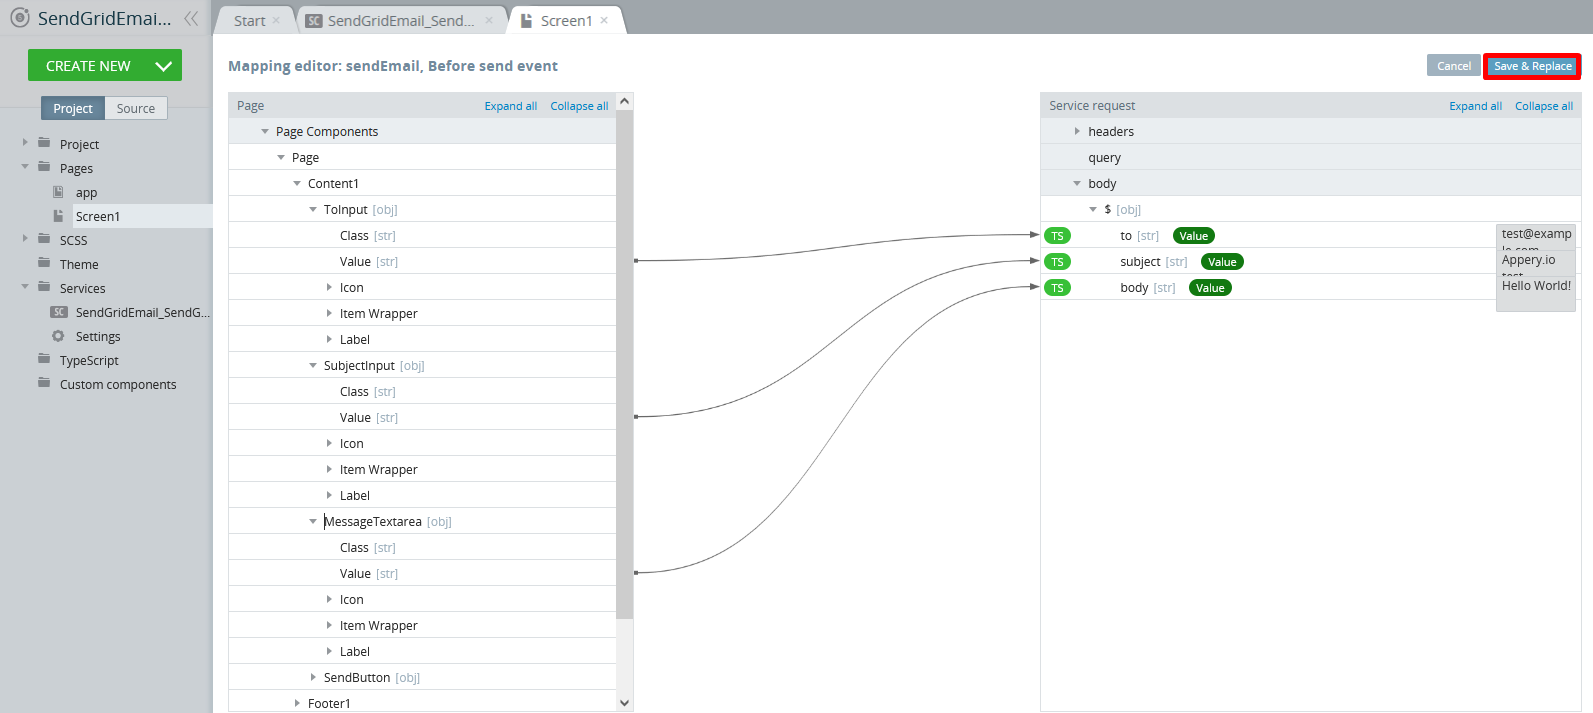
- Click the Before send service mapping button to open the mapping editor and map the following properties to the corresponding body request parameters:
ToInput > Value = to;
SubjectInput > Value = subject;
MessageTextarea >Value = body. - Click Save & Replace to save your work:
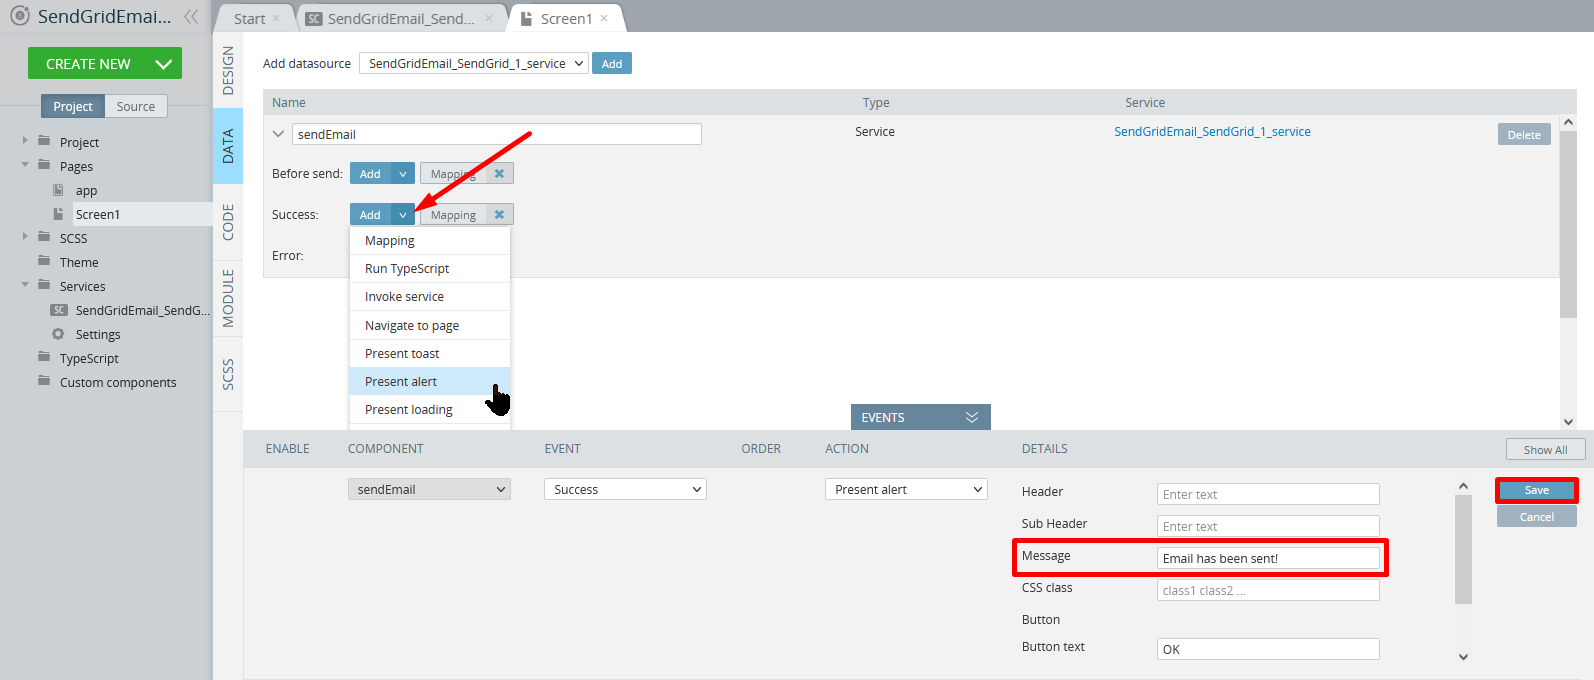
- To add the alert notifying that the message has been sent successfully, click the arrow button next to the service Success event, select the Present alert action from the list, and define message text as Email has been sent!. Save the action:
- The last thing is to invoke the service that you have set up:
Go back to the page DESIGN panel, select the SendButton and for its Click event, select the Invoke service action defined with the sendEmail service:

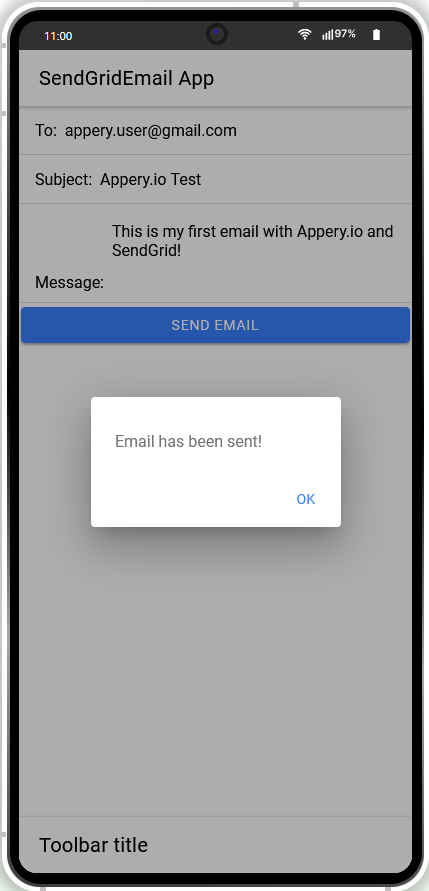
App Testing
You are now ready to test your app: click the TEST button in the App Builder Toolbar to run the app in the preview to launch the app in the browser.
Now, enter the addressee, subject, message and click the SendEmail button:
Updated about 1 year ago