DALL-E-2 App Template
Use our DALL-e-2 template to create your own bot app for generating images.
Introduction
This document describes our customizable DALL-e-2 app template that is based on OpenAI ChatGPT technology and designed for creating a bot app capable to generate images.
Important: Before You Can TestTo test this AI technology, obtaining an API key from the OpenAI portal is required. So, open this link (or go to the API Access section of your OpenAI account dashboard) and either generate a new API key or manage your existing API keys.
Video: How to create Mobile and Web applications integrated with ChatGPT in 5 minutesIf interested, you can also check out this video to learn how to create mobile and Web apps with ChatGPT using Appery.io:
Using DALL-e-2 App Template
No special knowledge or experience is required to use our DALL-e-2 app template — just follow the simple steps below to install the app and enjoy low-code development with Appery.io!
Important!Please rest assured that you are the creator and you are the only owner of this application (actually, like any other app created with Appery.io).
For more details, you can check our Copyright, Trademark, and Content Ownership section here.
Creating App from Template
- From the Apps tab, click Create new app.
- Select DALL-e-2, enter the name for your project (for example, DALL-e-2), and click the Create button.
In a few moments, refresh the browser tab to see that the app will be created, and you can open it.
The first thing you can see is our App Builder Educational Video Guide page with the Project View section on the left where all the predefined project data can be found.
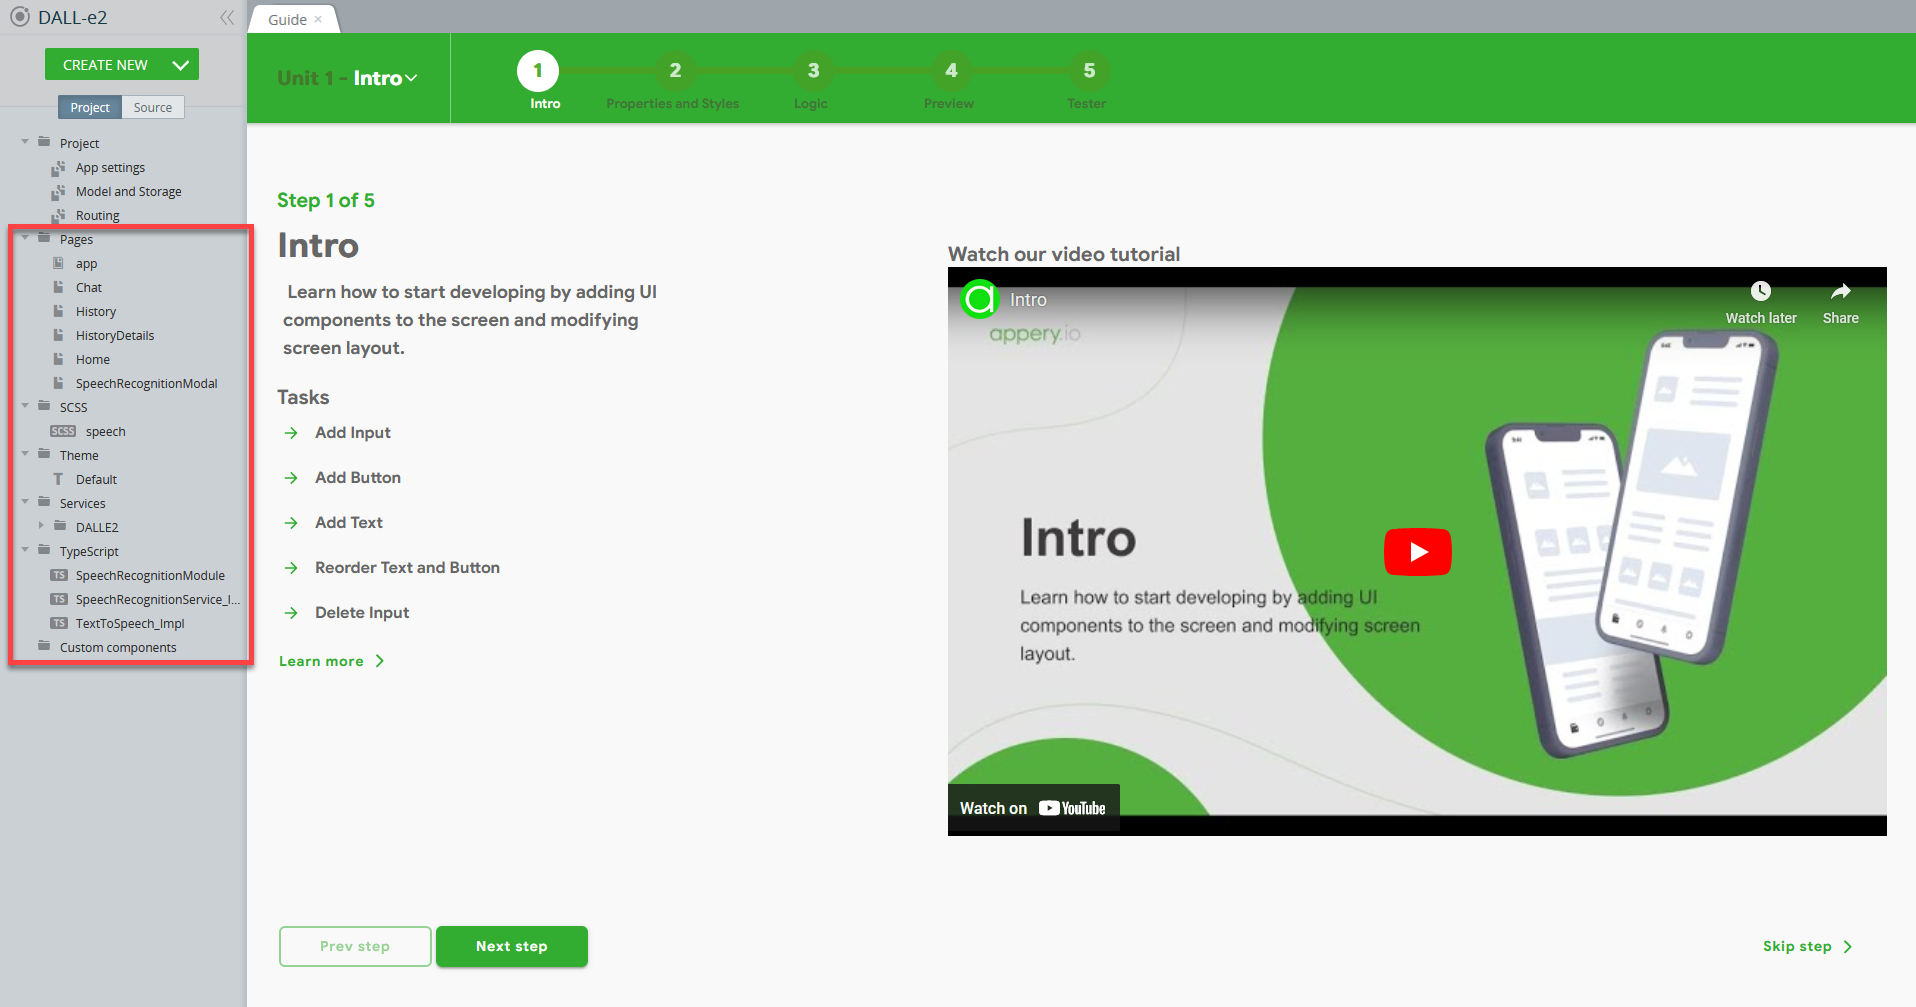
Note!If you are launching your project for the first time, please allow some time for the app preview to load.
Testing App
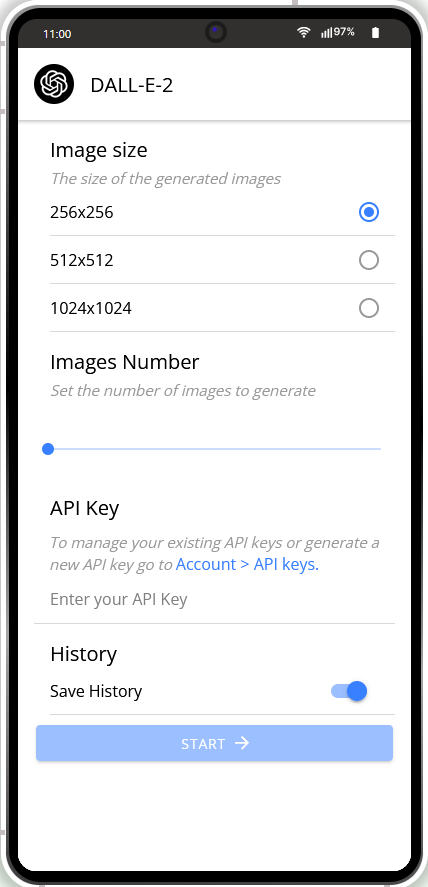
Actually, the application is ready to be used and does not require any additional effort on your part so let's test the app at work and see what it's all about.
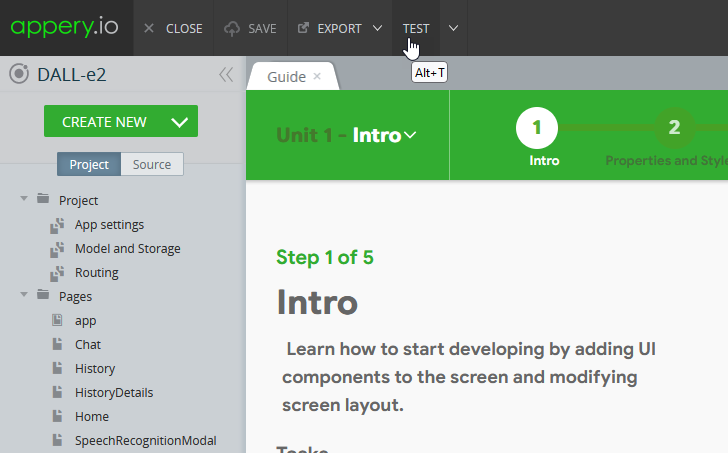
Click the TEST button in the app Toolbar; you will be redirected to the tab with the app preview.
Testing on Device
When your app version is ready and you like its resulting UI, you might also like to test it on the device.
Appery.io Tester AppA great option to quickly test the app on the device (including resting the text-to-speech and speech-to-text options) is to use our Appery.io Tester app.
The app is free and available for both iOS and Android.
You can check out this page to learn more about using the Appery.io Tester app.
Hiding Controls menuTo test the app using the Appery.io Tester app, you will need to hide the Controls menu by first clicking the main control a button and then selecting the third icon (Four arrows pointing inwards) on the menu. In the modal screen, click OK to confirm:
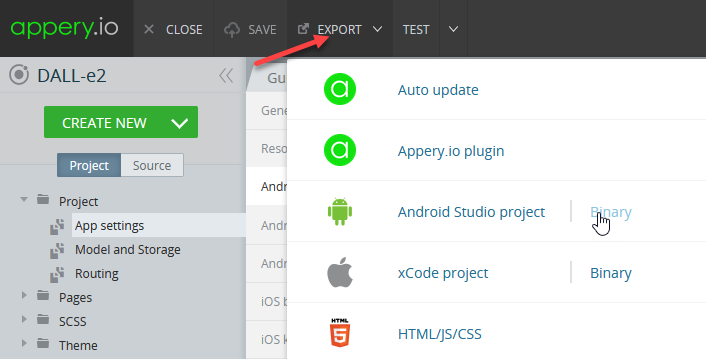
Exporting App
When your final app version is ready, you might like to proceed with exporting your app for
Android or iOS with further installation it on a device.
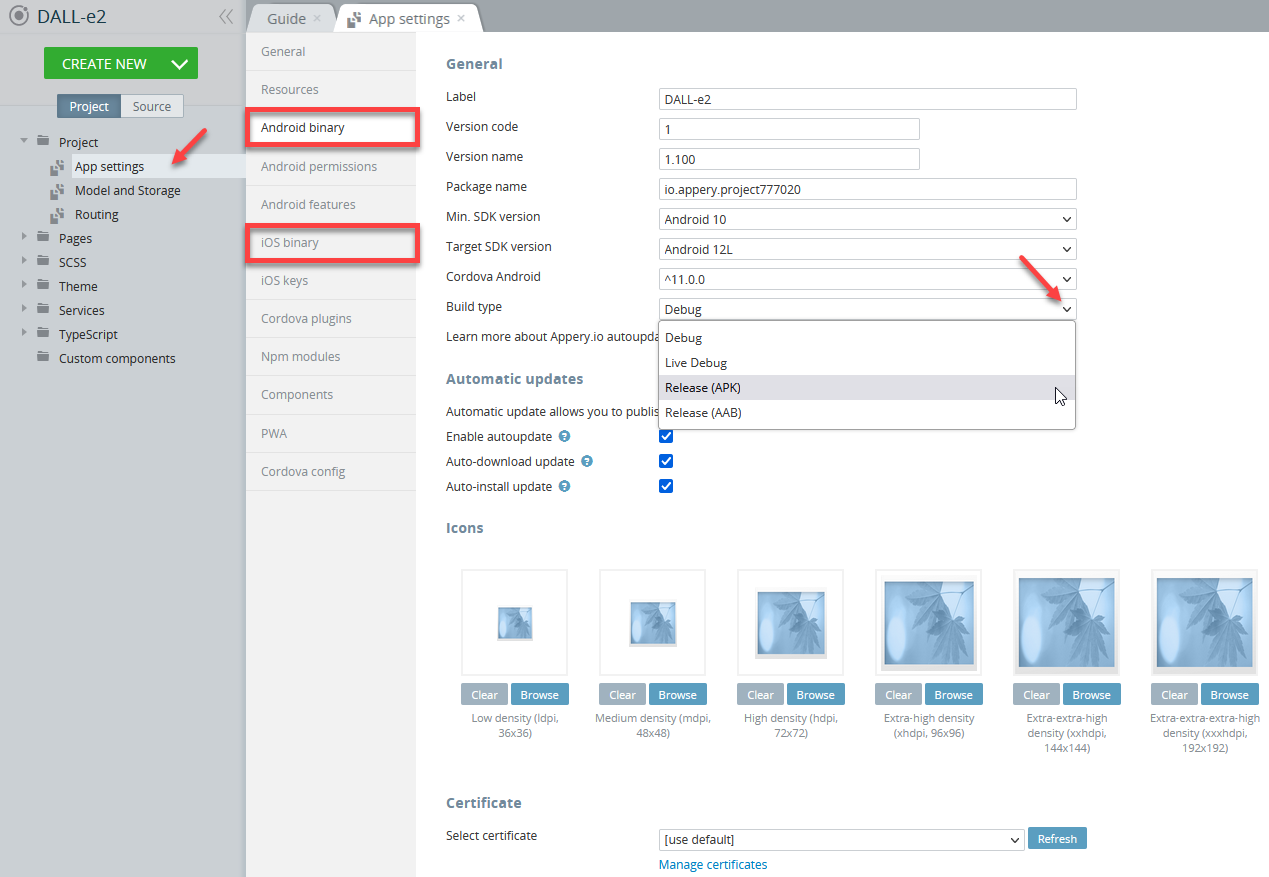
Selecting Build TypeBefore you can proceed with exporting your app, go to Project view > Project > App settings > Android binary/iOS binary to select the Release build type (Debug is the default type for both and can be used for testing purposes only):
If the Release and Publish type is selected under the iOS binary tab, building the release app version will be performed together with publishing it to the App Store.
Please check this step-by-step Appery.io YouTube video to learn how you can develop an iOS mobile app with Appery.io right in the browser using a Windows desktop.
Also, you will learn how to install it on an iPhone for testing and then publish it to the App Store:
Important Note!Please, note that before you can export the app, the app certificates must be imported or automatically generated (in the case of Android).
You can check this document in case you need help with exporting your application for iOS.
Here, you will find information on generating certificates for Android.
Note as well that starting from August 2021, new apps are required to publish with the Android App Bundle (.aab) on Google Play.
Please read more here.
You can also check this Appery.io Community video that shows how to create Android and iOS certificates:
Managing Build Error The certificate file is not setIf this is your first app created with Appery.io you will most likely get the error signifying about missing certificates that will prevent you from successfully finishing the build process.
The error reads similarly for both binary types and indicates that you should set the corresponding certificate before starting a new build.
If this notification is what you see after starting your build, please check out the this document about certificate management that explains how to add the needed certificate to your project:
- After the needed certificates have been added to your app all you need to do is to wait for the bundle to be created.
- Now, you need to select the format you prefer (you are also free to build both if you need) to start building your project:
- Once your project is generated, you will see the QR-Code that you can use to upload the application to your device (or save the file for further use).
Then, install the app on your device and enjoy the result of your customization efforts.
Publishing App
Any app that you build in Appery.io can be published as a mobile web app. This means the app will be hosted on a server and can be accessed from any browser on a mobile device:
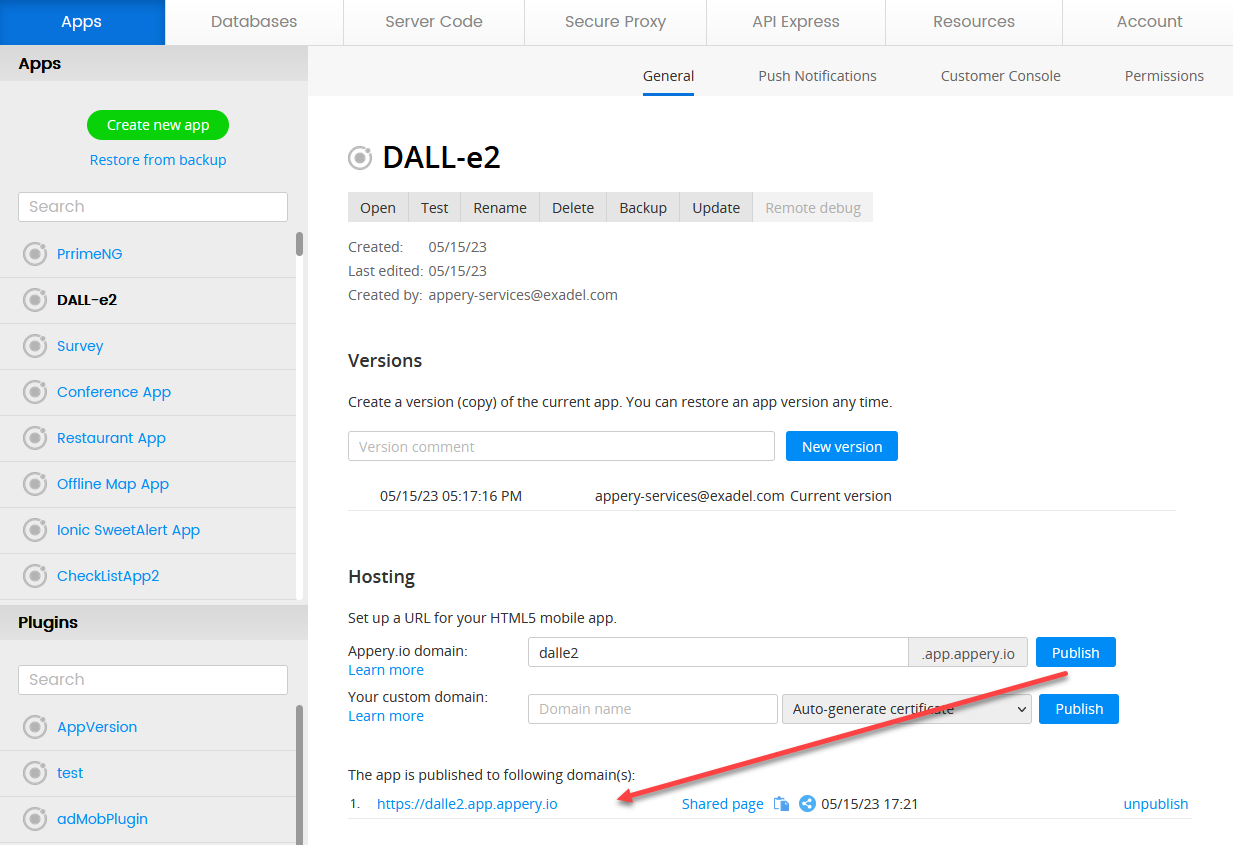
Also, you are free to add the published app to any site of your choice as a widget.
Please check this link to see what it will look like.
Below is the sample code you can use for embedding the app published on Appery.io as a widget:
<script>
  var script = document.createElement('script');
  script.type = 'text/javascript';
  script.src = 'https://app.appery.io/aio_dalle2_widget.js';
  script.onload = function() {
    window.aioChatWidget.init({
      frameUrl: "https://dalle2.app.appery.io/",
      // buttonColor: "blue",
      // buttonTextColor: "red",
      // buttonImgUrl: "https://appery.io/app/resources/img/mobileframe/favicon-192x192.png",
      preload: true,
      // autoOpen: 5000,
      // position: "top_right",
    });
  }
  document.head.appendChild(script);
</script>
where:
frameUrl: '', // the iframe url;buttonColor: '#4DC95B', // css color. The button color for the chat button (if set to default, the button image is used) and close button;buttonTextColor: '#FFFFFF', // css color. The button text color for the chat button (if set to default, the button image is used) and close button;buttonImgUrl: '', // custom image for the button, if not set, then the default.svgimage is used;preload: false, // if set to true - add iframesrcon init (load frameUrl immediately), otherwise, the iframe will be loaded only after opening;autoOpen: 0, // ms. If 0 - do not open;position: "bottom_right" // bottom_right, bottom_left, top_right, top_left.
Updated about 1 year ago