Menu App Template
Check out our Menu app template to build your own restaurant business app.
Introduction
This document describes our Menu app template designed to grow into the perfect app choice for your small restaurant business.
This template contains ready-to-use services and a UI that makes it easy to use.
The sample app uses and demonstrates:
As a bonus, we provide detailed explanations for those who are interested in customizing the offered app template.
You can right now test our sample app at work:
Using Menu App Template
No special knowledge or experience is required to use our Menu app template — just follow the simple steps below to install the app and enjoy the results of low-code development with Appery.io!
Important!Please rest assured that you are the creator and you are the only owner of this application (actually, like any other app created with Appery.io).
For more details, you can check our Copyright, Trademark, and Content Ownership section here.
Customizing OptionsBesides, many customization options are available like renaming the app, changing the template color themes, launch icons and screens, customizing app pages, etc.
If interested, check out the instructions in the Customizing App section.
Creating App from Template
- From the Apps tab, click Create new app.
- Select the Menu template, enter the name of your project, and click the Create button.
In a few moments, the app is created.
Tip!If you leave the name field empty, the app will get the default Menu name but you can rename it any moment later.
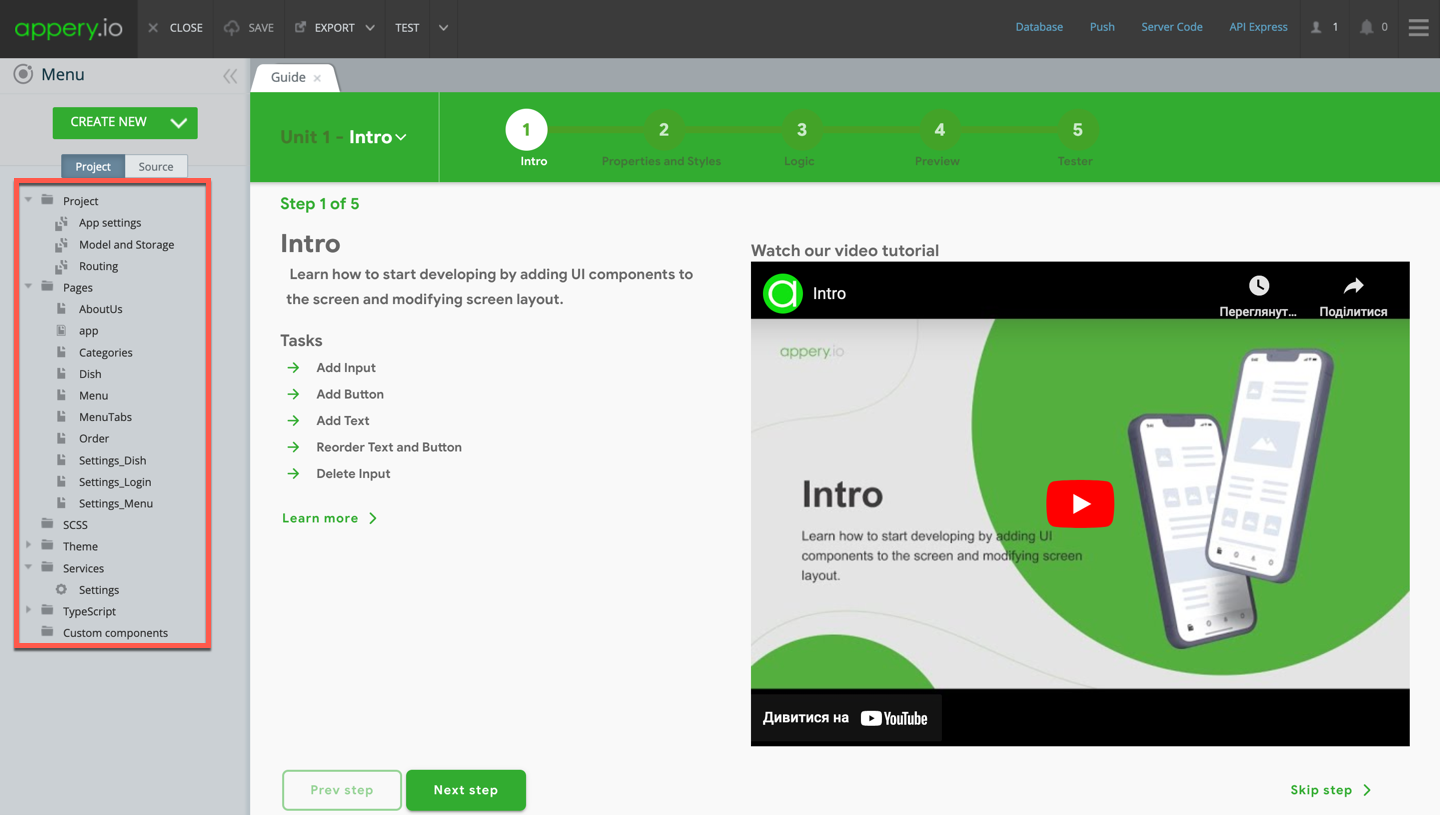
The first thing you can see is our App Builder Educational Video Guide page with the Project View section on the left where all the predefined project data (pages and services) can be found:
Actually, the application is ready and you are close to releasing your small restaurant app.
But before you can start with customizing it, you are free to check out what this app is about. This app is quite simple to operate and requires no special knowledge.
App Description
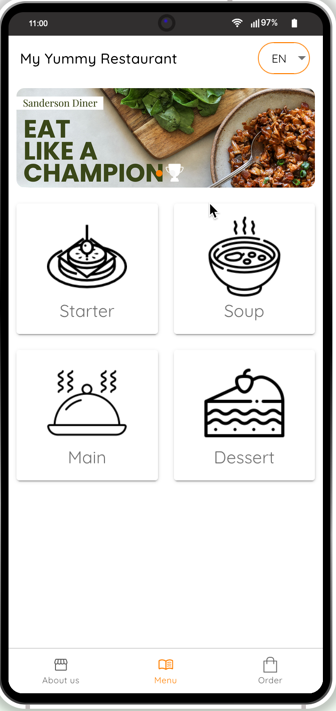
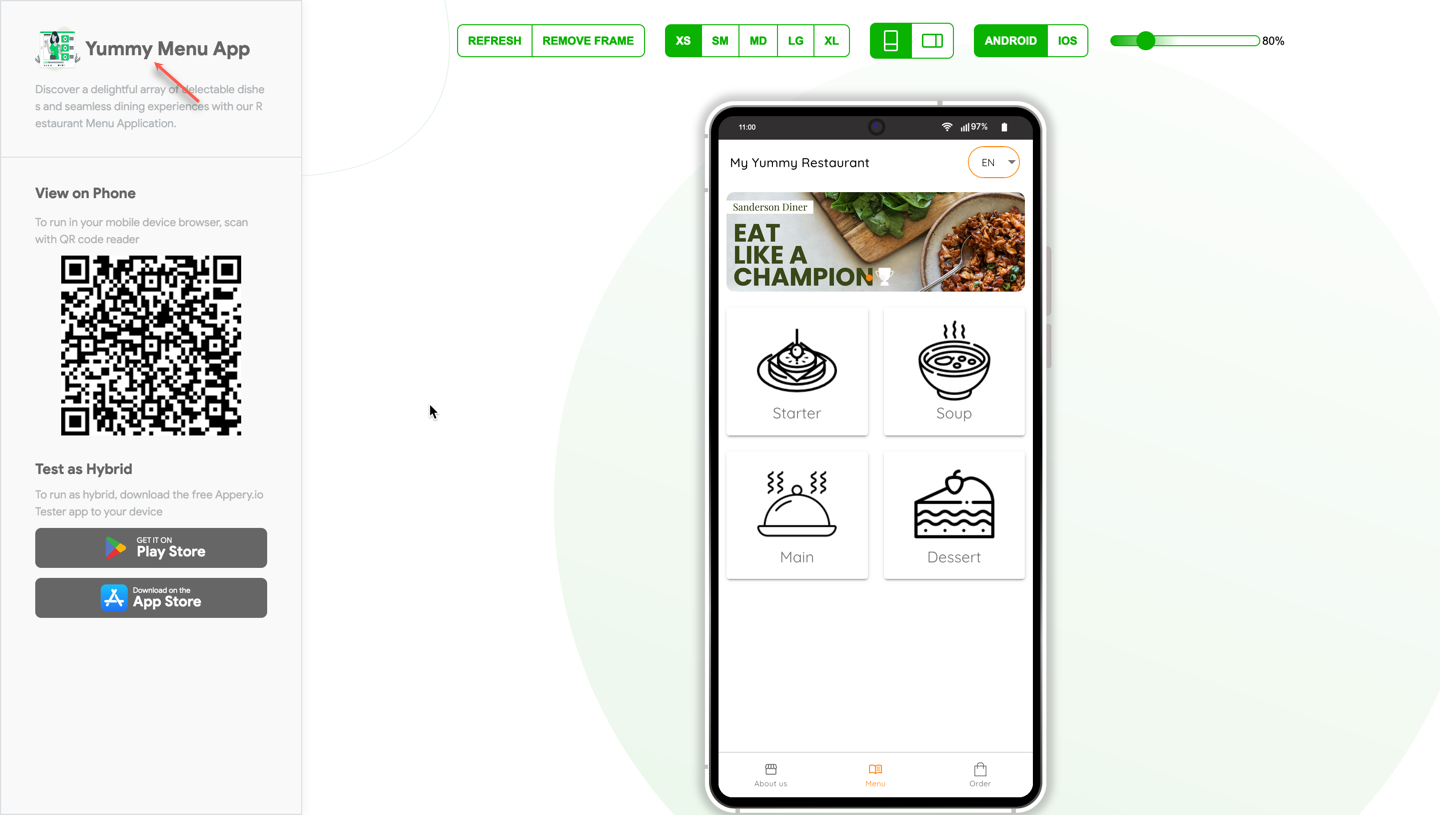
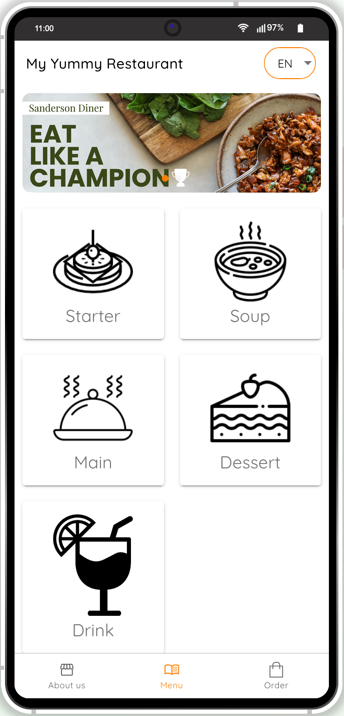
Click the TEST button in the app Toolbar right now. Once loaded, the application Menu page will launch in the preview. You can see the restaurant's generic name, some generic banners, a language-switching button, four default cards featuring meal categories, and a footer:
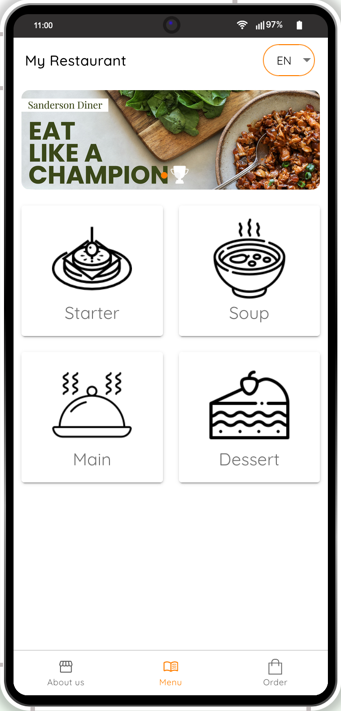
The three Tabs buttons in the footer allow browsing the app pages: About us, Menu, and Order (left to right).
As an app user, you can start right away by browsing the Menu page sections and reviewing the offered meal listings. On the screen, four cards are organized so that you can comfortably browse for the meal type you are interested in: Starter, Soup, Main, and Dessert. Click on the card redirects to the meal listings.
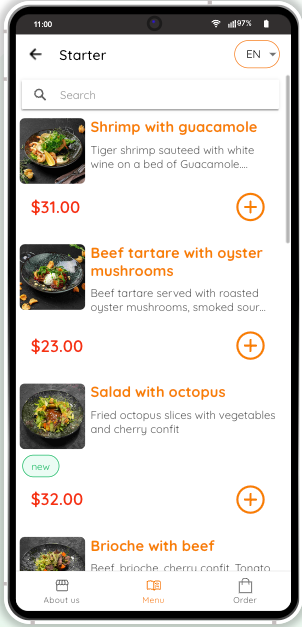
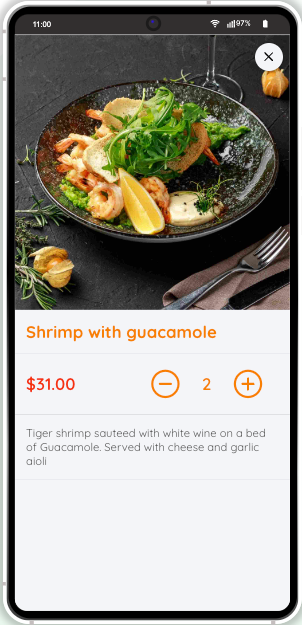
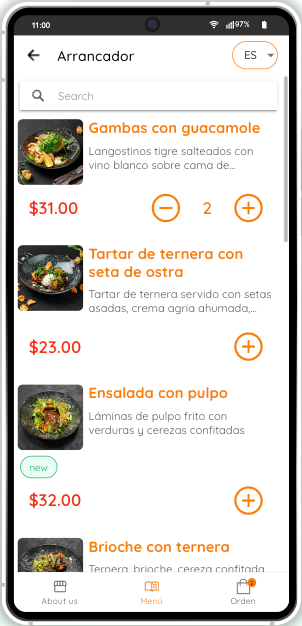
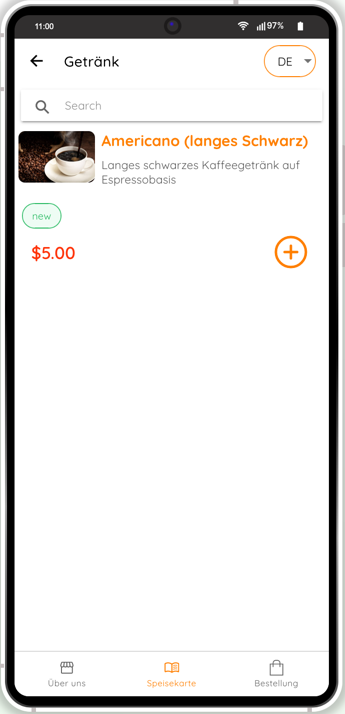
You can now search for the meal and/or select the meal you like; view its card featuring its name, photo, price, some short description, and a tag (optional). To add the meal to the cart, click on the + icon:
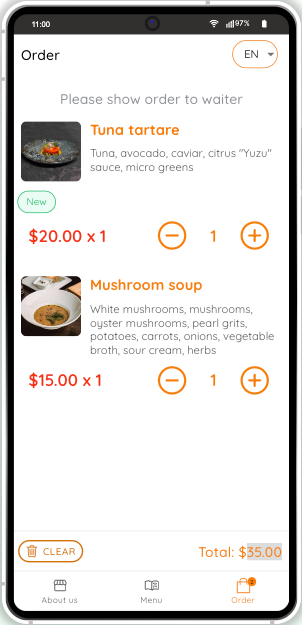
Now, you can review your order before you place it with the waiter:
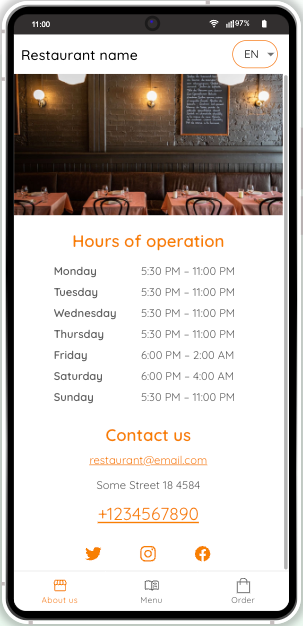
You might also like to check out the About Us page with some generic information about the place:
Another useful option added is the ability to switch the app interface to Spanish:
Customizing App Template
It is natural that being a sample, our Menu app template offers many customization options. So, if you are interested in customizing this template, we highly recommend you check out the instructions in this section.
Note that our Services Team will be happy to assist you in building the application you need. So, if you require professional help with additional customizing or debugging your app code and/or logic, you can consider purchasing one of our Support Packs to get the highest priority support.
Renaming App
The first thing you might like to do to make your app unique is rename your project.
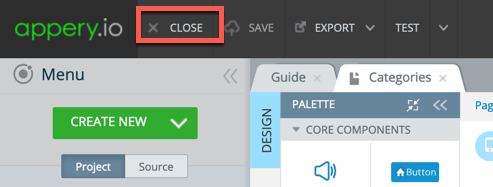
- To do it, you will first need to exit the App Builder so click the CLOSE button in the top app Toolbar:
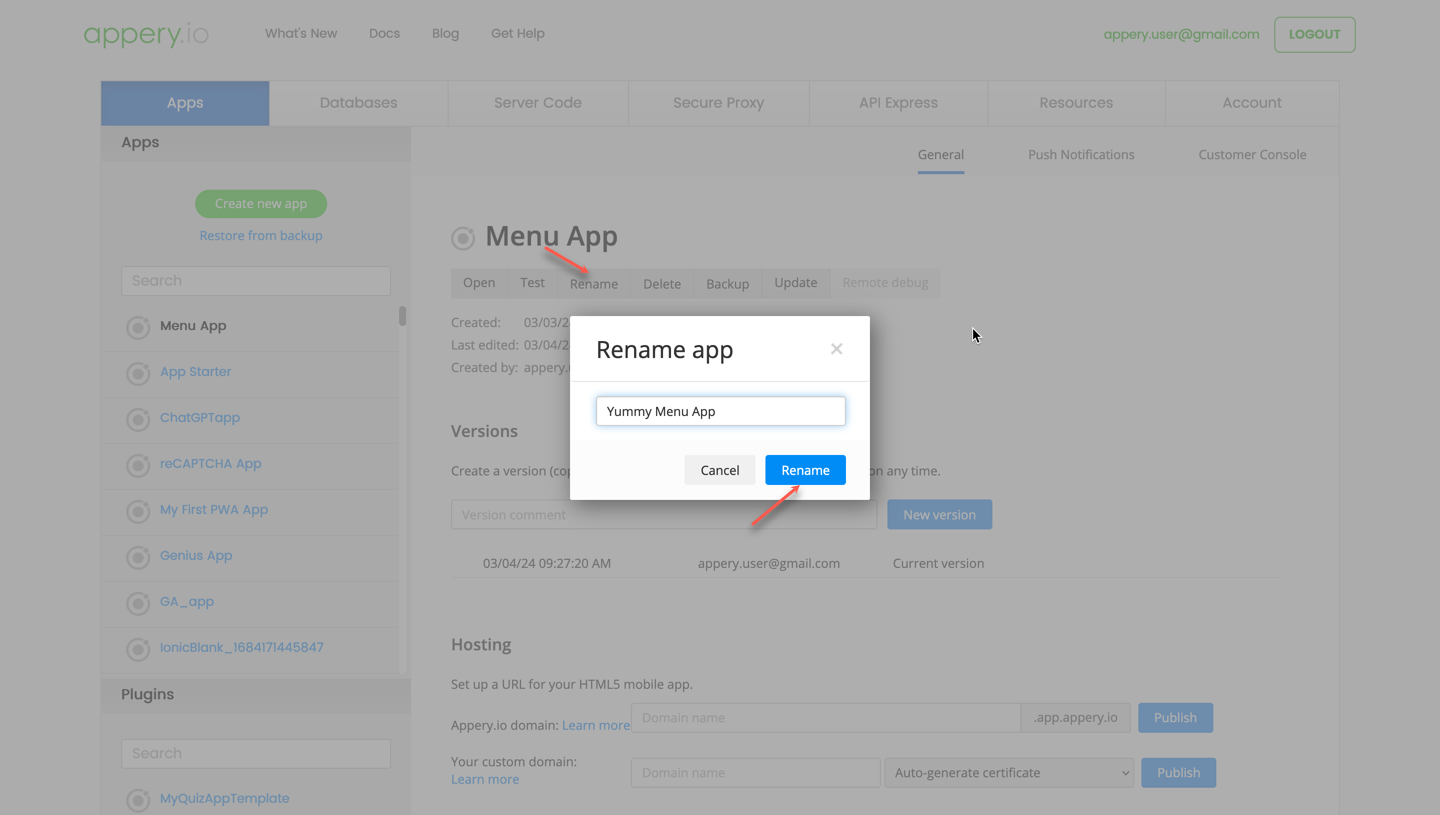
- After that, you will be redirected to the Apps tab with the information about your Appery.io projects, their saved versions, people with whom you share the project, and about hosting on Appery.io. Here, click the app Rename button.
- Now, in a new window, provide a new app name, for example, Yummy Menu App, and confirm this change:
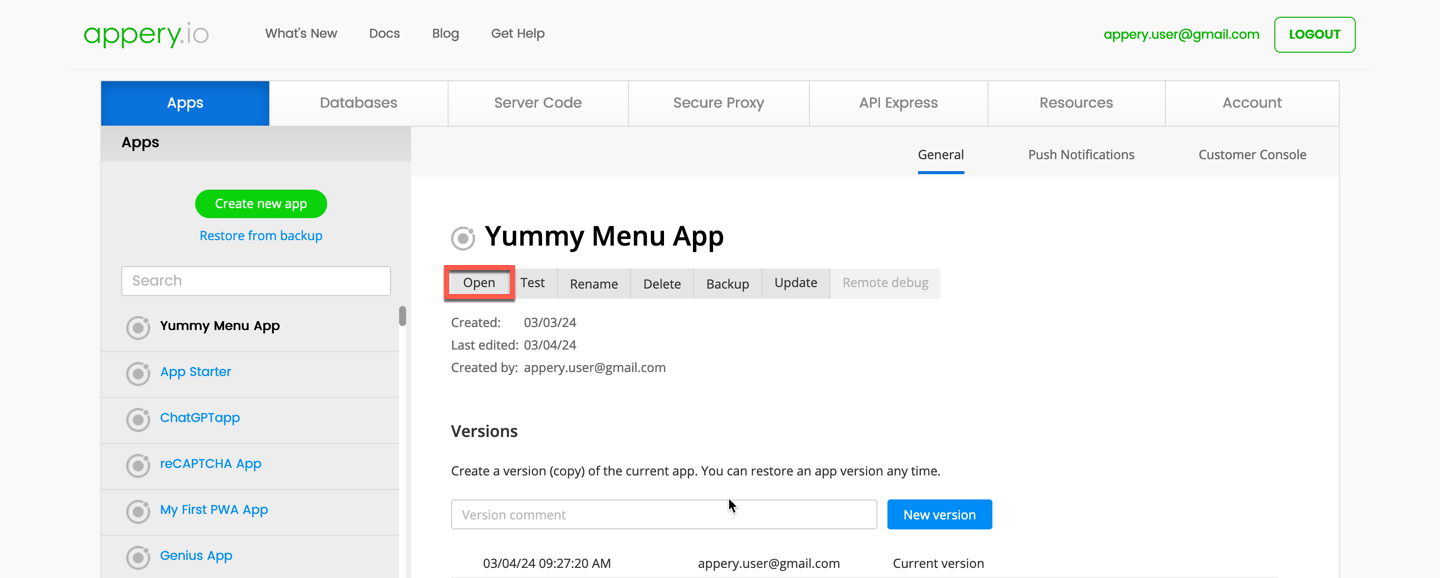
- In a moment, the Apps tab will be updated with a new app name and you can click Open to proceed with customizing your application:
Reviewing General App Structure
When the app reopens in the App Builder, you will see that this app was created with Ionic and has multiple folders comprising a set of organized pages and TypeScript resources all of which can be customized as per your needs and app requirements. You can unfold any of them to see what resources are available:
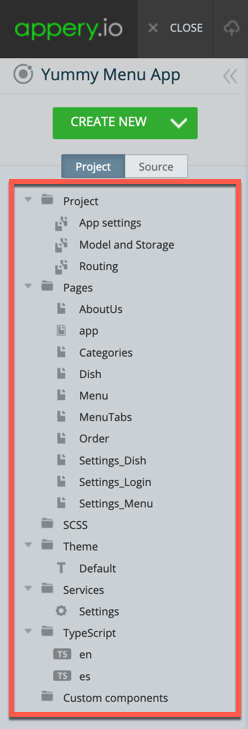
Every file or folder in the Project tree was created using our App Builder and we will now give you a little background on how you can customize the template resources.
Customizing App Pages UI
Opening the Pages folder, for example, will allow you to customize the individual app pages' UI and behavior.
The easiest is changing the text so let's have a closer look at how this can be done.
Customizing Categories Page
Changing Text Property
With Appery.io, not only can you easily change the name of your application, but you can also modify any component on any page in the suggested template.
Let's review the example of changing the text of one of the Categories page UI components.
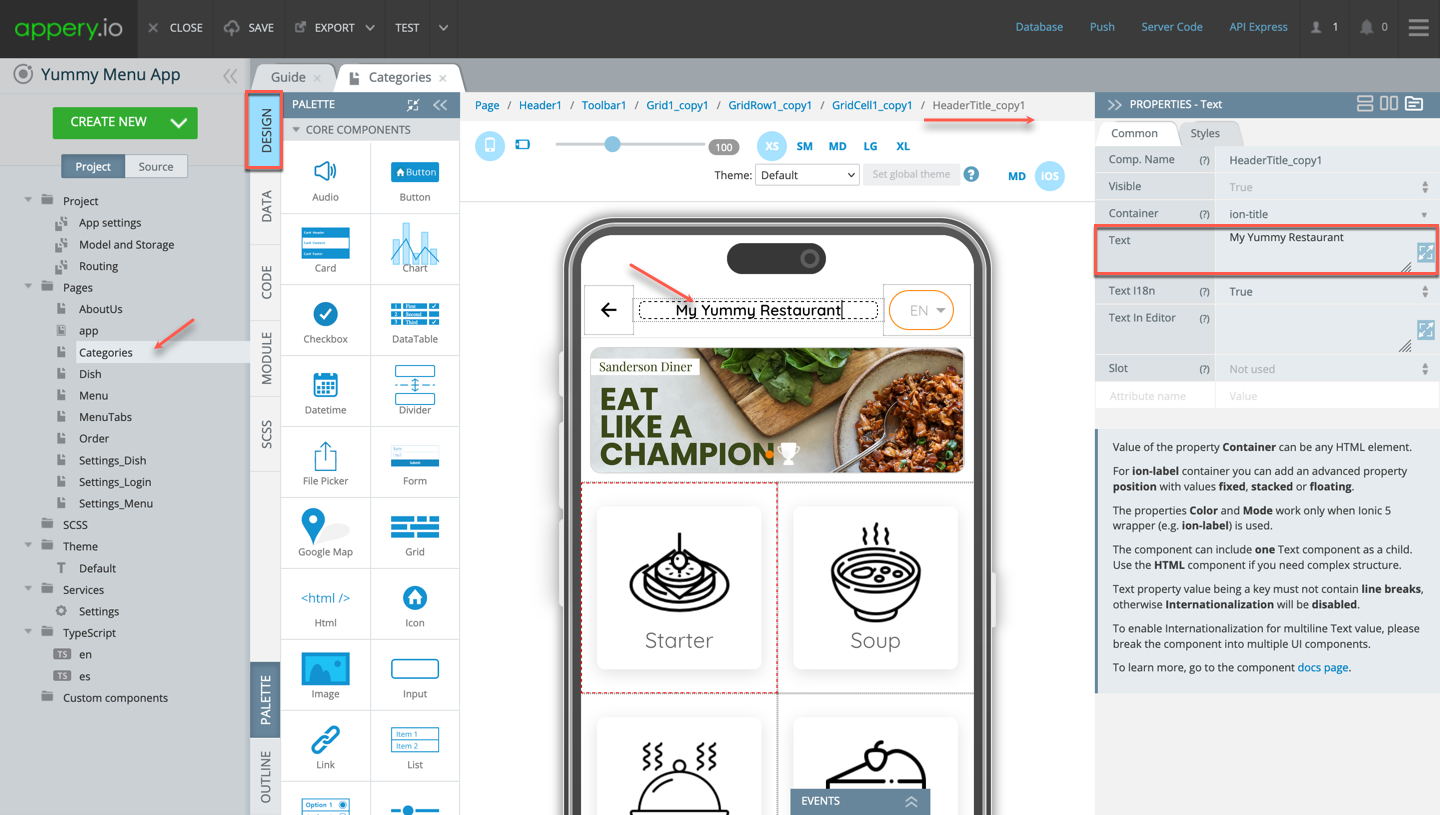
- First, select the Categories page on the Project tab list located to the left of the mobile phone frame. The page will open in the DESIGN panel.
Adjusting Screen SizeNote that you might need to switch to the comfortable screen size (depending on your monitor) XS, SM, MD, LG, XL to see the whole page.
- Select the text instance you would like to modify, for example, the text for the page Header Toolbar Title.
- The PROPERTIES panel for that component will be shown on the right where you can locate its Text property.
- Now, you can modify the text value, for example, replace the default My Restaurant with My Yummy Restaurant by typing in right in the mobile frame (or do this under the PROPERTIES panel); this change will be automatically reflected in the UI:
Using BreadcrumbsYou might have noted that there are the breadcrumbs above the phone frame: they are often used for easy navigation between the parent/child components.
- Now, when you click TEST once again to reopen the app Menu page, you will see that the preview has also been updated according to the recent change made:
Tip!Any text instance can be similarly customized by typing in the mobile frame or modifying the generic text under the PROPERTIES panel.
Also, if the text string is rather spacious, you can click the expand button to show it in a special popup for comfortable editing:
Customizing About Us Page
If needed, you can customize all your text business information on the page, upload a photo, change the name, adjust your actual working hours and contacts, etc.:

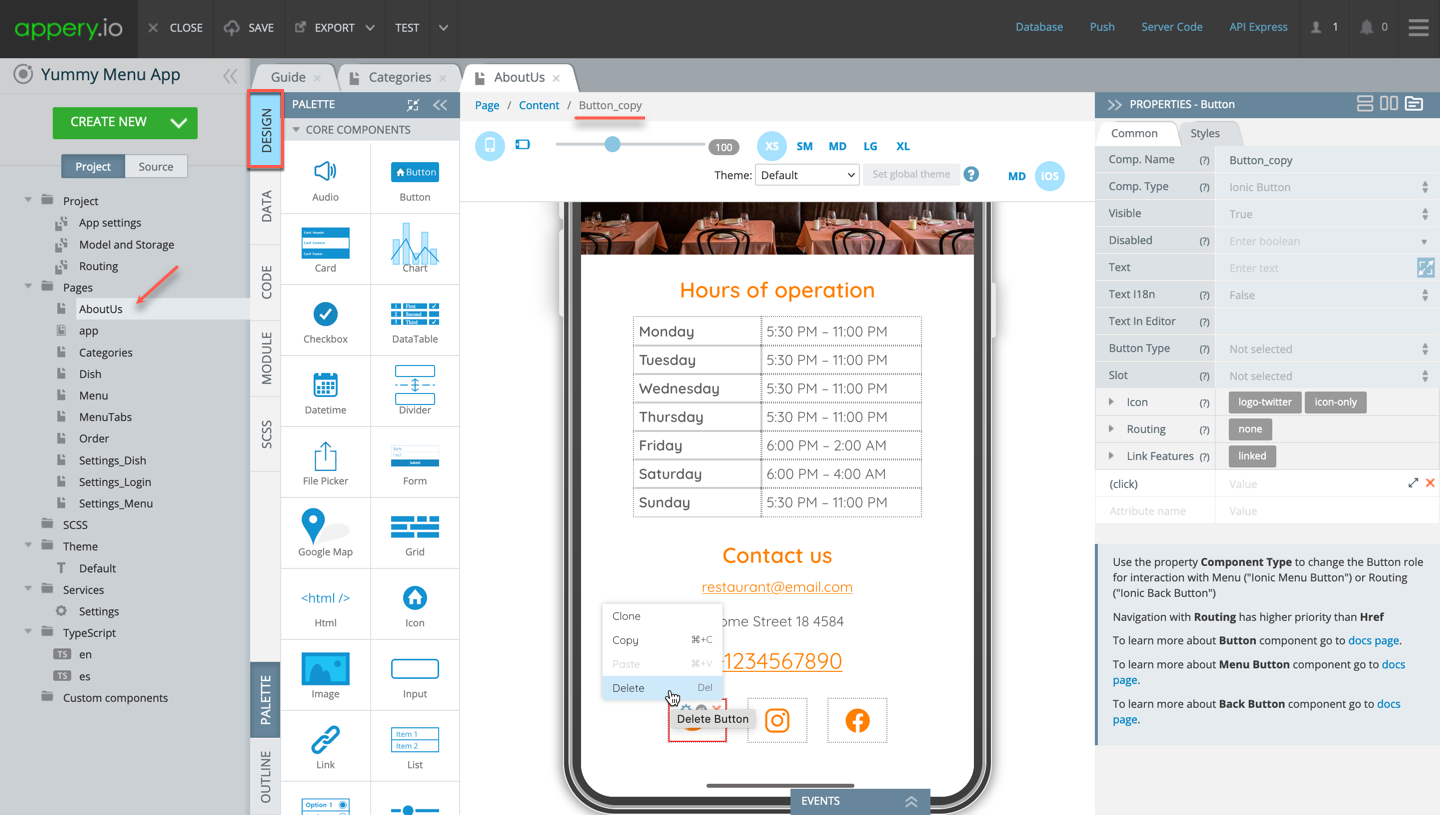
You might also like to delete the components you do not plan to use on this app page:
Another great way to make your application stand out from a plethora of other apps is by changing the app color theme.
Customizing App Color Themes
You will be surprised to see how easy it is to completely change the looks of your app using our Theme Generator option.
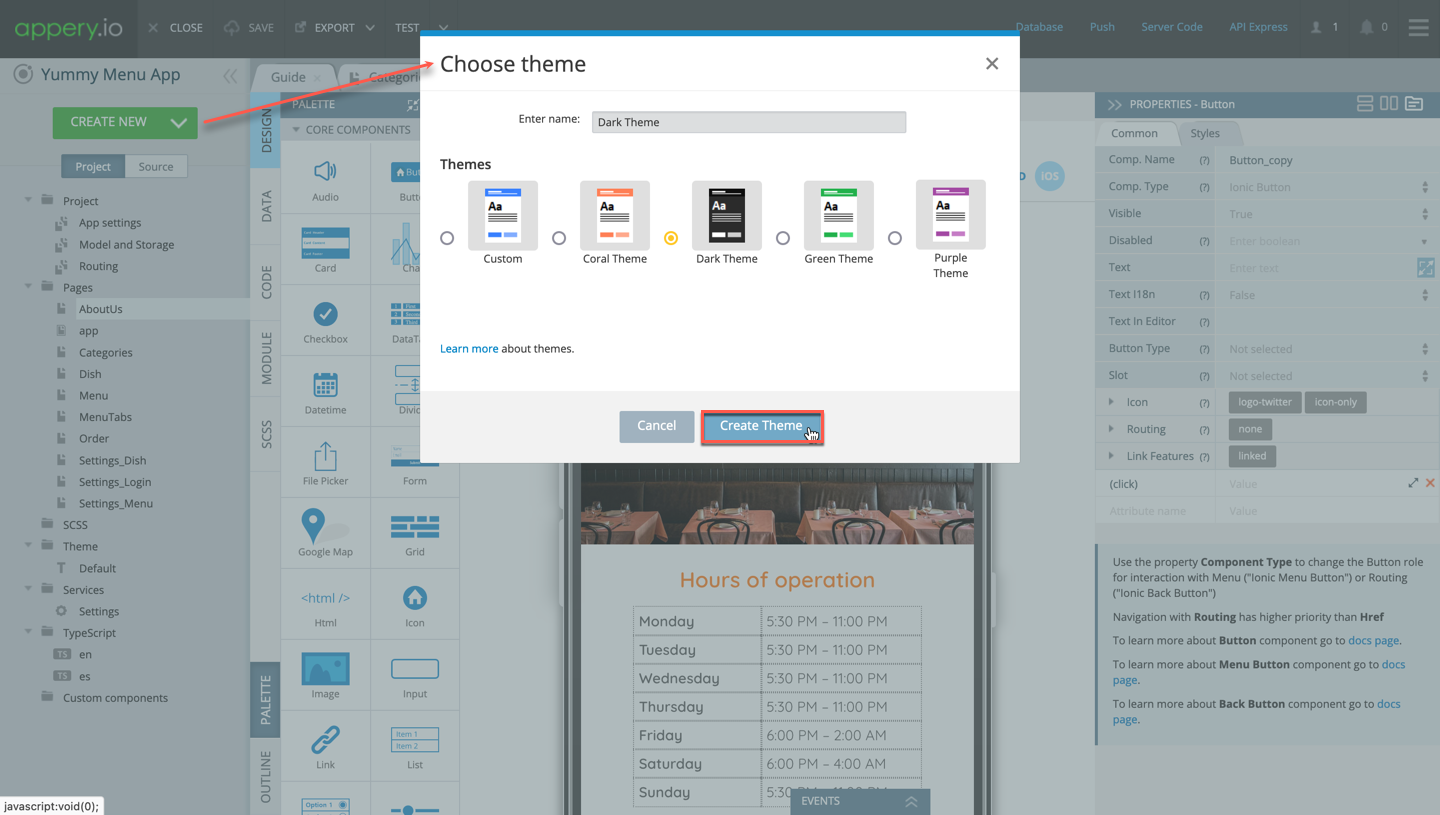
To create a new theme, from the Project view, click CREATE NEW > Theme, select the option that looks closest to what you plan to have for your app, and give it a name (or leave it as it is, for example, Dark Theme):
The new theme is created in the Theme folder of the Project tab and can be previewed and, if needed, modified:
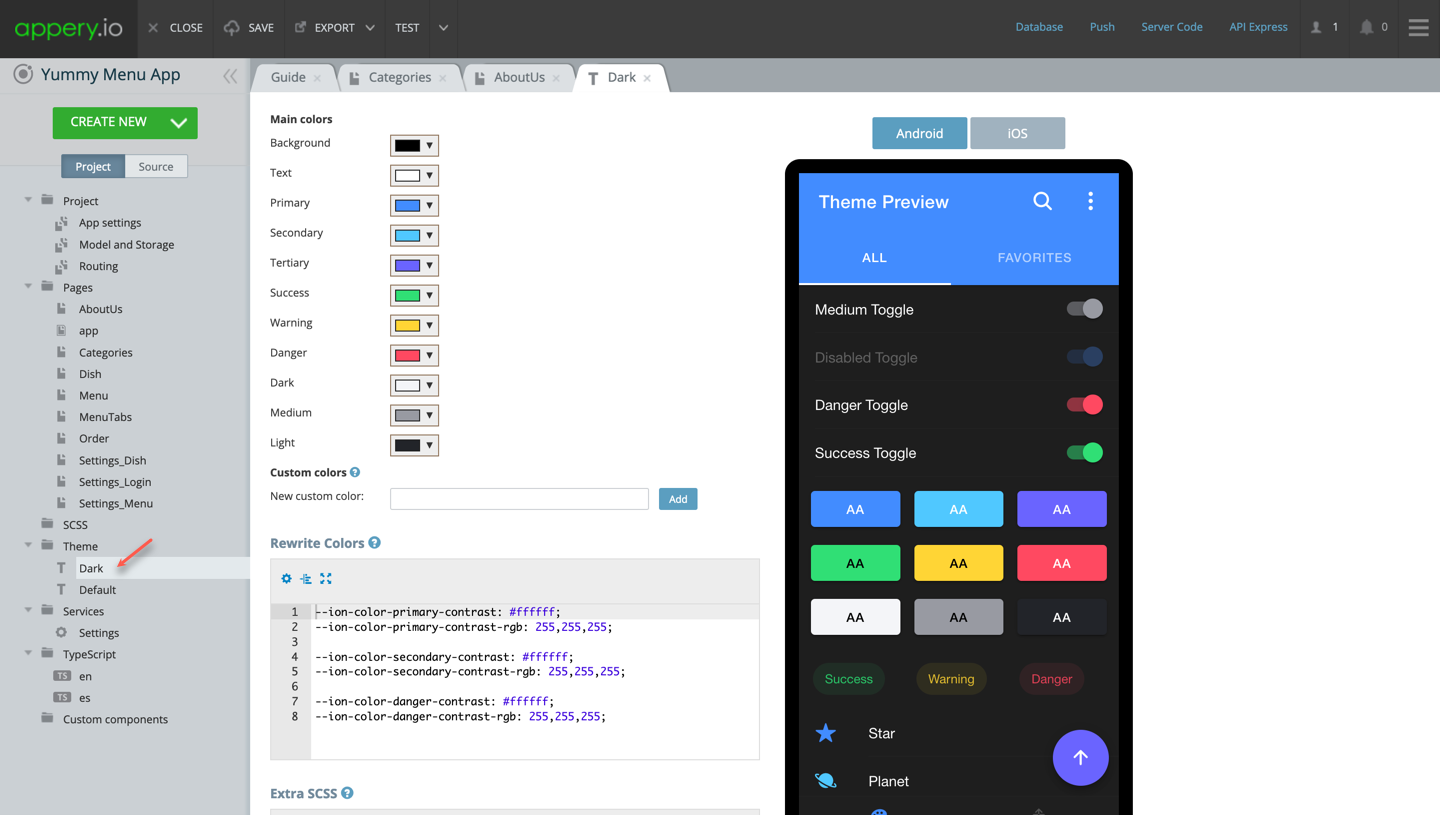
Theme GeneratorNote that you can modify the theme template using the Theme Generator editor: you just need to select the main colors one by one and configure them using the color picker tool until you get the UI you would like your app to show on the screen.
You can try creating as many themes as you need before you decide which looks best.
Every app page has a Theme drop-down list and you can try selecting other theme options from the dropdown to see what this specific page will look like under a different theme:
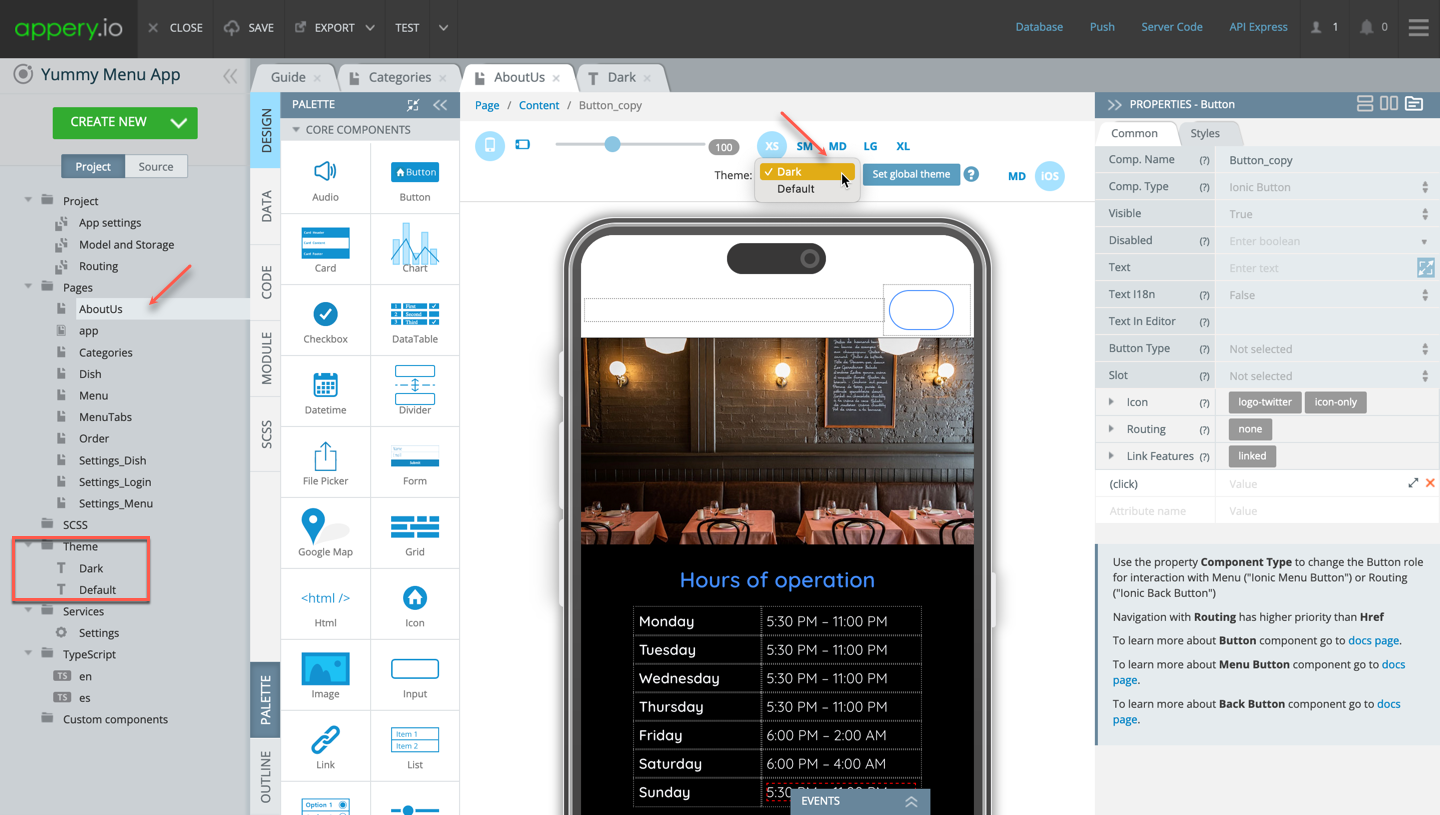
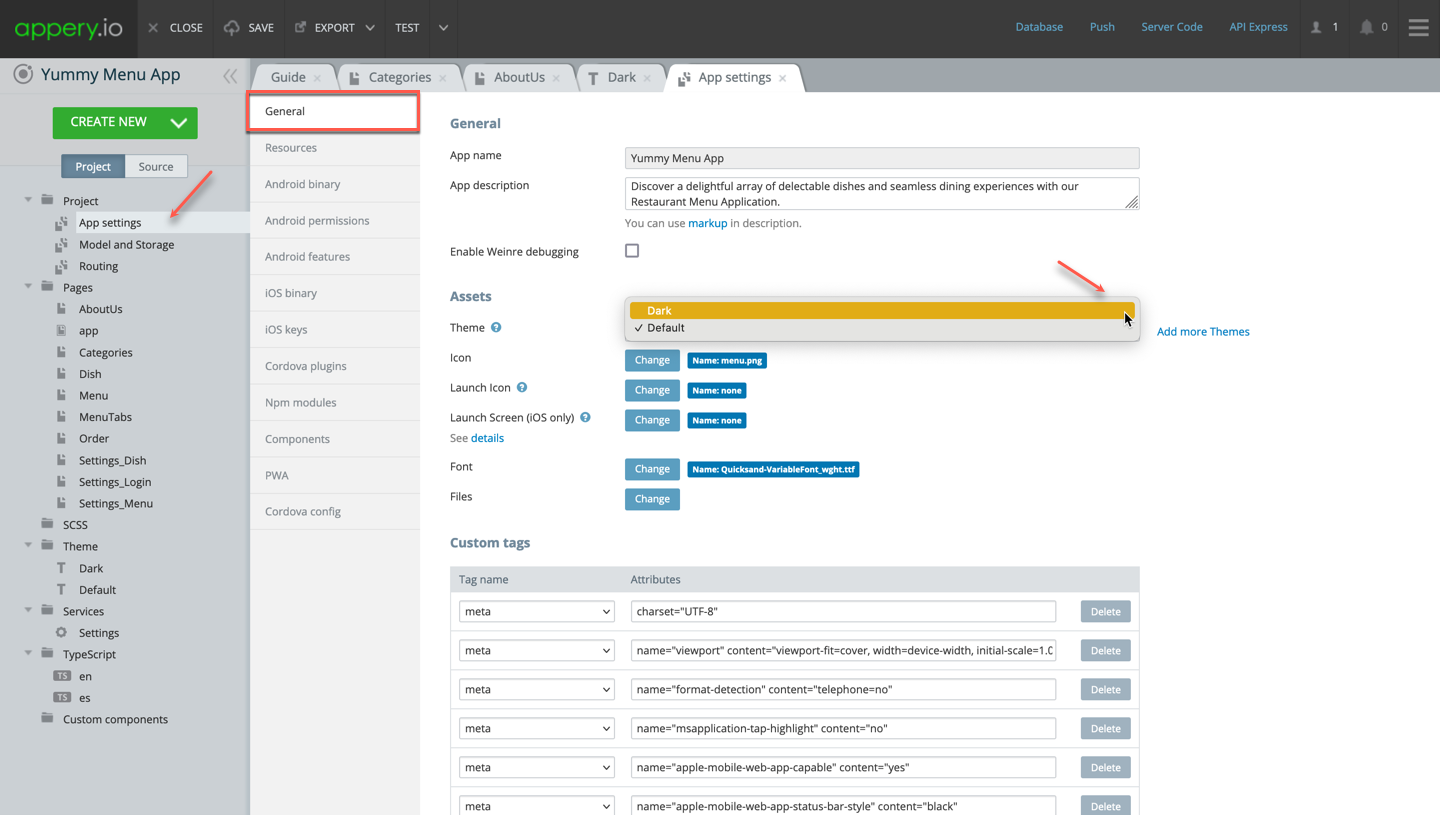
Important!This dropdown works for page preview purposes only and if you decide to apply the selected theme to the entire application, set it as global or go to Project > App Settings> General and select the needed theme from the dropdown, for example, Purple:
Now, save the app and click TEST again to see how the application looks like with a newly selected theme:
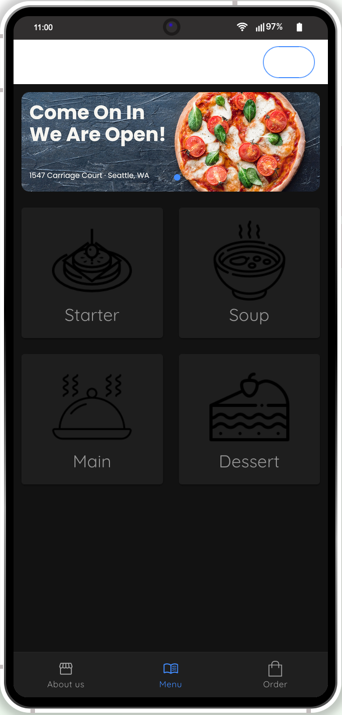
However, I like the default theme more, so let's revert to it.
Customizing App Fonts, Launch Icons, and Screens
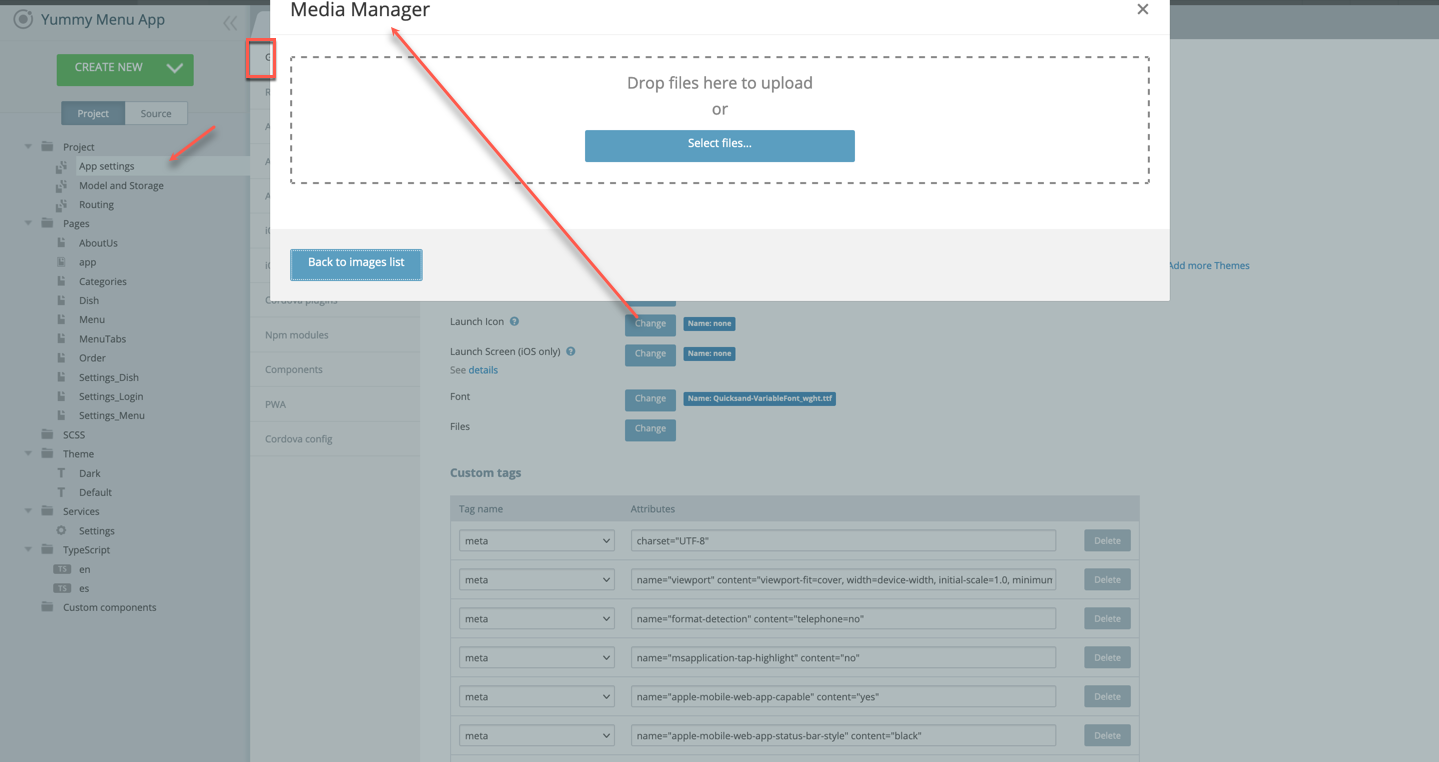
In addition to modifying the appearance of the app pages, you are also free to replace the default icons, launch icons and screens (iOS only) by using our Launch Icons and Screens generator (or upload your custom fonts by using the Files Manager).
- Click the Change button for the resource that needs updating to open the Media Manager window. Click Select files to either select one of the available images or upload a needed file from your drive:
- Select the file you want to set as an app icon (you can also upload your custom one) and then apply it:
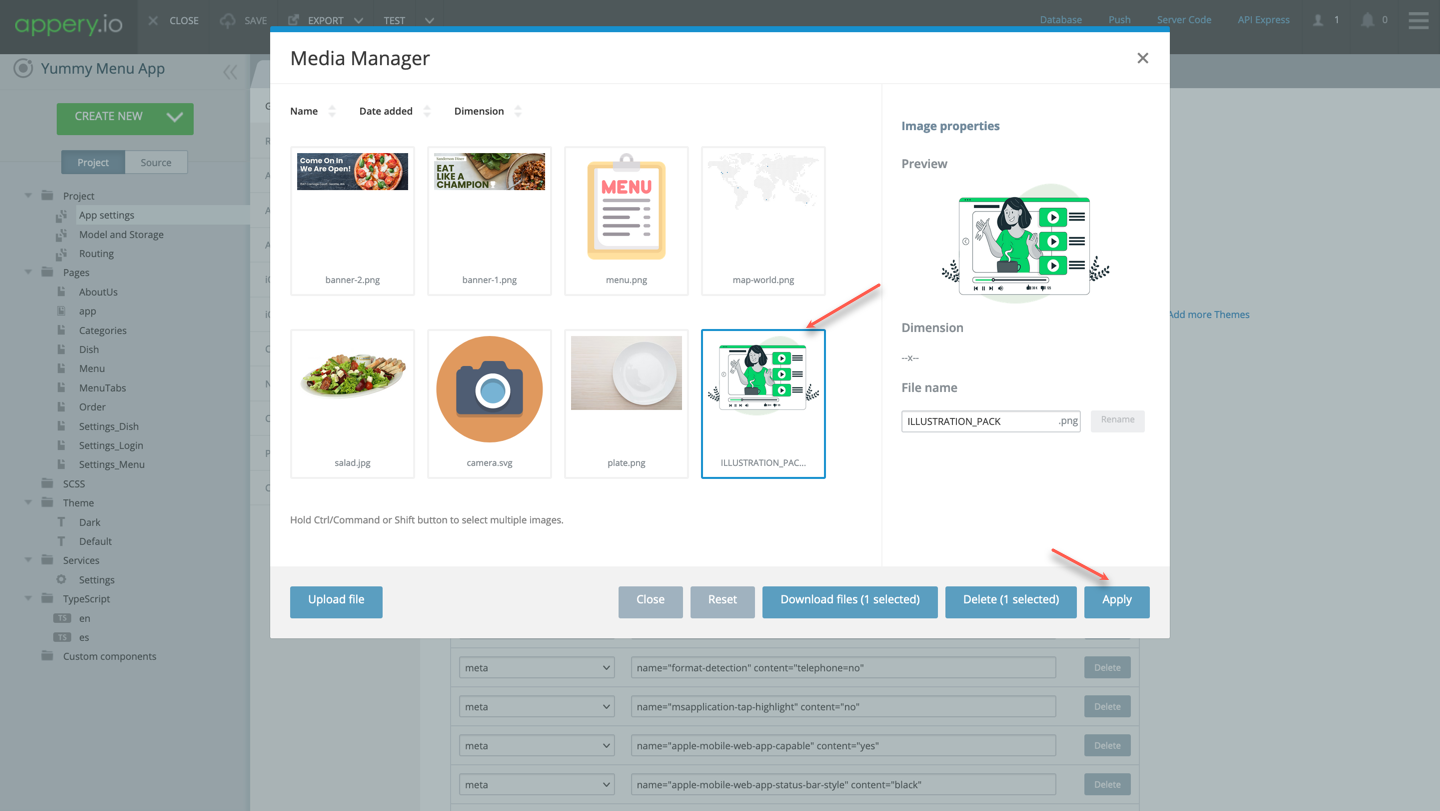
- In a moment, a new icon file is added to the app:
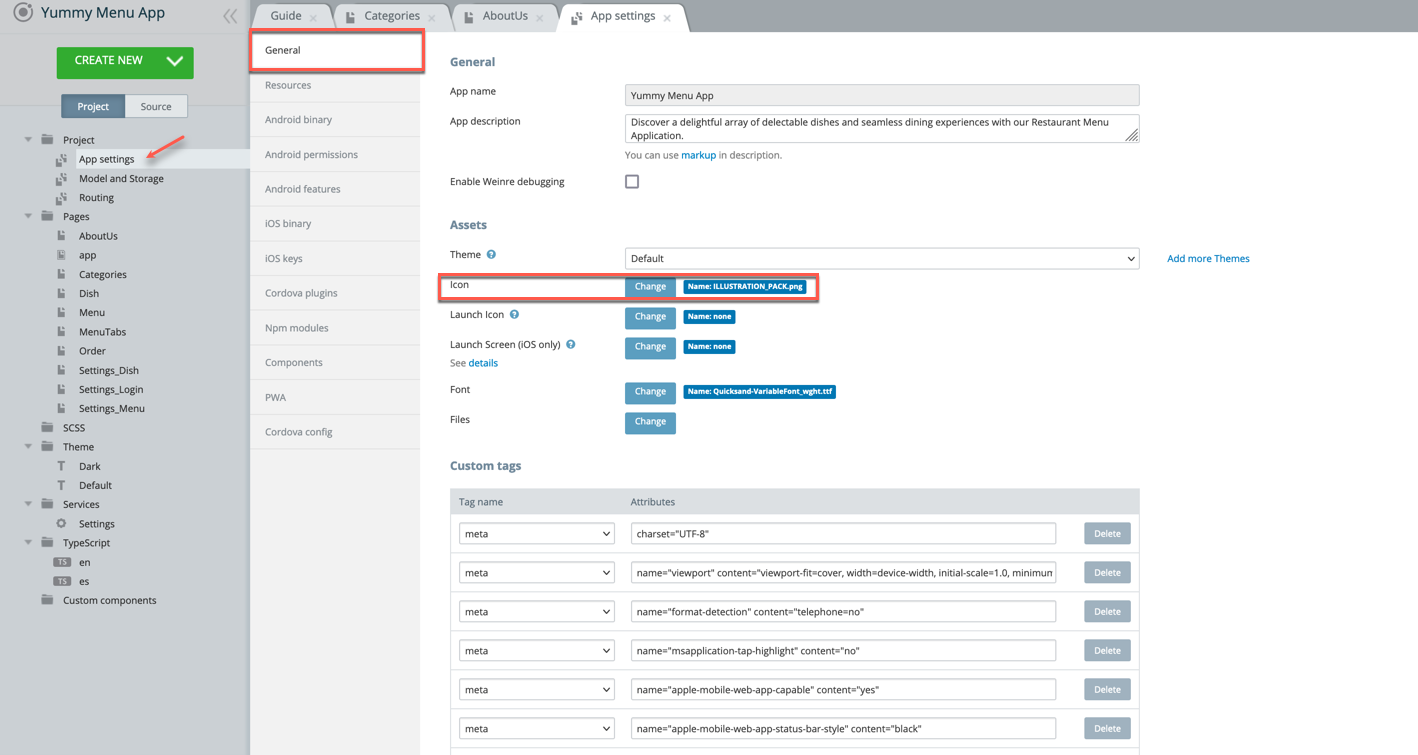
- As a result, an updated icon image is shown when testing:
Also, when published app will be shown with this icon in the browser tab.
Adding Custom Images
Like most mobile apps, our Menu app template has a database backend which it connects to. The app uses Appery.io APIs to connect to this backend to view, edit, and store app data.
By default, the template ships with some predefined banners and is managed by using the Media Manager as described before:
You are free to use the default database or link your own database to the app. If you need professional help with setting up your own database and/or linking the database services to the app, please consider purchasing one of our Support Packs to get the highest priority support. Our Services Team will be happy to assist you in building the application you need.
Customizing App Backend
Now, let's see how you can customize the template backend without writing a line of code.
To do it, first get to know the most interesting details of the app that make it so unique.
- In the App Builder, click Project >Model and Storage.
- Open the Storage tab where all the important variables are added:
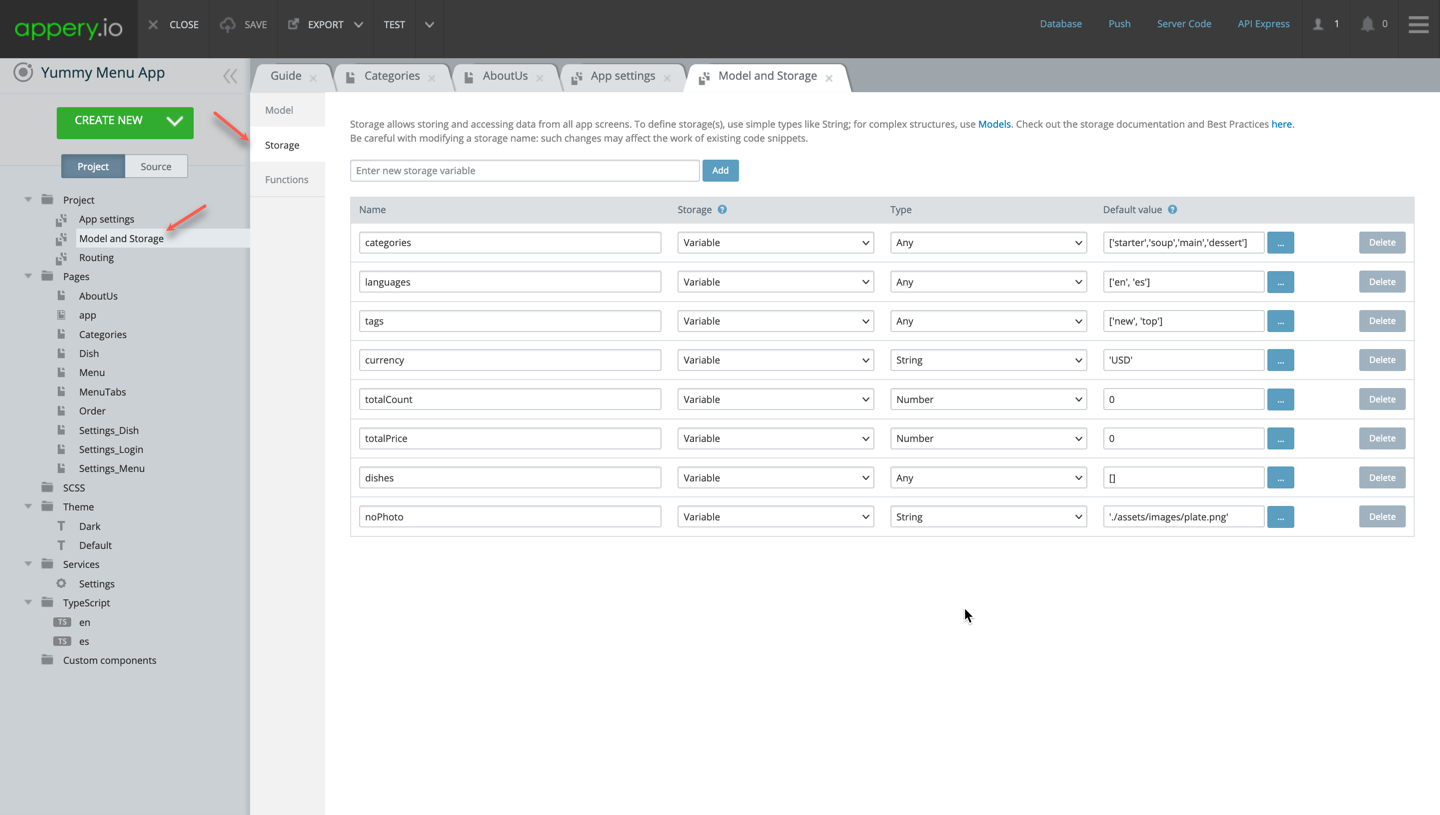
Below, we will demonstrate how you can:
To do this, we will customize the categories and languages variables. Also, we will need to make some adjustments to the app pages.
Let’s see how customization works.
Adding New Category
Most likely, you will need to add some drinks to your menu. For this, you will need to create a new category.
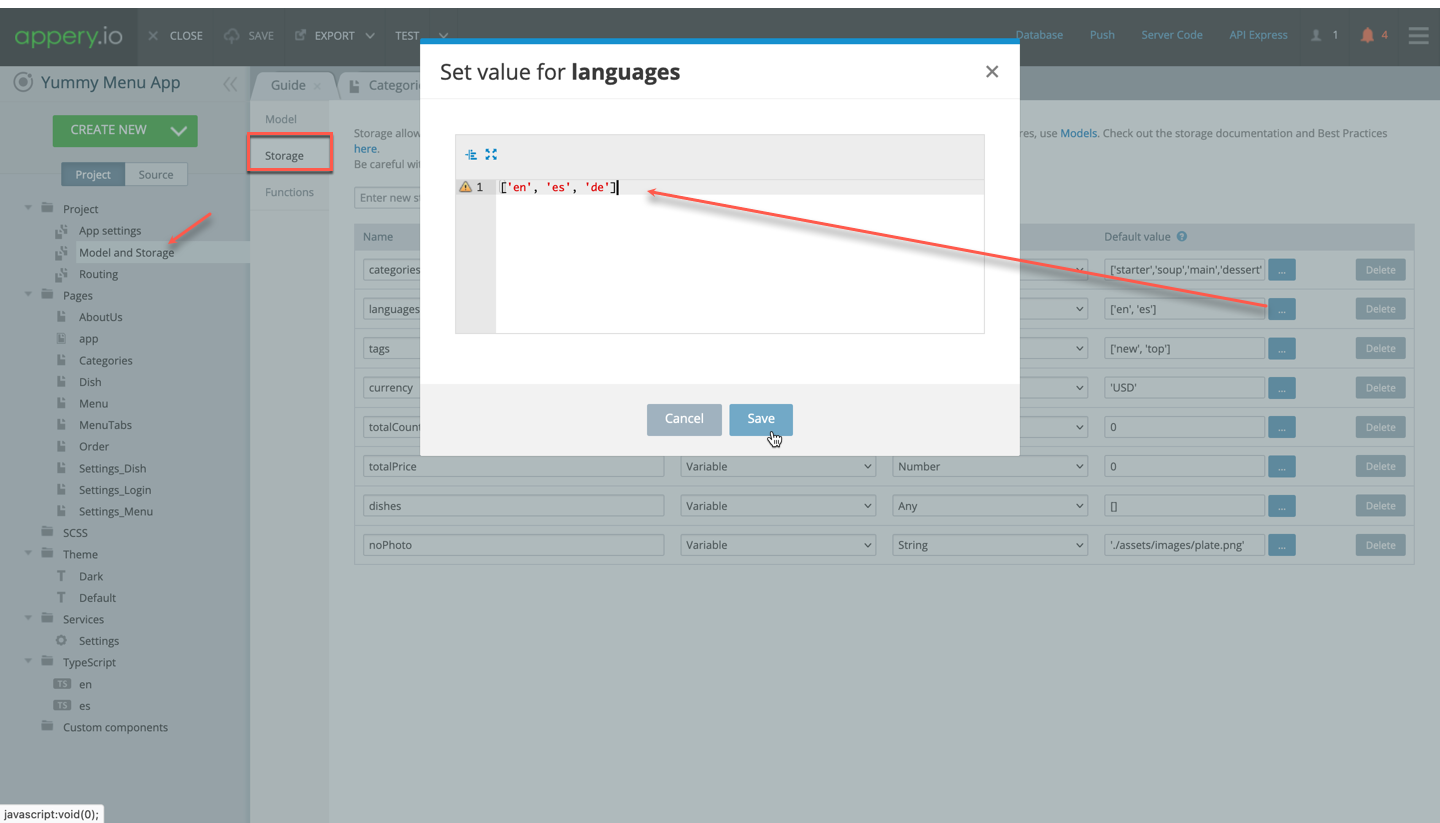
- Go to the Storage tab and select the categories variable that has four default values.
- Let's add one more for our new category. Click the three dots button to open the editor and add one more value, drink:
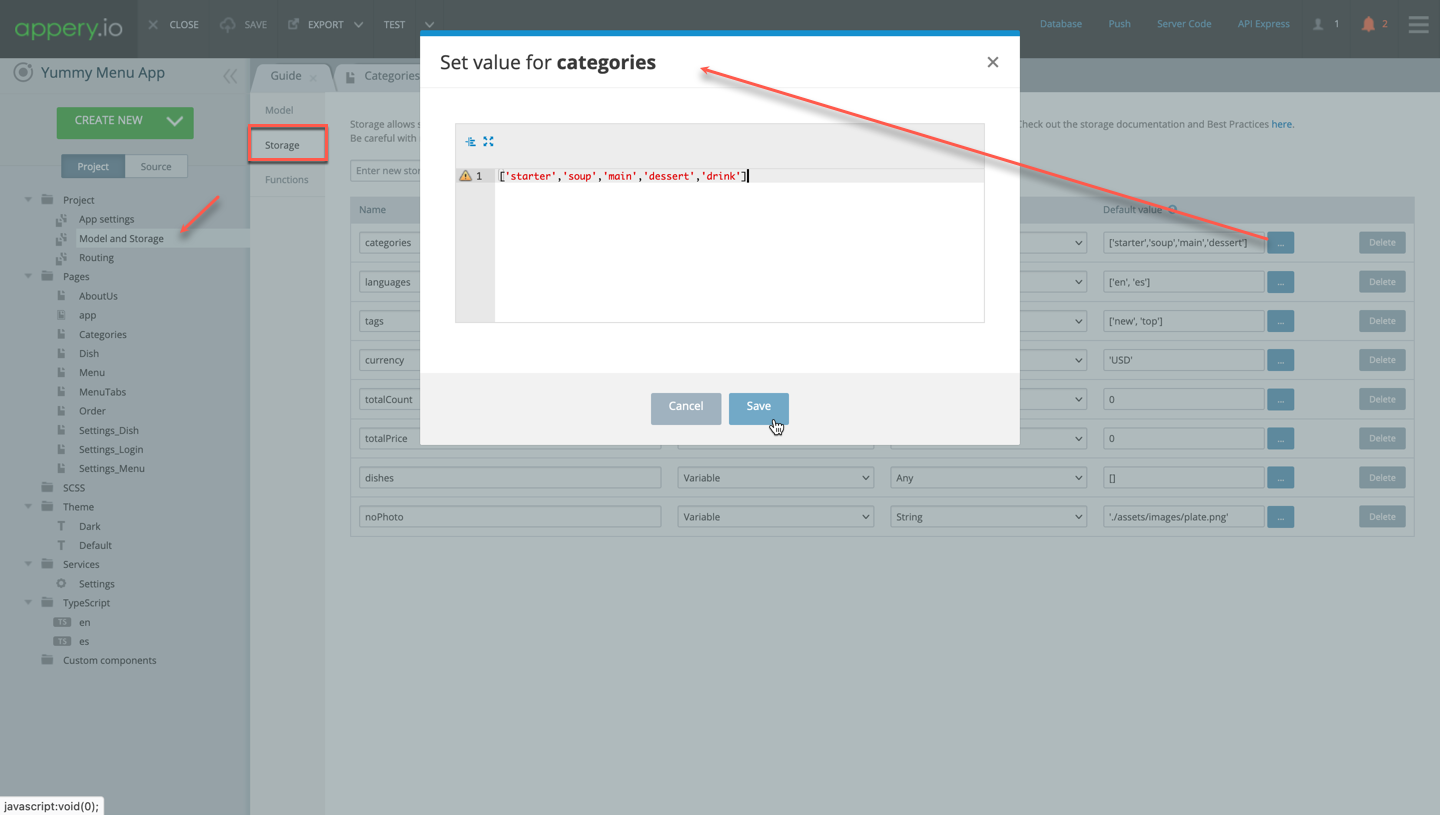
- Save.
Now, we need to add a new category to the page as well. Let’s arrange for this.
Adjusting Page UI
- Click to open the Categories page, select the Dessert GridCell, then click the Settings icon. Finally, click to clone this grid cell:

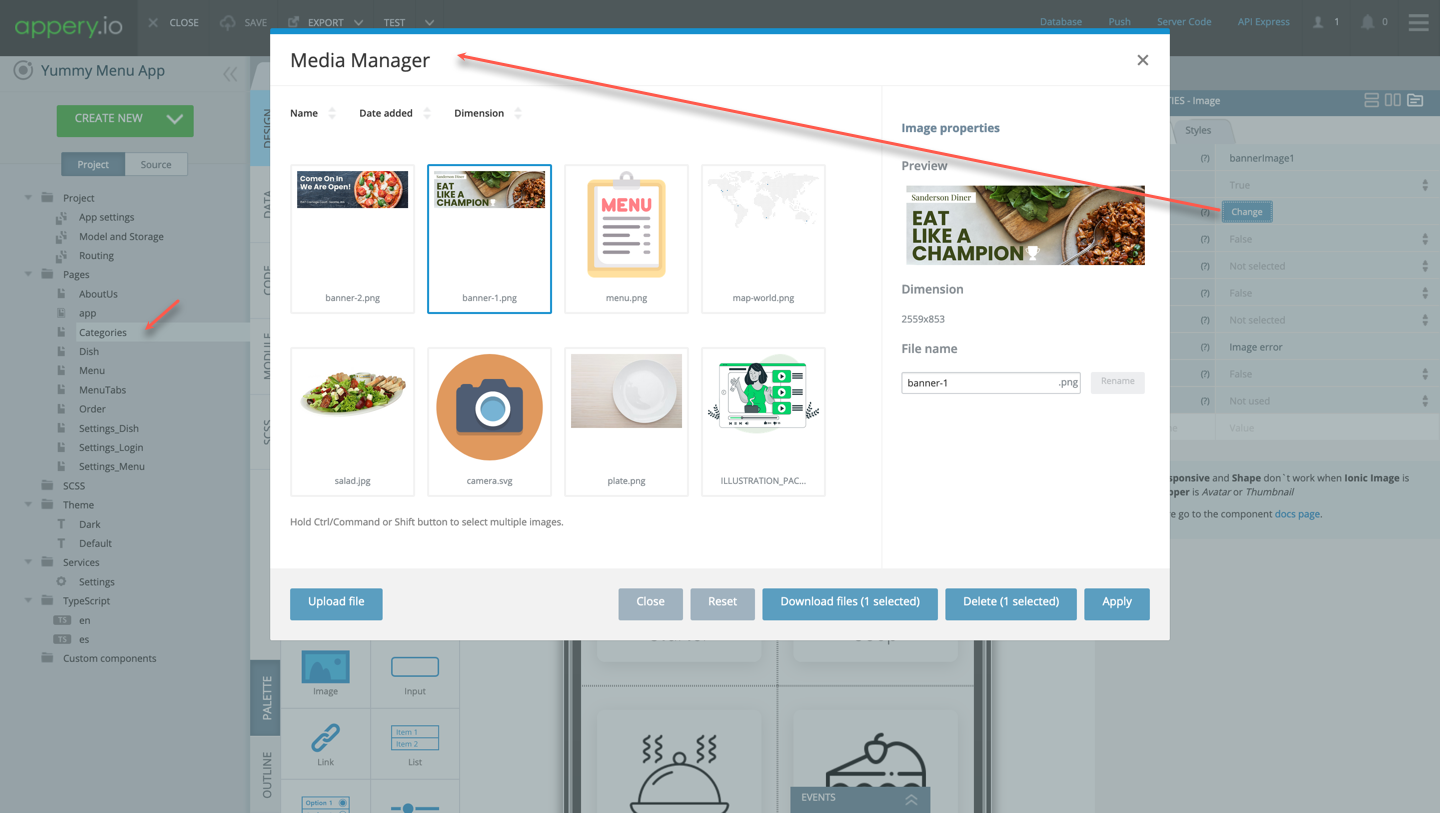
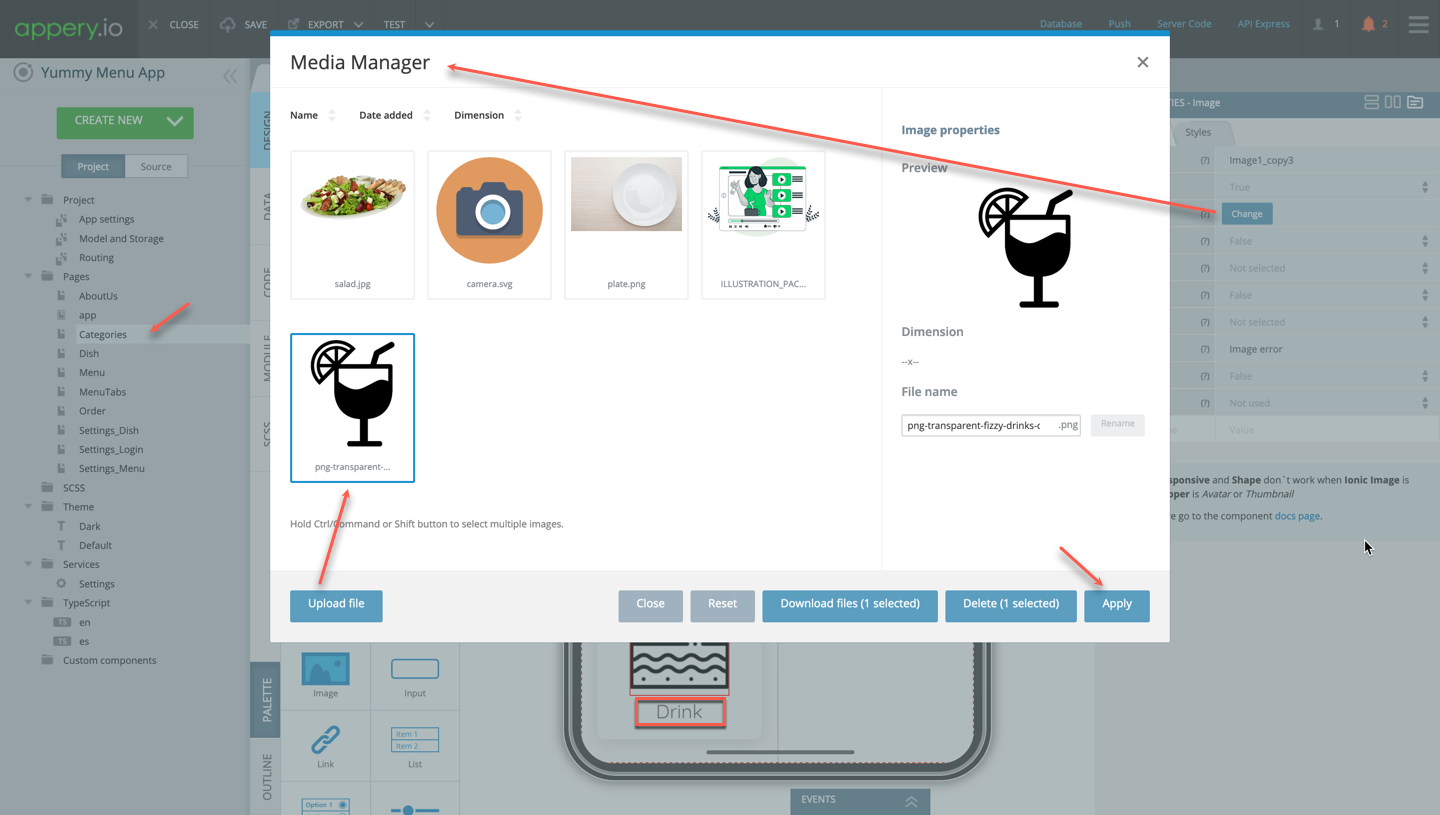
- Now, rename the category to Drink, then select the image and click Change.
- The Media Manager window opens where you can upload the new image file.
- To finish, click Apply and enjoy the updated card:
- Next, select the Card component and update the its [queryParams] property to {category: 'drink'}:
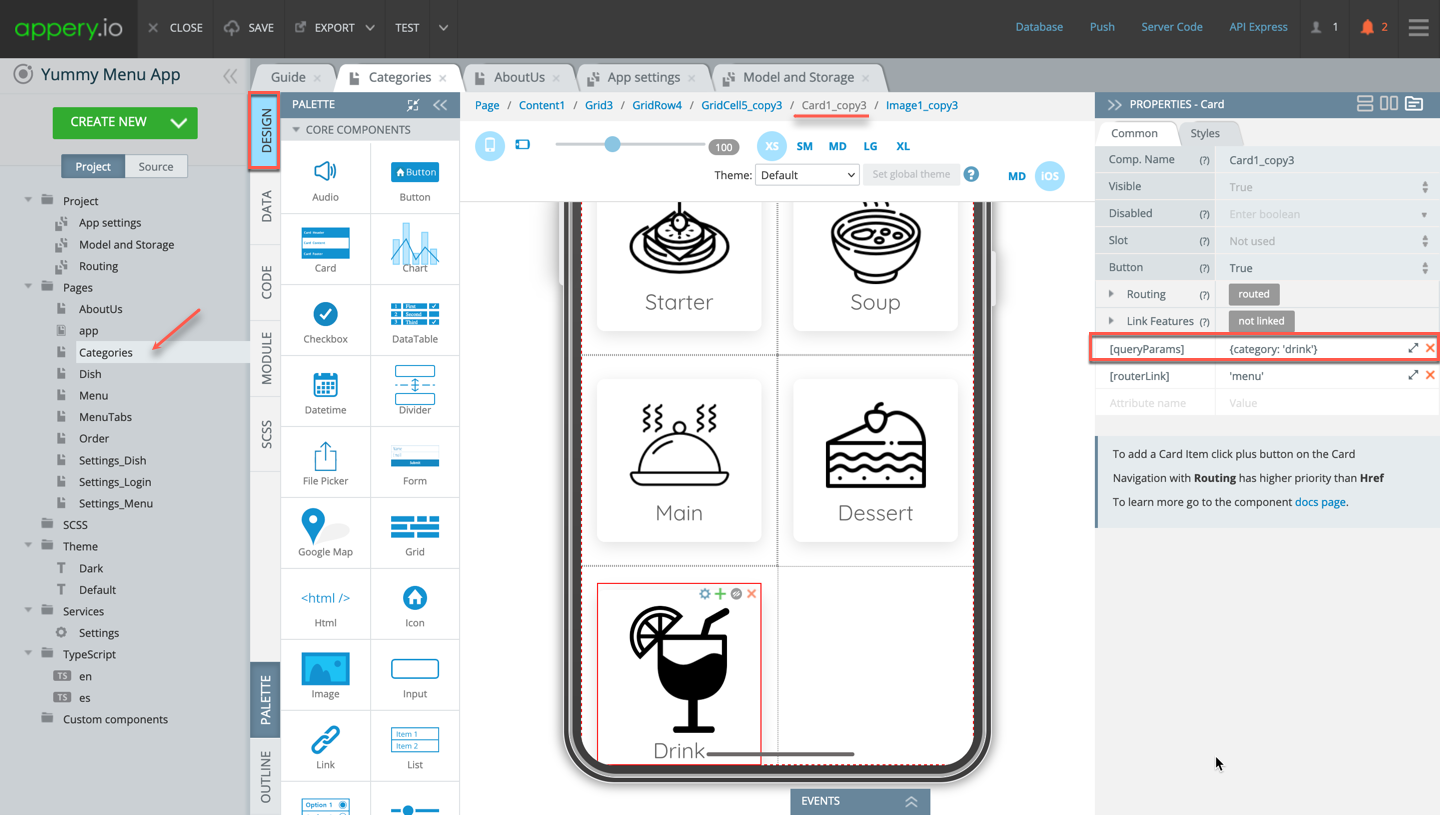
The app now has a new category:
Adding New Language
By default, two languages are available in the template but any other can be added to make it custom.
Let`s see how to do it.
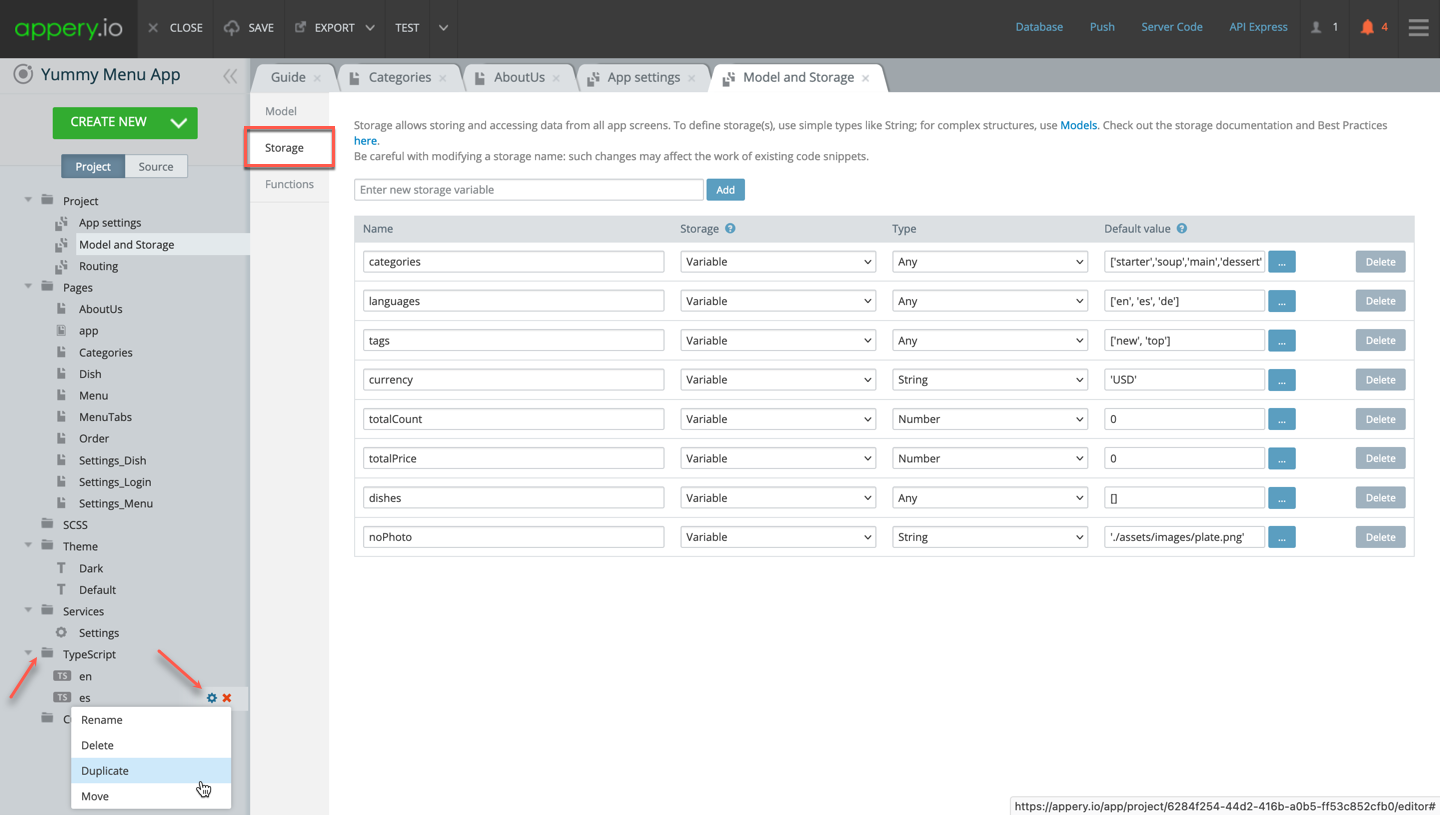
- Go back to the Storage tab and add a new value for the languages variable: de:
- Now, go to the TypeScript folder, and hover over the script for the Spanish language to see the Settings button.
- Click it and select Duplicate:
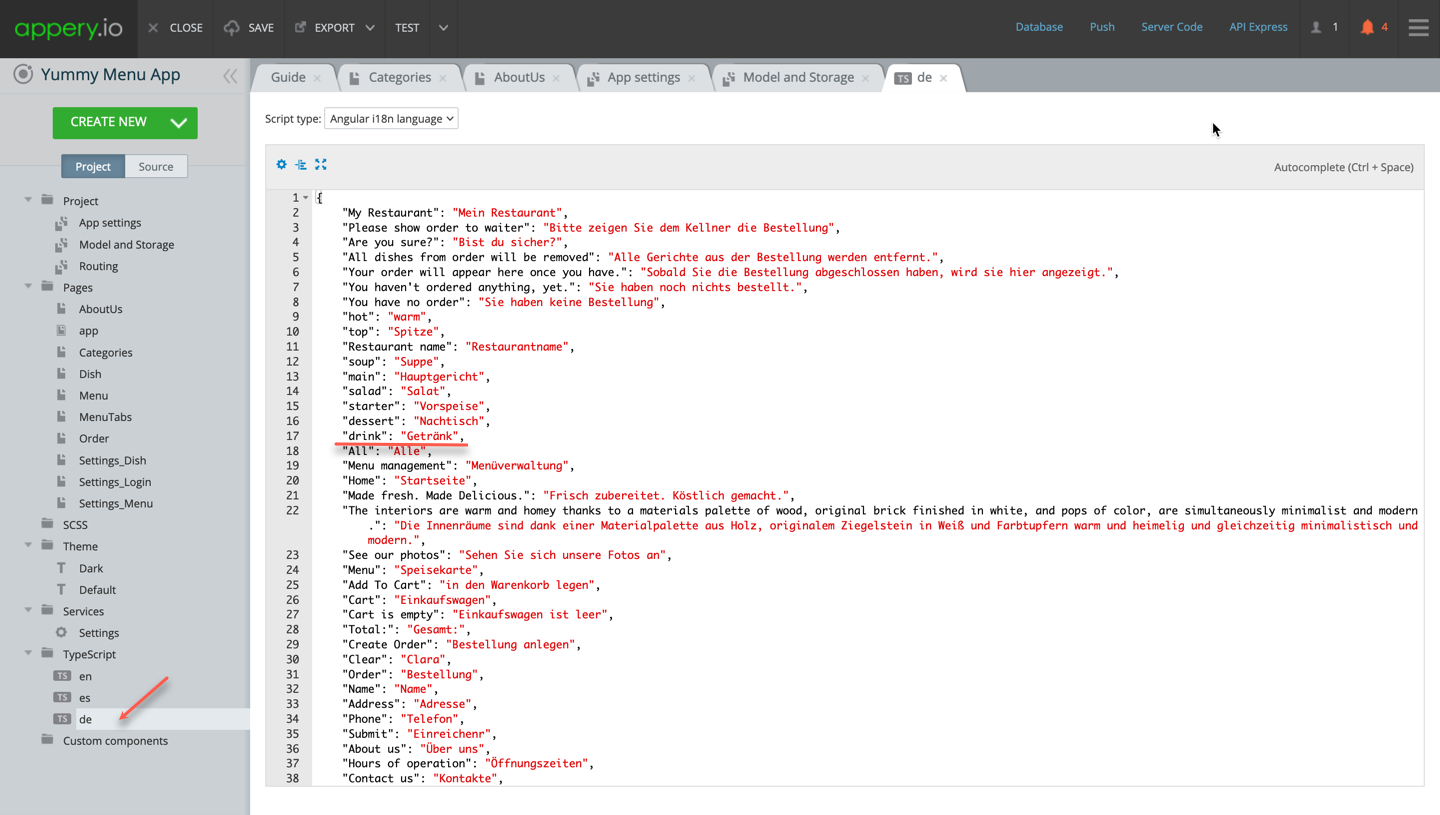
- Replace the copied script with a German variant, for example:
{
    "My Restaurant": "Mein Restaurant",
    "Please show order to waiter": "Bitte zeigen Sie dem Kellner die Bestellung",
    "Are you sure?": "Bist du sicher?",
    "All dishes from order will be removed": "Alle Gerichte aus der Bestellung werden entfernt.",
    "Your order will appear here once you have.": "Sobald Sie die Bestellung abgeschlossen haben, wird sie hier angezeigt.",
    "You haven't ordered anything, yet.": "Sie haben noch nichts bestellt.",
    "You have no order": "Sie haben keine Bestellung",
    "hot": "warm",
    "top": "Spitze",
    "Restaurant name": "Restaurantname",
    "soup": "Suppe",
    "main": "Hauptgericht",
    "salad": "Salat",
    "starter": "Vorspeise",
    "dessert": "Nachtisch",
    "drink": "Getränk",
    "All": "Alle",
    "Menu management": "Menüverwaltung",
    "Home": "Startseite",
    "Made fresh. Made Delicious.": "Frisch zubereitet. Köstlich gemacht.",
    "The interiors are warm and homey thanks to a materials palette of wood, original brick finished in white, and pops of color, are simultaneously minimalist and modern.": "Die Innenräume sind dank einer Materialpalette aus Holz, originalem Ziegelstein in Weiß und Farbtupfern warm und heimelig und gleichzeitig minimalistisch und modern.",
    "See our photos": "Sehen Sie sich unsere Fotos an",
    "Menu": "Speisekarte",
    "Add To Cart": "in den Warenkorb legen",
    "Cart": "Einkaufswagen",
    "Cart is empty": "Einkaufswagen ist leer",
    "Total:": "Gesamt:",
    "Create Order": "Bestellung anlegen",
    "Clear": "Clara",
    "Order": "Bestellung",
    "Name": "Name",
    "Address": "Adresse",
    "Phone": "Telefon",
    "Submit": "Einreichenr",
    "About us": "Über uns",
    "Hours of operation": "Öffnungszeiten",
    "Contact us": "Kontakte",
    "Monday": "Montag",
    "Tuesday": "Dienstag",
    "Wednesday": "Miittwoch",
    "Thursday": "Donnerstag",
    "Friday": "Freitag",
    "Saturday": "Sonnabend",
    "Sunday": "Sonntag",
    "Name is required field": "Das Feld „Name“ ist ein Pflichtfeld",
    "Address is required field": "Das Feld „Adresse“ ist ein Pflichtfeld",
    "Phone is required field": "Das Feld „Telefon“ ist ein Pflichtfeld",
    "The product has been added to the cart": "Das Produkt wurde dem Warenkorb hinzugefügt",
    "Category": "Kategorie"
}- Don't forget to name the script correspondingly!
The script should look like this:
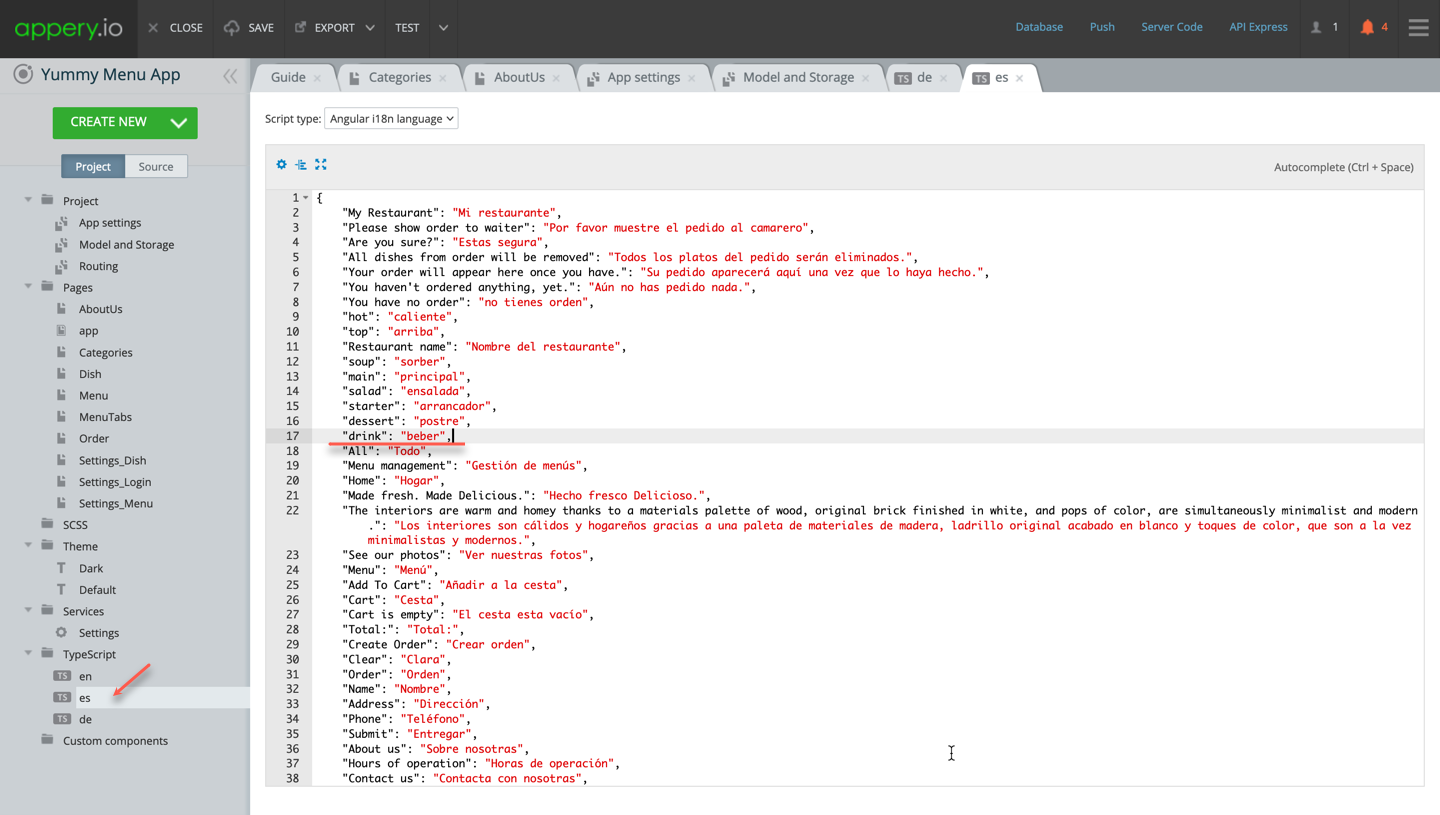
NoteThis script already contains the German translation for thedrink category we added before. But we will need to add the corresponding translation, `
"drink": "beber", to the Spanish version of the script as well:
- Save the app and click TEST to see if the changes we just made to the app can be seen in the preview.
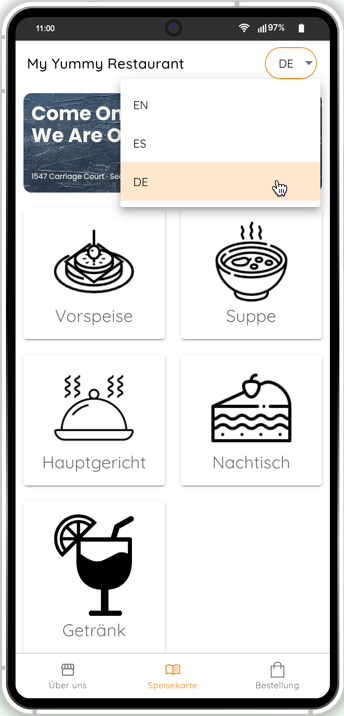
As you can see, the language selector allows setting the German language. - Let’s do it to see if the language change has been applied:
Everything looks perfect.
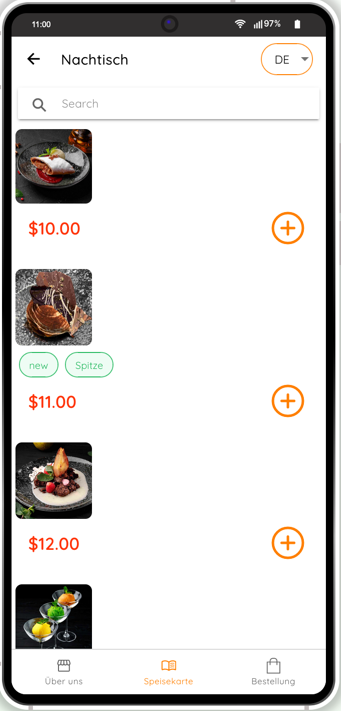
However, if you select the meal cards when shown in German - they look incomplete without translated names and descriptions:
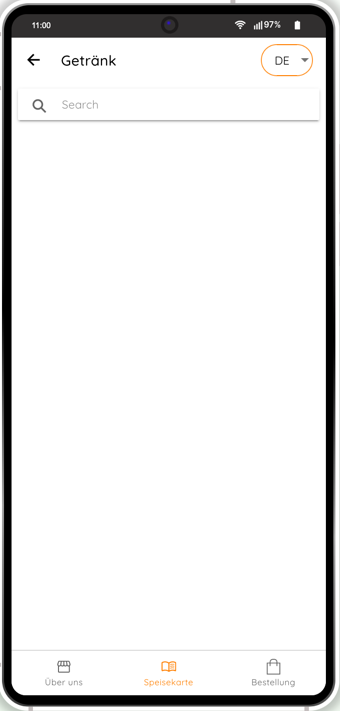
Also, the Drink category shows no added drinks:
To fix this, we will need to know how to administer the template.
Administering Menu App
The template has now five meal categories one of which is empty. So, probably, the very first question is "What to do if I want to add new meals to the menu?"
And the answer is "To access the app as the admin."
And, as our template offers two great ways to easily customize the menu records like adding a new meal, updating the meal data with a new language, or correcting their prices, you are free to select which one is preferable for you at the moment:
- log into the App Builder and access the database or
- do this on the fly right from his mobile.
Adding Custom Meals from Menu_DB
The most exciting and one of the most useful features of this sample app is the option of adding custom meal cards (with their images and all needed details) that can be applied to your menu list and opened in a separate meal card.
So, let's see how to add a new meal item to your app. For this, we will need to check the linked database and upload all the needed data from there.
- Open the Databases tab and open the Menu_MenuDB where all the predefined meal records in all available languages with all their details are kept.
- To see them, click Collections > Dishes:
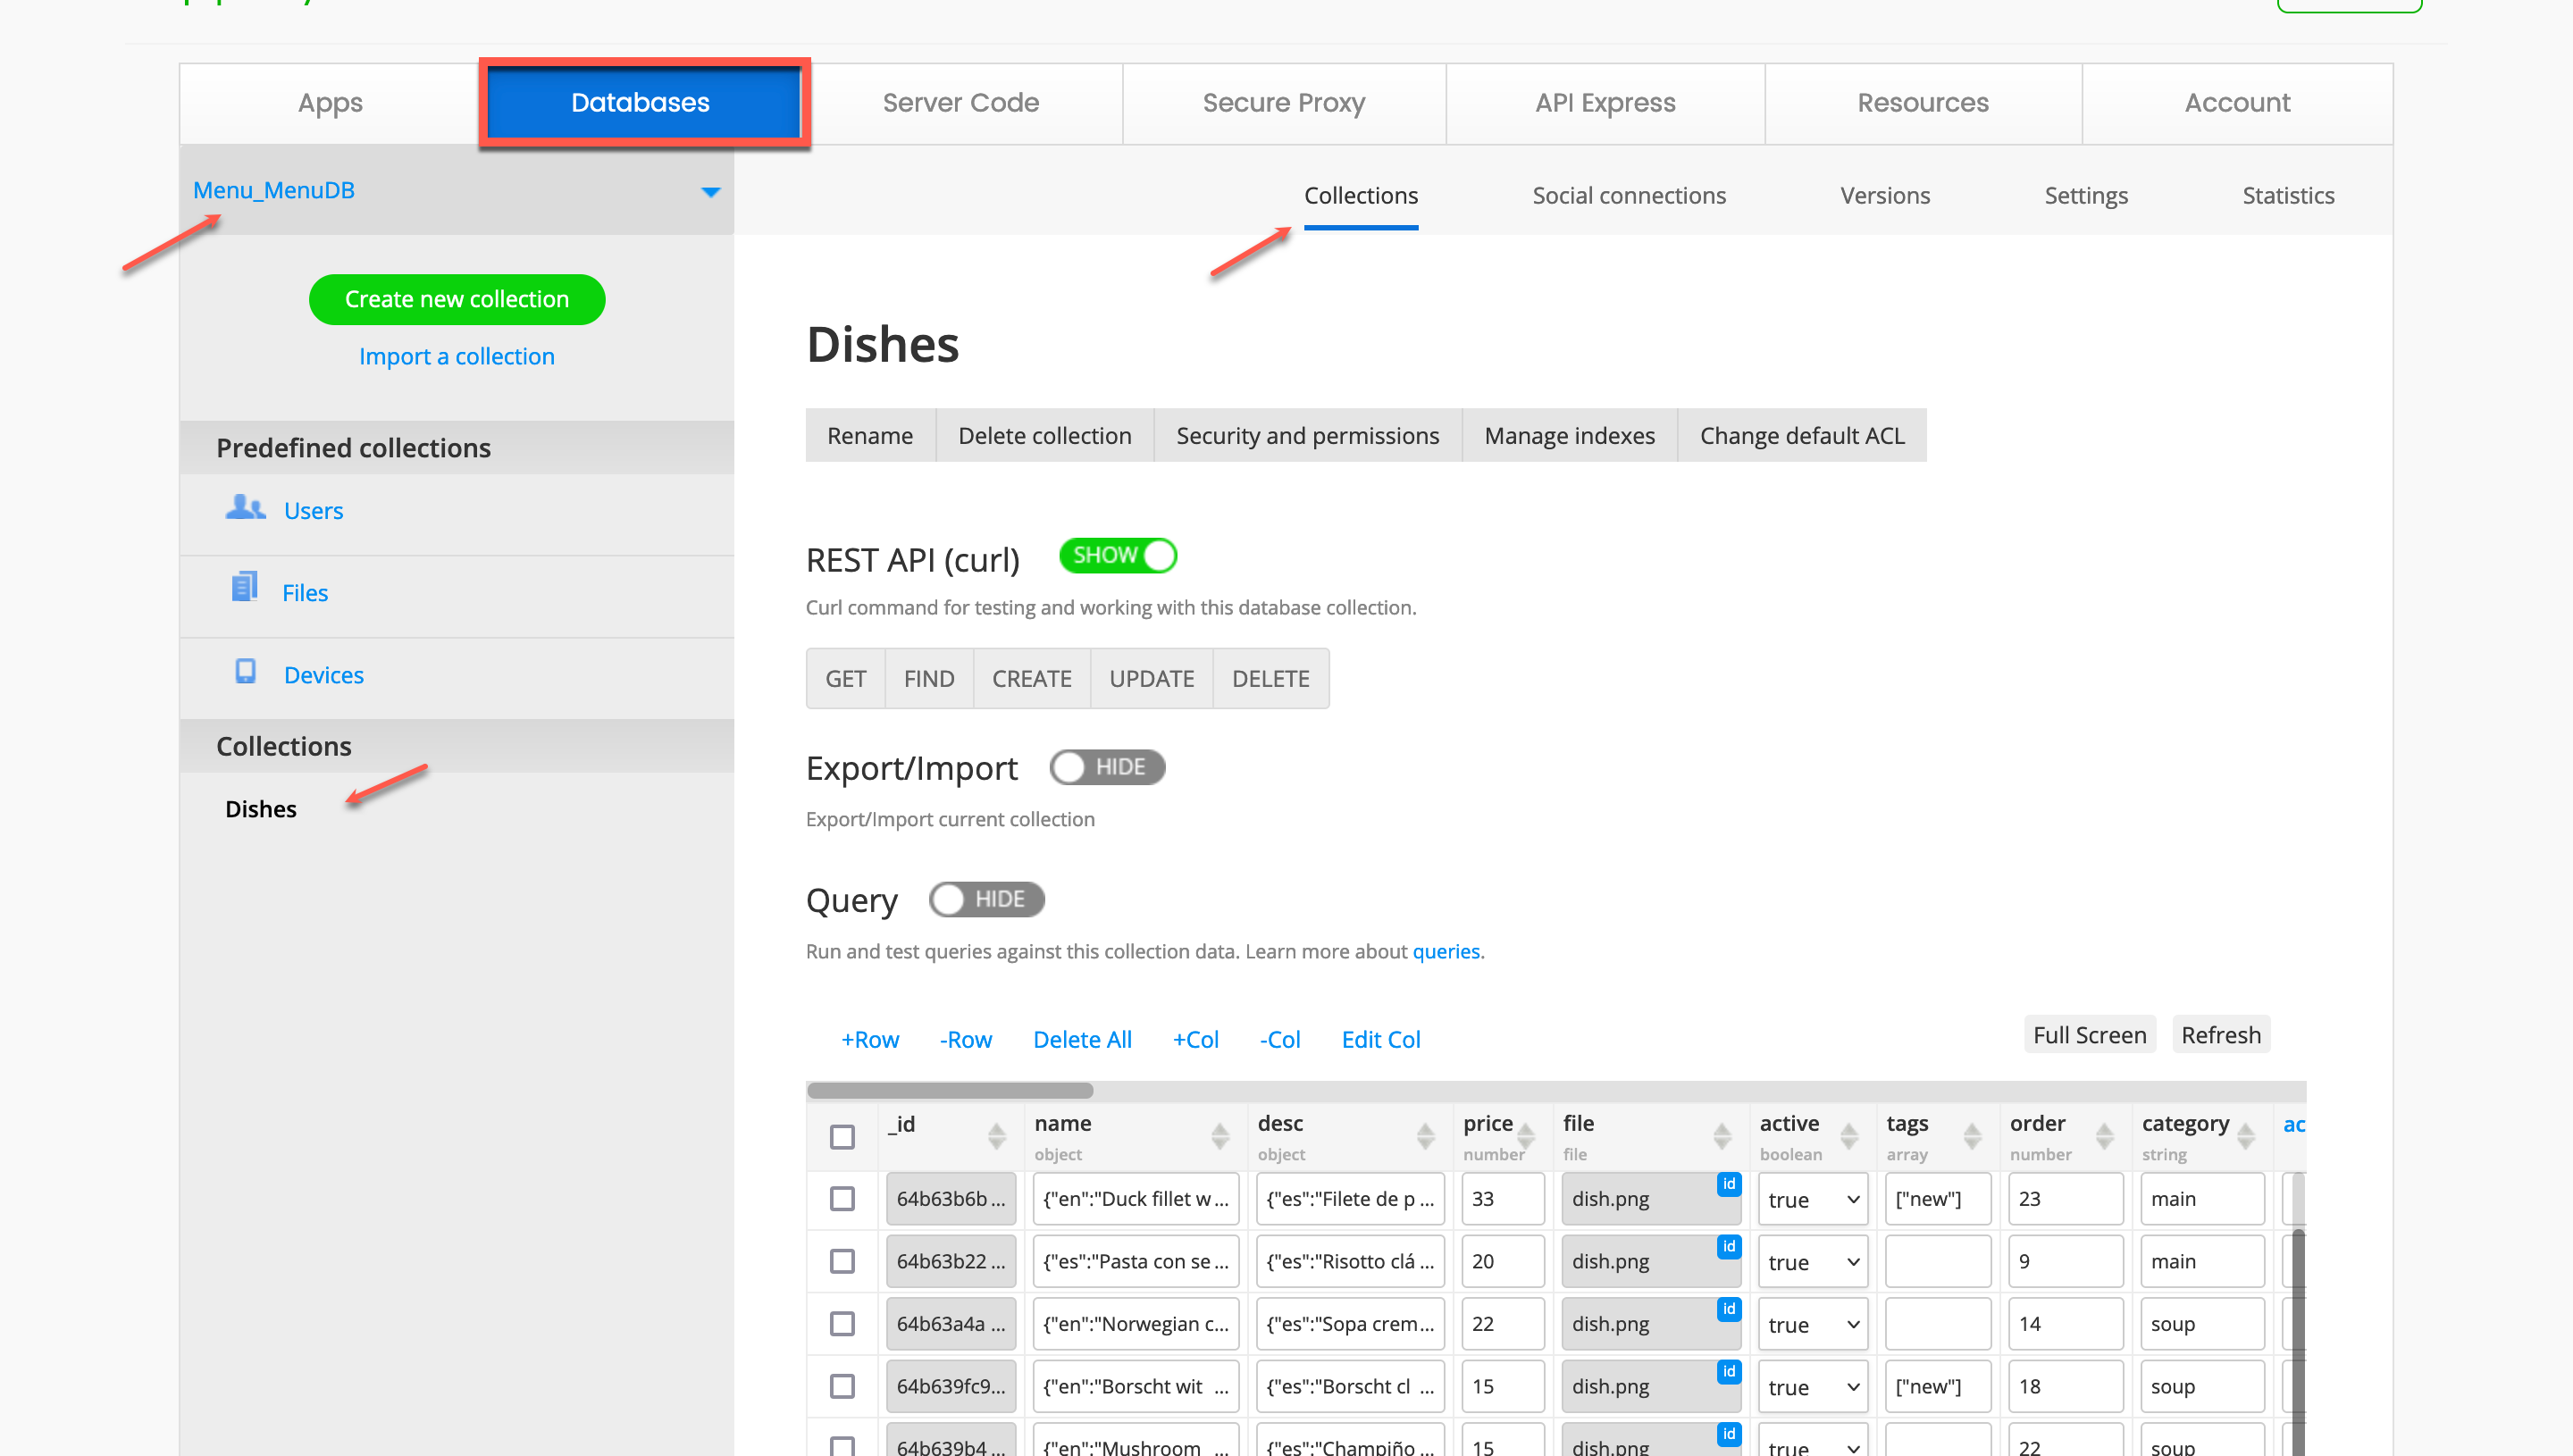
All the entries here are also editable and can be easily adjusted to meet your business needs.
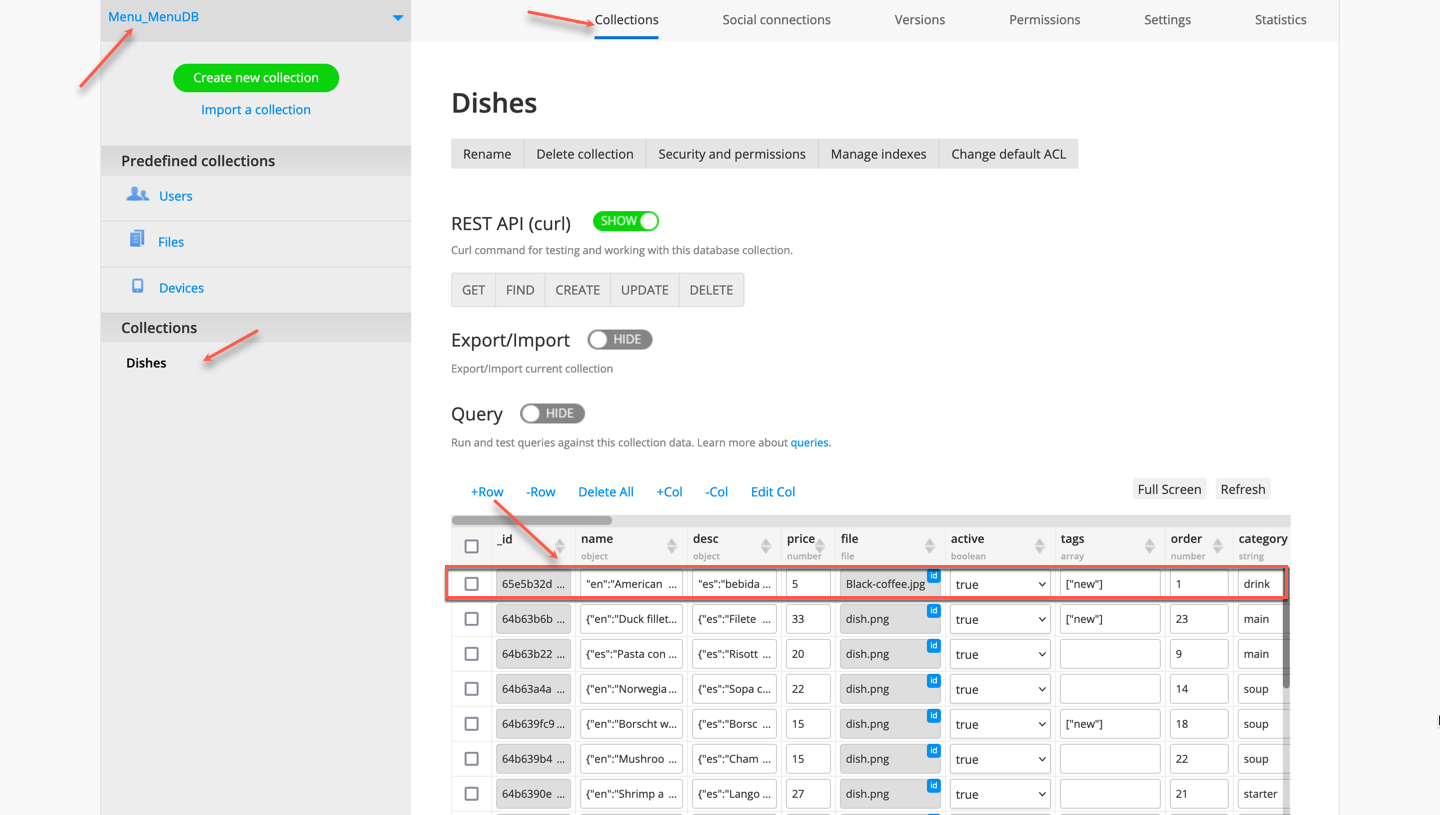
So, let’s add the first record to the Drink category.
- Click +Row and make sure you add some description, upload an image file, and set the category to drink.
The record should be defined like follows:
- name =
{"en":"Americano (long black)","es":"Americano (largo negro)","de":"Americano (langes Schwarz)"} - desc =
{"es":"bebida larga de café negro a base de espresso","en":"Espresso-based long black coffee drink","de":"Langes schwarzes Kaffeegetränk auf Espressobasis"} - price = 5
- file - upload the prepared image by using the Media Manager
- active = true
- tags =
["new"] - category = drink
Check that the custom image is added to the database Files collection:
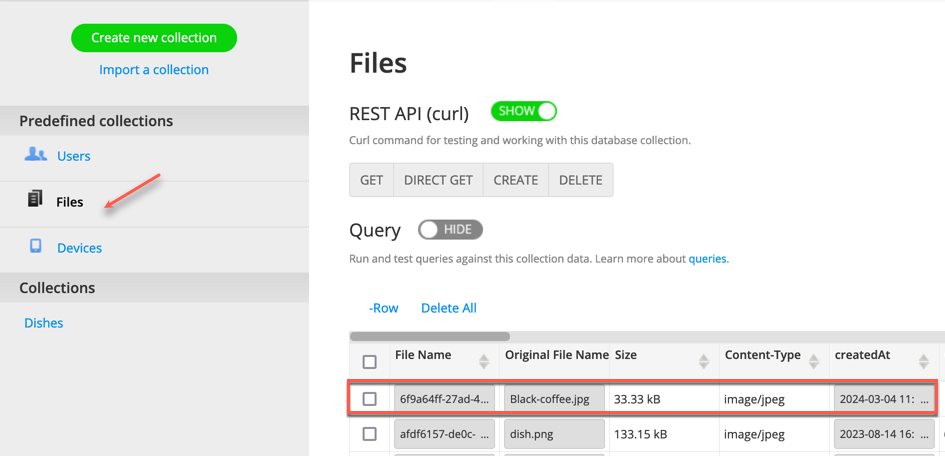
Fulll ScreenFor your convenience, you can switch to the Full Screen mode for editing long strings of data.
- Ready! Testing on the preview will show that the first meal card was successfully added to the drinks list and can be opened in a separate meal card and added to the order:
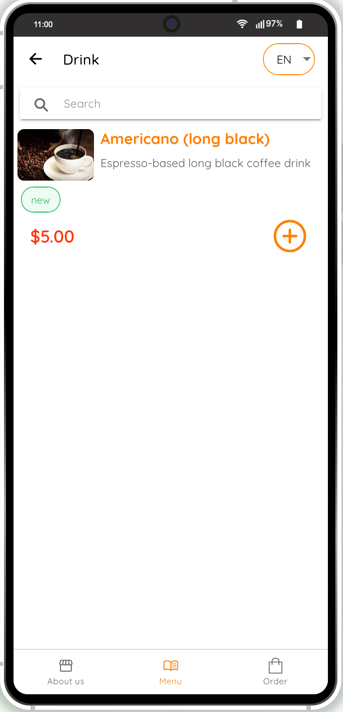
- If you like, you can also check if internationalization works as expected:
Important!To make all the meal cards show German translations, editing all the card entries separately is required!
Administering App from Device
Before any such administering action can be taken you need to access the database user records and set your password so let's do it now. While it may sound difficult, you will be surprised to find out how easy it can be done using the connected Appery.io DB.
Setting App Admin Password
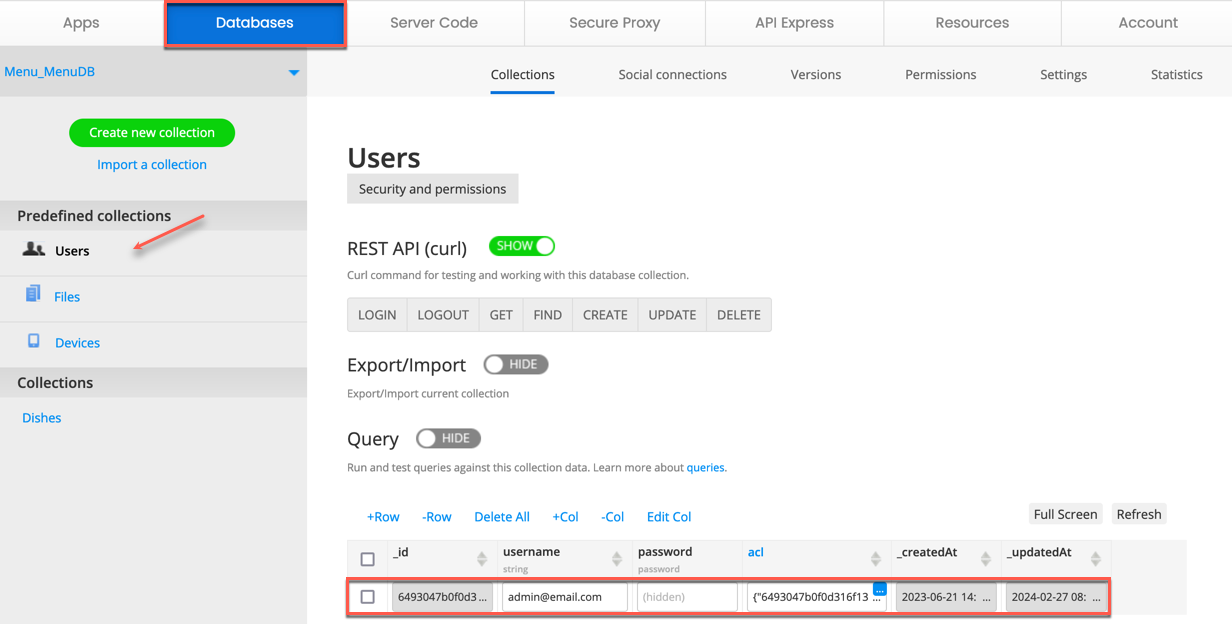
- Click the Database link located to the right of the top app Toolbar to open the Databases dashboard in a new window so that you can now work with your database without even closing the project:

- On the Databases page, go to the Menu_MenuDB database.
- Then, in the database, click on the Collections tab to access the default user records organized in the Users predefined collection and enter the password (and email address) you like:
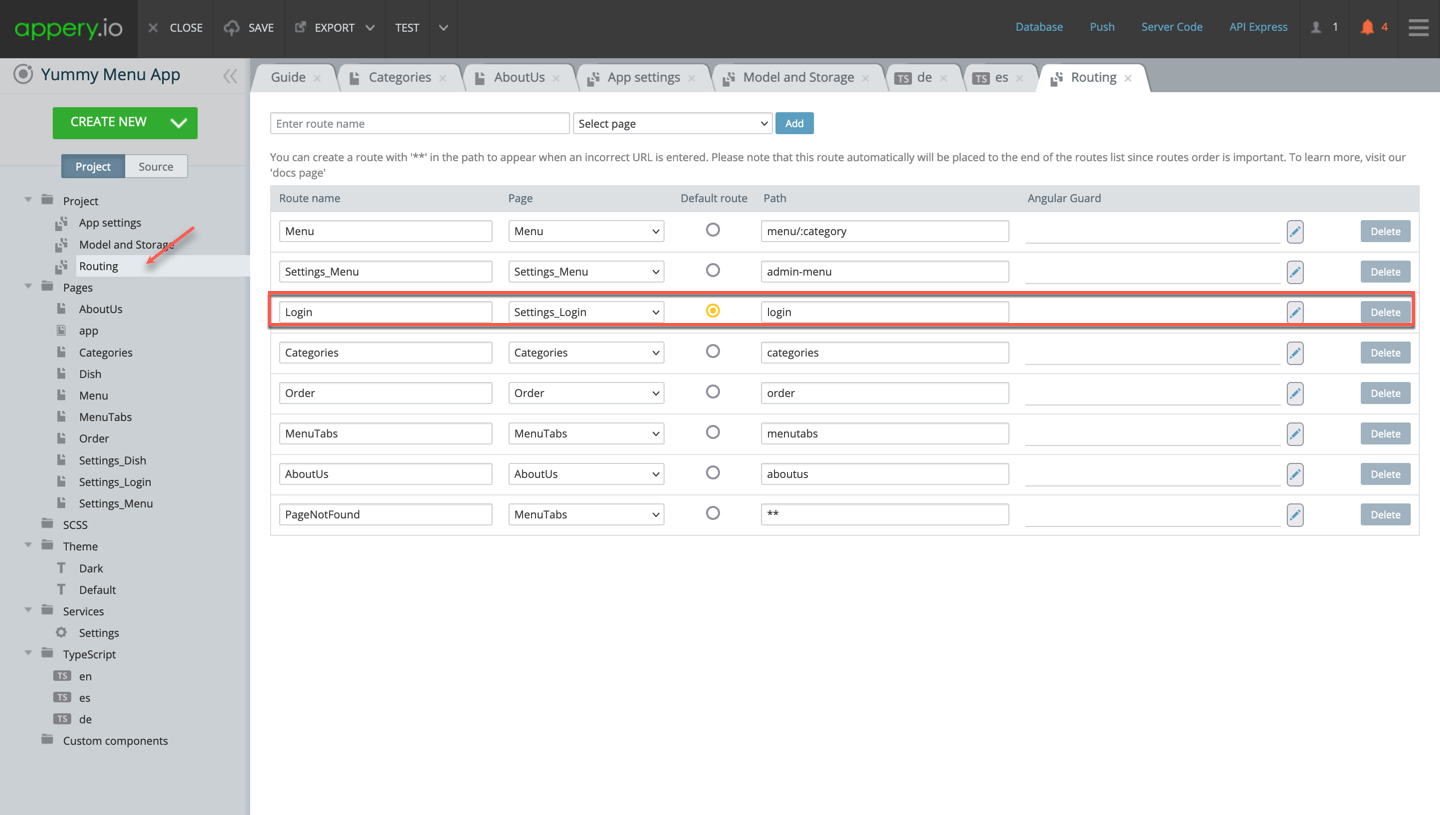
- Now, open the Project > Routing page and set the default route to the Login page:
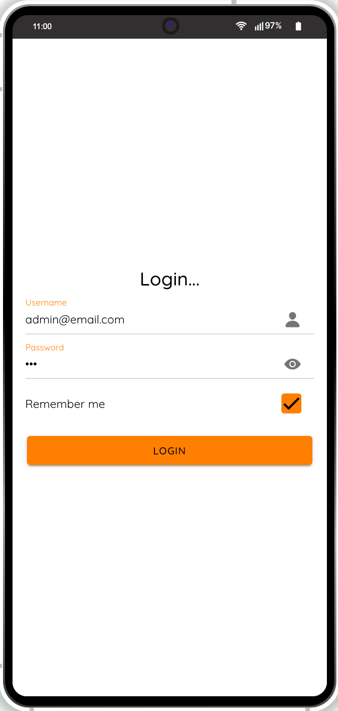
- Save the app, click TEST, and wait for the app to load. When ready, enter your credentials to log in as an app admin:
Managing Meals
- After you log in, the Menu management page opens displaying all the available meals, and from here, you can select whether you would like to edit the existing meals, reorder them (or even delete), or add a new one:
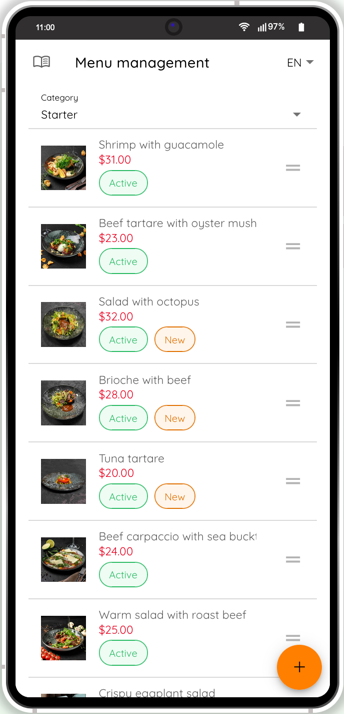
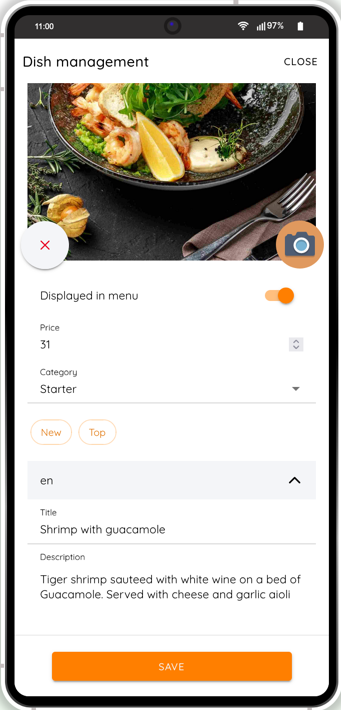
- Select the meal card to edit it: use the toggle to display or hide the meal from the menu (which can be useful if you need to remove some seasonal meal but do not want to delete it), move it to a different category, upload a photo, modify the description, set price, and add or remove) tags. The page also allows editing in different languages:
- To add a new meal, click the + button below. On the Dish management page, enter all the needed data and upload the needed images:
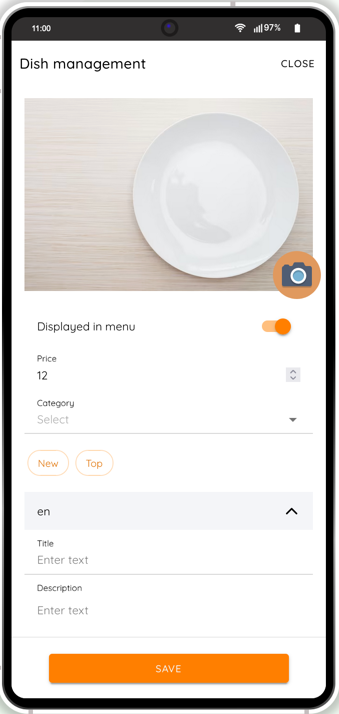
- When you are done, click SAVE.
Tip!As an app admin, you can edit any meal, deactivate or delete it, or add more at any time right from your device.
If you later need to make changes to the meal, you will be able to do so any moment on the Menu management page: just click the needed meal to access the edit mode.
Important!To go back to the guest app version, revert the routing to the default MenuTabs route:

That's it! 👏
Video Tutorial: Menu Template for AdminsYou can check this Appery.io YouTube video to learn how to administer your app created from our Menu app Template right from your device:
Testing Customized App
Testing the app is fast and simple. All you need to do is simply click the TEST button in the top App BuilderToolbar.
The browser will launch with the app that you have just built.
Testing on Device
When your app version is ready, you might also like to test it on the device.
Appery.io Tester AppA great option to quickly test the app on the device is to use our Appery.io Tester app.
The app is free and available for both iOS and Android.
You can check out this page to learn more about using the Appery.io Tester app.
Exporting App
When your final app version is ready, you might like to proceed with exporting your app for Android or iOS with further installing it on a device.
Selecting Build TypeBefore you can proceed with exporting your app, go to Project view > Project > App settings > Android binary/iOS binary to select the Release build type (Debug is the default type for both and can be used for testing purposes only).
If the Release and Publish type is selected under the iOS binary tab, building the release app version will be performed together with publishing it to the App Store.
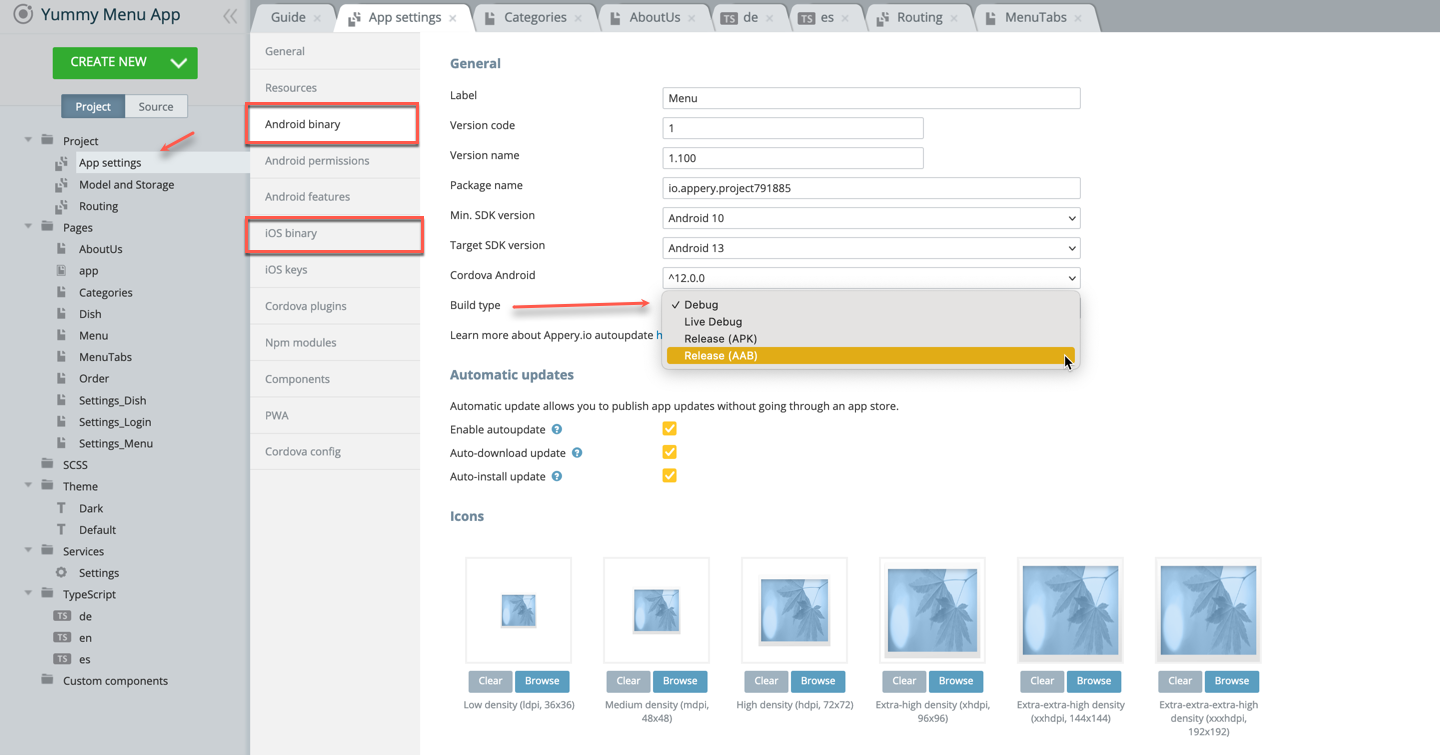
Selecting iOS binary build type
Important Note!Please, note that before you can export the app, the app certificates must be imported or automatically generated (in the case of Android).
You can check this document in case you need help with exporting your application for iOS.
Here, you will find information on generating certificates for Android.
Note as well that starting from August 2021, new apps are required to publish with the Android App Bundle (.aab) on Google Play.
Please read more here.You can also check this Appery.io Community video that shows how to create Android and iOS certificates.
Also, you will learn how to install it on an iPhone for testing and then publish it to the App Store:
- After the needed certificates have been added to your app, all you need to do is wait for the bundle to be created.
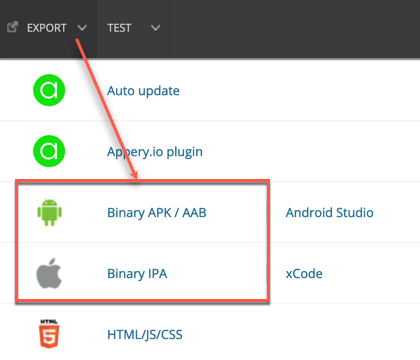
- Now, you need to select the format you prefer (you are also free to build both if you need):
.apk/.aabor.ipato start building your project:
Managing Build Error The certificate file is not setIf this is your first app created with Appery you will most likely get the error signifying about missing certificates that will prevent you from successfully finishing the build process.
The error reads similar for both binary types and indicates that you should set the corresponding certificate before starting a new build.
If this notification is what you see after starting your build, please check out the this document about the certificate management that explains how to add the needed certificate to your project.
-
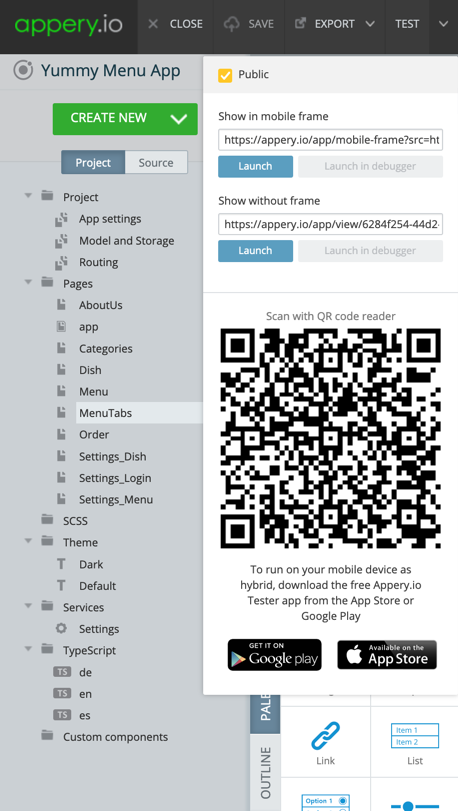
Once your project is generated, you will see the QR-Code that you can use to upload the application to your device (or save the
.apk/.aabor.ipafile for further use). -
Then, install the app on your device and enjoy the results of your customization experiments.
Publishing App
Any app that you build in Appery.io can be published as a mobile web app. This means the app will be hosted on a server and can be accessed from any browser on a mobile device:
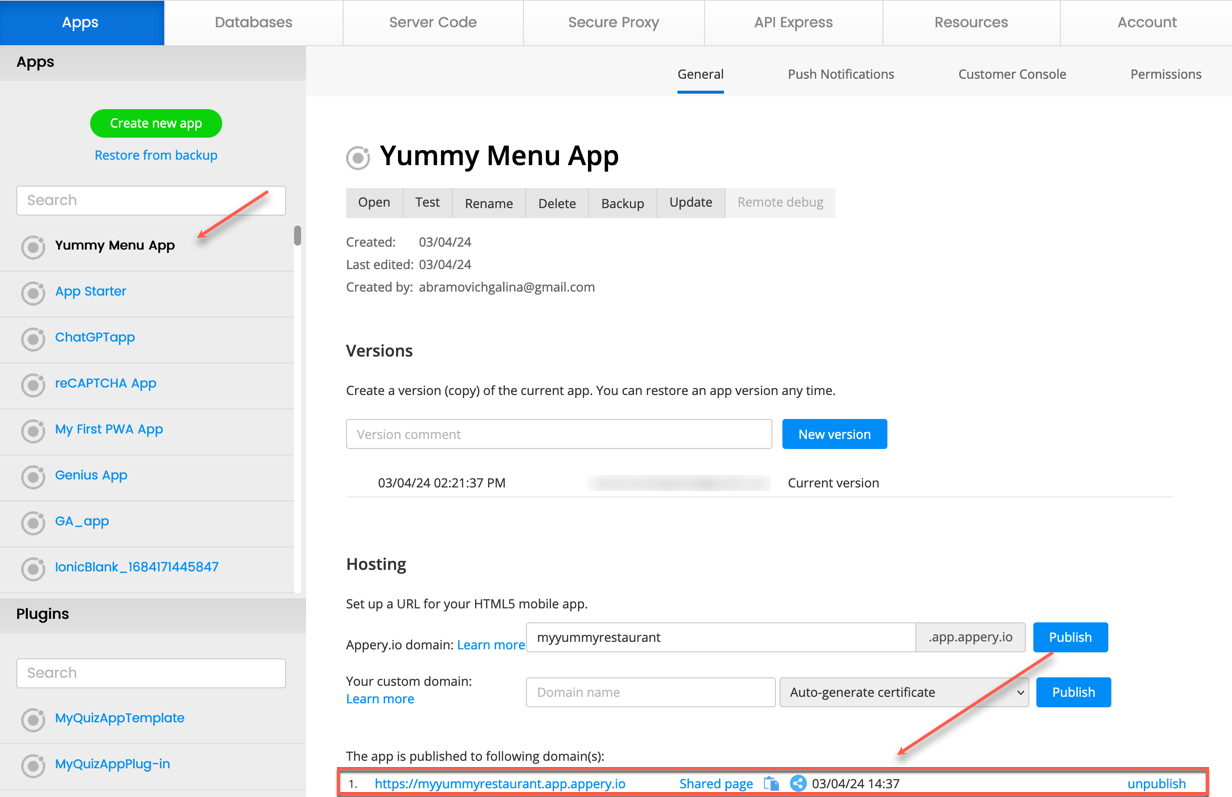
Please check this link to see what it will look like.
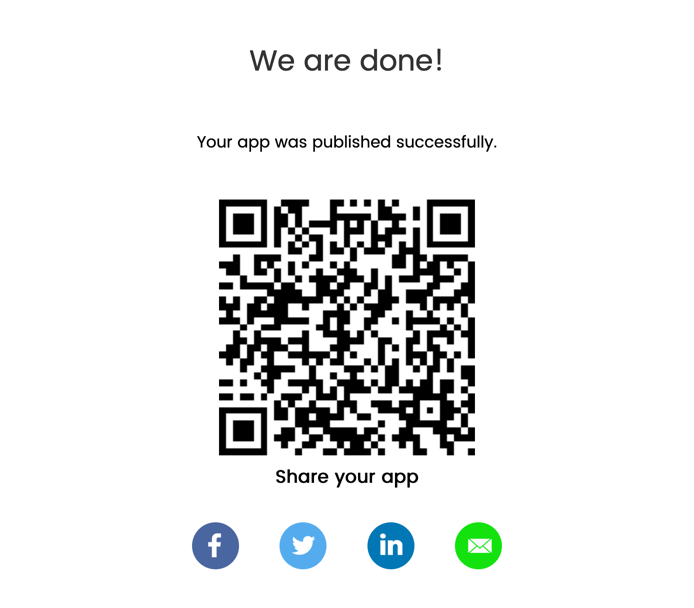
Congratulations!
Now, you can print the QRcode and place the cards with it on the tables so that your guests can enjoy placing their orders in a language they understand with no hassle:
Also, you are free to add the published app to any site of your choice as a widget.
Below is the sample code you can use for embedding the app published on Appery.io as a widget:
<script>
  var script = document.createElement('script');
  script.type = 'text/javascript';
  script.src = 'https://app.appery.io/aio_restaurant_widget.js';
  script.onload = function() {
    window.aioChatWidget.init({
      frameUrl: "https://restaurant.app.appery.io/",
      // buttonColor: "blue",
      // buttonTextColor: "red",
      // buttonImgUrl: "https://appery.io/app/resources/img/mobileframe/favicon-192x192.png",
      preload: true,
      // autoOpen: 5000,
      // position: "top_right",
    });
  }
  document.head.appendChild(script);
</script>
where:
frameUrl: '', // the iframe url;buttonColor: '#4DC95B', // css color. The button color for the chat button (if set to default, the button image is used) and close button;buttonTextColor: '#FFFFFF', // css color. The button text color for the chat button (if set to default, the button image is used) and close button;buttonImgUrl: '', // custom image for the button, if not set, then the default.svgimage is used;preload: false, // if set to true - add iframesrcon init (load frameUrl immediately), otherwise, the iframe will be loaded only after opening;autoOpen: 0, // ms. If 0 - do not open;position: "bottom_right" // bottom_right, bottom_left, top_right, top_left.
Updated about 1 year ago