Facebook Sample jQM App
Sample jQuery Mobile app using Facebook API.
Important Note!The option of creating new apps with thejQuery Mobile framework was removed but we still support the projects that were created with it earlier.
Introduction
This sample app shows you how to add authentification via Facebook and invoke Facebook API. You will learn how to:
- Invoke the Facebook API.
- Add a Login with Facebook button to your JQM app.
- Load data from Facebook.
- Post a message on someone's wall.
Getting App
To get the app UI:
- From the App page, select Create new app > JQuery Mobile > Blank and click the Create button.
- In the CREATE NEW dropdown, select From Plugin, check the Facebook Sample App plugin, and press the Import selected plugins button.
- A pop-up dialog should appear. Set the start page to Facebook_Login and confirm.
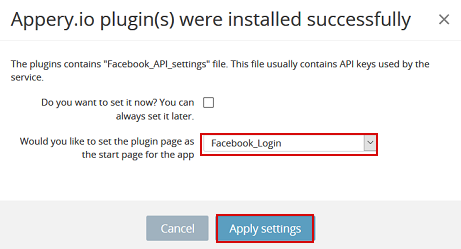
Facebook plugin.
Getting Backend
To get the app backend:
- Download the API Express project backup.
- Go to the API Express page.
- Press Create new project, upload the backup, set any project name (e.g. "Facebook API") and click Create.
Registering Facebook app
Log in or sign up to developers.facebook.com.
NoteYou should have a verified Facebook account. Read here for more information.
- Click My Apps in the top menu, then Add a New App.
- Enter your Display Name.
- Enter your contact Email and click Create App ID.
- From the list of products, select Facebook Login, then select Web as the app platform.
- In the new window, insert the URL of your site. Use the following Site URL as a template, but use your Appery.io App ID:
https://appery.io/app/view/{ENTER HERE YOUR APPERY.IO APP ID}/app/Facebook_Me.htmlIf you're using libraries version below 3.0, the URL will look as following:
https://appery.io/app/view/{ENTER HERE YOUR APPERY.IO APP ID}/Facebook_Me.html.
Don't mention it if you don't know what it is about.
The Appery.io App ID can be taken from the Appery.io app URL:
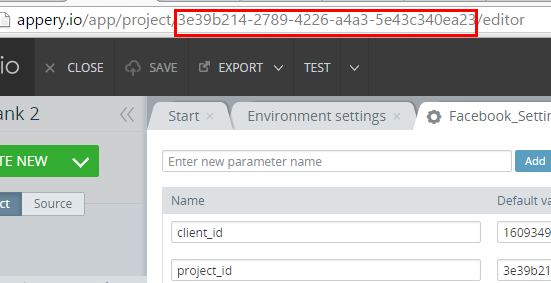
App ID.
Then, go to Settings > Basic where you need to type appery.io in the App Domains field and choose the needed category.
Lastly, click Save Changes. The App Settings tab should look like the following:
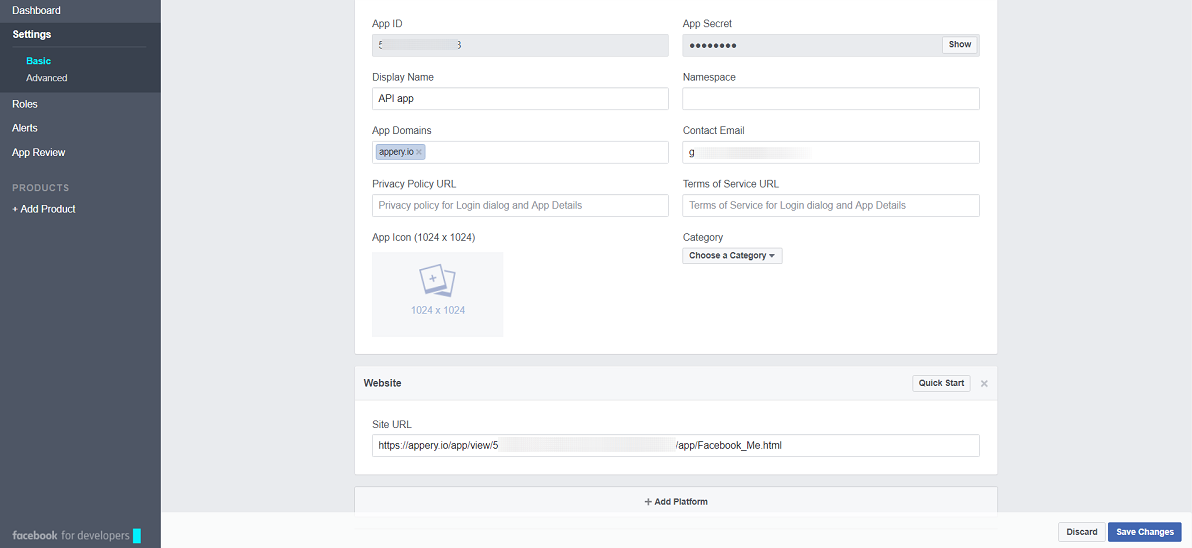
Facebook app.
Now, when the app is saved, copy the App ID, which will be used to configure the Facebook API plugin.
App Settings
Since the App ID is copied to your clipboard, open the Facebook_API_settings service and paste it as the value for the client_id parameter.
Copy the Appery.io App ID from the URL string and paste it to the project_id:
You also need to connect your UI app with the backend API Express project. In order to do this, go to the API Express page and select the project you've created from the backup at the beginning of this tutorial. Then copy its UUID from the address bar.
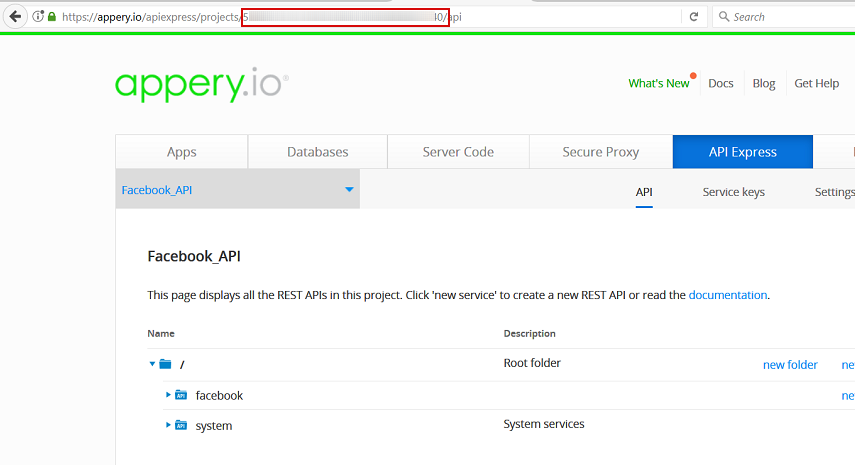
API Express project UUID.
Go back to your app, open the Facebook_API_settings service and paste the copied id as a value for API_EXPRESS_API_KEY field.
Lastly, on developers.facebook.com, go to the Products > Facebook login section and add the callback URL to the whitelist:
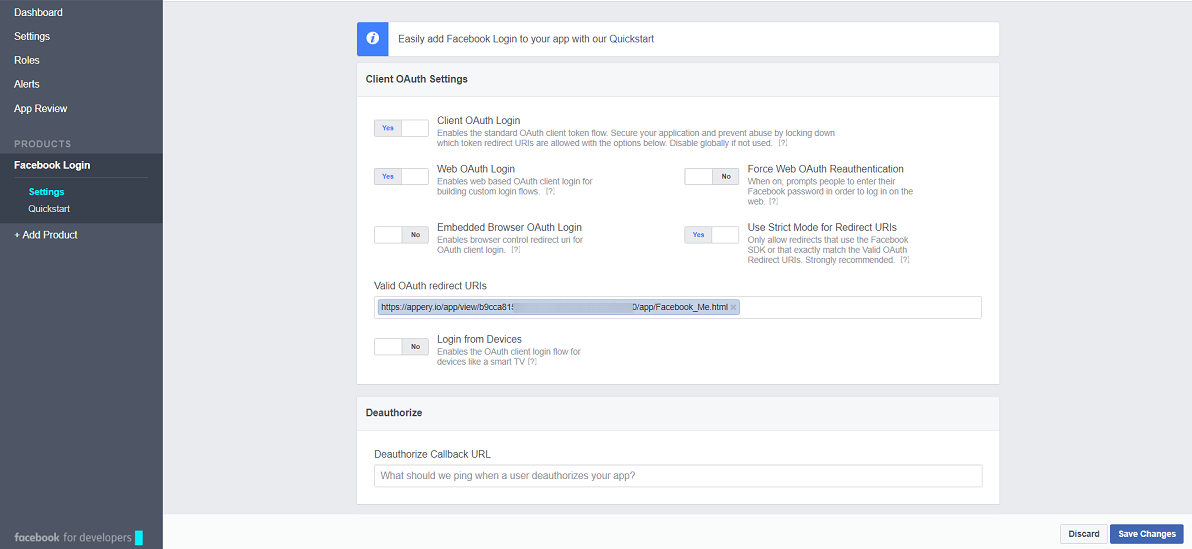
Adding the valid OAuth redirect URIs
The app, with the imported plug in, allows the user to log in with their Facebook username and password, and returns the logged user information. Information is displayed on the Facebook_Me page.
Testing Login API
Click on the small arrow icon to the right of the Test button in the upper-right corner of the screen and launch the Show without frame option.
After a few seconds, the following page will appear on the screen:

Testing Without the Mobile FrameOnce again: it's important you test the app without the mobile frame; otherwise, it will not work.
Click Login to Facebook. You’ll be redirected to the Facebook authorization page where you will need to enter your login information. After successful authorization, you'll be automatically returned to the Facebook_Me page, which contains the personal information of the logged user.
Important iOS informationFor the app to work on iOS platform you must set the project to Public:
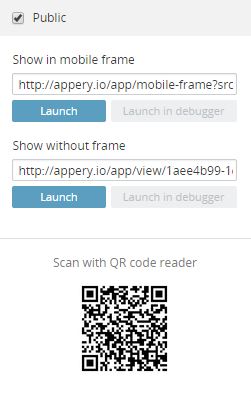
Testing the app.
Creating API Express Service
Open your Facebook API project on the API Express page.
Create a new service in the facebook folder.
Read more about creating API Express service here
Set the URL Template property of the Start component to post - this will be the name of the service. Set HTTP method to POST.
Change Request Body type to x-www-form-urlencoded and add 2 Request Body Parameters: access_token and message.
The properties of the Start component should look as follows:
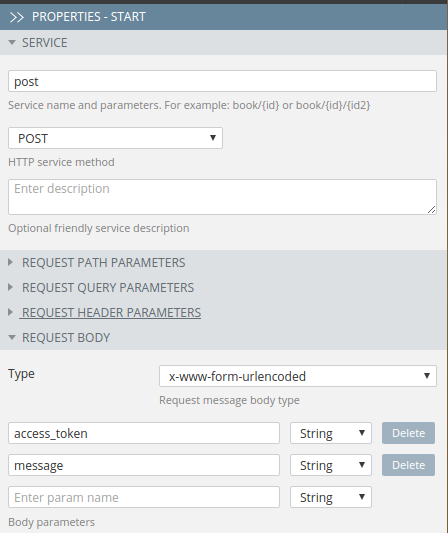
API Express properties.
Add a REST component. Set its URL to https://graph.facebook.com/me/feed, change HTTP method to POST.
Change Request Body type to x-www-form-urlencoded and add 2 Request Body Parameters: access_token and message. Bind them to BODY.access_token and BODY.message respectively, so that your service looks like the following:
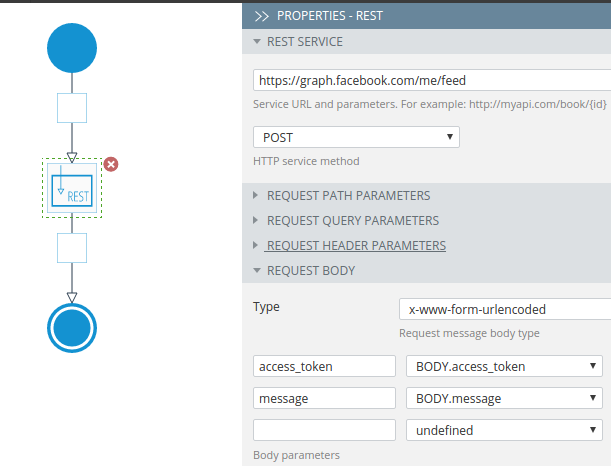
API Express service flow.
That's all about API Express. Click the Save button and close API Express Editor.
Importing Services into App
In the App Builder CREATE NEW dropdown, select API Express Service.
Then choose your API Express Project and the previously created post service:
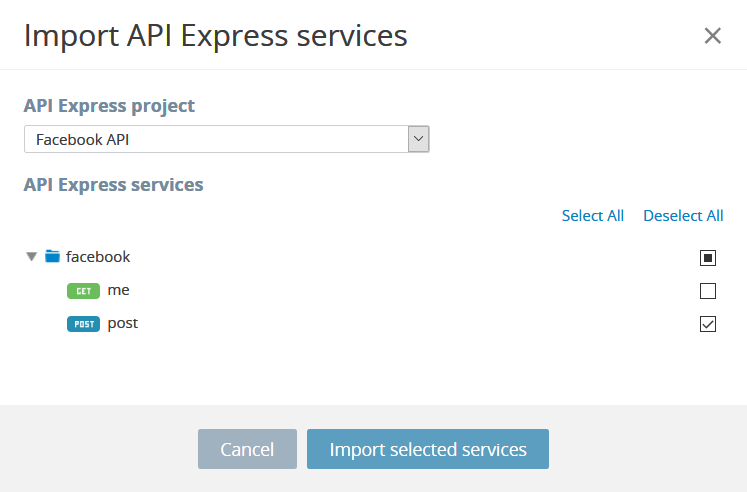
Importing API Express services.
Press Import selected services.
Designing UI to Post Message
Go to the Facebook_Me page and add the Input and Button components below the existing UI. Name the Input to message and provide any text for the Text property. Name the Button as post_message_button and change its Text property to Post message:
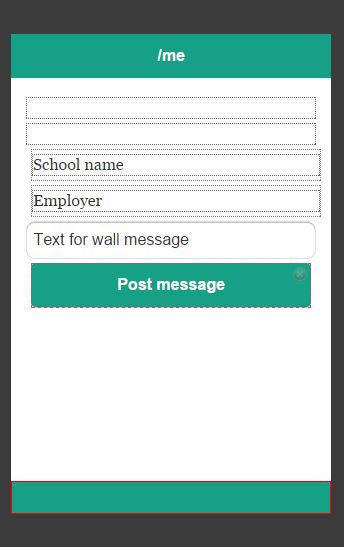
Updating app UI.
Mapping
Switch to the DATA tab. Select Service > Facebook_API_facebook_post_post as datasource and click Add.
Rename the added instance to postService:

Adding a service to a page.
Click Mapping for the Before send instance, and create the following mapping. Remember to check the Storage box on the left:
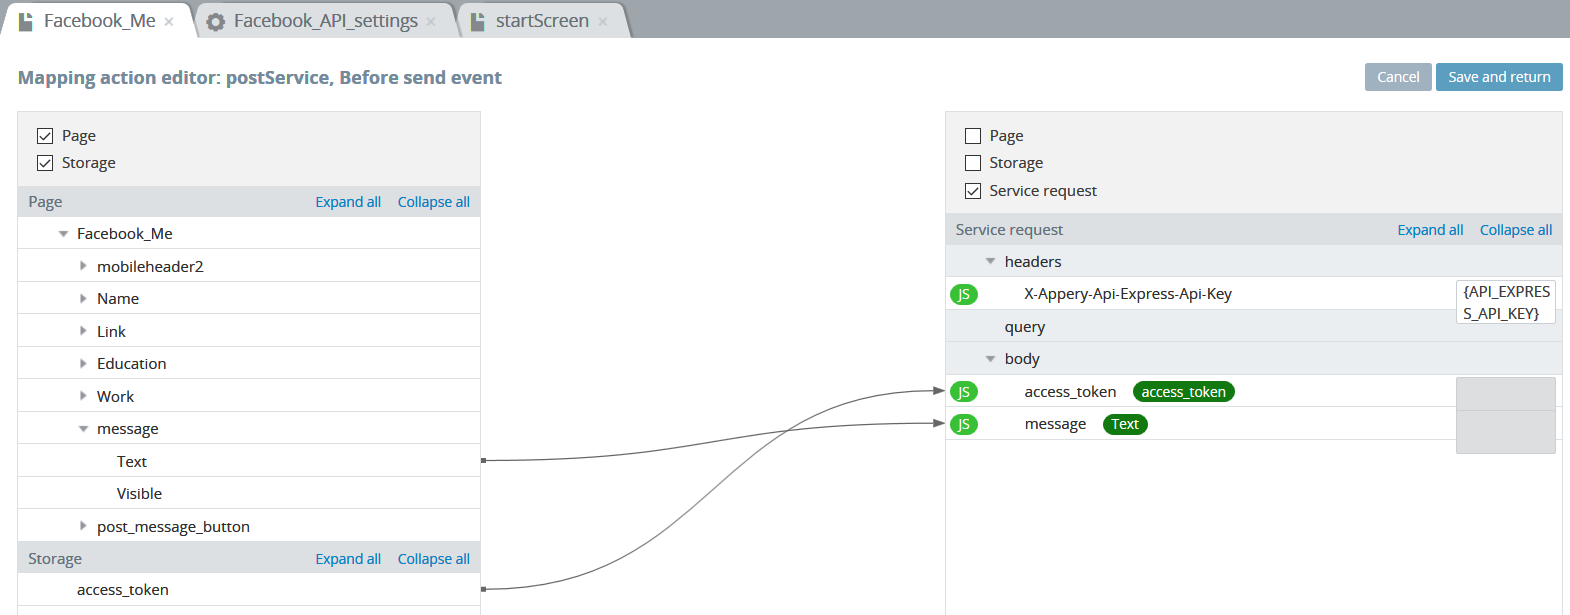
Mapping.
Click Save and return.
Switch to the DESIGN tab, select the post_message_button and add the following event: post_message_button > Click > Invoke Service > postService.
Read more about creating events here
Click Save.
Here's how the added wall message looks:
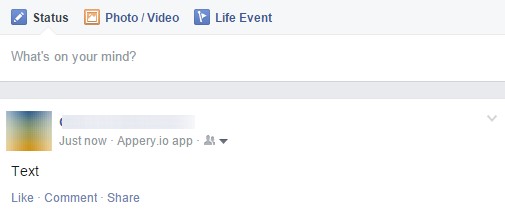
Test message.
Testing App
The final app will look like this:
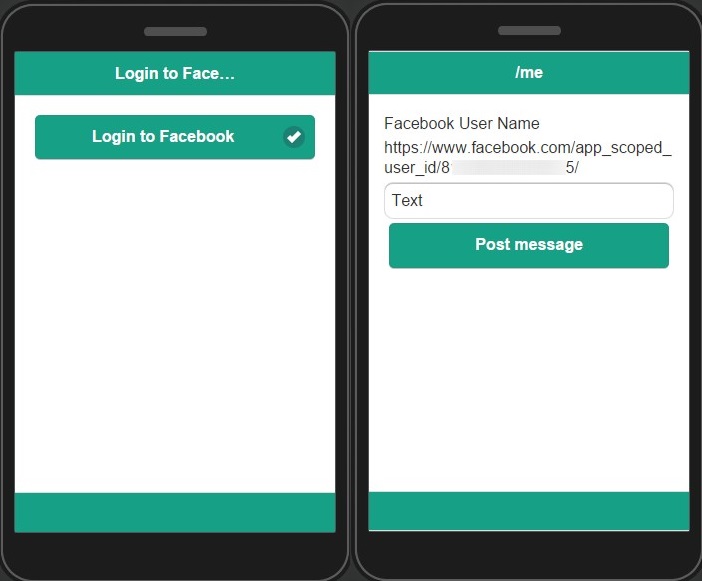
Testing the app.
Updated 7 months ago
