Ionic Facebook Login Plugin App
Sample Ionic app using Facebook API.
Introduction
This sample app shows you how to add a social login feature to your application using the Facebook Login Appery.io plugin.
If you are looking for video instructions on how to to create an Ionic application with the functionality of social authentication via Facebook by adding the Facebook Login plugin, you might like this video tutorial:
But if you are interested in the detailed tutorials, please follow the steps below. So, to create the app:
Getting the App
- From the App page, select Create new app > Ionic Blank and click the Create button.
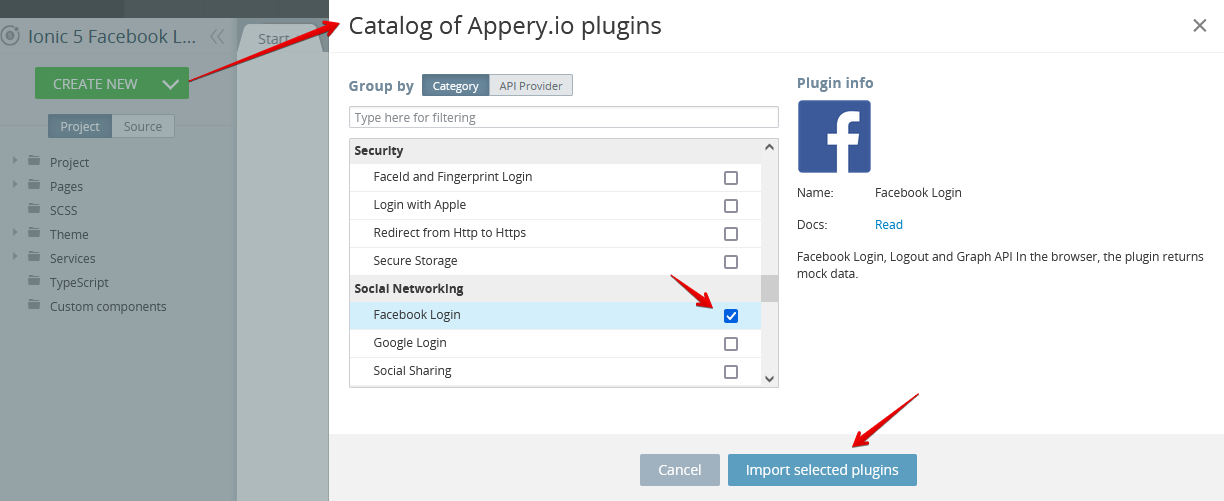
- In the CREATE NEW dropdown, select From Plugin, scroll down to the Social Networking section and check the Facebook Login plugin, and press the Import selected plugins button:
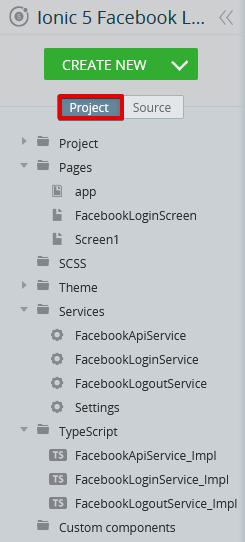
All the needed pages and defined services will be imported instantly under the Project view:
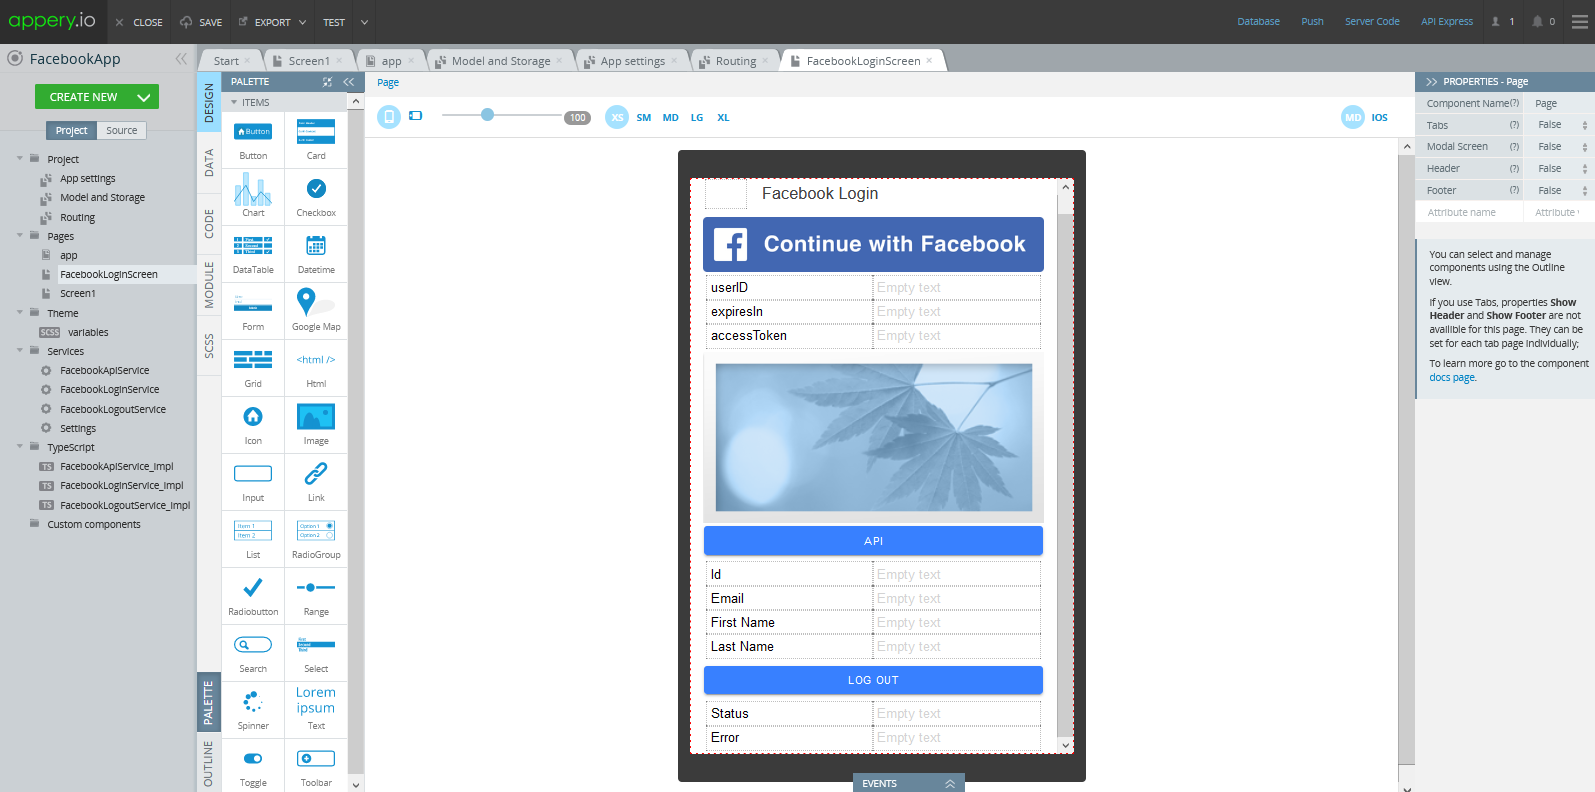
You can review the application in the App Builder by switching between the pages and/or services:
You can even check the app behavior in the preview:
- Open the Project >Routing tab.
- Change the default route page to FacebookLoginScreen and save:

- Next, click the TEST button in the App Builder Toolbar to open the app in preview where you can press the buttons to show the service response with the predefined data:

Now to make it work in full mode, we need to configure the application so that it can be connected to the Facebook API.
Getting App Backend
Now, to get the native application, you need to define the app backend:
Registering Facebook App
Log in or sign up to developers.facebook.com.
NoteYou should have a verified Facebook account.
Read here for more information.
- Go to http://developers.facebook.com/ and log in.
- Click My Apps > Create App.
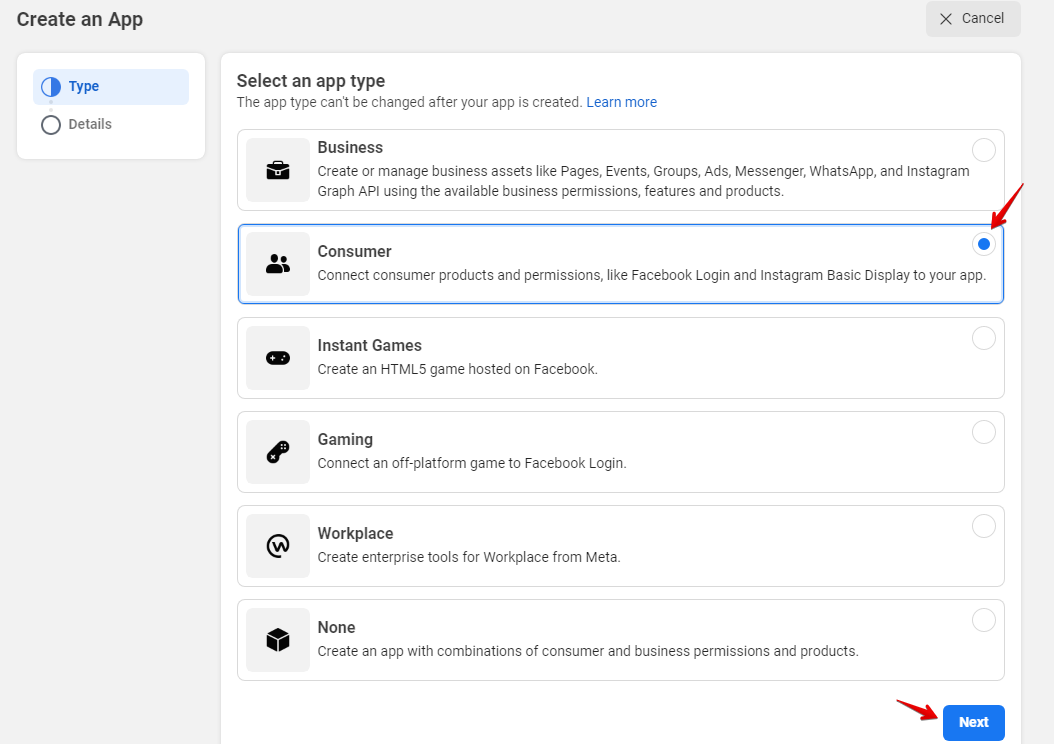
- In the new window, select the needed app type (here, Consumer) and confirm by clicking Next:
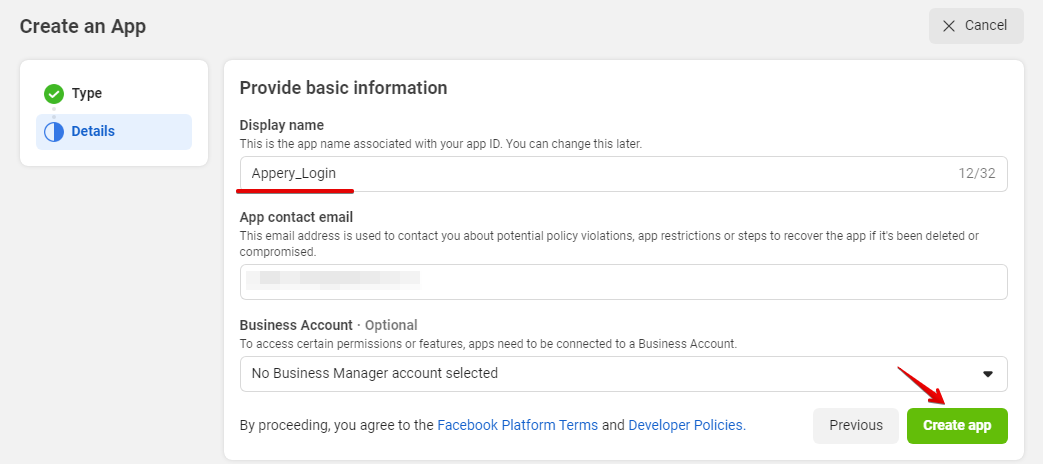
- A new window opens where you can provide the app nameand confirm creating it:
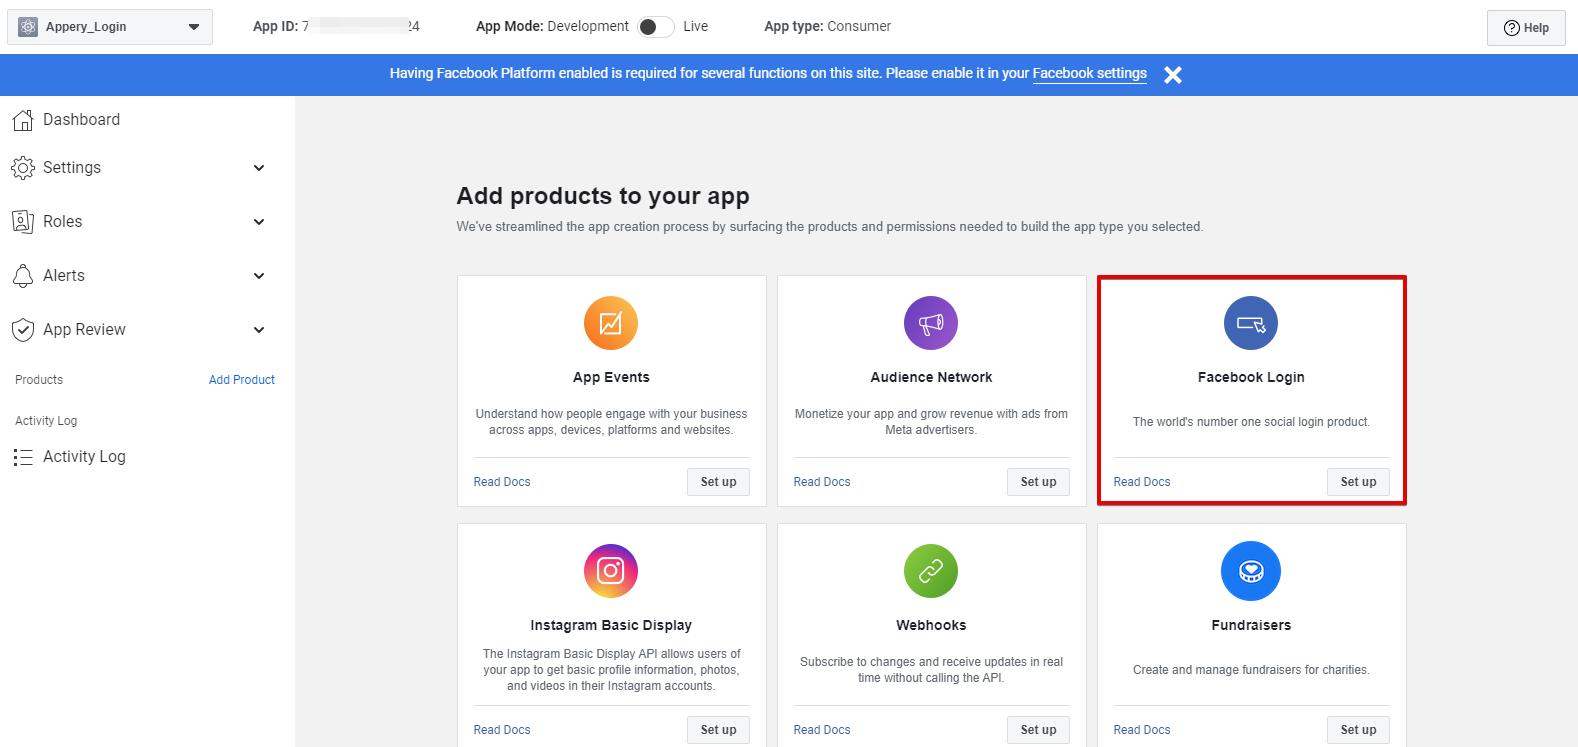
- Then, if asked, complete the security check and start with adding the Facebook Login product.
- Click Set Up and, in the new window, select the needed platform:
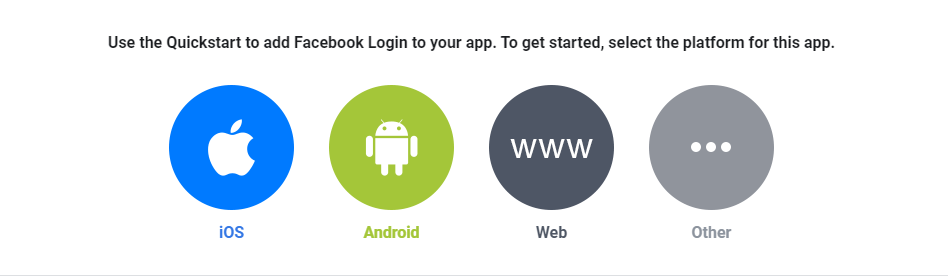
We will start with setting the iOS platform up so let's select it.
Defining for iOS platform
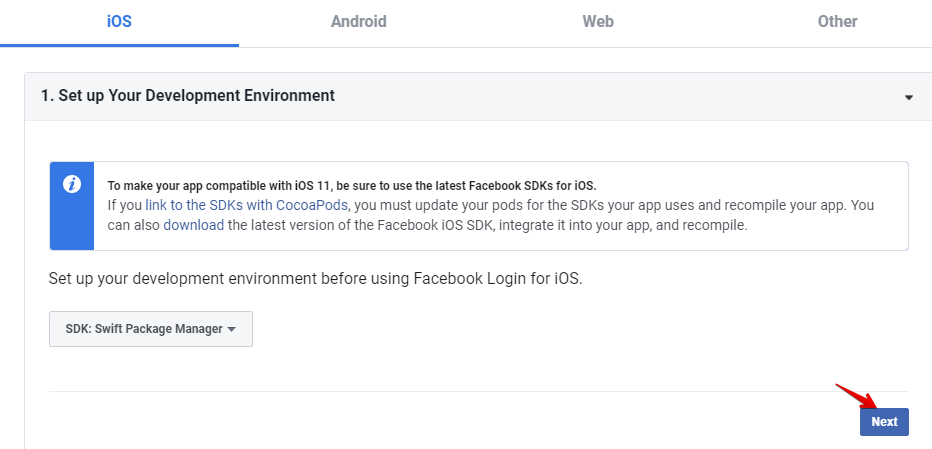
- The first item does not need to be defined, so skip it by pressing Next:
- For the app Bundle ID, go back to your Ionic Facebook Login App and open the App settings >iOS binary tab:
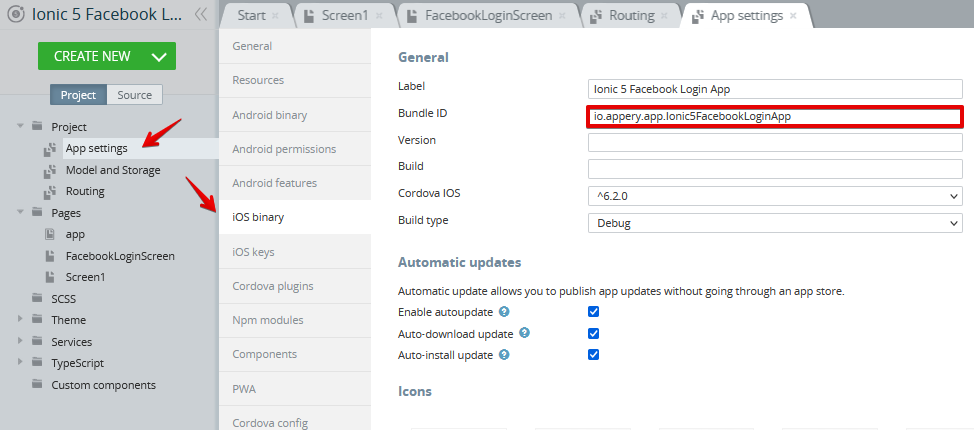
- Copy it to the clipboard, switch back to your Facebook for Developers dashboard, paste it into the field provided and click Save; then Continue:
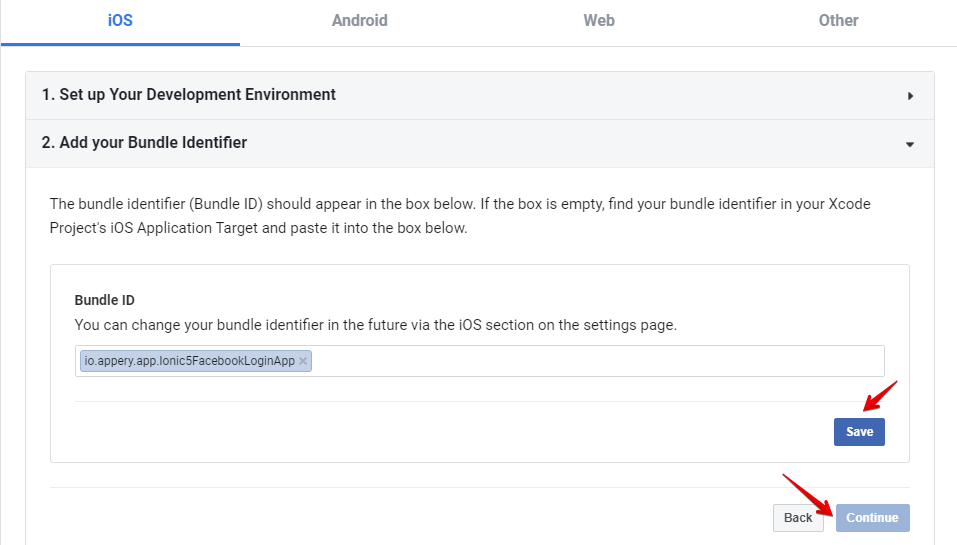
- In the next step, enable the Single Sign On option, save and proceed to Step 4:
- The other steps do not require entering any user information, so you can just skip them all by pressing the Next button for every item.
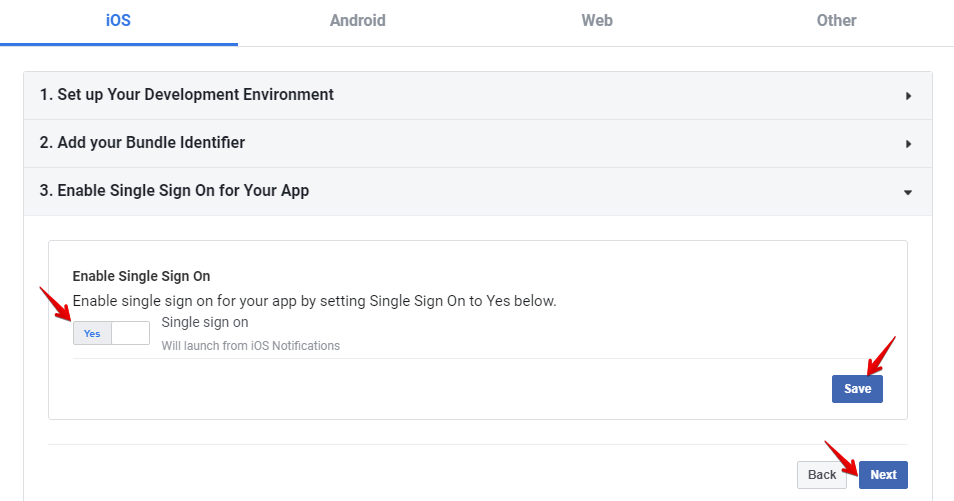
- When ready, open the Basic settings tab, provide the Privacy Policy URL and Data deletion instructions URL (in this case, https://appery.io/privacy-statement and https://appery.io/terms-of-use), select the Category (here, Business and Pages) and, if needed, upload the app icon. Save.
- Then, click the In Development toggle - this will switch the project to Live and, lastly, click Save changes:
Note the App IDNow, when the app is saved, copy the App ID, which will be used to configure the Facebook API plug-in:

The project is now ready for integration!
iOS App Settings
- Go back to your Ionic Facebook Login App, open the App settings > Cordova plugins >Core Cordova plugins tab, make sure that the Facebook Connect plug-in is enabled and click its Options button:
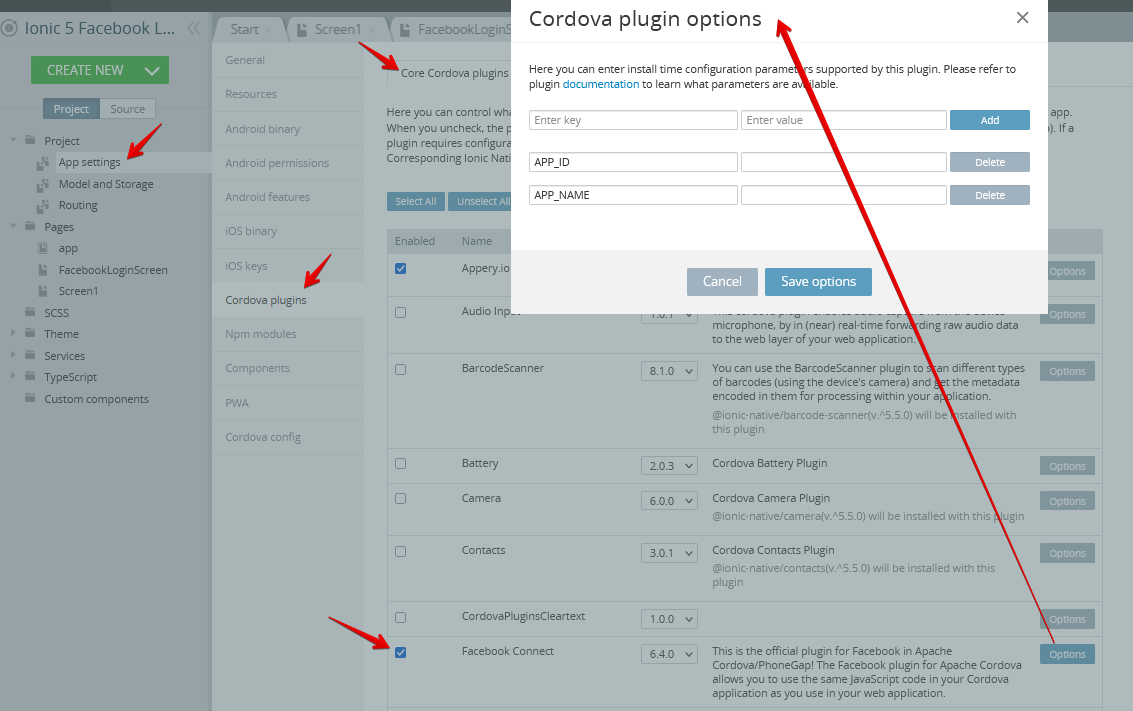
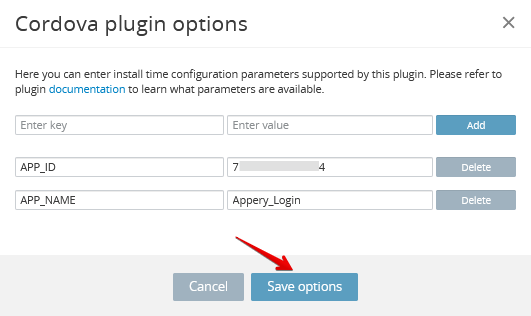
- Since the App ID is copied to your clipboard, paste it into the APP_ID field, the APP_NAME is Appery_Login.
- Click Save options to complete:
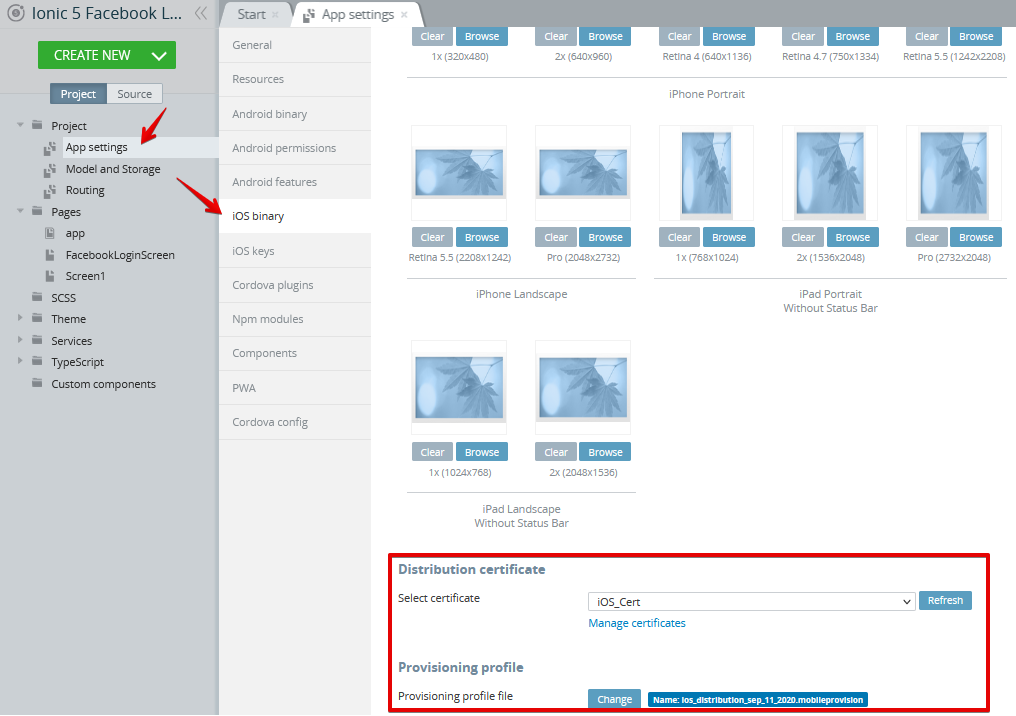
- Finally, you are ready to publish the app. To do it, go to the iOS binary tab, scroll down and upload your Apple certificate (
.p12) and provisioning profile (.provision) under the corresponding sections:
- You are now ready to export the app.
Building an iOS binaryIf you need assistance on where you can get the Apple certificates, visit this page: https://docs.appery.io/docs/appexport-ios#publishing-for-ios.
Testing iOS App
This is how the app should look like when it starts on an iOS device:
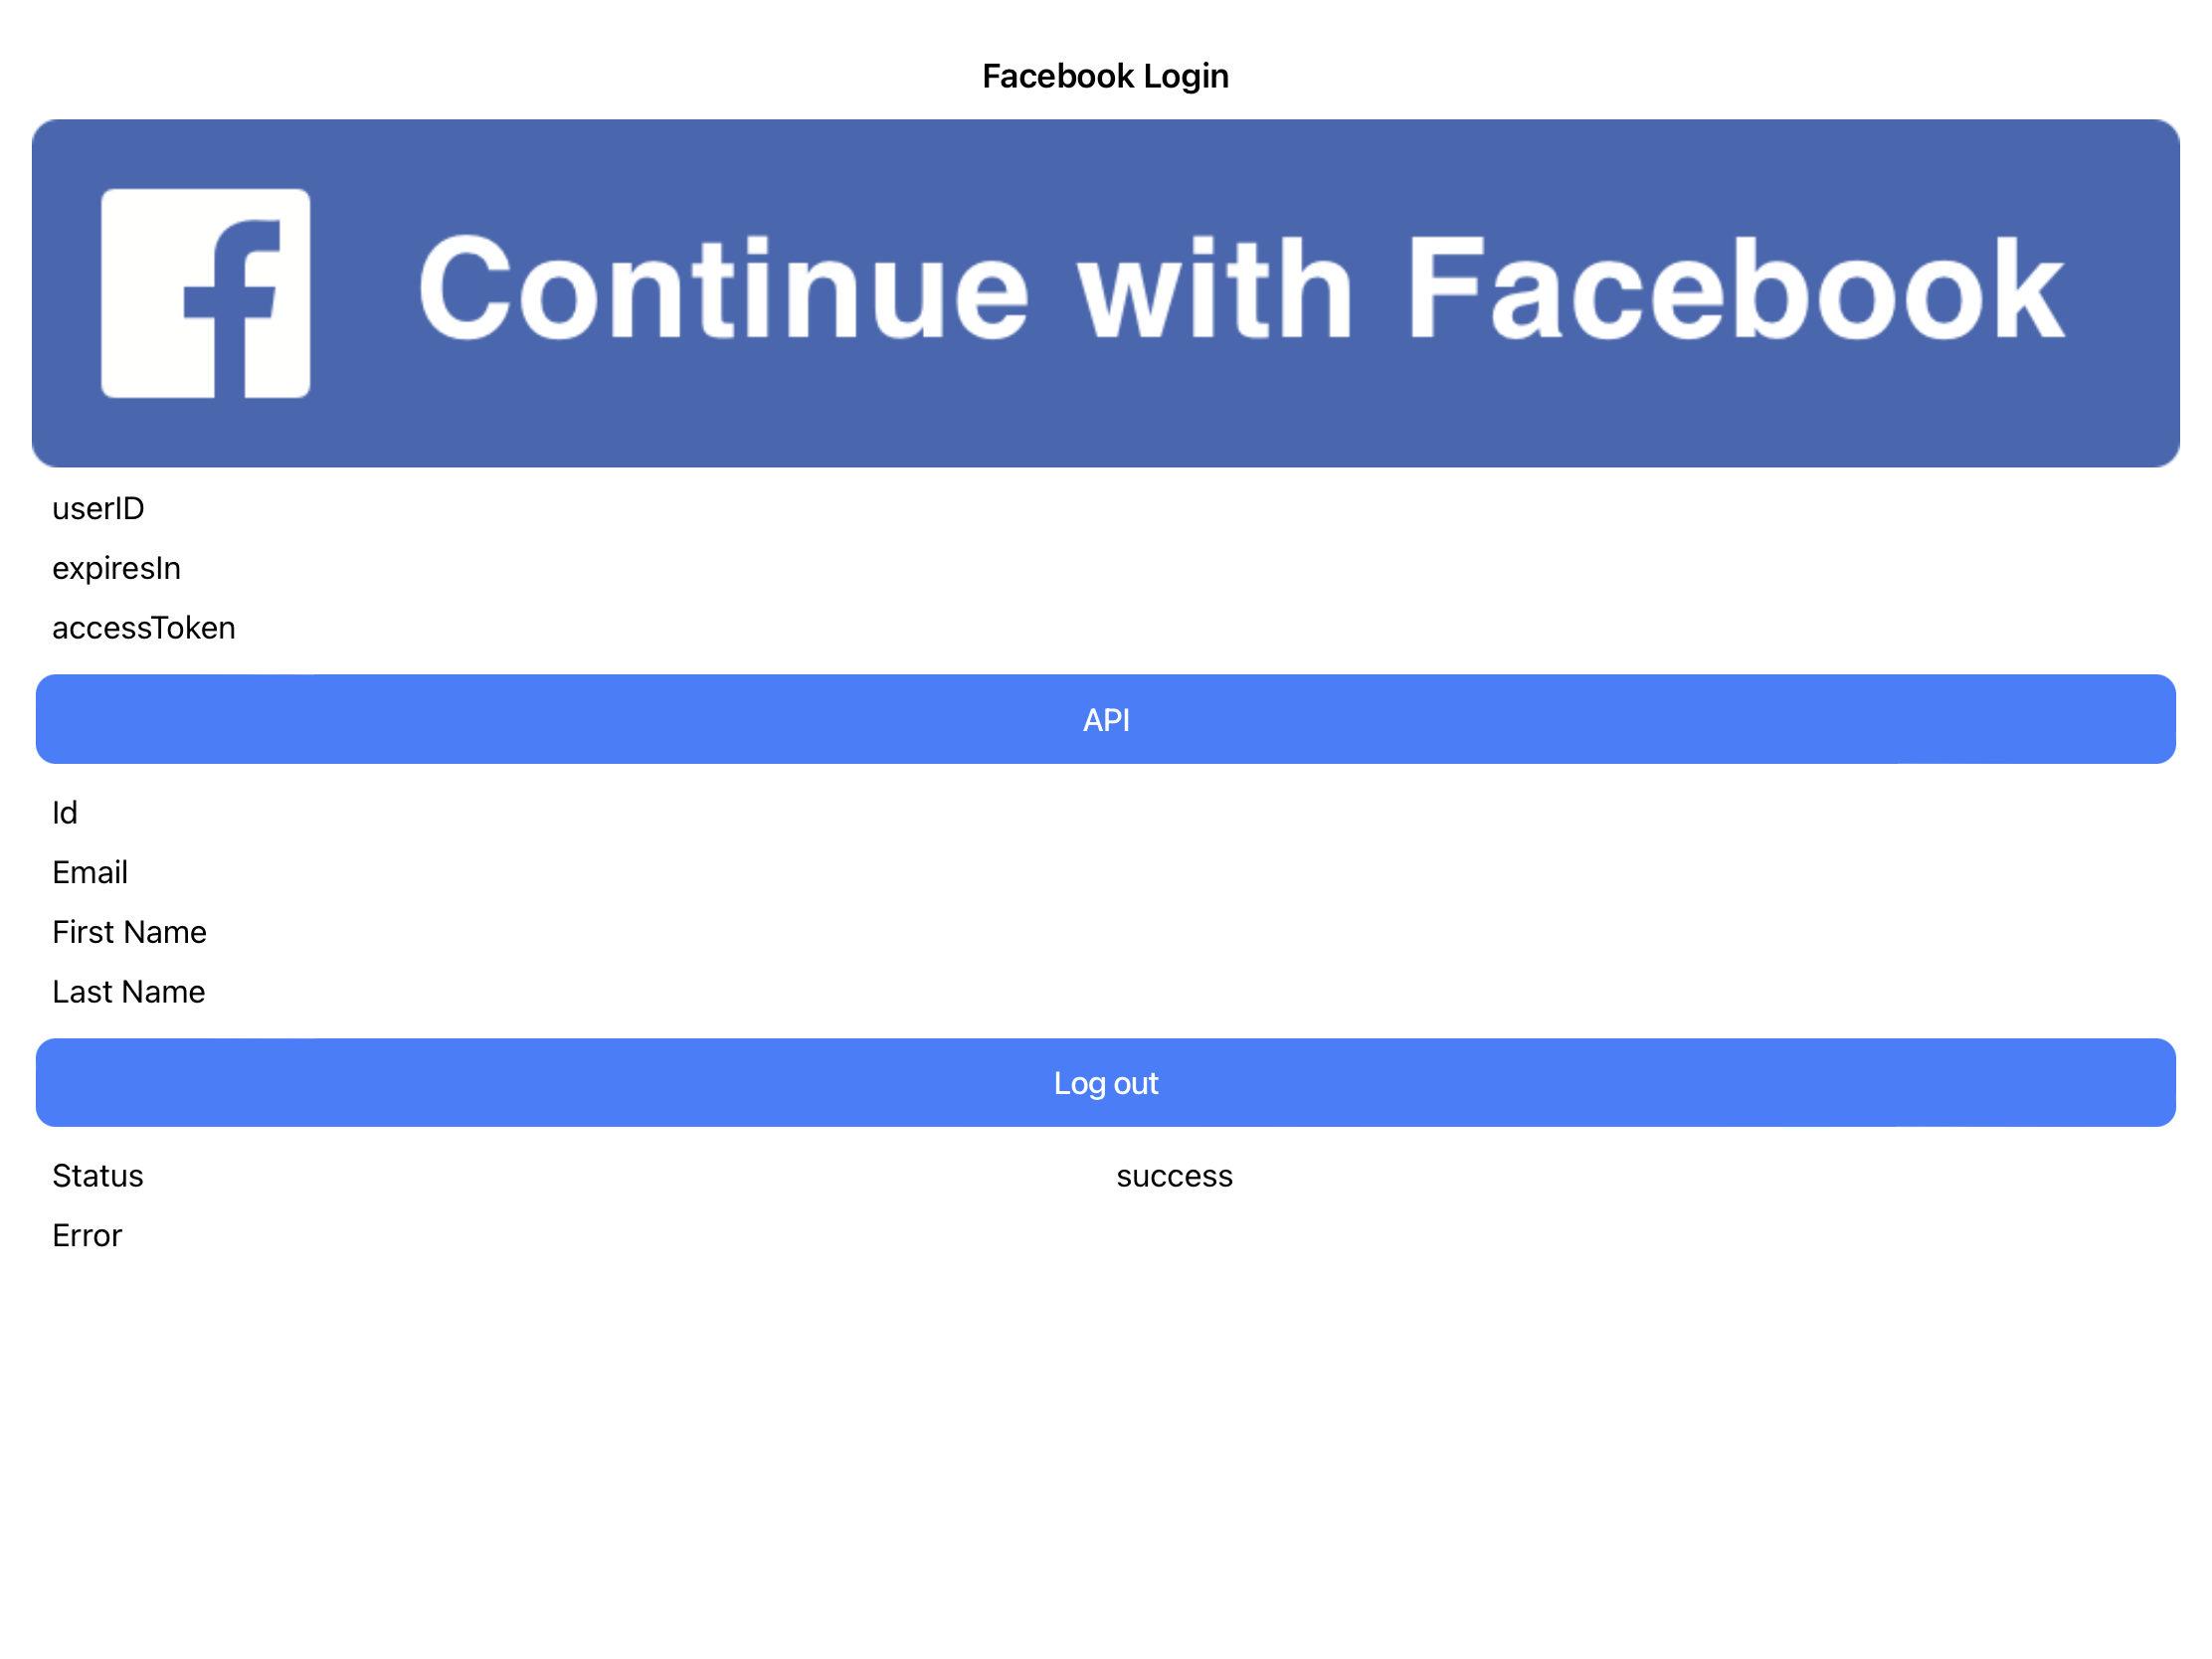
Click Continue with Facebook:
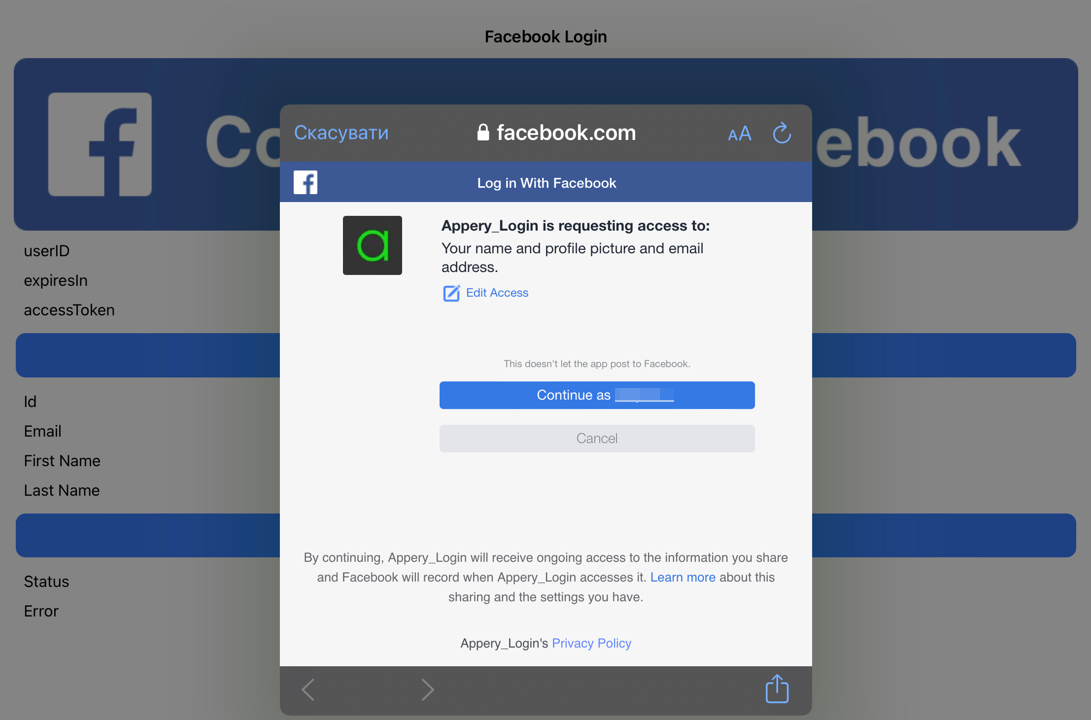
After you confirm, you will be successfully logged in:
Important iOS informationFor the app to work on the iOS platform you must set the project to Public.
Defining for the Android platform
If you also need to add login on Android devices, you can follow the flow similar to what was done for iOS.
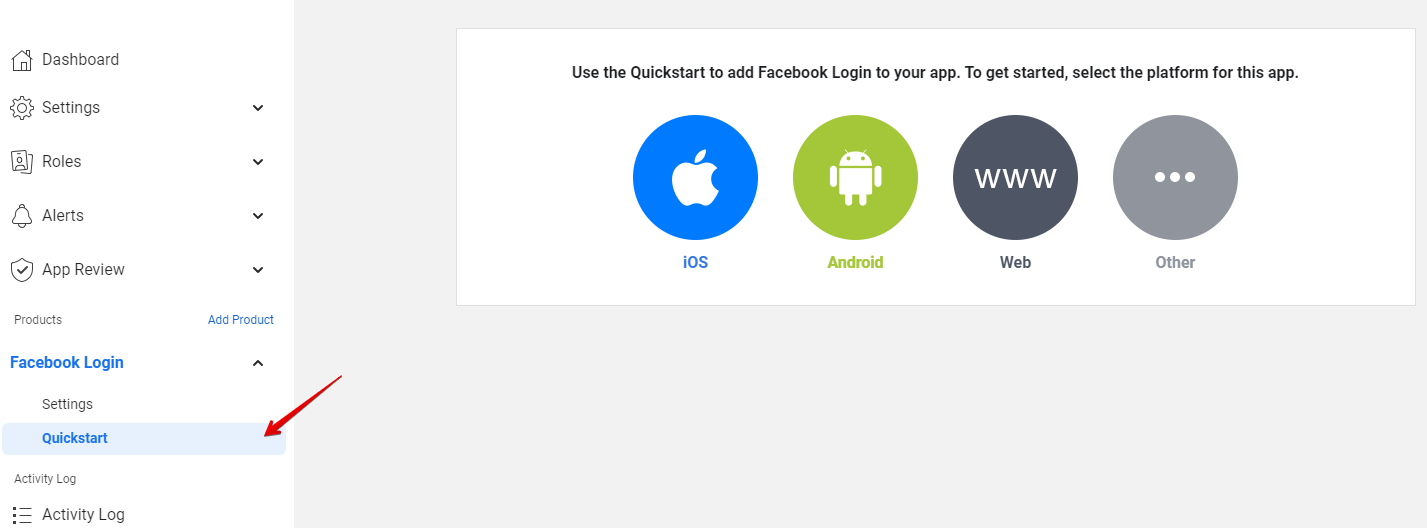
- First, open your Facebook project on Facebook for Developers (https://developers.facebook.com/apps/), unfold the PRODUCTS > Quickstart folder and select the Android platform:
- Skip the first two steps by pressing Next.
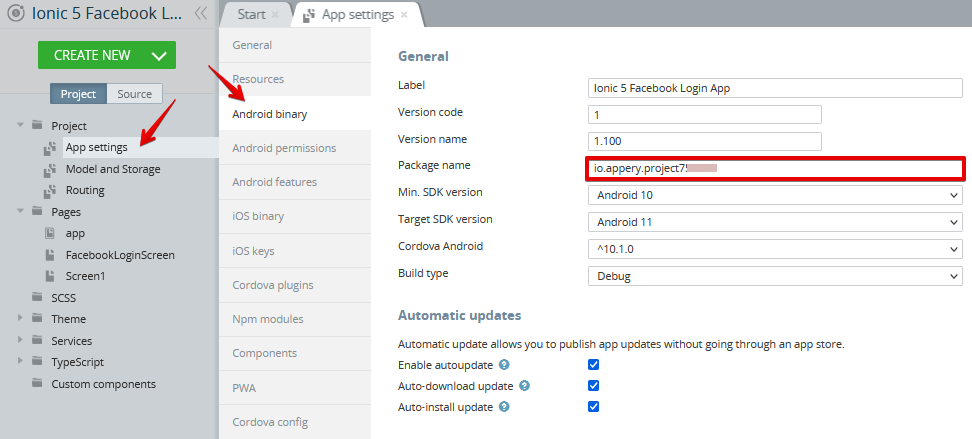
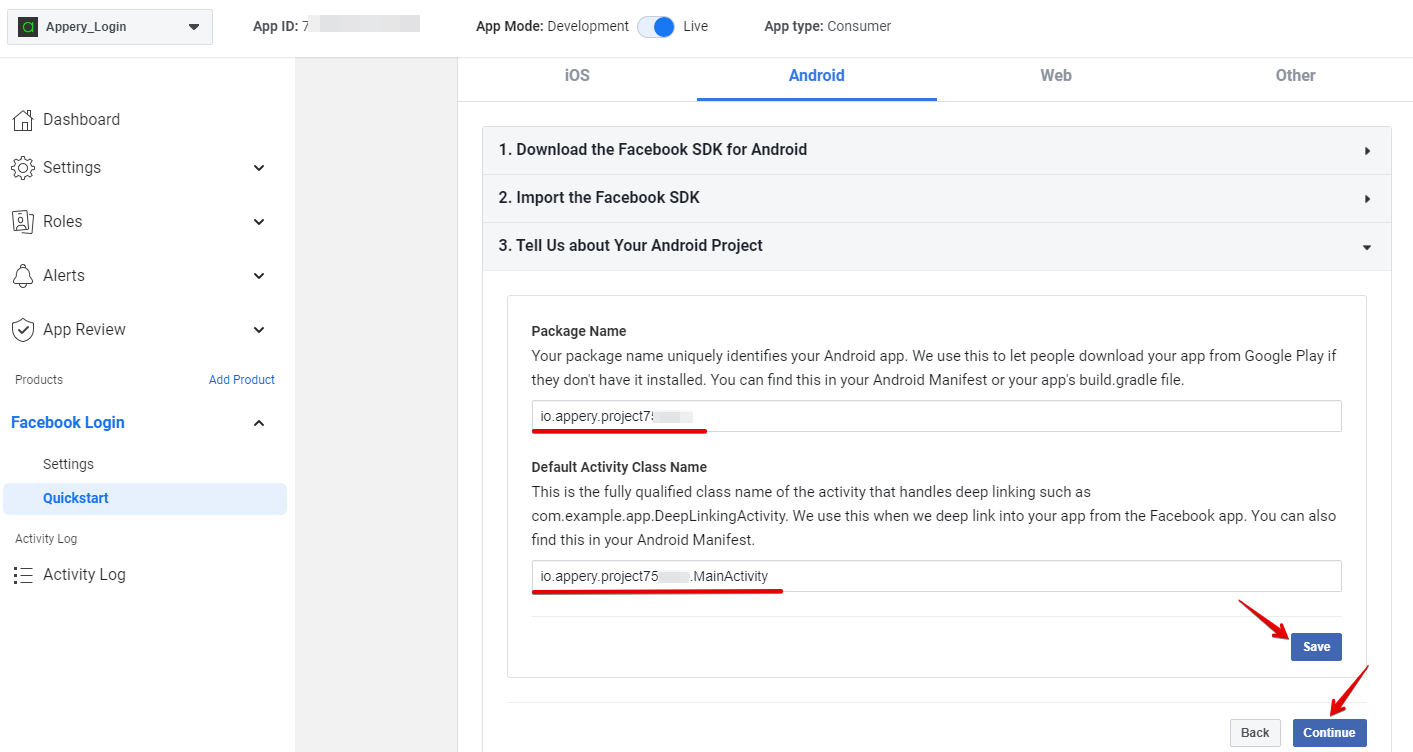
- In Step 3, you will need to define the package name. To locate it, go back to your Appery.io Ionic Facebook Login App App settings >Android binary tab, then copy it to the clipboard:
- Back in your Facebook project, insert the package name into the corresponding field. Also, duplicate this name as the main activity. Click Save and then Continue:
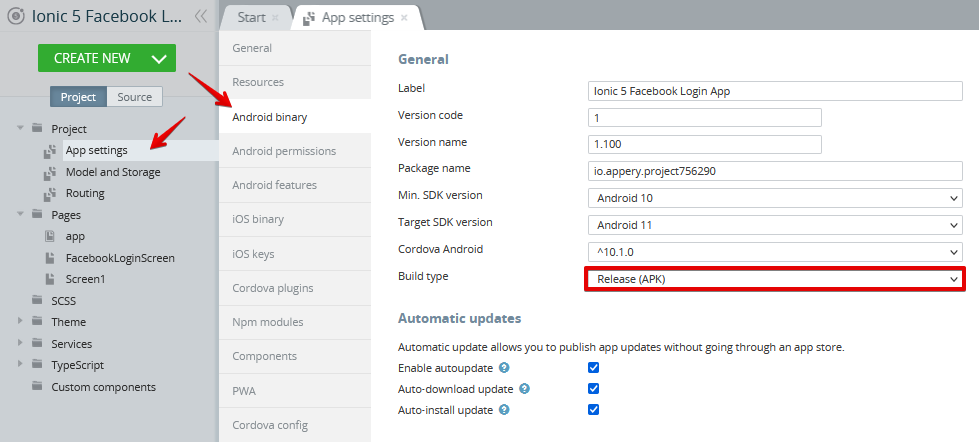
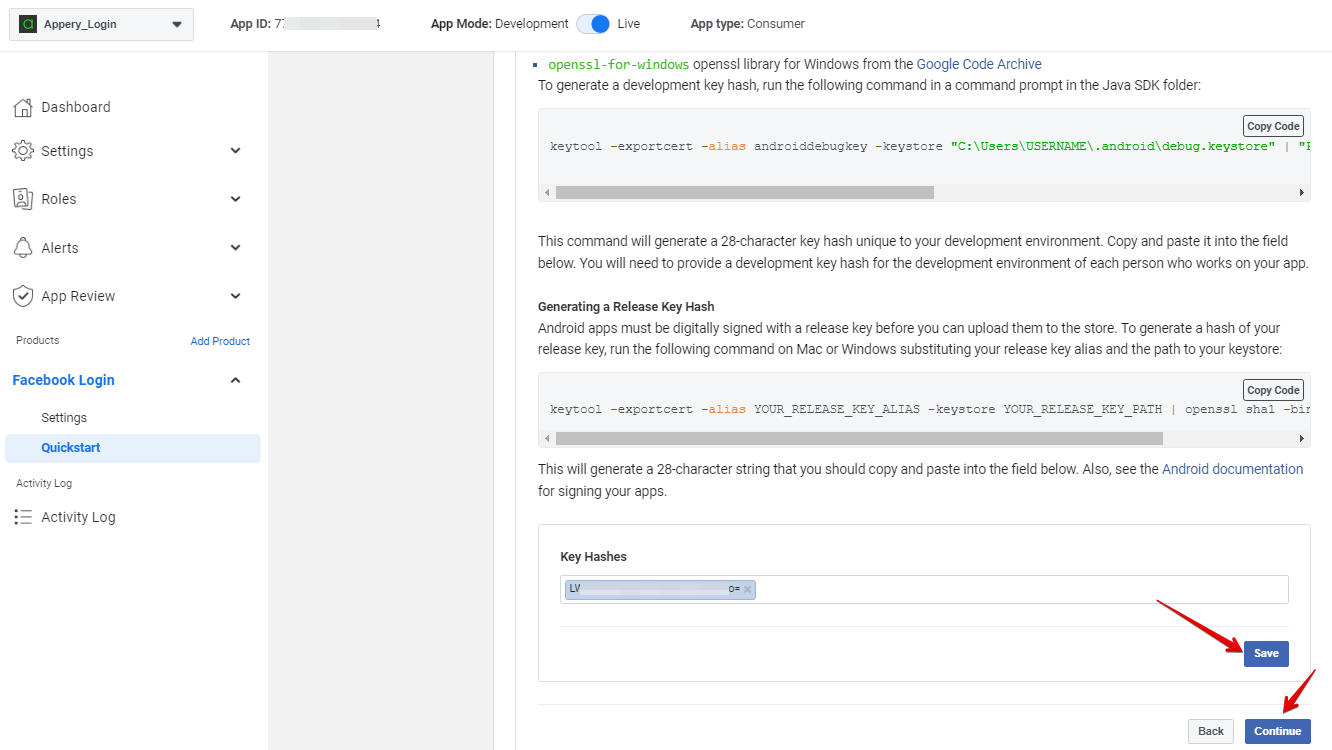
In Step 4, you will be required to provide your key hash.
- To get it from your app, first, open App settings >Android binary and select the Release (APK) build type option:
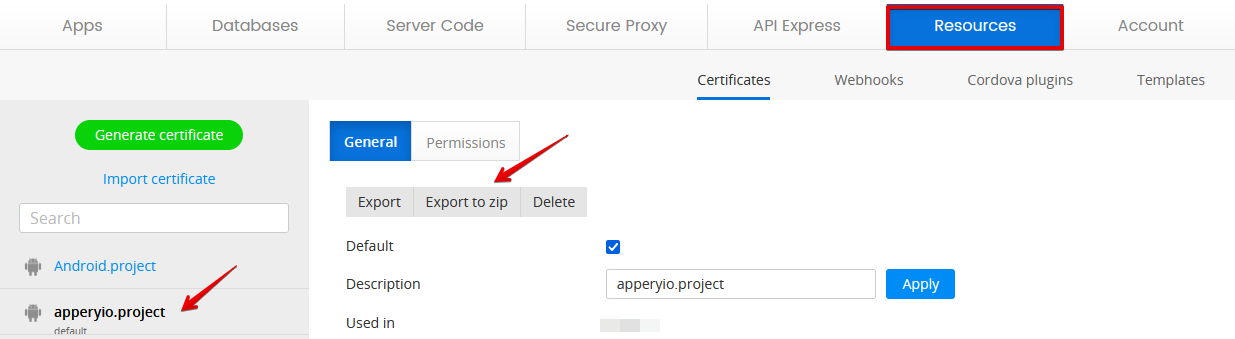
- Then, go to the Resources tab and click Export to zip for the default apperyio.project certificate to save it to your drive:
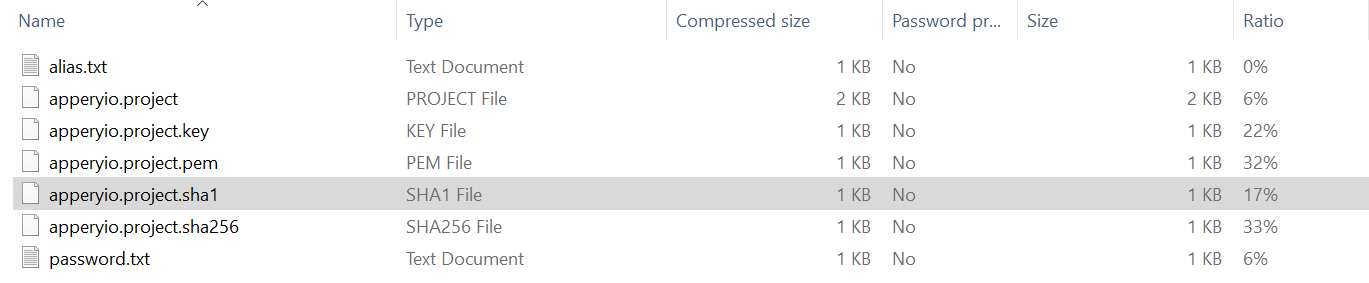
- Now, unpack the archive and copy the hash value of your certificate (here, it is the apperyio.project
SHA1file):
You can use any word editor to open the file, for example Notepad++.
- Now, let's convert this
Hexvalue to base 64 format on https://base64.guru/converter/encode/hex:
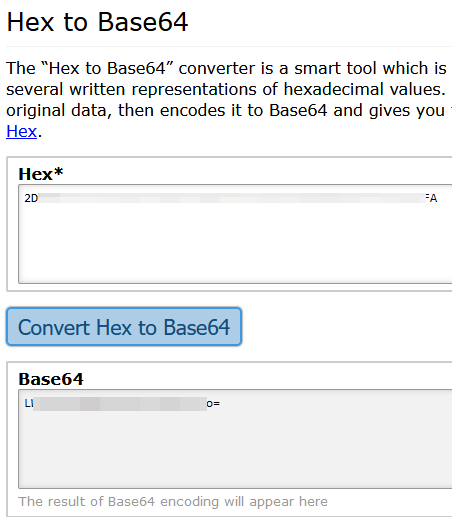
- You can now copy this Base 64 code and paste it into the Key Hashes field. Save and click Continue:
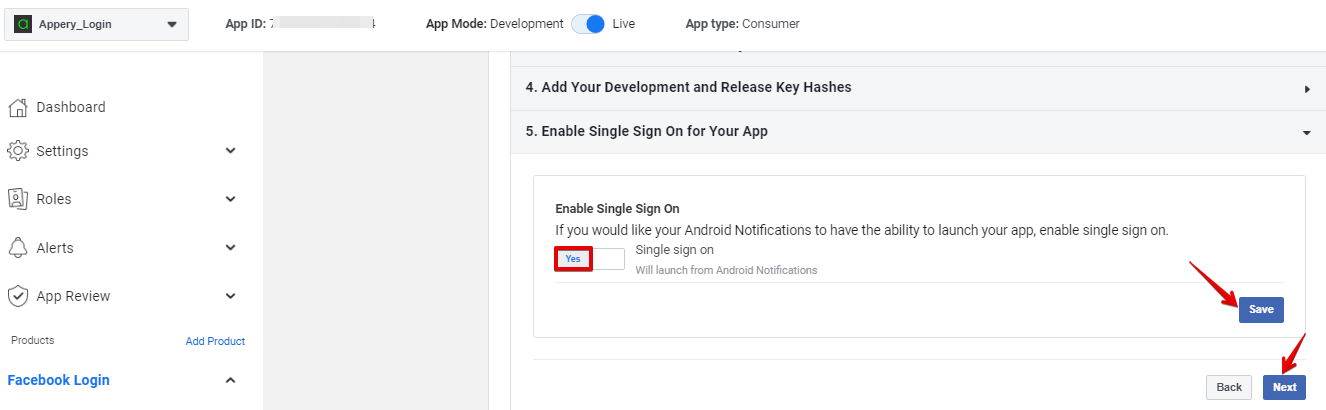
- In the next step, enable the Single Sign On option and save. Click Next:
- The other steps do not require entering any user information, so you can just skip them all by pressing the Next button for every item.
Actually, your app is ready and you can build the app apk to install it on your device for testing:
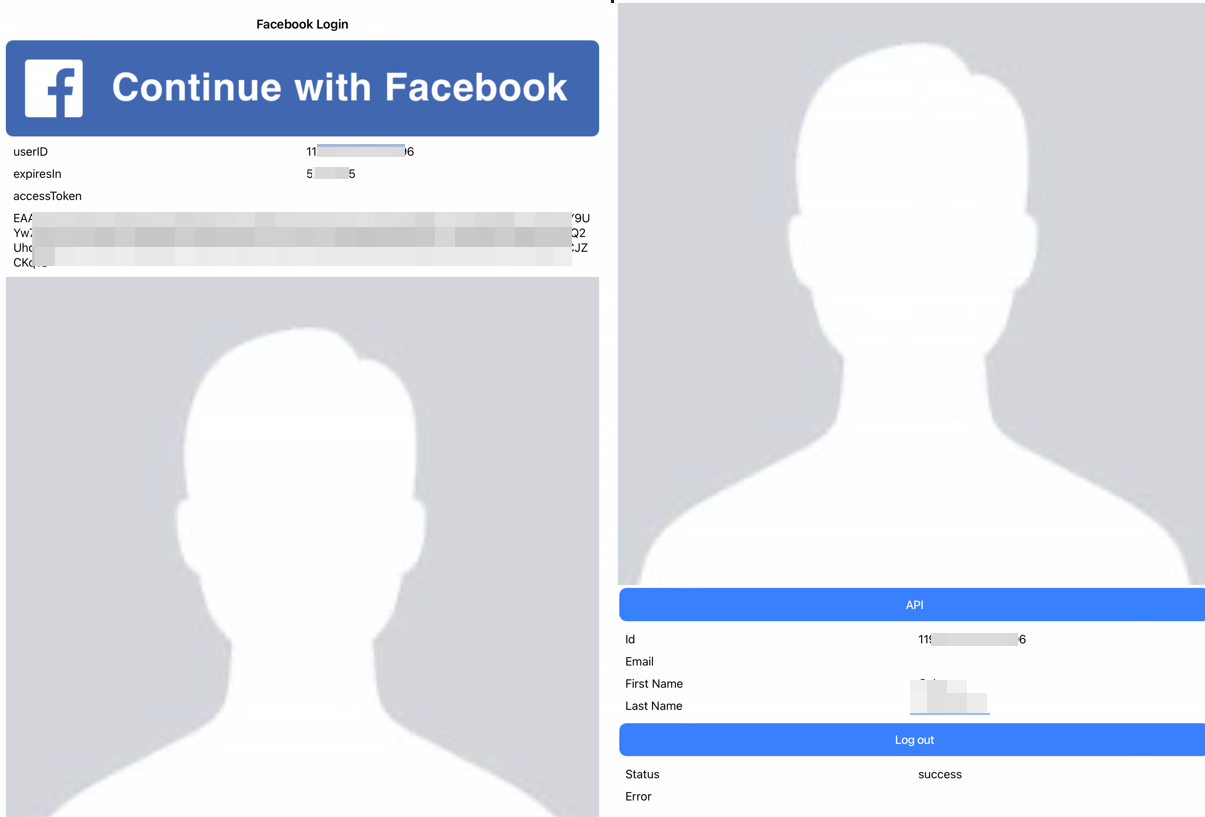
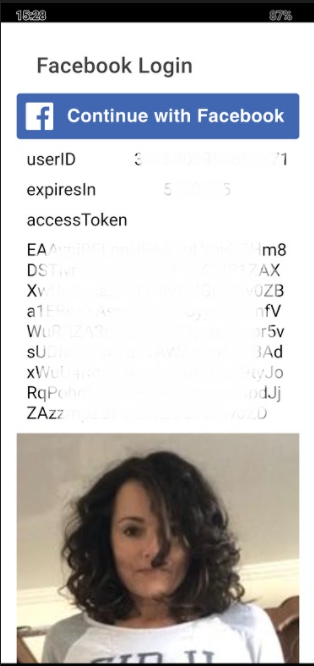
Testing Android App
This is how it should look like on the Android device with the actual Facebook profile:
Updated about 1 year ago