Ionic Google Maps Tutorial
This tutorial demonstrates how to use the Google Map component in an Ionic app. As part of the app design, the Geolocation service is added to show current coordinates on the map.
Appery.io provides the Ionic Google Map component. You can simply drag it to the page, configure it via the PROPERTIES panel like any other UI component, and then use it with the Google Maps API via JavaScript.
Before You Start
Google Maps API keyBefore you begin, don't forget to set up the Google Maps API key for yourself if you haven't already. It's required for the Google Maps component to work correctly in your app. Learn how to get your API key from this guide.
And be careful with API restrictions. (You can read about these here.)
Want to know more?You might also like our Appery.io YouTube video that shows how to build a mobile application that uses Google Map, Google API, and Appery.io Database:
Creating New App
- From the Apps tab, click Create new app.
- Select Ionic Blank as the application type, enter an app name, and click Create.
- You will see a Start page. On the left side, expand the Project tab folder and go to App Settings > Components>Google Maps. Set your own Google API Key to the Browser API key field:
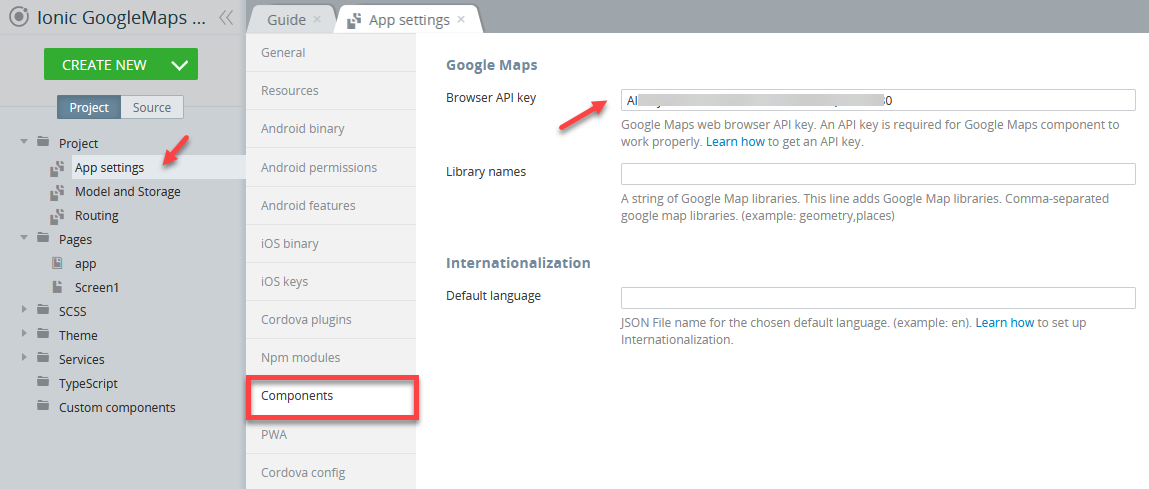
Google API Key
- Then navigate to App Settings > Cordova plugins >Core Cordova plugins view and enable the Geolocation plugin:
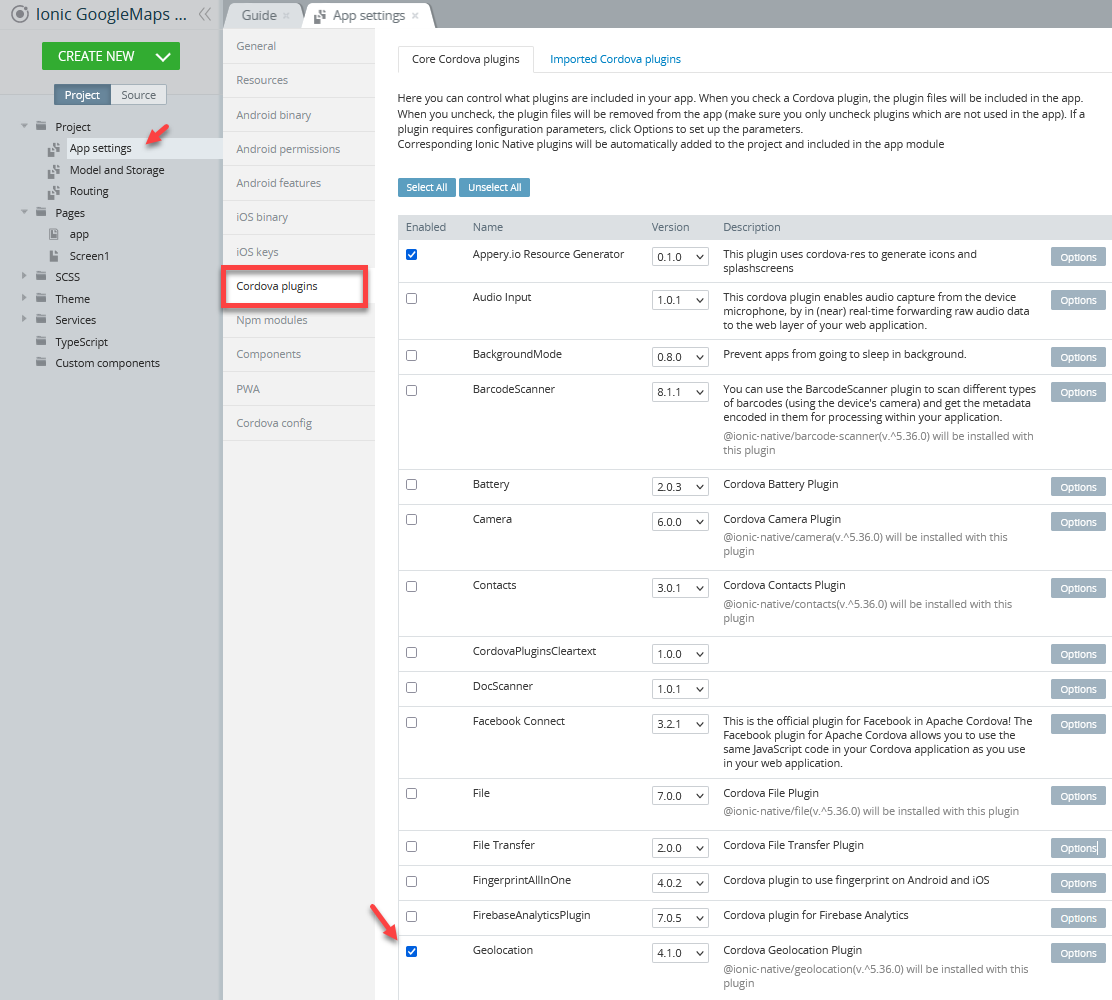
Geolocation plugin
Building UI
Next, we set up the UI, consisting of a Google Map component and a Button component.
- Open Screen1 and go to its DESIGN tab. Click on the Toolbar title in the app screen and change it to Google Maps App by changing the Text property under the PROPERTIES panel menu.
- Now, use the Breadcrumbs to select the Page component. Then, under its PROPERTIES panel, set the Footer property to False.
- Drag the Button component to the screen and under the Common tab, set its Text property to Get Current Position.
- Then, drag the Google Map component and drop it to Screen1.
The resulting app UI should look like this:
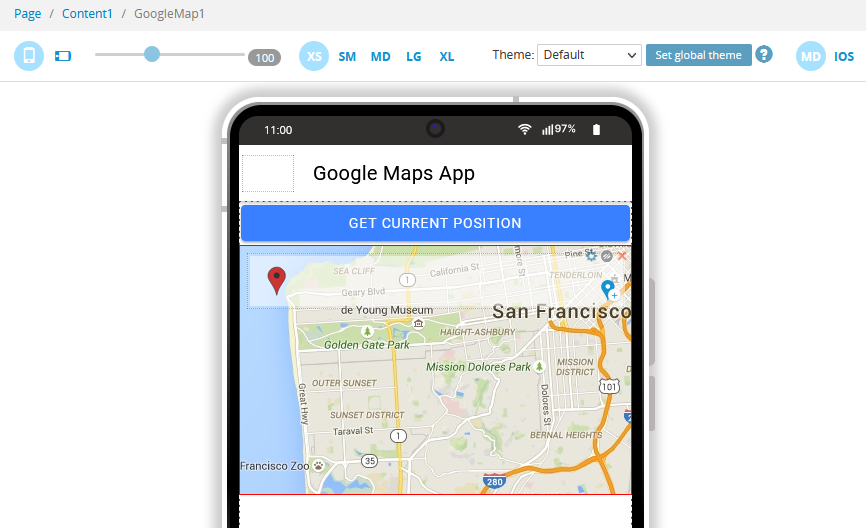
Resulting app view
Defining Application Logic
Next, we are going to "wire" things together in the app.
- Open the CODE tab. Add
latandlngvariables and set their type to Number:

Add lat and lng variables
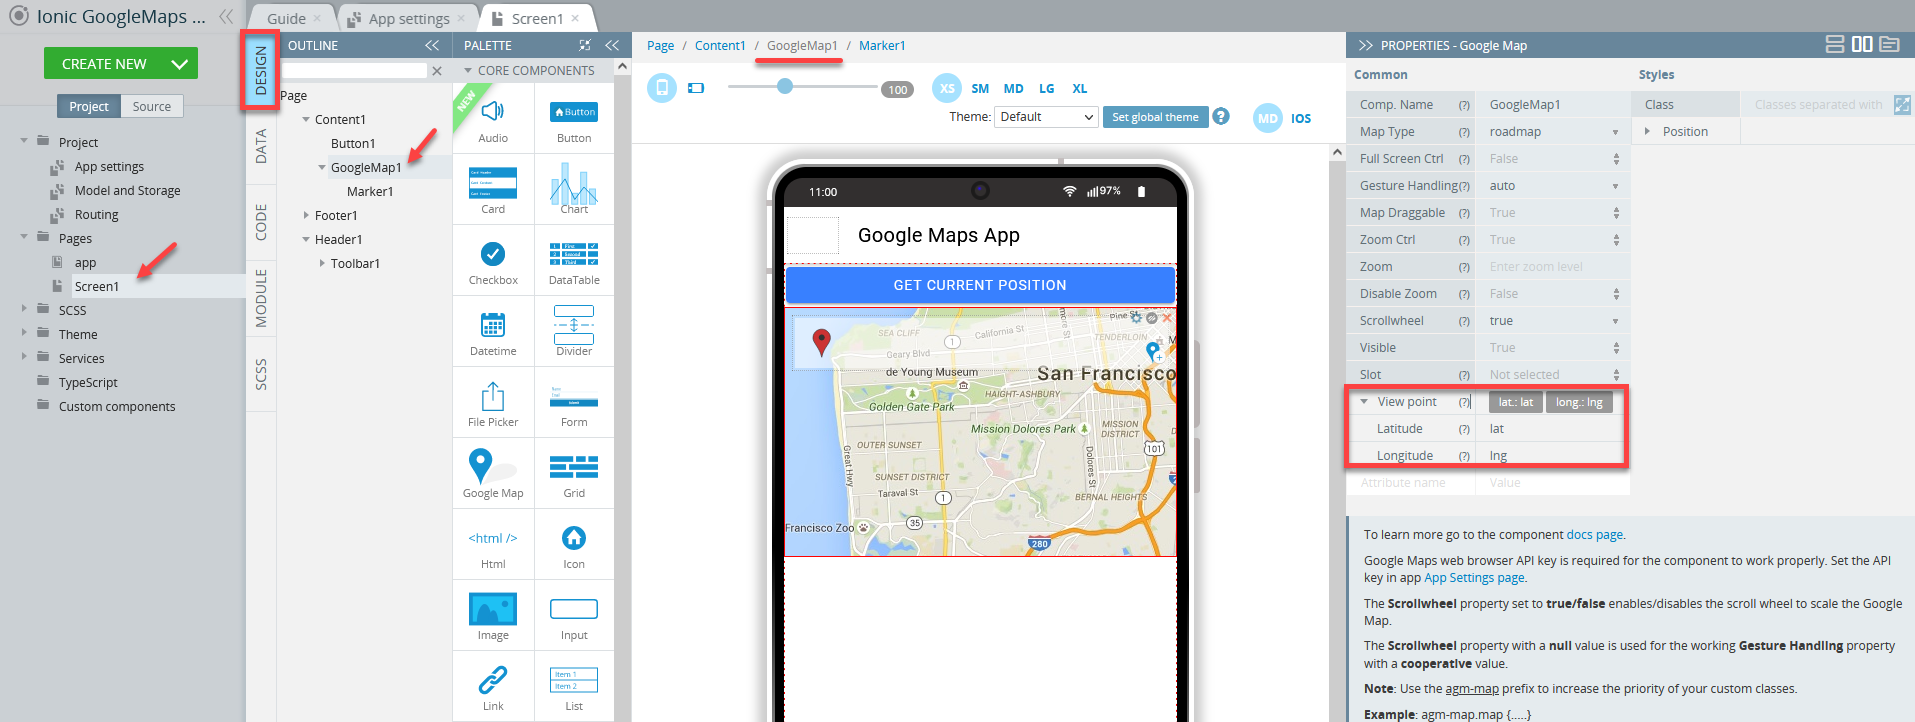
- Go back to the DESIGN tab. Select the Google Map component (for your convenience, you can use the OUTLINE view or do it by selecting the needed component in the Breadcrumbs menu) and set its View point properties to:
- Latitude = lat
- Longitude = lng:
Define lat and lng variables
- Then, select Google Map >Marker1 and set its Coords properties to:
- Latitude = lat
- Longitude = lng:
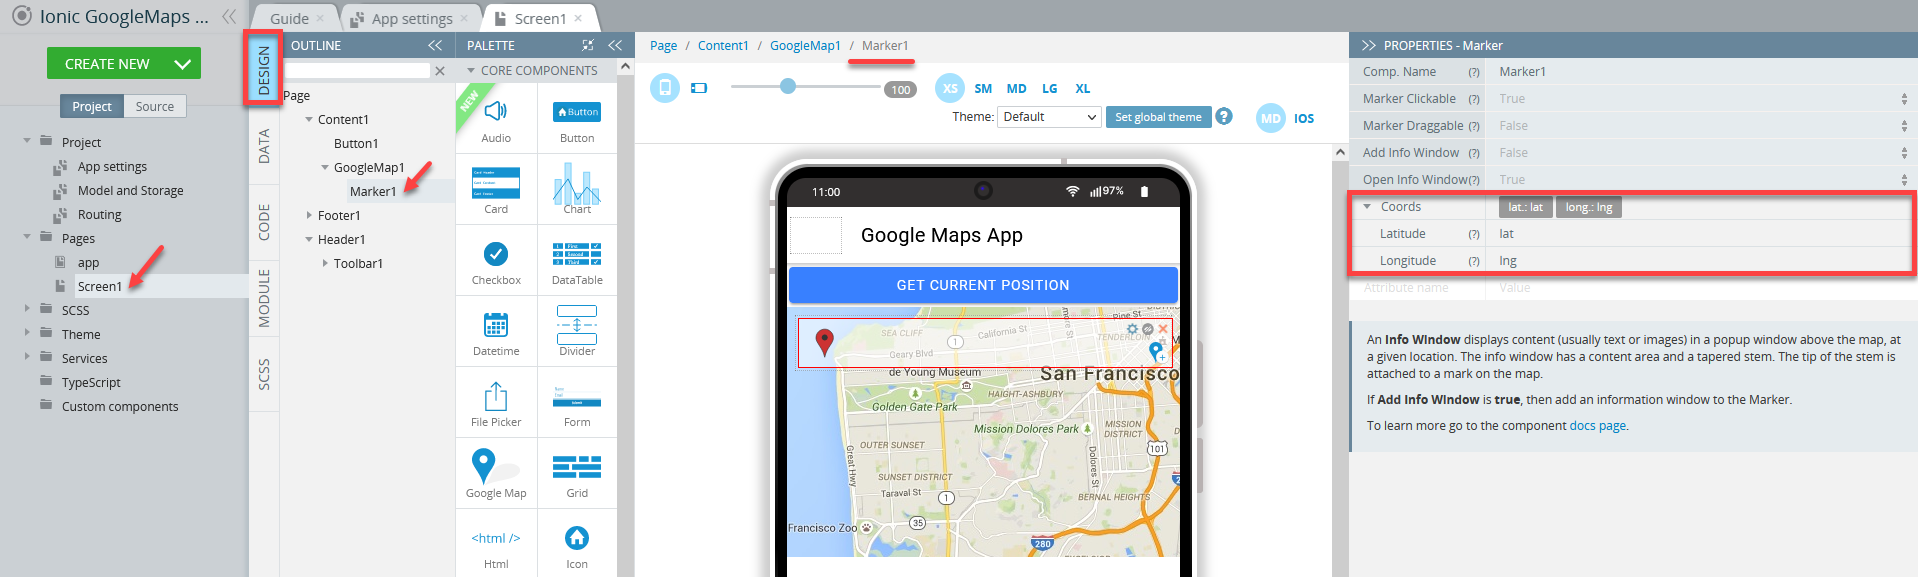
Define Marker coordinates
- Click the Get Current Position button (Button1) and expand the EVENTS tab from the bottom. There, for the Button1 component, select the Click event and, for action, set Run TypeScript with inserting the following code:
let _this = this;

let onSuccess = (position) => {
    _this.lat = position.coords.latitude;
    _this.lng = position.coords.longitude;
};

function onError(error) {
    console.log('code: ' + error.code + '\n' + 'message: ' + error.message + '\n');
}

navigator.geolocation.getCurrentPosition(onSuccess, onError);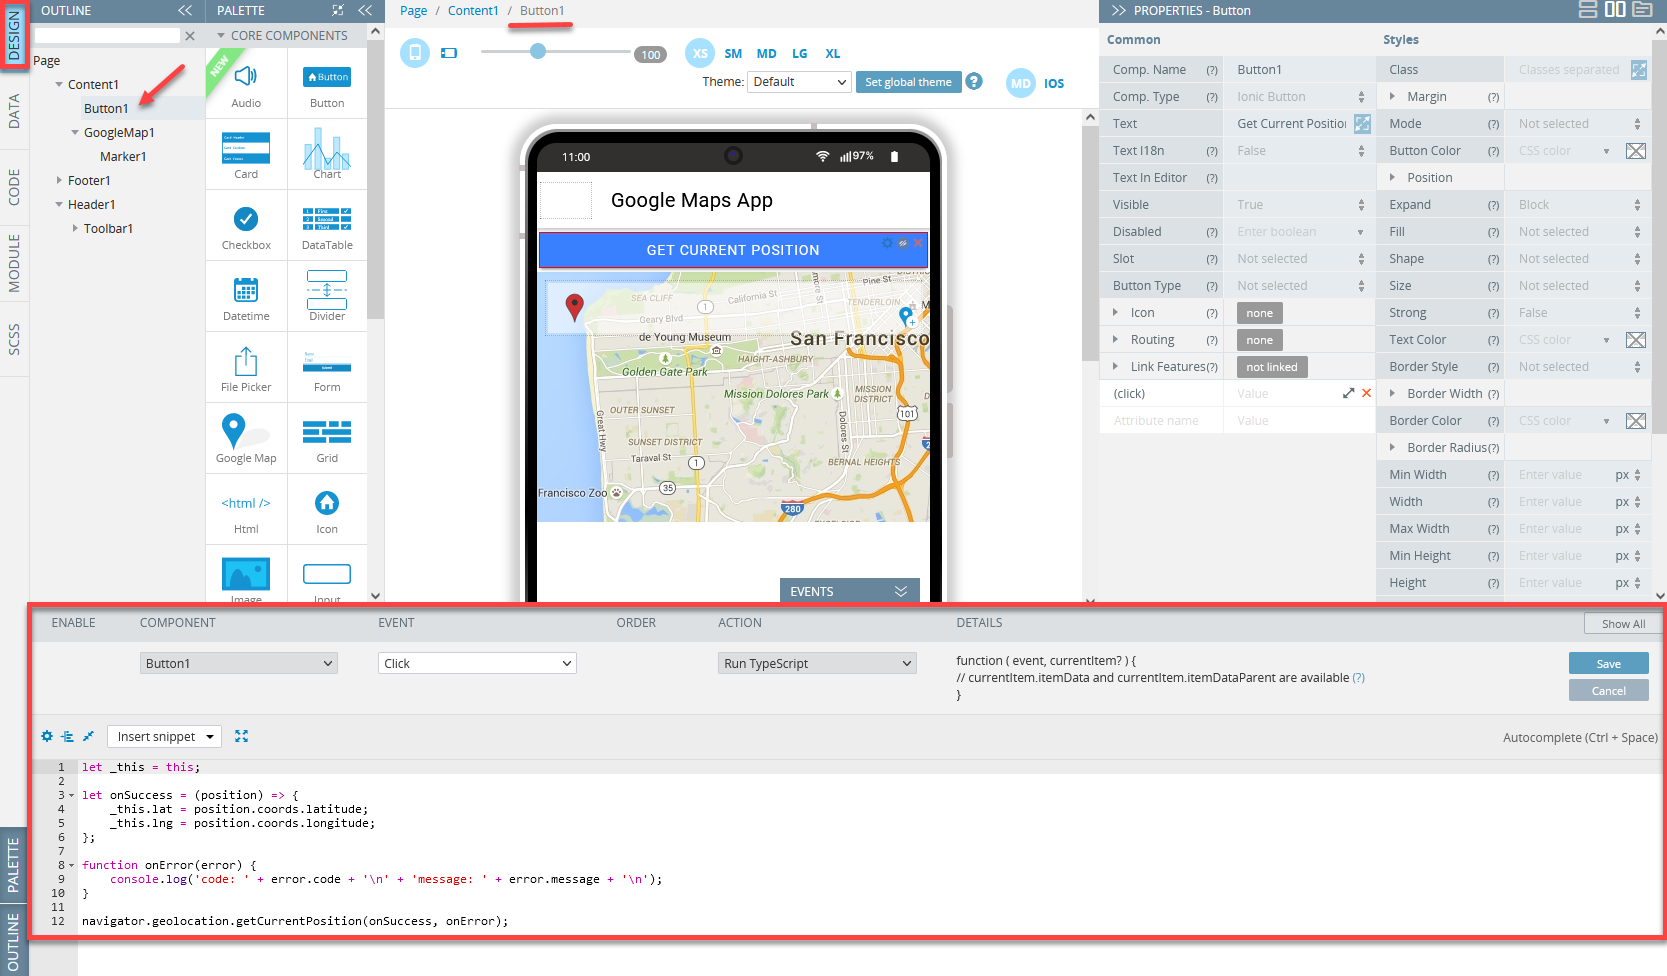
Set Click event
- Click the SAVE button in the App Builder Toolbar to save all the changes.
App Testing
Now, you are ready to test your app.
Click the TEST button in the App Builder Toolbar to launch the app in the browser.
After the map loads, click the button to get your current position.
Testing on Device
Now, when your app version is ready, you might also like to test it on the device.
Appery.io Tester AppA great option to quickly test the app on the device is to use our Appery.io Tester app.
The app is free and available for both iOS and Android.
You can check out this page to learn more about using the Appery.io Tester app.
"For Development Purposes Only" ModeWhen testing, you can see the message "For Development Purposes Only". To get unrestricted access, you will need to enable Billing on the Google Cloud Project at https://console.cloud.google.com/project/_/billing/enable.
Learn more at https://developers.google.com/maps/gmp-get-started.
Troubleshooting

"This page didn’t load Google Maps correctly" error
If you encounter this issue, make sure that Google Maps Platform billing is enabled. To use the Maps JavaScript API, add the API key to all API requests and enable billing for each of your projects. You can read more about it here.
Updated about 1 year ago