Connecting to a REST API
Connecting to a REST API in an Ionic application.
Introduction
This quickstart tutorial shows how to connect to a 3rd party REST API using API Express. In this tutorial, you will learn about:
- Connecting to a 3rd party REST API.
- Our recommended approach to using 3rd party REST APIs in your Appery.io apps.
OpenWeather API
This tutorial uses the OpenWeatherMap API.
Please sign up for a free account to get an API key to use the service.
To start, you are going to create an API Express project.
Creating API Express Project
- Go to the API Express tab.
- Click the Create new project button.
- For the name, enter weatherAPI. Optionally enter the API description:
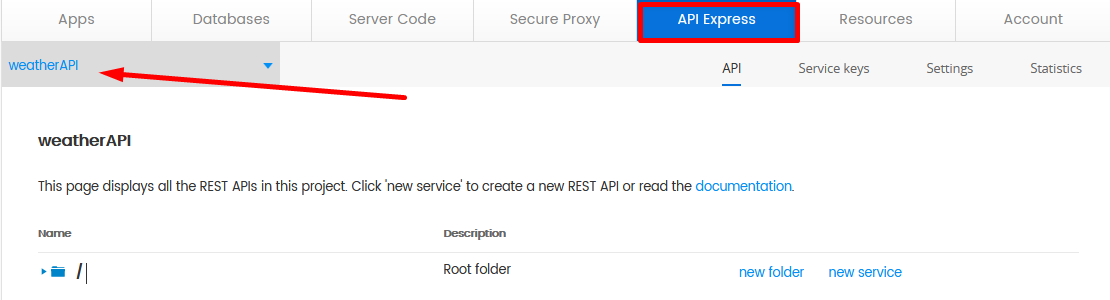
The visual service editor will load where you will use the REST component. But first, you need a place to store the API key for the service.
Storing API Key
The API key (called appid in OpenWeatherMap) rarely changes so we want to store it in one place so we can easily reference it in the API. For this, you are going to use the Service keys functionality.
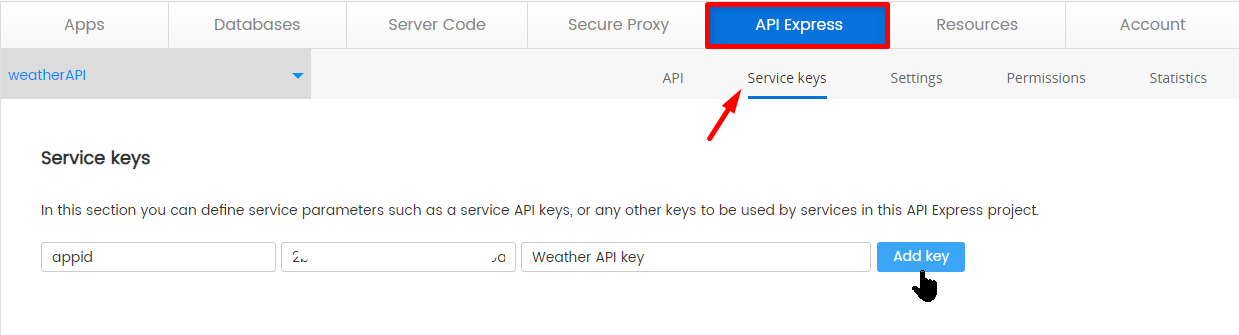
- From the newly created API Express project, click on the Service keys page.
- For the key name enter: appid.
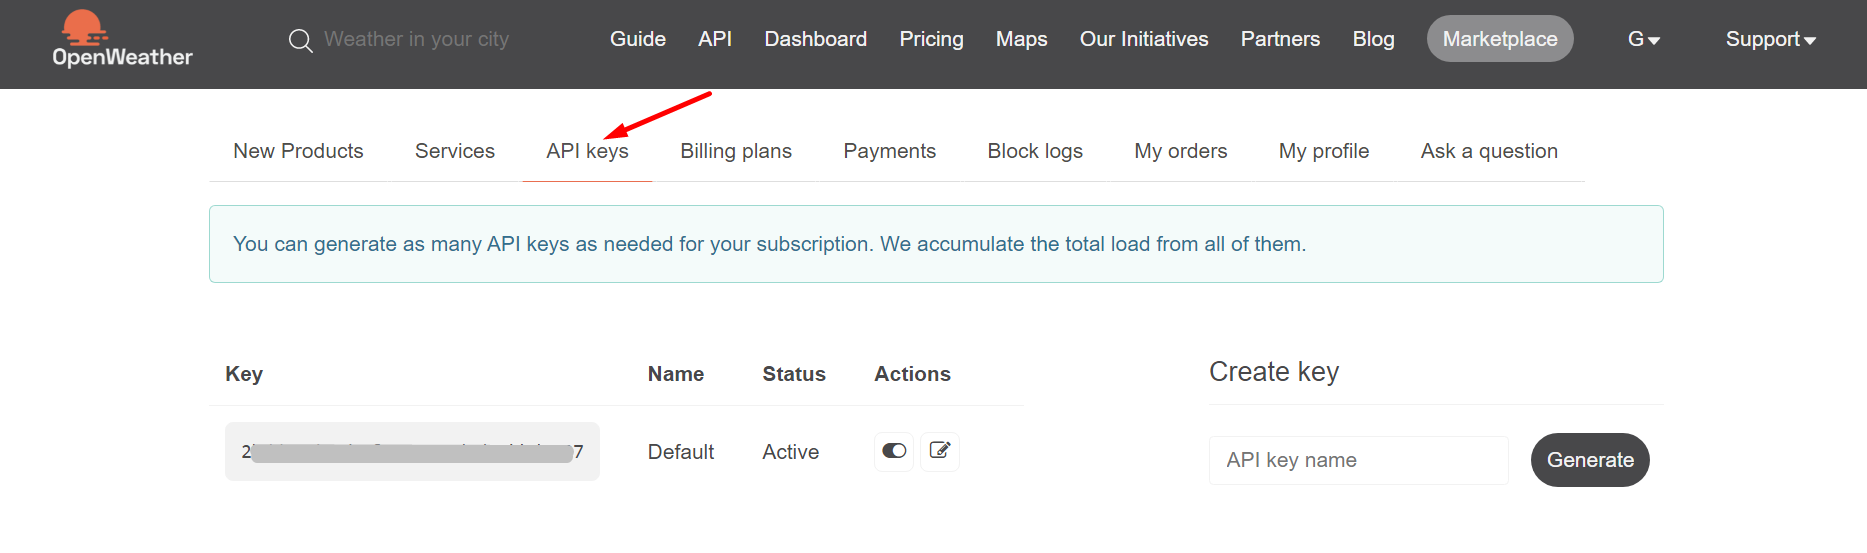
- For the key value, paste the appid from the OpenWeatherMap site.
You can find the appid on this page:
- For description enter: Weather API key.
- Click the Add key button to save this key:
Now the API key is safely and securely saved on the server. Next, let's work on setting up the REST component.
Using REST component
In this step, you will add and configure the REST component.
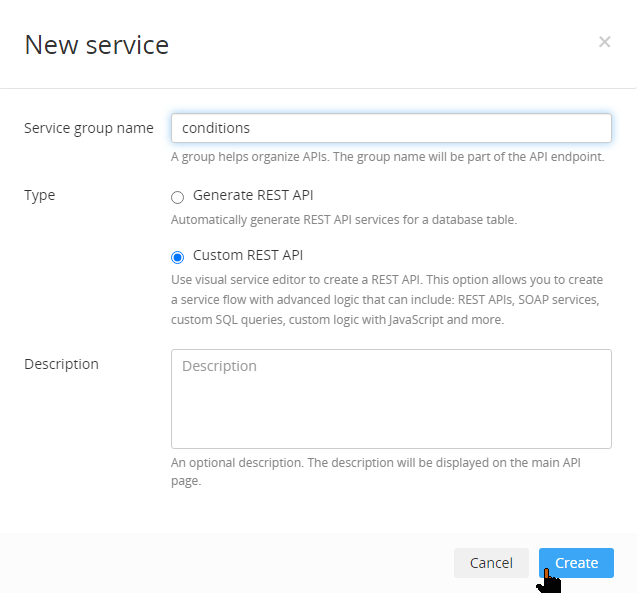
- From the main API page, click the new service link:
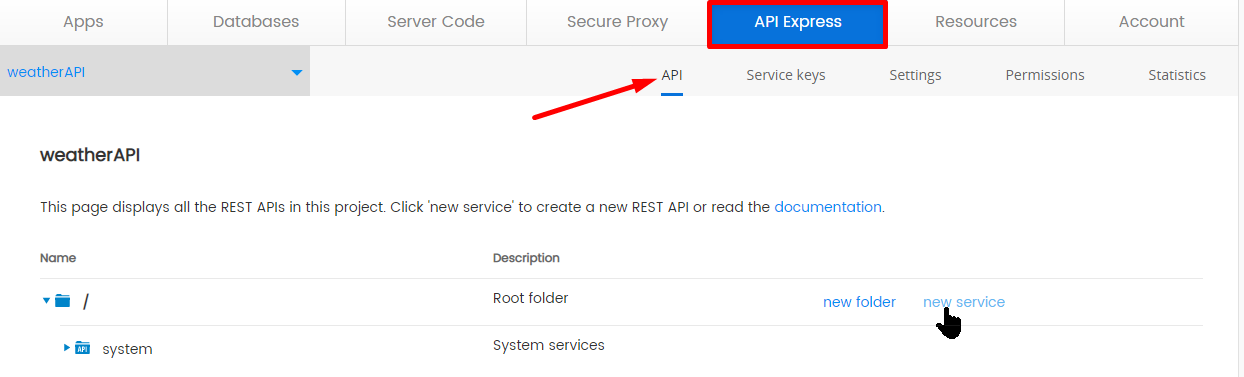
- For Service group name enter: conditions.
- Select the Custom REST API option and click the Create button:
The visual service editor will load.
- Select the START component and under its SERVICE section, set the URI template value to: weather. This is the name of the service.
- The OpenWeatherMap service requires two parameters to work: appid and location. We already took care of the appid. In this step, we need to create the location parameter which will be passed to the weather API. Under the REQUEST QUERY PARAMETERS section, enter: location (*String** type):

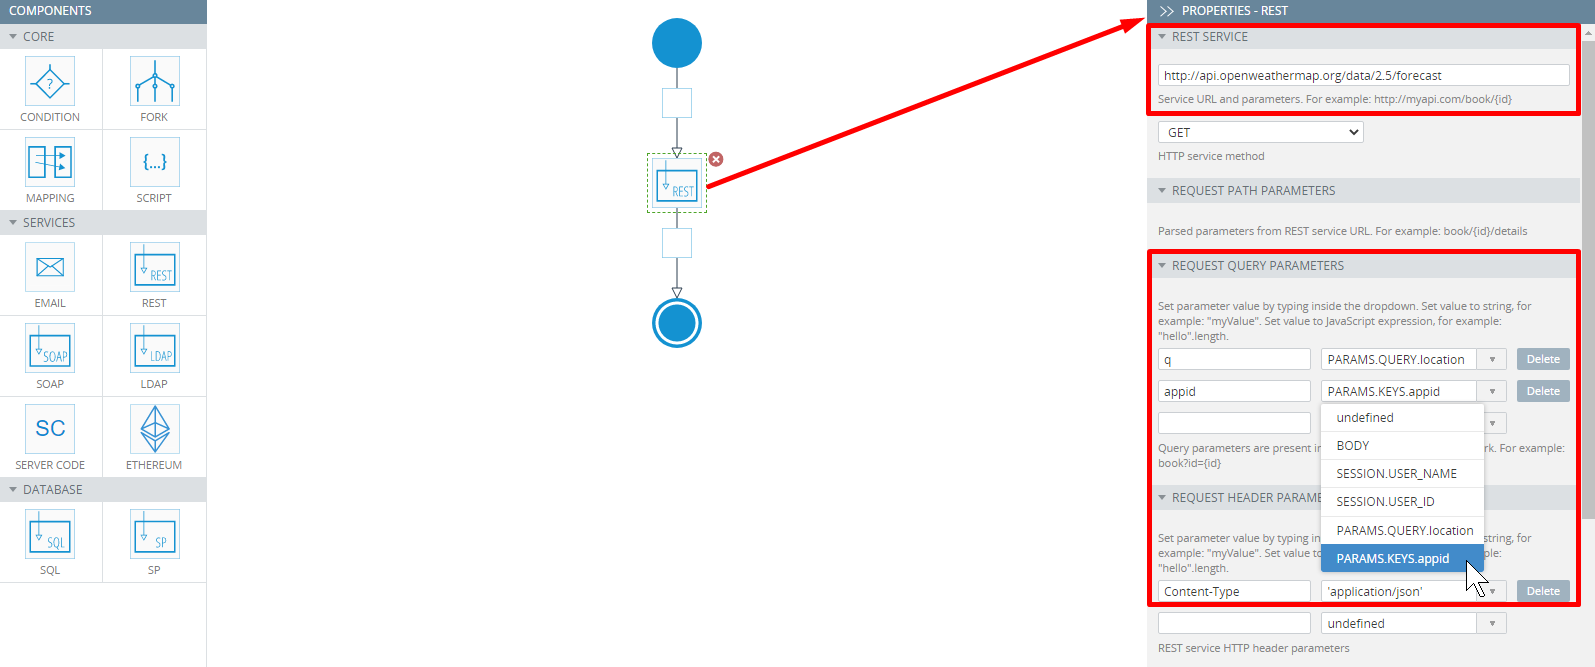
- Next drag the REST component and drop it into the square between the START and END components.
- In the REST SERVICE section, for the URL value, enter http://api.openweathermap.org/data/2.5/forecast.
- In the REQUEST QUERY PARAMETERS section, create a parameter called: q and map it to the PARAMS.QUERY.location value. In this example, q is the parameter used by the OpenWeatherMap API and it is mapped to a location parameter in the API Express service you are creating.
- Below, add another parameter, appid, and map it to the PARAMS.KEYS.appid value. Any keys you create can now be accessed in the service editor:
Next, you will need to generate the API Express service response by testing the service.
Setting REST Component Response
To set the REST component, you will need to test the service.
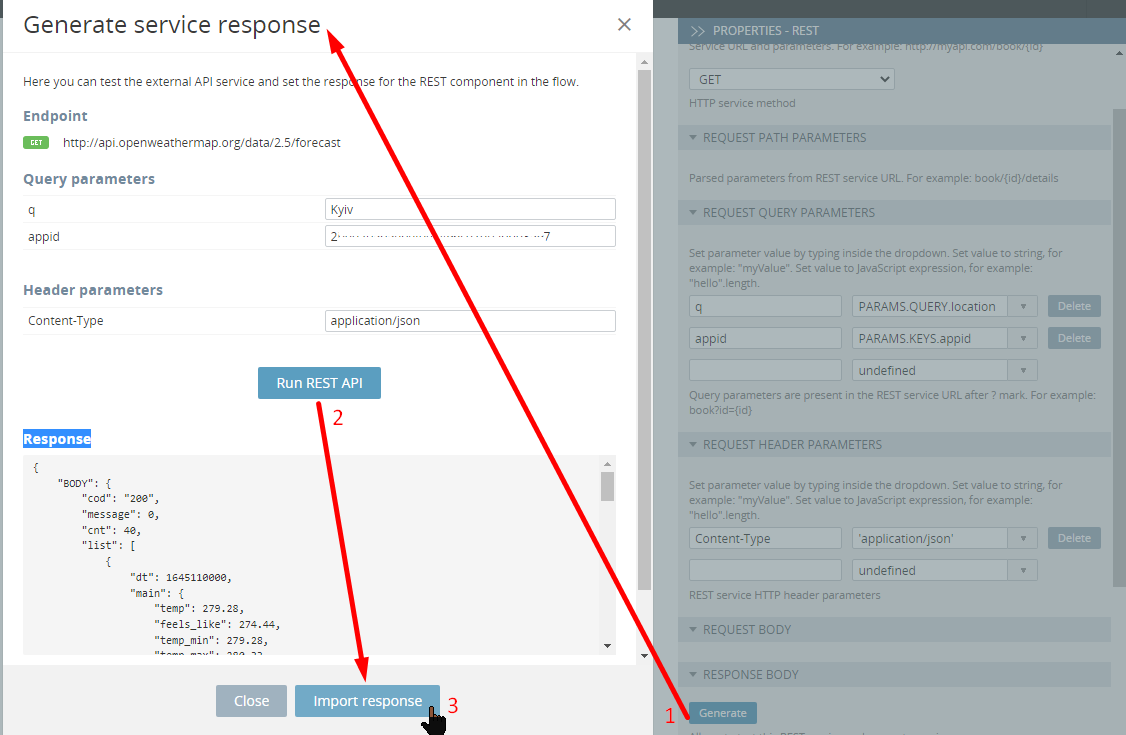
- Scroll down the REST component PROPERTIES section and click the Generate button.
- On this page, you can test the 3rd party REST API. You will need to enter a location. The appid is already pre-filled.
- Click Run REST API to test the API. The service response will be displayed below.
- Next click the Import response button. This will use the response from the weather API as the response of the REST component:
Setting Service Response
The last step is to set the API Express service response. That's the weatherAPI service.
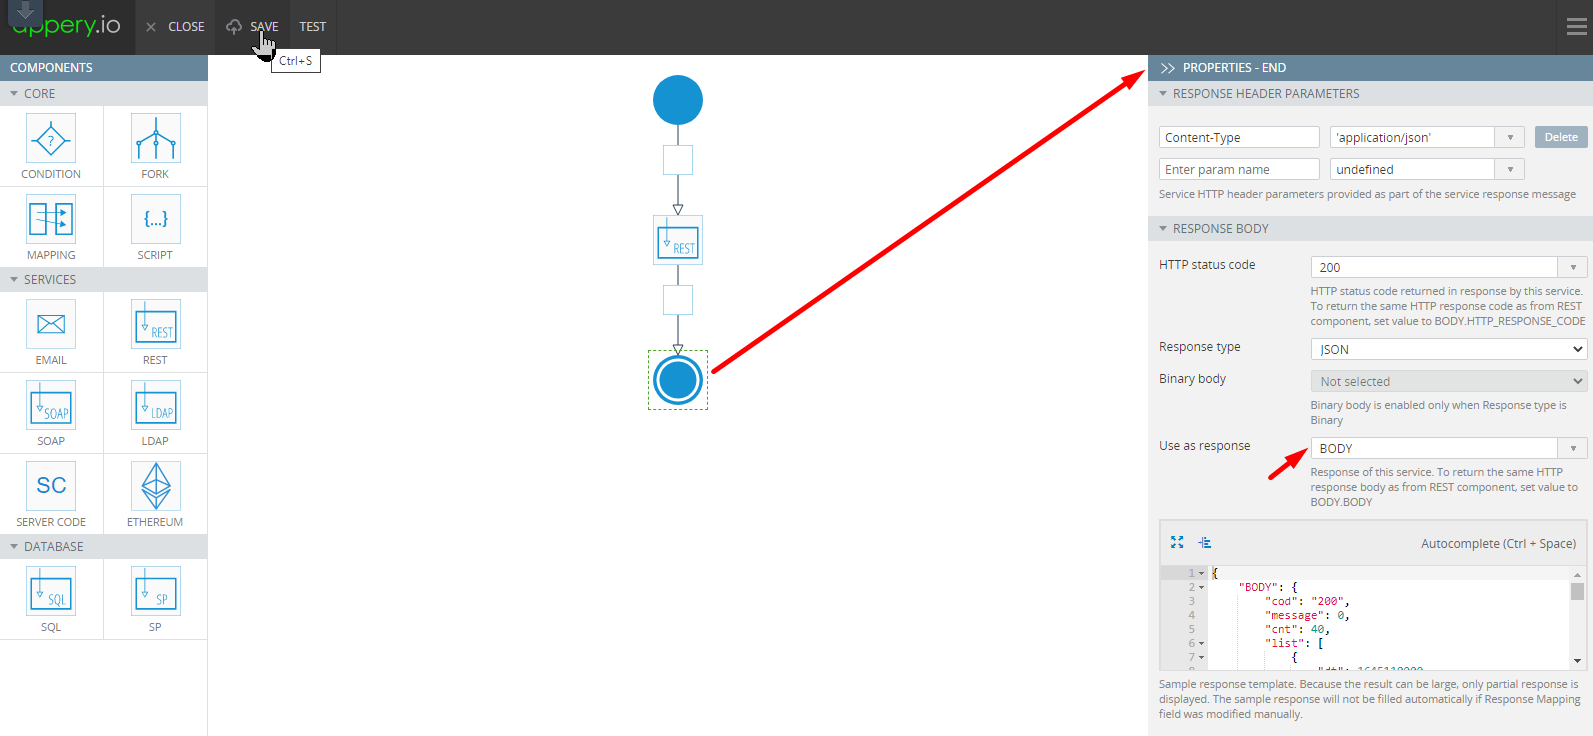
- Select the END component.
- Under the RESPONSE BODY you will see that Use as response is set to BODY. BODY means using the response from the previous component, the REST component. That's exactly what we need in this example.
To learn more about the BODY object, you can go to the Components Data page.
- Click the SAVE button and you are ready to test the service:
Testing Service
Now, let's test the service by clicking the test link:
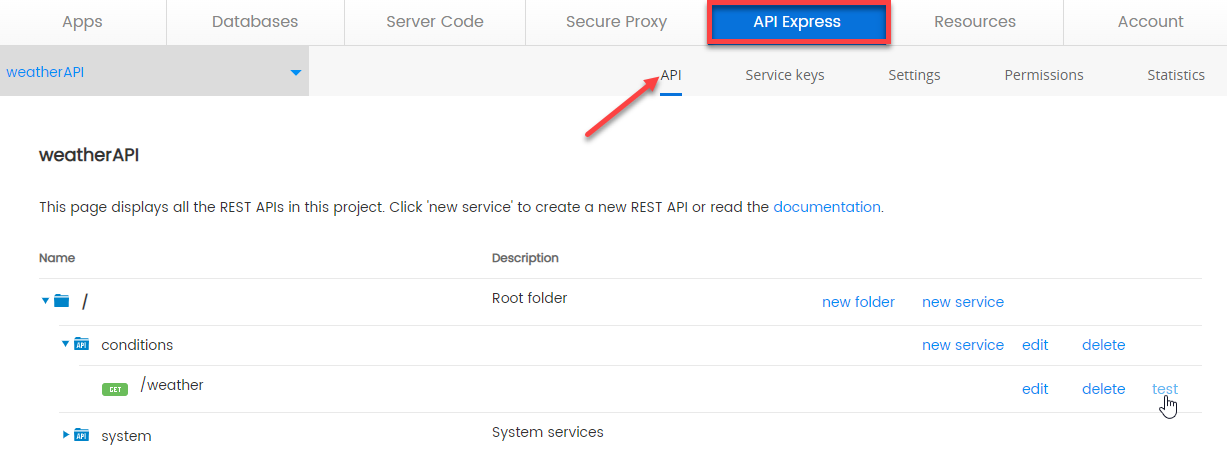
A new browser tab will open where you can test the service you just created. You only need to enter a test location:

Creating New App to Use the API
You have created the backend for your app, so the next step is to build the app UI.
- Close the service editor and from the Apps tab, click Create new app:
- Select Ionic Blank as the application type, enter Ionic WeatherApp for the app name, and click Create.
Next, you are going to import the REST API service you just created.
Importing API Express Service
API Express services can be quickly imported into the app.
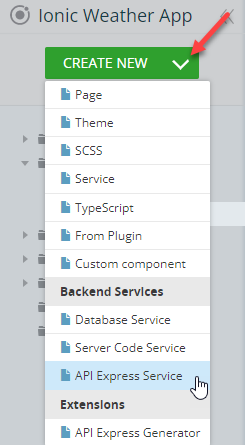
- Click CREATE NEW > API Express service:
- Select the API Express project you've just created.
- You will see the conditions/weather endpoint REST API. Check the weather check box and click the Import selected services button:

- The API Express service is now imported under the Services folder:
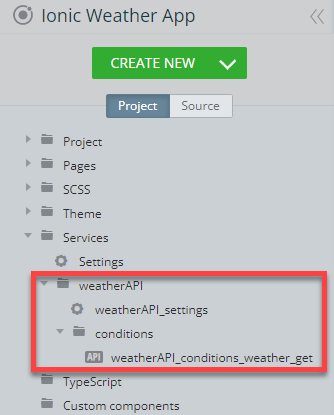
Open the service to see that everything is preconfigured.
It's a good idea to test the service inside the App Builder. To do that:
- Select the service, then go to its Test tab.
- Open the Query String tab and enter some test value for location.
- Now, click Test to test the service. You should see the response in the Response section:

Editing ServicesIf you need to make changes to the services it is recommended to make any changes to the service in API Express, test the service there again and re-import it. If you re-import the service, any mappings you have set for the service will be removed.
Another option (more advanced) is to edit the service in API Express and then edit the service in the App Builder. This way you don't need to re-import it.
Re-importing the serviceIf you re-import any service that has been used on a page, all mappings and callbacks will be removed.
Now that you have imported the service, it's time to build the app UI.
Designing App
The app UI will consist of one page. You will be able to enter a location and display conditions for that location.
- Open Pages >Screen1 in the Project view tree.
- Now, select the Page component from the breadcrumbs (you can also use the OUTLINE view to locate the needed component) and set the page Footer property to False as we will not use it in the app (you will also be asked to confirm changing the property):

- Then select ToolbarTitle of the screen header and change its Text property to Weather App:

- From PALETTE, drag the Input component to the page and under the PROPERTIES panel, rename the component, set its Placeholder property value to: Enter location, and replace the default Input1 > Label> Text property with Location:

- Below the Input component, drop the Button component. Under PROPERTIES, change the Text property to Show weather.
- Now, drop the Card component below the Button. Then select this Card Item and add one more Card Item Title:

- Next, you are going to add and map the service so let's work on using the service you have imported.
Using Service on the Page
Now, we should define the newly created service on the Screen1 page.
- Open the page DATA panel.
- For Add datasource, select our service and click the Add button (if needed, you can also change the name of the created instance):

- Now, let’s update the execution flow. For the service Before send event, select Mapping.
- To send the input entered value to the service, create the following mapping and save:

- Now, click Mapping for the Success event and to display the result on the page (in this case, we will display the name of the location, date and temperature), create the following mapping ans save:

- After you click the Save & Replace button, you will be back in the code editor and the mapping code will be automatically generated.
- Open the DESIGN panel and with the button selected, open the EVENTS tab and define the following event: Button1 > Click > Invoke service > weatherAPI_conditions_weather_get1, then click Save:

Finally, click the SAVE button in the top menu to save all the app changes and you are ready to test the app.
Testing App
In the top menu, select the TEST button to start the app in the web browser. Now, try entering city names and see what the weather is like in those locations:
Appery.io API Express: How to Set Up and Connect a Relational DB into Your ProjectYou can also check this video for instructions on how to:
- Set up a relational database using Amazon Web Services
- Create a db table and populate it with data using pgAdmin software.
- Create and define the database connection and generate and test an API express service to expose the DB data.