Validation: How To
How to set up the Validation component for your mobile app
In this document, you will learn how to set up the Validation component for your mobile app.
- Open the DESIGN panel and drag the Form component to the needed app page.
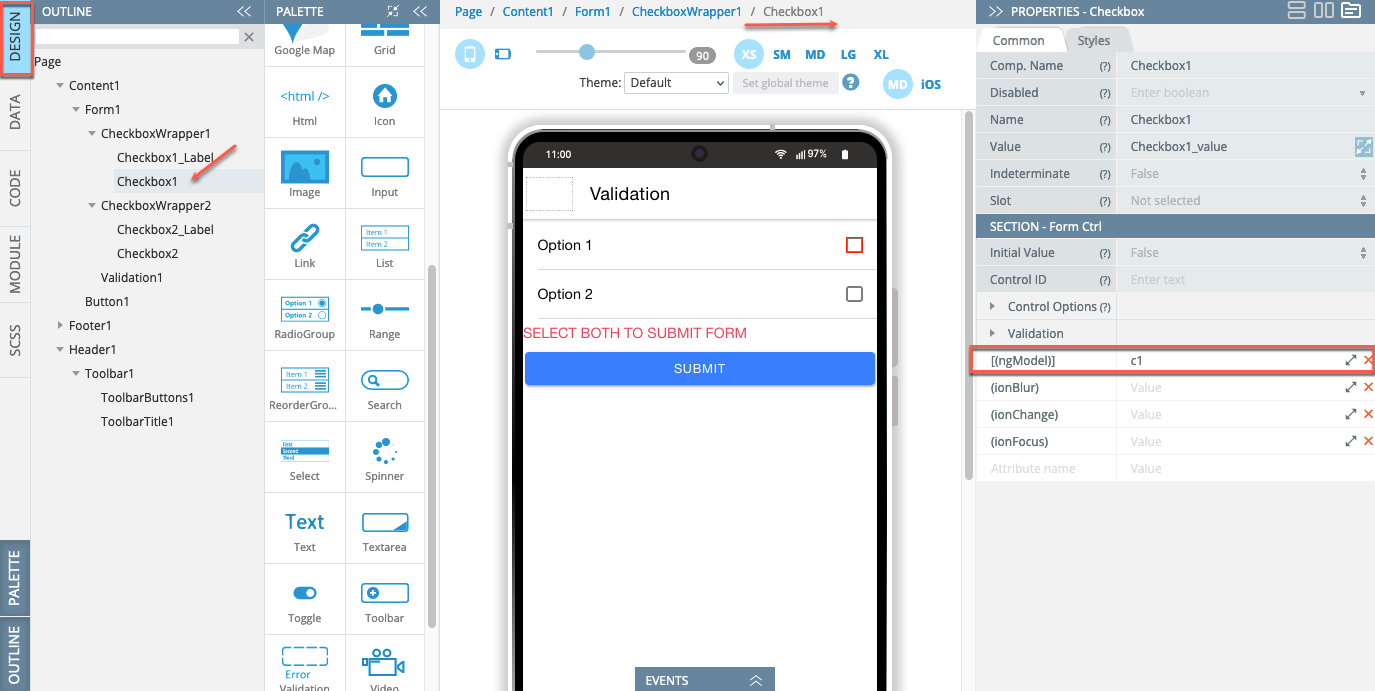
- Now, add two Checkboxes, one Validation, and one Button component to the Form.
- One by one, select the Checkbox components and change their Label Text fields to Option 1, and Option 2 correspondingly. Then for both Checkboxes, define their [(ngModel)] properties as c1 and c2:
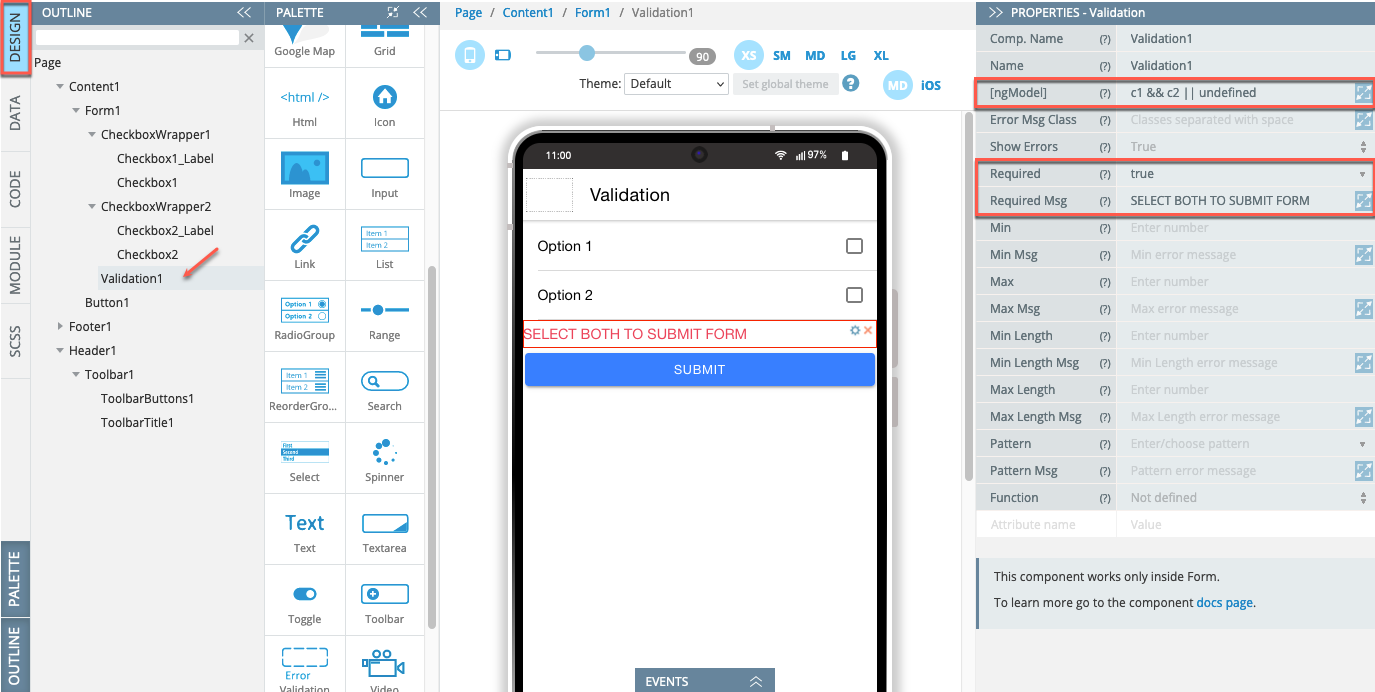
- The Validation component has the below properties modified as follows:
- [(ngModel)] = c1 && c2 || undefined;
- Required = true;
- Required Msg = SELECT BOTH TO SUBMIT FORM:
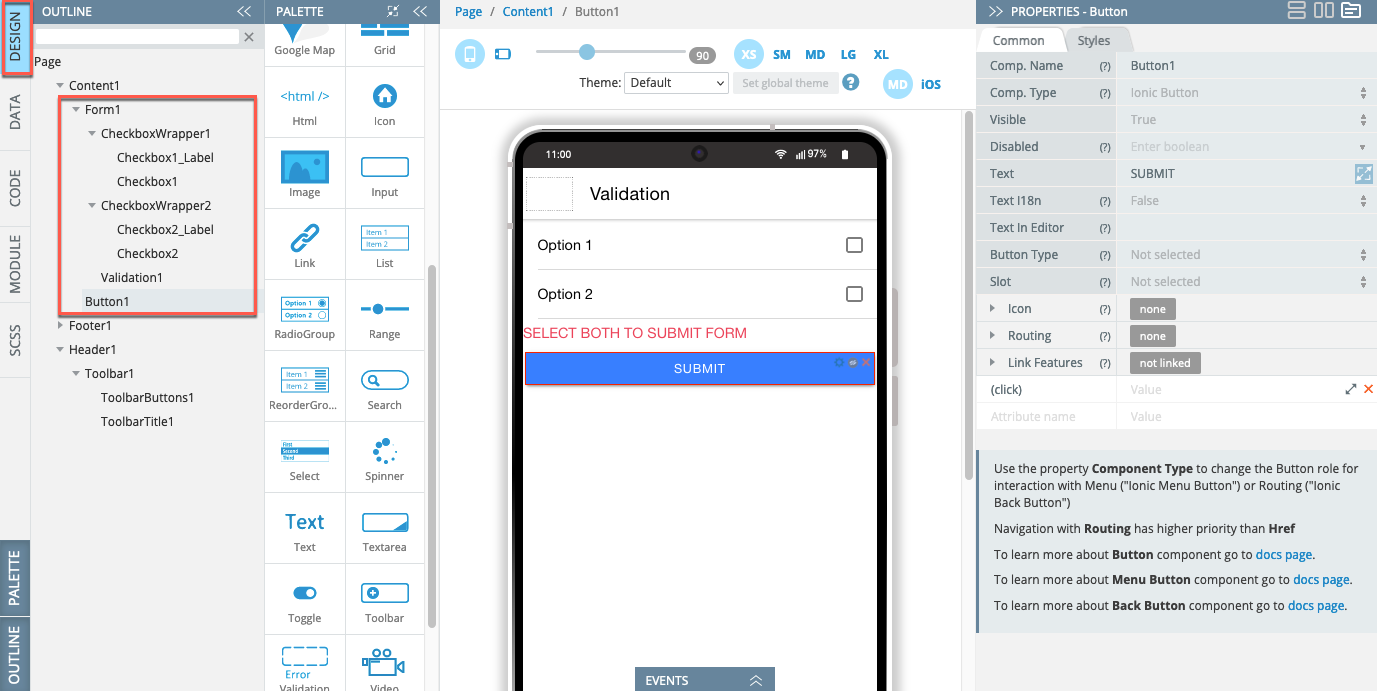
- For the Button component, the Text property is set to SUBMIT:
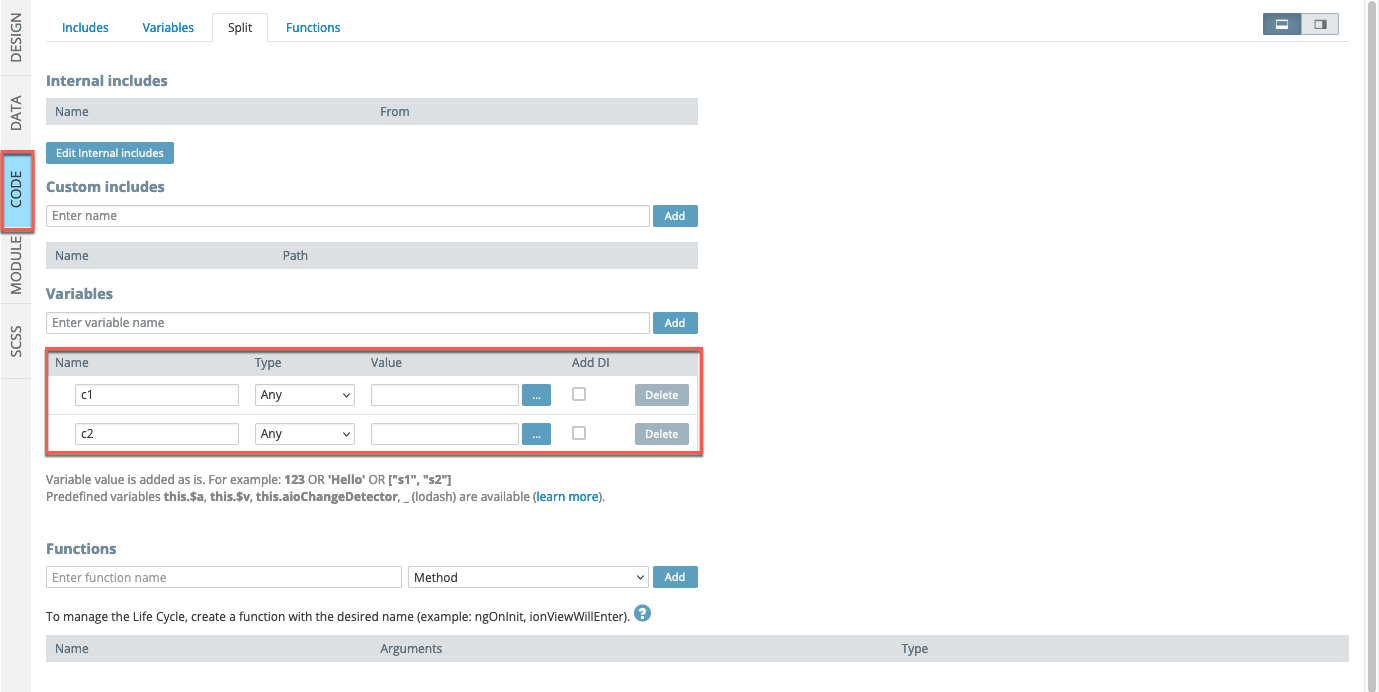
- Now, open the **CODE**panel and add two variables:
c1andc2:
- Finally, unfold the page EVENTS tab.
By default, the button is selected with its Click event enabled. Select the Mark all as touch action and specify the Form component for its DETAILS; save the event:
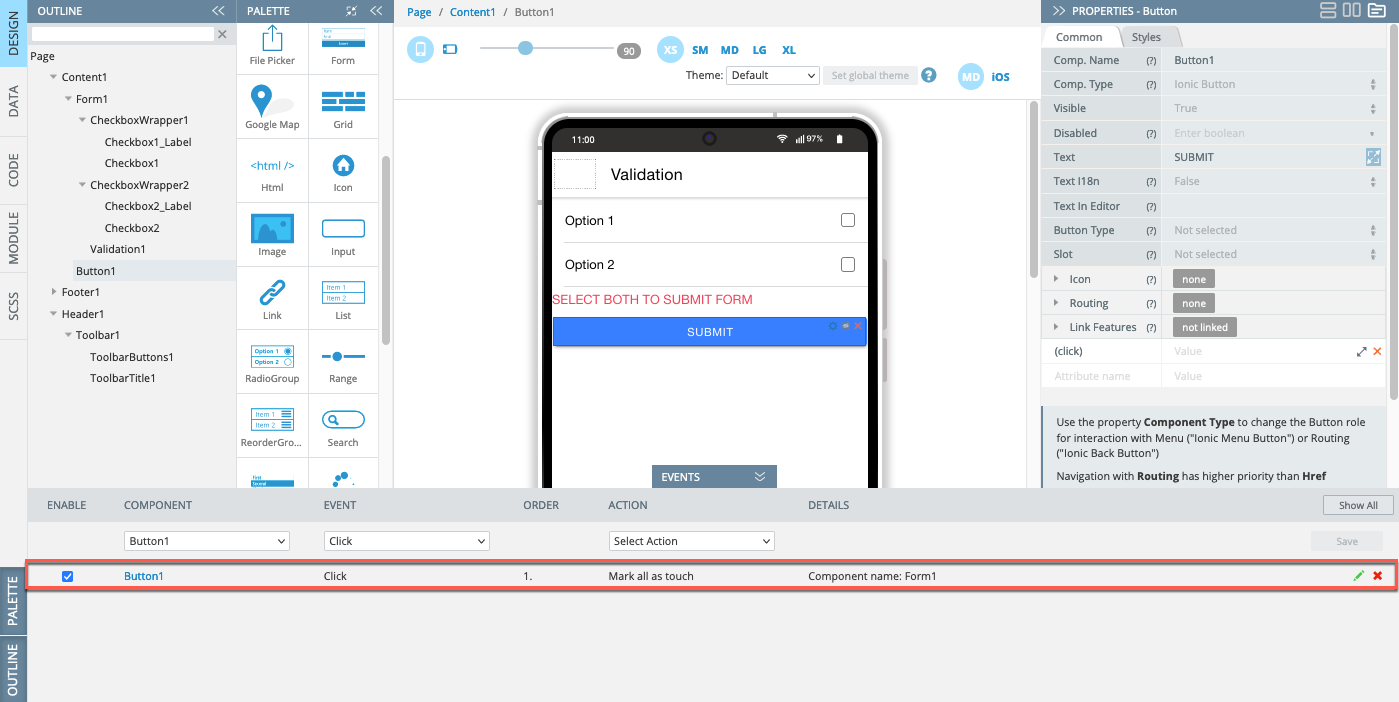
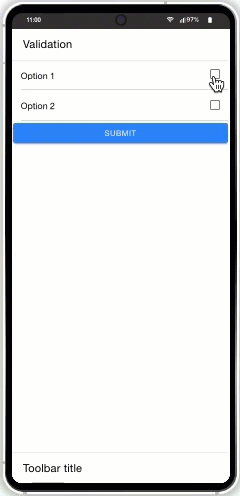
- Click the SAVE and then TEST buttons in the App BuilderToolbar to open the app in preview. Now, try selecting the options one by one and click the SUBMIT button: you should see the validation warning. Make sure that only selecting both options makes submitting the form possible:
Datetime Validation Customization Video TutorialYou can also check this YouTube video to to learn how to how to use the plugin, make date fields required and ensure user input, and see how the Validation component works within the Form container for reliable datetime checks:
Updated 8 months ago
Did this page help you?