Ionic InAppBrowser App Tutorial
Using the InAppBrowser API in an Ionic app
Introduction
In this tutorial, you’ll learn how to build an Ionic app that navigates to a web page via various methods of the Apache CordovaAPI as a preconfigured native service. The InAppBrowser plugin provides the ability to spawn a browser instance from the application.
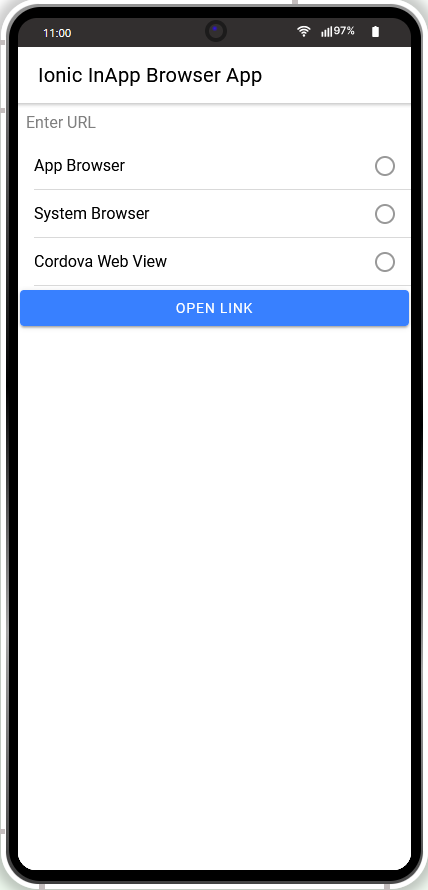
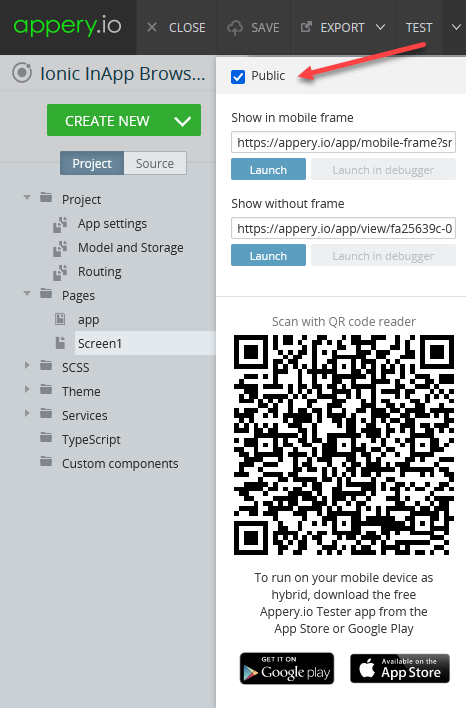
The app will look like this:
Want to know more?To learn more about the component, and any other settings and options, please go to the InAppBrowser documentation page.
Creating App
First, let`s create a new app in the App Builder.
From the Apps tab, click the Create new app button, select Ionic Blank, then enter an app name and click Create.
Creating App UI
- First, open the Screen 1DESIGN panel and to make the app UI more well-round, click on the Toolbar title in the app screen and change it to Ionic InApp Browser App by changing the Text property under the PROPERTIES panel menu:

- Now, select the Page component from the breadcrumbs (you can also use the OUTLINE view to locate the needed component) and set the page Footer property to False as we will not use it in the app (you will also be asked to confirm changing the property).
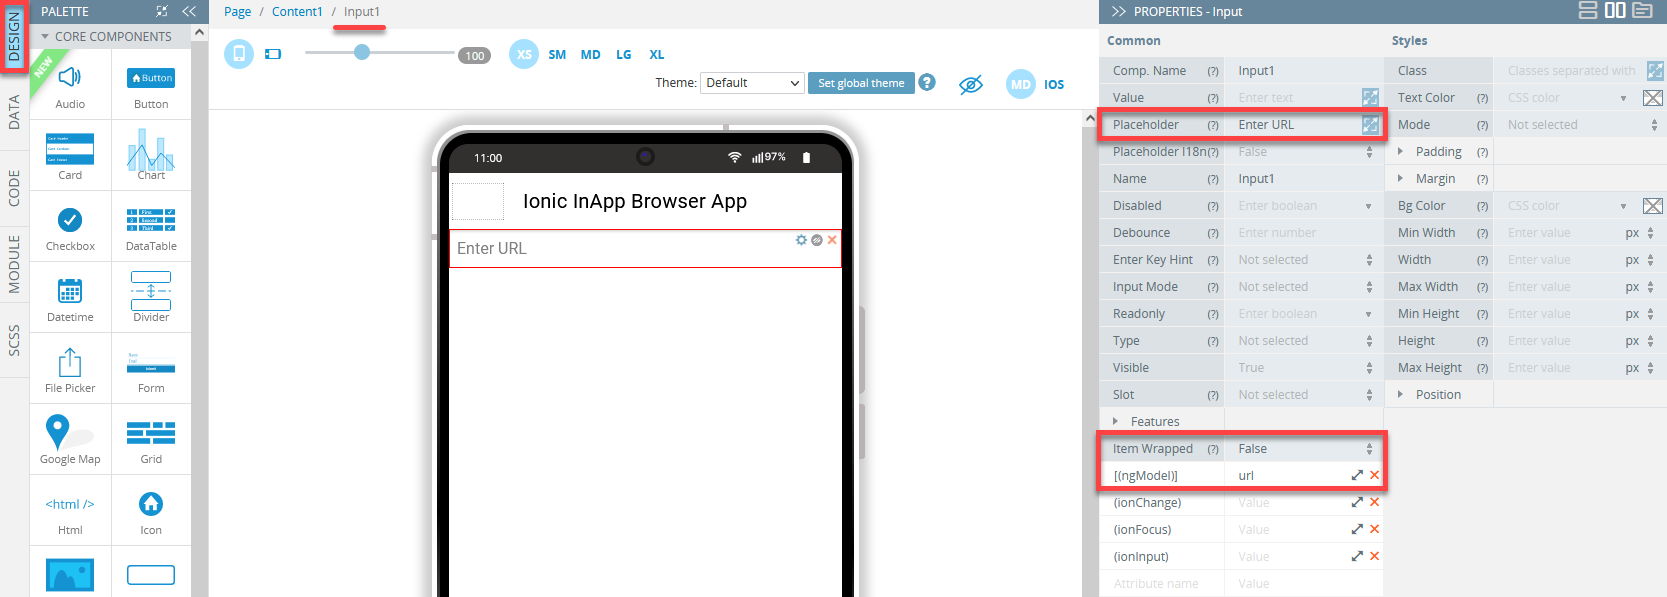
- Now, drag the Input component to the editor.
- Under the PROPERTIES panel menu, change its Placeholder property to Enter URL and set its Item Wrapped property to False. Also, set url as the [(ngModel)] property of the Input component:
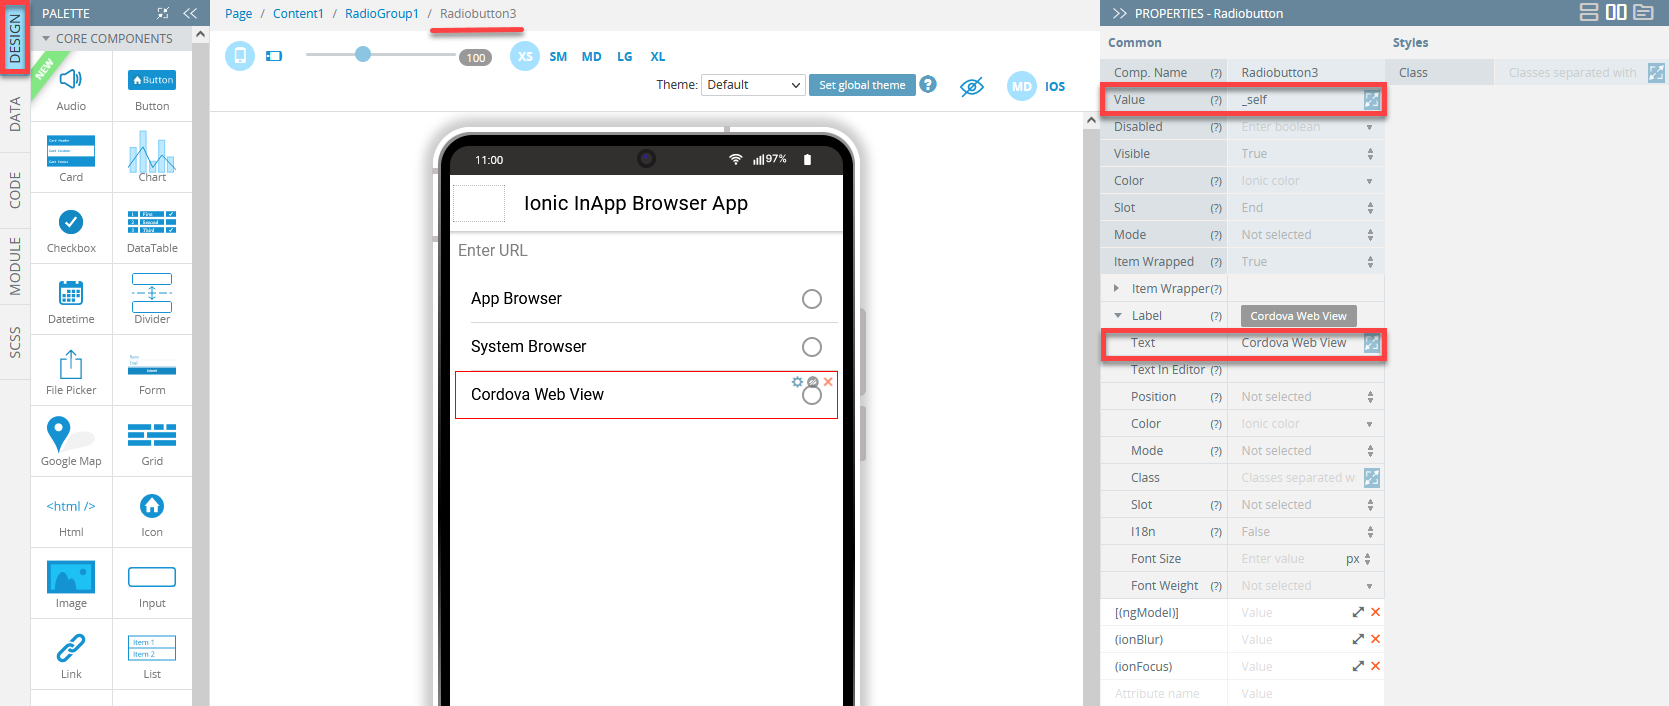
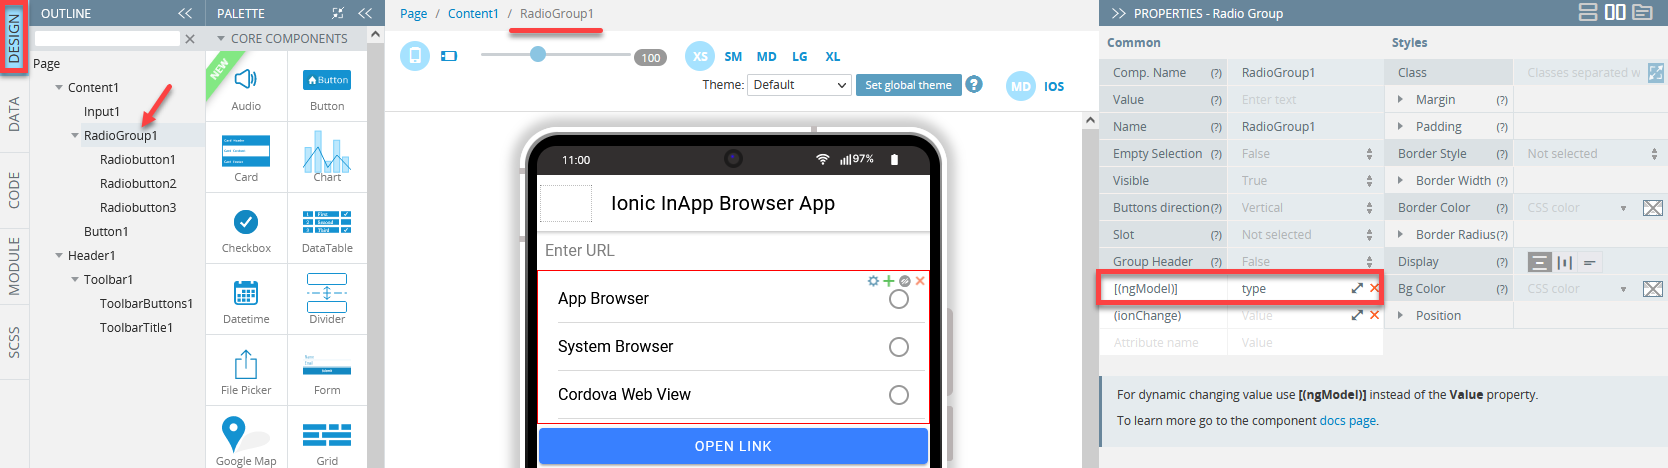
- Now, place the RadioGroup component and set the following parameters for each Radiobutton:
- For Radiobutton1, type In App Browser for its Label > Text property, and define the component's Value as blank.
- For Radiobutton2: set the Label > Text to System Browser, Value – to system.
- And for Radiobutton3: set Label > Text property to Cordova Web View and Value property to self:
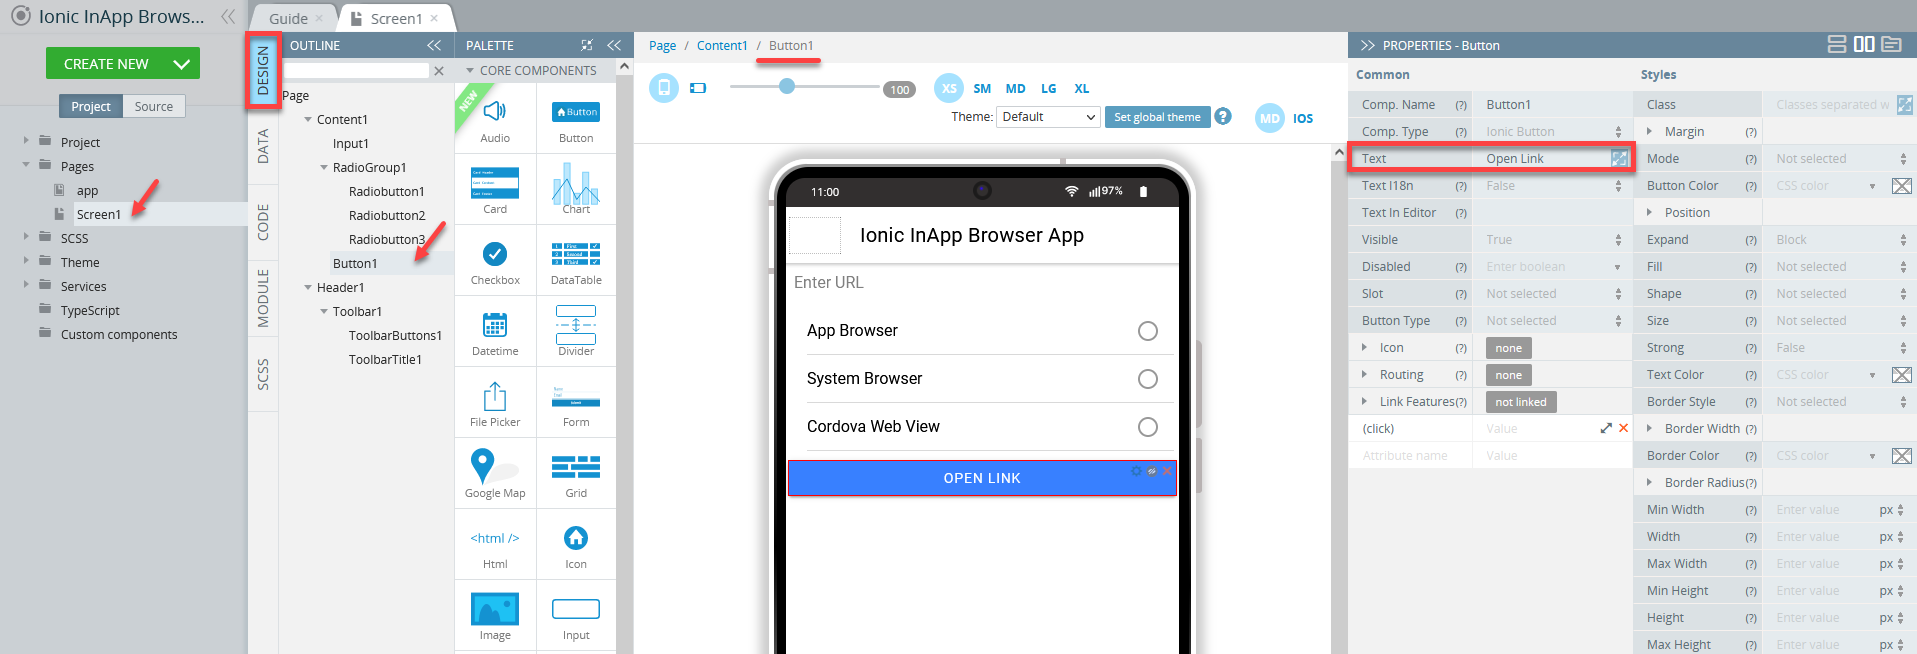
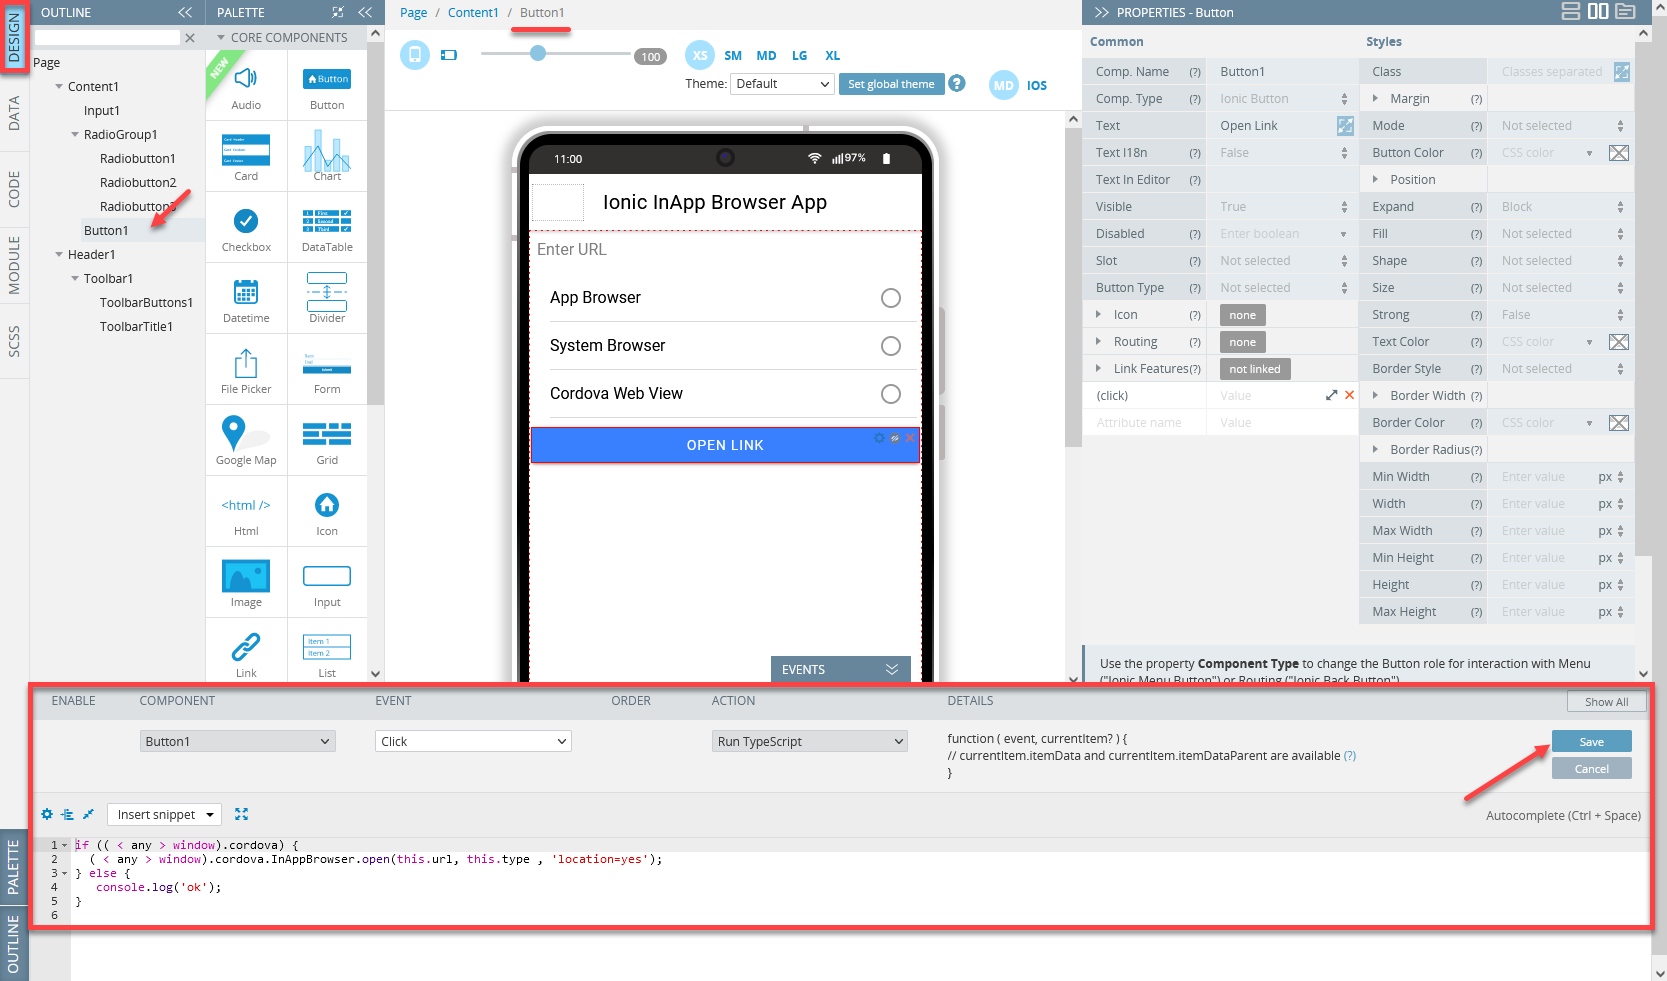
- To finish with the app UI, place the Button component on the page, then define its Text property as Open link:
Defining App Logic
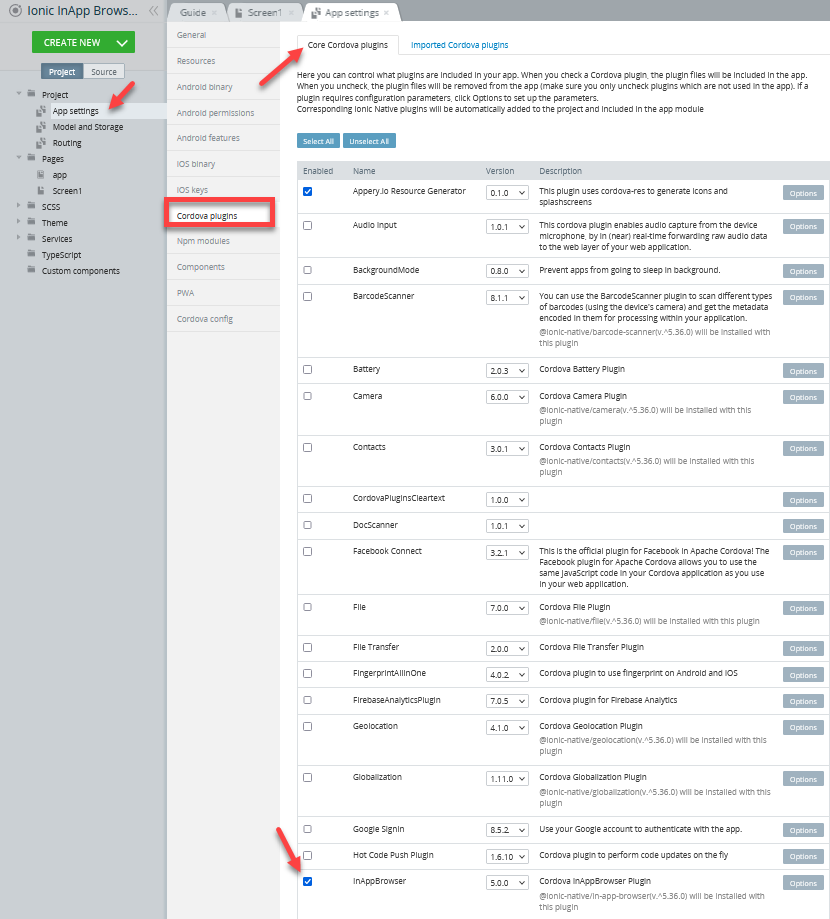
- Go to Project > App settings > Cordova plugins and enable the InAppBrowser plugin check box under the Core Cordova Plugins tab:
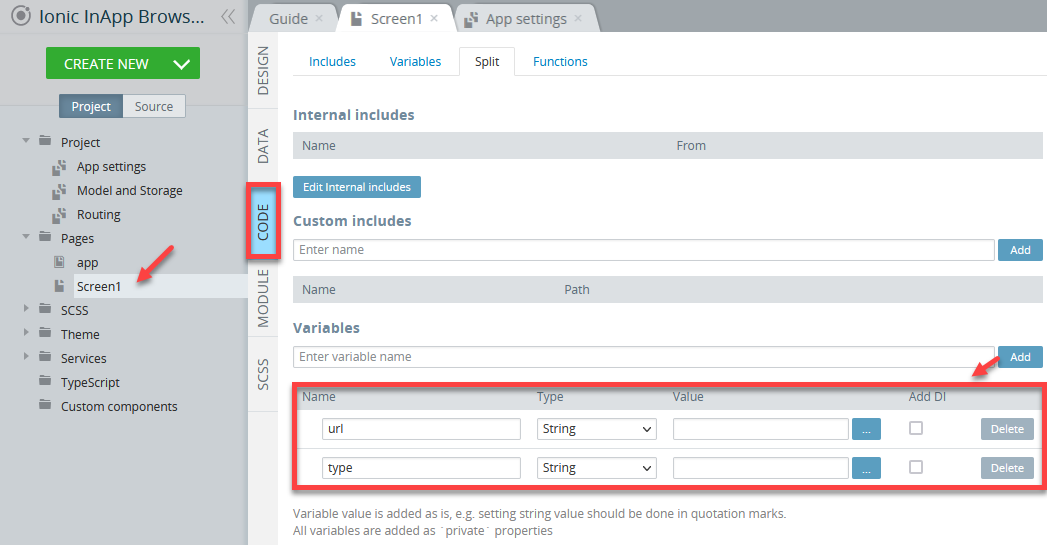
- Go back to the Screen1 page, open its CODE panel, and add two variables -
urlandtype, both of String type:
- Now, enter type for the [(ngModel)] property value of the RadioGroup component:
- Next, unfold the EVENTS tab from the page bottom, and for the Open Link button Click event, select the Run TypeScript from the drop-down list.
- Then, in the editor, add the following code and save the event:
if (( < any > window).cordova) {
  ( < any > window).cordova.InAppBrowser.open(this.url, this.type , 'location=yes');
} else {
   console.log('ok');
}
- Click the SAVE button in the App BuilderToolbar to save the app.
App Testing
We’re invoking a native Cordova component here, so the app has to be installed on a mobile device to test the In-App Browser functionality.
When your app version is ready, you might also like to test it on the device.
Appery.io Tester AppA great option to quickly test the app on the device is to use our Appery.io Tester app.
The app is free and available for both iOS and Android.
You can check out this page to learn more about using the Appery.io Tester app.
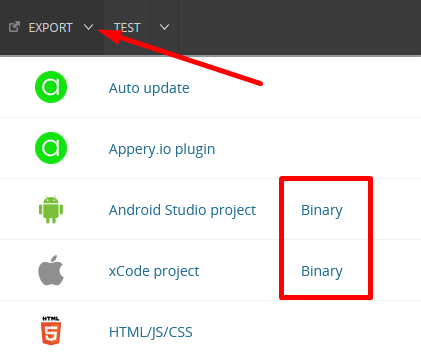
Also, you can export the app as an Android binary by clicking EXPORT > Binary (both iOS and Android options are available) in the top menu to install it on the device:
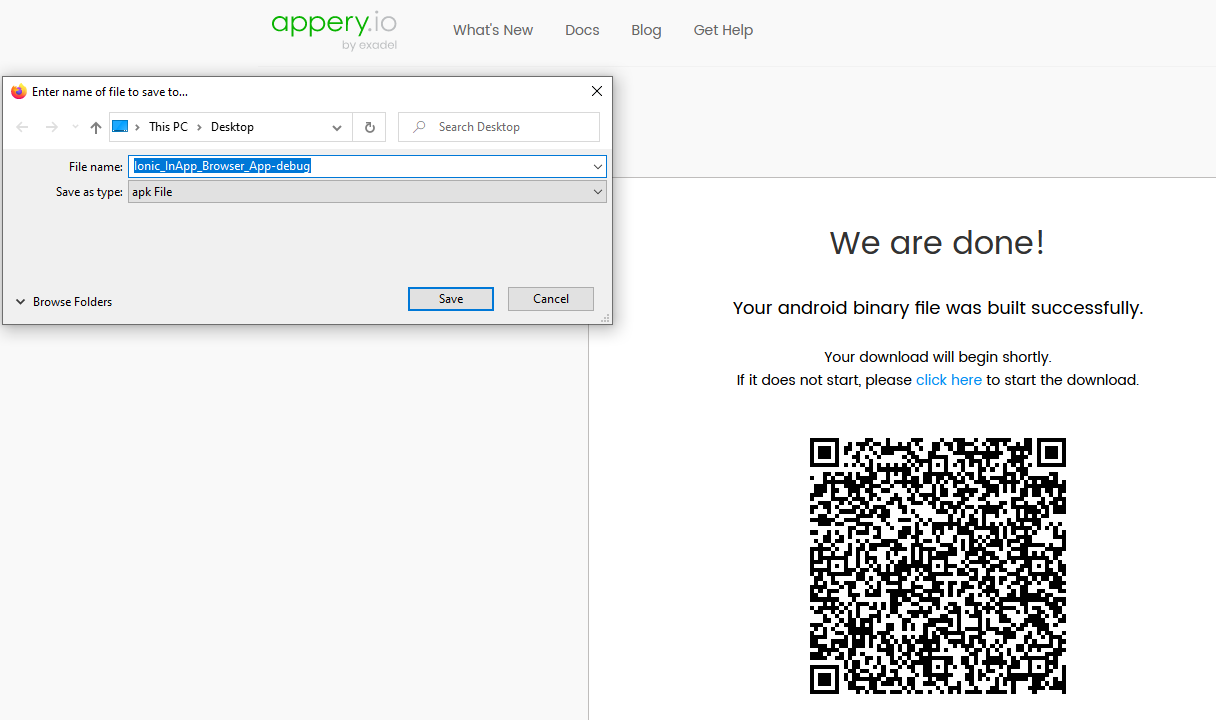
Once the build is completed, the file can be downloaded and you can also see the QR code:
Here is how the app performs on an Android device:
Important Note!Please note that you will need to generate the iOS certificate with the In-App Purchase capability to build an
.ipafile.
You can check this document in case you need help with exporting your application for iOS.
Here, you will find information on generating certificates for Android.
Note as well that starting from August 2021, new apps are required to publish with the Android App Bundle (.aab) on Google Play.
Please read more here.
You can also check this Appery.io YouTube video that shows how to create Android and iOS certificates:
Updated about 1 year ago