Configuration
Enabling and configuring Push Notifications.
Important!You need to enable Push Notifications in the app and in the backend services (server).
Enabling in Backend Services
To turn on messages for the app in the backend services:
- Click on the Push link in the App BuilderToolbar:
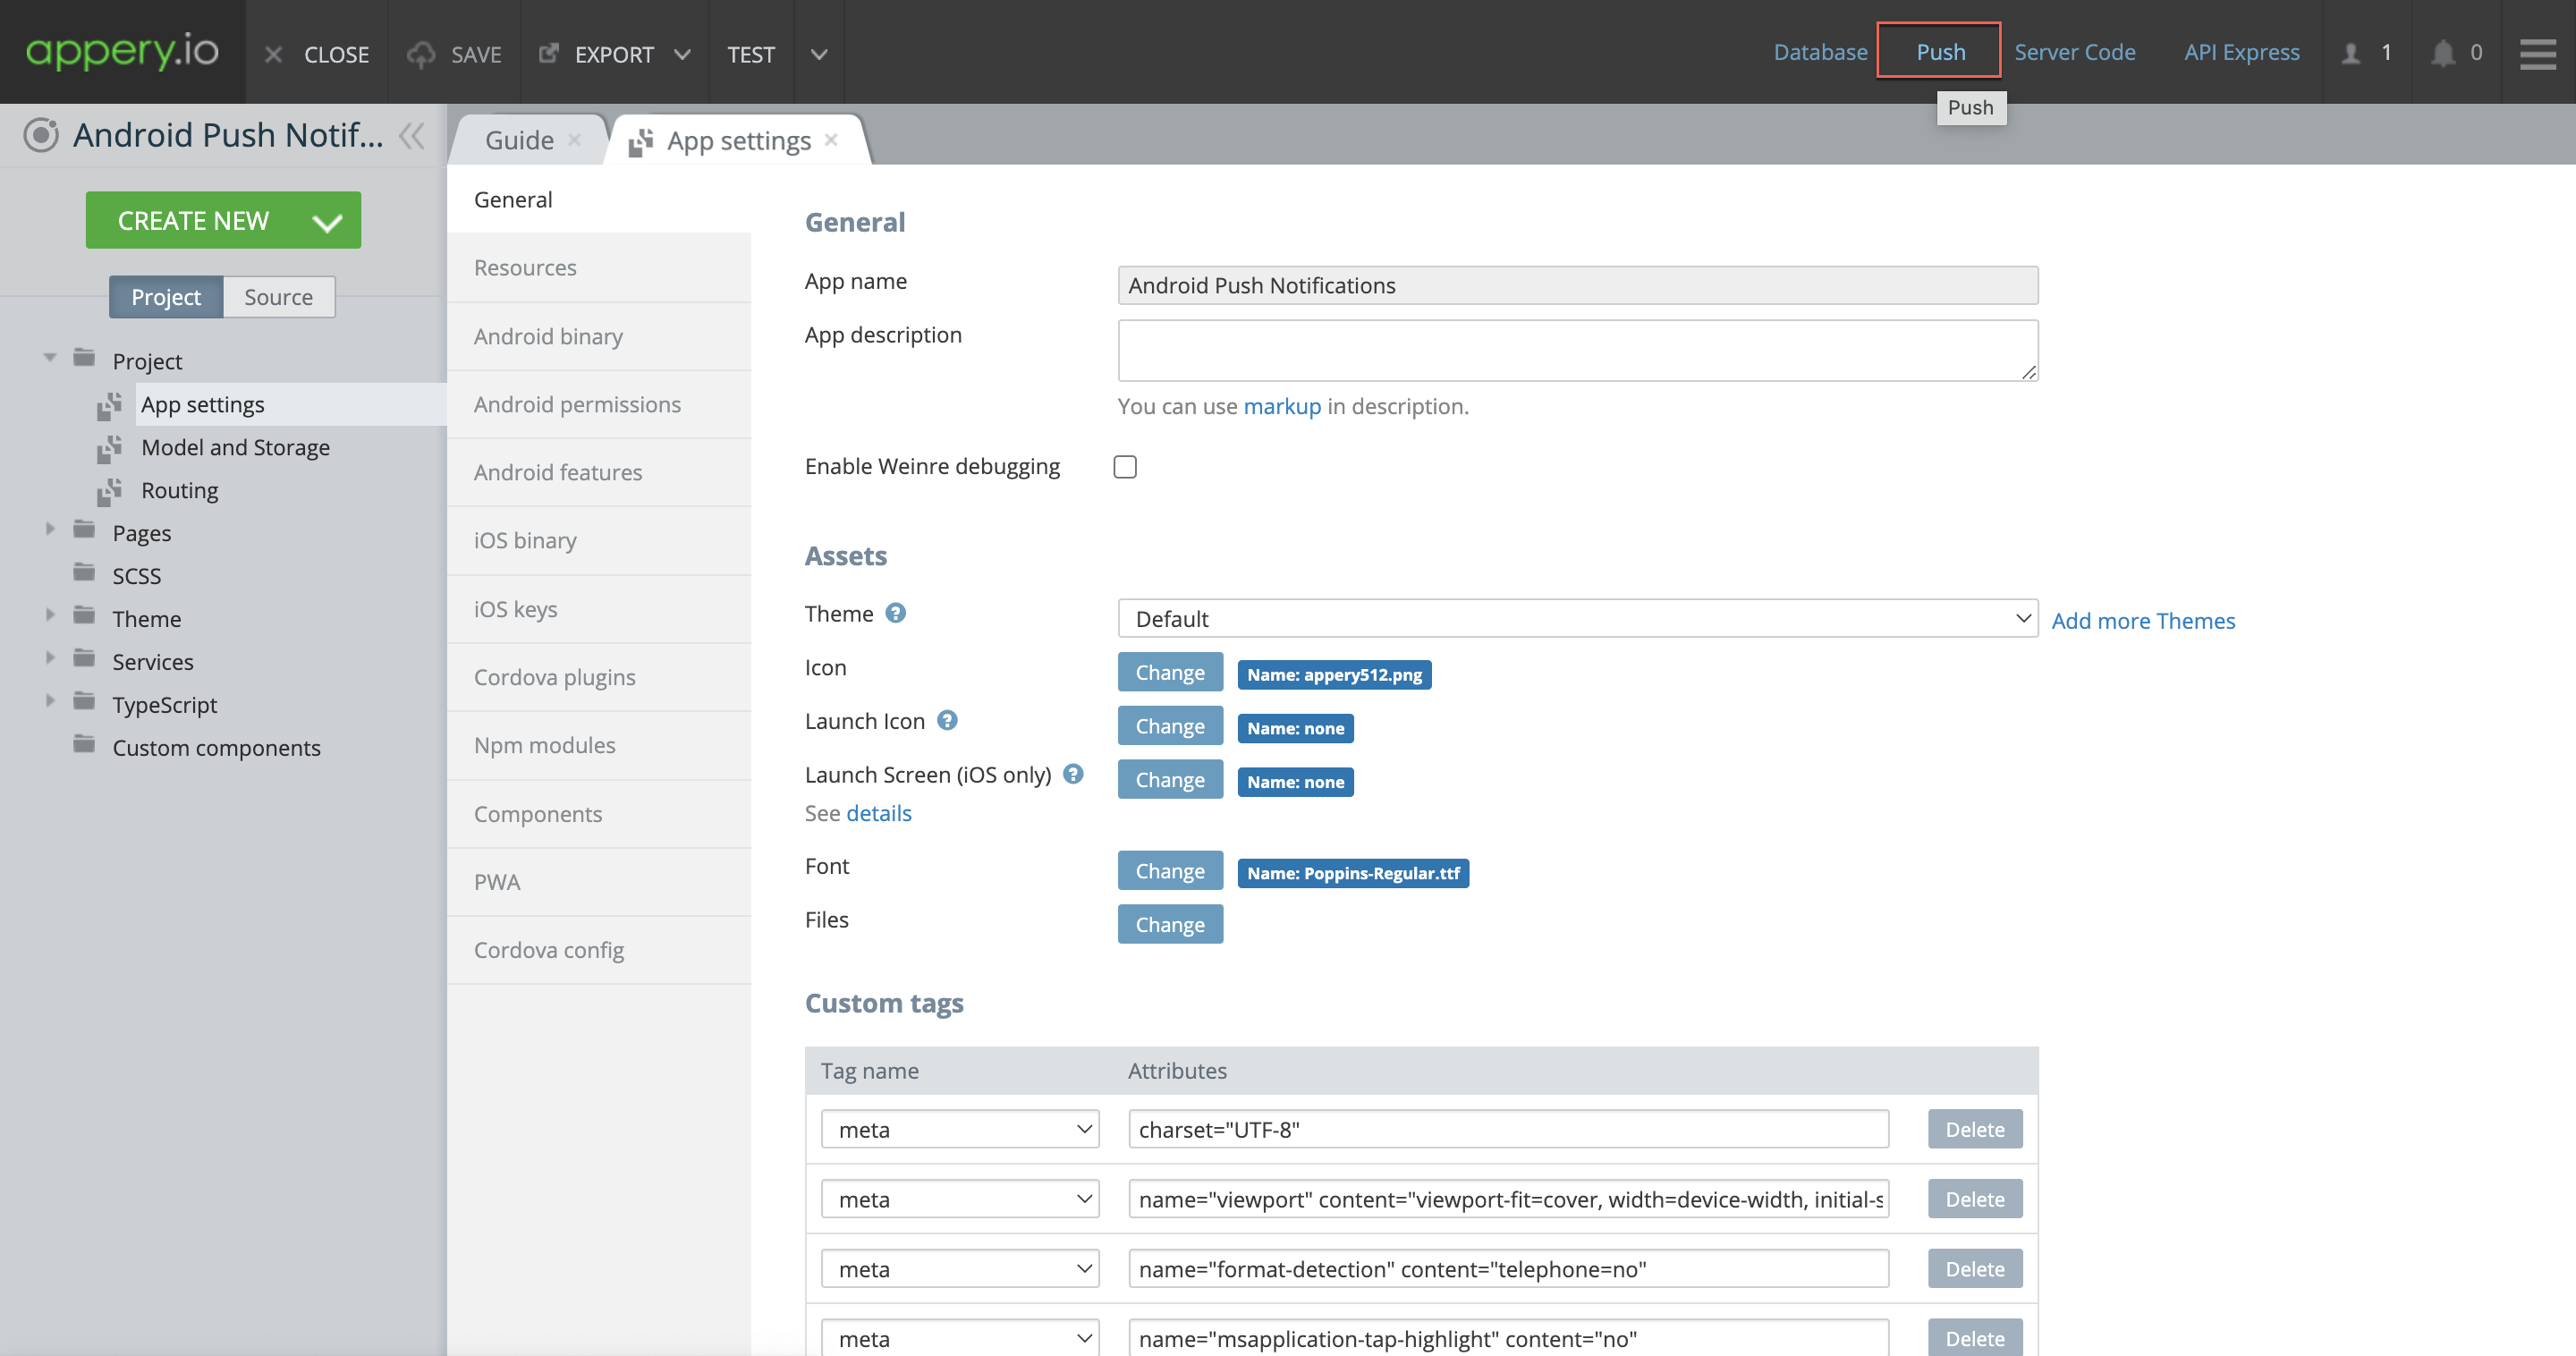
The settings page for this app will open in a new tab.
Tip!Note that you can also switch to the Push Notifications tab directly from the Project Information page.
- Select the Enable Push Notifications check box to enable Push Notifications for this app:
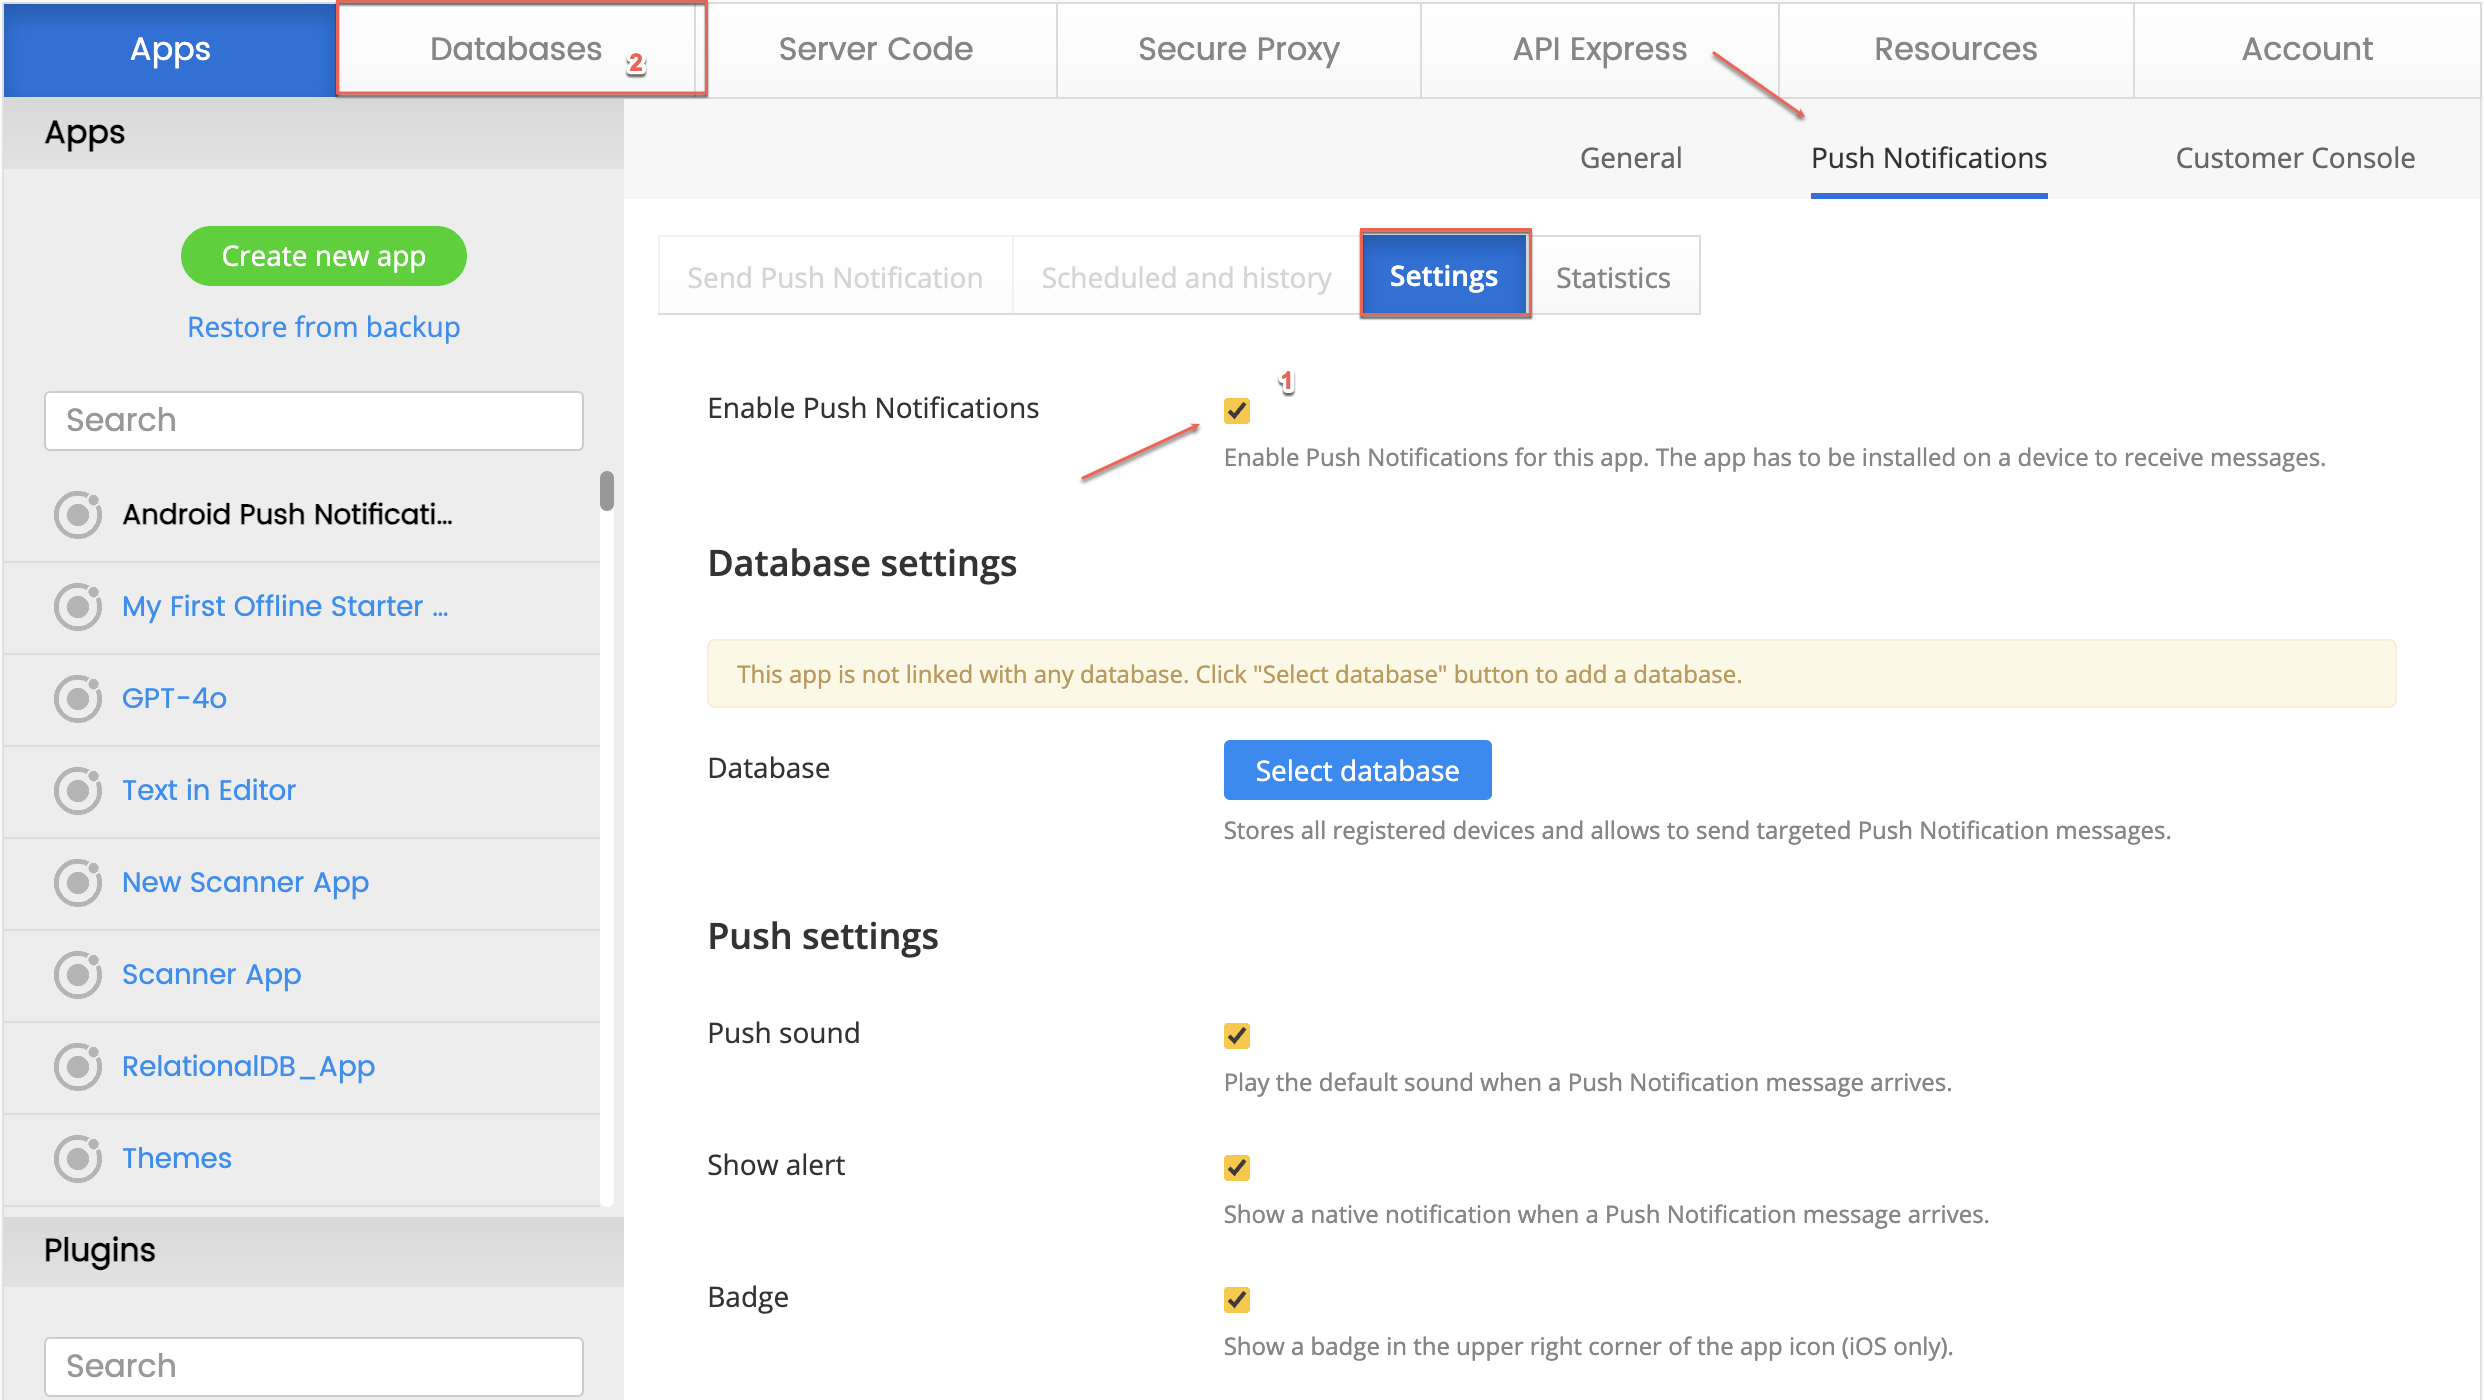
You will be notified that the next step is linking the app with the database of your choice.
Linking with Database
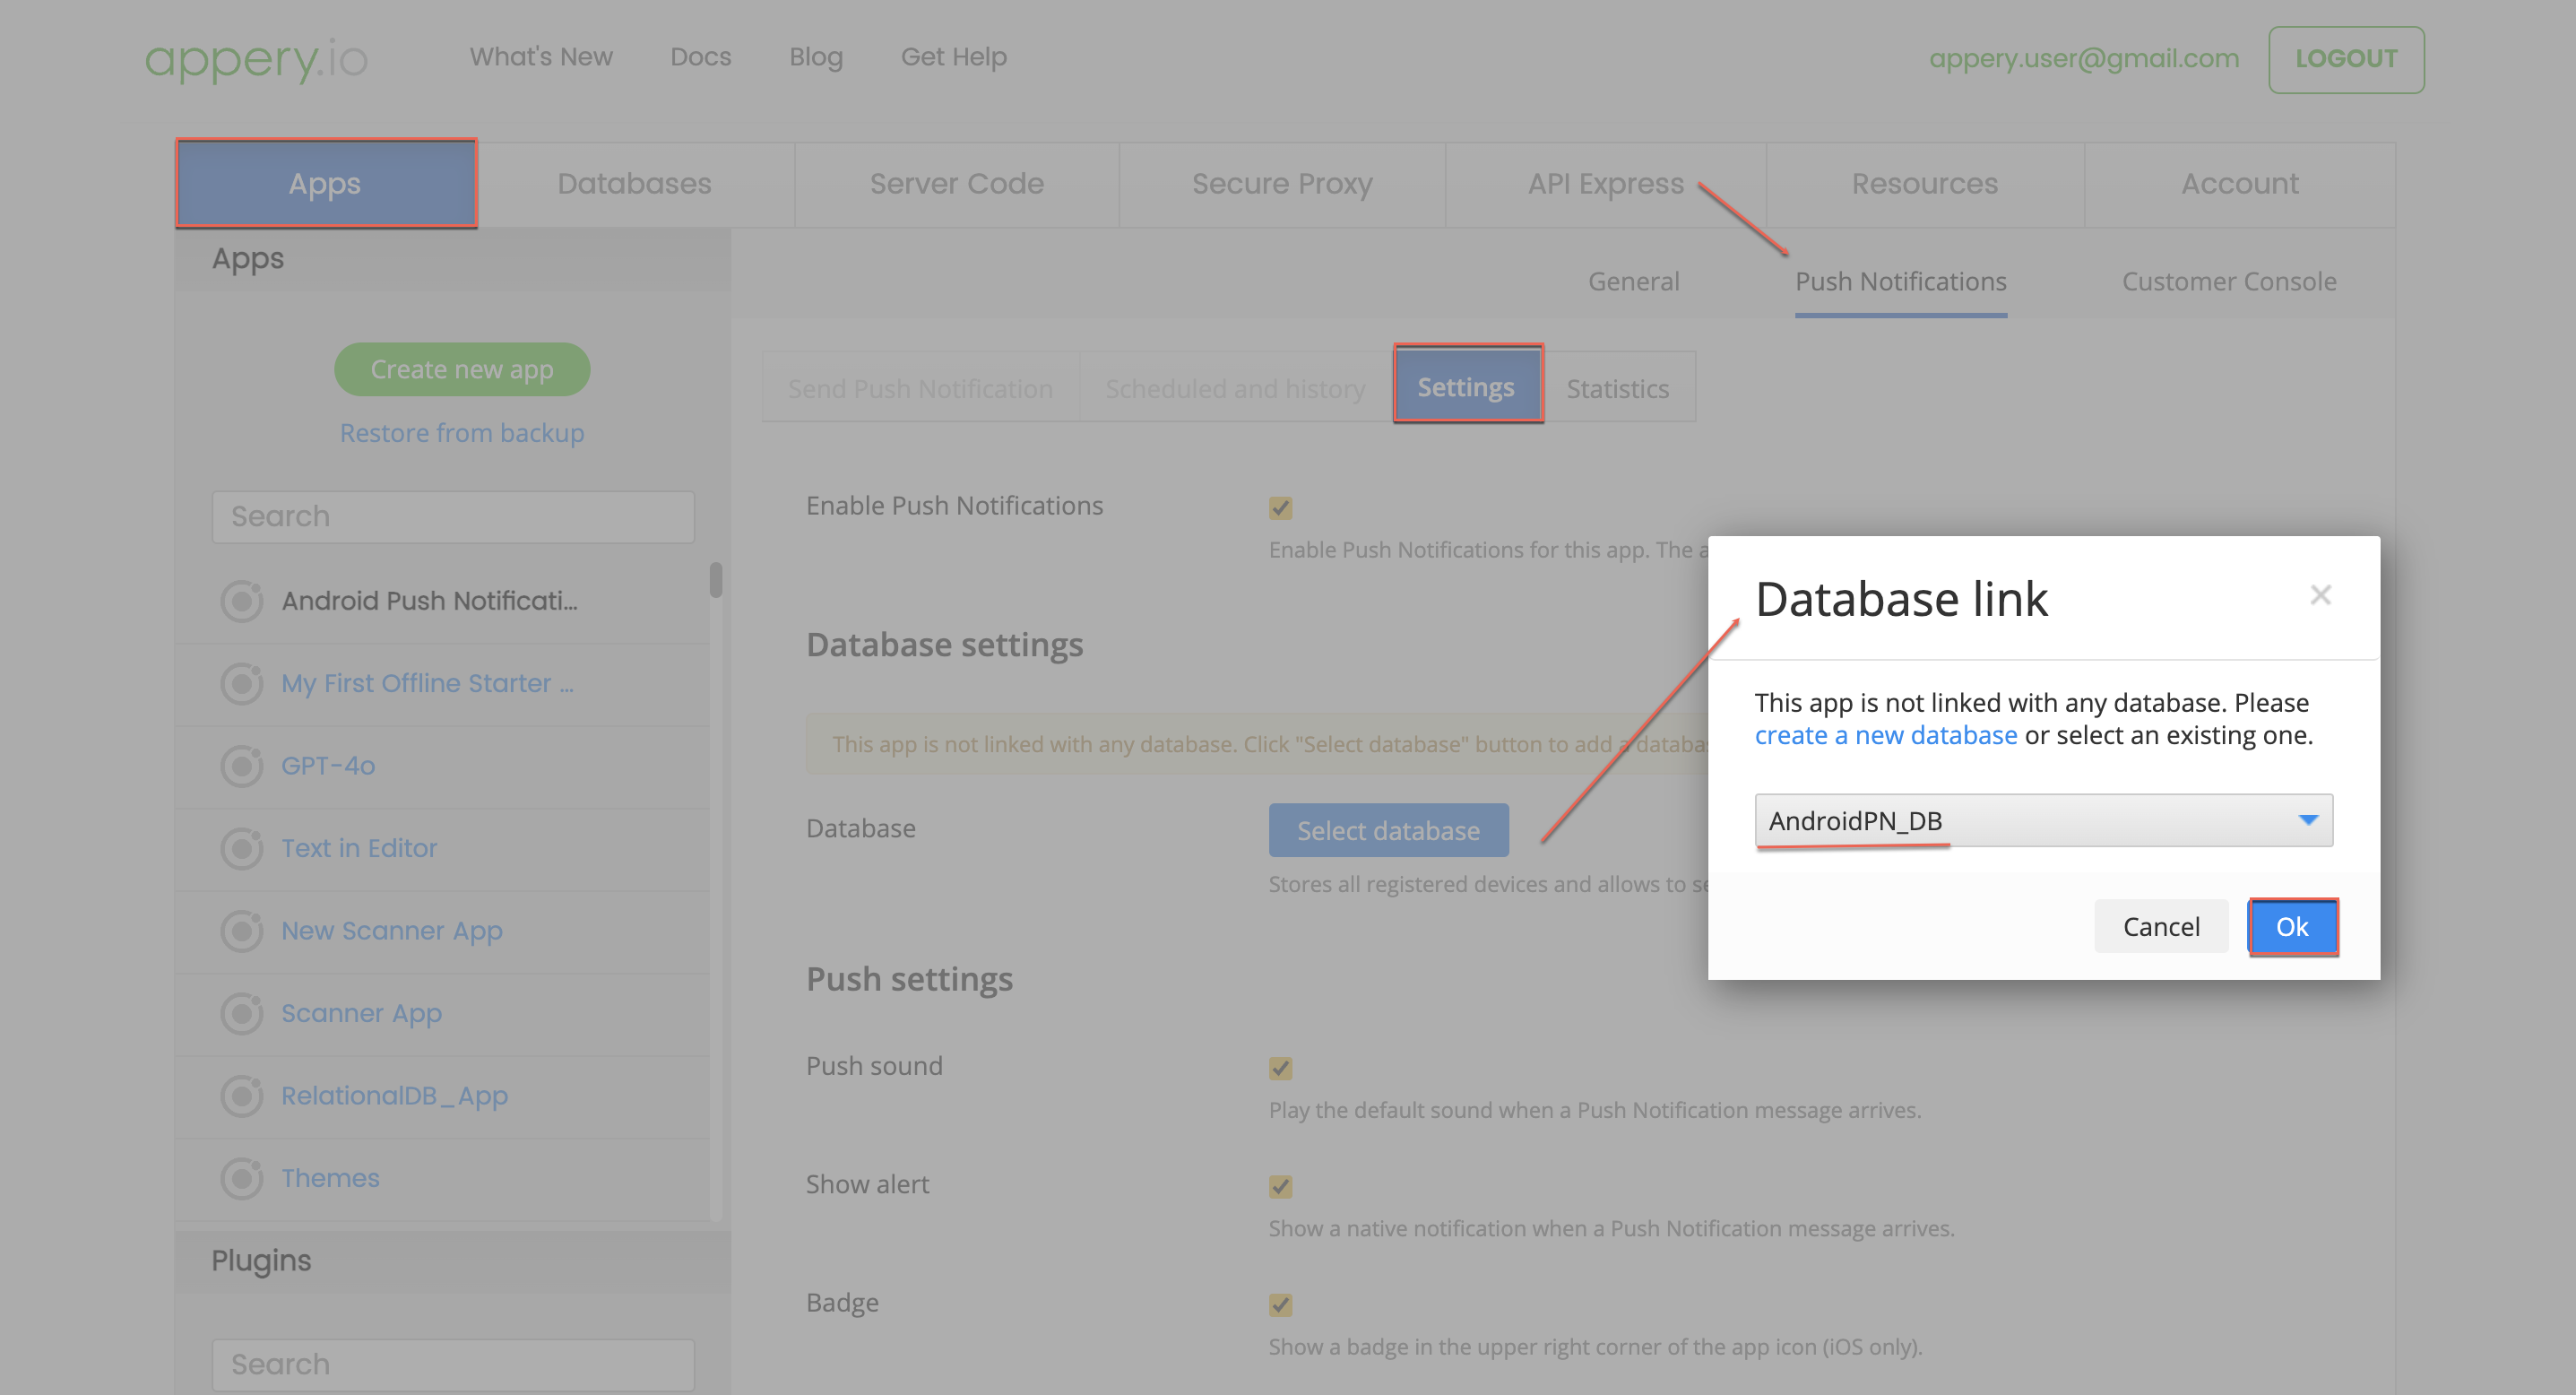
Push Notifications require using a database. The database stores all registered devices and allows sending targeted Push Notification messages.
For Database, click the Select database button. We recommend creating a new database but you can also use an existing one. Device information will be stored in the built-in Devices collection:
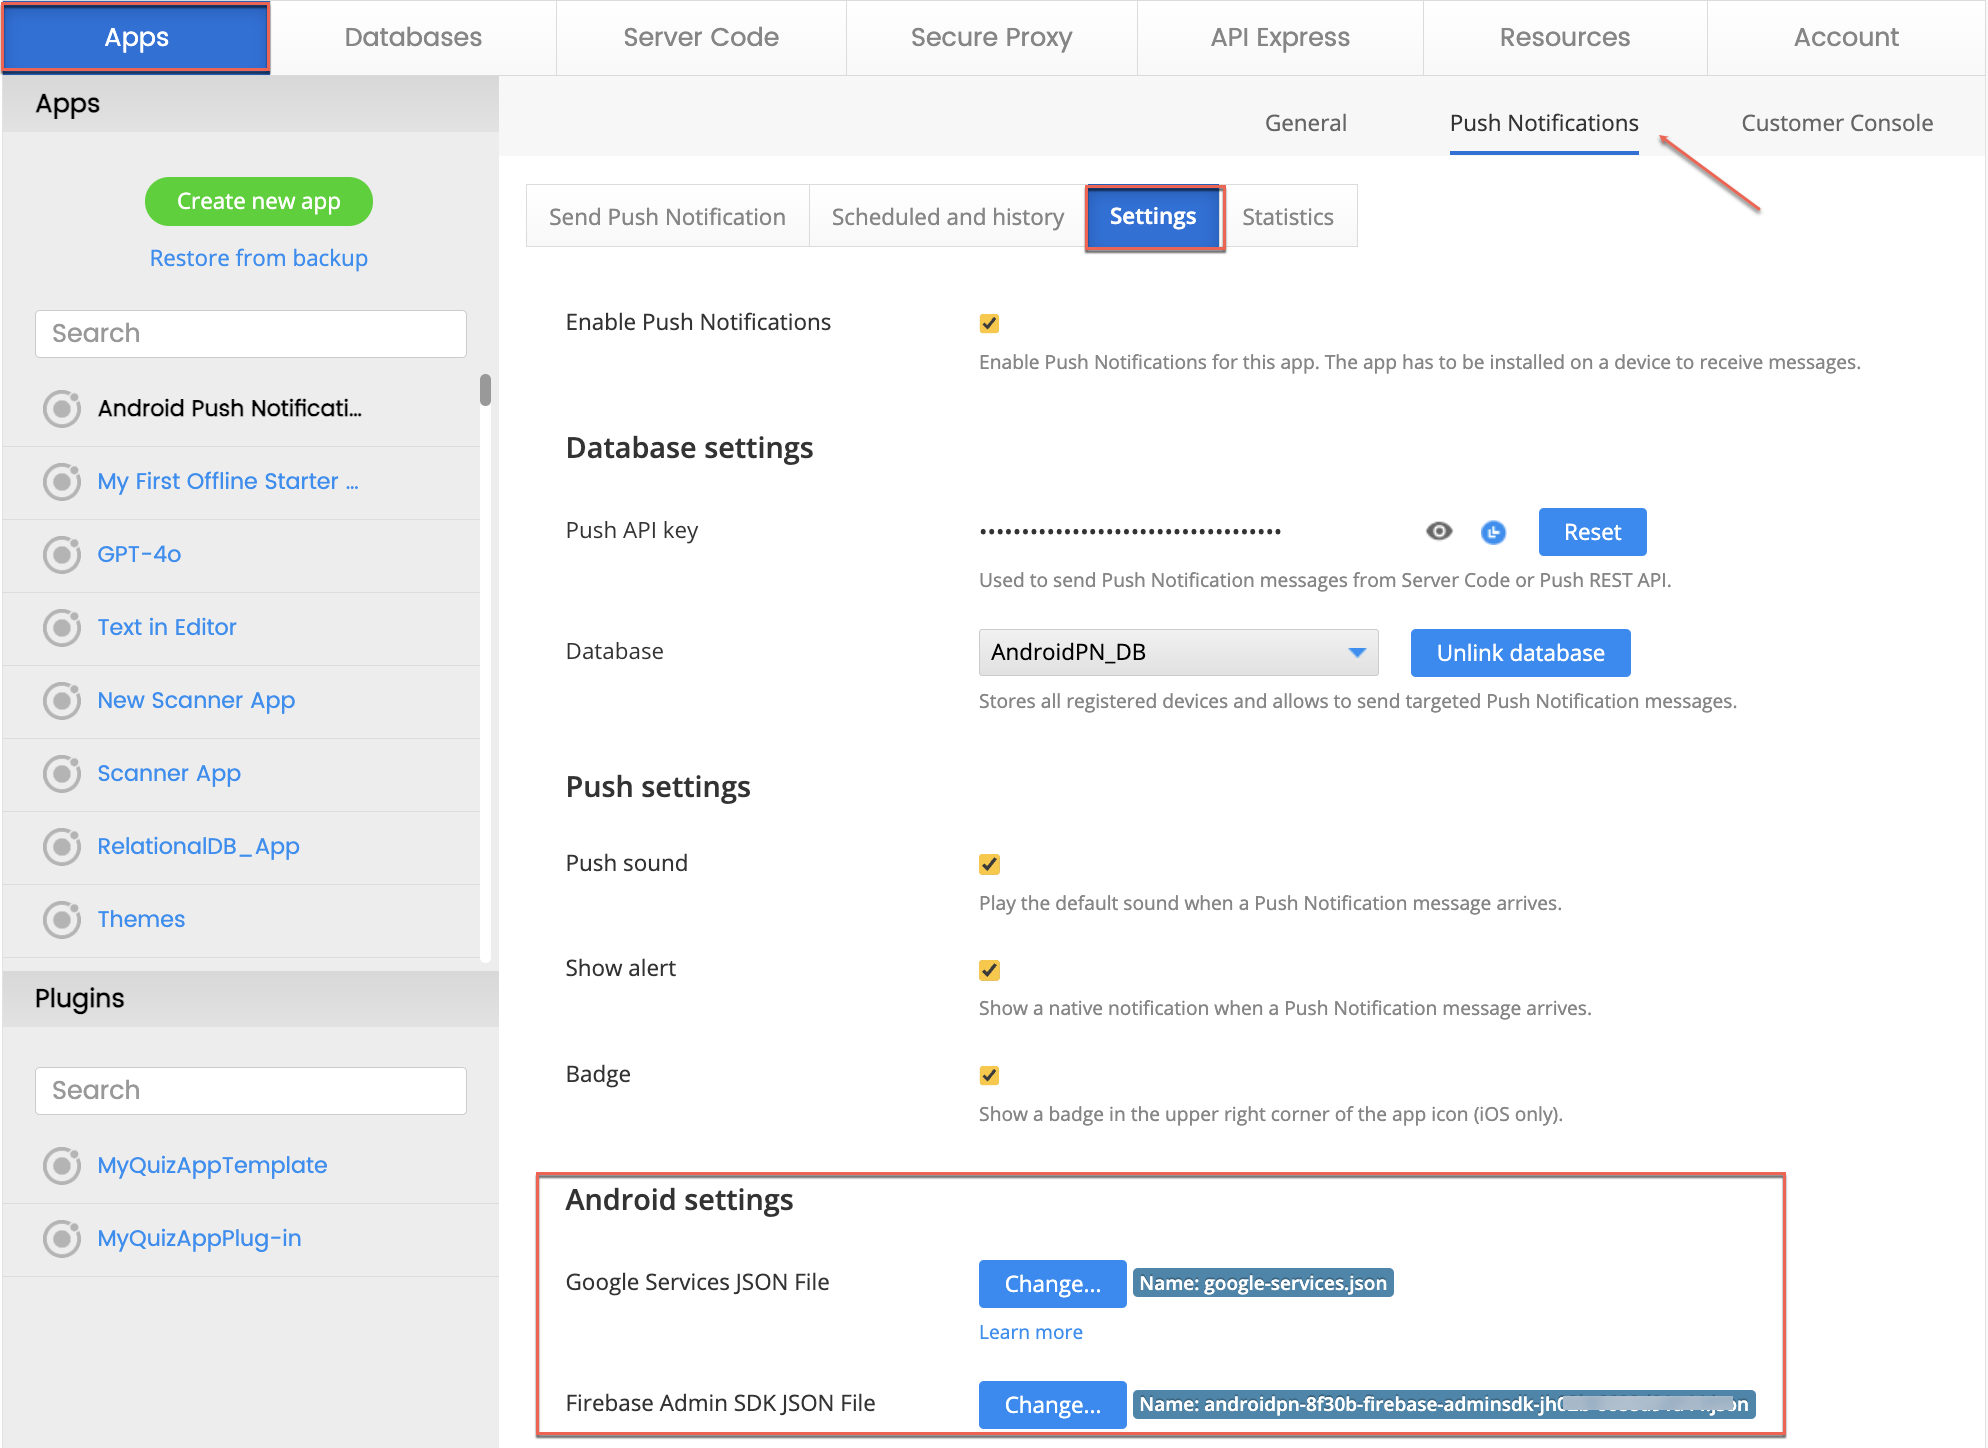
Push Notifications Settings
Make sure that under the Settings section, all three options are selected:
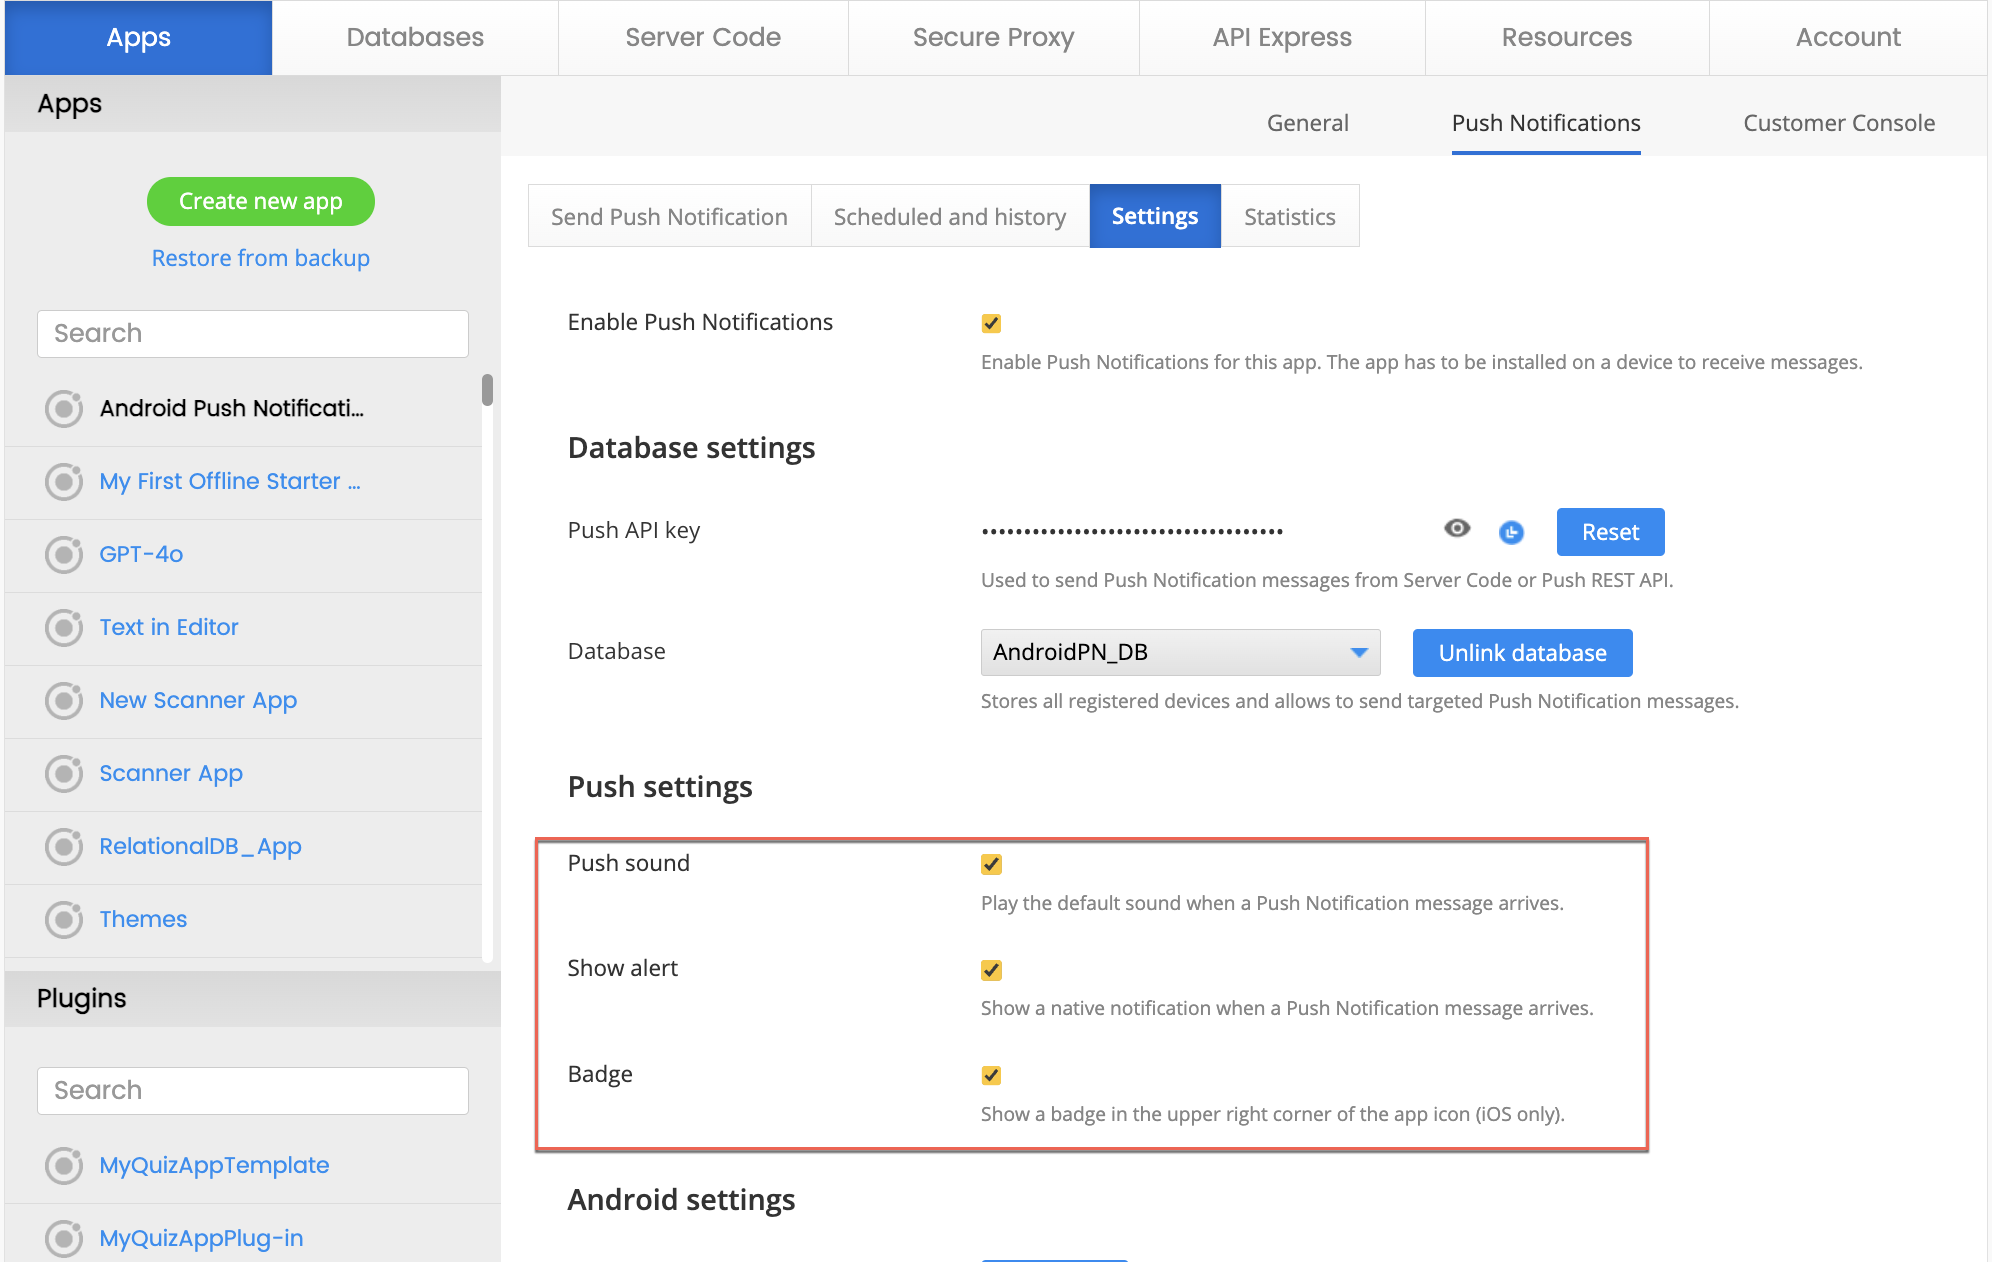
Android Badges SupportSome Android launchers also support badges.
You can read here to learn more.
Android Settings
Push Notification ProviderPlease be aware that GCM provider is not supported by Google anymore. Therefore, only FCM provider settings are available.
Learn how to migrate your project from GCM to FCM here.
Setting up Firebase Cloud Messaging Provider
Push notifications on Android devices are sent via Firebase. So, if you have no Firebase account, you’ll need to create it to be able to to send pushes. This is free and requires no special knowledge.
Existing Firebase ProjectThis section shows how to create a new project. You can also use an existing project.
-
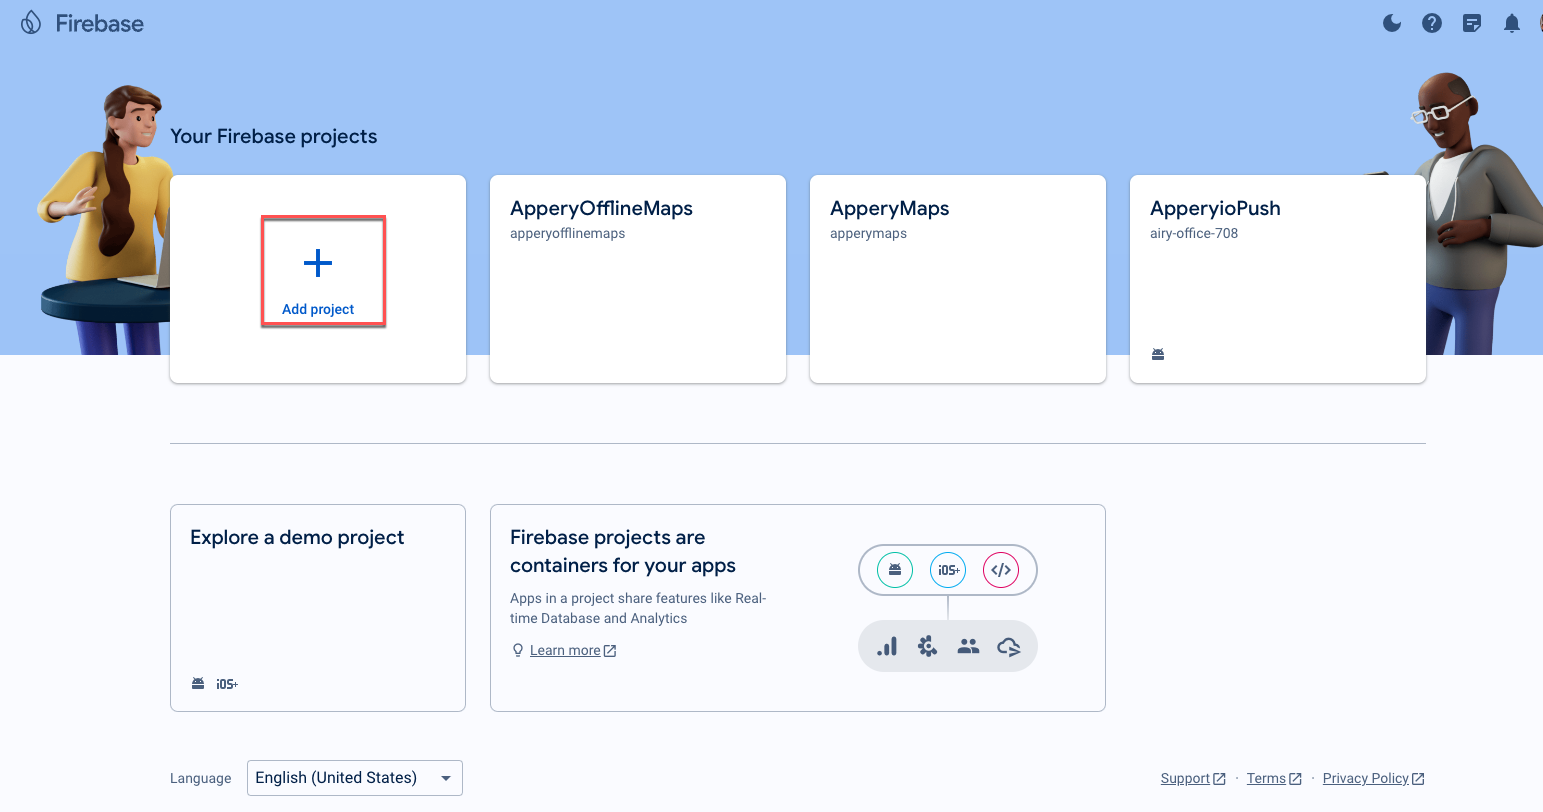
Go to http://firebase.google.com and log in with your developer credentials. If you are already signed in, you will see the Go to console link in the upper right corner.
-
In the console, click the Add project button:
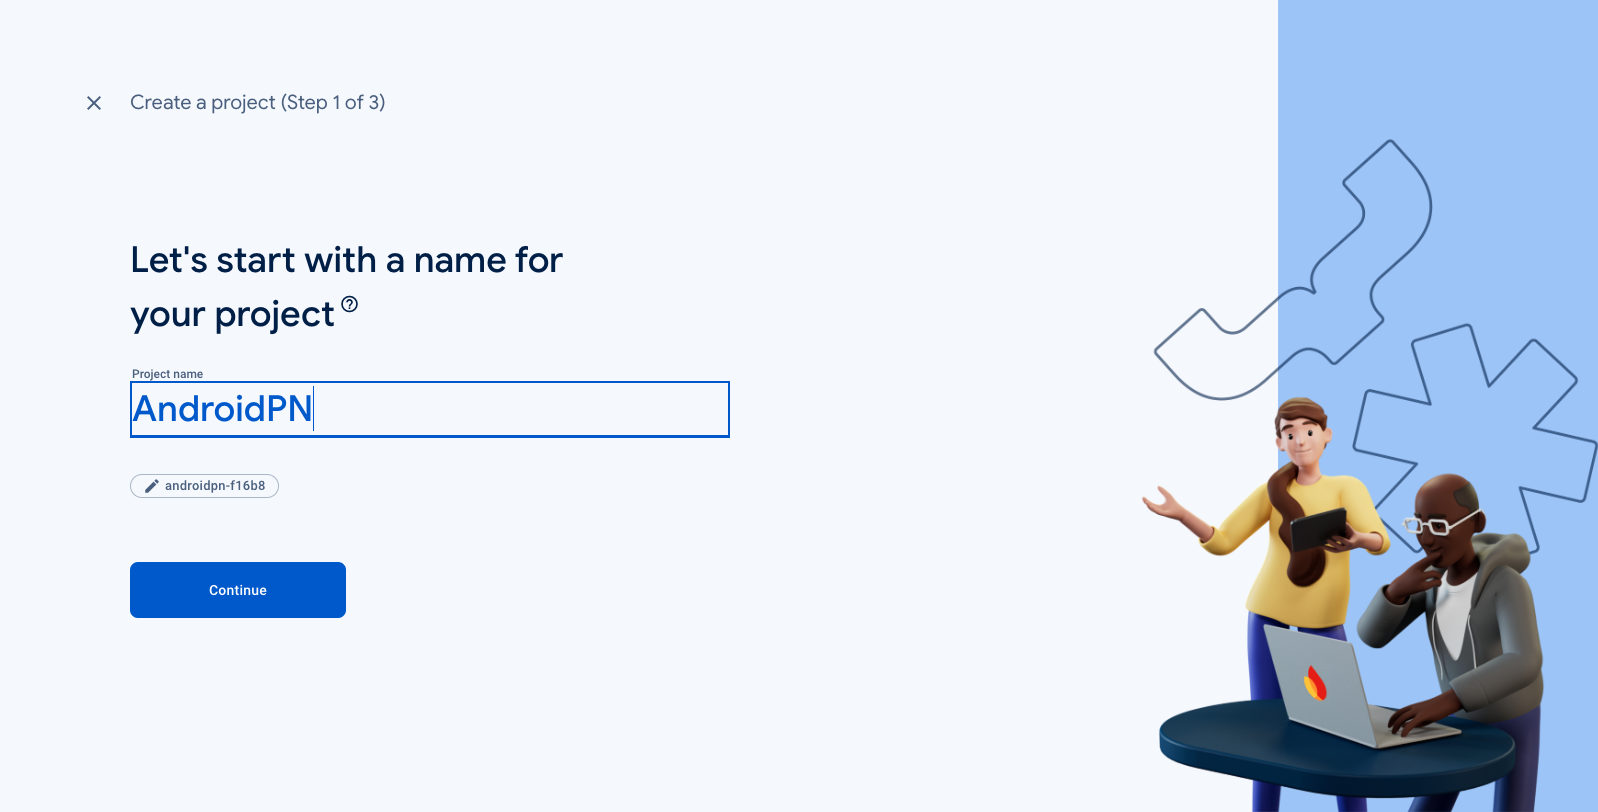
-
Enter the project name, for example, AndroidPN. Click Continue:
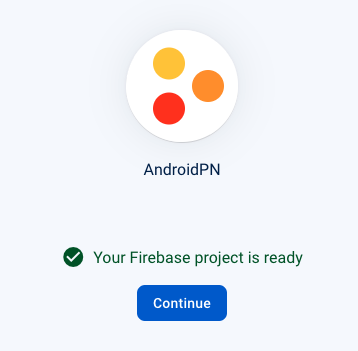
-
Proceed with the following steps and when it’s ready, click Continue to open the project:
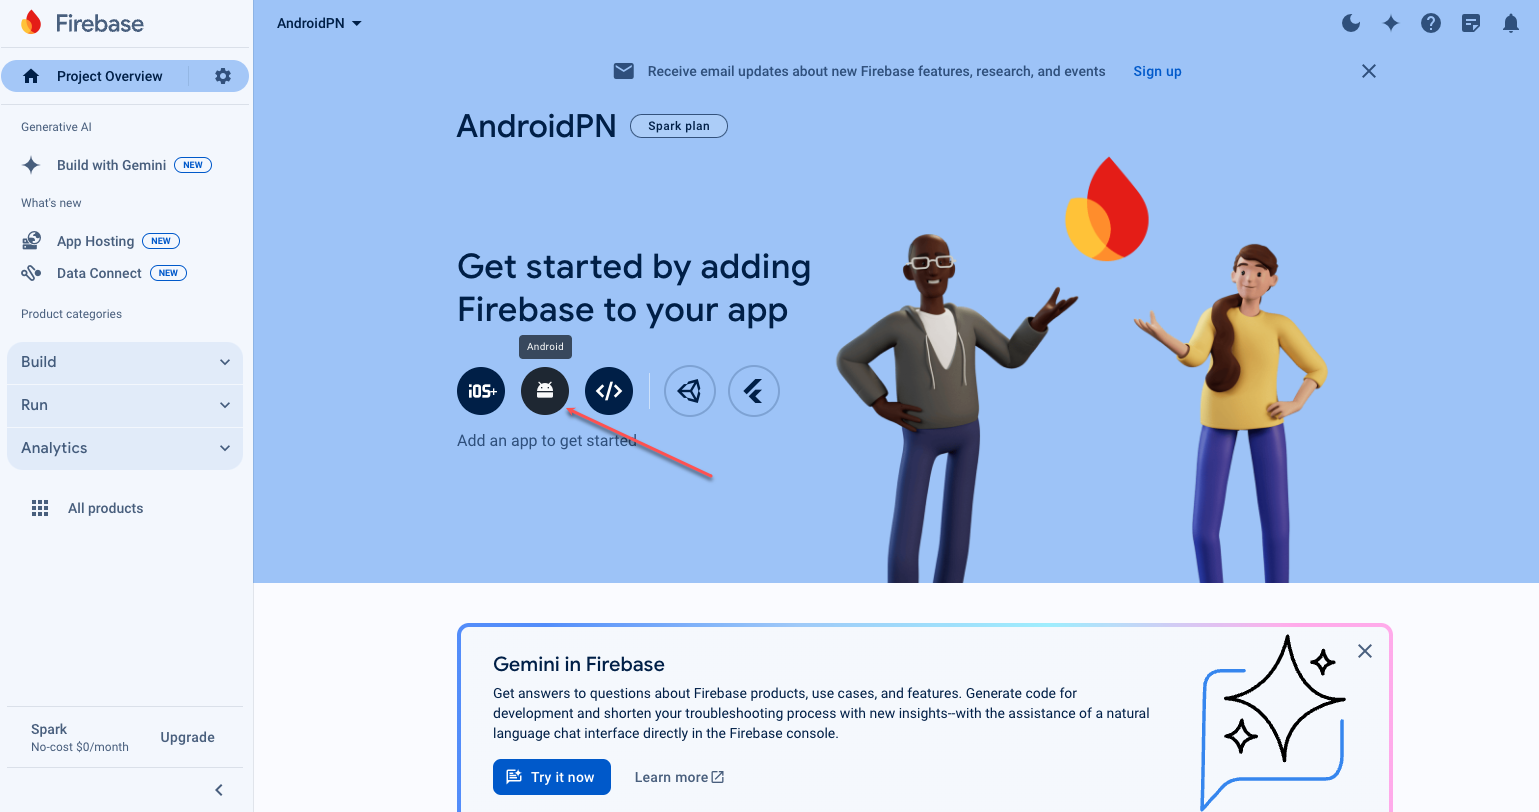
- Click on the Android icon:
-
You will be asked to enter the app package name:
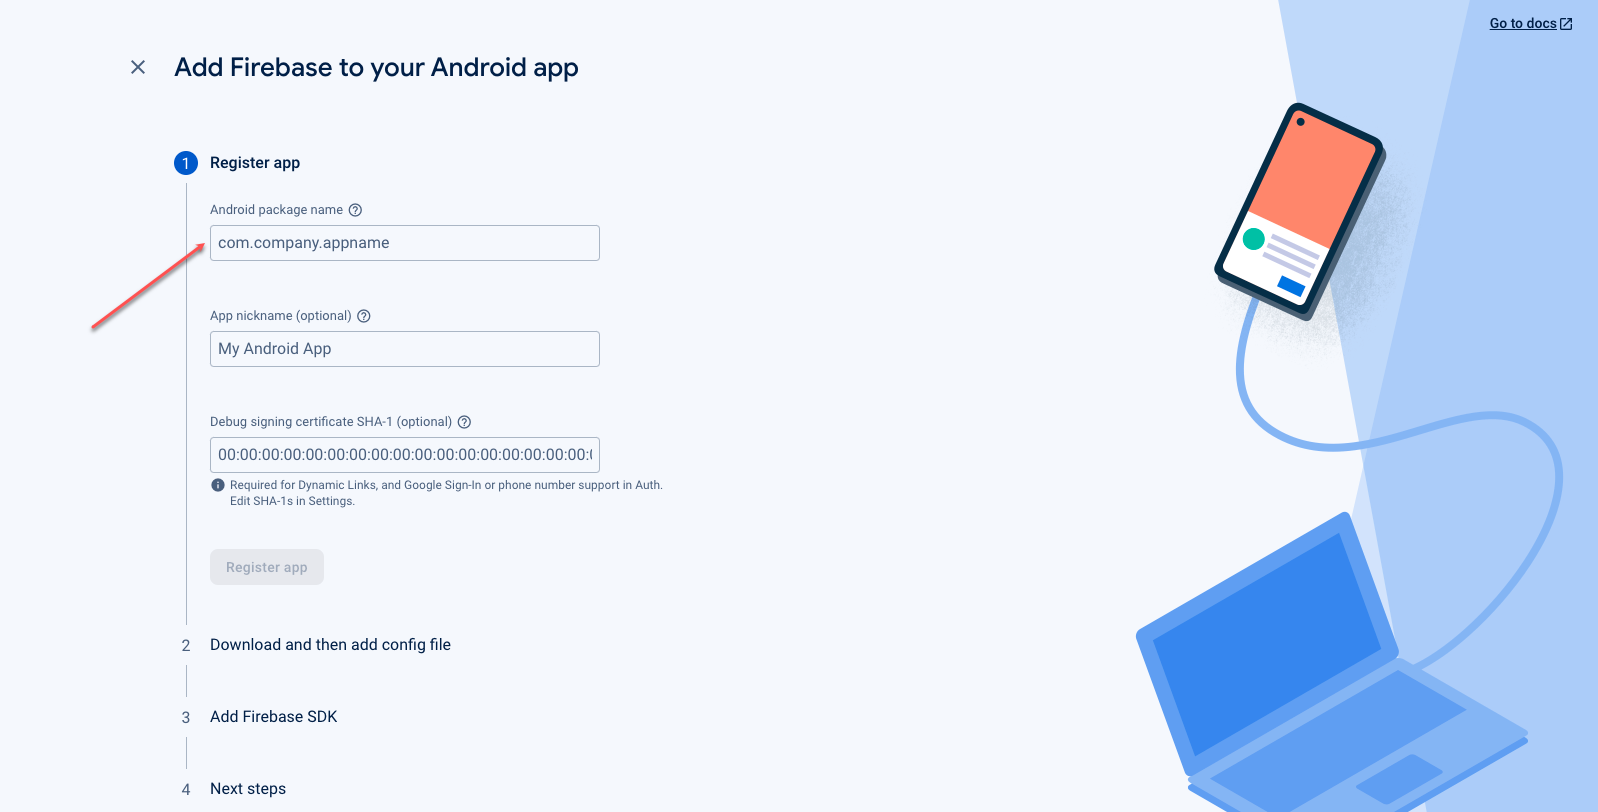
-
This can be found in the App settings > Android binary section of your Appery.io application:
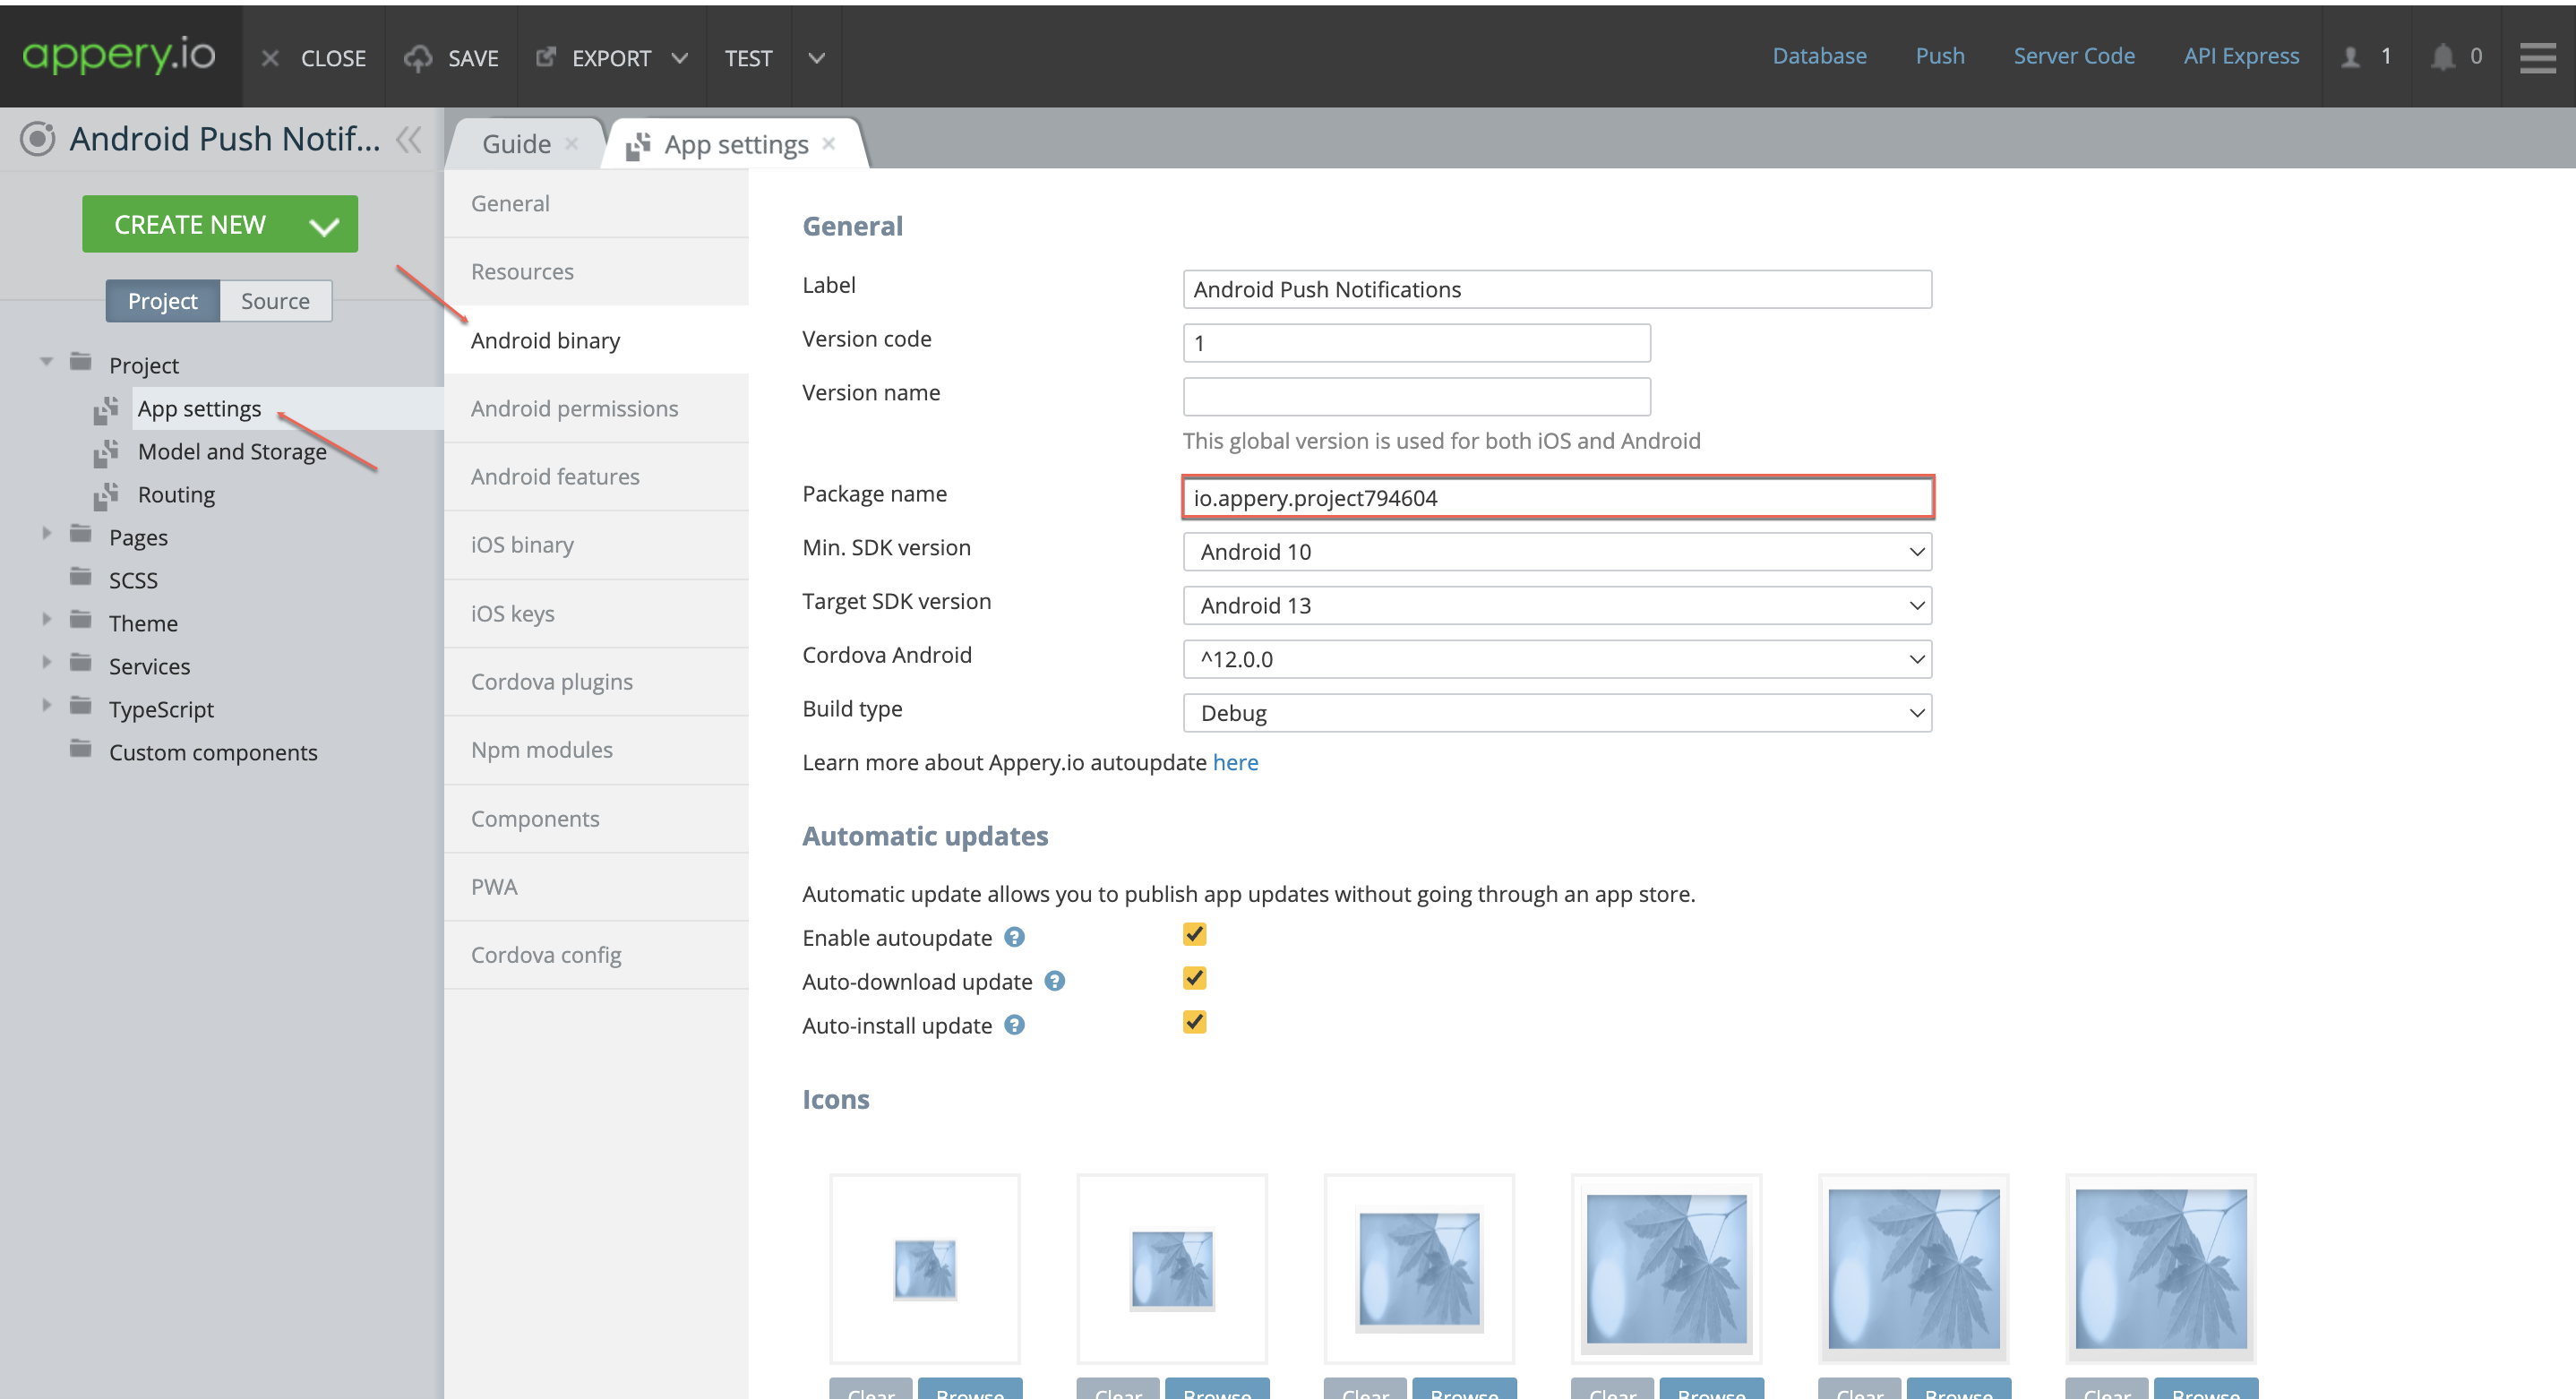
Important!This name can be modified or left as is but the Firebase app package name should match the name inside the App Builder in Project > App settings > Android binary.
- Go to Firebase and paste this name into the Android package name field. Also, name your project and proceed by clicking Register app:

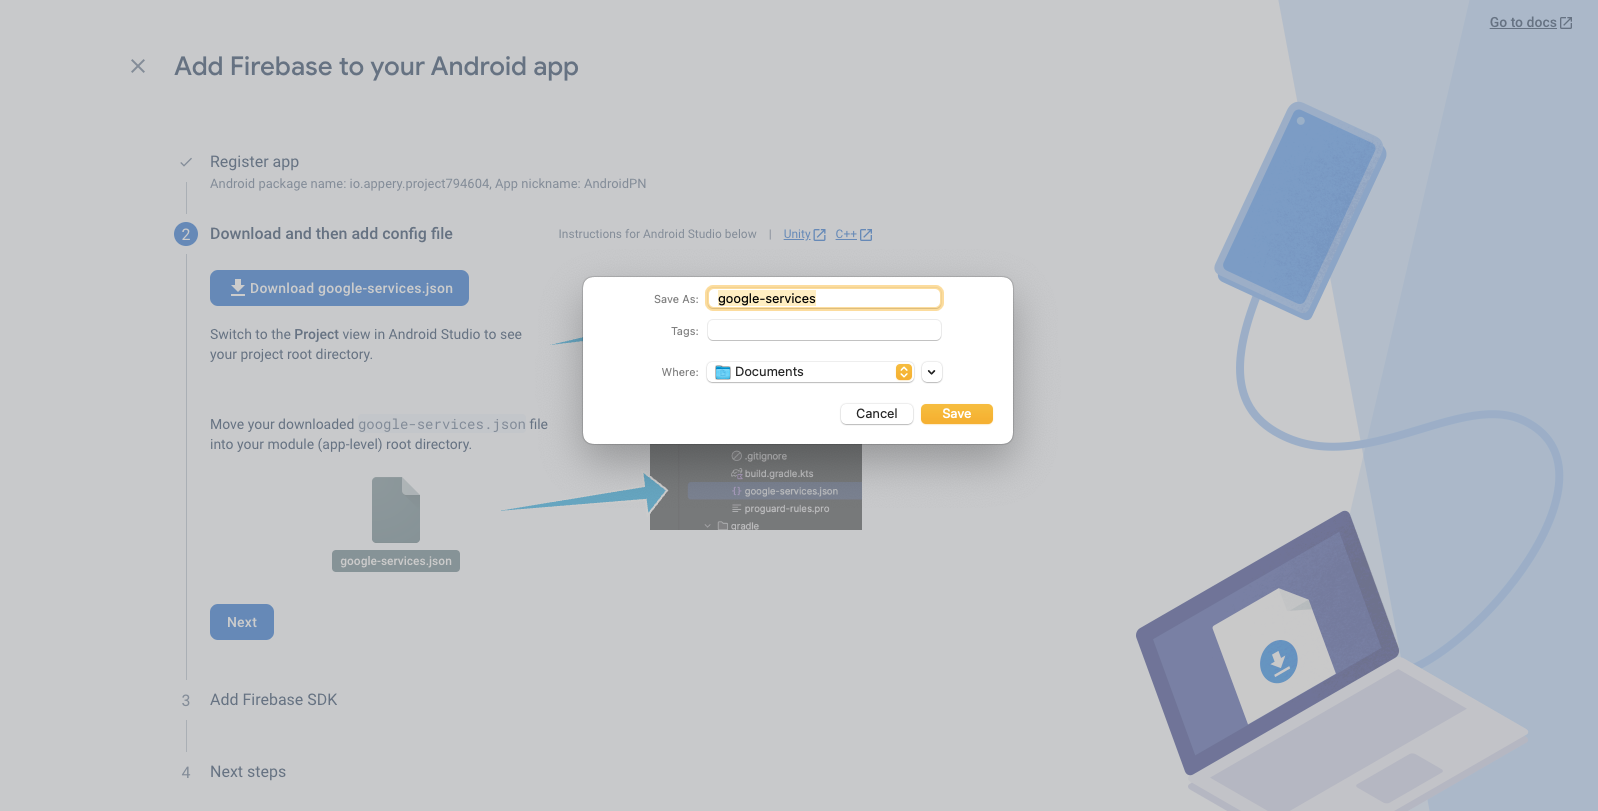
- In Step 2, click Download google-services.json and save the google-services.json file to your drive.
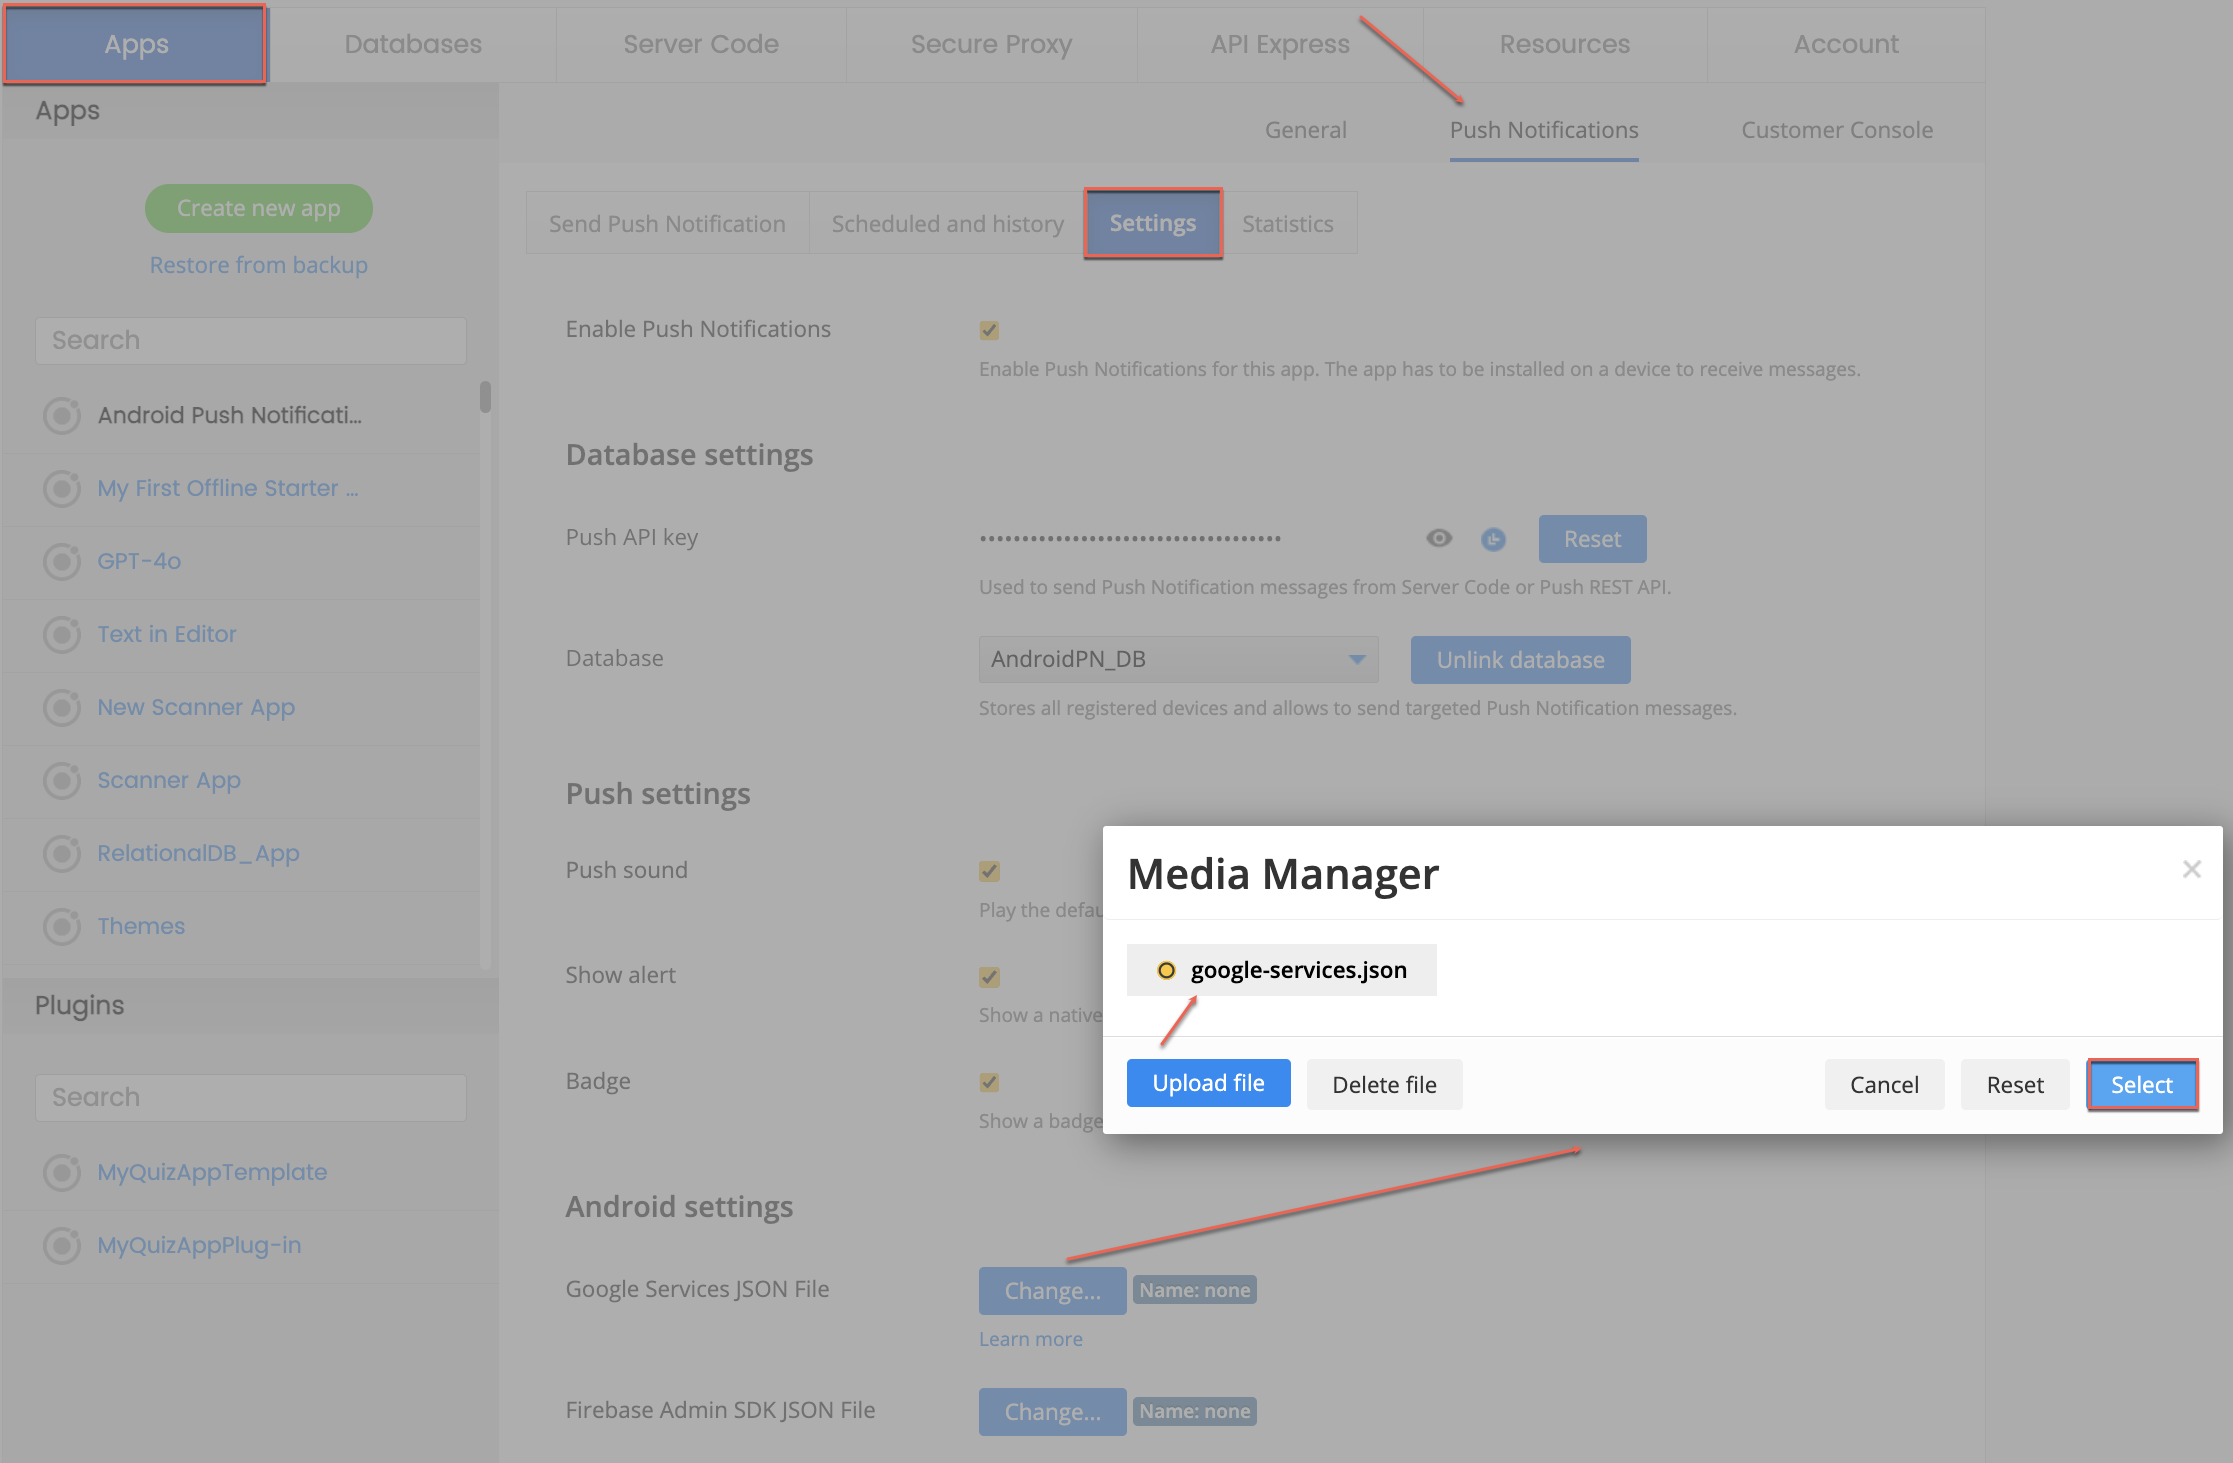
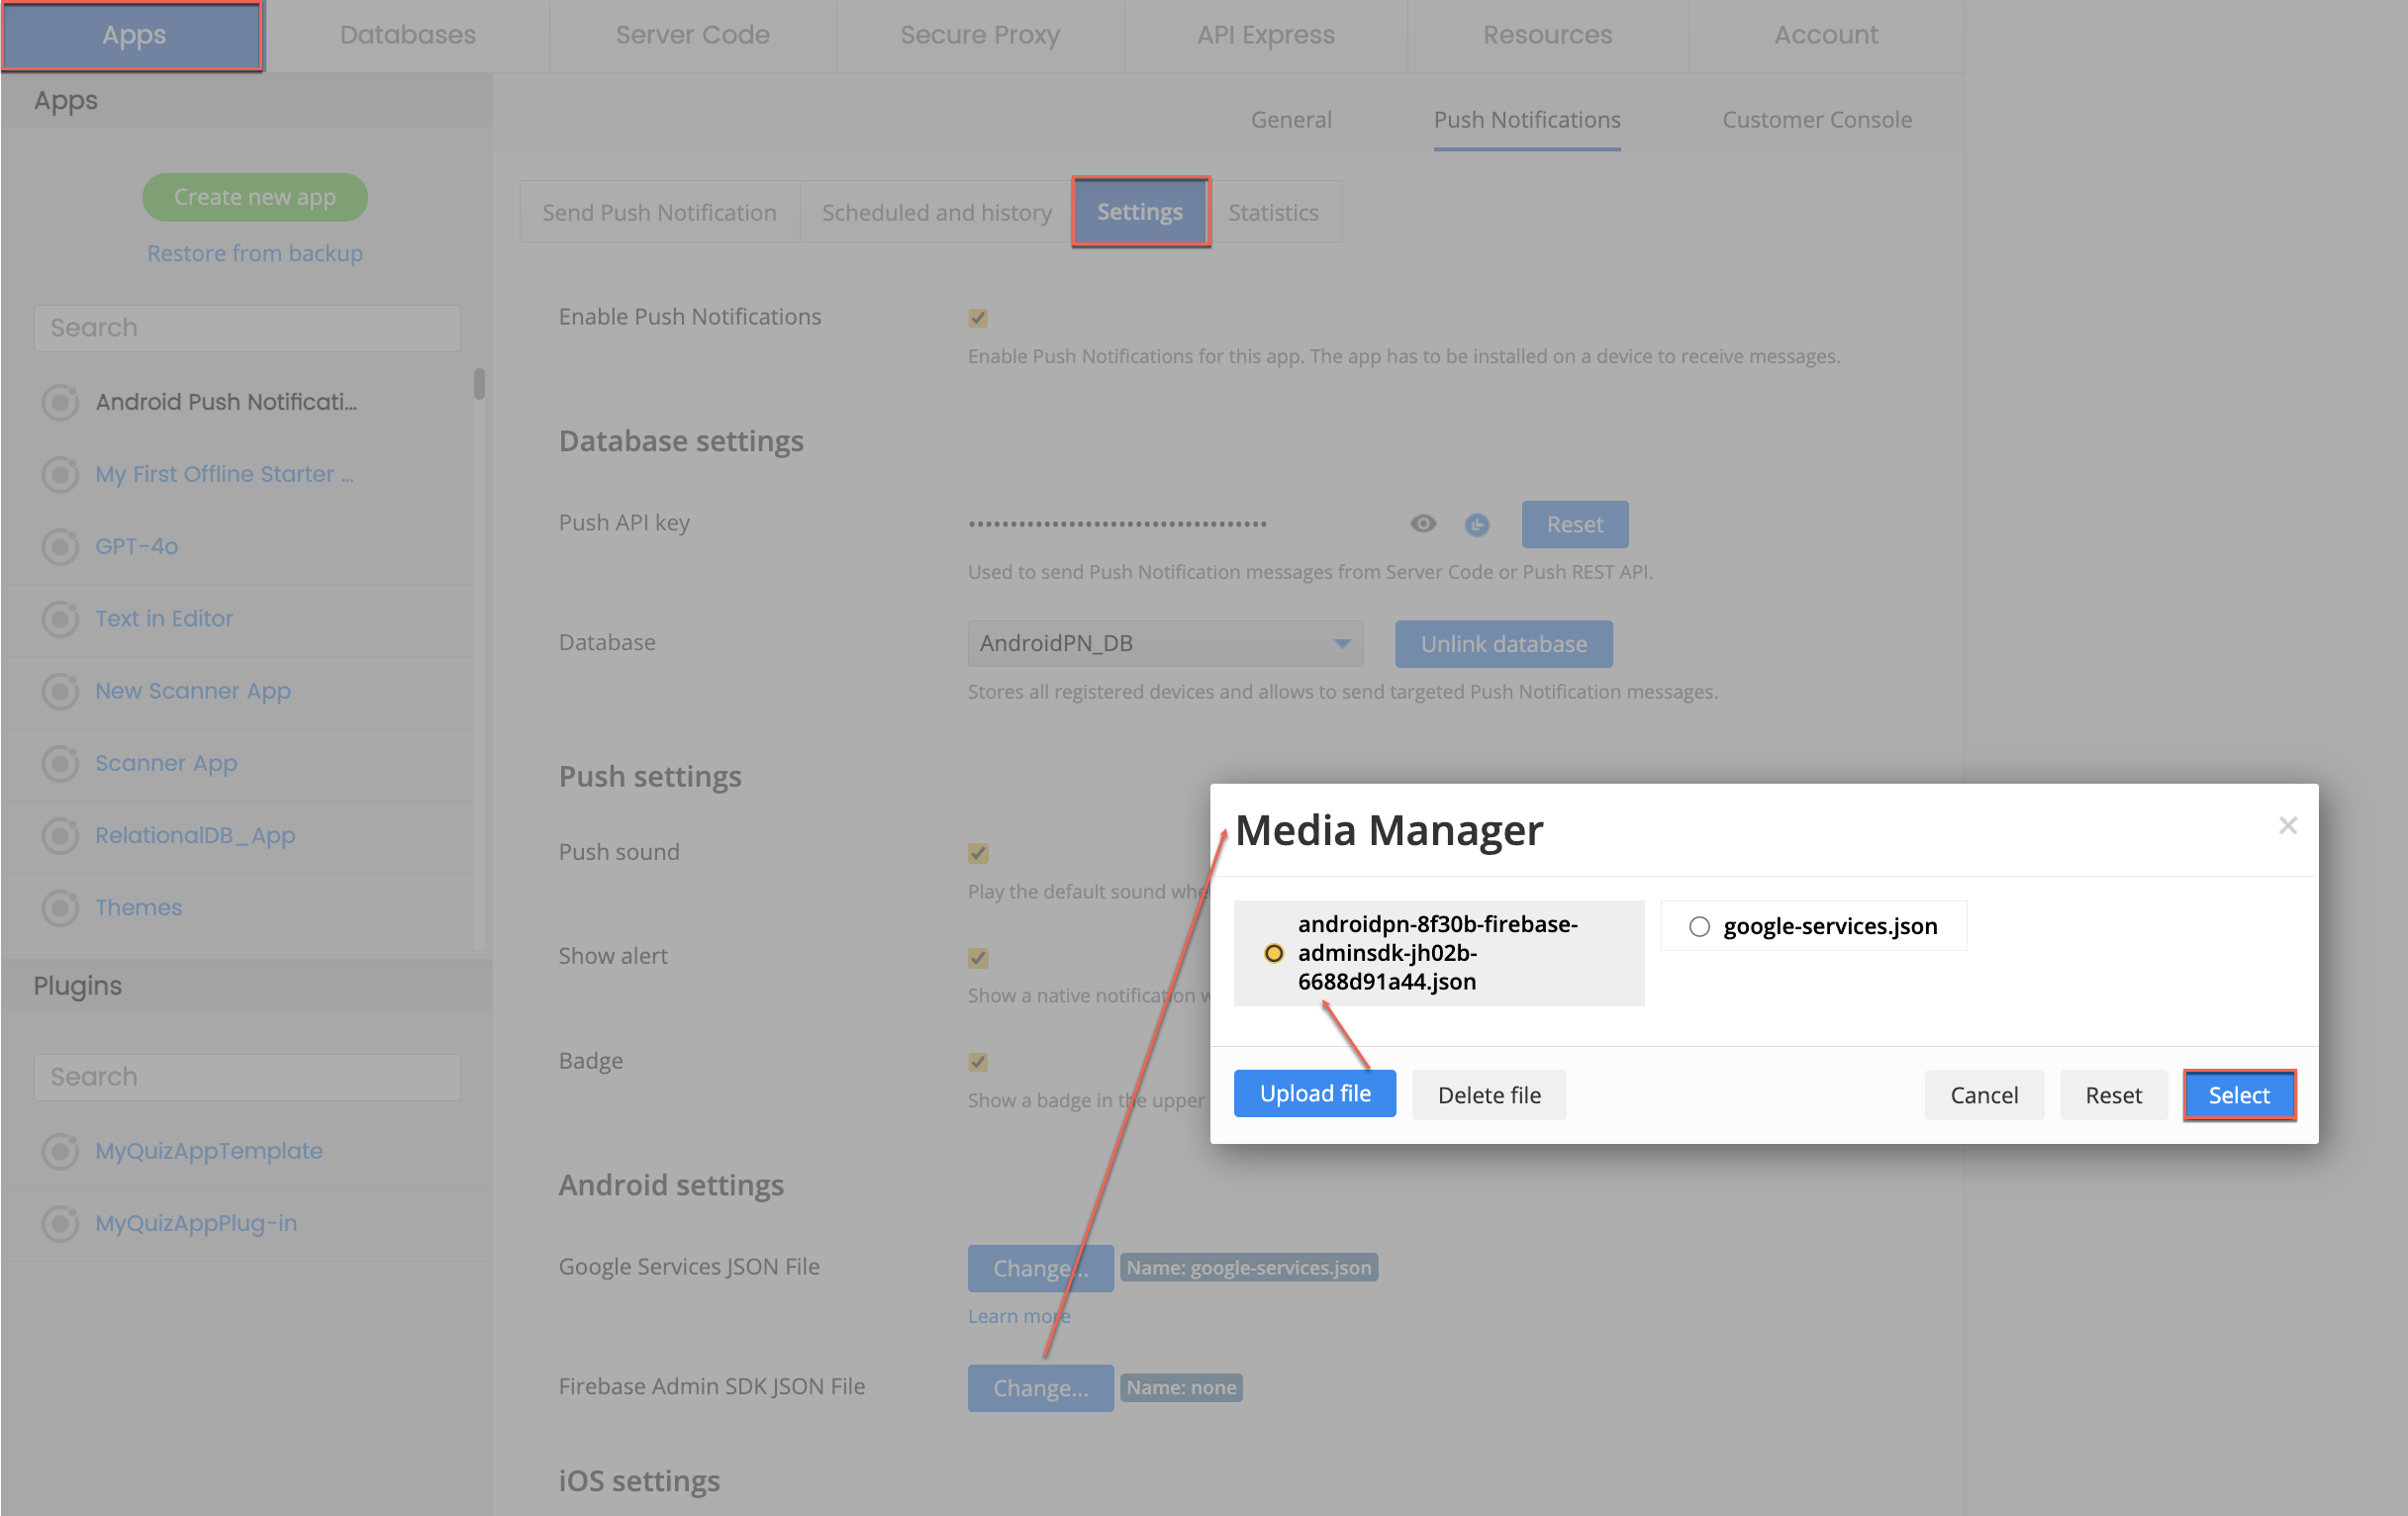
- Now, go back to the app Push Notification Settings tab, proceed to the Android setting section, and click the Change… button to upload the downloaded google-services.json file to the app by using the [Media Manager](Now, go back to the app Push Notification Settings tab, proceed to the Android setting section, and click the Change… button to upload the downloaded google-services.json file to the app by using the Media Manager tool:) tool:
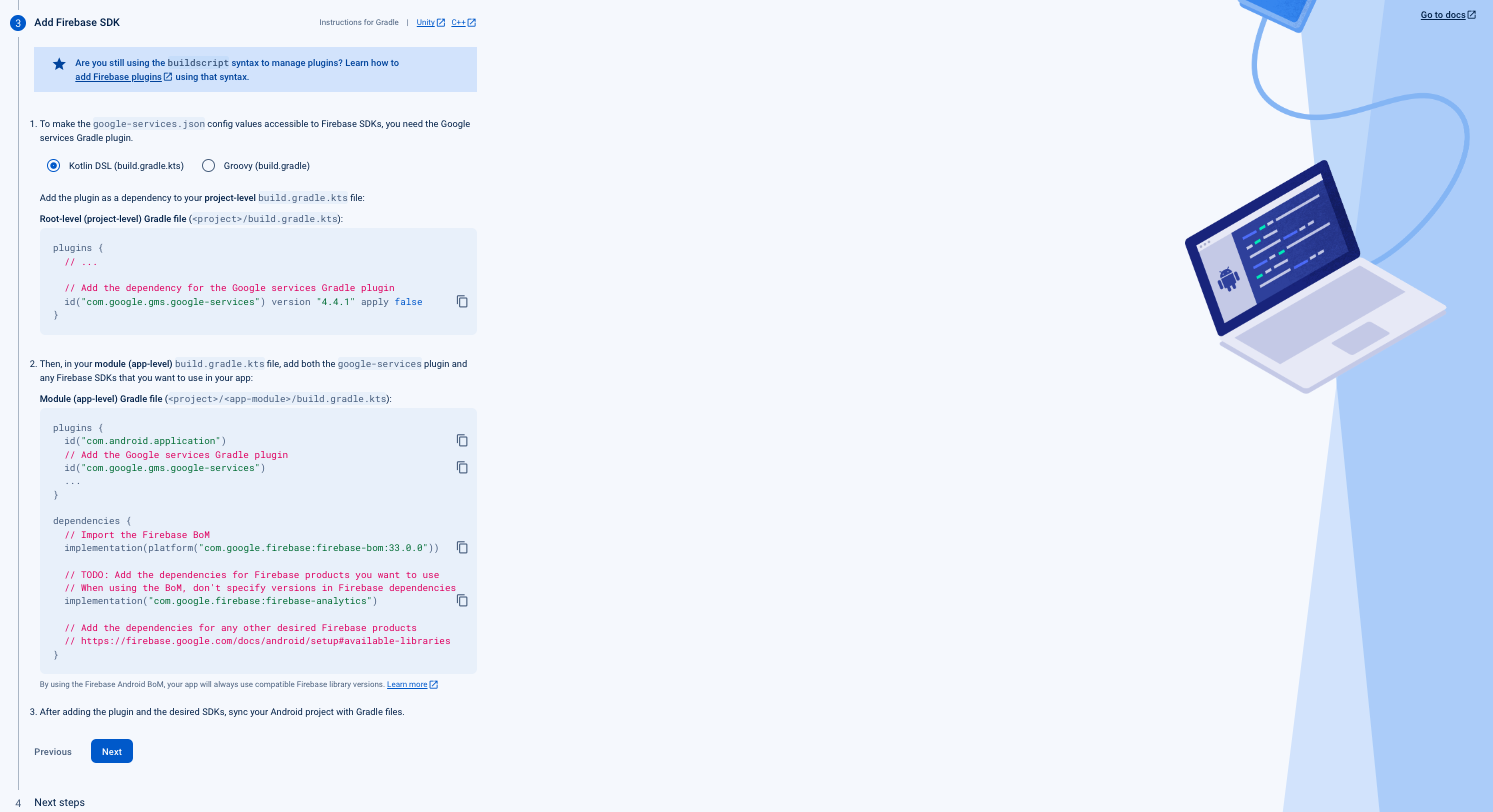
- Click Next, skip the Add Firebase SDK section, click Next and then Continue to console:
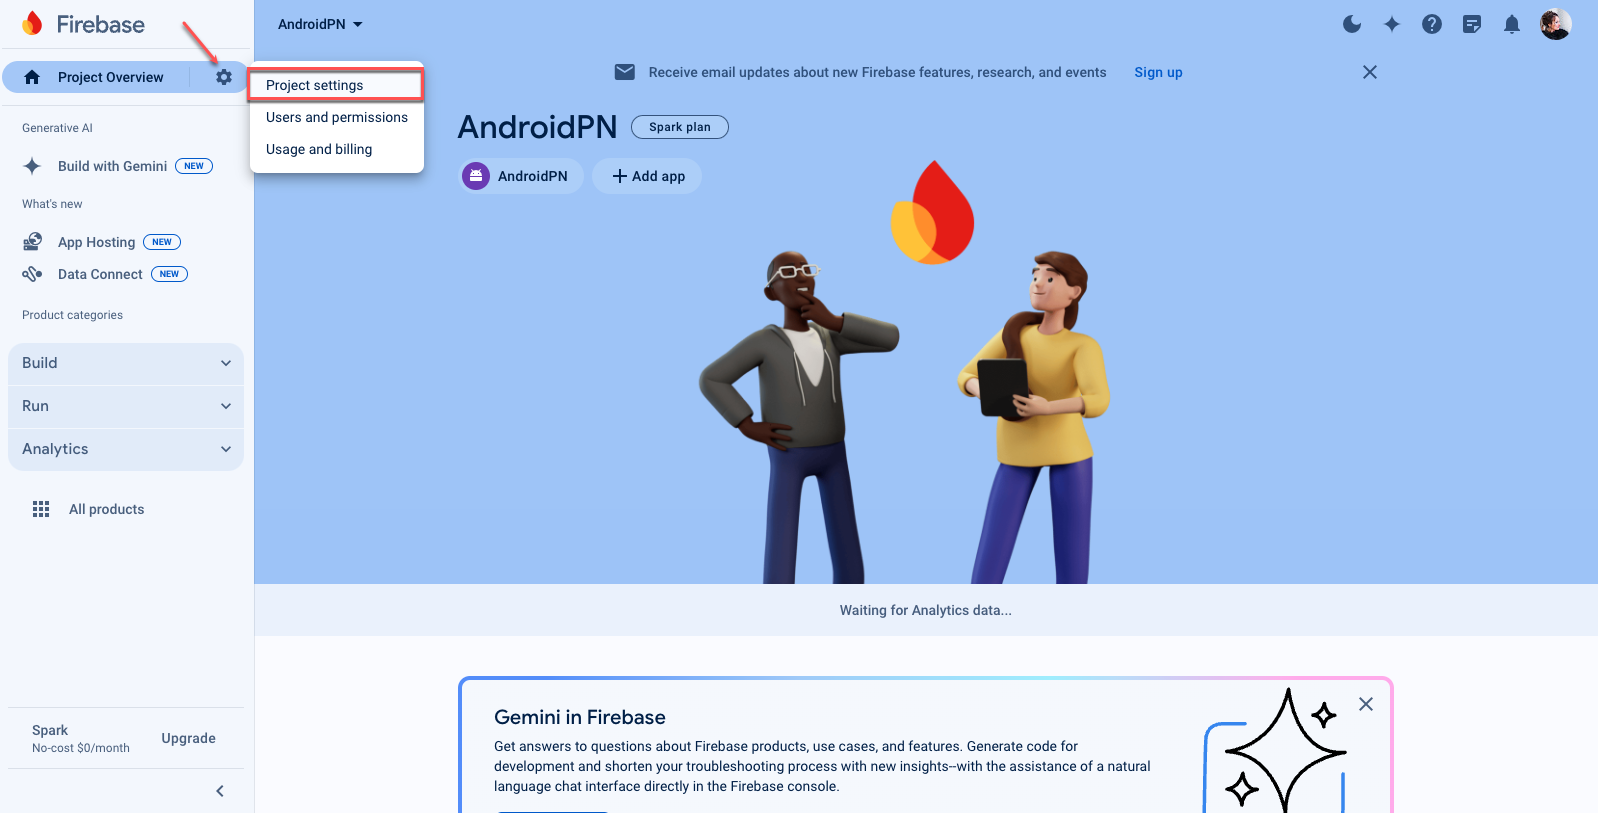
- When in the console, click the gear icon and select Project settings:
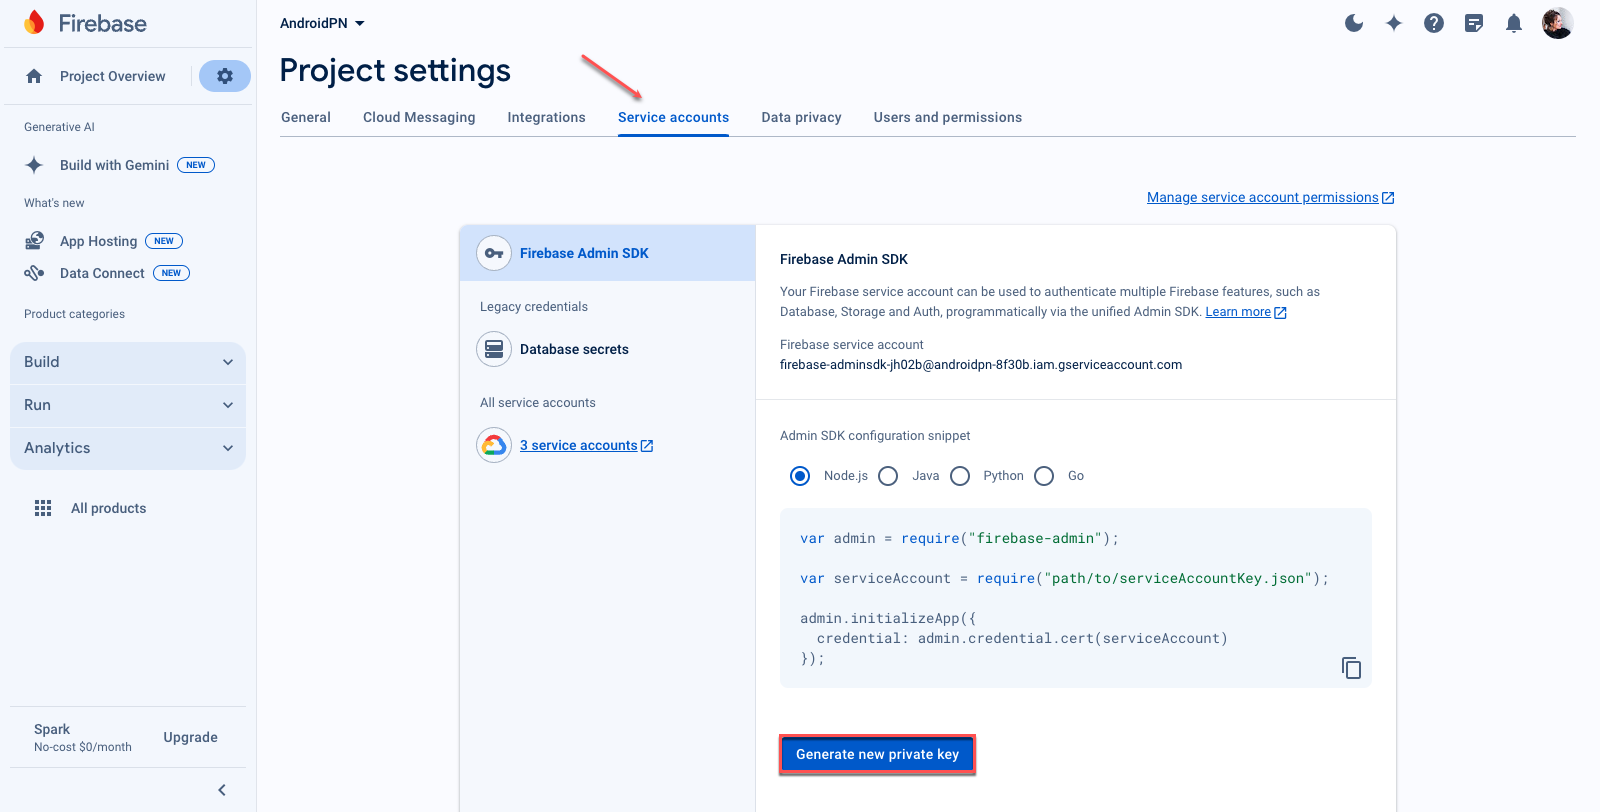
- Switch to the Service accounts tab and click Generate new private key, then confirm by clicking Generate key:
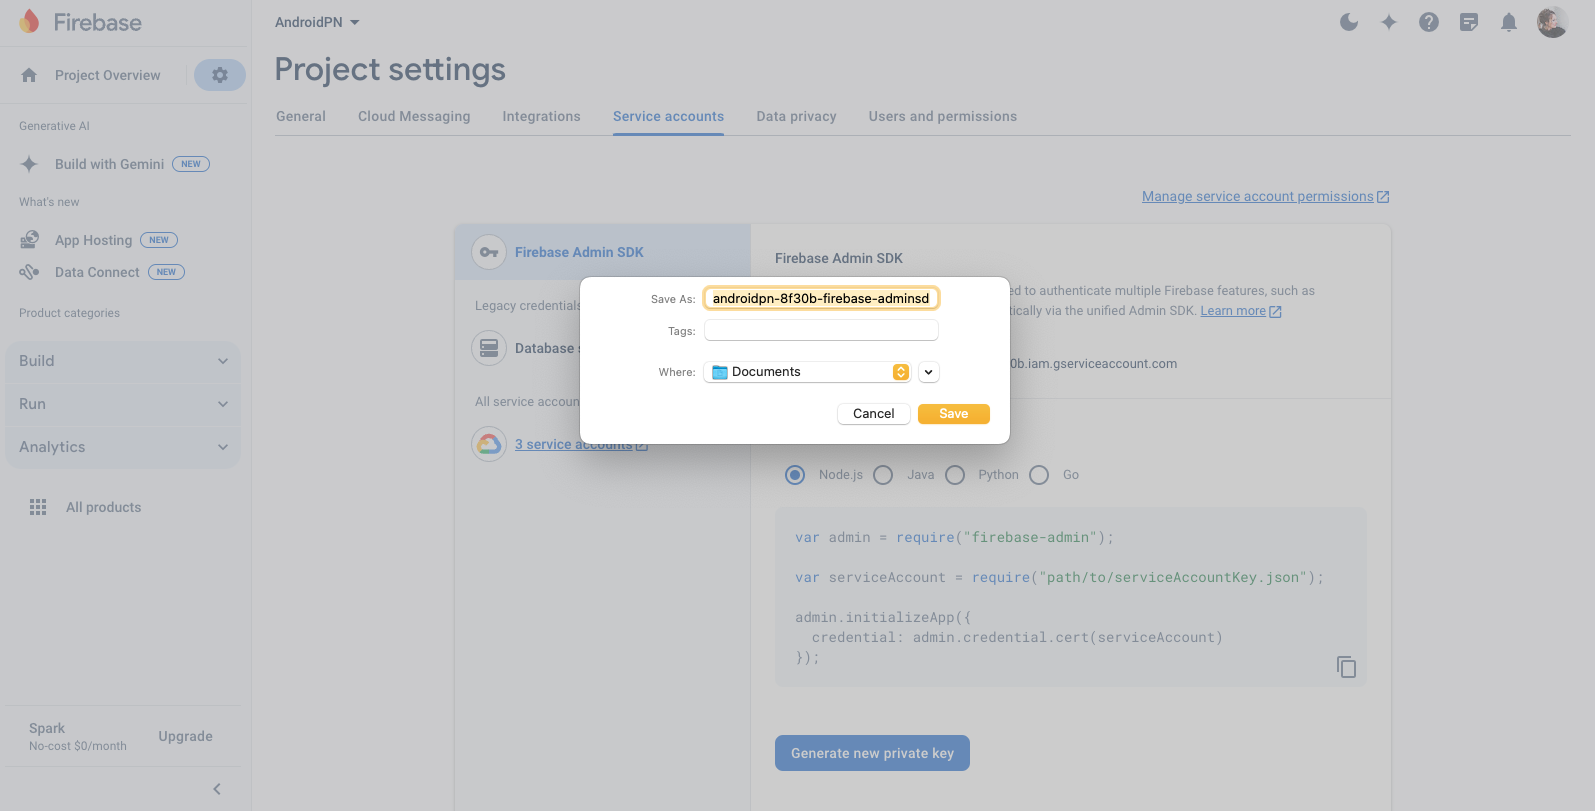
- Save the Firebase Admin SDK JSON to your drive:
- Return to Push Notification Settings in Appery.io.
- Click the Change button to upload the Firebase private key for the Firebase Admin SDK JSON File field
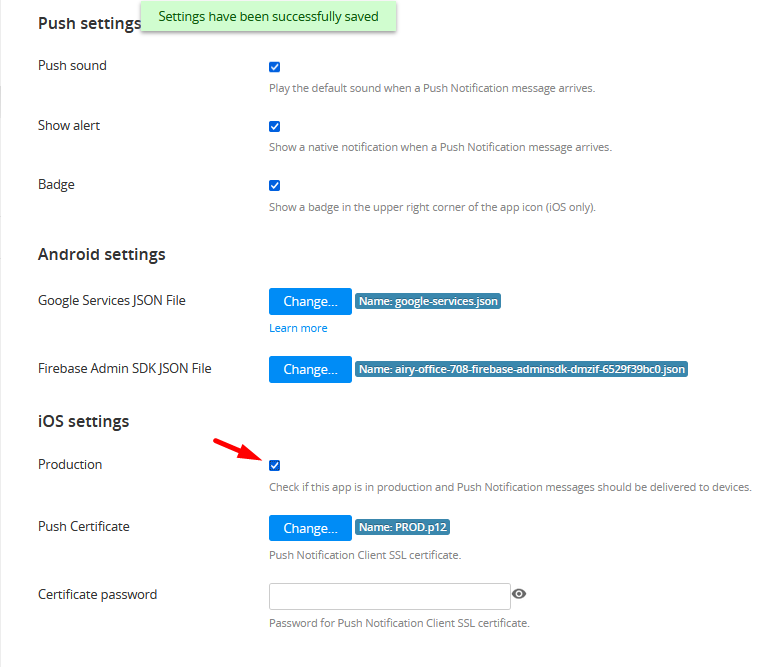
Your Push Notifications settings are saved successfully and you can generate your binary APK file and install the application.
Video: Configure Sending Push Notifications to Android mobile devicesYou can check this YouTube video tutorial that shows how to configure sending pushes to mobile devices running on Android:
Note!To create a Google Play account you'll need to pay a one-off $25 registration fee. You may be asked to verify your identity using a valid ID to complete your account registration. If we can't verify your identity, the registration fee won't be refunded.
iOS Settings
To enable Push Notifications for an iOS app, you must have a Development Certificate if your app is registered in the Development mode, and a Production Certificate if your app is registered in the Distribution mode.
- If you are using a Production Certificate, select the Production option in the iOS settings section. If you are using a Development Certificate, leave it unselected:
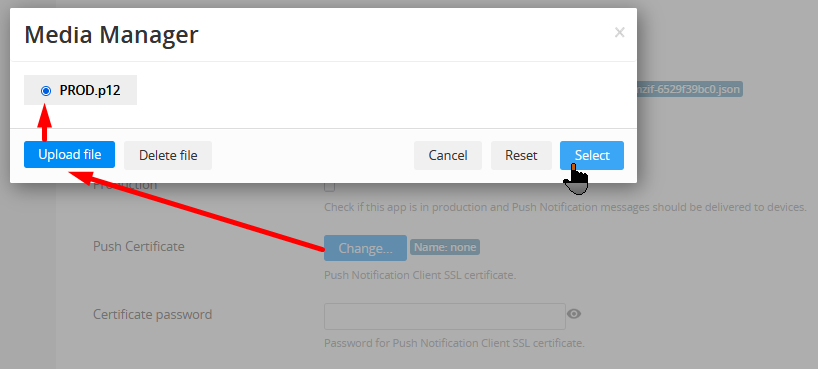
- Also, you will need to upload the Push Notification
Client SSLcertificate you downloaded from the Apple Developer portal. - To generate a Push Notifications certificate, you need to open the App Ids page, find the desired App ID, click Configure, and select the Enable for Apple Push Notification service check box. Then click Configure (selecting either Development or Production stage).
Important!For configuring sending pushes, you will need a different certificate from the one you get for signing your app but the flow of converting it is the same - using
opensslwith exactly the same commands.
You can check this video to learn how it's done.
- Fill in the Certificate password that was specified during .p12 certificate creation:
That’s it for iOS configuration.
iOS Bundle IDThe Bundle ID shouldn’t have a wild card character, otherwise, you will not be able to configure push notification properties.
Video: Configure Sending Push Notifications to iOS mobile devicesAlso, you can check this YouTube video tutorial that shows how to configure sending pushes to mobile devices running on iOS:
Enabling in the App
Cordova Plugin requirementsThe google-services.json file is required with PushPlugin Cordova plug-in for successful project builds. Please don't enable this plug-in before configuring Android settings.
To enable Push Notifications in an app, the Push Notifications plug-in has to be activated. Go to Project > App settings > Cordova plugins and enable the PushPlugin Cordova plug-in (and the Device Cordova plug-in for JQM projects):
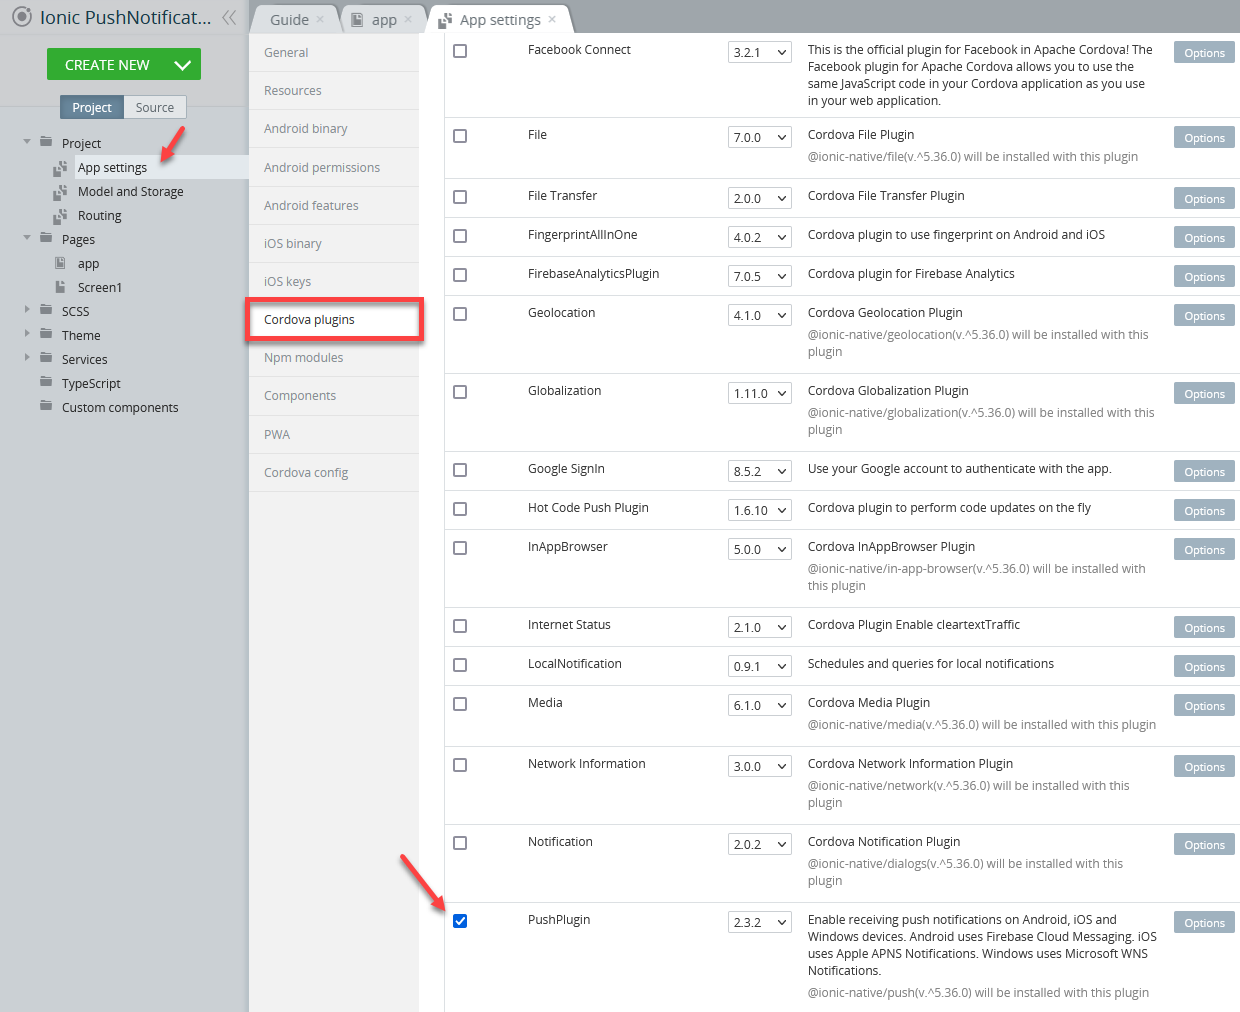
For Ionic projects, enabling the Device Cordova Plug-in is not required.
Migration from GCM to FCM
Before version 2.0, Cordova PushPlugin used Google Cloud Messaging provider to register devices. As GCM is not supported by Google, all projects with the Cordova PushPlugin version lower than 2.0 do not receive push notifications anymore.
Best practices for migration from GCM to FCM
- Setup Firebase Cloud Messaging provider on the Push tab.
- Update PushPlugin Cordova plug-in in your project. It should be at least of 2.0 version.
- Publish your project.
Project updateUsers won't be able to receive push notifications until they update application. The auto update feature won't help in this case.
Updated about 1 year ago