Ionic Quickstart Push Notifications Tutorial
Getting started with Push Notifications for Ionic projects
This quickstart tutorial will show you how to send a Push Notification with an Ionic app.
Video: Configure Sending Push Notifications to Android mobile devicesYou can check this YouTube video tutorial that shows how to configure sending pushes to mobile devices running on Android:
Video: Configure Sending Push Notifications to iOS mobile devicesAlso, you can check this YouTube video tutorial that shows how to configure sending pushes to mobile devices running on iOS:
Apache Cordova (PhoneGap)
Apache Cordova (PhoneGap) is automatically included when you create a new app in Appery.io. The Push Notification component used in the Appery.io app is the notification plugin from Apache Cordova.
Want to know more?Please check out this document to learn how to add the predefined Push Notification services your Ionic mobile app.
To learn more about the component, and any other settings or options, please see the notification documentation page.
Important: Testing Push NotificationsTo test sending and receiving Push Notification messages the app has to be exported and installed on the device.
Note that Push Notification messages cannot delivered when running the app with the Appery.io Tester app but you can use the Live Debug feature to test this functionality.
Before You Start
If this is your first time working with Push Notifications, we recommend you create a new app so that it will not impact anything else you are working on.
How Service Works
After starting the application, you should receive a notification that the device has been registered.
Both iOS and Android handle notifications in the following way:
- When the app is in the background (not active), a standard notification will be shown to the user.
- When the app is in the foreground (active), a standard notification will not be shown as the app is currently active. The notification will still arrive, but you simply need to add an event handler (described in Step 4) to handle (process) this notification.
This is just a sample behavior and you might want to invoke another action to process the notification in your project.
Enabling Push Notifications
Please follow the steps on the Configuration page to learn how to enable and configure Push Notifications.
Important noticeIn Push Notifications > Settings, keep the Show alert check box selected. Otherwise, the issue with push notifications permissions on iOS devices can be observed.
Creating New App
- From the Apps page, click the Create new app button.
- Select Ionic Blank for the application type, enter Ionic PushNotifications App for the app name, and click Create.
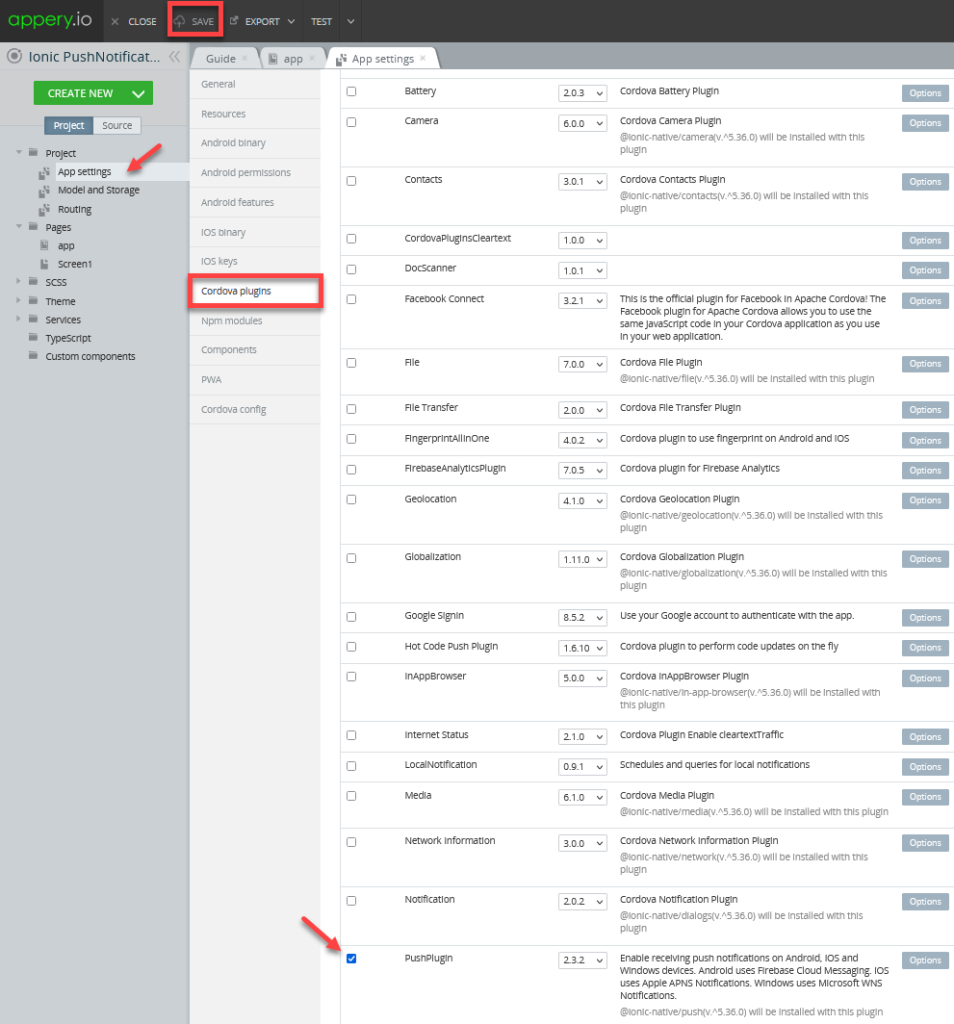
- After the App Builder loads, from the left menu, go to the Project > App Settings > Cordova plugins. Under the Core Cordova Plugins tab, select PushPlugin click the SAVE button at the top:
Creating App UI
Whether you use an existing or a new app, you need to create a very simple UI to handle Push Notifications.
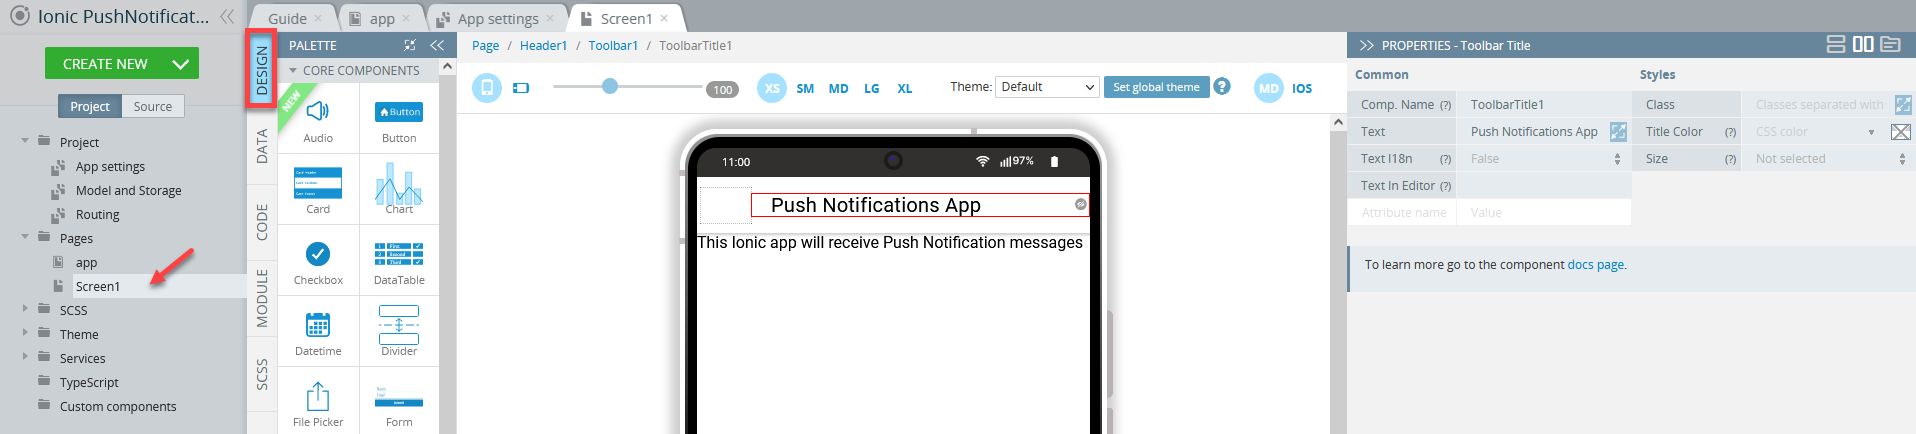
- Unfold the Pages folder, navigate to Pages > Screen1 and select the DESIGN panel.
- Now, select the App BuilderToolbar component and change its Text property to Push Notifications App. You can also add the needed components to the page. For example, drag the Text component and drop it into the app. Here is an example:
Designing App for Pushes
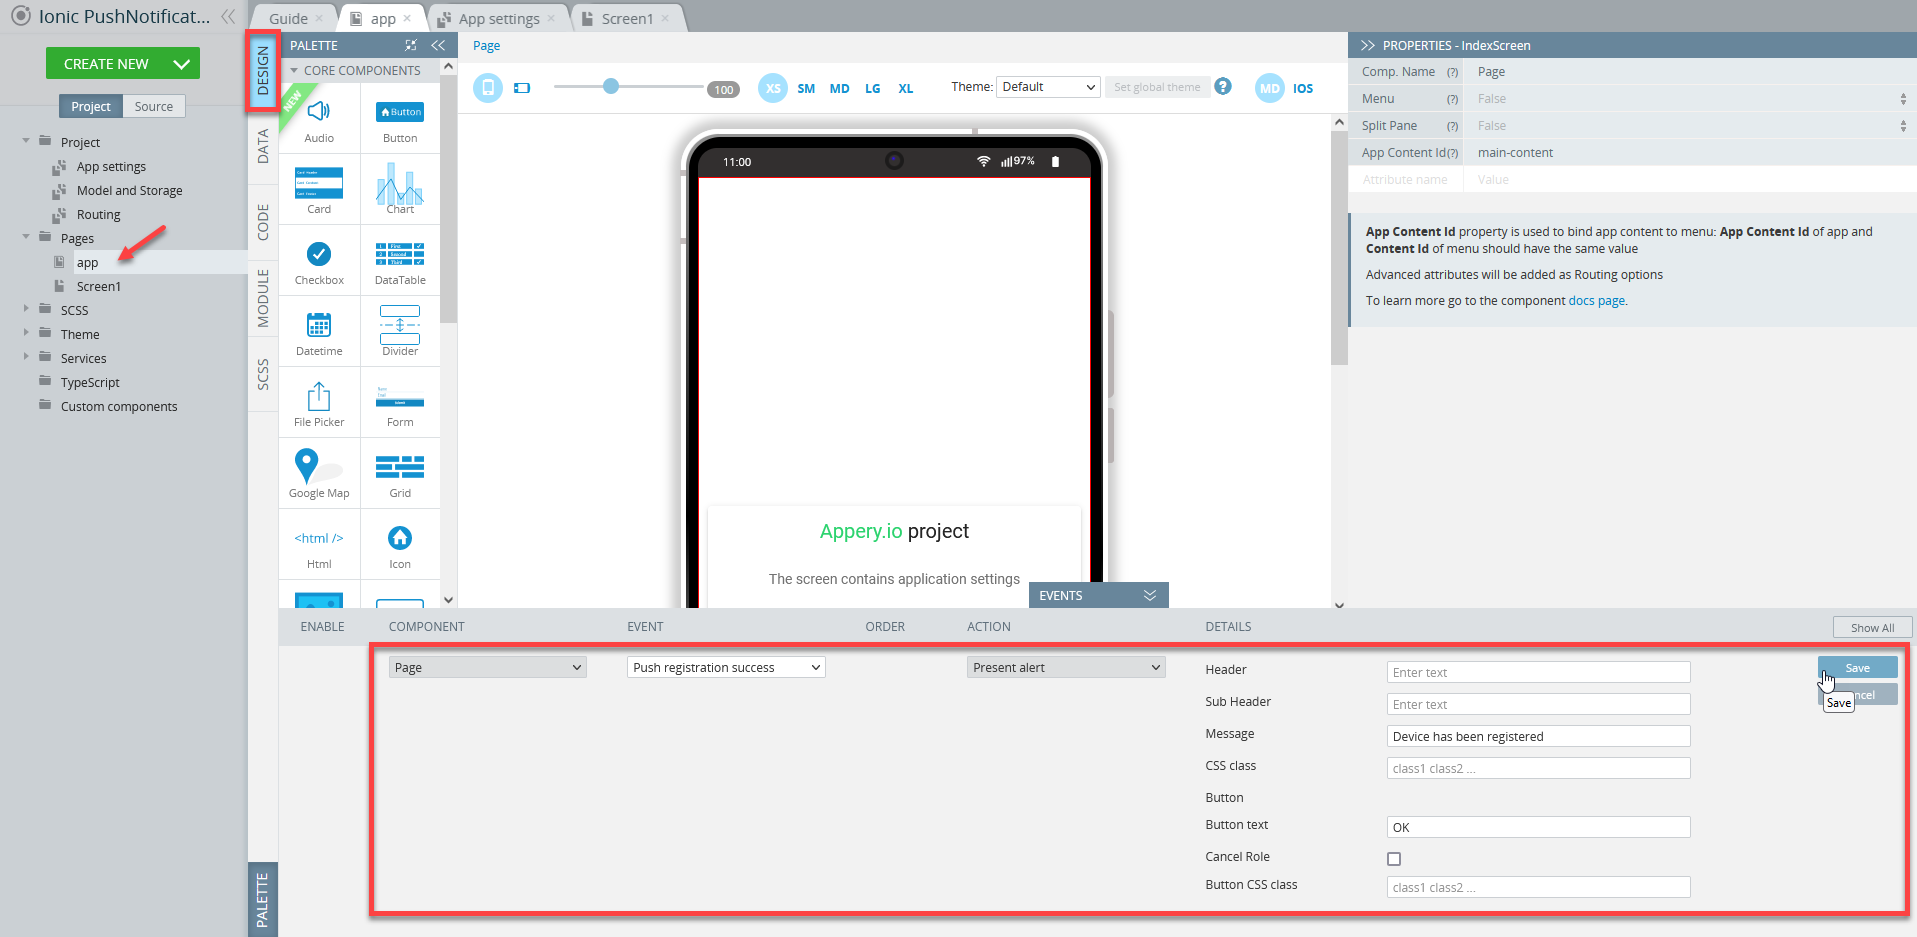
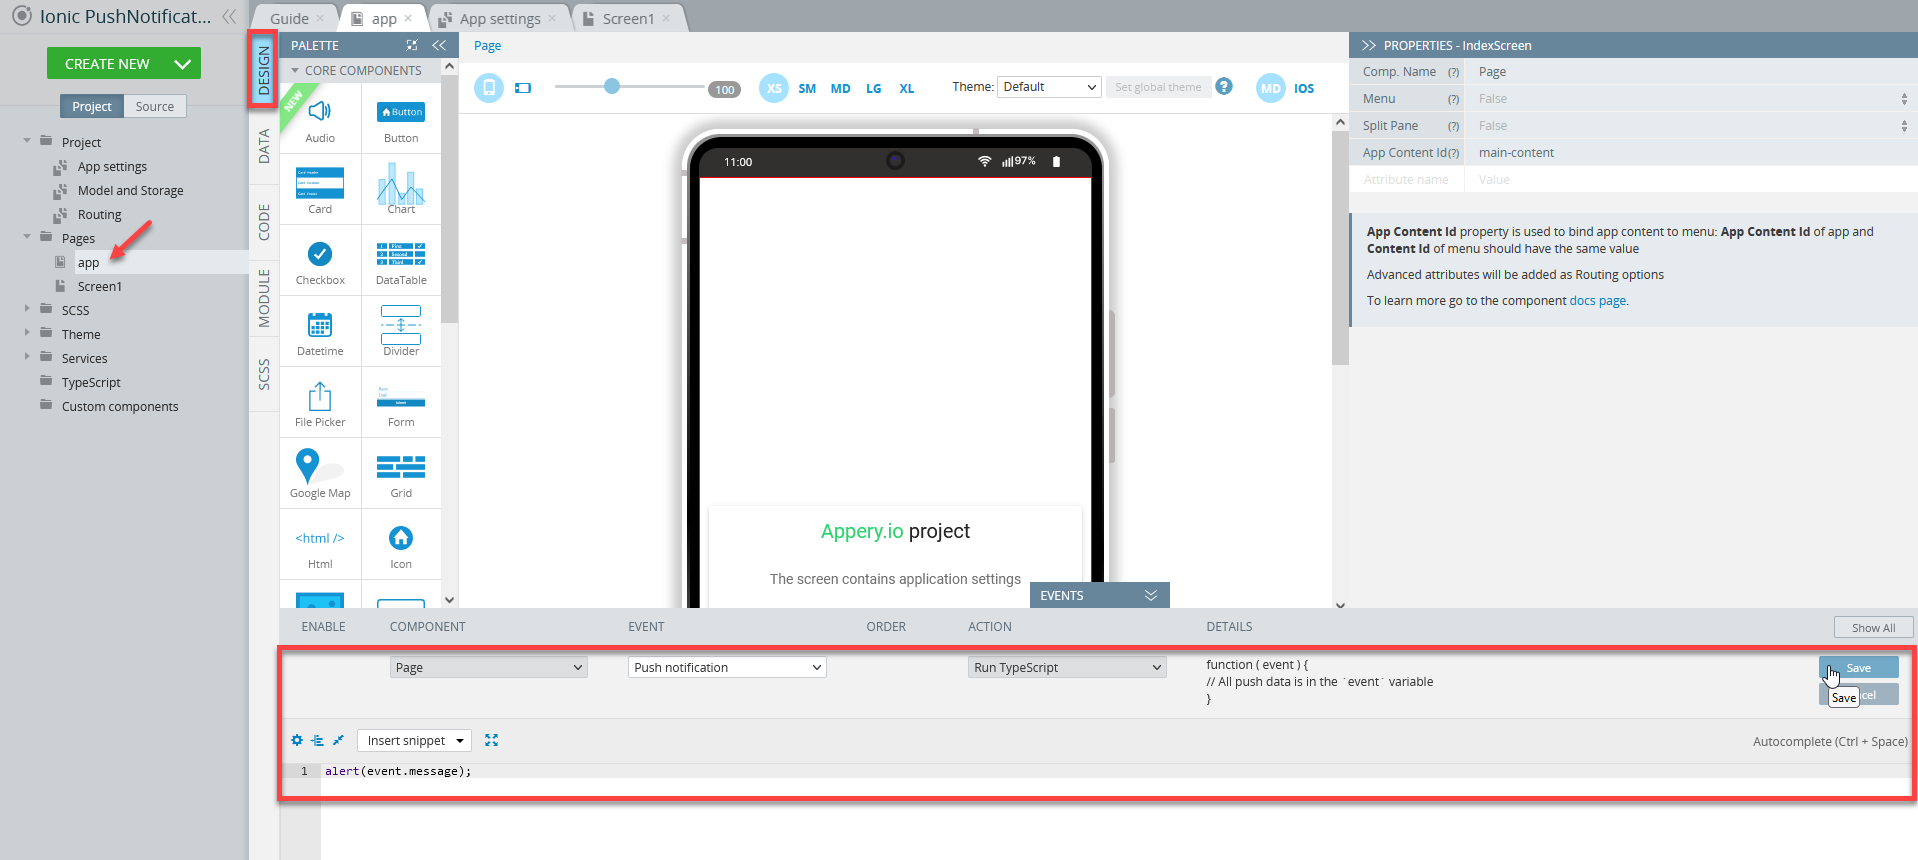
- Switch to the app page and expand its EVENTS tab.
- Add the Push registration success event for the Page component. Then, add the Present alert action. For the alert, set the Device has been registered message and save:
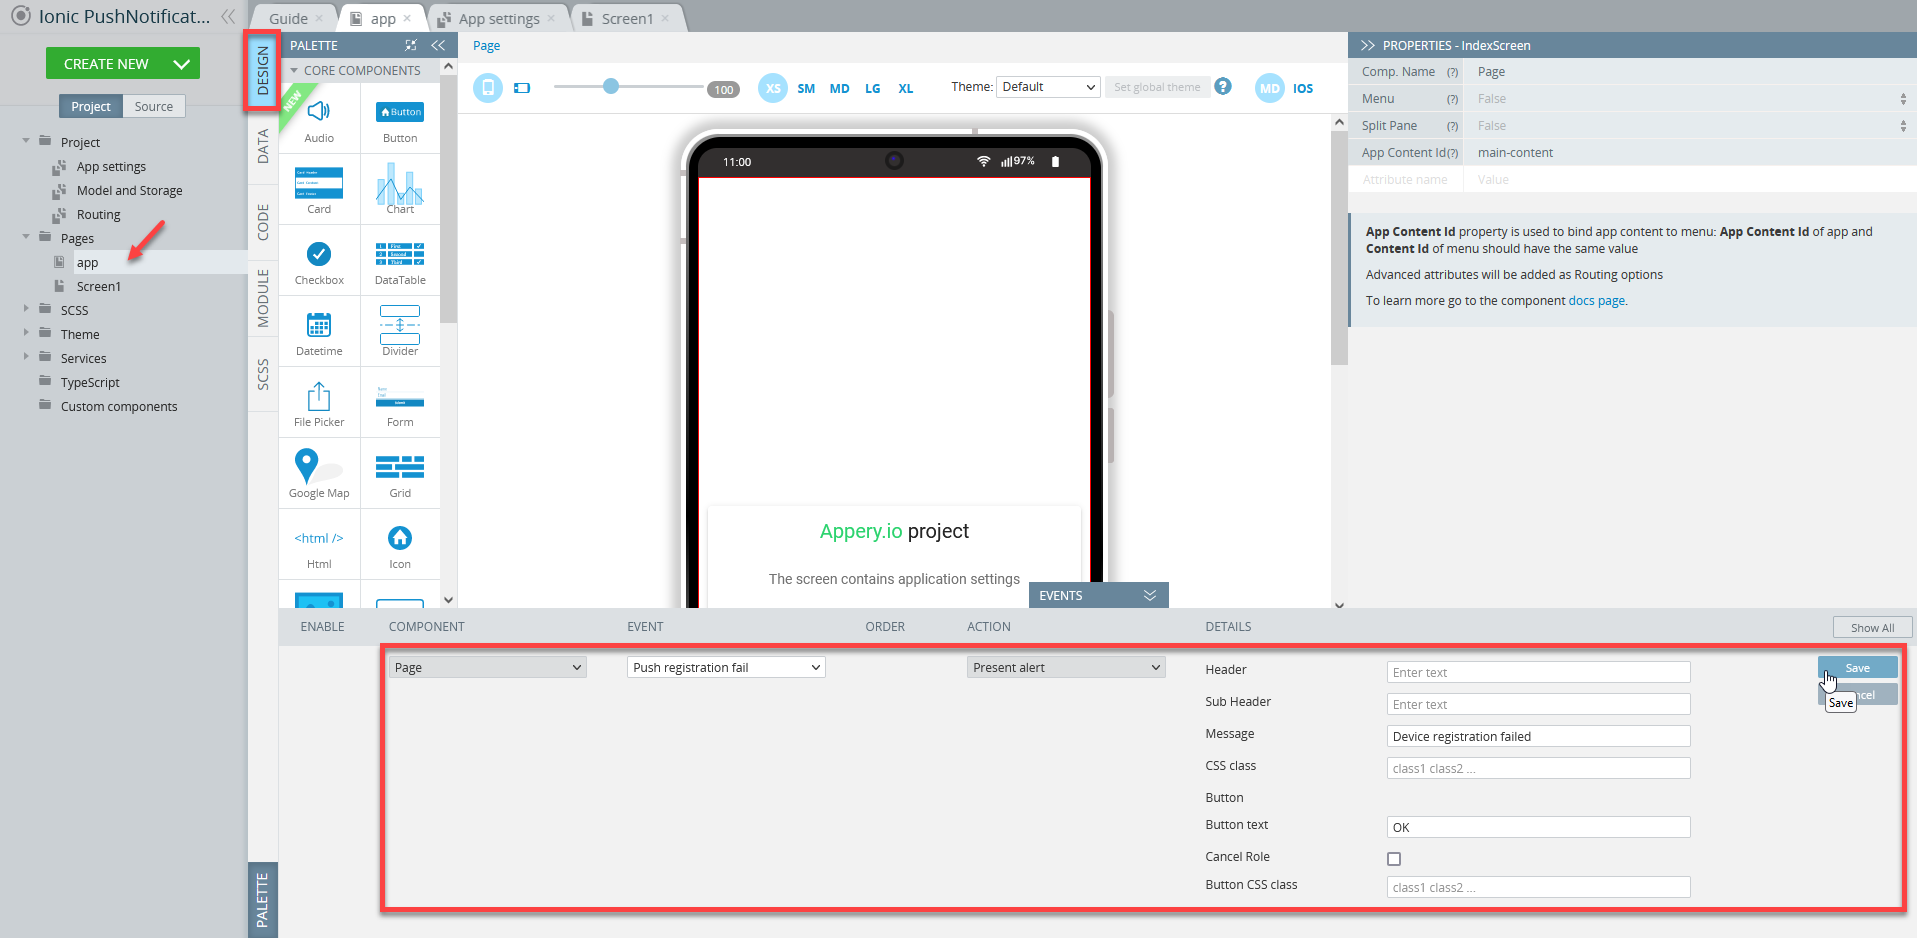
- Now, for the same Page component component, add the Push registration fail event with the Present alert action. For the alert, set this message: Device registration failed:
- Finally, add one more event for this page, Push notification and, for its action, select Run TypeScript, enter the code
alert(event.message);and save:
NoteIf different event handlers are added to different pages, the most recent event will be prioritized in handling (processing) a notification. This can be used to activate/deactivate alerts when opening a particular page.
Adding Custom Sound (Optional)
You might also want to send some custom sounds with your pushes.
If this is something you do not need, you can skip this section but if you do, follow the steps below:
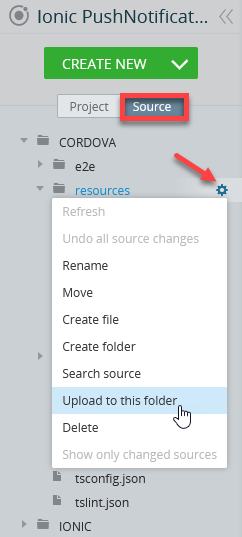
- In the Source tab, unfold the CORDOVA > resources folder and upload your custom sound, for example, the
push.wavfile (should be prepared beforehand):
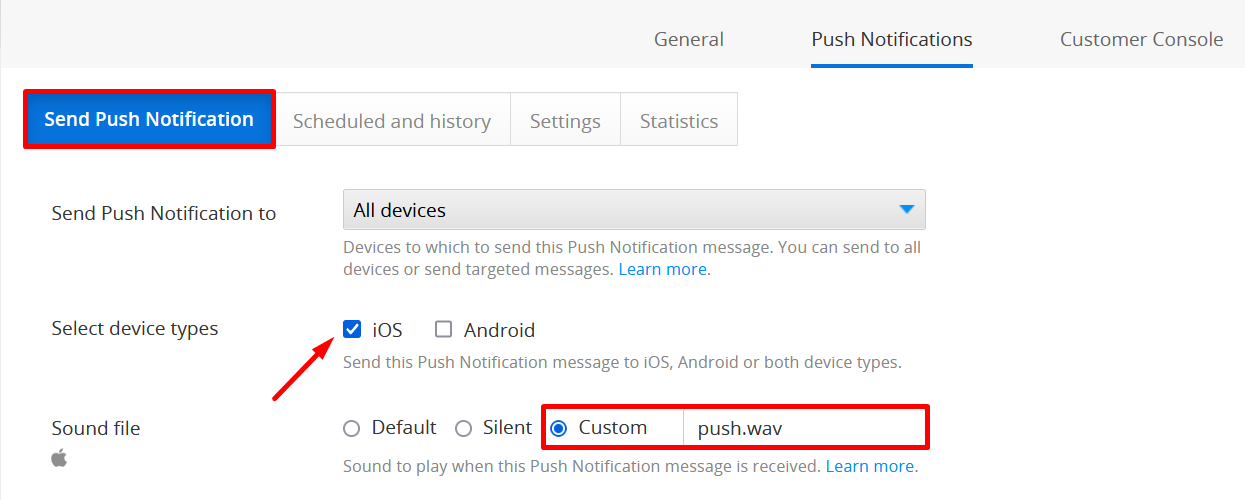
- Enable the needed device type and then select the parameter Custom sound file (with providing the file name on the Send Push Notification tab:
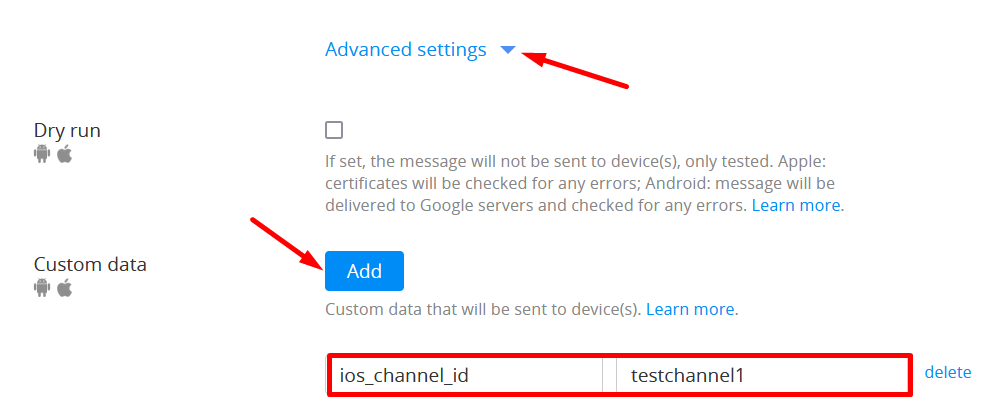
- Scroll down, expand the Advanced settings section, and click the Add button for the Custom data parameter; provide ios_channel_id with a channel name, for example testchannel1:
- Go to the app page and declare the Push initialize event with the following code (note the correct ios_channel_id name (here, testchannel1) and the file name without its extension:
wav):
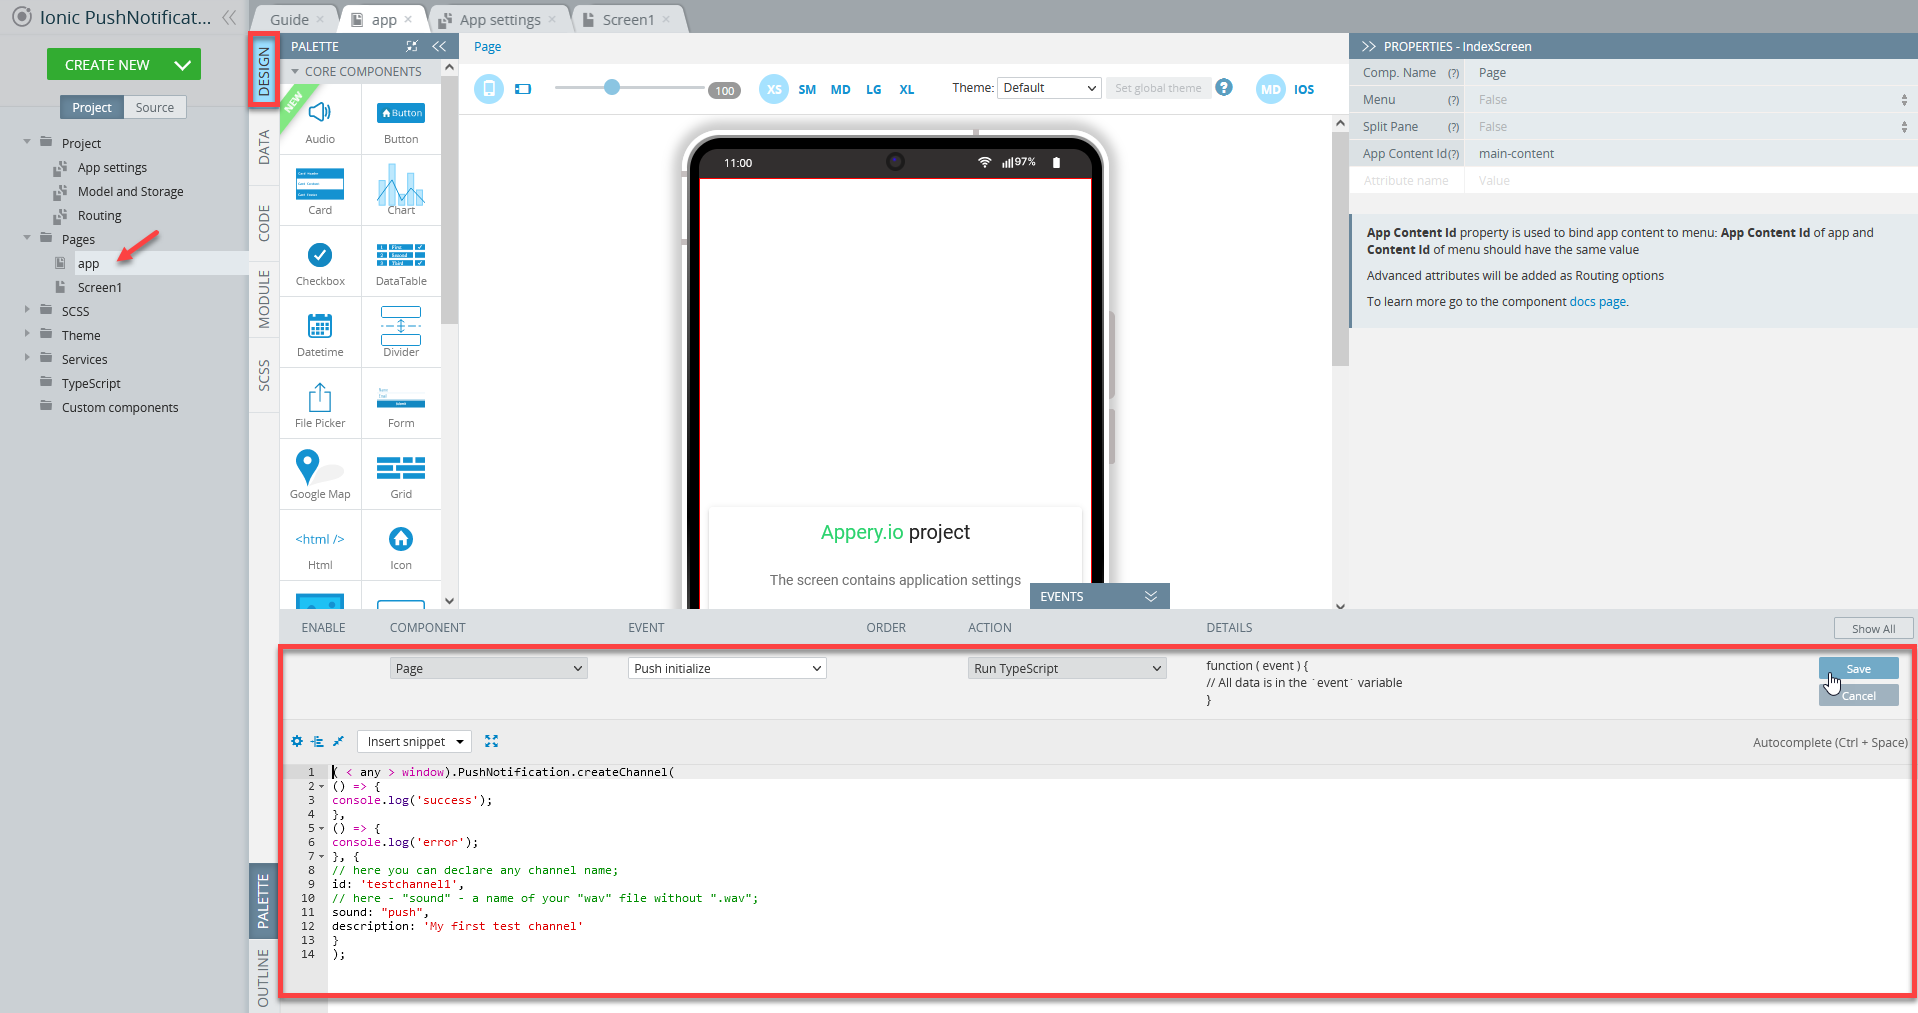
( < any > window).PushNotification.createChannel(
() => {
console.log('success');
},
() => {
console.log('error');
}, {
// here you can declare any channel name;
id: 'testchannel1',
// here - "sound" - a name of your "wav" file without ".wav";
sound: "push",
description: 'My first test channel'
}
);- Go back to the Project tab and add the link to your custom file to the
config.xmlfile into the Custom config section under the App Settings > Cordova config tab.
Select the needed tab under the Project > App settings tab (here, we use iOS) and paste the below line of code:
<resource-file src="resources/push.wav"/>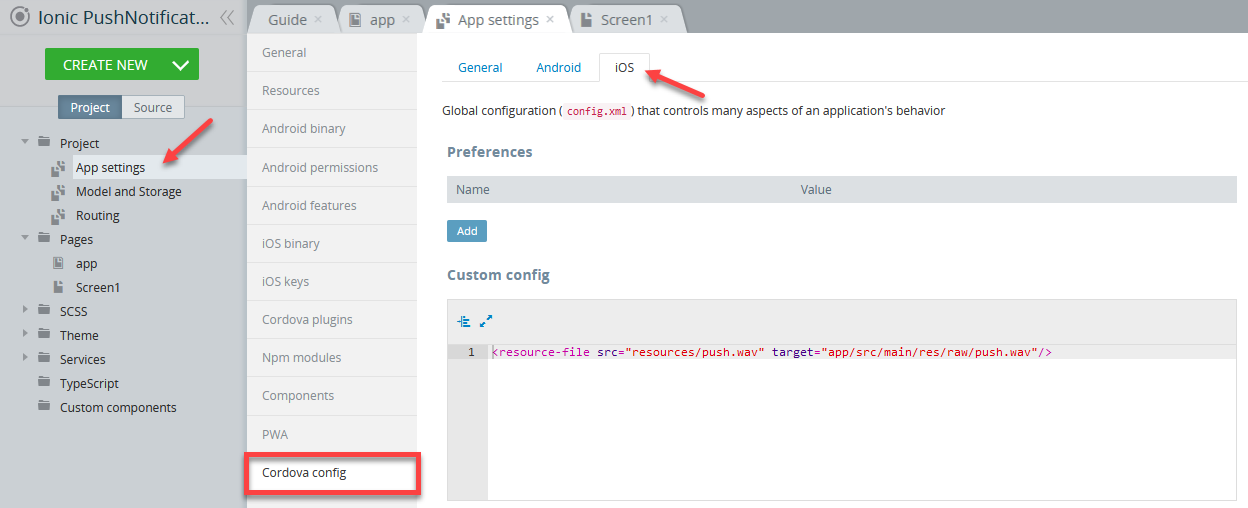
Important!Note that, for Android, full path is required:
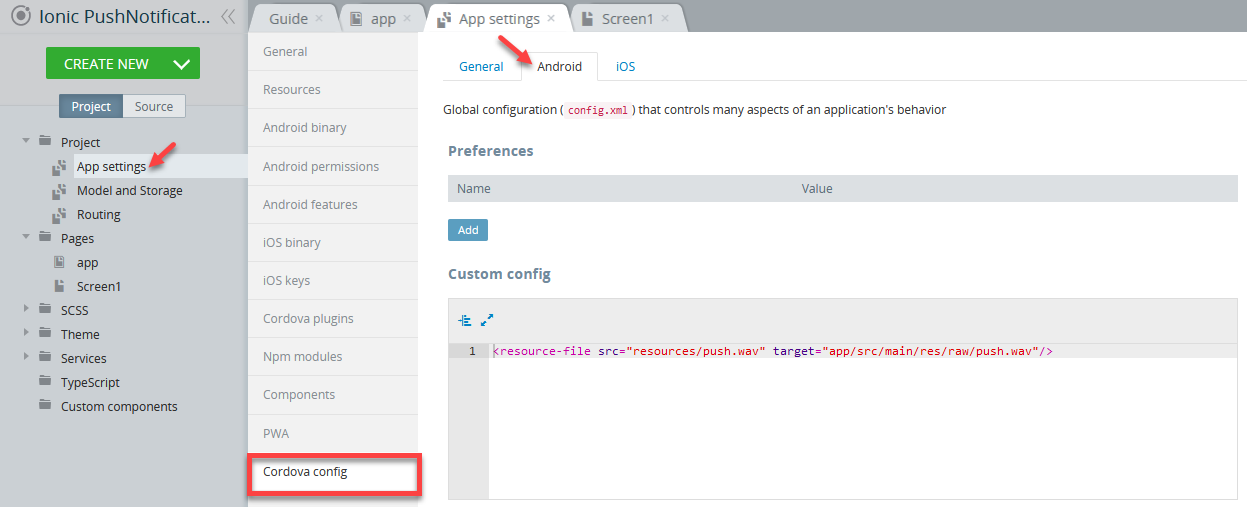
Save your work.
Installing App on Device
Note that you need to test it on a device as the push plug-in won’t work inside the browser.
So, to be able to receive Push Notification messages, you need to build (.apk / .aab for Android or .ipa for iOS) and install it on your device.
App ExportYou can check below for how to export your app:
- for Android: (https://docs.appery.io/docs/appexport-android)
- for iOS: (https://docs.appery.io/docs/appexport-ios)
ATTENTION!Make sure you follow all the steps described in the Configuration document. Otherwise, no push notifications will be sent.
Now, when you have successfully registered your device, you can arrange for sending your first Push Notification.
Sending Push Notification Message
- Go to Apps > Ionic PushNotifications App > Push Notifications > Send Push Notification.
- For Send Push Notification, keep the All Devices option selected.
- For Select device types, select the device type to which you want to send the message. You can select both if you have installed the app on iOS and Android.
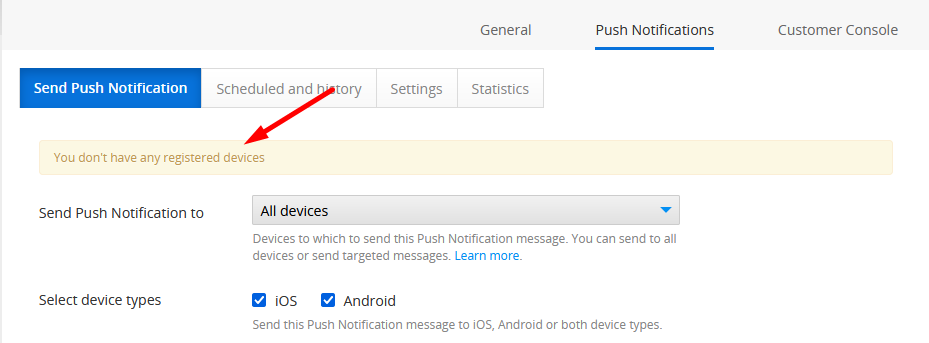
After your device is registered, your app will notify you with the alert:

"You don't have any registered devices" NotificationIf you see the "You don't have any registered devices" message, this means you have not installed the app on any device so, please follow this link to learn how to do that:
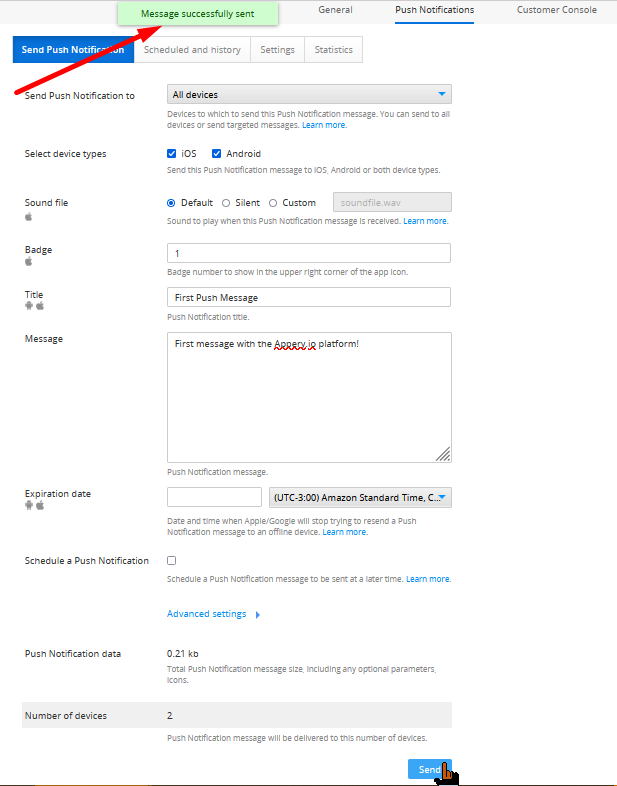
- To proceed, for Badge, enter: 1.
- For Title, enter: First Push Message.
- For Message, enter: First message with the Appery.io platform!:
- Now, scroll to the bottom of the page, check that the needed devices have been registered, and click the Send button to send the message:
NoteTo learn more about sending pushes, check this document.
Within a few seconds, your device should receive a Push Notification message you have just sent:

Push Notification message on an Android device

Push Notification message on an iOS device
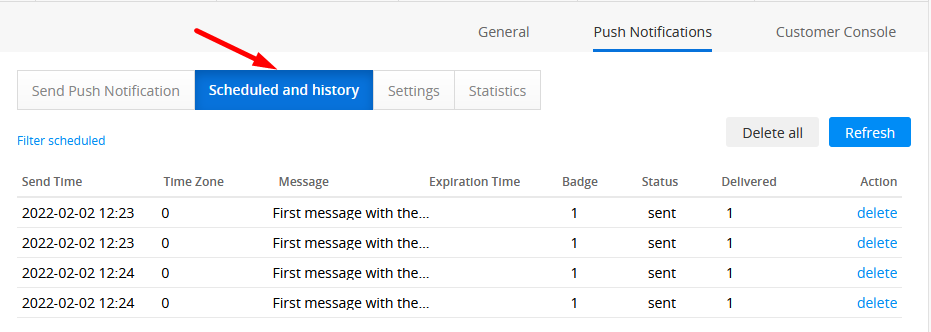
To make sure the pushes were sent successfully, open the Scheduled and history tab:
"Error occurred while loading the keystore: keystore password was incorrect" NotificationSometimes, the error status can fire with the message "Error occurred while loading the keystore: keystore password was incorrect" while sending pushes to an iOS device:
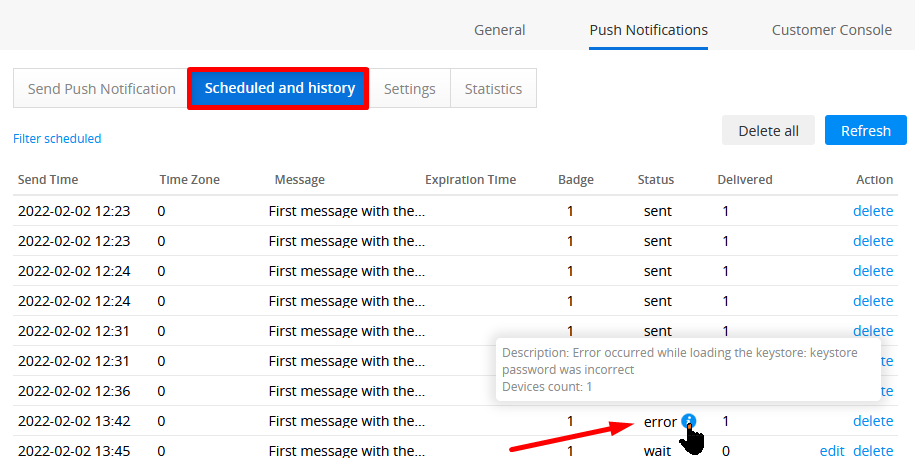
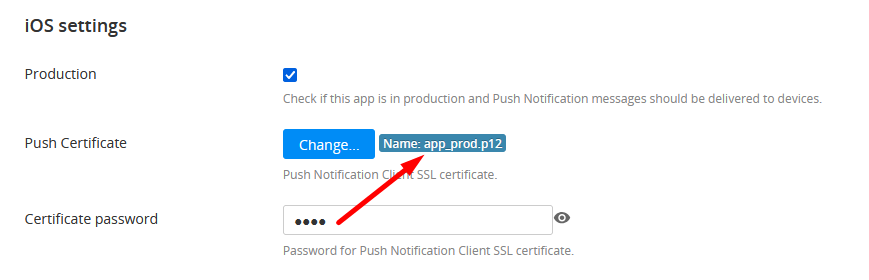
To resolve this issue, please go back to your app Push Notifications > Settings tab and double-check that the entered password is correct and corresponds to the Push Notification Client SSL certificate you got from Apple:
Want to know more?Also, you can check this tutorial to learn how you can keep application logic working when in the background mode.
Updated 12 months ago