Picture Upload Sample jQM App
Sample jQuery Mobile app to upload a picture or a file to the Appery.io database.
Important Note!The option of creating new apps with thejQuery Mobile framework was removed but we still support the projects that were created with it earlier.
Introduction
This sample app shows the following features:
- jQuery Mobile UI.
- Appery.io Database.
- Two files uploading approaches used:
- Upload files via Web API (this approach uses only the browser API).
- Upload files via FileUpload_service working on the mobile device.
The Picture Upload App sample app shows how to upload a picture taken with the mobile device camera to the Appery.io Database.
The app is also capable of working in a web mode; in this case, the Camera button will redirect to your drive where you can select the image to be uploaded to the linked database.
What is specific about this app: the app logic detects the needed mode automatically: whether the app is working via Web API or the upload will need to be processed by mobile device FileUpload_service (for this, the app needs to be installed on the device).

Sample app to upload a picture to a database.
The database requires a sessionToken for uploading files to the database. To make the sample app simpler to use, it uses the Master Key. So, to configure this app, you should provide the ID of the database that will be used to store files and Master Key instead of sessionToken.
Getting the App
First, you are going to get the app. The app is available as an Appery.io plug-in.
- Go to the Apps tab.
- Click the Create new app button.
- Select the jQuery Mobile tab, then select the Blank template. Name the app: Picture Upload App and click the Create button:

- When the visual App Builder loads, click CREATE NEW > From Plugin.
- Under the Appery.io Examples section and select Picture Upload App.
- Click Import selected plugins:

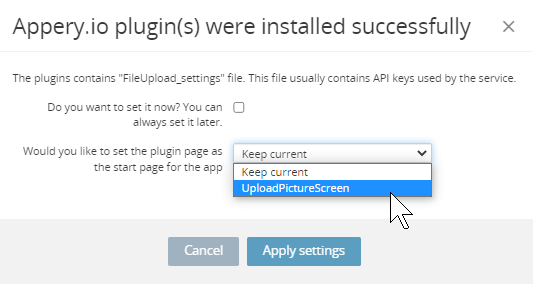
- In the next screen, select UploadPictureScreen as the app start page and click the Apply settings button to finish importing the plug-in:
Save the app and go to App settings >General to make sure the UploadPictureScreen page was applied as the app start page:

App Architecture
Let's review the app architecture that allows working in two modes:
- Uploading files via Web API (using browser API).
- Uploading files via the mobile device FileUpload_service.
Unfold the Services folder in the Project view to inspect the services that have been added automatically:
- The service NoCameraService that uses the Web API will work directly in the browser that is why you can select a picture or a file from your computer/device and upload it.
- On the contrary, the service CameraService is defined to work with the app installed on the device (Cordova camera):

There is one important step left before you can use the app: you need to create a new or use an existing database.
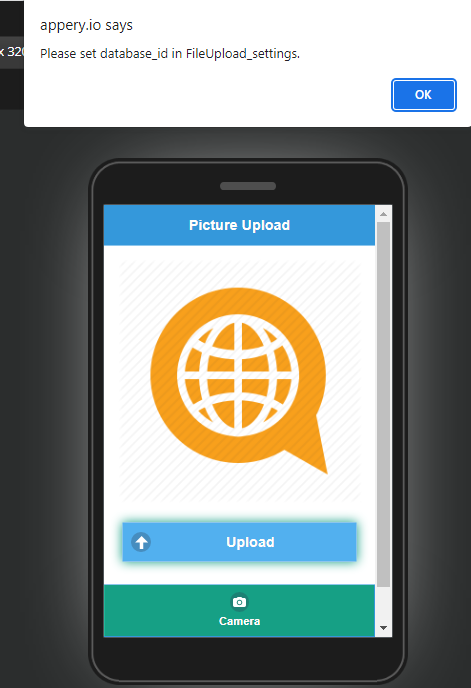
Error: Picture upload with no linked databaseIf you now try testing the app in preview, picture uploading will fail with the following error:
Database Setup
You can create a new database or use an existing database. The actual files will be uploaded to the default Files collection.
In the database, go to the Settings page. There, you will see the API key (database ID) and the Master Key. You will use both values in the next step:

Connecting the App with the Database
You are going to configure the app services to use the Appery.io Database.
- Inside the App Builder, open Services > FileUpload_settings.
- Here, set the database ID and the Master Key values obtained in the previous step:

- Save all the app changes.
Ready! That's all the setup you needed to do.
Testing the App
Testing Uploading Files via Web API
You can click the TEST button in the App Builder Toolbar to launch your app in the browser.
After the app loads, click the Camera button, and then - the Upload button:
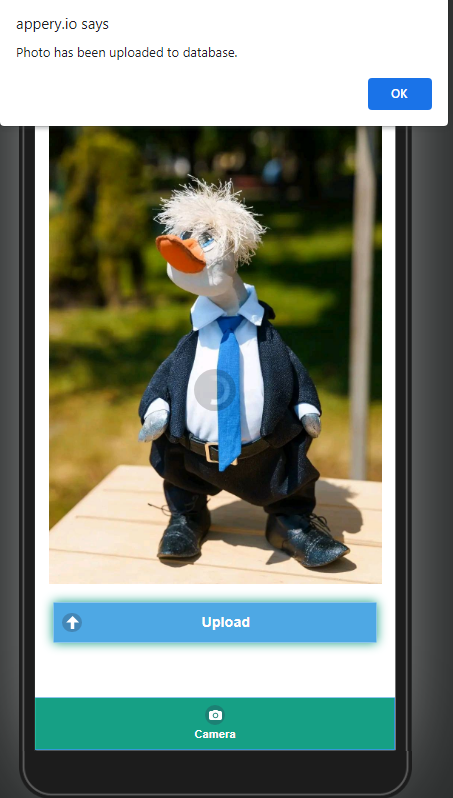
In a moment, you will see the success message. Now, if you now go to the linked database Files collection and click the Refresh button, the new record will be displayed:

Testing Uploading Files via Cordova Camera
To check how Cordova upload (CameraService) works, you will need to export the app and then run it on the device.
However, no additional settings are needed, switching modes will be done automatically:
Run the app on the device, click the Camera button to open the device camera, make a shot and save it on the device and then upload it to the database by clicking the Upload button:

App work on an Android device
Once you upload a picture, head to the linked database and open the Files collection.
There, you should see the file you have just uploaded:

Quirks
The little things you should know.
File Upload Name
The file name generates automatically (as timestamp) by default.
However, if you need to rename the generated file name(s), please be informed that Appery.io Database has some restrictions to file names. The valid file name should contain only a-zA-Z0-9% .- characters, and file name length is limited to 218 characters. If the file contains an invalid character such as space, you should replace spaces with a character such as**** before uploading the file.