JQM: Working with Binary Data
Sample jQM app which shows how to work with binary data in the database.
Important Note!The option of creating new apps with thejQuery Mobile framework was removed but we still support the projects that were created with it earlier.
Get/Send binary data
In this tutorial, you’ll learn how to receive and send binary data in an Appery.io project.
We are going to get the binary file from the Appery.io database and save it back to the Appery.io database, but you can use this described approach working with third-party APIs.
Preparation
- We'll save files to a database so you will need a DB session token. Read here on how to obtain a session token and how to save it to a storage variable. Let's assume that you already have a valid DB session token in the storage variable token.
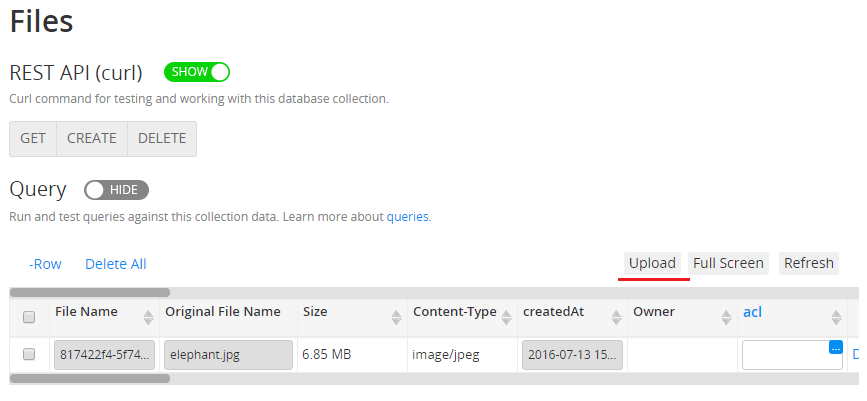
- Upload to db jpg file. We’ll use it as a data source.
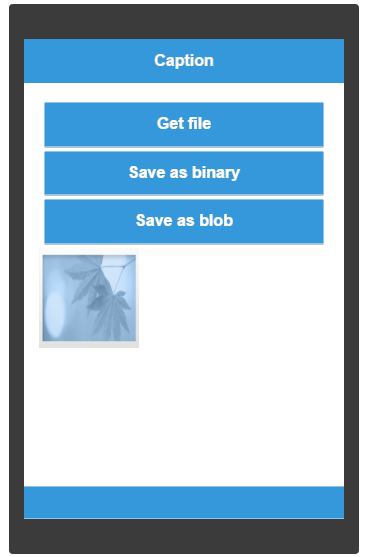
- The Upload page will contain the following UI:
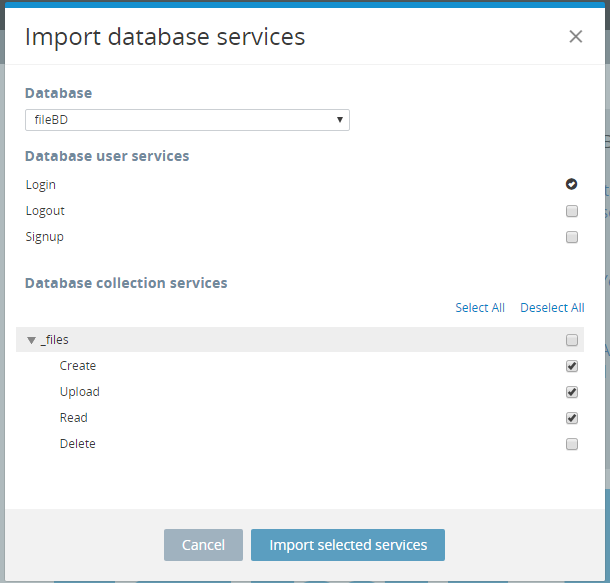
- Import following DB services: files -> Create,_files -> Upload, files -> Read
- Add storage variable data.
Read Binary Data
You may need to read binary data when you want to download any binary file (image, archive, or whatever) from the Appery.io database or any other third-party APIs. For example, you can read images from third-party services and save them in your DB, or send to another third-party service.
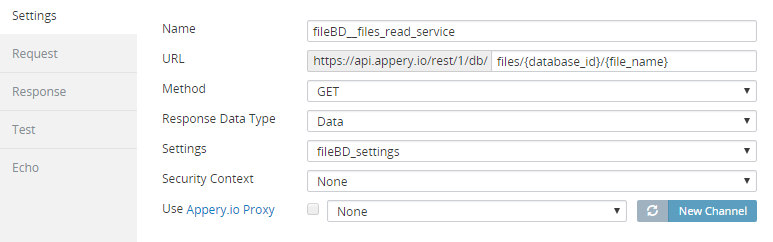
- Switch to the DATA view, add FileDB__files_read_service, and rename the service to readSrv.
Pay attention that FileDB__files_read_service has Data in Response Data Type, this means that service will receive binary data.
- Click Mapping for Before send event and create the following mapping:
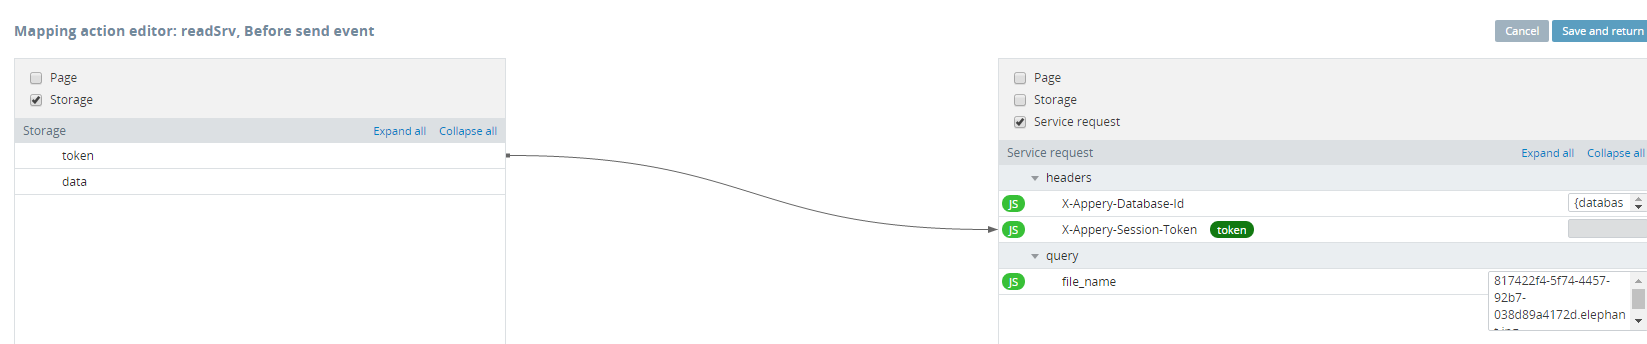
Fill name of the file in file_name field.
- Go back to the DESIGN view, and open the EVENTS tab.
- Select read_button > Click > Invoke service > readSrv.
- Click Save.
- Received binary data will be available as a string in the data response field.
Switch to the DATA view, and add the following services:
readSrv > Error > Run JavaScript > add the following:
alert("Read file Error");readSrv > Success > Mapping add the following mapping:
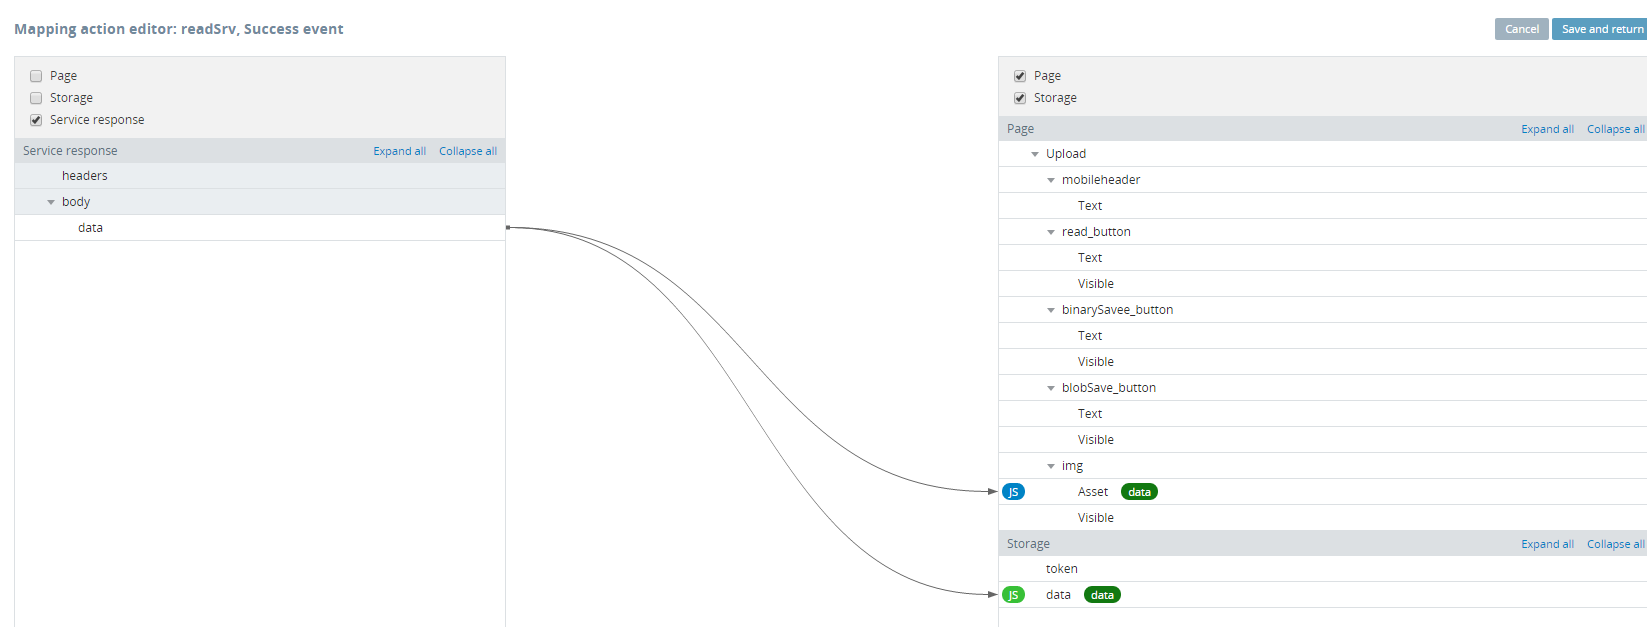
To show received image in img component add the following JS code to the mapping:
return "data:;base64," + btoa(value);where btoa(value) encodes received data to base64.
Sending Binary Data
You can send a file’s content as raw binary data (ArrayBuffer), or as a Blob inside multipart form data. It depends on third-party API that you use. Let’s try both variants.
Sending An ArrayBuffer
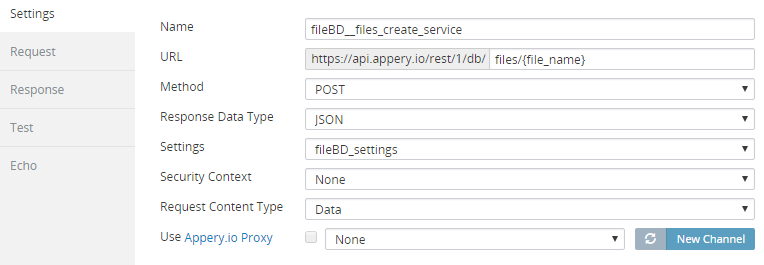
- Switch to the DATA view, add FileDB__files_create_service, and rename the service to binaryArraySrv.
Pay attention that FileDB__files_create_service has Data in Request Content Type, this means that service will send binary data.
- Click Mapping for Before send event and create the following mapping:
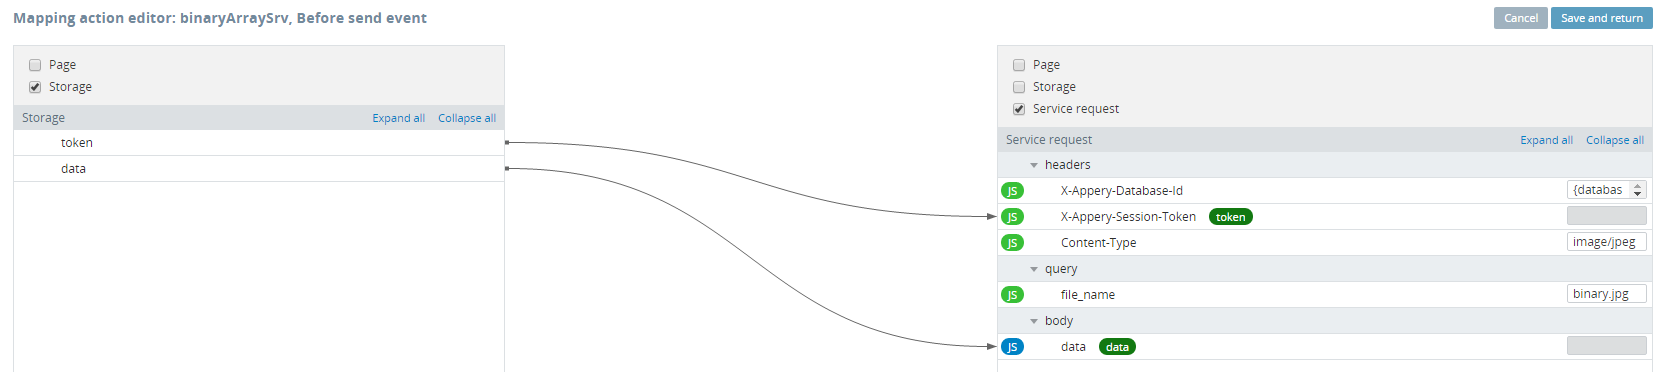
Enter the MIME-type of the transmitted file in Content-Type property, in our case it’s image/jpeg, in file_name property enter name of the file, for example binary.jpg, add the following JS code to mapping to data property:
//transform string to ArrayBuffer
function str2ab(str) {
  var buf = new ArrayBuffer(str.length);
  var bufView = new Uint8Array(buf);
  for (var i=0, strLen=str.length; i < strLen; i++) {
    bufView[i] = str.charCodeAt(i);
  }
  return buf;
}
return str2ab(value);-
Go back to the DESIGN view, and open the EVENTS tab.
-
Select binarySave_button > Click > Invoke service > binaryArraySrv.
Sending Blob
-
Switch to the DATA view, add FileDB__files_upload_service, and rename the service to blobSrv.
Pay attention that FileDB__files_upload_service has a Data in Request Content Type, this means that service will send binary data. -
Click Mapping for the Before send event and create the following mapping:
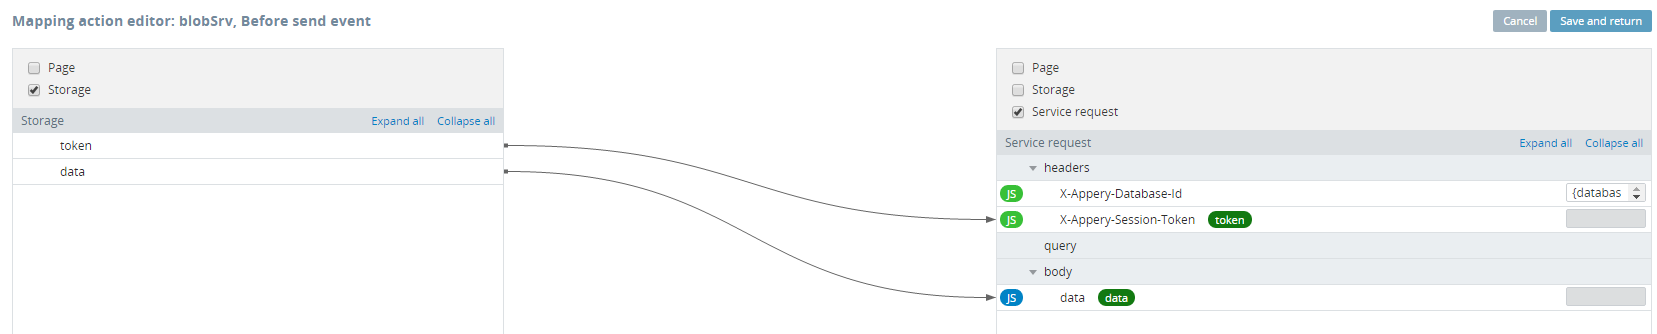
Add the following JS code to mapping to the data property:
function str2ab(str) {
  var buf = new ArrayBuffer(str.length);
  var bufView = new Uint8Array(buf);
  for (var i=0, strLen=str.length; i < strLen; i++) {
    bufView[i] = str.charCodeAt(i);
  }
  return buf;
}
var ab = str2ab(value);
var blob = new Blob([ab], {type: "image/jpeg"});  //here you can set file's mime type
var fd = new FormData();
fd.append('blob.jpg', blob); //here you can set file's name
return fd;-
Go back to the DESIGN view, and open the EVENTS tab.
-
Select blobSave_button> Click > Invoke service > blobSrv.
Testing App
After login to DB, press the Get file button. You’ll see loaded from DB image in Image component.

Press the Save as binary button, and then Save as blob button.
Check the database to see the two just uploaded files.
Updated about 1 year ago