4. Building App Logic - Routing and Navigation
Learn how to set up routing (navigation) for an Ionic app
Introduction
One of the core Ionic features is Routing based on Angular routing and navigation. It is used to build a single-page app with multiple views. Using Routing to load different parts of the app helps logically divide the app and make it more manageable.
Routing is needed to show different content depending on what route is chosen.
Using Routing between App Pages
When creating a new page (CREATE NEW > Page) you are suggested to create a navigation route for it:

New page with navigation
You might also like to create new pages using our predefined screen layouts: this will significantly save your development time as the app page(s) will instantly get the needed UI.
Once a page is created, go to Project > Routing to see the newly created routing:

Ionic Routing.
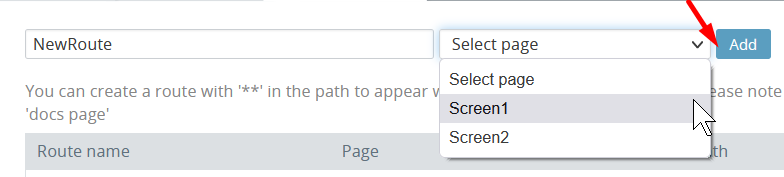
It's also simple to add a route manually. On the Routing view:
- Enter the route name.
- Select the page (where to navigate).
- Click Add to add this routing rule.
Make sure a correct Default route is set. The Default route shows the first page that will be shown when the app loads:
App Navigation Video TutorialYou can check this Appery.io YouTube Education Guide video to learn how to arrange navigation in the Appery.io mobile app:
Navigating to a non-existing route will also redirect you to a default screen. Several routes can lead to the same screen but paths must be different.
Duplicate PathsRouting should not contain duplicated paths. Unique paths are recommended to ensure that your app works correctly.
When renaming a page, you can choose whether to change the paths of the corresponding routes.
Working with Guards
Ionic route guards help determine if a particular action can be taken against a route.
In an Ionic app, all angular guards are implemented so that working with routing is easy and more powerful:
Can Activate Guard Example
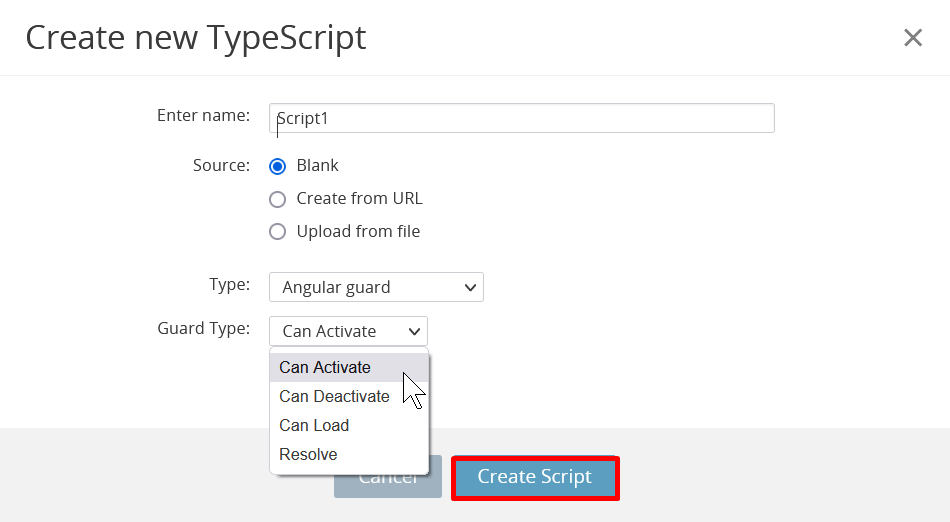
To add a new guard, it first needs to be created under CREATE NEW > Typescript with selecting the Angular guard type from the drop-down (for example, Can Activate):
The created script of the Angular guard type will be instantly listed under the Project tab:
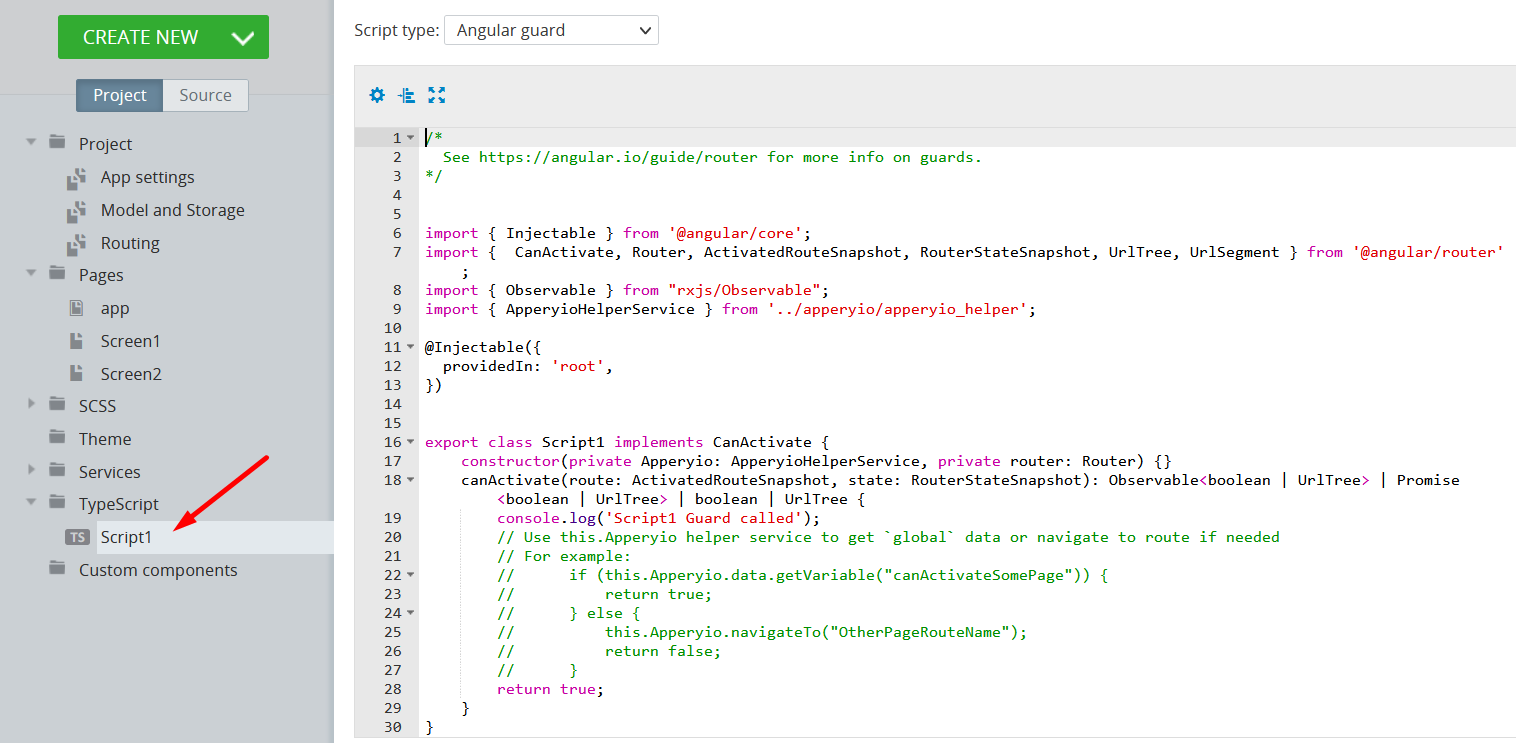
This function will return true if the transition is allowed, and false if it is not allowed.
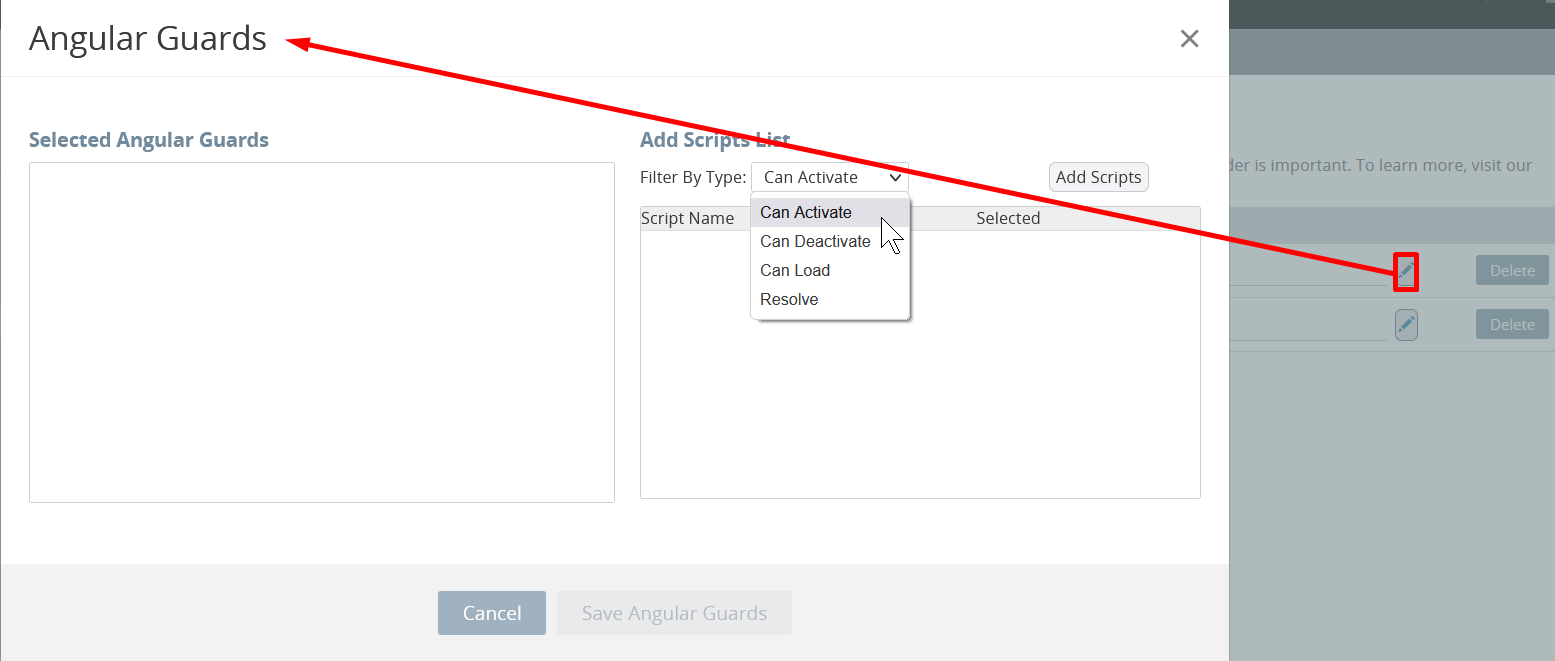
Open the Routing tab to add the guard. When done, it can be selected that will allow routing to the particular app page by default:
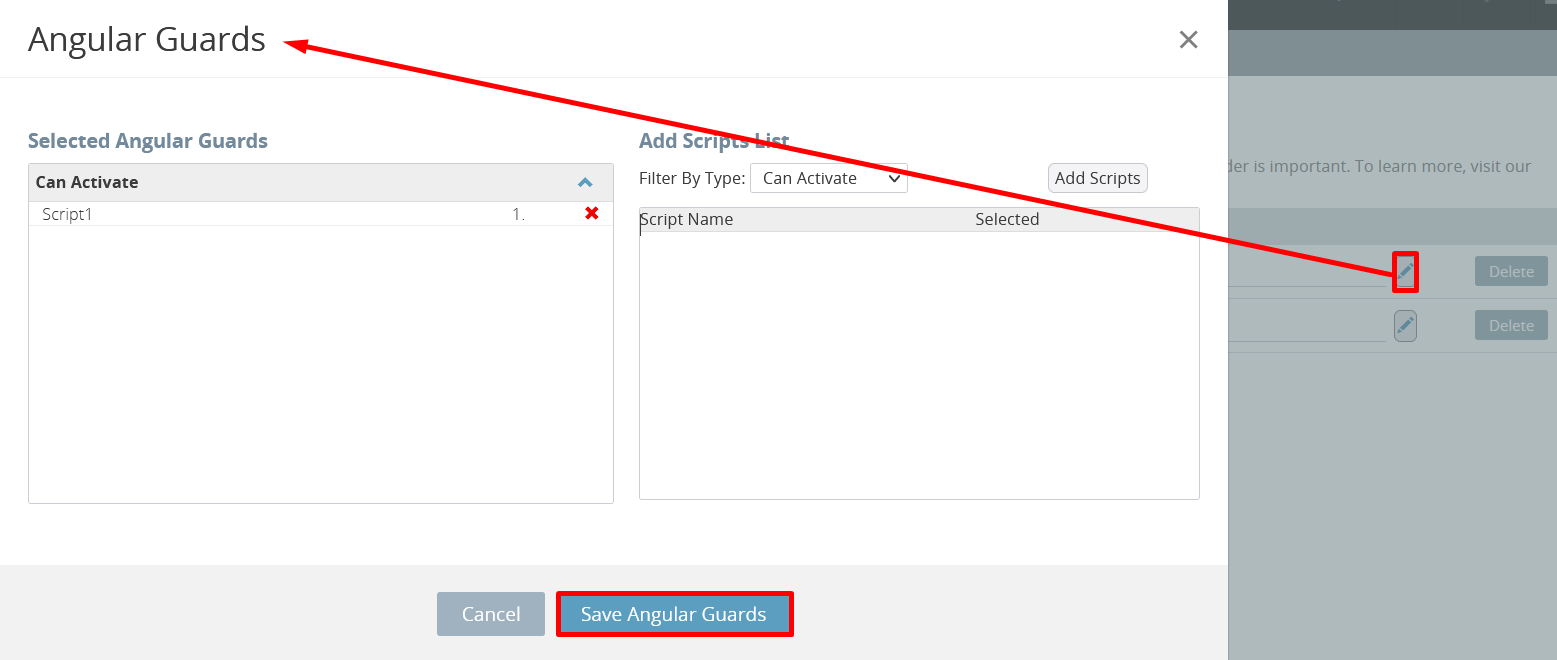
The result:

Note on Angular Performance Optimization!Before starting your release build, make sure you:
- use our default export flow (used for creating a guard) for all project interceptors and quards:
export let ExportedClass = xxxxxxxxx;(notexport { xxxxxxxxx as ExportedClass };)- not only
ExportedClassbut also the class itself has been exported so thatexportis added before class description:
export class xxxxxx implements CanActivate
or
export class JwtInterceptor implements HttpInterceptor.
To modify this logic (for example, show the page to the authorized user only, etc.), changes have to be made to the code of the canActivate function. More details can be found here.
How Routing Works
Using Ionic Back Button
Simple routing to the previously opened page (the app should have at least two pages) can be added by adding an Ionic Back Button to the Toolbar Buttons area.
This is done in two steps:
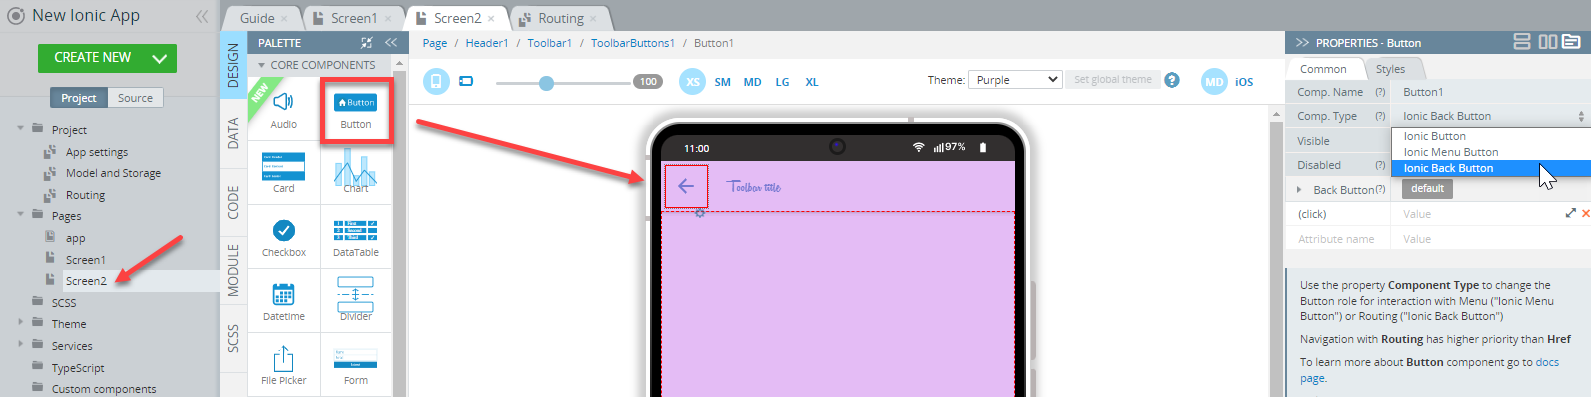
- Open Screen2, drag a Button and drop it to the Toolbar Buttons area.
- Define its Component Type property as Ionic Back Button:
Using Ionic Menu Button
To be able to use the menu functionality for your app:
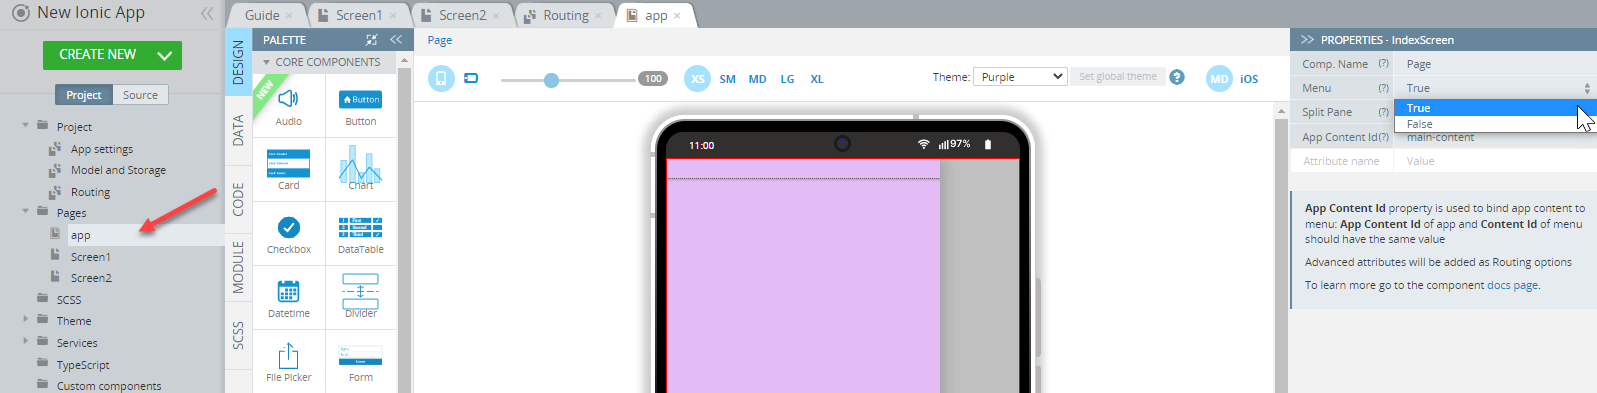
- Set the Menu property of the app page (which is the app indexScreen) to True:
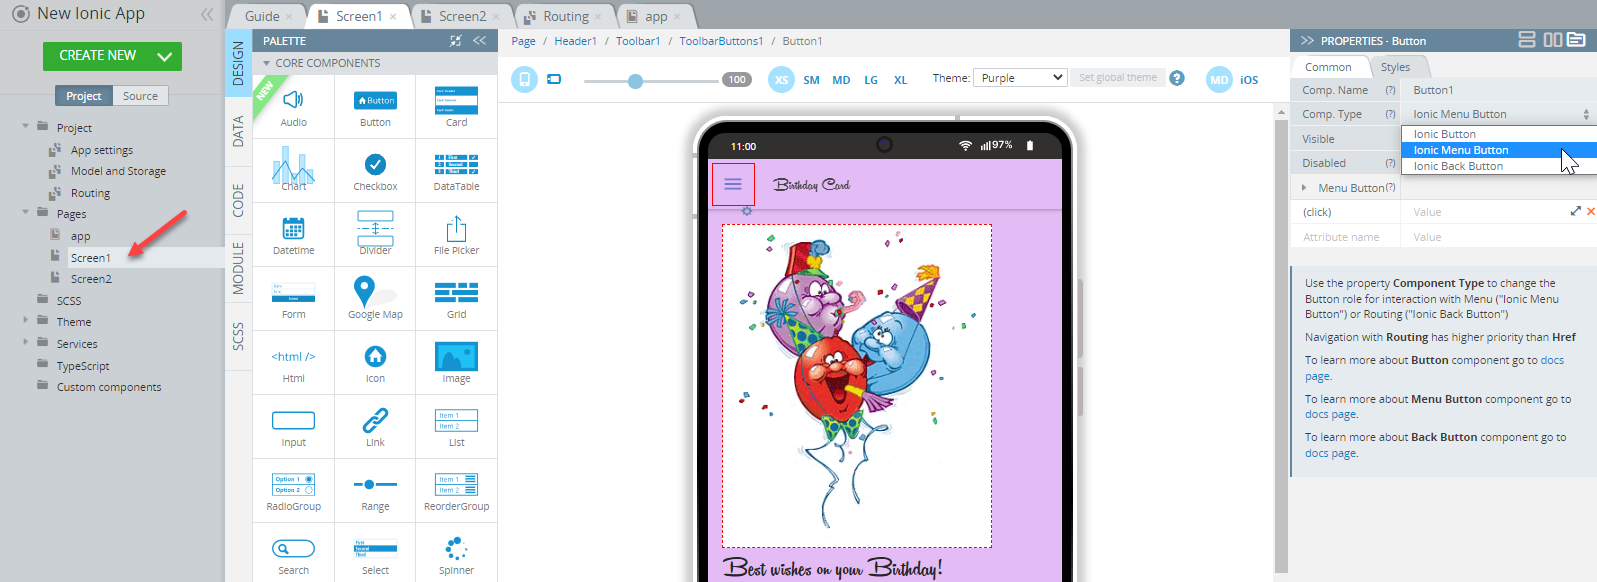
- Switch to the needed page, drag a Button and drop it to the Toolbar Buttons area.
- Define its Component Type property as Ionic Menu Button:
You can check here for more details to learn how our Ionic Components Sample App with the menu was created.
Using Navigate to page Snippet
Navigating to a page is as simple as using the built-in Navigate to page snippet.
You just need to select the Navigate to Page snippet from the snippets list and set its value to an existing route:

Using navigate-to directive.
Note!Note that to make the snippet work correctly, you will need to replace the generic
routeNamewith the actual root name so that it can look like this:
this.Apperyio.navigateTo("Screen1"/*, optional, params, here */);
Also, if you add the component which is to invoke the navigation, you can use the Routing menu under this component's PROPERTIES panel to select the existing page to be redirected to:
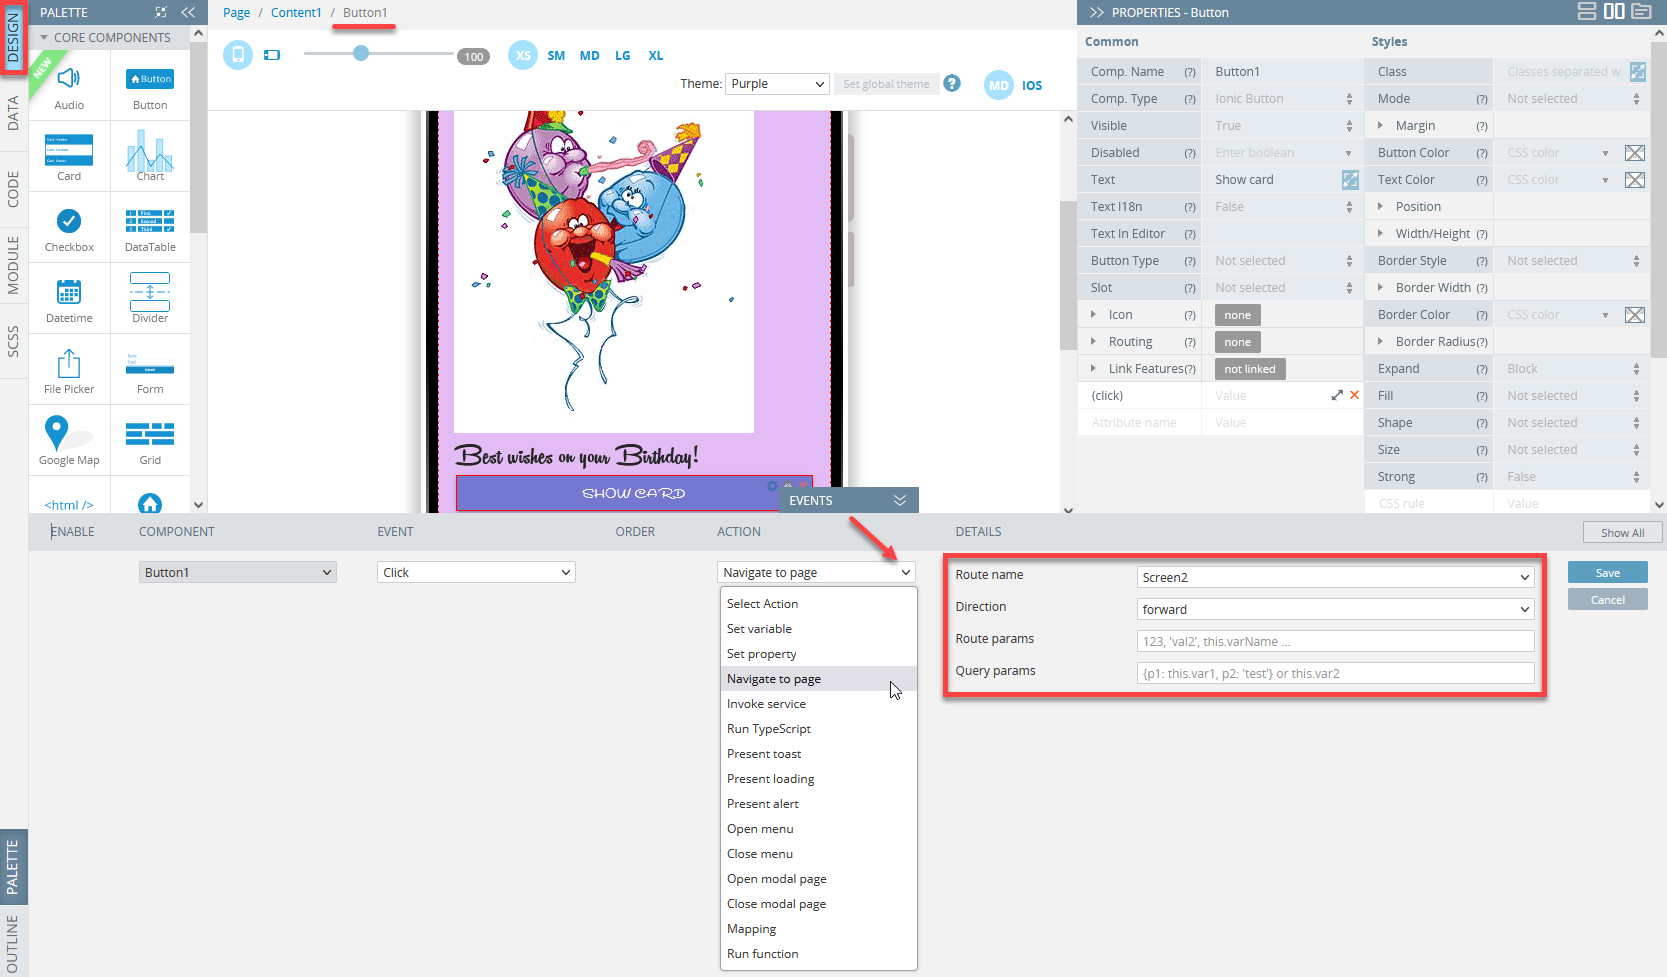
Using Navigate to page Action
It is also possible to apply the Navigate to page action for the needed component's event with setting the Route name, Direction, Route params, and Query params:
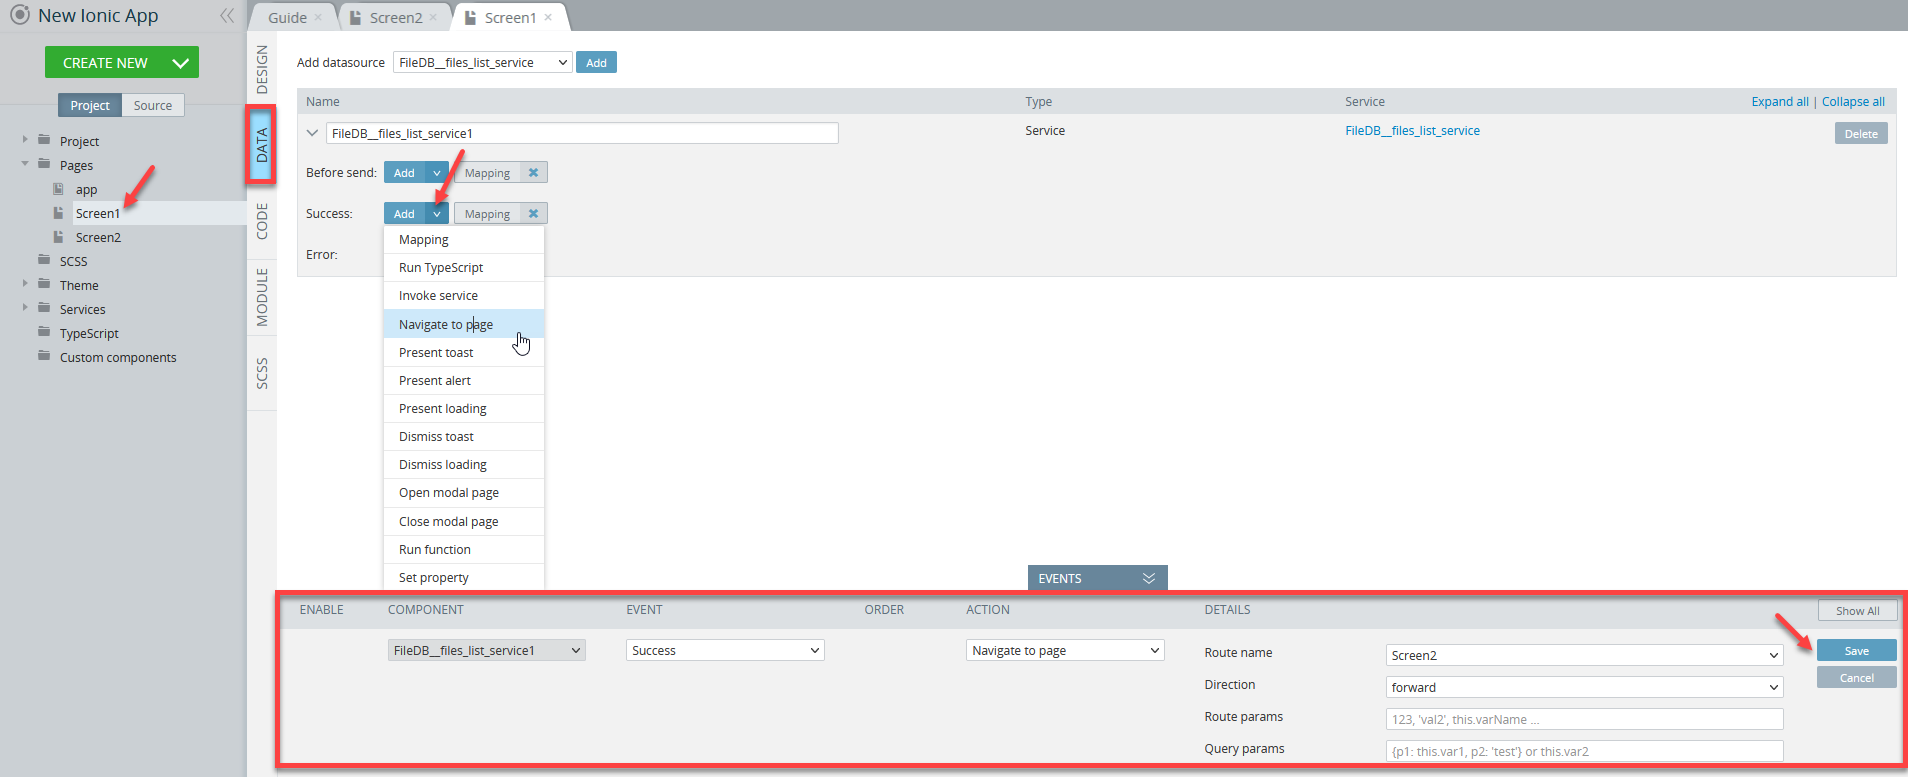
Datasources Navigation
Under the DATA panel, navigation can also be defined for datasources. To do it, select the service (should be added separately) and define its event with the Navigate to page action.
Here, you can also set the following values: Route name, Direction, Route params, and Query params; for example, set the Route Params value to pass some parameters in URL at navigation, for example, this.email.
If several values are passed, they should be separated with commas
(param1, param2, ...).
Every route is bound to its own page. Also, several routes can be bound to one page. Depending on the situation, a number of routes can be used in both scenarios: when navigation has some parameters defined or has no parameters.
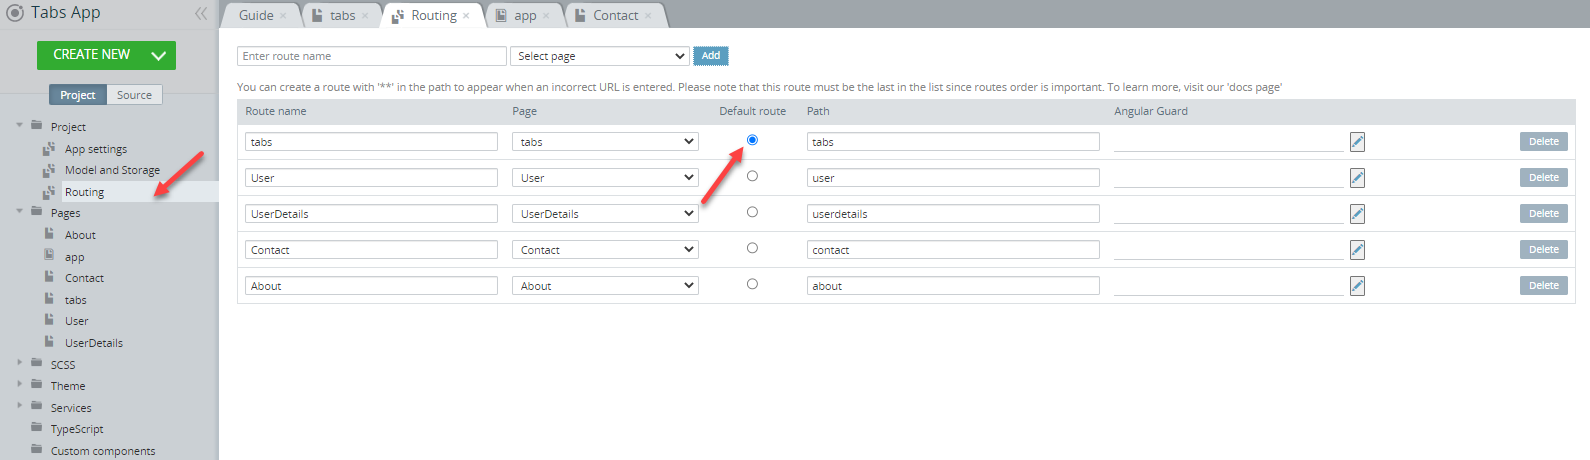
Working with Tabs Routing
Set the tabbed page as default under Project > Routing:
Under the PROPERTIES panel, for the Tab property of the Tab Button select the page to be navigated to:
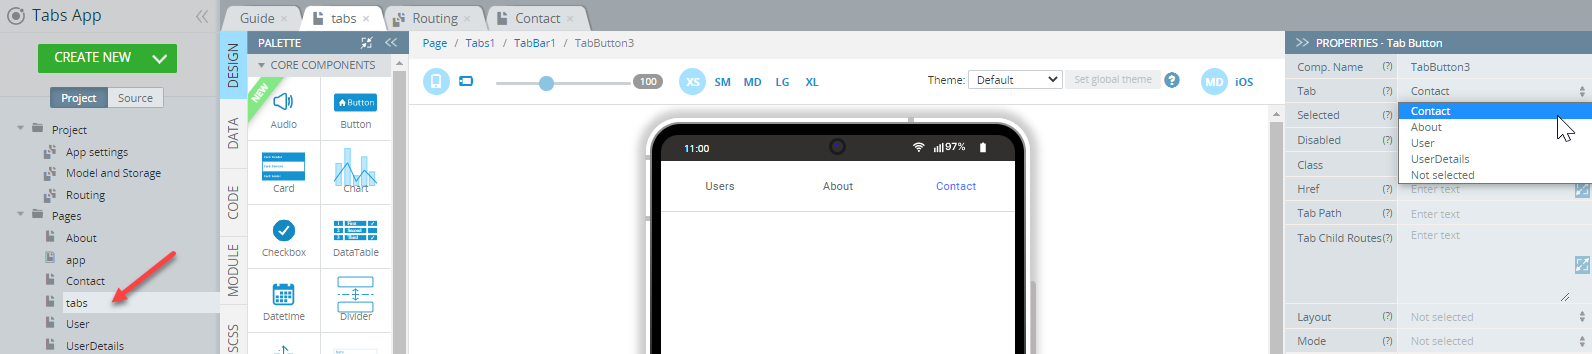
If you need to show tab buttons for such navigation, use the Tab Path property of the Tab Button component but this is not required as the path will be created automatically (For example, /profile, /home, /info).
Also, child routes can be added to define nested (multilevel) routings for every page:
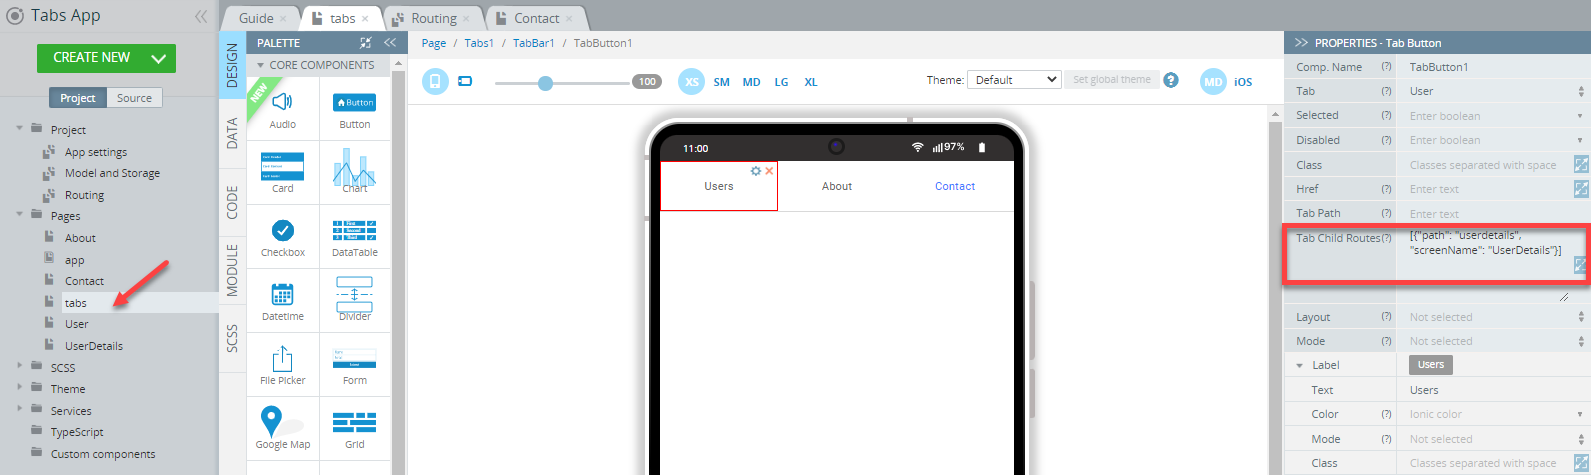
Want to know more?You can read here for more details.
They are described in
JSONwith the format shown in a pop-up hint. Please check this link for more explanation.
Using Route Path Template
By default, a route path template looks like screen_name. You can easily change the path by clicking the drop-down list and selecting a new screen. The default path may be changed this way when needed.
You can also manually change the path value, including the default part.
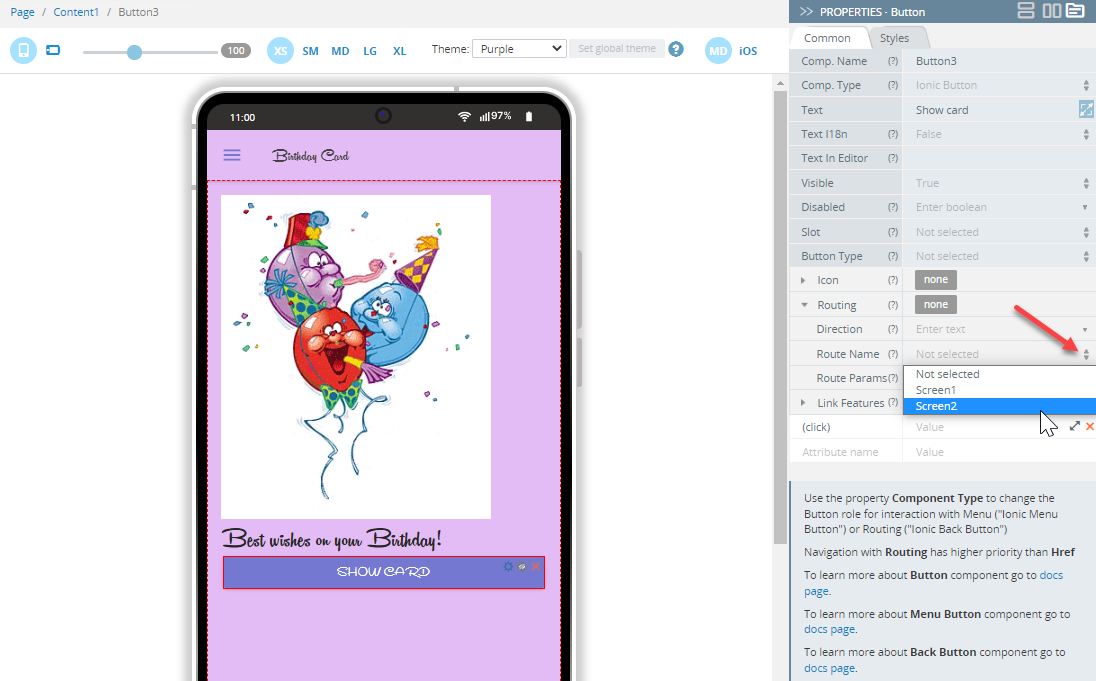
UI Components' Routing
Some Appery.io UI components, for example, Button or List Item feature the Routing property which can be used for redirecting to specific app pages: if you unfold the Routing folder for the Button component, you will see that the routing path from it can be set to some particular page (for example, Route Name = welcome):
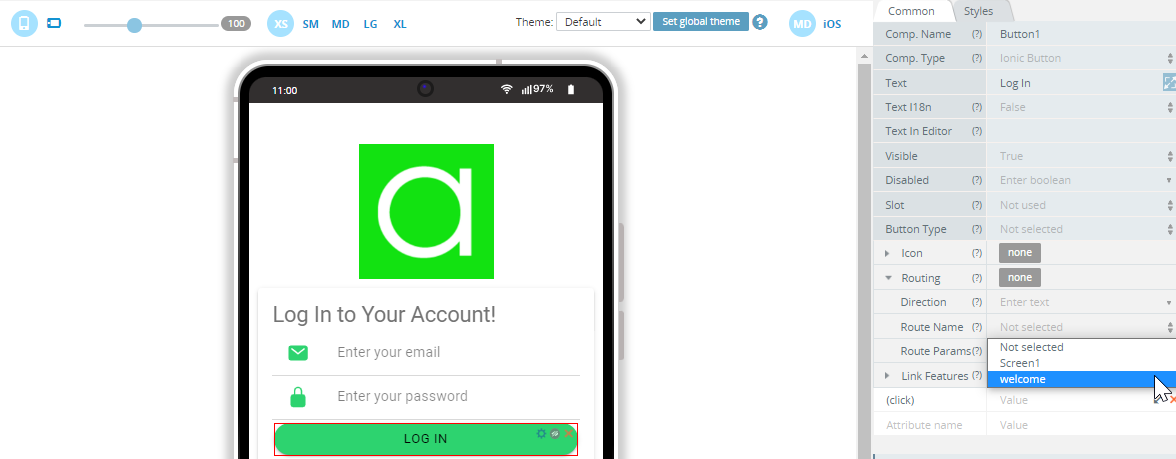
This means that if this particular button is selected (clicked) in an app, you will be redirected to the app welcome page.
Want to know more?You can check here for more details to learn how our Ionic Components Sample App with the list menu routing to different app pages was created.
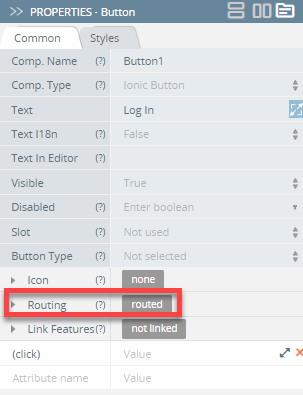
You can customize this behavior by selecting another Route Name value. Note as well, that when folded, the Routing value (routed) indicates that some routing path is defined for this component:
Please be informed that if you are building your app from scratch and have not defined any custom page yet, the Route Name can be set to the only page available at the moment: Screen1.
Updated about 1 year ago