Mapping
Working with service/components mapping in Ionic apps
Service mapping
When a service is to be invoked in an app, it usually requires inputting data. In most mobile apps, the data comes from the page (user-entered), or from storage (previously saved). When the service is invoked, it returns the data you need for further actions.
Mapping Video TutorialYou can check this Appery.io YouTube video that shows how to map the Input value to the Card component on a button click:
Mapping Editor
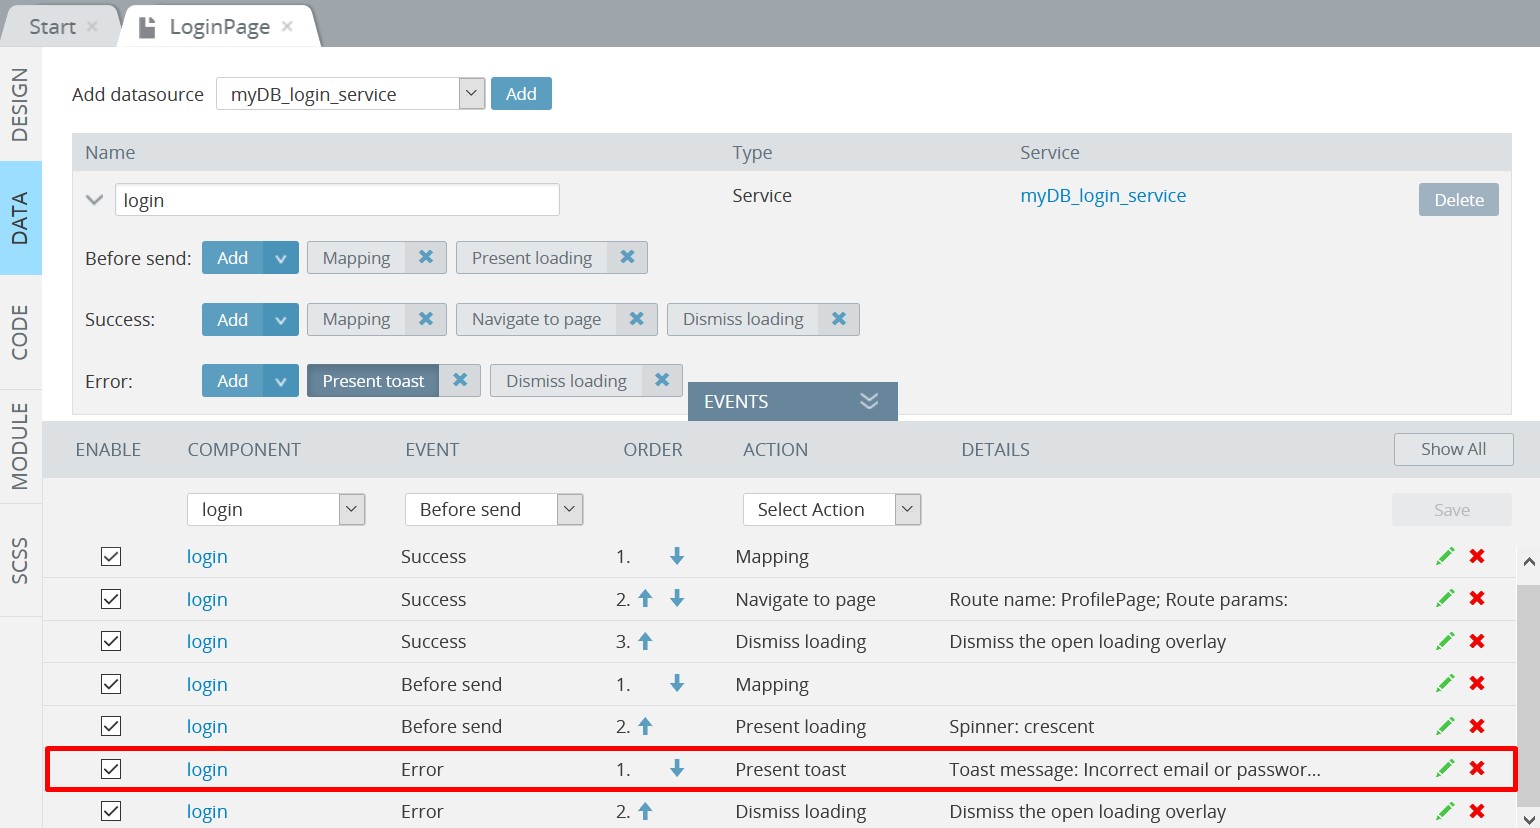
To start defining input or output service mapping, go to the page DATA panel and make sure you have added at least one service component on the page. You’ll see a list of service events that can be used to add actions including Mapping:
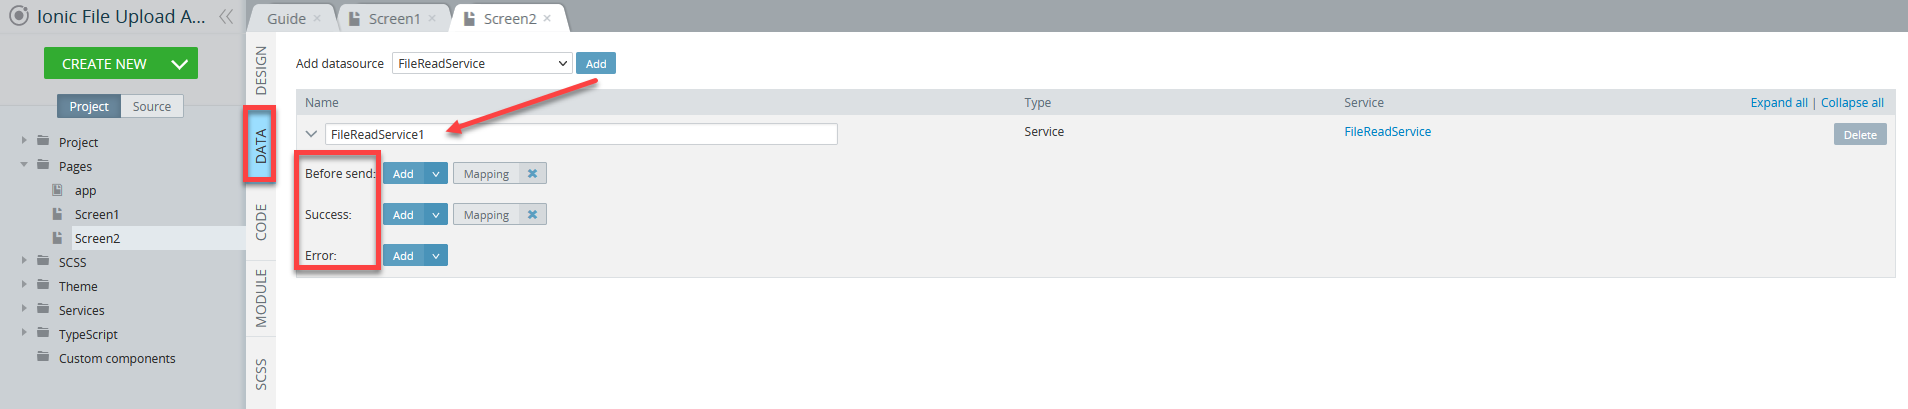
Service mapping is available only if it is used as an action for events of the datasource (Before send and/or Success) added in the DATA panel.
Use the Before send event to define input mapping and the Success event to define output mapping. Mapping actions for Before send and Success events are automatically created for each new datasource:
Want to know more?Please check here for more details about how to work with Mapping editor.
There are a number of events and actions that can be chosen for a certain service.
Input Mapping
Now, let's see how to create an input mapping from scratch:
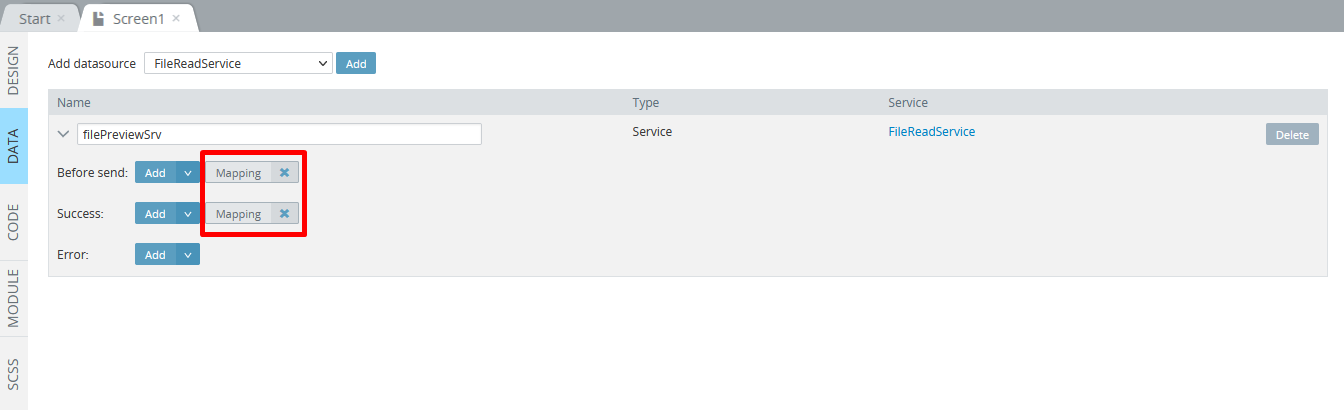
- Click Add to the right of the Before send event field and choose Mapping.
- The mapping window will then appear. You can map the input by dragging and connecting elements on either side:
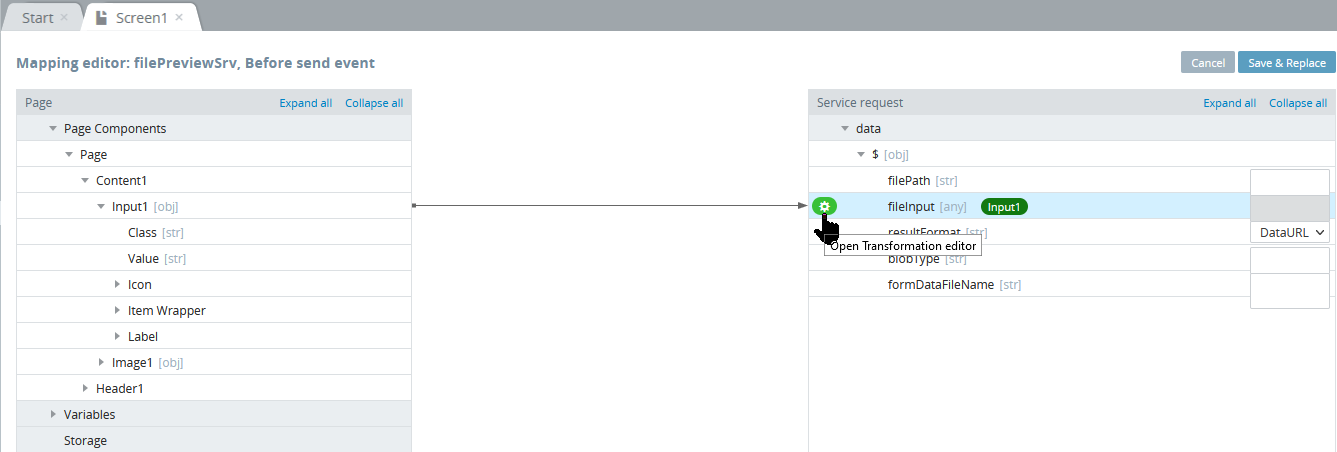
In the above screenshot, the value from the Input component is mapped to the fileInput service body request. To create such a connection, select Input, and drag and drop it over the fileInput on the right. After it’s over fileInput, release the mouse button; this way the connection is created.
Mapping Transformation Editor
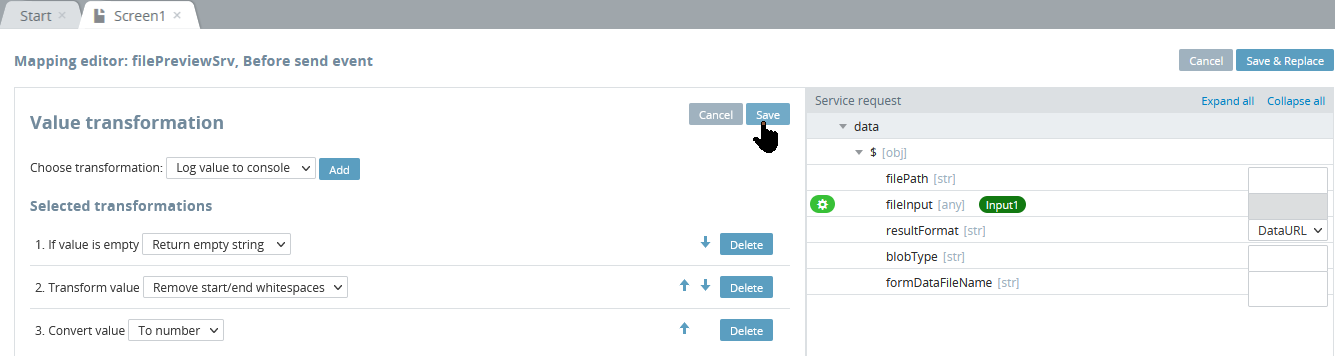
For your convenience, you can use the no-code transformation editor to add transformation, choose a type, and then edit it:
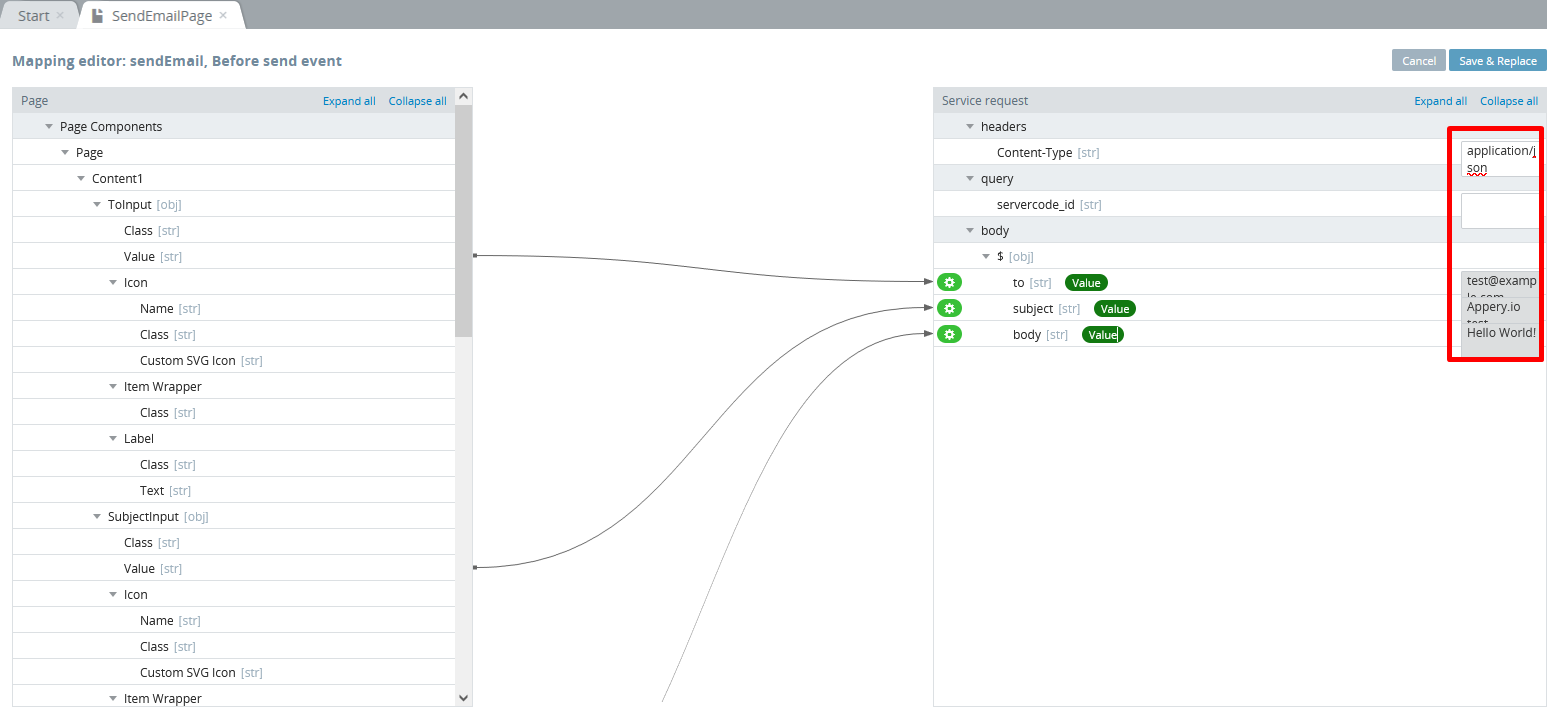
Note that with mapping, we can also set the default values to be sent. For example, in the below service, the Page Components > Page > Content1 > ToInput > Value is provided with the [email protected] value and the service request headers > Content-Type is set as application/json:
- Click Save & Replace when finished, and you’ll see that the Mapping action has been saved for the Before send event on the EVENTS tab.
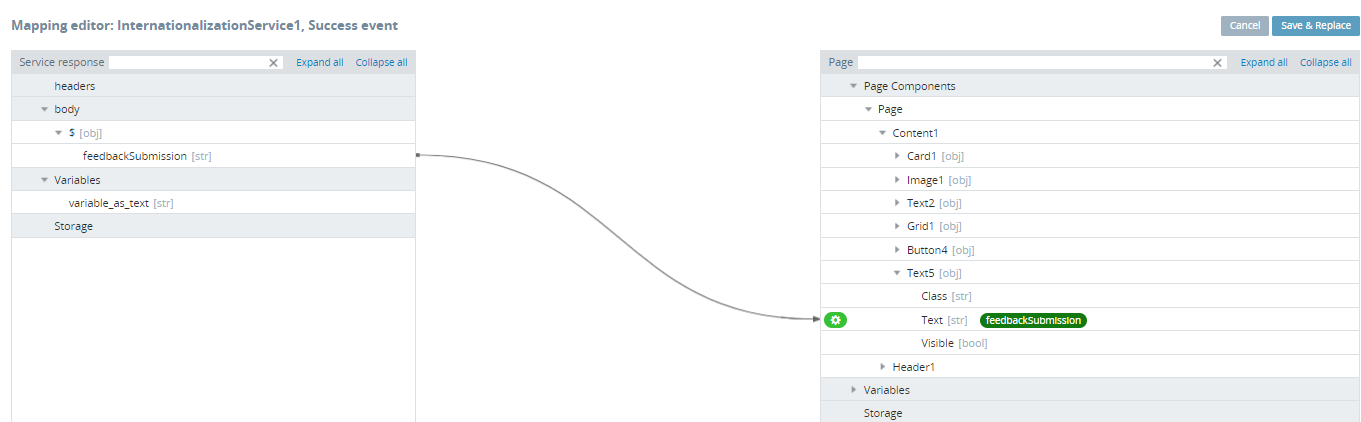
Output Mapping
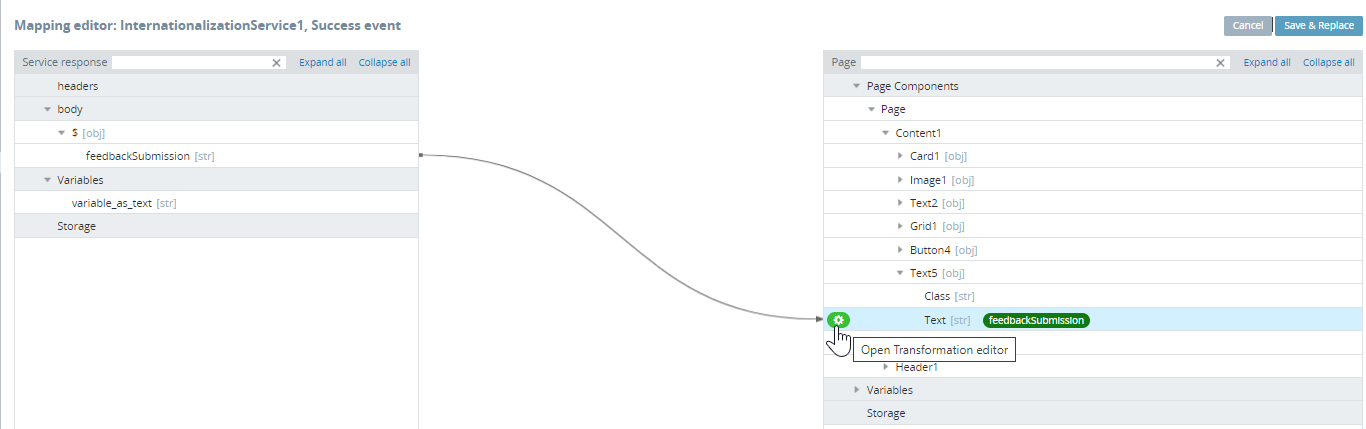
Output mapping takes data returned from the service and maps it to the page or to the storage variables. Click Add to the right of the Success event, and select Mapping. Output mapping is done in a similar way to input mapping - by clicking and dragging an element to the other side:
Actions mapped to the +Success+ event will only be invoked in the case of the REST service +Success+ event.
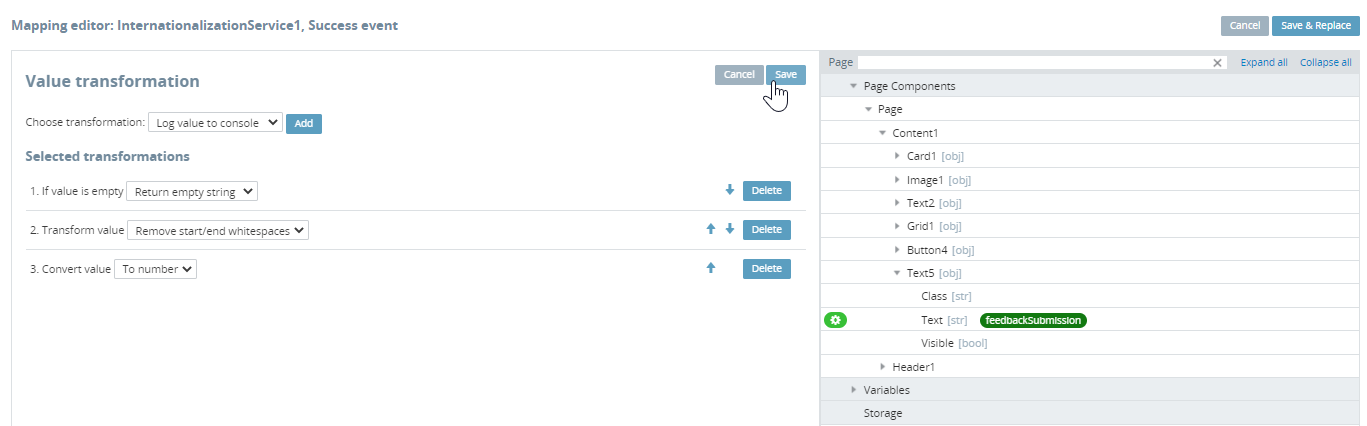
Mapping Transformation Editor
For your convenience, you can use the no-code transformation editor to add transformation:
Then, choose the needed type, edit it, and save:
Deleting Mapping
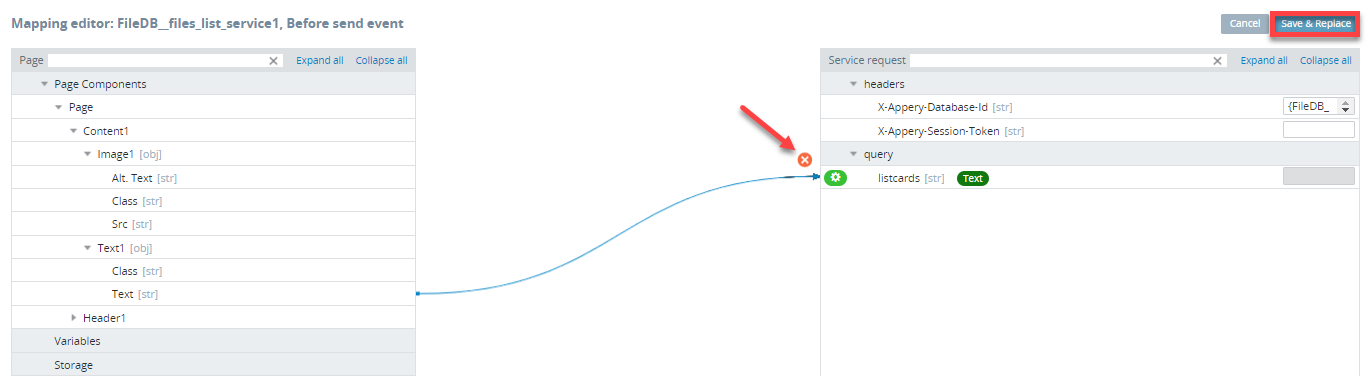
To delete a mapping connection, select the line. A red cross icon appears. Click this red cross icon to delete the connection:
Error Handling
If the service returns an error, the Error event can be used to invoke a custom JavaScript and notify the user of the error.
The Mapping action is not available for the Error event.
When these events are used, you can choose to apply the actions from the Add drop-down list:
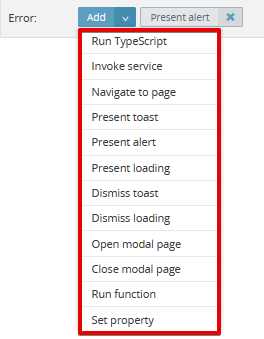
To add an event:
- Make sure you are in the DATA panel.
- Click Add to the right of the Error event.
- From the drop-down list, select Present toast:
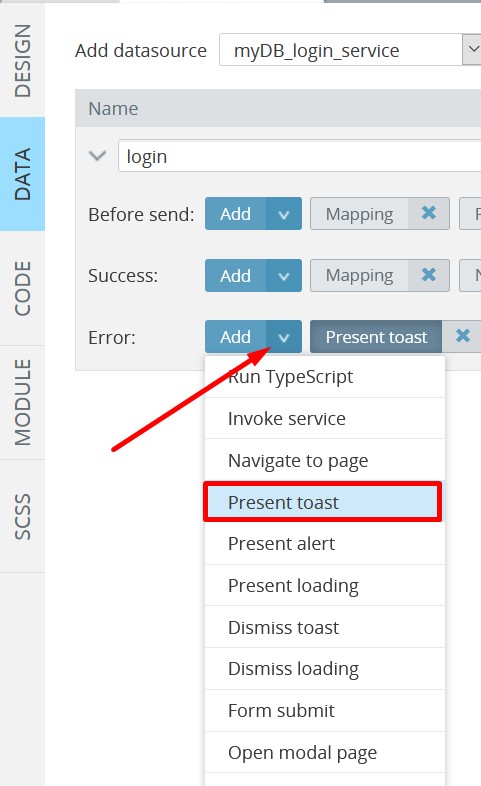
- Provide details to handle the event behavior:
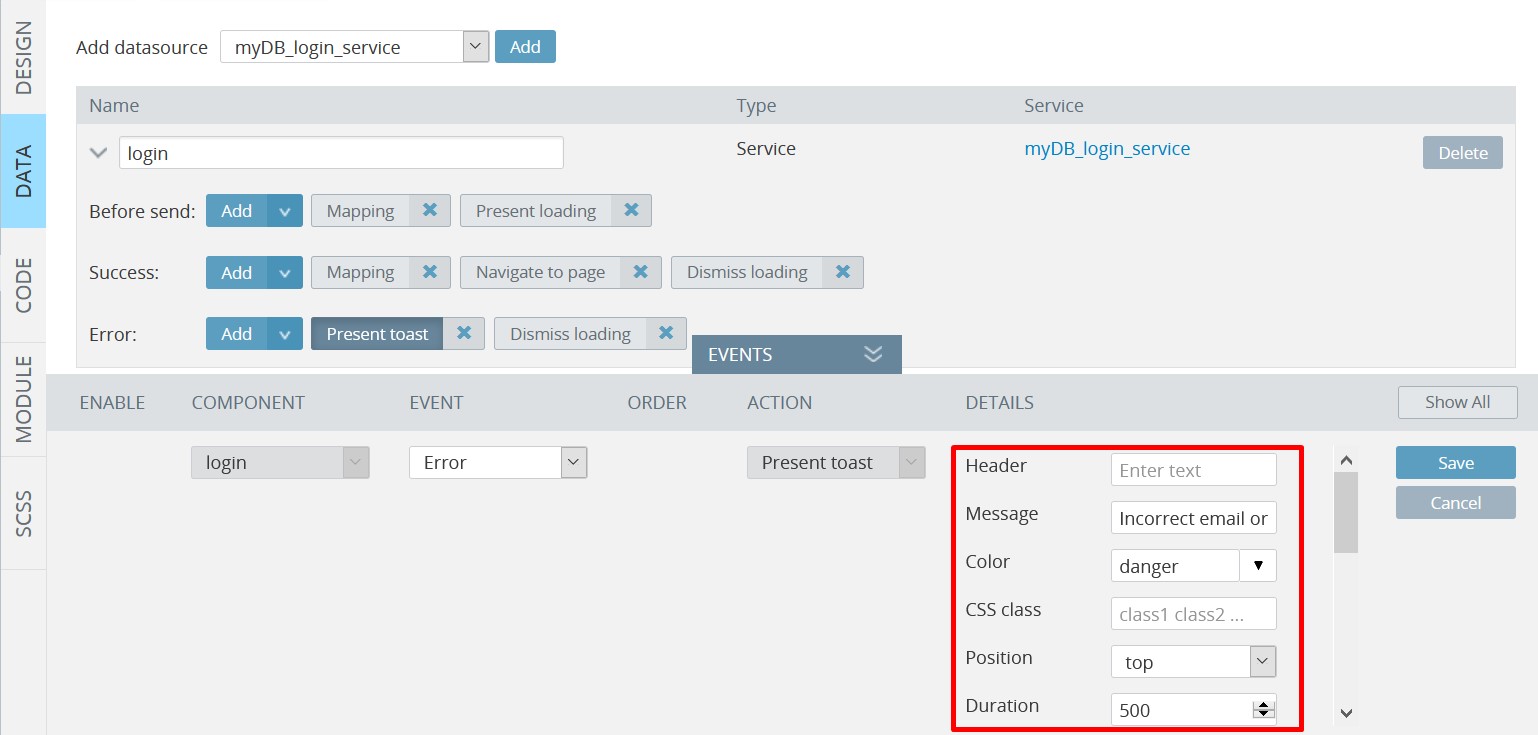
- Click Save. After this is done a new action will be added to the right of the Error datasource event and will be listed in the EVENTS tab among the other page events:
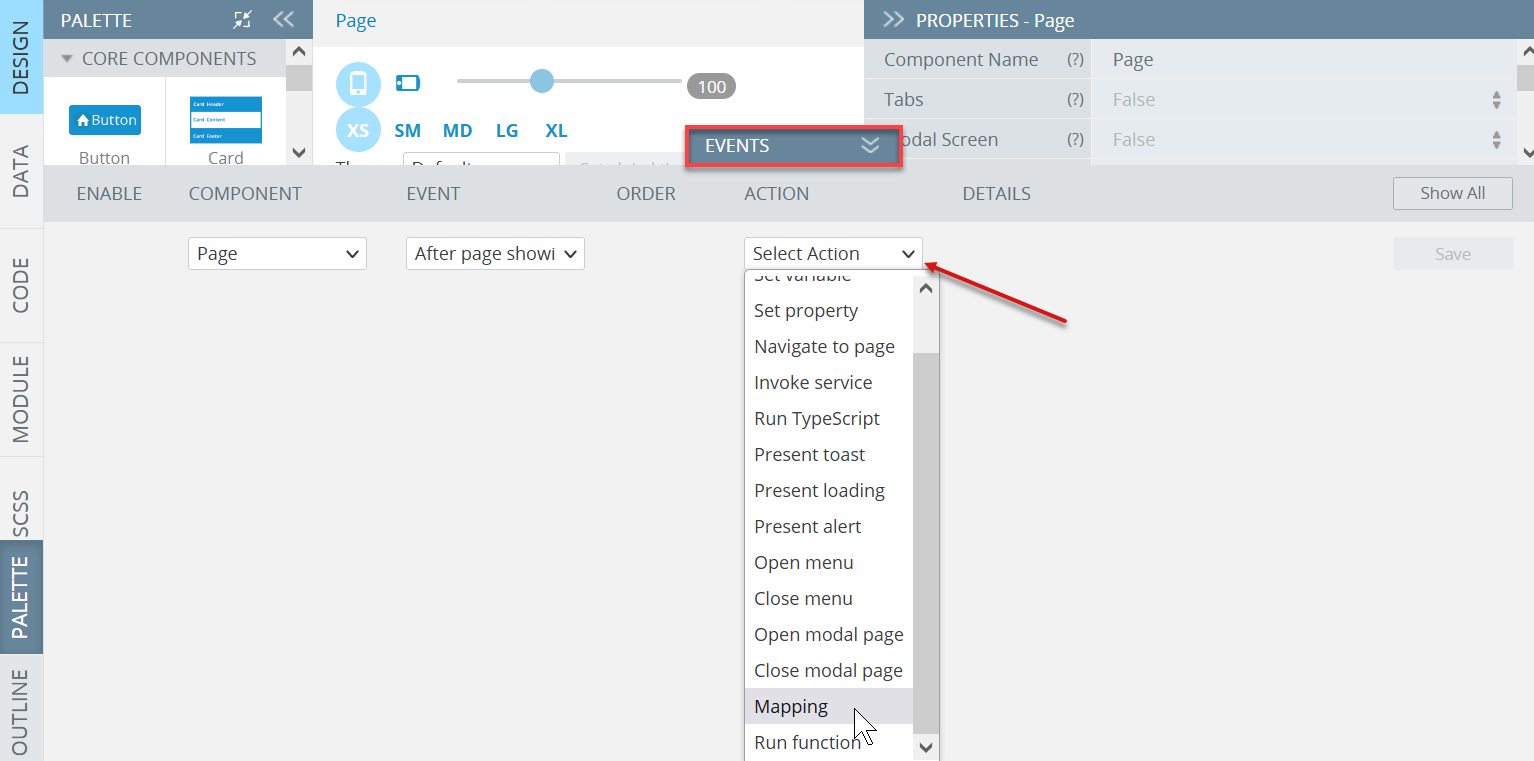
Components Mapping
In Ionic projects, you can also create mappings to and from component properties.
First, open the DESIGN panel, unfold the EVENTS tab from the bottom, then select the needed component (here, Page) and select the Mapping action to define the page behavior:
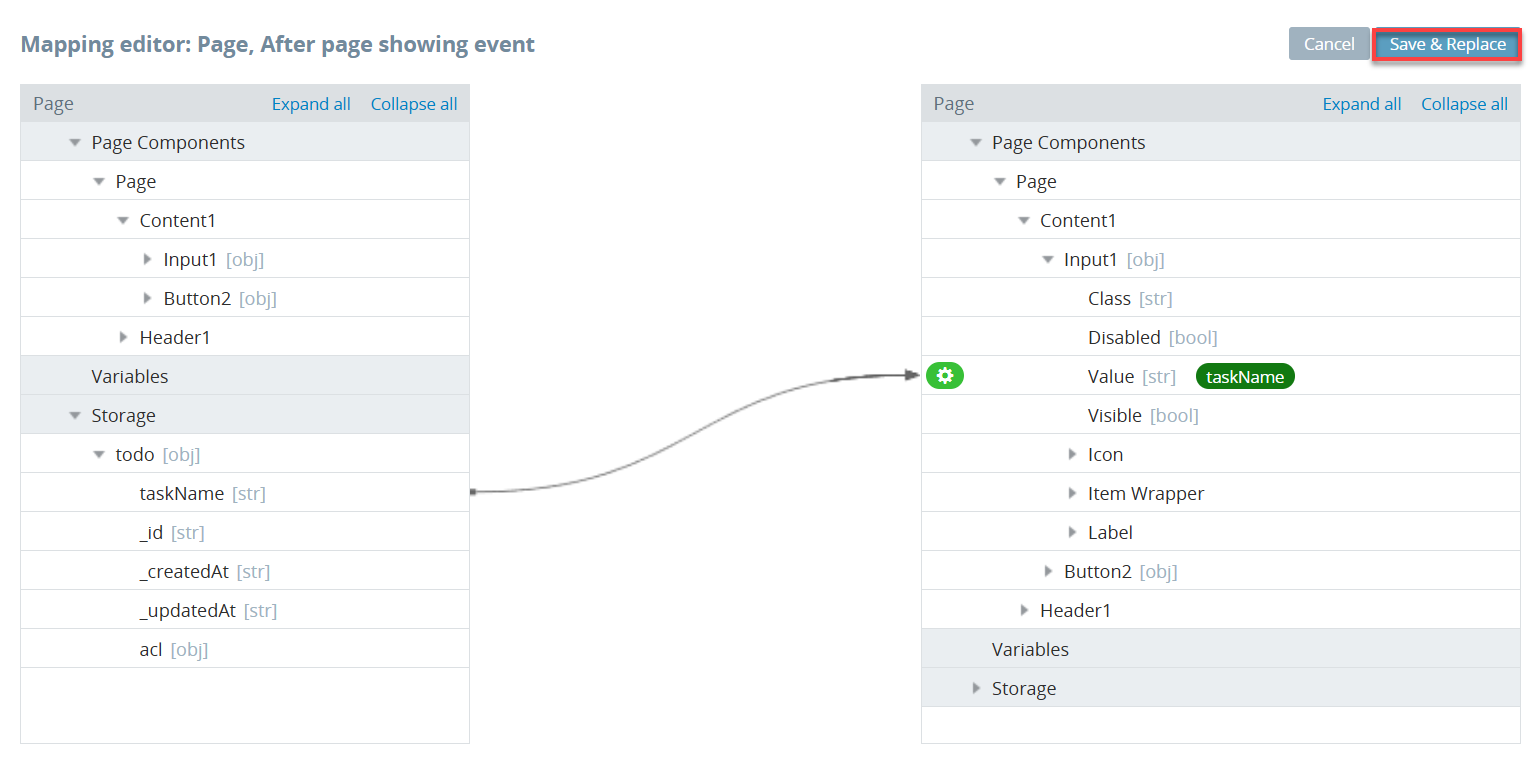
The new window with the Mapping editor opens. Now, you can define the mapping for the After page showing event, for example:
Please check this page to learn how to bind UI components in an Ionic app.
Storage and Variable Mapping
Mapping storage and/or variables is available only when variables (storages) have a custom model type that has arrays in its structure.
Such a custom model can be specified on the Model and Storage tab of Project settings. You can check here for more information.
Want to know more?You might also like our detailed instructions on how to use mapping for defining the Visible or Disabled UI components properties.
You can also apply mapping to the Selected property of its options.
Updated about 1 year ago