Working with Mailgun Email Templates
The tutorial explains how to modify Appery.io Server Code MailgunEmail plugin to work with Mailgun email templates.
Introduction
Mailgun allows storing predefined templates using their Templates API with further using them to send emails with just providing template name(s).
In this tutorial, you will learn how to modify MailgunEmail Server Code plugin from Appery.io and create a custom Mailgun email template of uniform stylistic design that will allow sending messages with different content. This is very convenient since the templates are predefined and there is no need to modify full html and/or css separately.
Creating Mailgun Email Template
Mailgun AccountBefore you you can send emails with the Mailgun plugin, , you will need to create a Mailgun Account and get a domain and API Key ID.
Please check out this section to learn how to do it.
First, you will need to create your Mailgun email template.
- To do it, go to Sending > Templates, click the Create message template button and select Blank for a template:

- Name your template, add the template code, and confirm creating it by clicking Create and start coding:
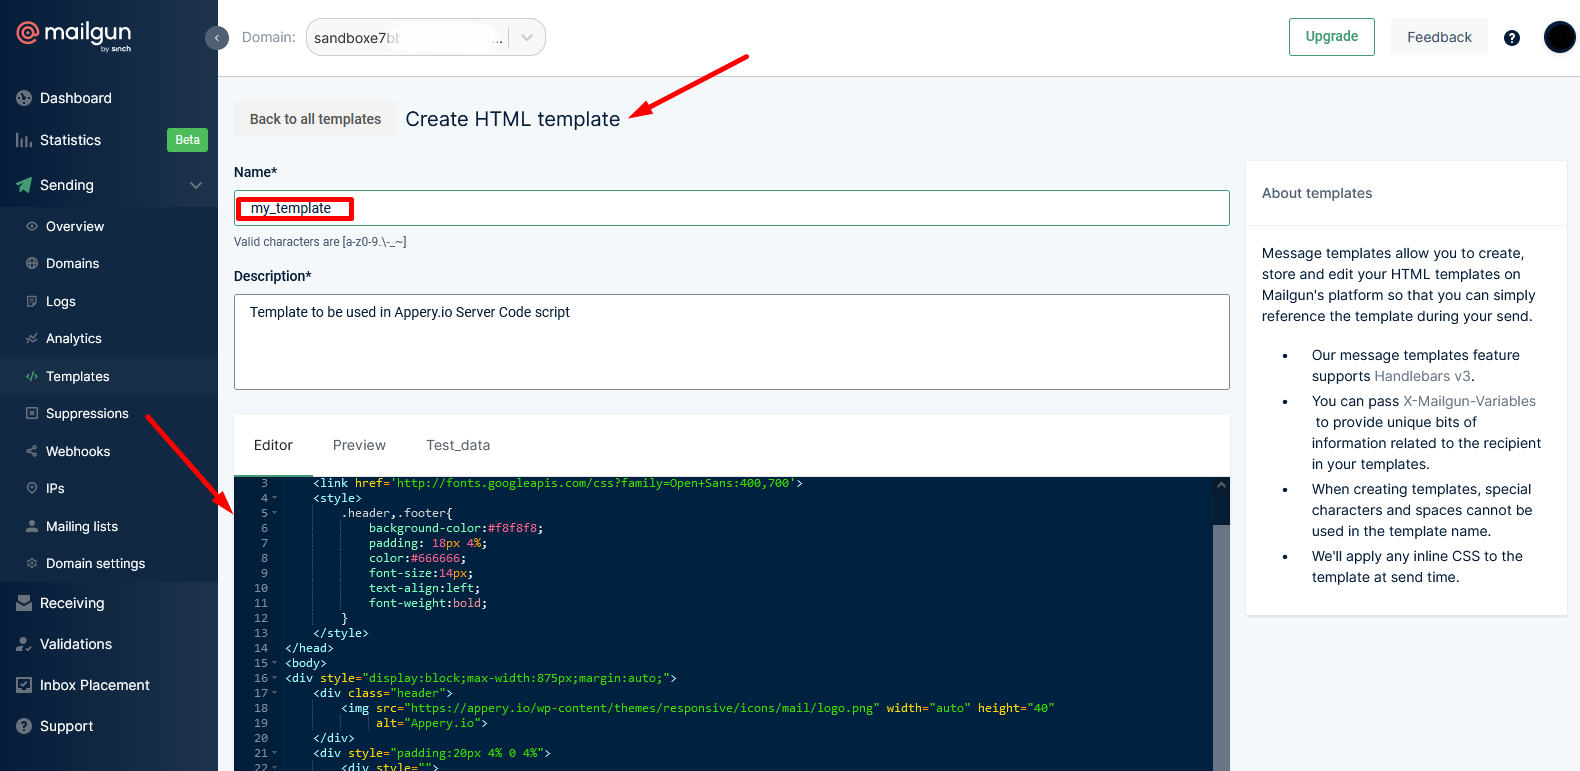
To get your first
htmlMailgun template, you may also use our sample template (named my_template):
<html  style="font-family: 'Helvetica Neue', Helvetica, Arial, sans-serif; font-size: 14px;">
<head>
    <link href='http://fonts.googleapis.com/css?family=Open+Sans:400,700'>
    <style>
        .header,.footer{
            background-color:#f8f8f8;
            padding: 18px 4%;
            color:#666666;
            font-size:14px;
            text-align:left;
            font-weight:bold;
        }
    </style>
</head>
<body>
<div style="display:block;max-width:875px;margin:auto;">
    <div class="header">
        <img src="https://appery.io/wp-content/themes/responsive/icons/mail/logo.png" width="auto" height="40"
             alt="Appery.io">
    </div>
    <div style="padding:20px 4% 0 4%">
        <div style="">
            <p>
                Hello {USERNAME},
            </p>
            <p>
                This is your first message sent from Appery.io server code script, that uses mailgun email template.
                And here is the text you've entered: <span style="color:red">{{message_text}}</span>
            </p>
        </div>
        <div>
            <p>
            Thanks for choosing Appery.io!
            </p>
        </div>
    </div>
    <div class="footer">
        <p>
        Check our <a href="https://docs.appery.io/docs">documentation</a>.
        </p>
    </div>
</div>
</body>
</html>
The created template will be added under the Sending > Templates page of your Mailgun active domain:
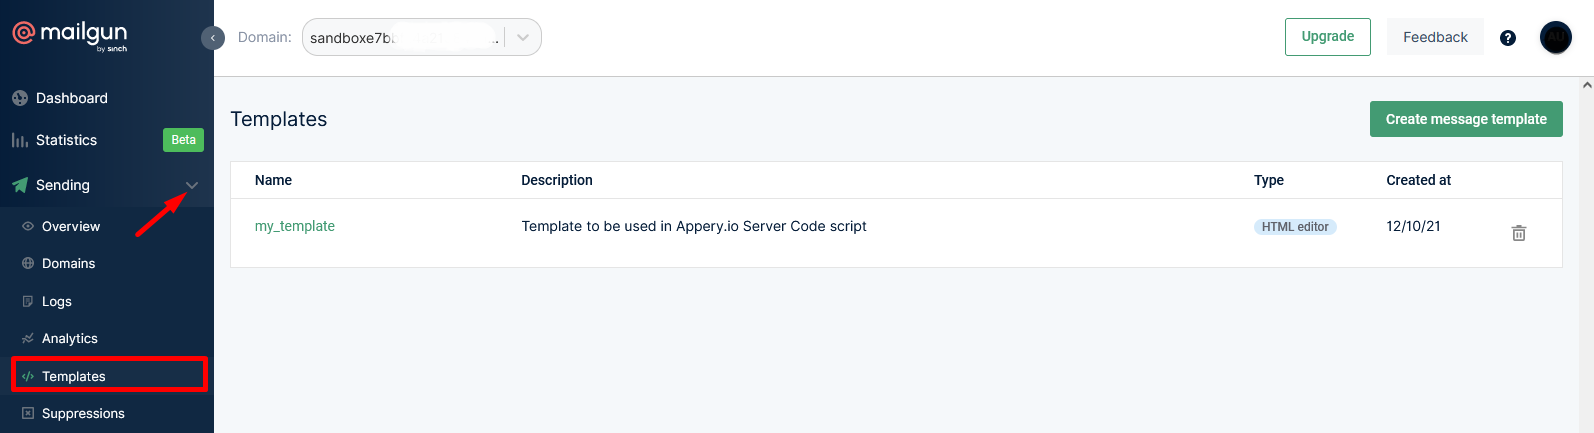
Note!Our sample template (my_template) and the variables names (here,
{USERNAME}and{{message_text}}) will be used in the script later.
Creating Server Code Script
Now, you can proceed with creating a Server Code script.
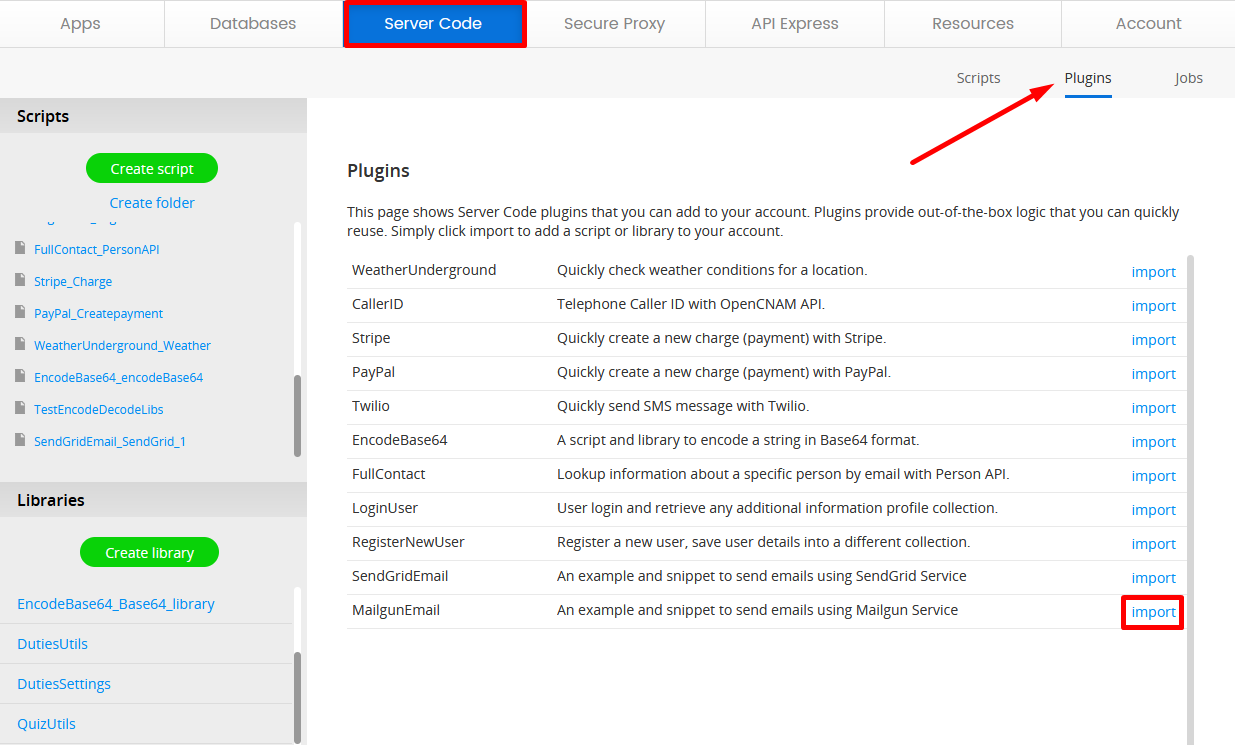
- To do it, go to the Server Code page.
- Open the Plugins tab.
- Import the MailgunEmail plugin:
- Click the imported script to open it and set up your Mailgun domain (line 8), api key (line 12), from (line10) parameters, and save your work:
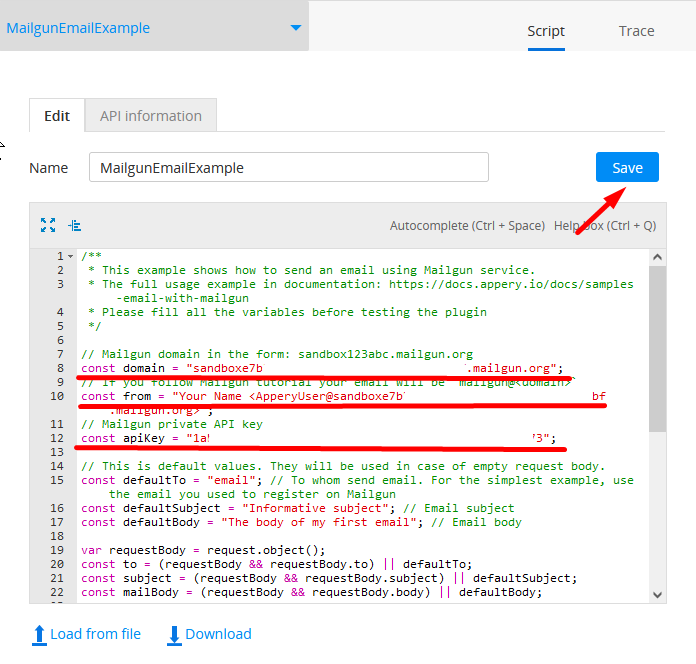
Please check out this section to learn where to look for the needed parameters.
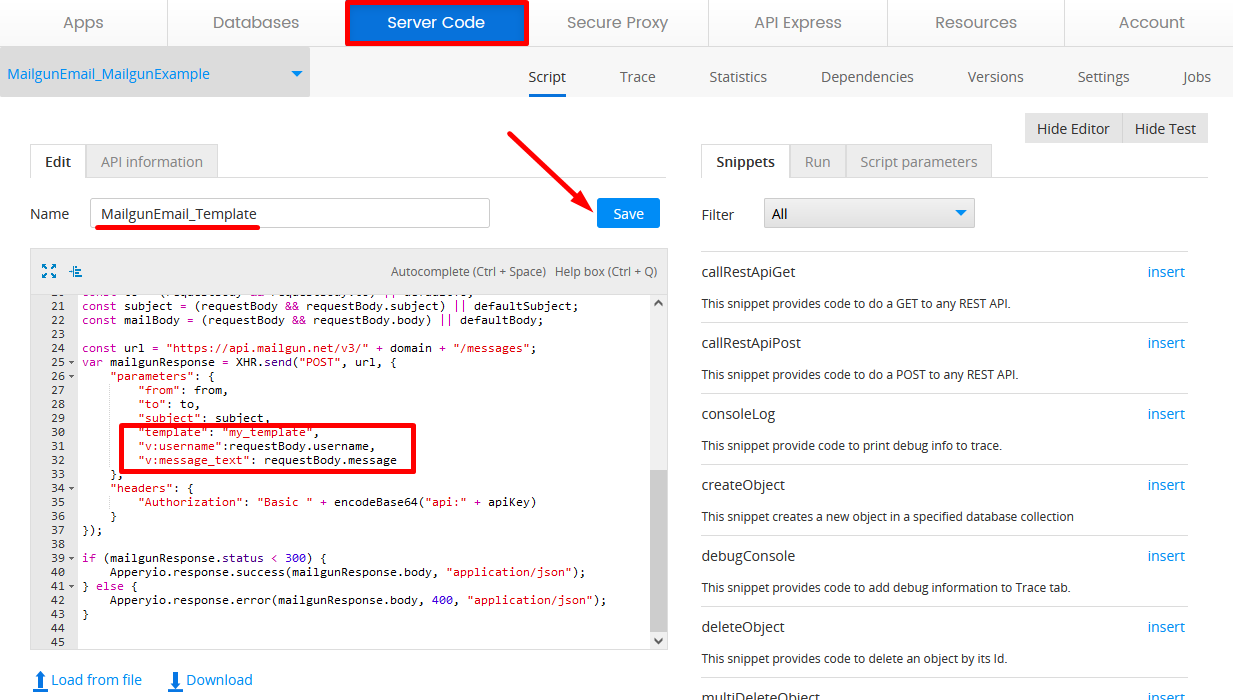
- Now, pay attention to the parameters that will be sent to the Mailgun service (lines 26-30).
Sending text is a common case, but we now want to use the created Mailgun template so let's replace the text parameter with template and add all the variables that were added to your template as the template parameters.
If following the example above, you will need to type in the below code and save:
"template":"my_template",
"v:username": requestBody.username,
"v:message_text": requestBody.message
Your code should look like this:
Testing Script
It is a good idea to test your script now.
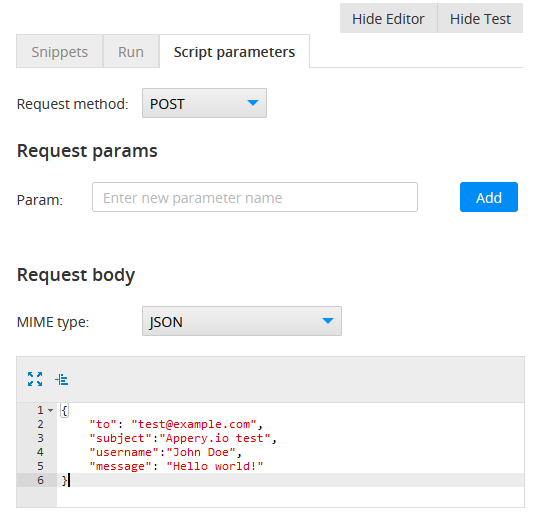
To do it, you can replace the default script values to, subject, username, and message in the script or open the Script Parameters tab, select JSON for Request body, and provide the needed values there, for example, { "to": "[email protected]", "subject":"Appery.io test", "username":"John Doe", "message": "Hello world!" }:
Finally, switch from the Script Parameters tab to the Run tab and click the Save and run button.
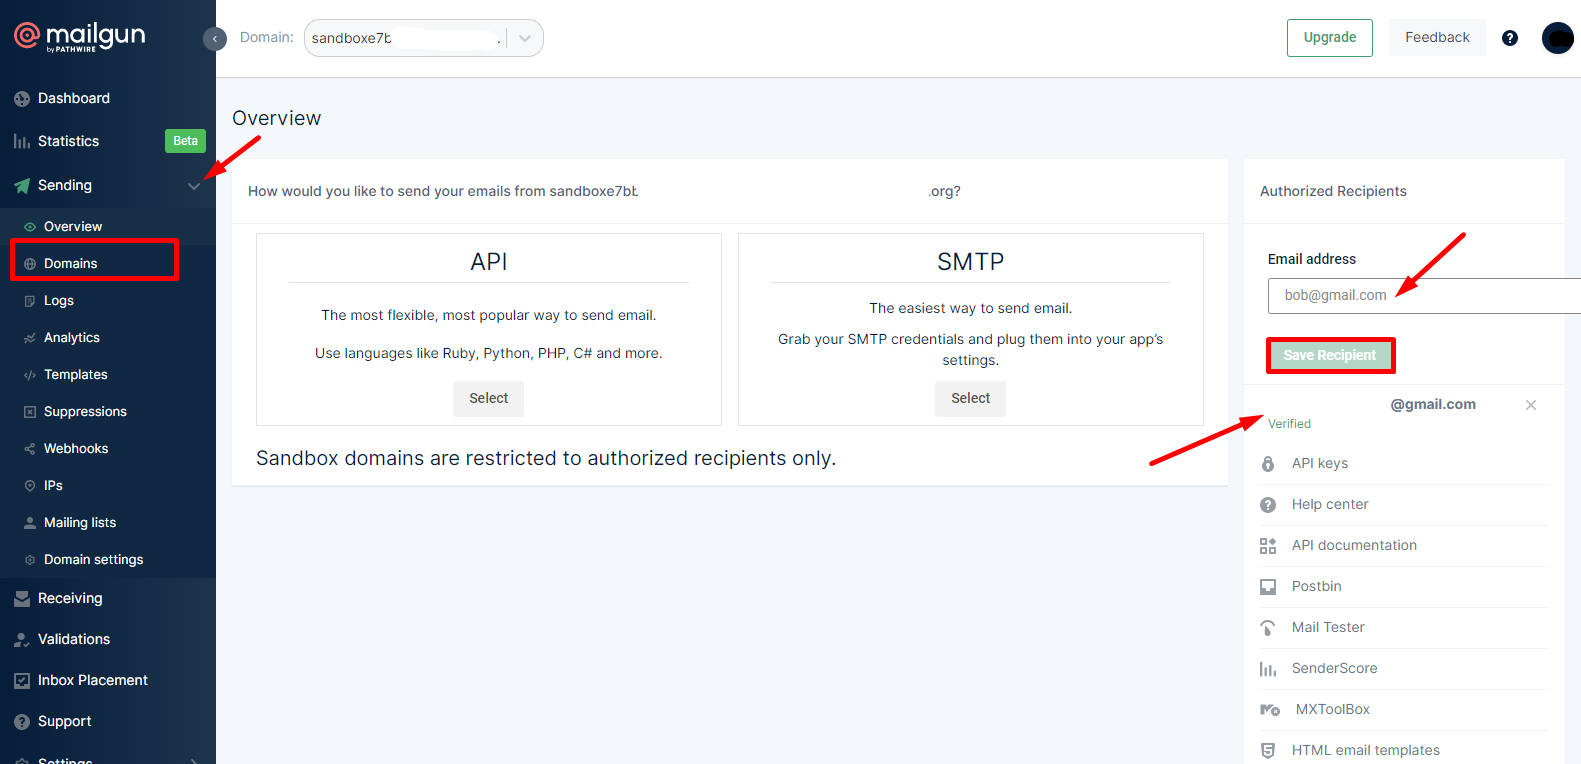
NotePlease be informed that with a free Mailgun plan, you will be able to send messages to authorized recipients only:
If your authorized recipient user checks the inbox now, the email will be there (if it is not, please check the Spam folder):
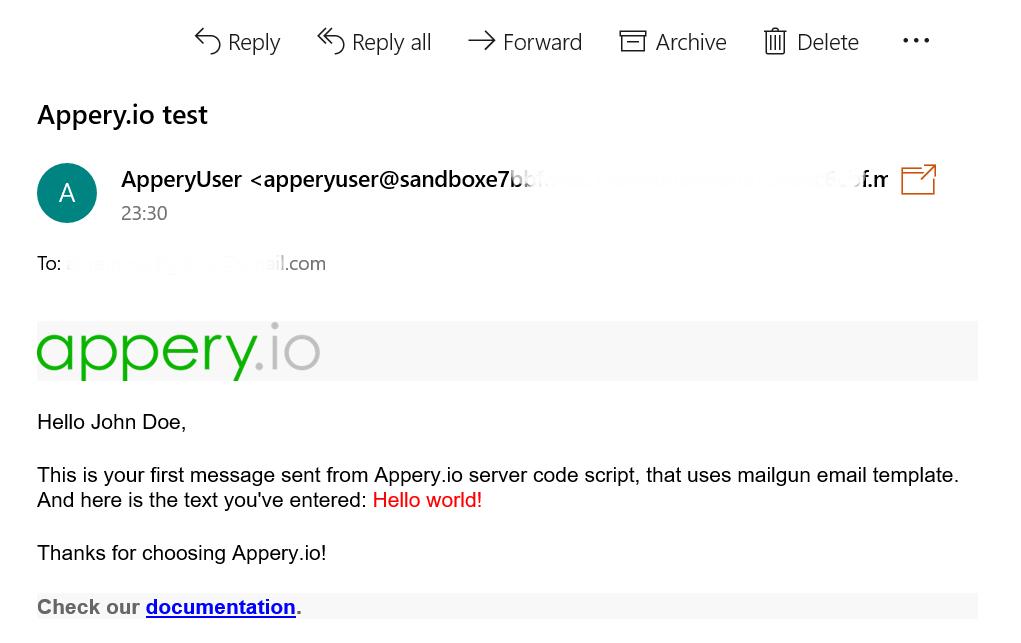
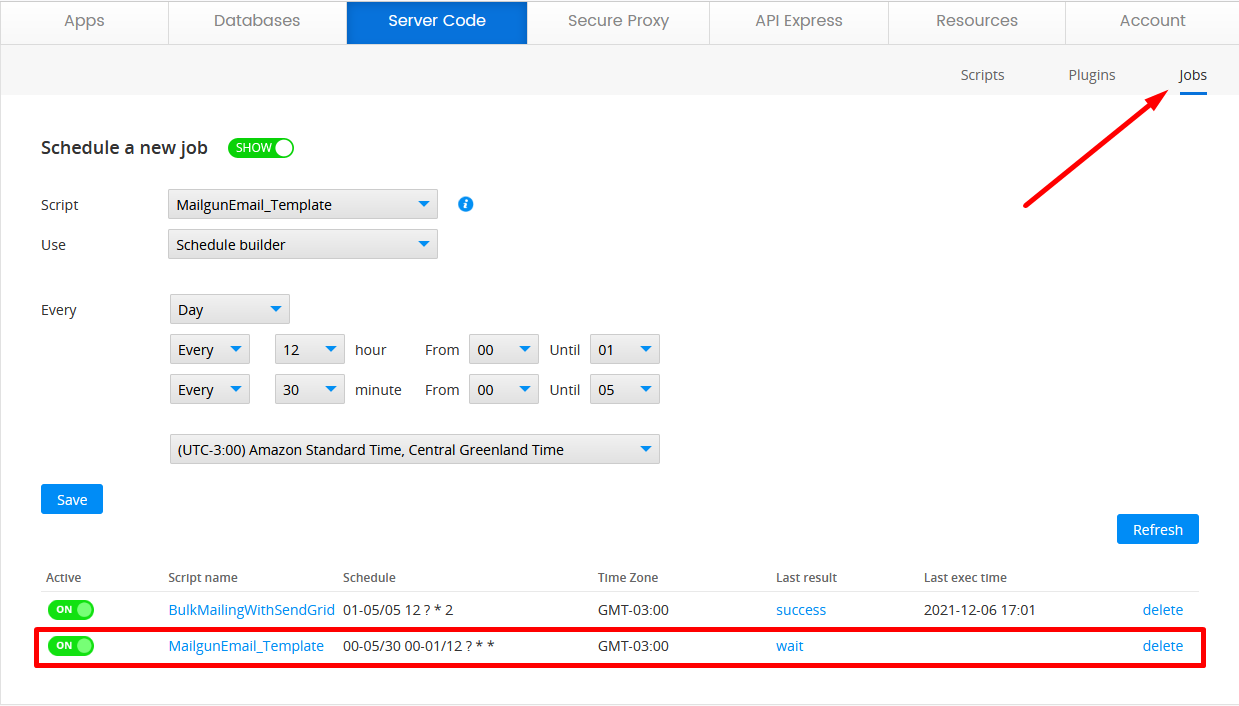
If the test email is received, your script is ready and you can use it in your app or create a scheduled job to send emails automatically.
To do it, switch to the Jobs tab and specify the needed data for your MailgunEmail_Template script:
Updated about 1 year ago