JQM: Uploading multiple files to the Appery.io database
JQM mobile app that uploads files to the Appery.io Database
Important Note!The option of creating new apps with thejQuery Mobile framework was removed but we still support the projects that were created with it earlier.
In this tutorial, you’ll learn how to build a jQM mobile app that uploads files to the Appery.io database.
Ionic Tutorial: Uploading Multiple Files to Appery.io DatabaseWe can recommend that you check our Uploading Multiple Files to Appery.io Database sample app created with Ionic here!
It’ll be an HTML5 app that uses a browser File API (different from the Appery.io Database File API). The File API is supported by most desktop browsers. However, if you want to run this app in a mobile browser, you’ll need to install the Firefox Mobile or Opera Mobile browser.
You can find more information about which browsers support the File API via the link.
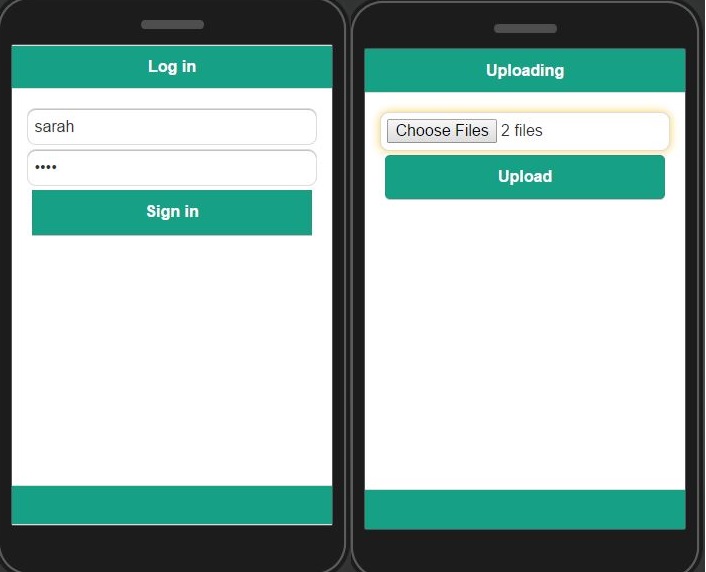
The app will look like this:
Building the sign in page
File upload functionality requires a user to be signed in. User management features are built into the Appery.io database, so it’s easy to implement.
Rename the default first page to Login and build the following page:
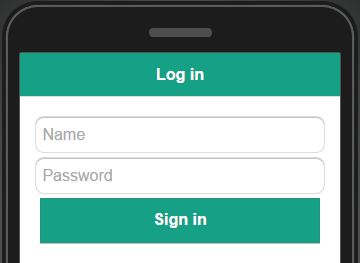
The Input fields are named username and password.
- Name and Passwordare both Placeholders.
- Password field type is set to password.
- Button name is changed to signInButton.
Creating a new database & user
- To create a new database, go to https://appery.io/database/, or click the “Database” button.
- For the database name, enter FileDB, and click “Create”.
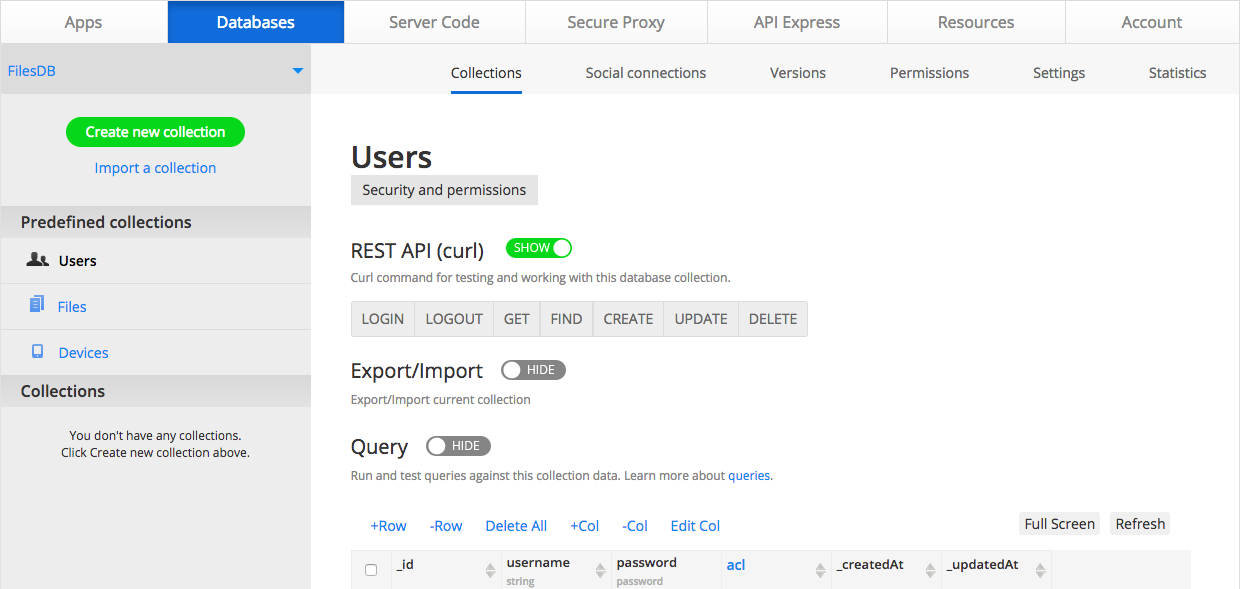
You’ll see the Collections tab:
- To create a new user, click “+Row” in the Users block.
- Enter the username and password:

Signing in the user
Creating database REST services
- Click CREATE NEW > Database Services.
- Select the FileDB database:
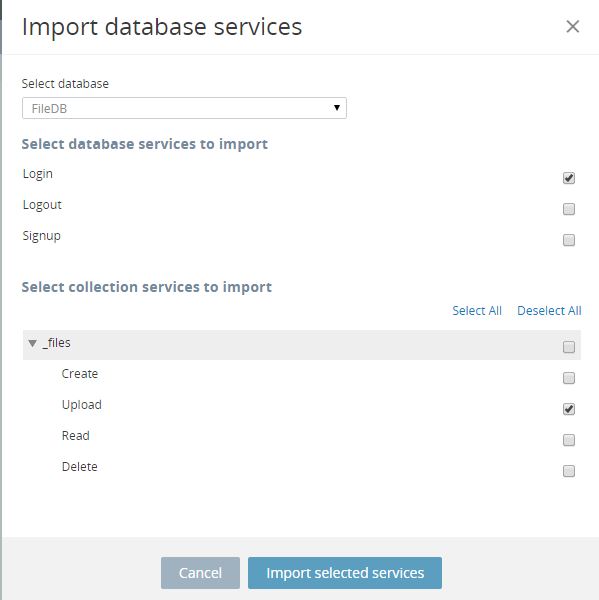
- You need a
Login, so check that service. To upload files, you also need to check the_files > Upload service. - Click Import selected services.
Next, you’ll need to add the login service to the page and map it. If you open the service, you will see that the URL, request and response parameters are all defined.
Mapping the service to the page
- Add the service to the page. Go to the DATA tab, and from the list, select
Service > FileDB_login_service, and click Add. - Rename the service instance; set it to signInService.
- To map the service to the page, click Mapping for the
Before sendevent and map the components as follows:
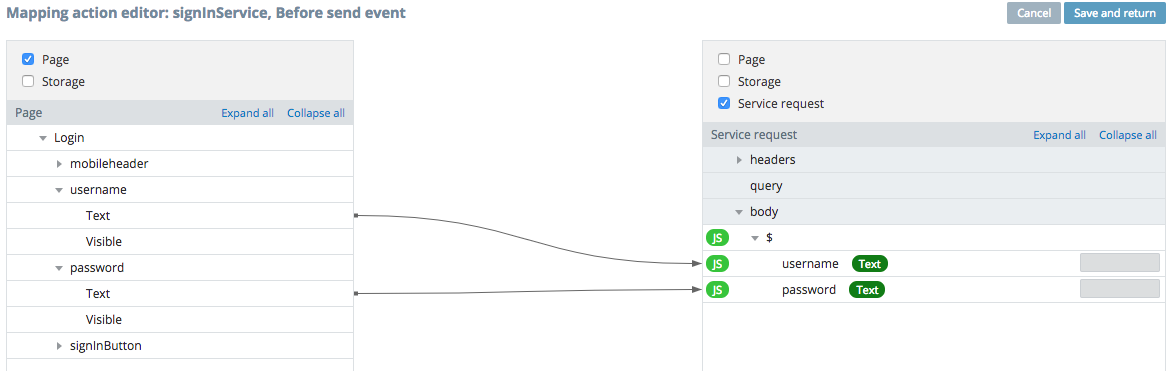
- Save.
- Switch to the
Successmapping.
Before you invoke the service you’ve created, you need to add the service to the page:
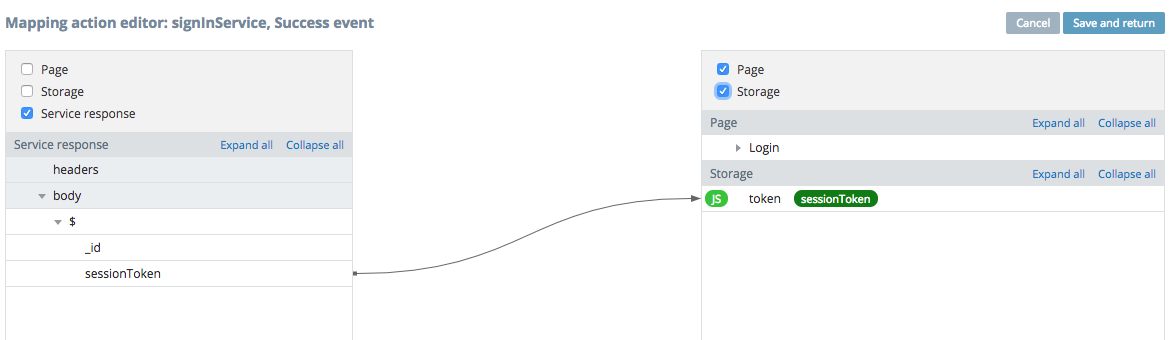
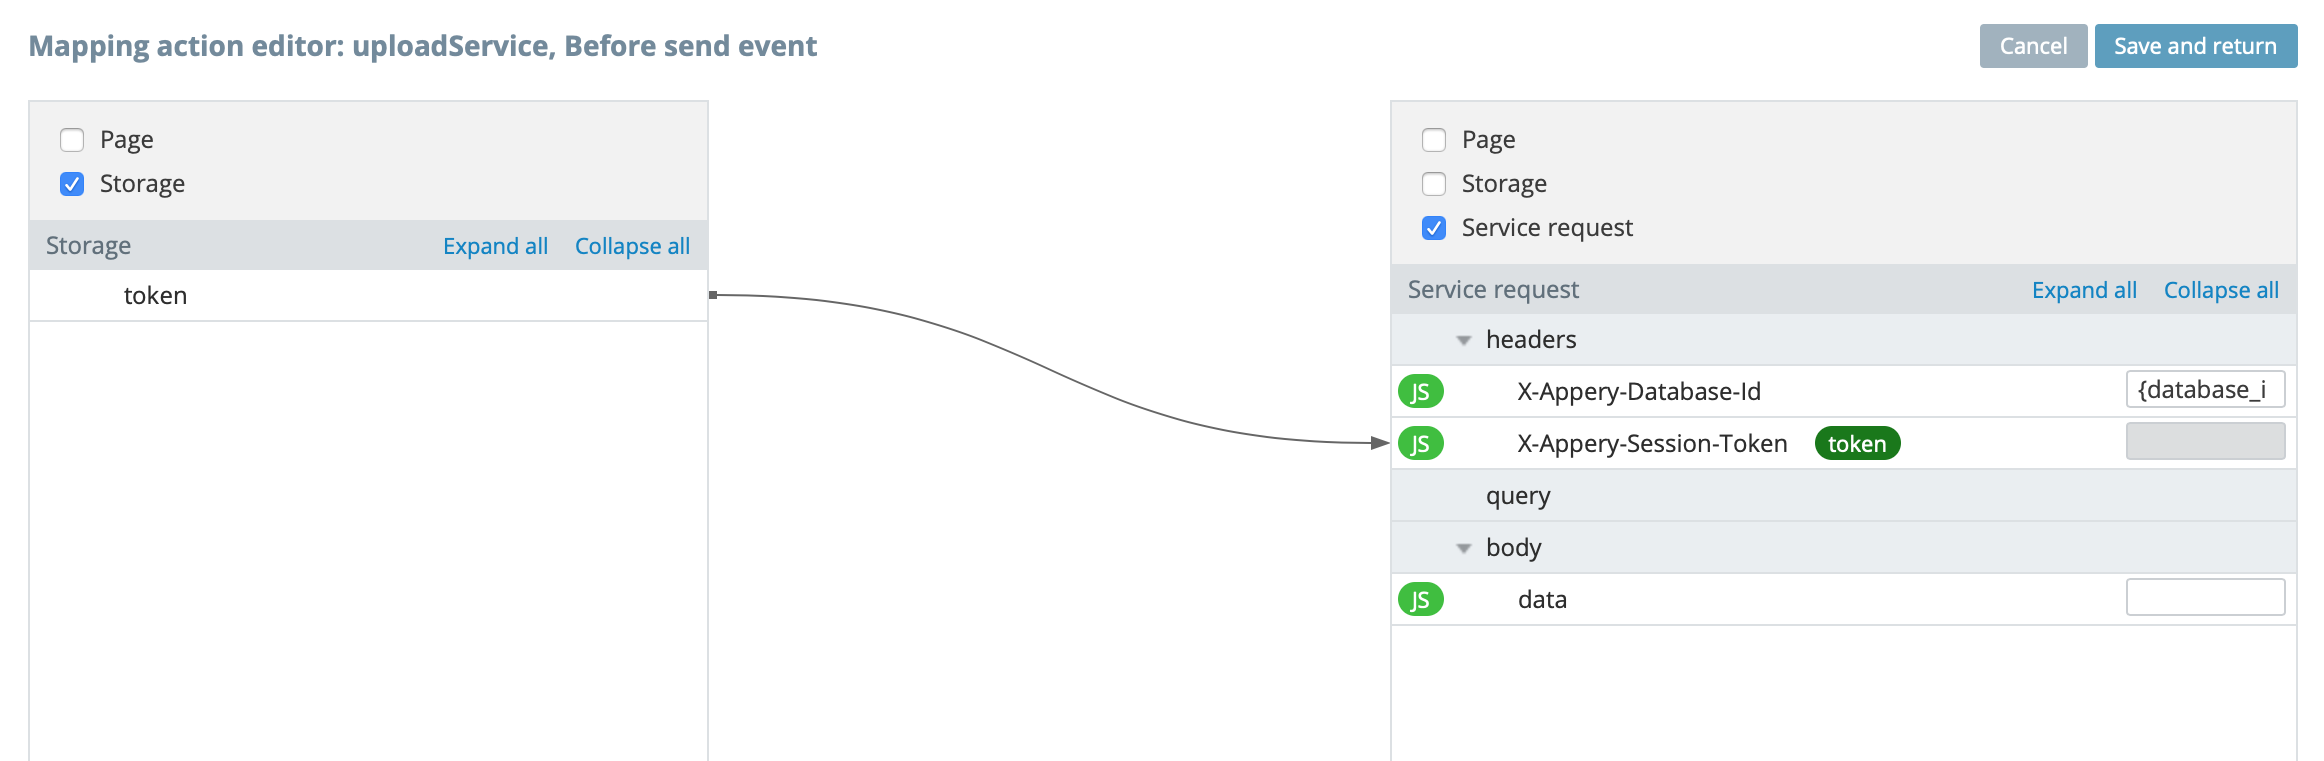
- The
sessionTokenshould be saved into storage. Go to Project > Model and Storage and open the Storage tab. For the new storage variable name entertoken, and click Add. The variable will be shown under Storage. - Now you can create the following mapping for the
Successevent and save:
Invoke the service to sign in the user, and navigate to a page where you can upload an image. To create the second page:
In the Project view, click CREATE NEW > Page.
Call the screen Upload.
Invoking the service
- Open the Login page.
- To invoke the service on button click, go to the DESIGN view, and open the EVENTS tab (bottom of the screen).
- Select the
signInButton > Click > Invoke Service > signInServiceand click “Save”.
Once you’ve successfully signed in, navigate to the Upload page.
- Go back to the DATA view and open the EVENTS tab.
- Select
signInService > Success > Navigate To Page > Uploadpage. - Click Save.
Add some basic error checking (in case the sign-in failed):
- For the
signInService, add anerrorevent. - Add the action
Run JavaScript, and then enter:
alert ("Signin failed");- Click Save.
- Test the app.
Building the upload page
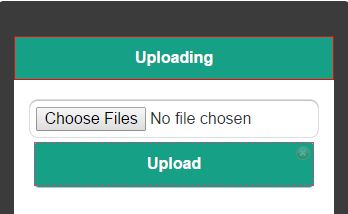
The Upload page will contain the following UI:
Add an Input component to the page, and name it file_input. Also, change the Type property to *file and check the newly-appeared option, Multiple:
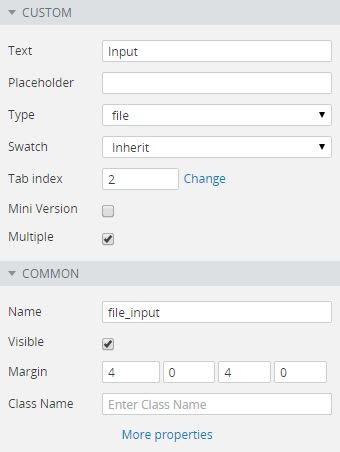
Place the Button under the Input component, and name it to upload_button. Also, change its Text property to Upload.
That’s all for the UI.
Uploading files
To upload files, you’ll need to map and invoke the FileDB__files_upload_service:
- Switch to the DATA view, add
FileDB__files_upload_service, and rename the service to uploadService:
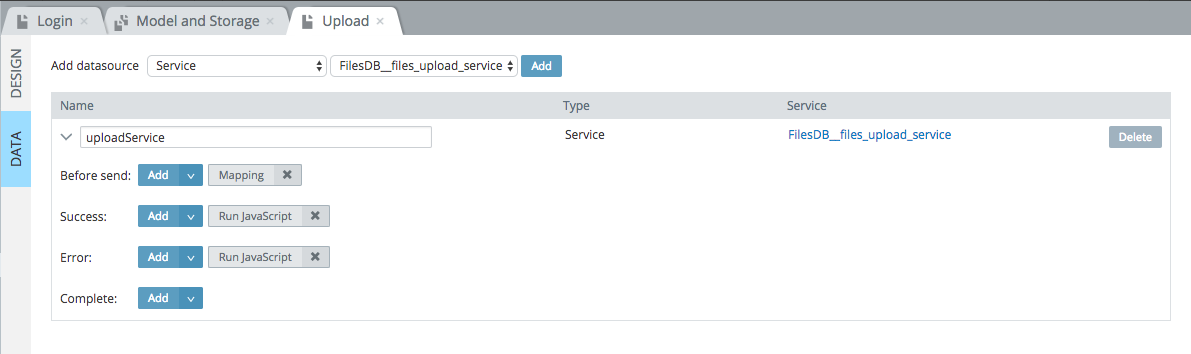
- Click Mapping for the
Before sendevent and create the following mapping:
- Go back to theDESIGN view, and open the EVENTS tab.
- Select
upload_button > Click > Run JavaScript.
Add the following JavaScript:
uploadMultipleFilesHelper(uploadService, Apperyio('file_input'));Where: uploadMultipleFilesHelper is the native Appery.io function that helps to upload files. It takes two parameters: service name, which will upload the files and input – the component that can be obtained by invoking the Appery.io function.
- Click Save.
- Switch to the DATA view, and add the following services:
uploadService > Success > Run JavaScript > add the following:
alert("Your file was successfully uploaded");uploadService > Error > Run JavaScript > add the following:
alert("Error:" + errorThrown);Testing the app
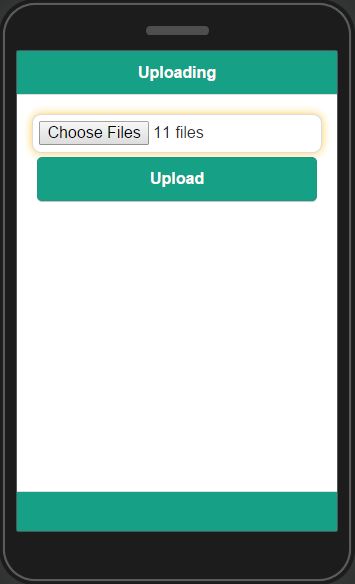
When the file is selected and uploaded to the browser:
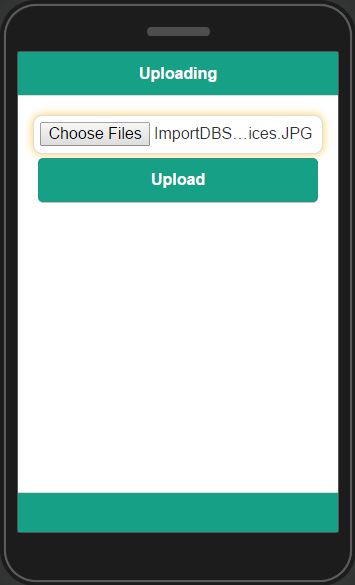
Since the “Multiple” check box is checked in the Input properties panel, you can choose multiple files at once:
When you click Upload in your app you can see the message “Your file was successfully uploaded”.
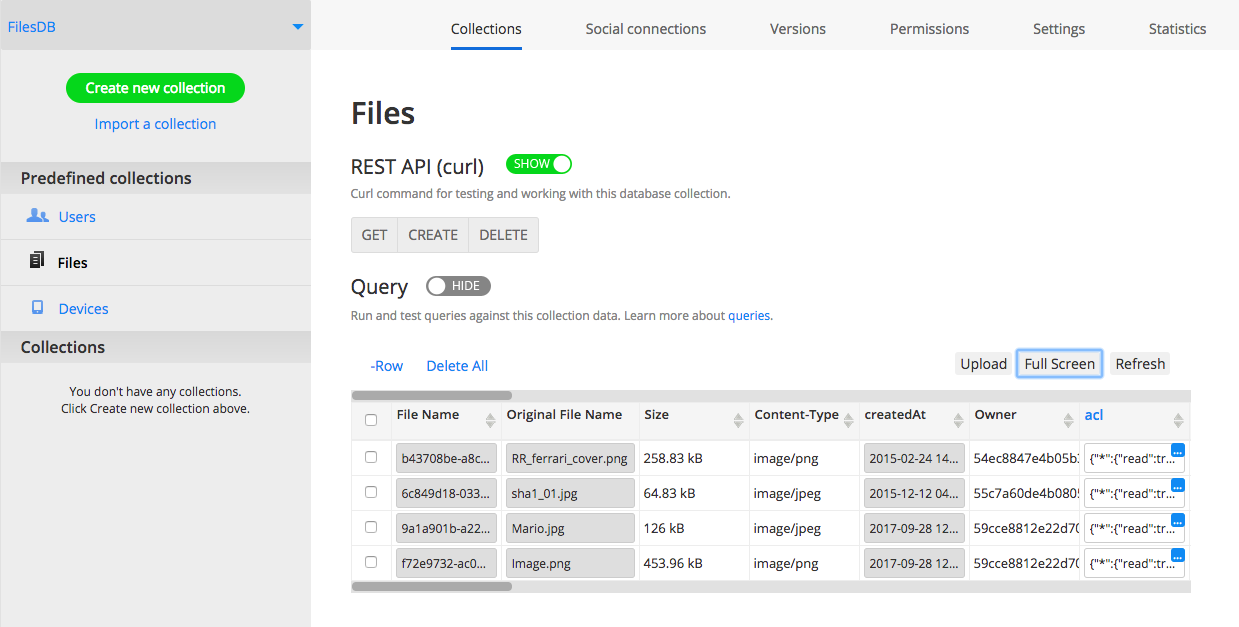
Now you can navigate to the Files tab in the app database to review the uploaded files:
Updated about 1 year ago