Ionic Weather Sample App
Sample weather app with backend services.
This sample app uses and demonstrates:
- Ionic.
- API Express.
- Invoking an external REST API.
This sample app uses API Express for connecting to a 3rd party Weather REST API services to show the temperature information based on the entered city name:
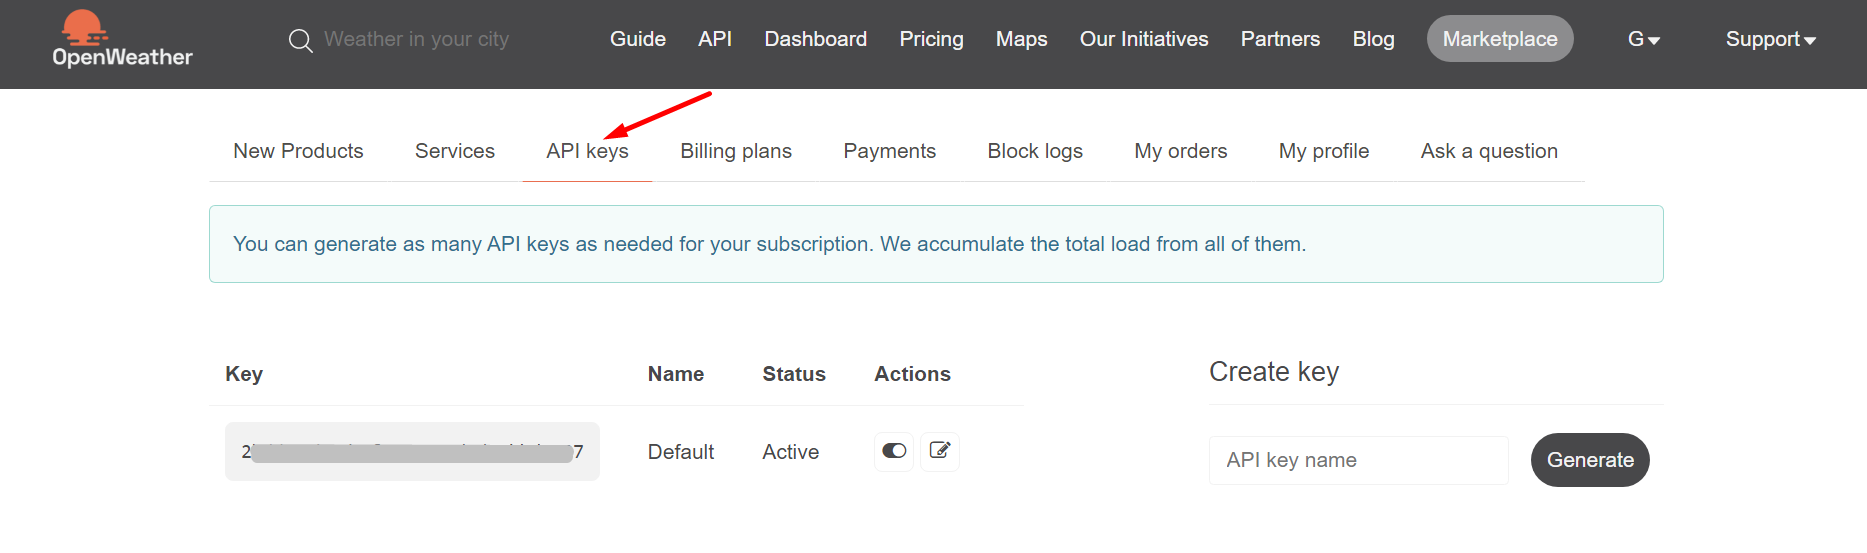
OpenWeather API
This tutorial uses the OpenWeatherMap API. Please sign up for a free account to get an API key for using the service:
NEW: One-Click Template Installation!You can now enjoy the one-click-away option of installing the sample app: simply click the button below and in a moment, your app is ready to start! There’s no need to go to the Create new app dialog or download the template backup with further installing it.
But if you are interested in how the app was created, please check out the steps below.
Creating API Express Project
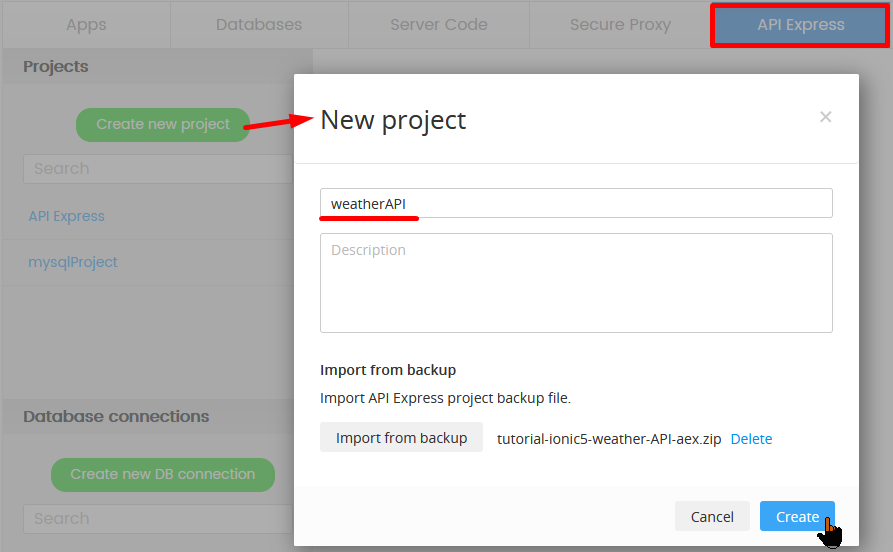
To start, you are going to create an API Express project from the backup file.
- Go to the API Express tab.
- Click the Create new project button and click Import from backup.
- Select the downloaded backup file.
- For the name, enter weatherAPI. Optionally, enter the API description.
- Click Create:
The visual service editor will load where you will see all REST components in the project. But first, you need some place to store the API key for the service. Open the Service keys tab and enter your own OpenWeatherMap API key for the {weather_api_key} key value:

Creating App UI
- From the Apps tab, click Create new app:
- Select Ionic Blank as the application type, enter Ionic Weather App for the app name, and click Create.
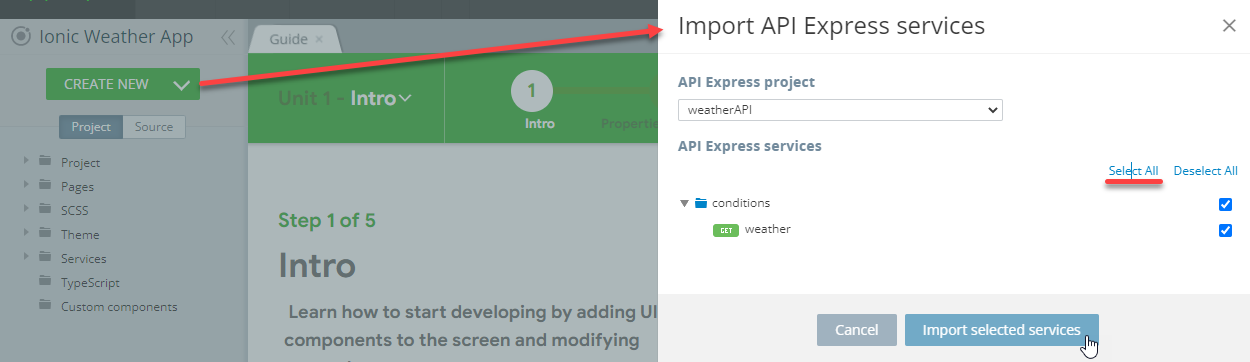
- Inside the App Builder, select CREATE NEW > API Express Service select the weatherAPI project, then all conditions/weather services, and click the Import selected services button:
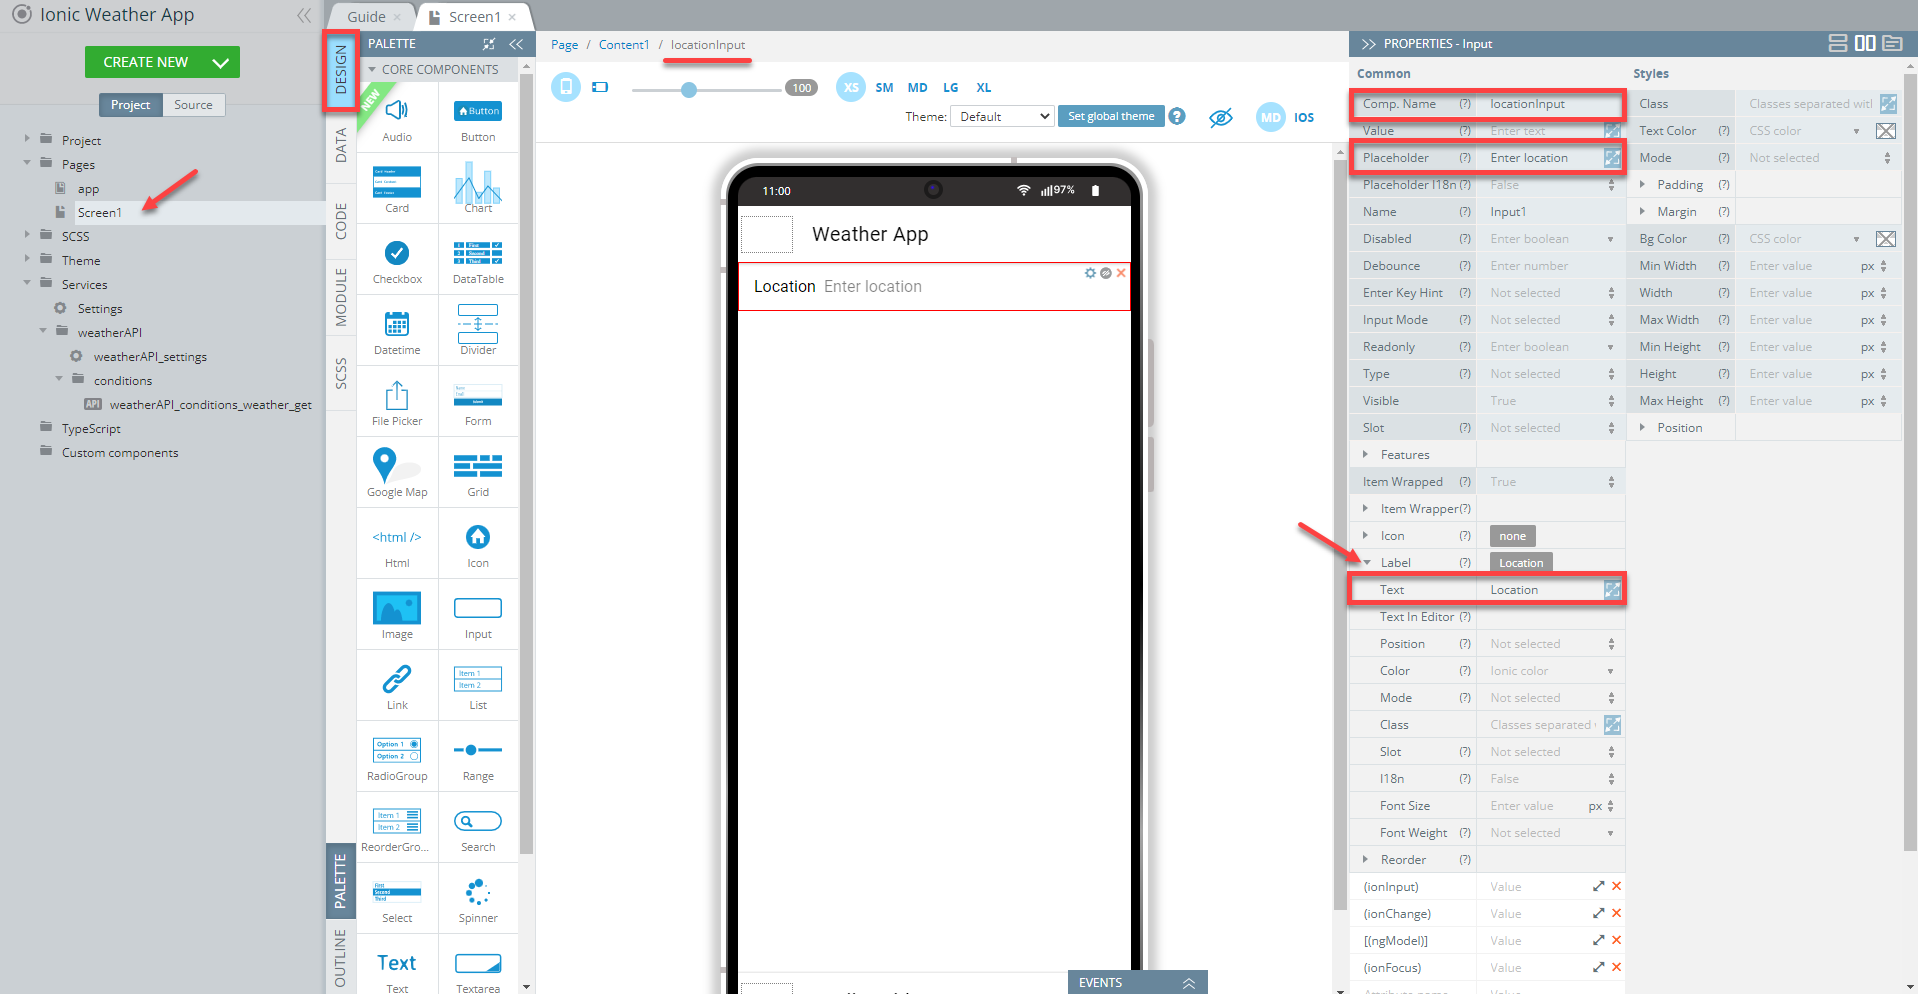
- On the left side, unfold the Pages folder and open the predefined Screen1.
- Select the Page component from the breadcrumbs (you can also use the OUTLINE view to locate the needed component) and set the page Footer property to False as we will not use it in the app (you will also be asked to confirm changing the property).
- On the page, select Toolbar title and set its property: Text = Weather App. You are also free to type in right in the mobile frame:

Defining App UI Components
- From the components PALETTE menu, drag the Input component and drop it into the page's main body. In the PROPERTIES menu, add the following properties for the Input component.
- For Comp. Name, enter locationInput;
- Unfold the Label section and, for Label > Text, enter Location;
- For the Placeholder property, enter Enter location:
- For Comp. Name, enter getWeatherButton;
- For Text, enter Check forecast:

App UI view with Input and Button
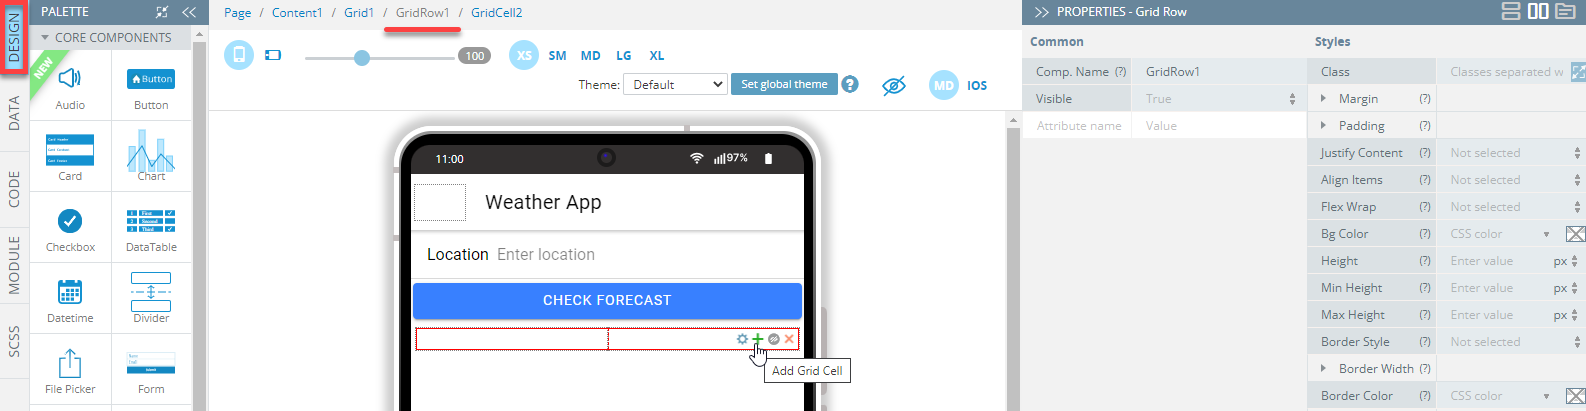
- In our app UI, we will also need a Grid component to show the results of our weather service. From the PALETTE, select the Grid component and place it beneath the Button on the page.
The grid will be created nesting a default Grid Row with two child Grid Cell components. - Select Grid Row (in the OUTLINE view or by selecting it in the breadcrumbs menu) after that click the plus icon in the top right corner of selection to add one more cell into the grid:
- Now we have a grid with three empty cells; for the output data of our service, we will need a Text component inside the grid cells. So, drag the Text component from PALETTE and drop it into each grid cell.
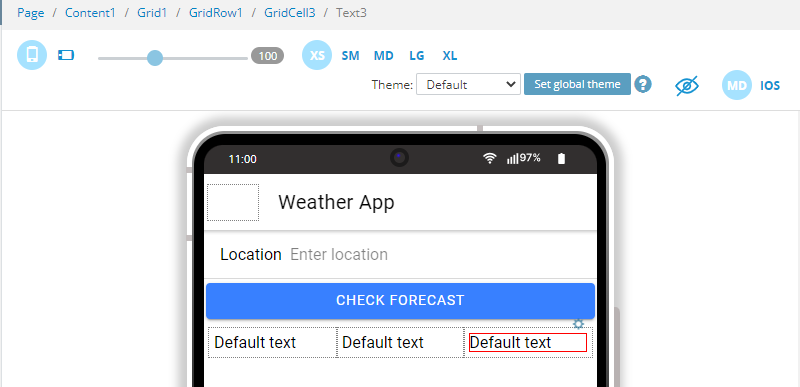
- And for each Text component inside the cells, set the corresponding Text properties as follows:
- Date;
- Temperature;
- Feels Like:

Grid component.
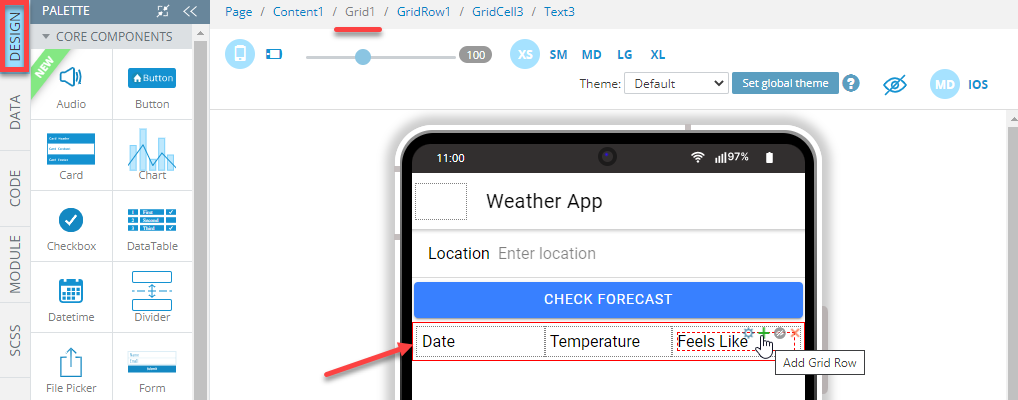
- Select the Grid (in the OUTLINE view or by selecting it in the breadcrumbs menu) after that click the plus icon in the top right corner of the selection to add one more Grid Row into the Grid:
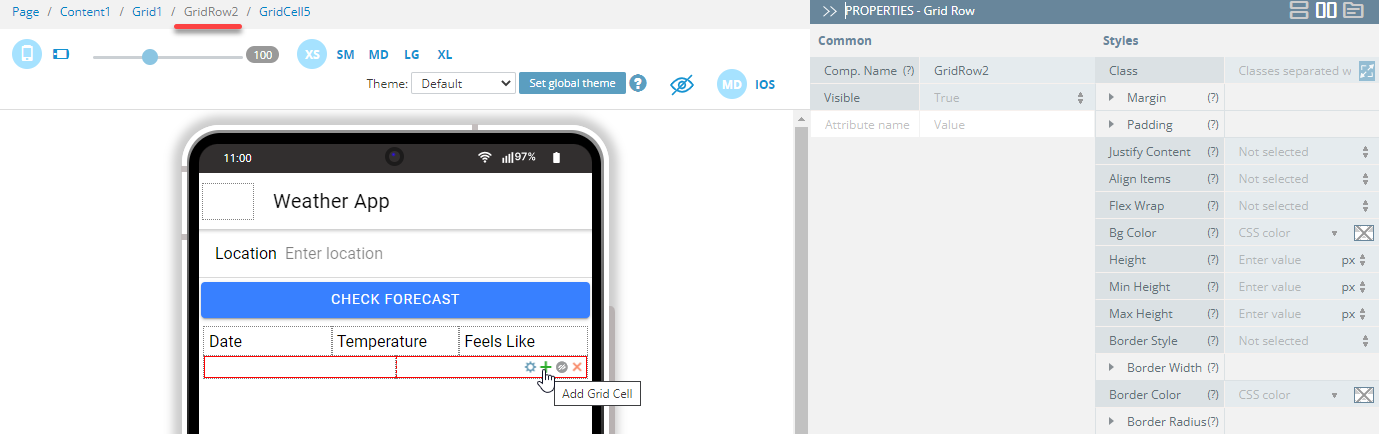
- Select Grid Row2 (in the OUTLINE view or by selecting it in the breadcrumbs menu) and then click the plus icon in the top right corner of the selection to add one more cell into the grid so that there are three cells:
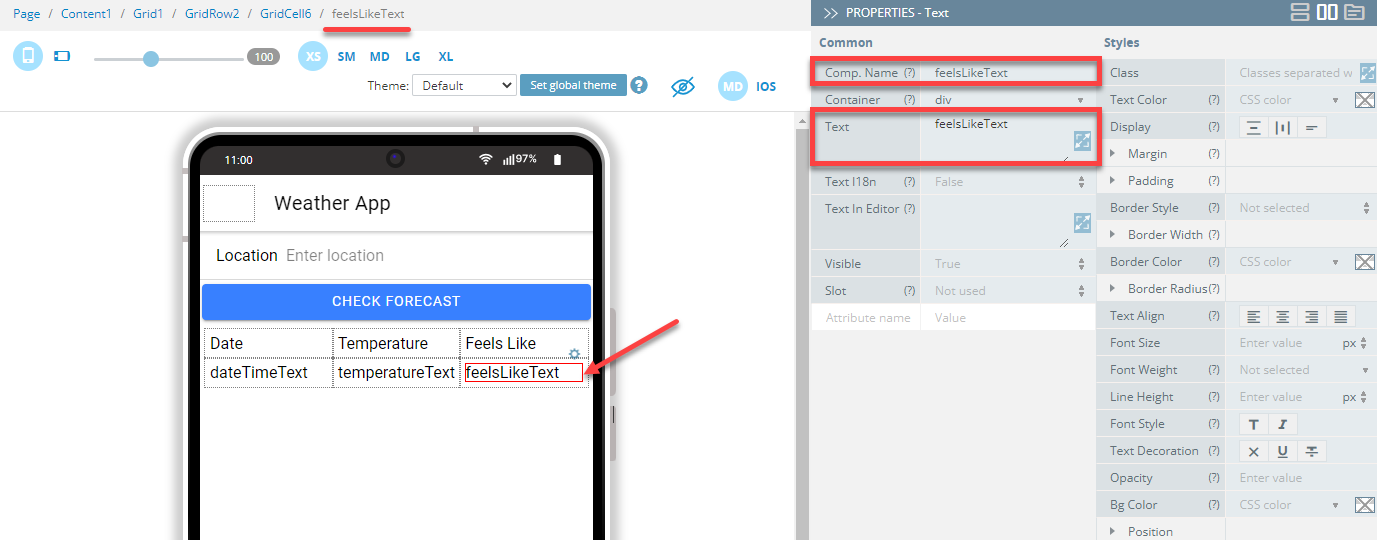
- Drag & drop the Text component into each grid cell of the second row.
- For each Text component inside the cells, set the corresponding Text and Comp. Name properties as follows:
- dateTimeText
- temperatureText
- feelsLikeText:
Backend
- Open the DATA panel on the left side menu.
- Select Service as a datasource in the menu with
weatherAPI_conditions_weather_getand click Add. - Rename it to getWeather.

DATA service configuration
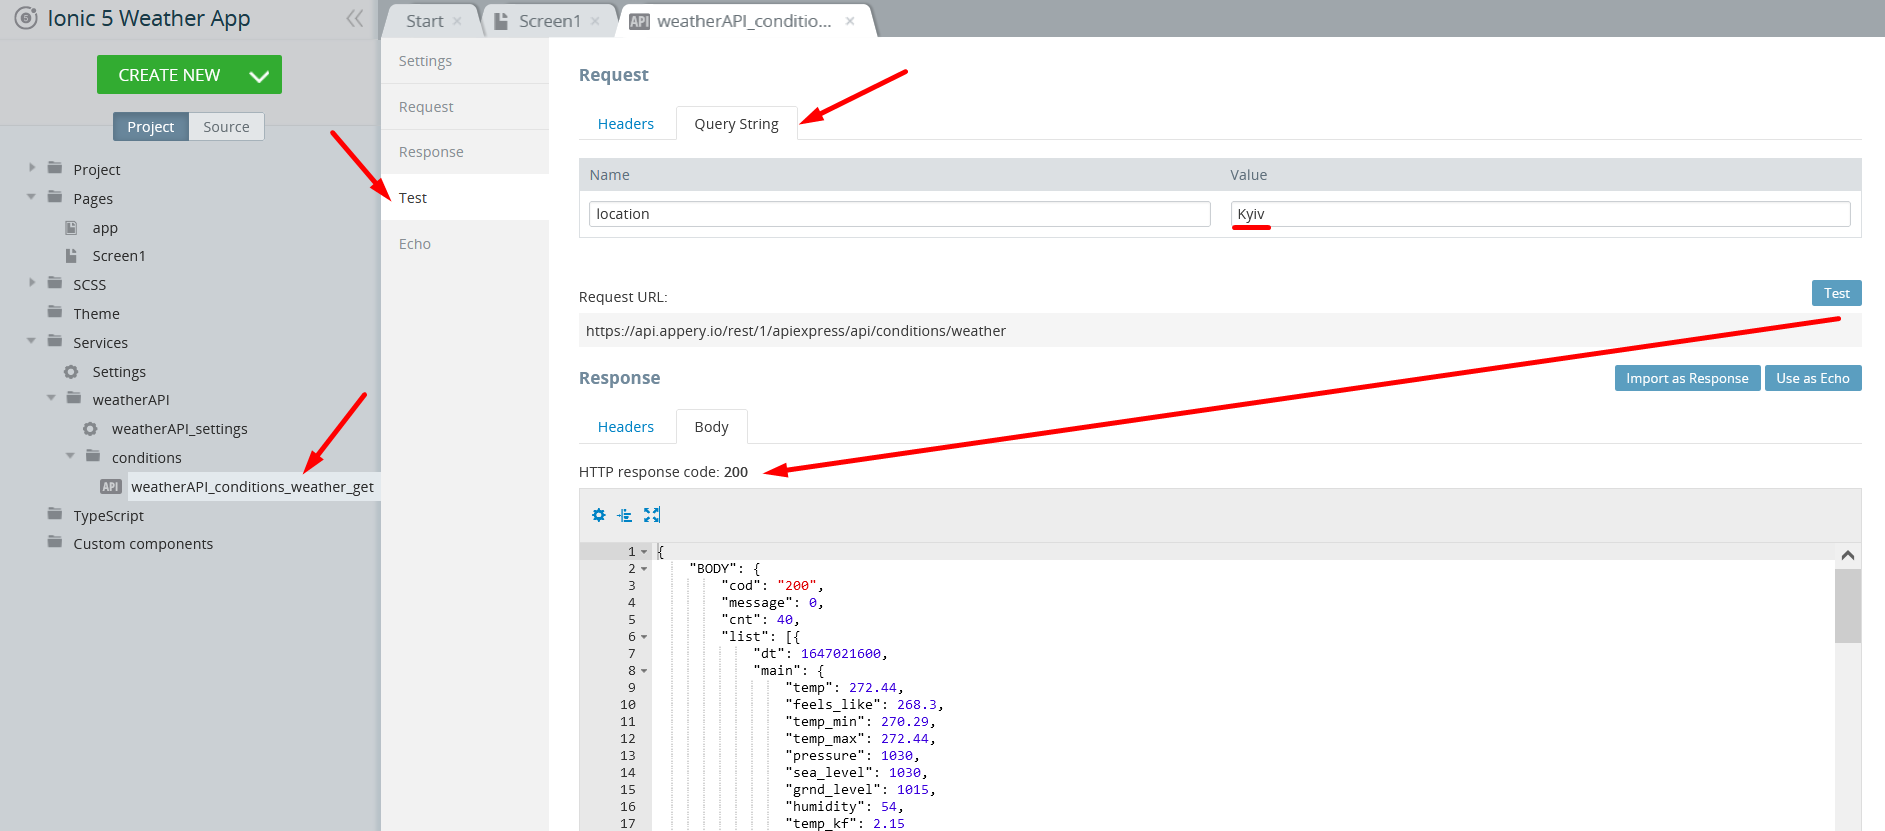
The services will be instantly imported and you can quickly test if they work correctly:
- Select weatherAPI_conditions_weather_get located under the Services > Weather API > conditions folder, go to its Test > Query String tab, enter some test value, for example, Kyiv, and click the Test button to invoke the service. You should see the service response in a moment:
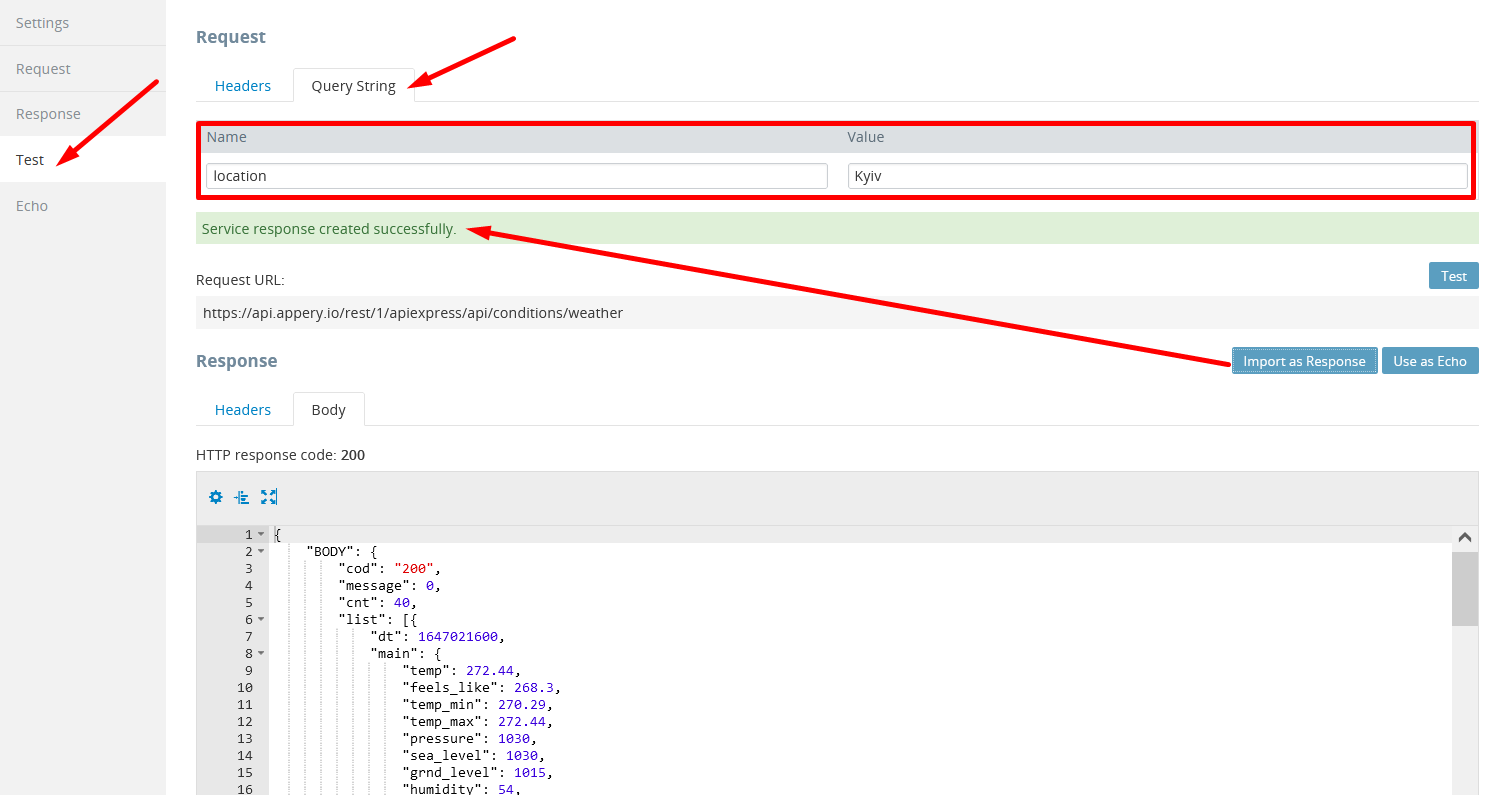
There is one step left and it is setting the service response.
- After you have successfully tested the script, click the Import as Response button:
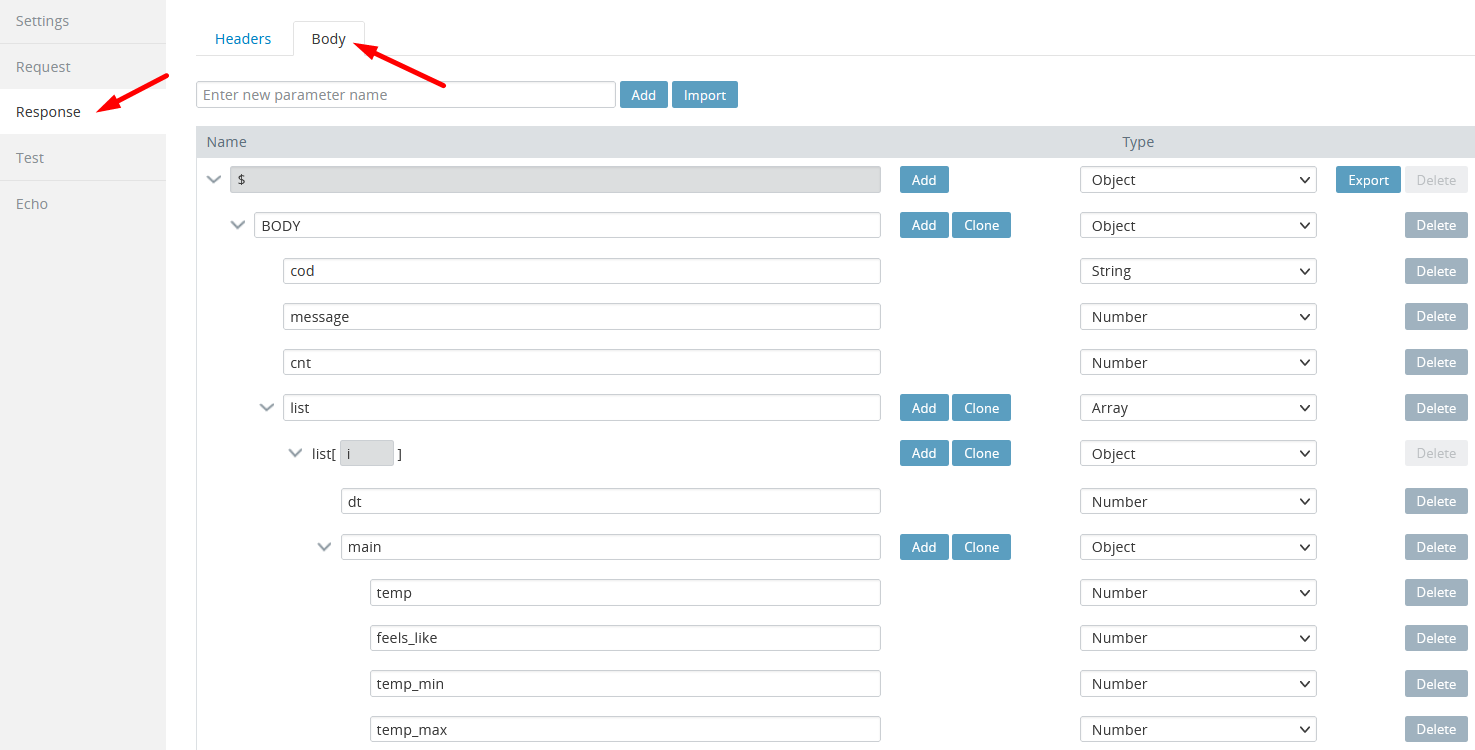
- You can open the Response > Body tab to see how it looks:
- Now, return to the Screen1 > DATA panel tab and click the Mapping button of the Before send element. The visual mapping editor window will appear.
- Expand the Page Components content, drag the locationInput Value property and drop it to the service request Query location parameter.
Click the Save & Replace button to save:

Mapping editor window
- Now in the DATA panel, click the Mapping button of the Success element. In the mapping window, expand the service response
body > listand drag and drop the list.list[i] parameter to thePage >Grid1.GridRow2element. This way, we have linked all the iterated items from the service response and linked them with the grid row data cells on the App UI. - We need to make the same for each mapping element in our data structure response we need to show in the app. The structure for mapping would be as follows:
body->$.list.list[i].dt_txtparameter to thedateTimeText.Textproperty;body->$.list.list[i].main.tempparameter to thetemperatureText.Textproperty;body->$.list.list[i].main.feels_likeparameter to thefeelsLikeText.Textproperty.

Service response mapping
- Click Save & Replace.
- Finally, let's go back to the DESIGN panel.
- Click the getWeatherButton and expand the EVENTS tab from the bottom. From the EVENTS menu drop-down, select the Click event, for action, select Invoke service with the getWeather datasource and save.

EVENTS panel menu
App Testing
We are now ready to test our Weather App in the web browser - in the top menu, select the TEST button and choose the testing option you would prefer. When the app starts in the web browser, enter the city name the weather for which you would like to know and click the CHECK FORECAST button:

Web preview in the browser
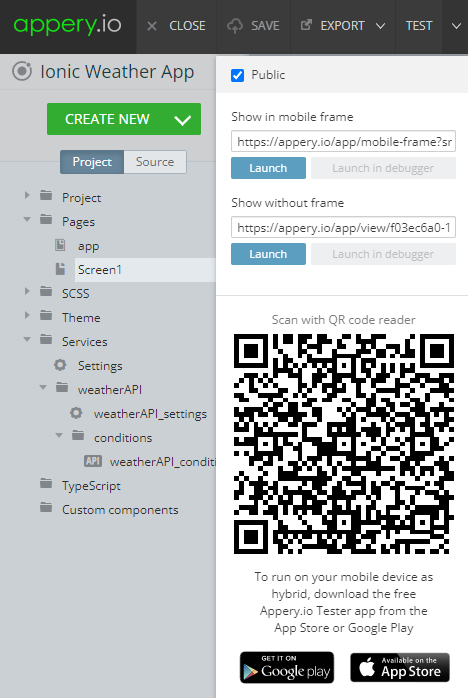
Testing on Device
When your app version is ready, you might also like to test it on the device.
Appery.io Tester AppA great option to quickly test the app on the device is to use our Appery.io Tester app.
The app is free and available for both iOS and Android.
You can check out this page to learn more about using the Appery.io Tester app.
Updated about 1 year ago