JQM Quickstart Database Tutorial
Using the database in a JQM app.
Important Note!The option of creating new apps with thejQuery Mobile framework was removed but we still support the projects that were created with it earlier.
If you are new to Appery.io Database, start with this simple tutorial. In this tutorial, you’ll learn how to build a JQM mobile app that displays a list of data from the database.
Every mobile app requires a backend (server) to store data or run some logic. Here we will use the database as our backend and so you will start by creating a new database.
Creating New Database
You will start by creating a new database.
- Go to the Databases tab.
- Click the Create new database button.
- Enter a new database name: WarehouseDB. Then click Create.
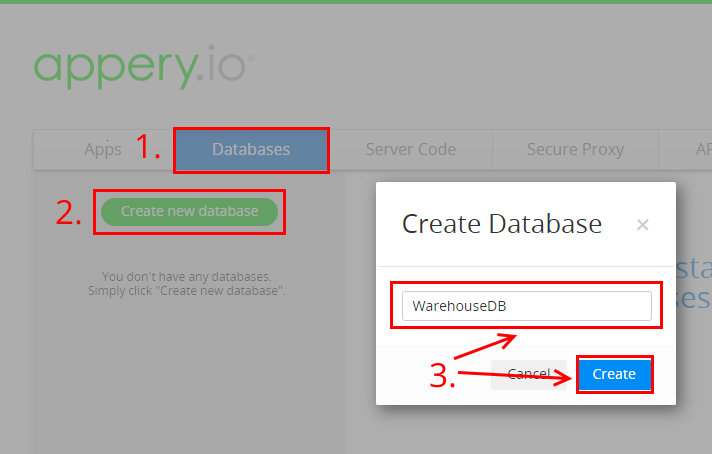
The next step is to create a new custom collection.
Creating New Collection
Now, you are going to create a new collection to hold the warehouse data.
- Click the Create new collection button.
- Enter the collection name: Goods and click Add.
The new collection has a number of default columns. You are going to create a new column to hold the actual item.
- Click +Col.
- Enter the column name: item. Set its Type as String.
- Click Create column.
You should see a new column created.
It's very simple to add sample data into the collection.
- Click +Row to insert a new row into the collection.
- Enter Cold drink as the first item.
- Enter two more items: Tea and Coffee.
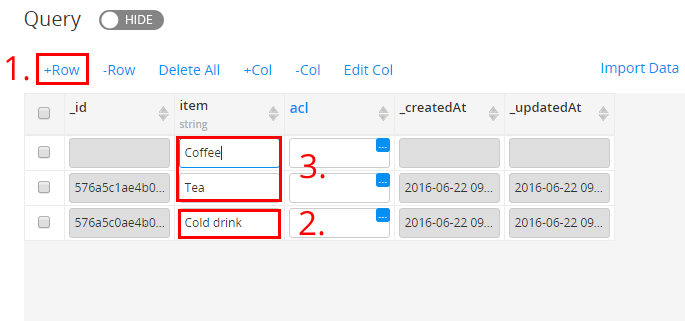
Collection data.
That's all you need to do on the database side. The next step is to define Server Code to access the database data.
Want to know more?You can also check this extended document to learn how to access the database and perform all the basic operations with the data stored in a database: reading, creating, editing, and deleting.
Creating Server Code Script to Access the Database
In this section, you are going to create a Server Code script to access the database and make it available for the app (client).
- Go to the Server Code page.
- Click Create script to create a new script. The editor will load.
- Name the script loadGoodsScript and click the Save button.
Every new script loads a default sample script to try. Go ahead and delete the script.
- On the right-hand side, you will see the Snippets tab. Locate a snippet called retrieveAllObjects and click insert to insert it into the script editor. It should look like this:
var result = Collection.query("dbId", "collectionName");Now, you need to set your dbId and collectionName in this code.
- To set the database ID, go back to the database you have just created and then to its Settings tab. There, locate the database ID (API key) and copy it to clipboard:
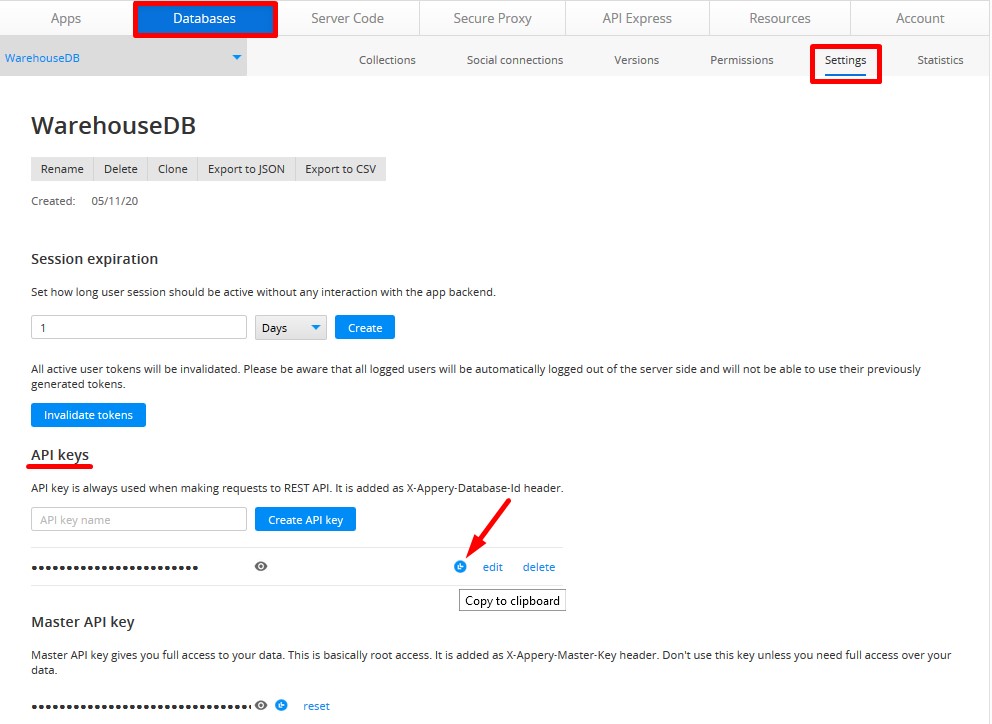
- Paste the key into the script.
- Set the collection name to Goods by replacing
collectionNamebyGoods. - Using Snippets again, find the responseSuccess snippet and insert it below the first snippet.
Place the cursor below the first code line before inserting.
- Replace
{"param1":"value1"}withresultand save the script. Your code should look like this:
var result = Collection.query("5eb8e8532e22d729ddf3e3b0", "Goods");
Apperyio.response.success(result, "application/json");
Testing Script
This script accesses the database and retrieves all the objects in the Goods collection. It is always a good idea to test the script before using it in an app.
Testing is very easy. On the right-hand side switch to the Run tab and click the Save and run button to invoke the script. You will see the script response showing the items from the database:
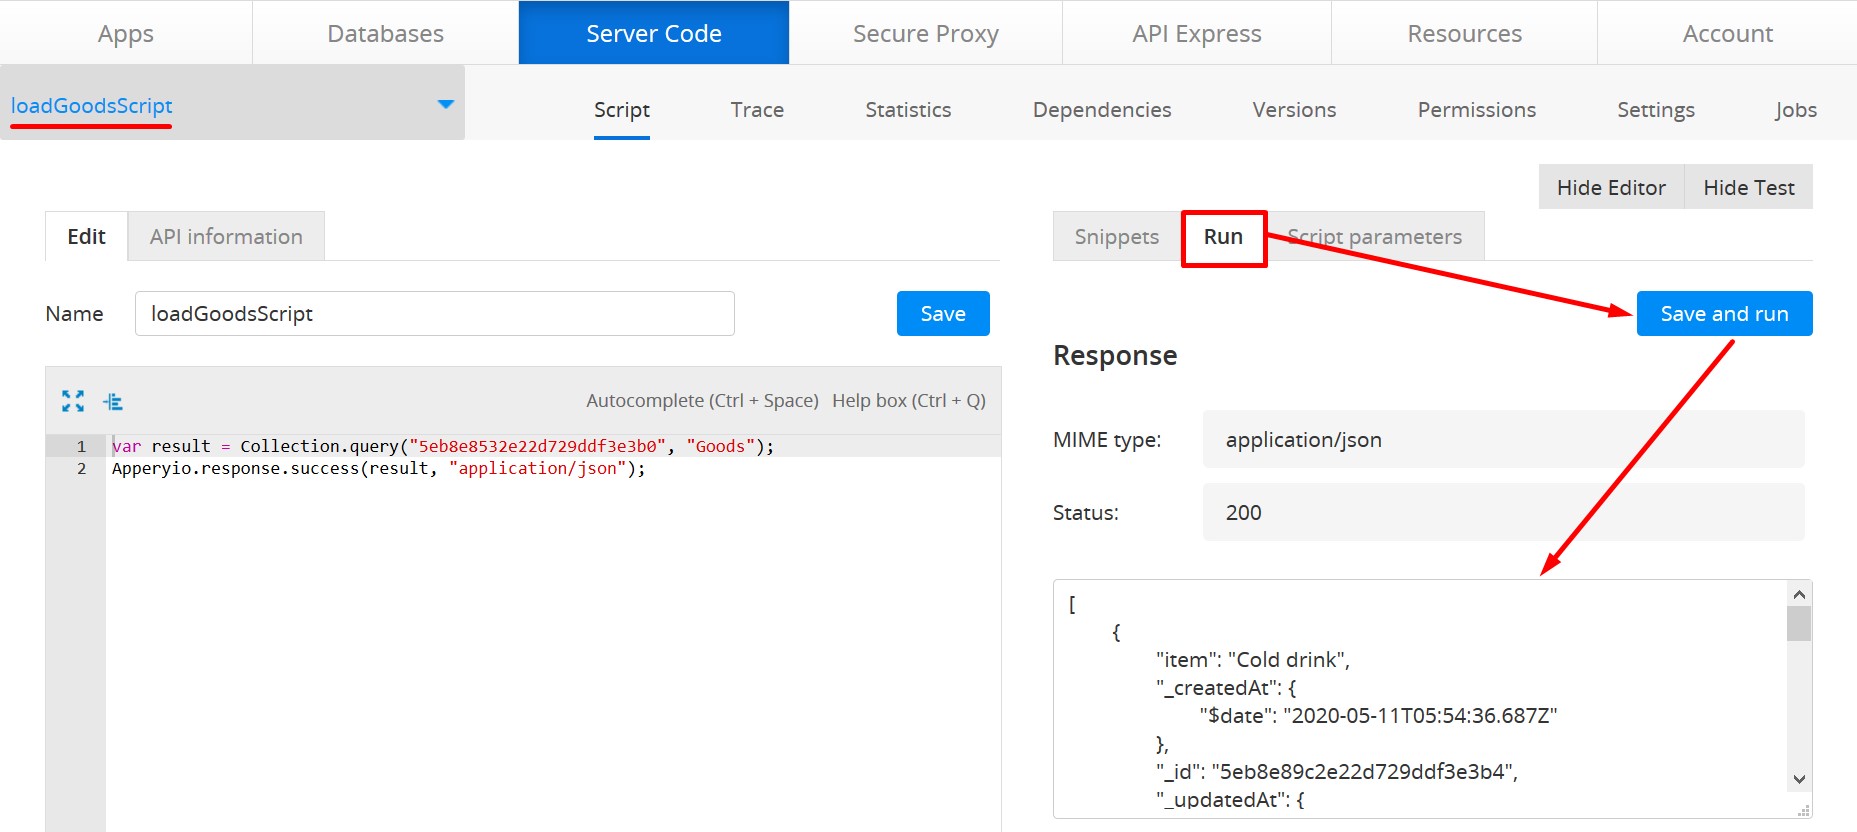
Next, you are going to work on the app UI.
Want to know more?You can also check more information about how to work with Database using Server Code scripts in Working with Appery.io Database and Server Code extended guide.
Building App
Creating New JQM App
To create a new app, go to the Apps tab.
- Click Create new app button.
- For the app name, enter WarehousejQueryApp.
- For the app template and type select jQuery Mobile > Blank , then click the Create button.
Next, you are going to design the app page.
Designing the App UI
Once the visual editor has loaded:
- Open the Pages > startScreen page.
- Select the header area and in the PROPERTIES panel change the header caption to My App.
- On the PALETTE, locate the List component and drag & drop it to the screen.
- The List component has three items. As the data will be loaded from the database you just need one item. With the list control selected, in PROPERTIES, set Items to 1.
Use the breadcrumbs to select the List container (not the List item).
- You can also remove the list icon. In PROPERTIES, click Buttons Icon and select the No icon button.
That's all for the app UI. This is how your page should look:
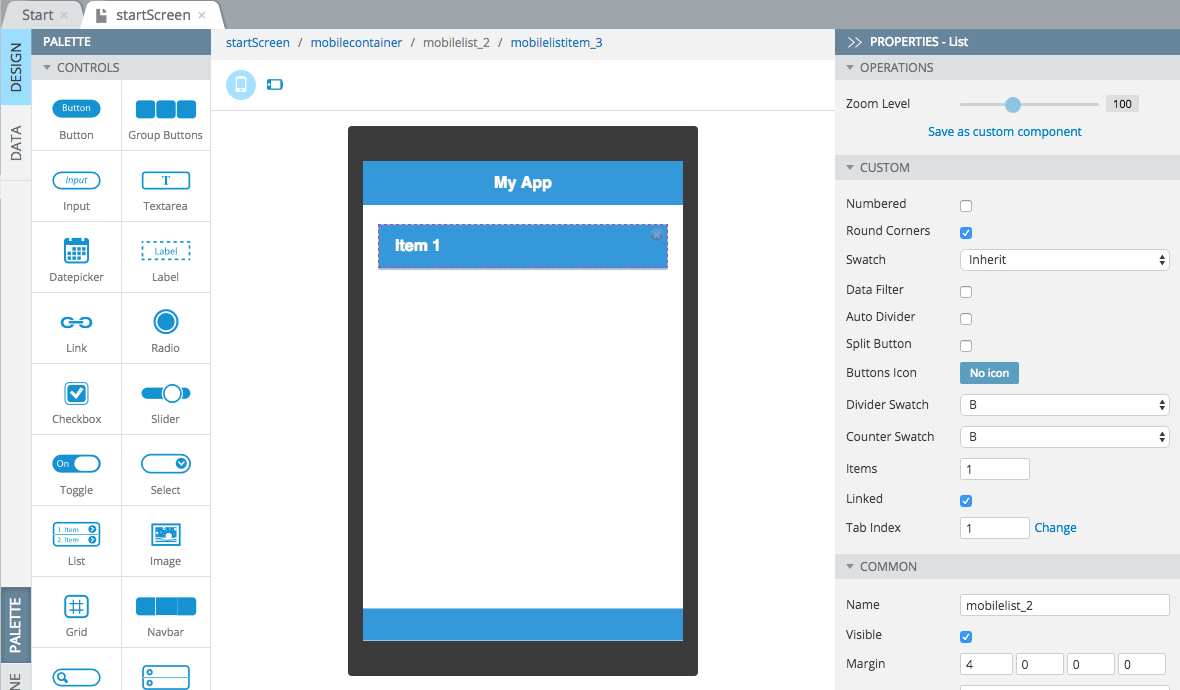
App UI.
Importing the Server Code Script
Now you are going to import the script you created as a service into the app.
- Click Create New > Backend Services > Server Code Service.
- Select the script you created.
- Click the Import selected services button.
The service will be imported. You can quickly test the service.
- Open the service, you will find it under the Services folder in the App Builder.
- Open the Test tab.
- Click the Test button to invoke the service. You should see the items you saved into the database.
There is one last step and that's to set the service response. After you have tested the script, click the Import as response button. This will use the sample JSON response as the response for the service. You can open the Response tab to see how it looks.
Next is to use the service on the page.
Mapping the Service to the UI
Now that you imported the service it's time to add the service to the page and map it to the page.
- In the startScreen editor, open the DATA view.
- For datasource select Service > loadGoodsService and click Add.
- It is a good idea to rename the default service name to: loadGoods.
- The service doesn't have any inputs thus you don't need to map Before send event (input).
- Click Mapping for Success event. This will allow you to map data from the service to the page.
- Using drag & drop, create the following mappings:
- $[i] to mobilelistitem_x.
- item to Text (under the list item).
- This mapping maps the collection of all items (goods) to the list. It will automatically list all the items returned by the service. And a particular item is mapped to the list Text property.
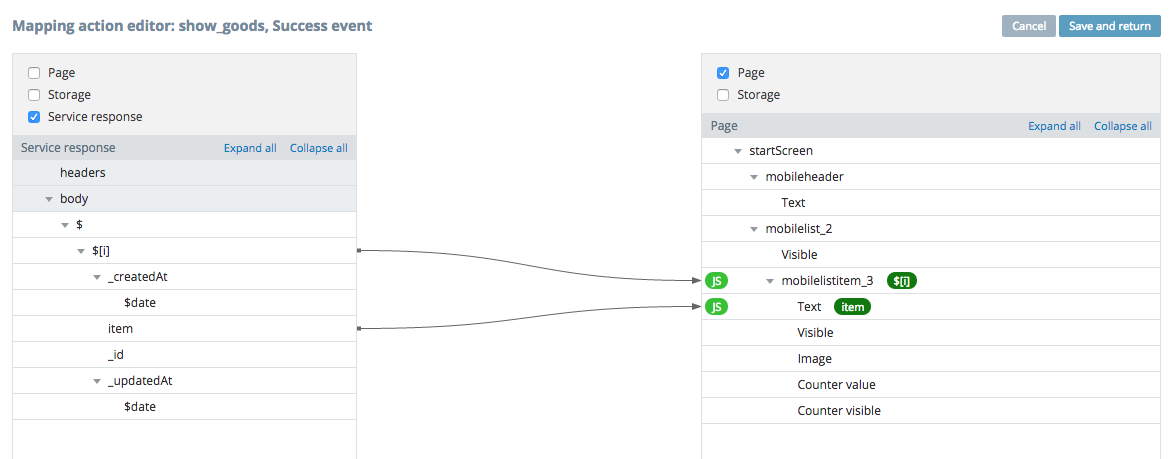
Service mapping.
- Once the mapping is done, click Save and return.
The last step is to invoke the service.
Invoking the Service
To invoke the service:
- Switch to the DESIGN view.
- Select startScreen in the page breadcrumbs.
- Open the EVENTS tab.
- For Component, select startScreen.
- For Event, select Page show.
- For Action, select Invoke service > loadGoods.
- Click Save to save all the changes.
You are now ready to test the app.
Testing the App
To test the app in the browser, click the TEST button in the toolbar. A new browser window will open and launch your app.
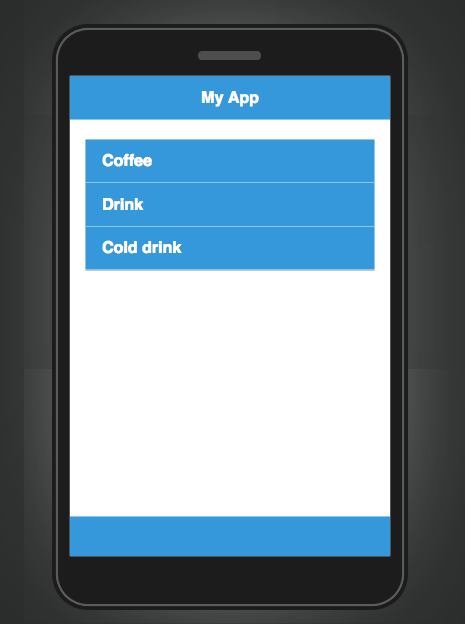
Testing the app.
Updated 7 months ago
