Platform Overview
This document gives an overview of the main tabs of the Appery.io platform dashboard and introduces its general functions
Introduction
Appery.io is a low-code app development platform that makes creating hybrid mobile apps, web apps, and progressive web apps (PWAs) really easy. It allows building mobile apps in several steps including:
- Choosing one of the available templates;
- Using drag-and-drop to design the UI;
- Connecting the database and services;
- Previewing your app;
- Deploying as either a mobile or web app.
In this document, you will find information about the main tabs of the Appery.io platform dashboard and the general functions you might need when backing up or otherwise managing your data.
Appery.io Dashboard Overview: Getting Started Video
We highly recommend that you also check this detailed video guide covering the main features of the Appery.io platform:
Platform Overview: High-Level
When you sign up or log in, the Appery.io platform dashboard opens.
There are several tabs on it – Apps, Databases, Server Code, Secure Proxy, API Express, Resources, and Account:
Page Header
The page header also has links for quick navigation between useful references and other services from Appery.io. For example, the What's new link will open the window with information about the most recent videos, the latest enhancements to Appery.io, quickstarts, and trending tutorials from Appery.io:
Apps Tab: Managing Projects
The Apps tab includes information about your projects, saved versions, people with whom you share the project, and about hosting on Appery.io.
Here you can:
- Create new projects.
- Open, test, rename, update, and delete projects created earlier.
- Make an app backup.
- Create project versions and restore the old version of the project.
- Invite people to share the project, or change the project owner.
- Publish your project to your custom domain or the Appery.io domain.
The left panel is the list of your apps with the labels indicating the framework the app was built with:
But if you are new to Appery.io, you will have no projects listed and will need to create your first app to see what's inside.
Appery.io Education Video Guide
It's also a great idea to check out our Education Video Guide where you will learn how to create a stunning UI for your first mobile app, how to add the needed features to it, debug and test it, and much more…
Project Information
If you already have some projects and plug-ins created under your account, you can access them by selecting the needed app (or the previously created private plugin .
As you move the mouse over the project name, the Open button appears. Click it to open your project for editing (you will be redirected to Appery.io Visual Builder).
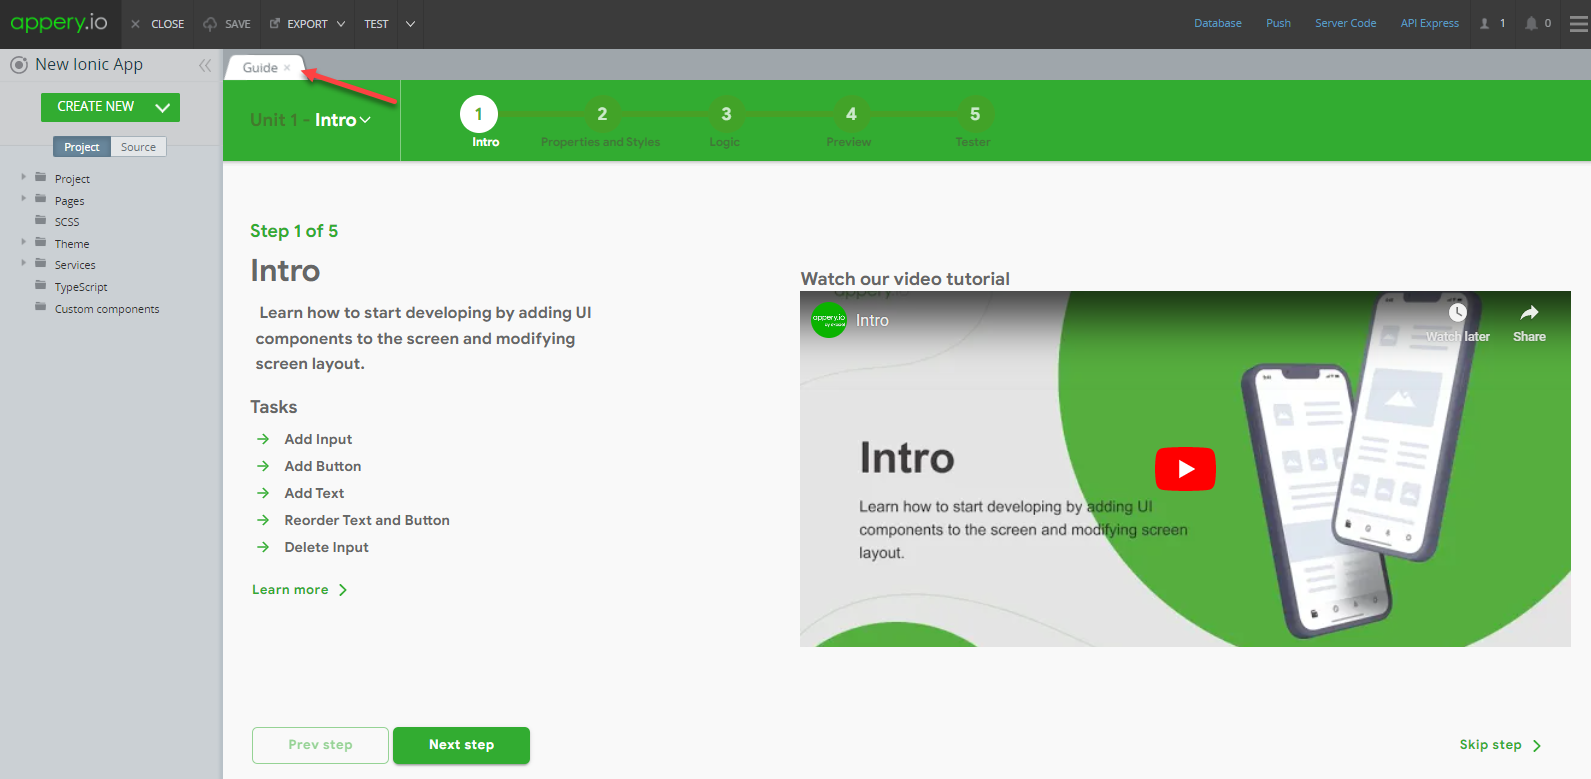
In a moment, the app opens and the first thing you will see is the Guide page where you can learn how to create a stunning UI for your very first mobile app, get help on how to add the needed features, debug and test it, and much more…
The main app frame includes information about the selected project. Here, you can also switch between General, Push Notifications, and Customer Console frames:
Permissions Tab
App Permissions
Note that only Admins can access the project Permissions tab where managing users and their permissions within this particular project is possible:
However, the user [email protected] (being a Developer on the project and the creator of this app) does not have access to the Permissions tab:
General Project Tab
The General frame consists of the following sections:
Project summary
The Project summary section contains the project name and some related data. You can also see the different options available for managing this project (Open, Test, Rename, Delete, Backup, Update, and Remote Debug):
From this section, the project can be opened, tested, renamed, deleted, updated, debugged remotely (to activate this option, select the Enable Weinre debugging check box under the project App settings > General tab) or saved for later use (backed up) with further restoring it or even transferring to another account if necessary.
ATTENTION!
Deleting cannot be undone later.
Versions
The Versions section contains information about versions of the project. This area contains the following information:
- Reversed order number;
- Creation date and time;
- User who created the version;
- Version comment;
- Links to restore or delete the version. When you click any link, a pop-up opens where you can confirm or cancel the action.
In this section, you can create a version of your current project. Click New version to create a new app version. It is a good idea to enter a version comment to help you identify the version later.
Tip!
It’s always a good idea to make app versions as you go along during your development so that you can experiment with your project safely.
Later, you will be able to go to the General tab, scroll down to the Versions section, restore the necessary app version, and create another project backup if needed.
App Versions Number
The number of versions is plan-dependent, so check our Pricing table to learn how many versions can be created under your plan.
If you haven’t created a version yet, the Versions area contains information about the current user, and the date and time the project was last saved.
To create a version, type the version name and click New Version.
When you restore the version, you’ll lose the changes made after the last version was saved. If you created a new version before restoring one of the earlier saved versions, no changes are lost and you can restore them later.
Hosting
The Hosting section allows you to publish your app. This area also contains information about the domains where the project was published.
Trial plan Limitation
The option of Publishing on Appery.io is disabled for Trial plan users.
This area has a field for Appery.io hosting – publishing to the custom domain and/or to the app_name.app.appery.io domain (for more detailed information check this link).
Click Publish to publish the app and update it after editing:
Click Unpublish to stop hosting the app:
When publishing is completed, you can choose to share your app by copying the link or selecting among several social sharing options:
Webhooks
More information on Webhooks can be found here.
Share with support
The section Share with support is placed at the bottom of the page:
When a user shares (turns the toggle on), the specified resource appears in the admin section. This feature can be used by the support team for viewing and accessing all resources (apps, databases, server scripts, etc) shared.
When a user unshares (turns the toggle off), the specified resource can’t be accessed for viewing by the support.
Making Project Backups
By making a backup of an app you can save all the created pages with their UI and services, enabled plugins, libraries versions, keys and binaries, themes, JavaScript, CSS, etc. The structure of the application also remains unchanged.
Maximum App Backup Size
Appery.io has a limitation for backups. The maximum app backup size you can upload is 60MB.
Therefore, you should be careful with the size of your applications (with a lot of local media files) and if your backup file size exceeds the max. app backup size that can be later re-uploaded. Before initiating the backup process, please check if your project contains large media files and delete them or reduce their size. Also, you can consider keeping them in the cloud and upload them to your project separately.
However, if the project size doesn't exceed this limit, you can be sure all your data will be kept safe.
And all you need to do is to select an app under the Apps tab list, go to its General tab, and click Backup:
A new window opens allowing you to select where you would like to save your backup.
App Backups Number
The number of allowed backups is plan-dependent, so check our Pricing table to learn how many app backups can be created under your plan.
Bundle Project Backup
If your app has integrated backend services like Databases, Server Code, API Express, or Proxies, you can export this app bundled with all its dependencies. This allows making a full copy of the existing app in just a few clicks with keeping all the service settings and values in place.
With the option of creating a bundle project backup, there is no need to regenerate all the backend data anew.
Note!
Please note that such custom dependent data like push configuration settings (certificates, etc.), Google Services JSON File, Firebase Admin SDK JSON File, API Express Security Providers, etc. are NOT added to the build and you will need to define them separately.
To generate the bundle project backup, select the needed app under the Apps tab list, go to its General tab, and click Backup.
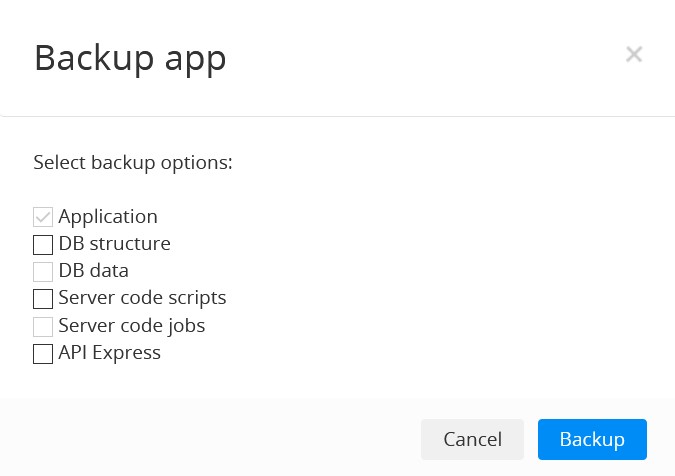
If your app has some backend, a new window will open and you will be offered to check the backup options you would like to save:
Now, all you need to do is select the backend services you would like to save with the project and confirm your selection.
You will see the message App export has been queued. You will be notified by email when ready. After a while, you can check your inbox for the email with the link to the generated bundle project backup.
Important Note!
Please be informed that the source application and the application you created from the backup will not be connected and not dependent on each other in any way.
Now, you are free to save it to your drive for further use or recreate the app with all its dependencies under the same account (so that you have two different working copies of the same app), or even create an app from this backup under a different Appery.io account.
Note!
Please be aware that it is NOT recommended that you make any changes (for example, renaming or replace elements, etc.) to the exported backup file - this might result in a corrupt file with no possibility to unpack it in the future.
Creating from Project Backups
Maximum App Backup Size
Appery.io has a limitation for backups. The maximum app backup size you can upload is 60000000.
Therefore, you should be careful with the size of your applications (with a lot of local media files). But if the app size doesn't exceed this limit, you can be sure all your data will be kept safe.
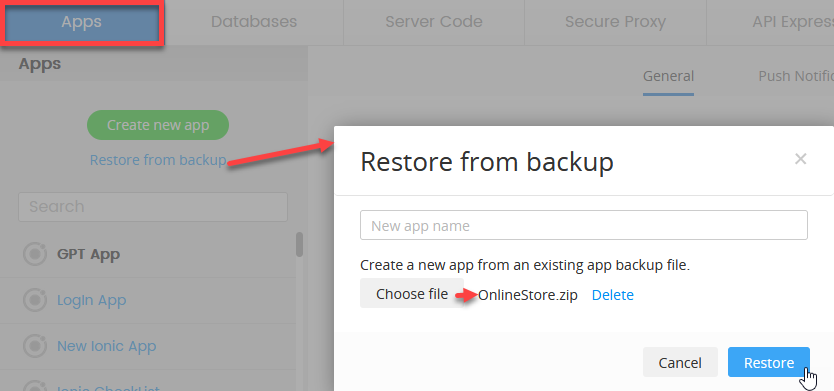
Later, when you decide to recreate your saved project, under the Apps tab, click the link under the Create new app button. In the new window, enter the project name, choose the backup file saved on your drive, and confirm the action:
Important note!
We highly recommend that you always save all your custom generated data like Apple provisioning profiles or those involving 3rd party Push notification providers like Firebase Cloud Messaging (FCM) and legacy Google Cloud Messaging (GCM).
Importing Saved Data Back
Importing other saved data is even easier.
Just select the appropriate platform tab (Apps, Databases, or API Express) and click the green button Create new …. In the new window, choose the previously saved backup file to be imported, name it, and hit Create.
For Server Code, you will need to specify what resource you are creating: script (Create script) or library (Create library) and then hit Load from file.
Important note!
Please be aware that you will need to make backups under the corresponding tabs and import them back under the same tabs.
Check below how to create a new database from a backup:
You will need to wait a bit and then…
Congratulations! You’re done!
Managing Private Plugins
Under the Apps tab, you can also access the private plugins you created earlier:
Find more details about how to work with private plugins in this document.
Platform Backend Tabs
The below tabs provide tools for setting up a backend for your Appery.io projects and the detailed information can be found under the corresponding links:
- Databases tab stores app data;
- Server Code is used for writing app logic on the server using JavaScript;
- Secure Proxy is used for creating a service used for securing sensitive data such as an API key by keeping it only in the database and not in a mobile application;
- API Express is used for exposing enterprise data sources such as an
SQL
database orSOAP
service via REST APIs.
You can also click on the corresponding link in the App Visual Builder Toolbar to be redirected to the corresponding console: Database, Push, Server Code, or API Express:
Managing Account Resources
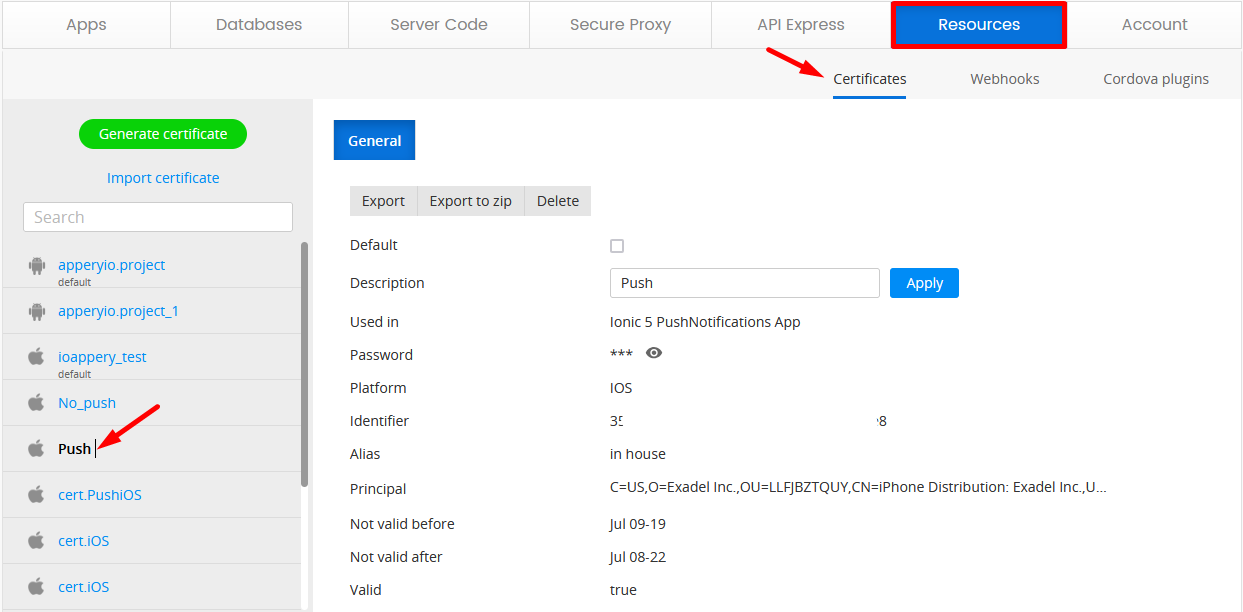
The Resources tab provides access to the resources saved under your account such as certificates, webhooks, and Cordova plug-ins. Selecting the corresponding tab allows access to the management options among which are exporting, exporting to ZIP, deleting, updating, etc., depending on the resource selected:
Find more details about how to work with:
- Certificates: https://docs.appery.io/docs/appexport-certificate-management
- Webhooks: https://docs.appery.io/docs/webhooks-overview
- Cordova plug-ins: https://docs.appery.io/docs/cordova-overview.
Managing Appery.io Account Information
To view/update your account information, go to the Account tab:
There, many options are available such as changing/canceling plans, deleting the account, creating teams, purchasing support packs, etc. For more details, check here.
Updated about 1 month ago