Duties App Template
Build your own duties management app using our ready-to-go Duties app template.
Introduction
This document describes our customizable Duties app template that is designed to efficiently manage teamwork and can be used on any device:
As a bonus, we provide detailed explanations for those who are interested in customizing the offered app template.
Using Duties App Template
No special knowledge or experience is required to use our Duties app template — just follow the simple steps below to install the app and enjoy low-code development with Appery.io!
Important!Please rest assured that you are the creator and you are the only owner of this application (actually, like any other app created with Appery.io).
For more details, you can check our Copyright, Trademark, and Content Ownership section here.
Creating App from Template
- From the Apps tab, click Create new app.
- Select Duties, enter the name for your project (for example,Duties App, and click the Create button.
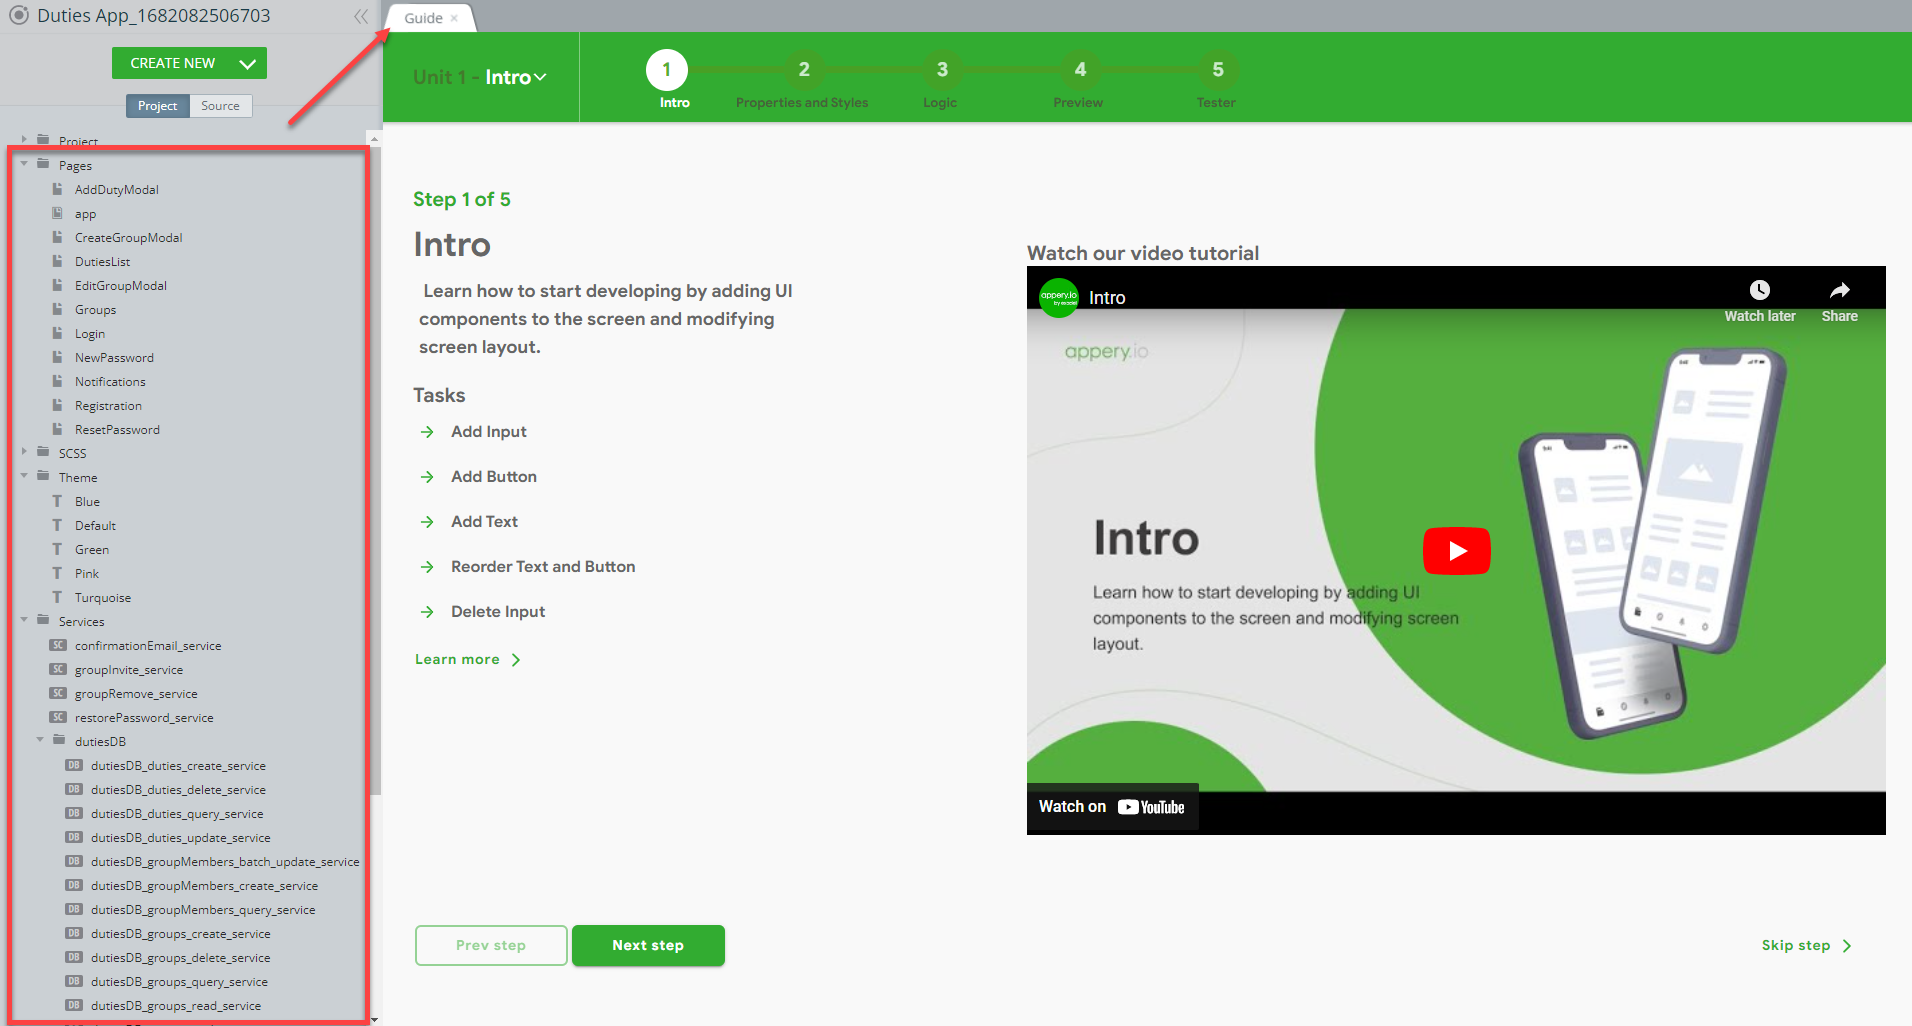
In a moment, refresh your browser to see that the app is created and the first thing you can see is our App Builder Educational Video Guide page with the Project View section on the left where all the predefined project data can be found.
Actually, the application is ready to be used and does not require any additional effort on your part so let's test the app at work and see what it's all about.
Click the TEST button in the app Toolbar; you will be redirected to the tab with the app preview.
Note!If you are launching your project for the first time, please allow some time for the app preview to load.
Registering Account
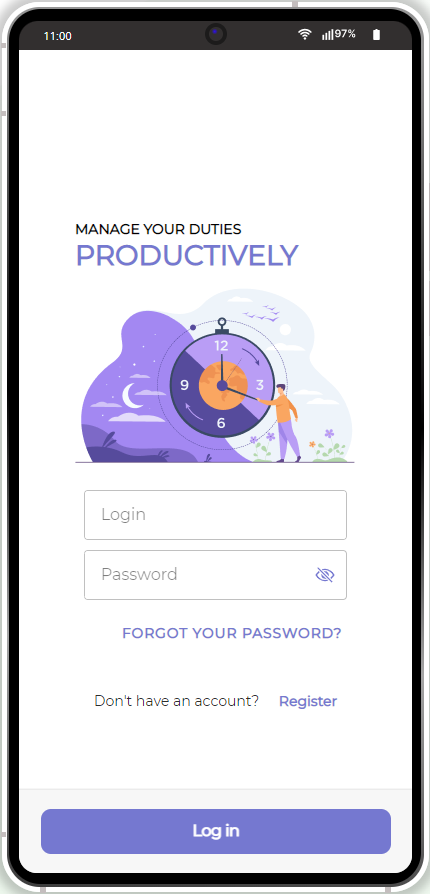
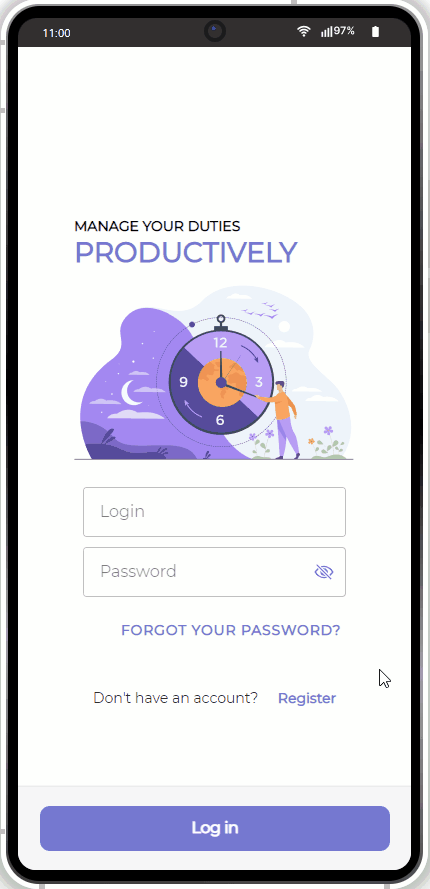
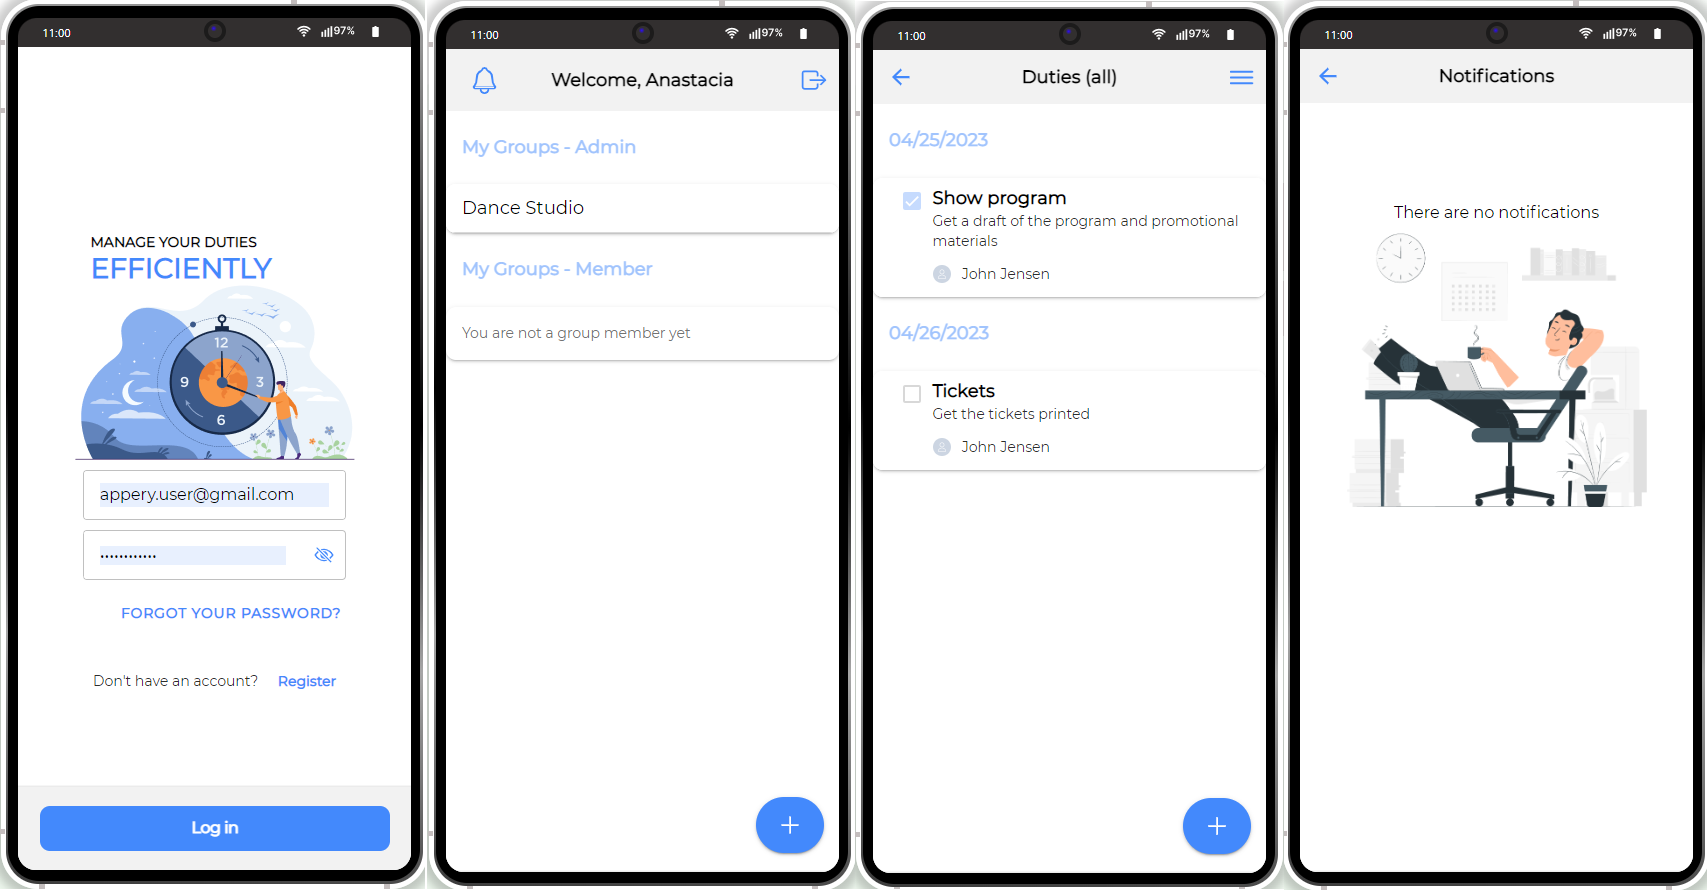
Once loaded, the application Login page will launch in the preview, looking like this:
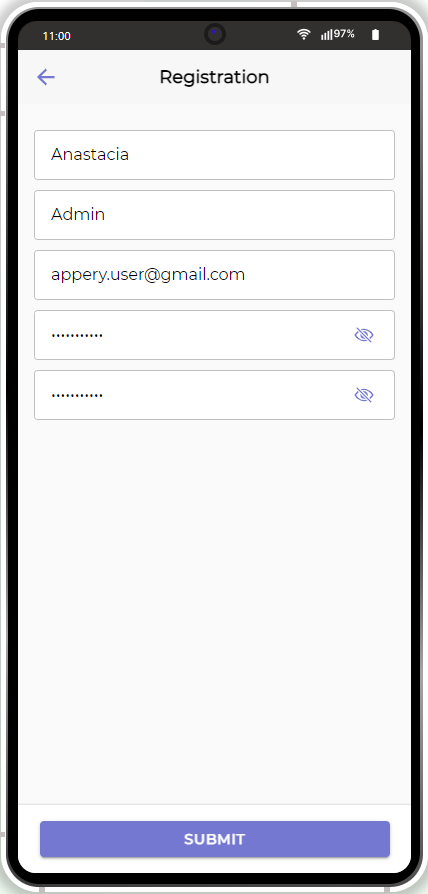
As a new app user, you will need to register an account before you can start using the app. So, click the corresponding link and provide registration data: your first and last names, email address, and password:
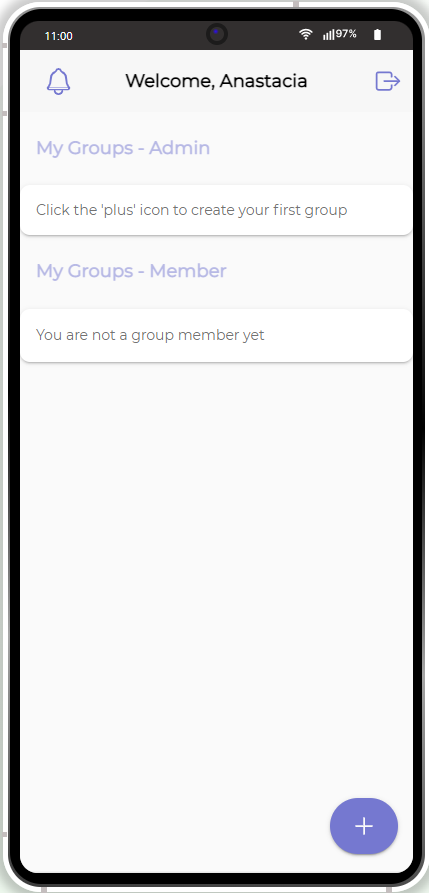
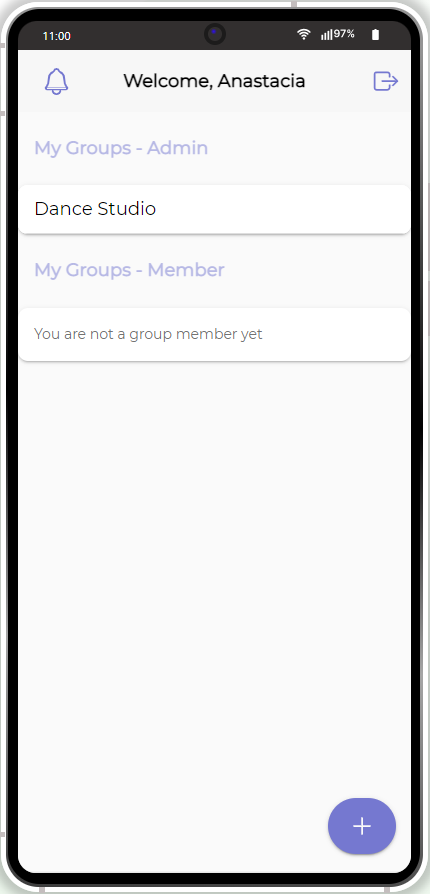
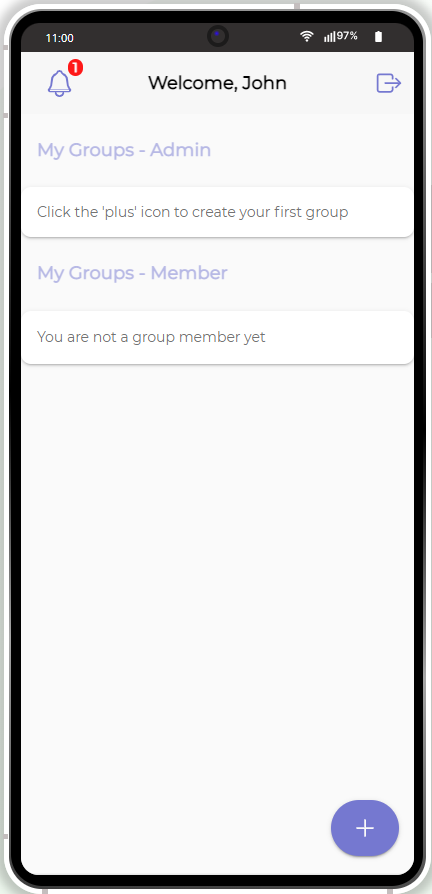
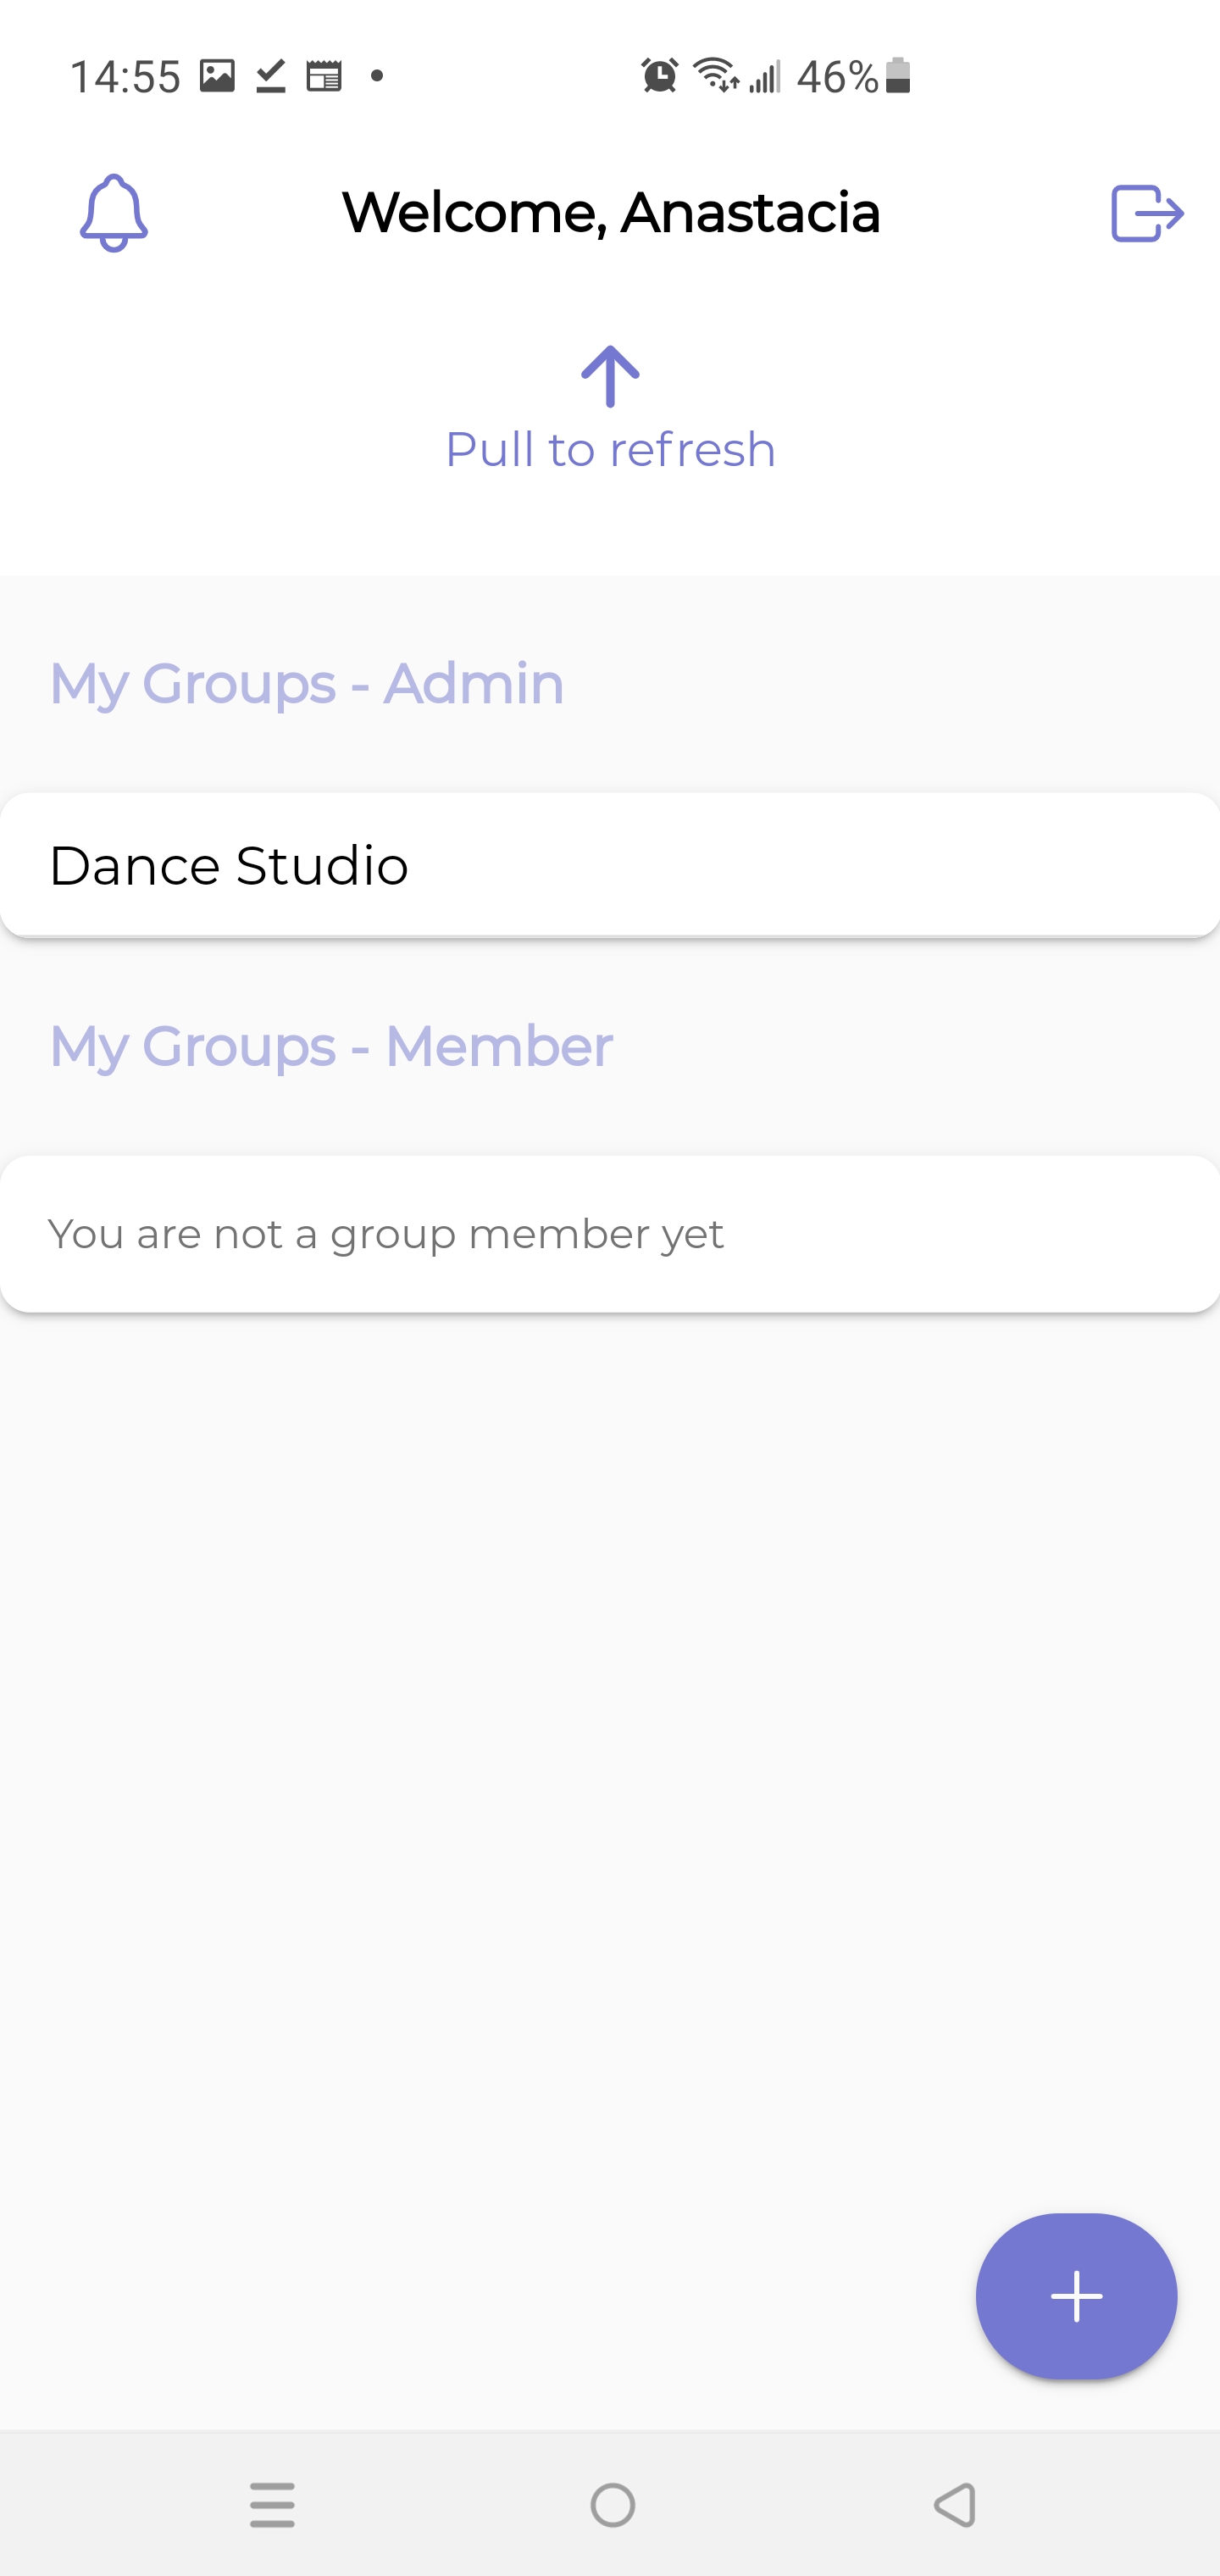
Once registered, you will be redirected to the Groups page. Here, you can see the current list of the groups where you can be either an Admin or a Member. And it's natural that a new user can see the empty list:
Admin Role
To become a team manager, Admin must first create a group by inviting users to their team.
Creating Groups
- Start by clicking the + button to initiate creating the first group that you will administer.
- Name your group and enter the email address of the user you want to invite:

- After you hit CREATE, the created group will appear on the Groups page list, and the invitation to join the group will be sent to the provided email address:
- The next step is to click the group to open the duties board where the duties can be added and assigned among the group members:
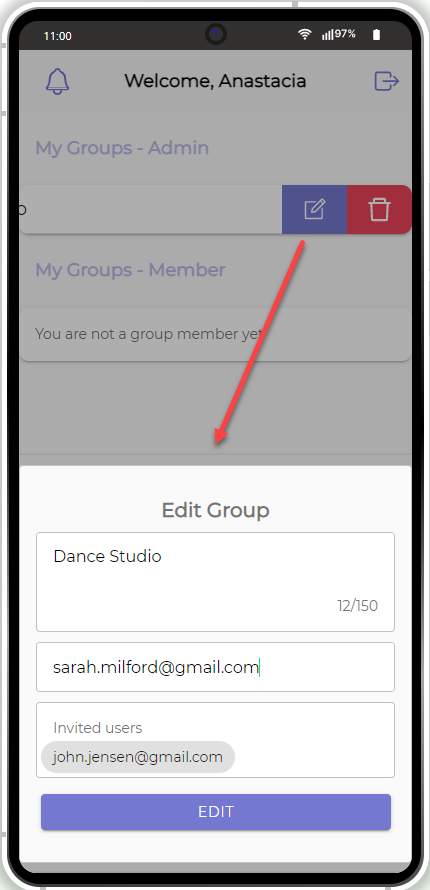
Admin can also edit or delete their group(s) by swiping left and selecting the needed option:
- To invite another user to this group, click the edit button and, in the modal window, enter the new invitee`s email address and confirm:
Now, after the user accepts your invitation, new duties entries can be assigned to this user as well.
Adding Duties
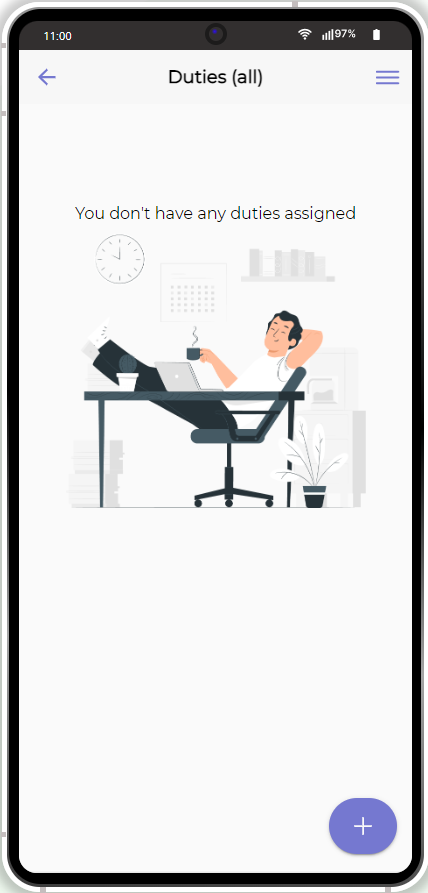
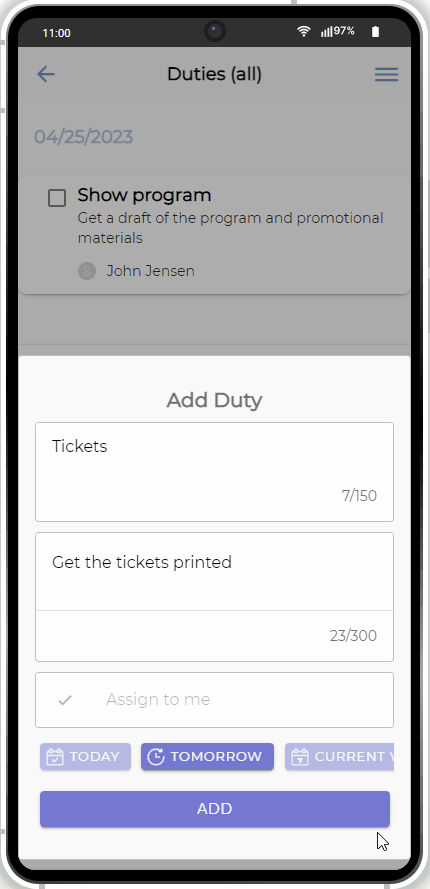
- Our duties board is empty, so let's click the + button to create the first duty entry.
- The Add Duty screen opens where the duty name, description, and due time should be provided. Also, select whether you want to assign it to your group member(s) (available if there are any who already accepted the invite) or would rather do it yourself:
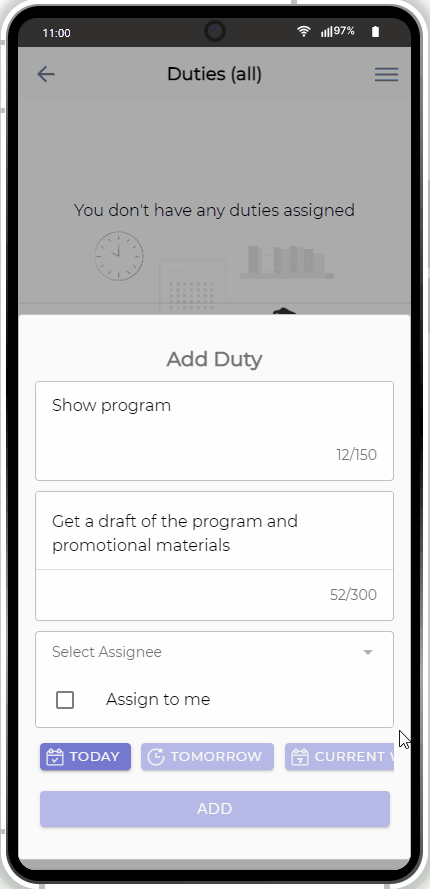
Assigning duties to your group members is possible only after they have accepted your invitation.
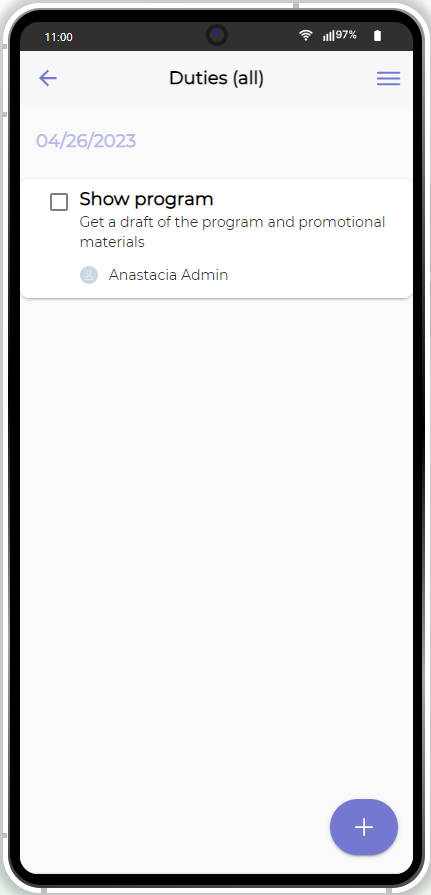
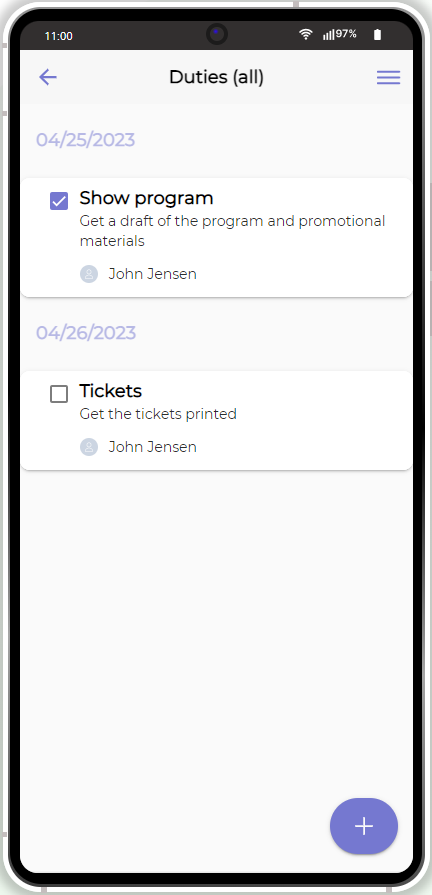
- After you confirm, the duty entry will get listed on the board where you can review it:
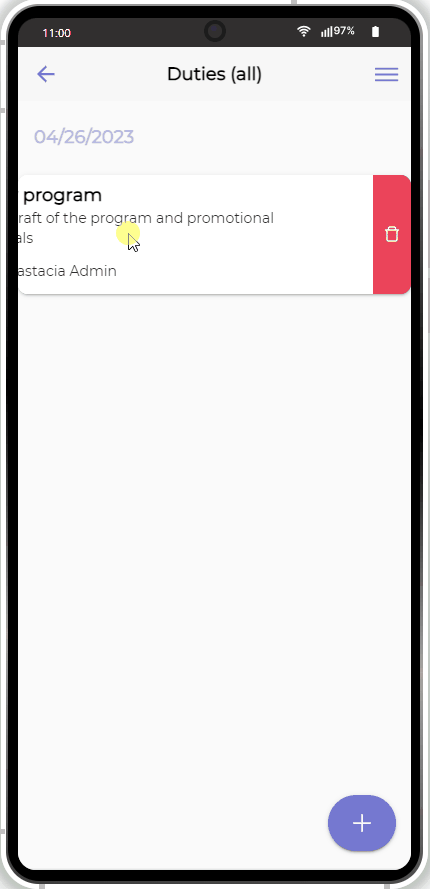
- As the app Admin, you can also choose to mark the entry done (if it was assigned to you) or delete it by swiping it left and then confirming the action:
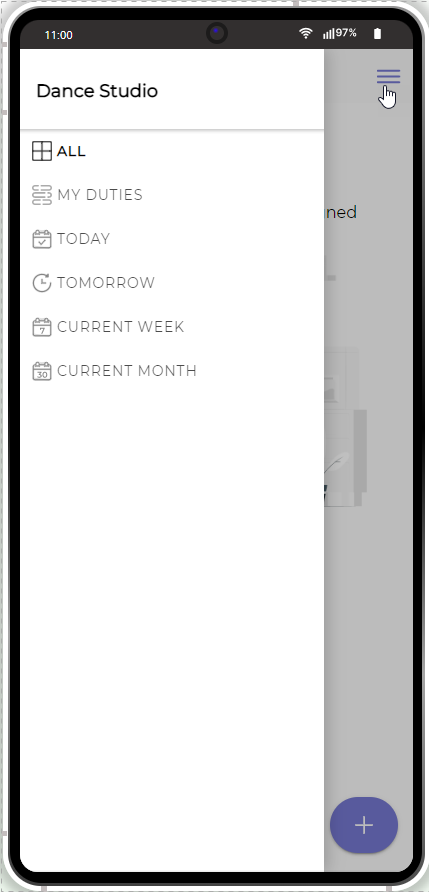
Also, there is a menu (three lines) button in the upper right corner of the duties board where you can review all pending duties assigned to this group and, if needed, filter the duties lists:
Member Role
- As an invitee, who decided to join the group, you will need to first sign up for the app (if you are not already registered) using your email address.
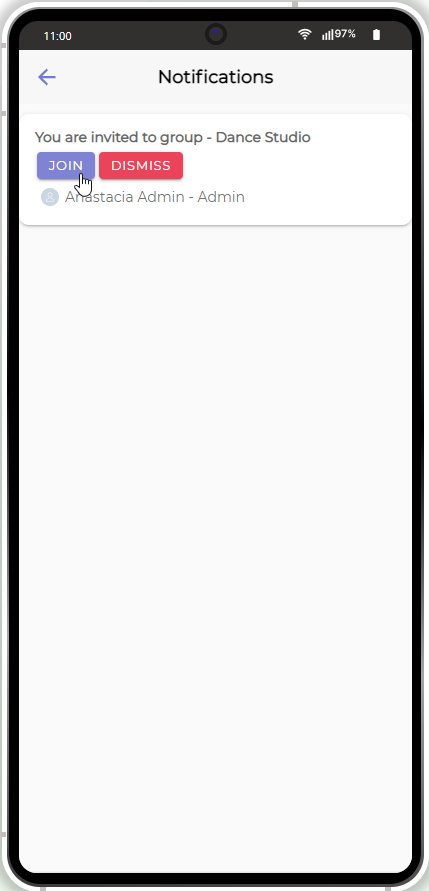
- After you log in, you can see that the notification button in the upper left corner indicates there is some message sent to you. Click it to see the invitation:
- Now, click JOIN to accept (or DISMISS to reject) it:
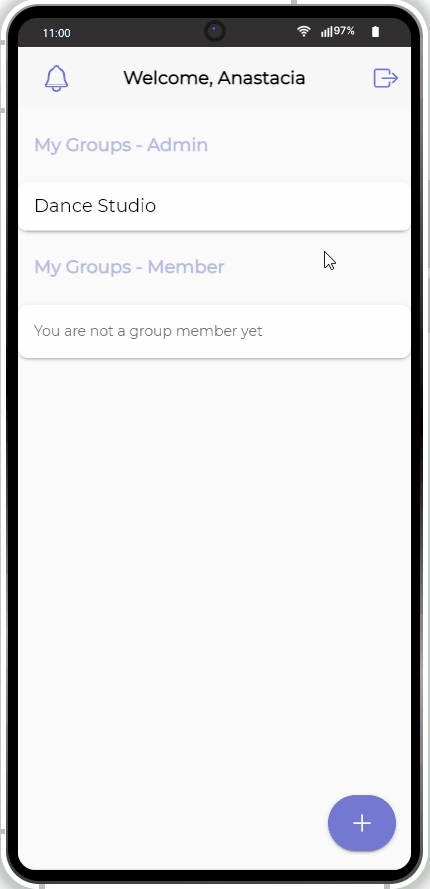
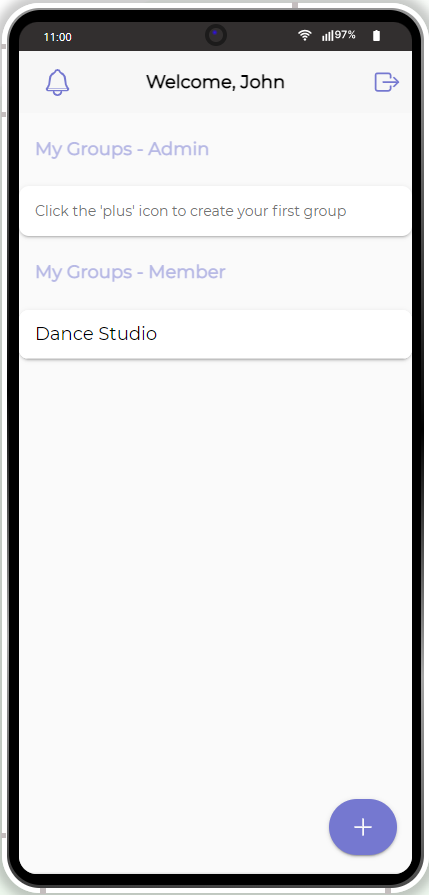
- Now, you can see that you have successfully joined the group Dance Studio:
While being the group member you can still initiate building your own group where you will be the Admin. To do it, click the + button, name your group, and send invites.
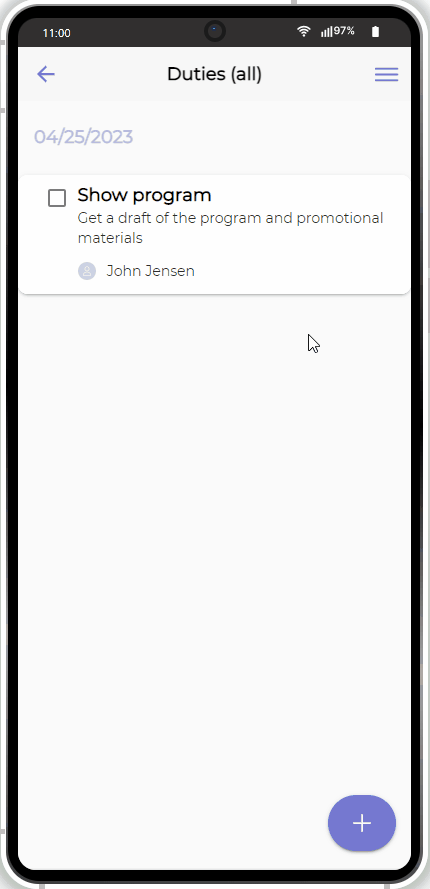
- Select the group to open the duties board.
- In this screen, only one duty entry is listed and you can mark it done by checking the check box:
Adding duties to the group, modifying and/or deleting them can be done by Admin only.
- You can also choose to create another duty entry from this view; to do it, click the + button.
- On the Add Duty screen, provide the name, description, and due time, then click ADD:
Note, that as an invited group member, you cannot assign it to anybody, only to yourself.
- The entry will be added to the group duties board with the indication that you are responsible for this assignment:
- When you are done with this duty, you can also check the corresponding check box.
More Template Options
In addition to its main functionality - adding duties and assigning them to specific users - our Duties app template offers some extra benefits like the Pull to Refresh feature or the ability to send notifications when a device goes offline (or back online), etc.
Pull to Refresh feature
A very handy tool to use when several app users need to efficiently coordinate their work by adding new duties simultaneously: this way, every group member is kept updated:
App Offline/Online Notifications
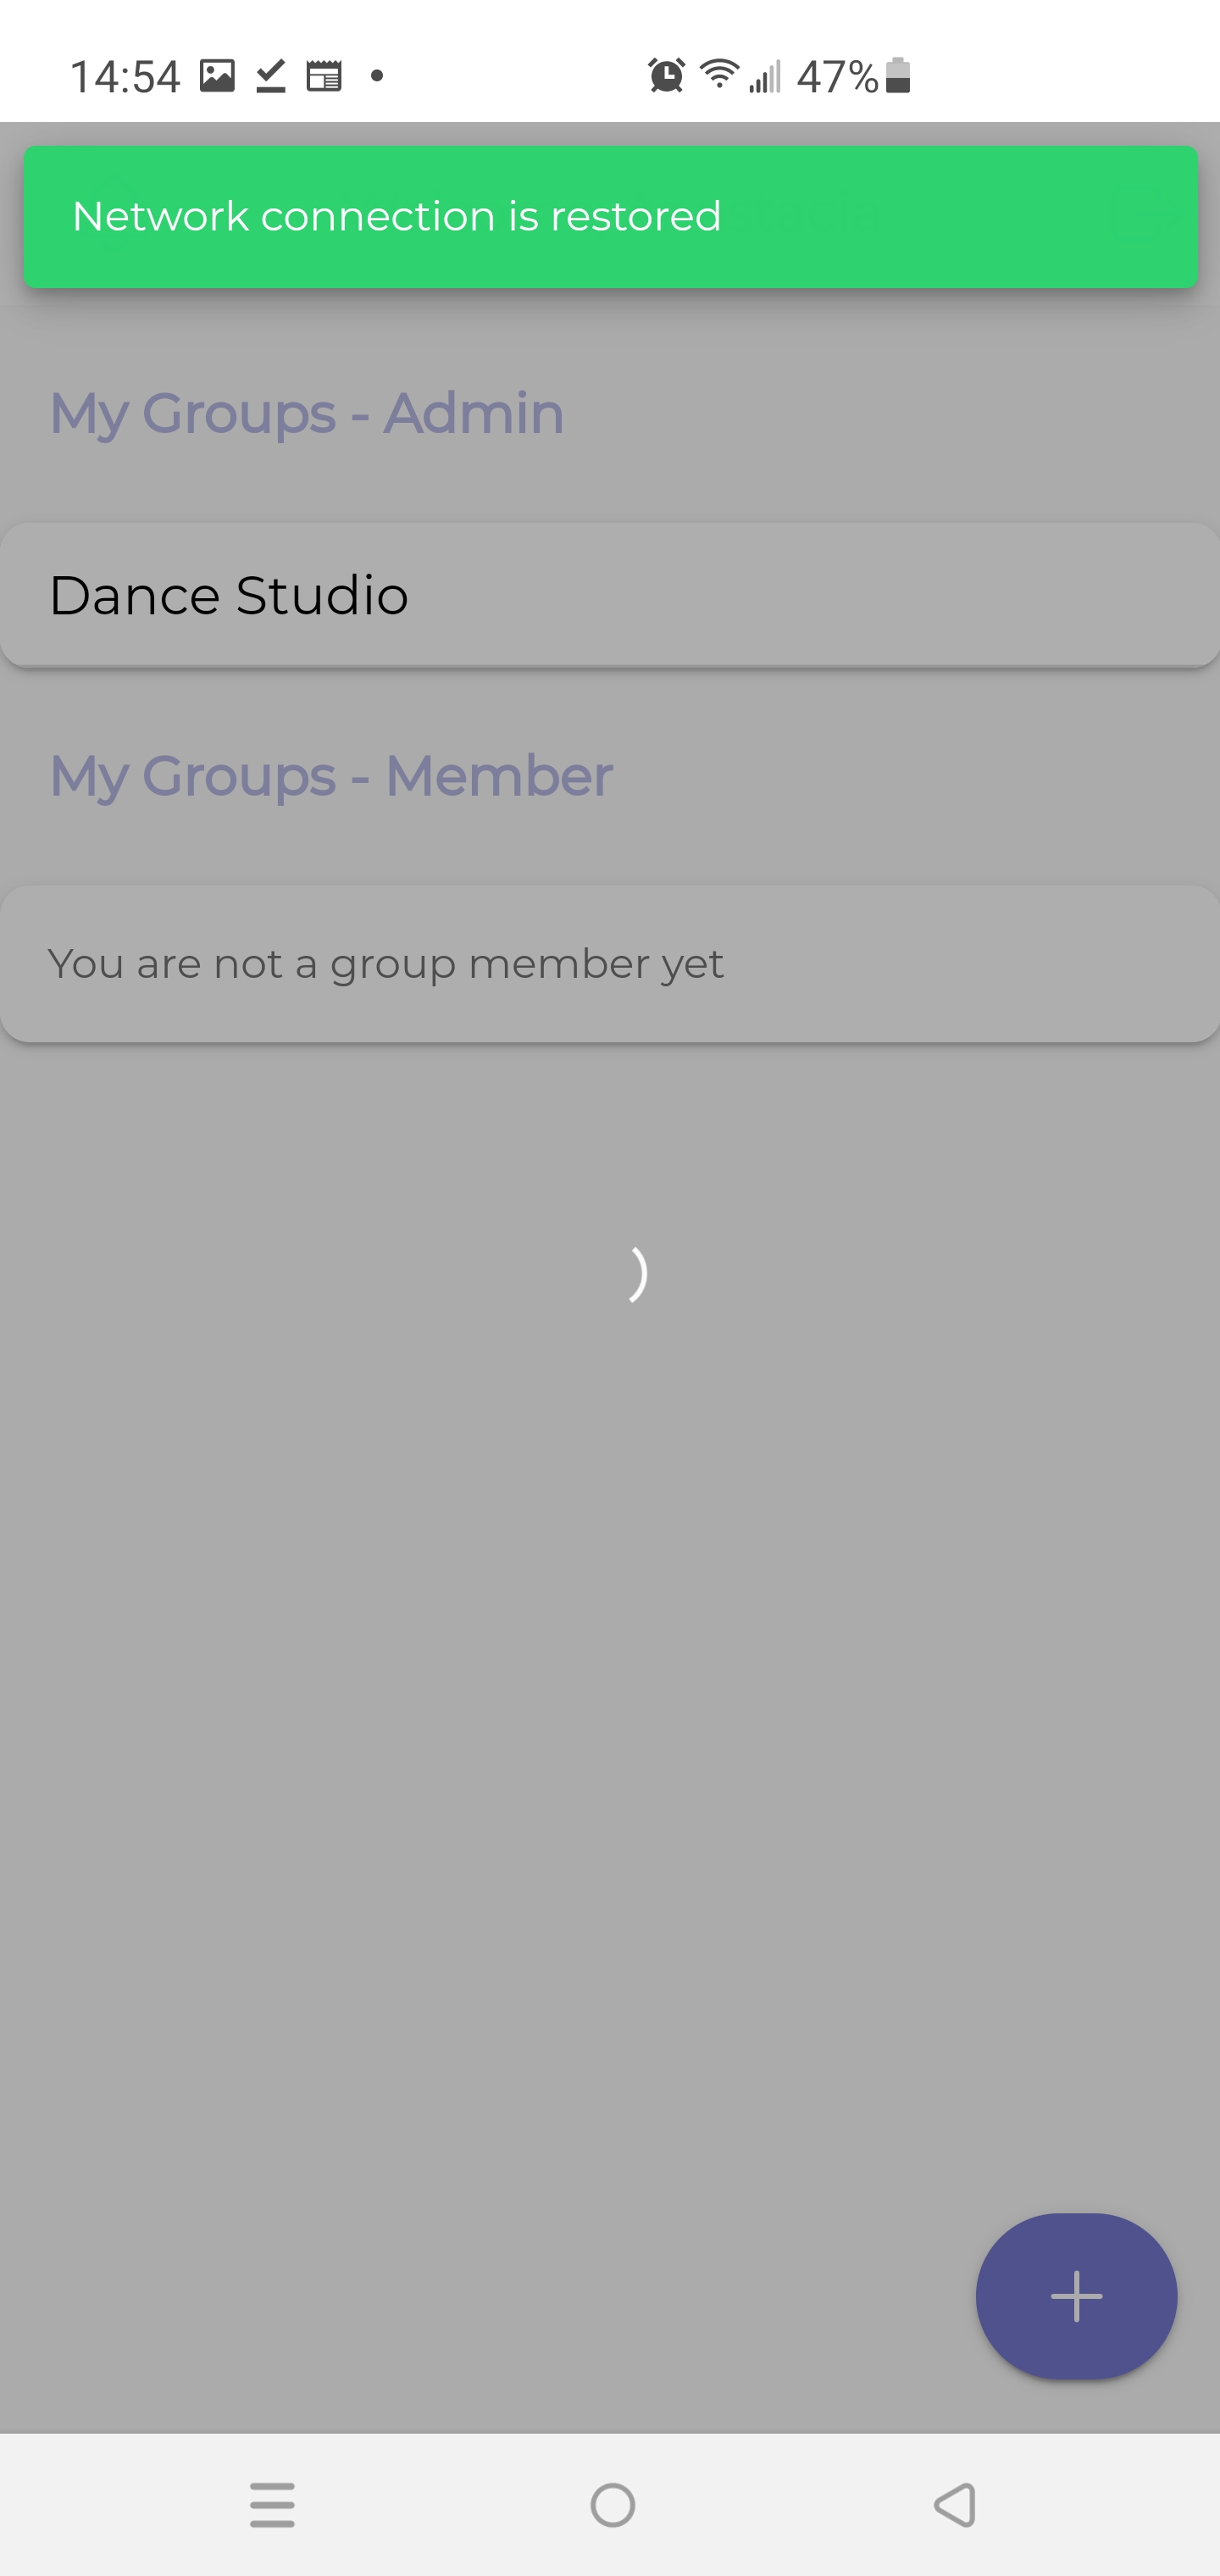
With this feature, you will be instantly notified when your device connection goes offline:
Also, after your device automatically reconnects, you will be informed that your network connection is restored:
Personalizing Profile
Before the app can be used efficiently, some personalization changes need to be made to the server code library that manages sending confirmation emails, inserting the correct app store links, etc.
- Click the Server Code link located to the right of the top app Toolbar to open the Server Code dashboard in a new window so that you can now work with it without even closing the project.
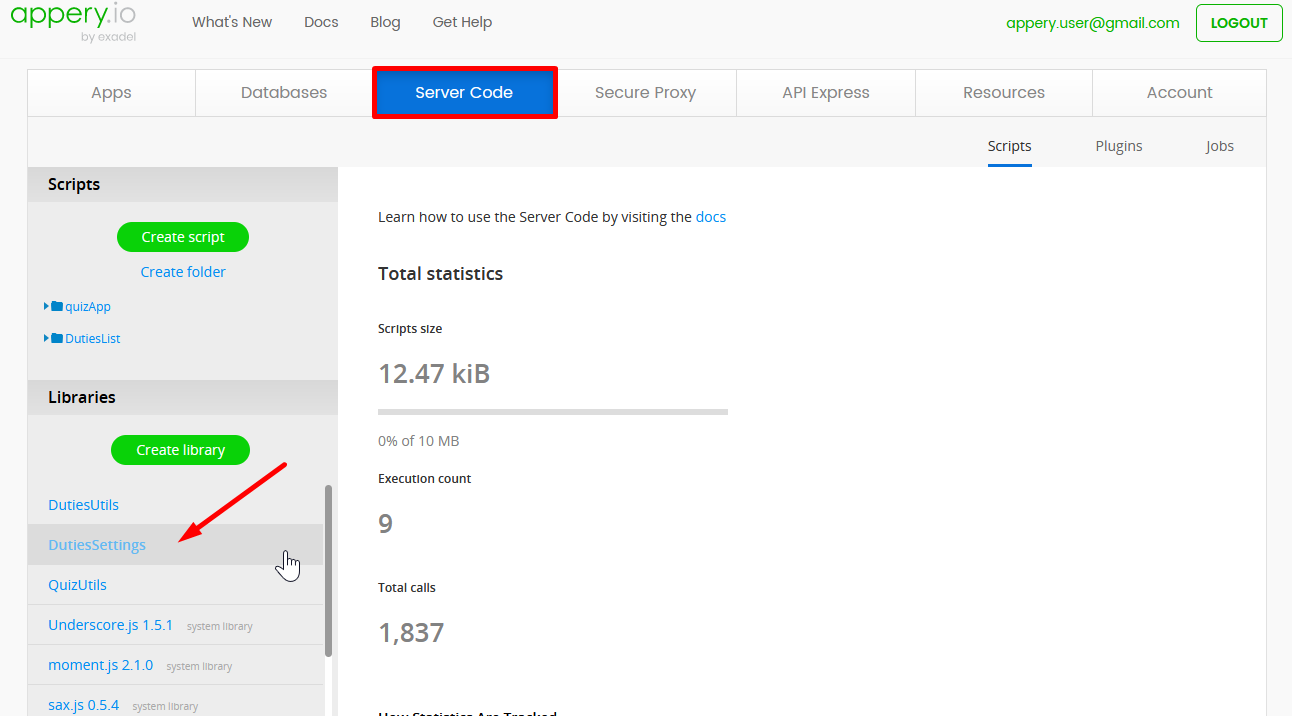
- On the Server Code page, select DutiesSettings to open the library:
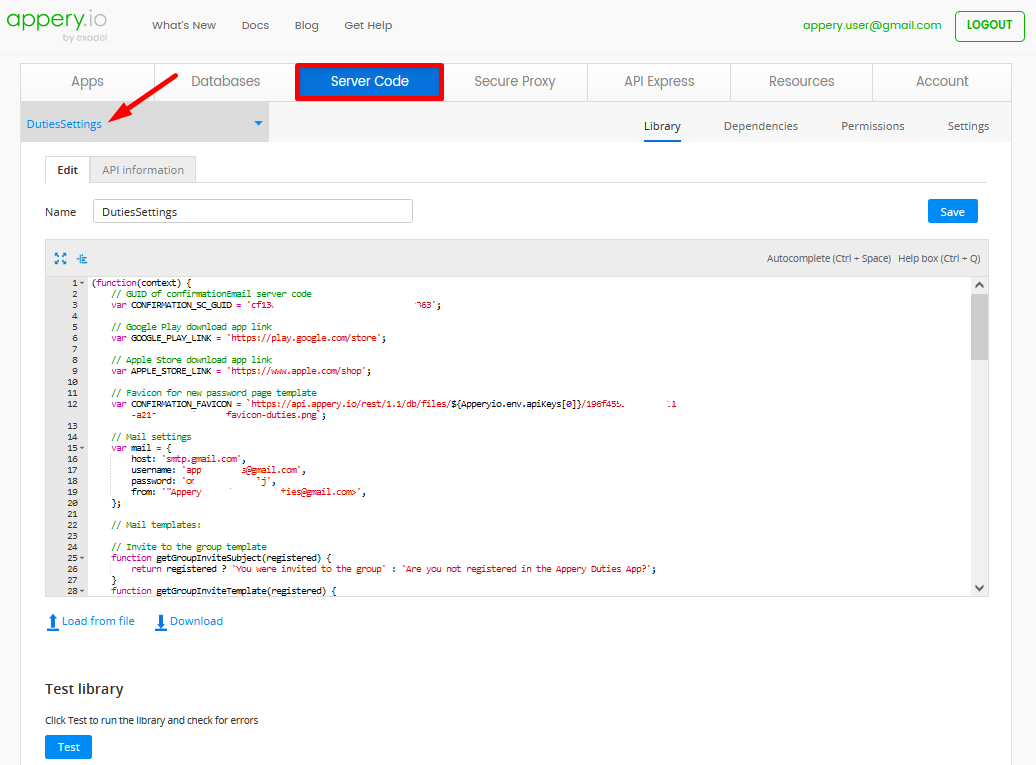
- Now, go to its code editor to proceed with personalizing the needed fields by replacing the default values with your custom ones:

1). GUID of confirmationEmail server code
Provide the valid GUID (can be found in the browser address bar)
2). Google Play download app link
Enter the link to your app published on Google Play
3). Apple Store download app link
Enter the link to your app published on App Store
4). Favicon for new password page template
If needed, you can upload your custom favicon to be shown in the app.
Example
For example, you can replace the default favicon added to the app database.
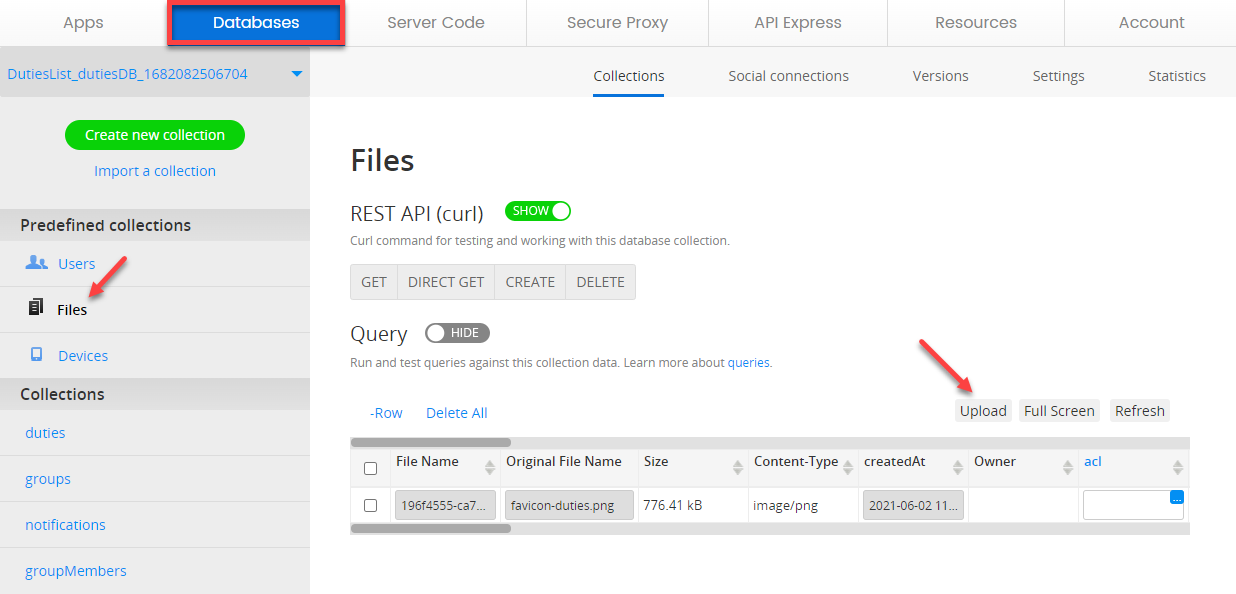
- To do it, click the Database link located to the right of the top app Toolbar to open the Databases dashboard in a new window.
- Select the autogenerated DutiesList_dutiesDB database, then click its Files predefined collection.
- Now, click Upload to select the needed file from your drive:
When done, you can go back to the code editor and provide the path to the newly uploaded file.
5). Mail settings
Provide your valid email settings.
6). Mail templates
Customize the templates of the emails sent to the app users. The library has several predefined templates all of which can be modified:
- Invite to the group template
- Remove from group template
- Reset password template
- New password page template
FORGOT YOUR PASSWORD? FeatureNote that the FORGOT YOUR PASSWORD? feature is the only one that cannot be functional unless properly defined and will not work out-of-the-box.
Customizing OptionsFor this template, many customization options are also available like changing the app color themes, launch icons and screens, customizing app pages, etc.
If interested, check out the instructions in the Customizing App Template section below or watch this video to learn how to do it.
Reviewing App Backend
The suggested template goes with the integrated backend services like Server Code (discussed earlier) and Appery.io Database.
While the Appery.io Server Code services provide correct serverside interactions, Appery.io Database services are responsible for keeping all app data.
Let's take a quick look at what the app database looks like from the inside.
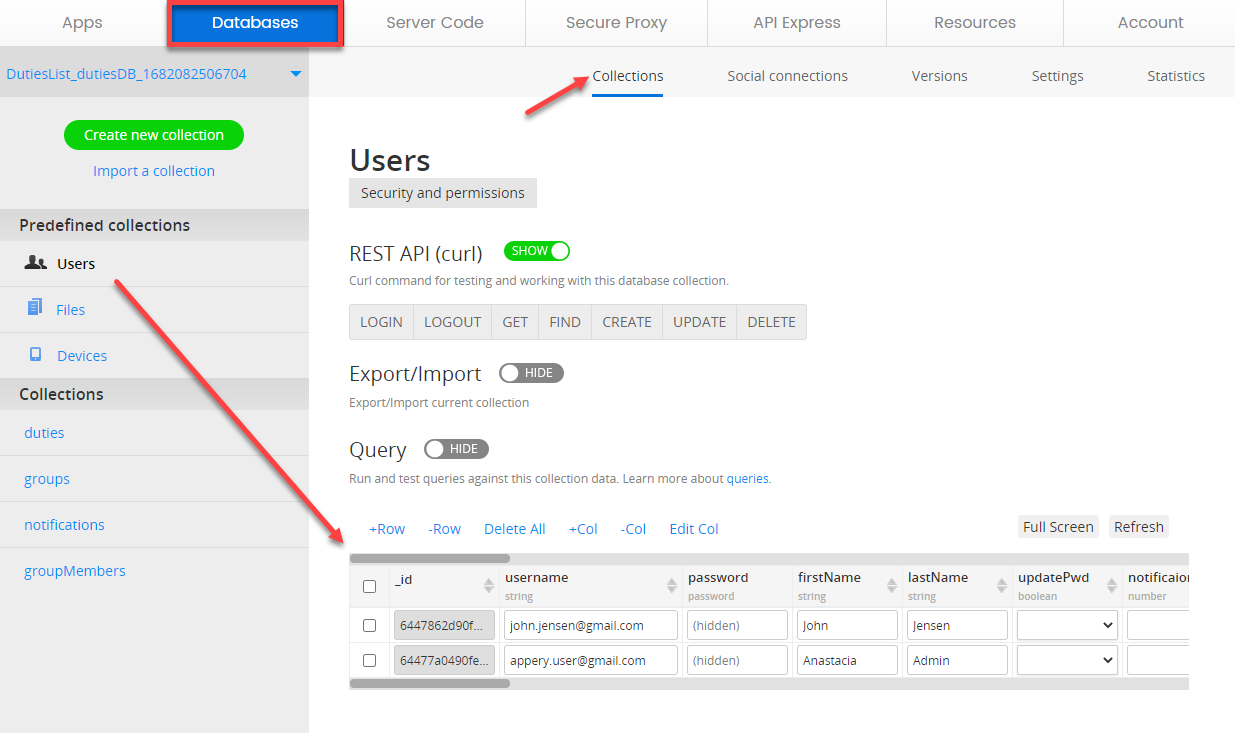
- Click the Database link located to the right of the top app Toolbar to open the Databases dashboard in a new window so that you can now review it without even closing the project:

- On the Databases page, click DutiesList_dutiesDB to open the database:

- When in the database, click on the Collections tab to access the default user records organized in the Users predefined collection and check that there are records of the users registered for your app:
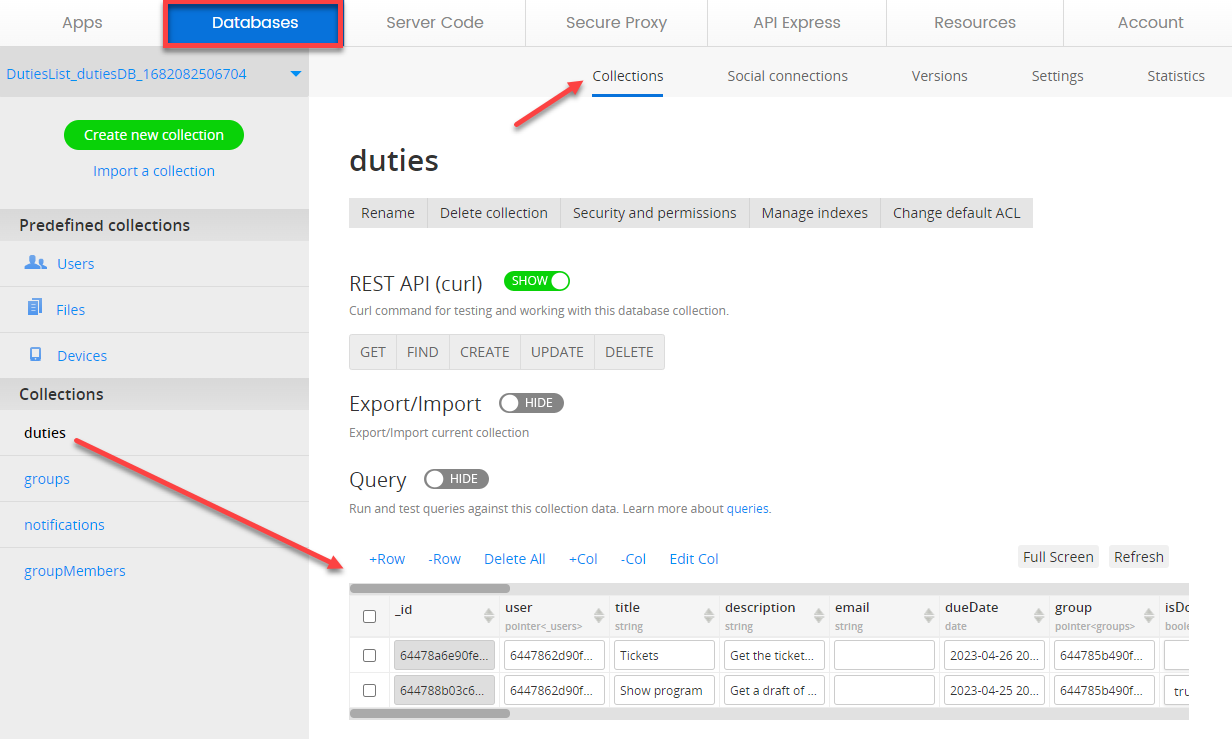
- Any other database collection can be reviewed (and modified if needed) in a similar way.
For example, to review the list of duties that have already been added to the app, select the duties custom collection:
Customizing App Template
It is natural that being a template, our Duties App offers many customization options. So, if you are interested in customizing this template, we highly recommend that you checked out the instructions in this section.
Also, you can watch this video for some tips on how it can be modified according to your needs:
Note that our Services Team will be happy to assist you in building the application you need. So, if you require professional help with additional customizing or debugging your app code and/or logic, you can consider purchasing one of our Support Packs to get the highest priority support.
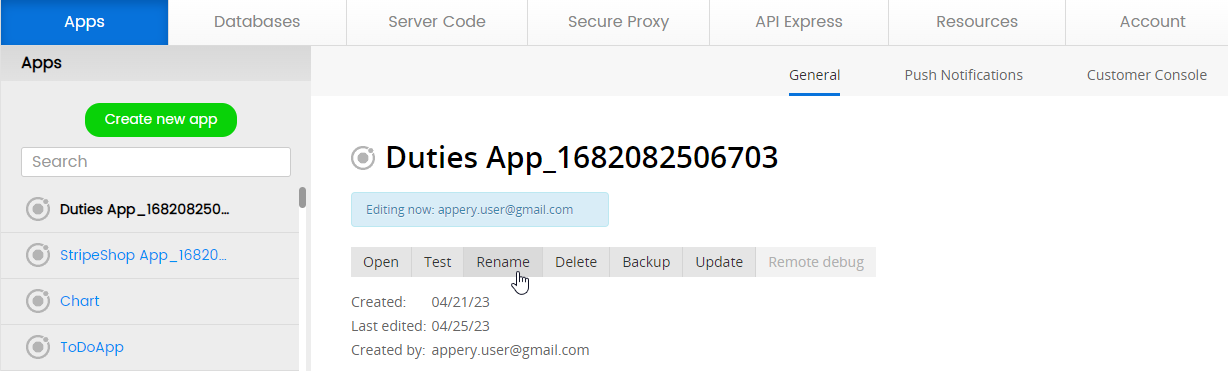
Renaming App
The first thing you might like to do to make your app unique is to rename your project.
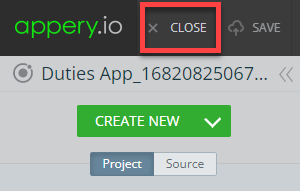
- To do it, you will need to exit the App Builder so click the CLOSE button in the top app Toolbar:
- After that, you will be redirected to the Apps tab with the information about your Appery.io projects, their saved versions, people with whom you share the project, and about hosting on Appery.io. Here, click the app Rename button:
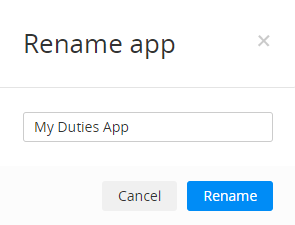
- Now, in a new window, provide a new app name, for example, My Duties App, and confirm this change:
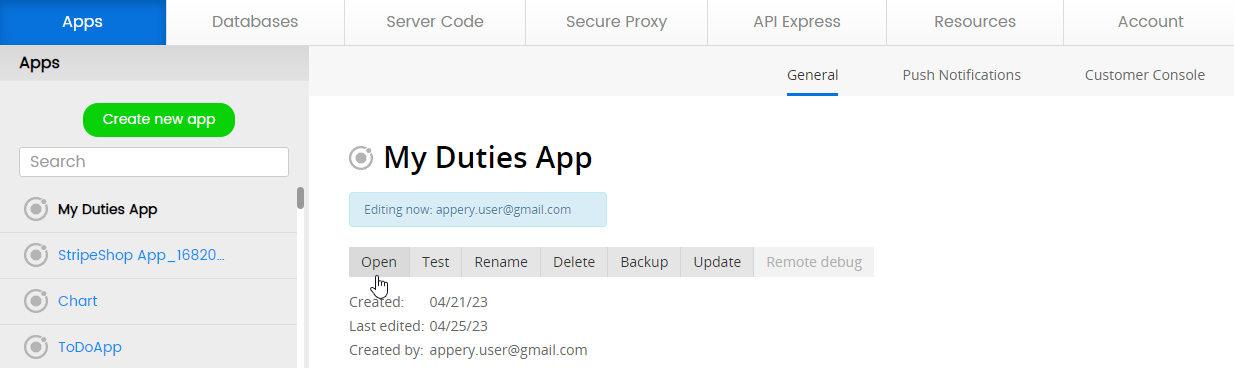
In a moment, the Apps tab will be updated with a new app name.
- Now, you can click Open to proceed with customizing your own application:
Reviewing General App Structure
When the app opens in the App Builder, you will see that this app template was created with Ionic 5 and has multiple folders comprising a set of organized pages, predefined color Themes, integrated backend services, and TypeScripts all of which can be customized as per your needs and app requirements. You can unfold any of them to see what resources are available:
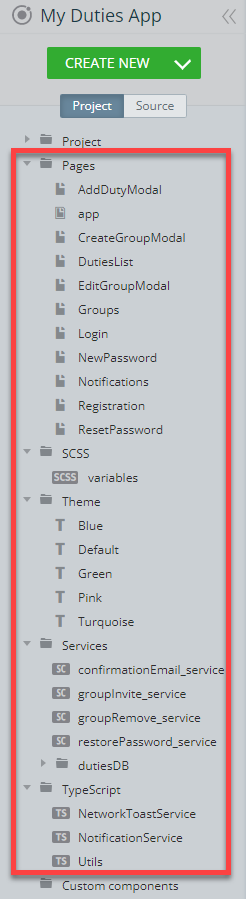
Every file or folder in the Project tree was created using our App Builder and we will now give you a little background on how you can customize the template resources.
Customizing App Pages
Opening the Pages folder, for example, will allow you to customize the individual app pages' UI and behavior. The easiest is changing the text so let's have a closer look at how this can be done.
Changing Text Property
With Appery.io, not only can you easily change the name of your application, but also you can modify any text in the suggested template.
Let's review the example with changing the text of one of the Login page UI components.
- First, select the Login page on the Project tab list located to the left of the mobile phone frame. The page will open in the DESIGN panel.
Adjusting Screen SizeNote that you might need to switch to the comfortable screen size (depending on your monitor) XS, SM, MD, LG, XL to see the whole page.
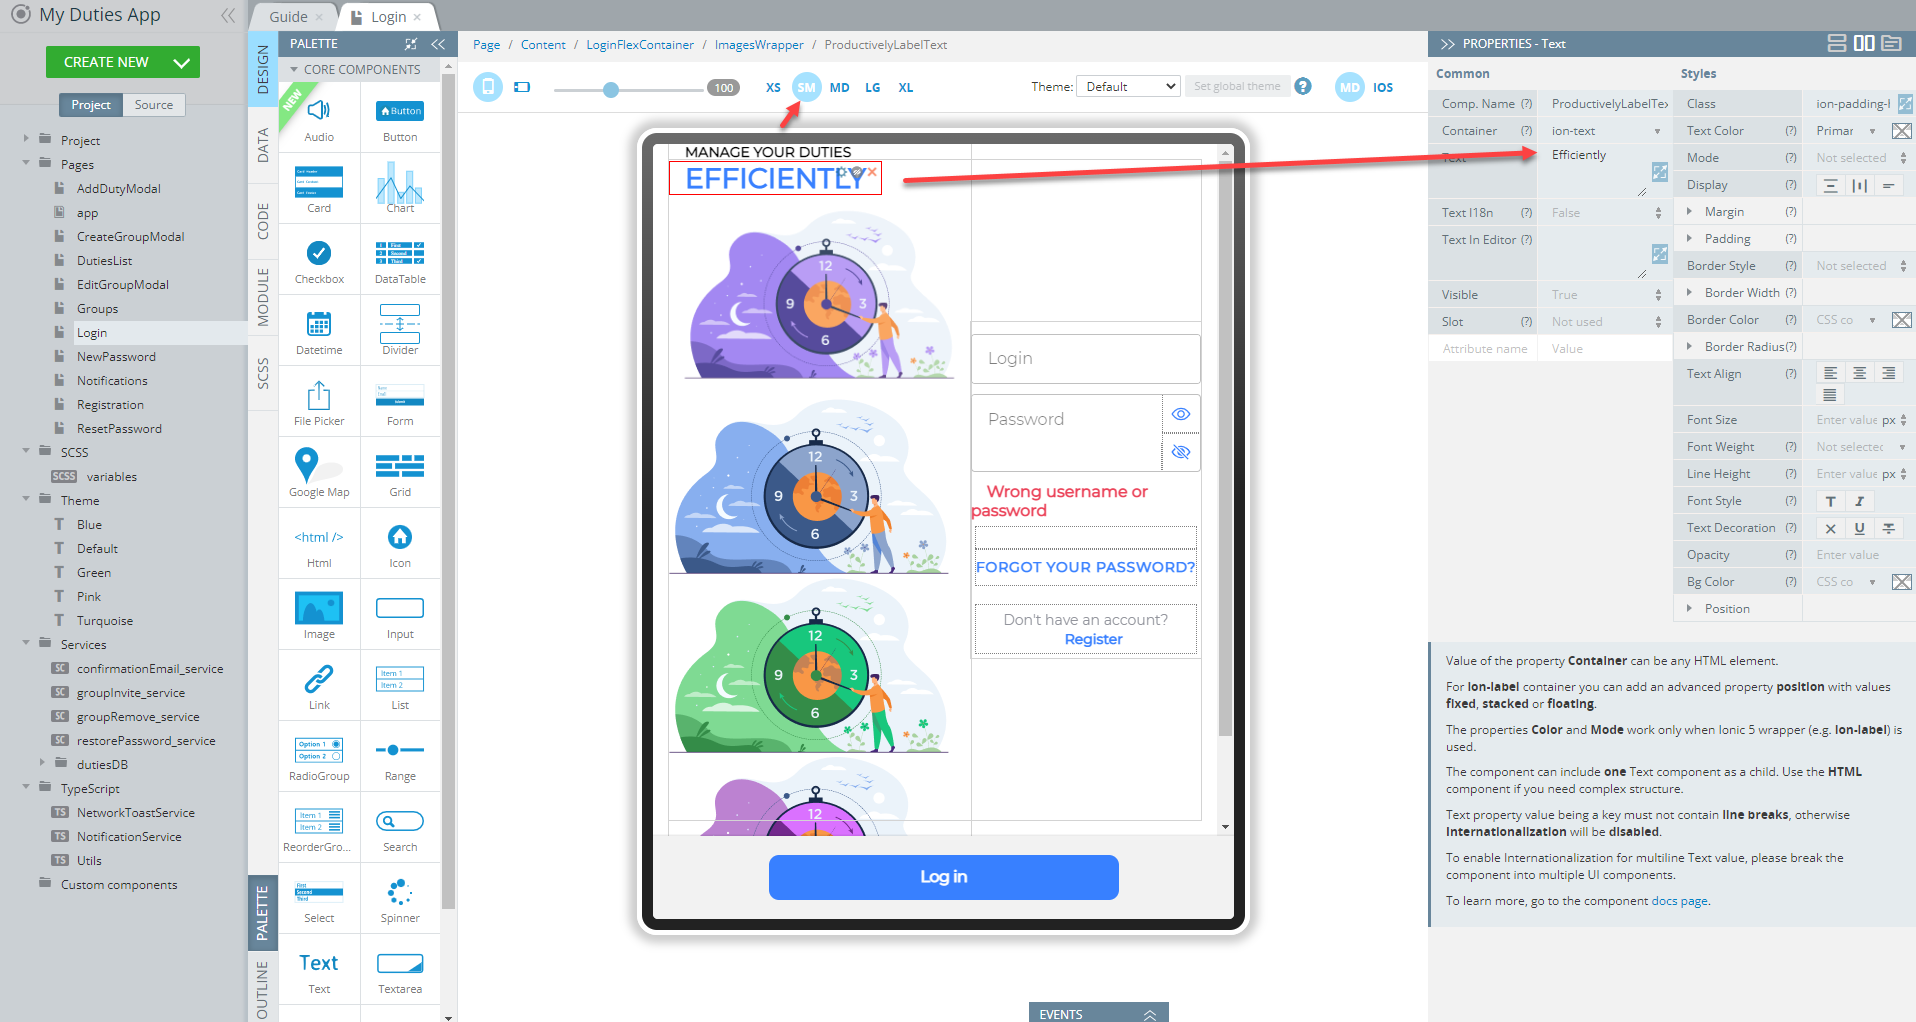
- Select the text instance you would like to modify.
Using BreadcrumbsYou might have noted that there are the breadcrumbs above the phone frame: they are often used for easy navigation between the parent/child components.
- The PROPERTIES panel for that component will be shown on the right where you can locate its Text property.
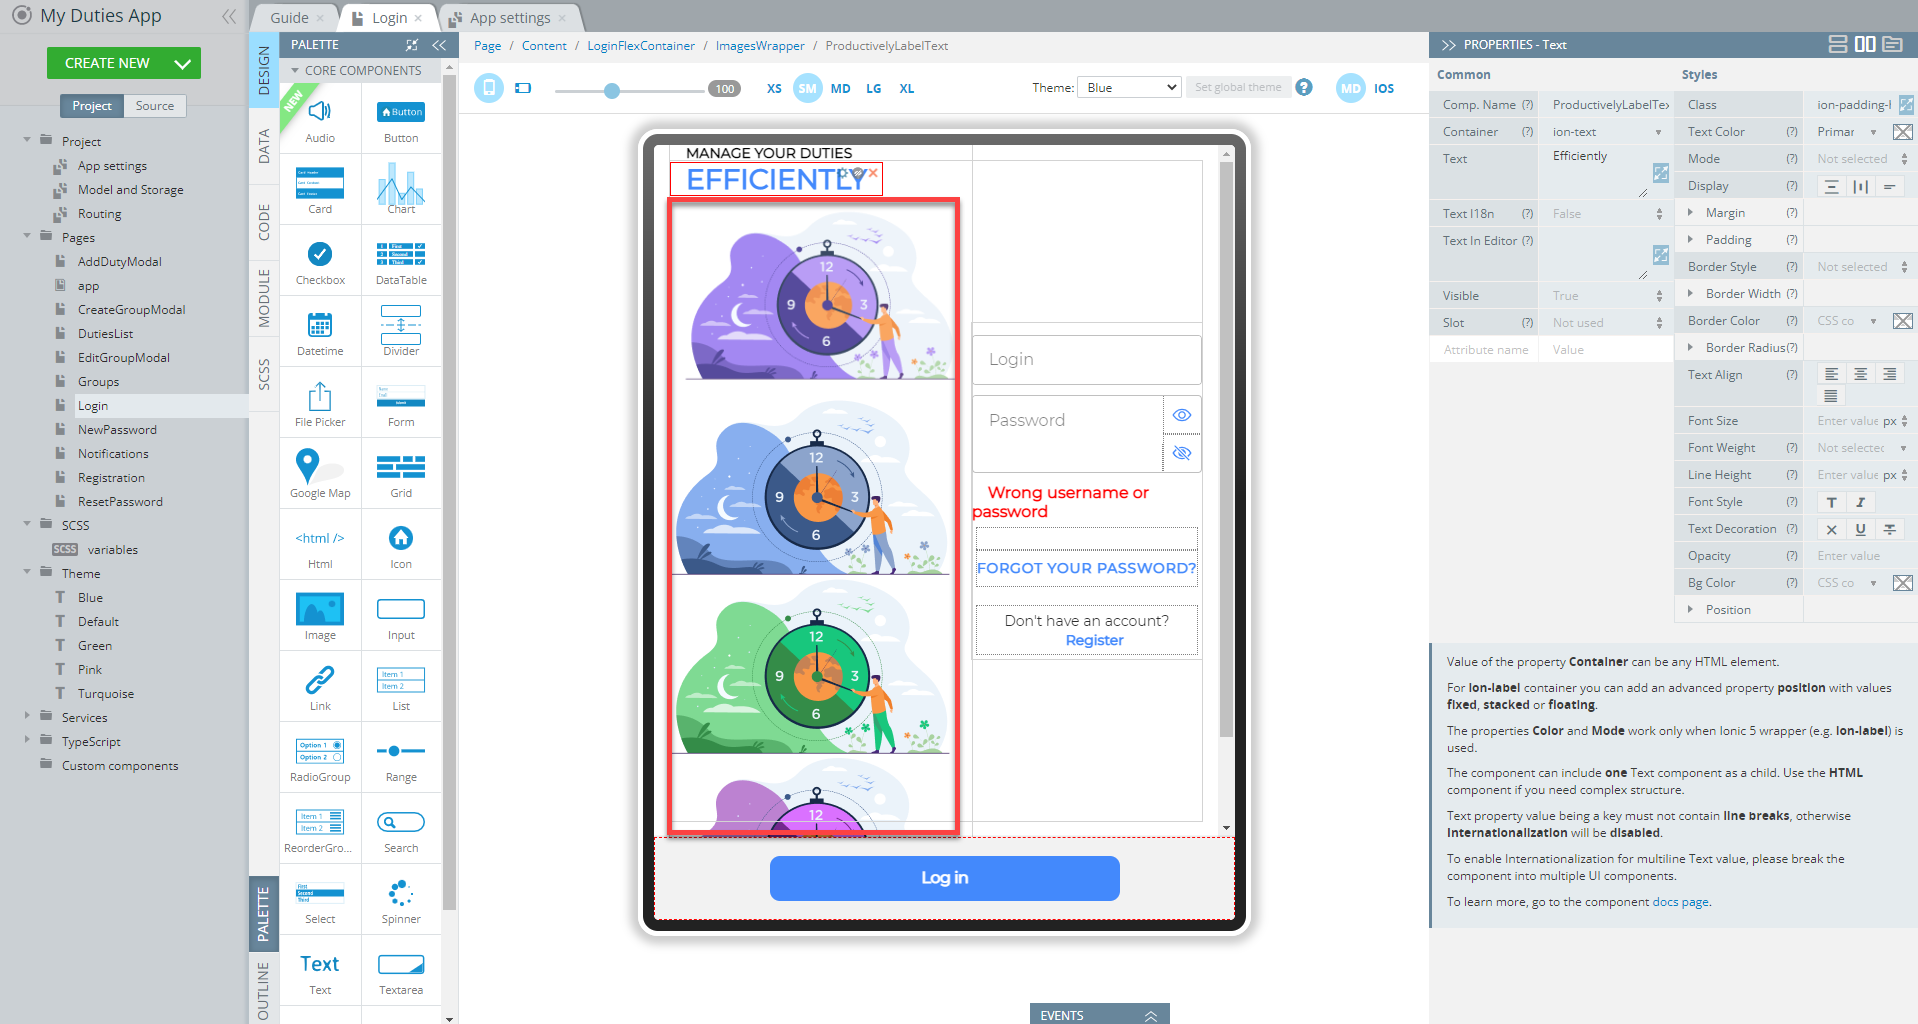
- Now, you can simply modify the text value, for example, replace the default Productively with Efficiently and this change will be automatically reflected in the UI:
- .Now, when you click TEST once again, you will see that the preview has also been updated according to the recent change made.
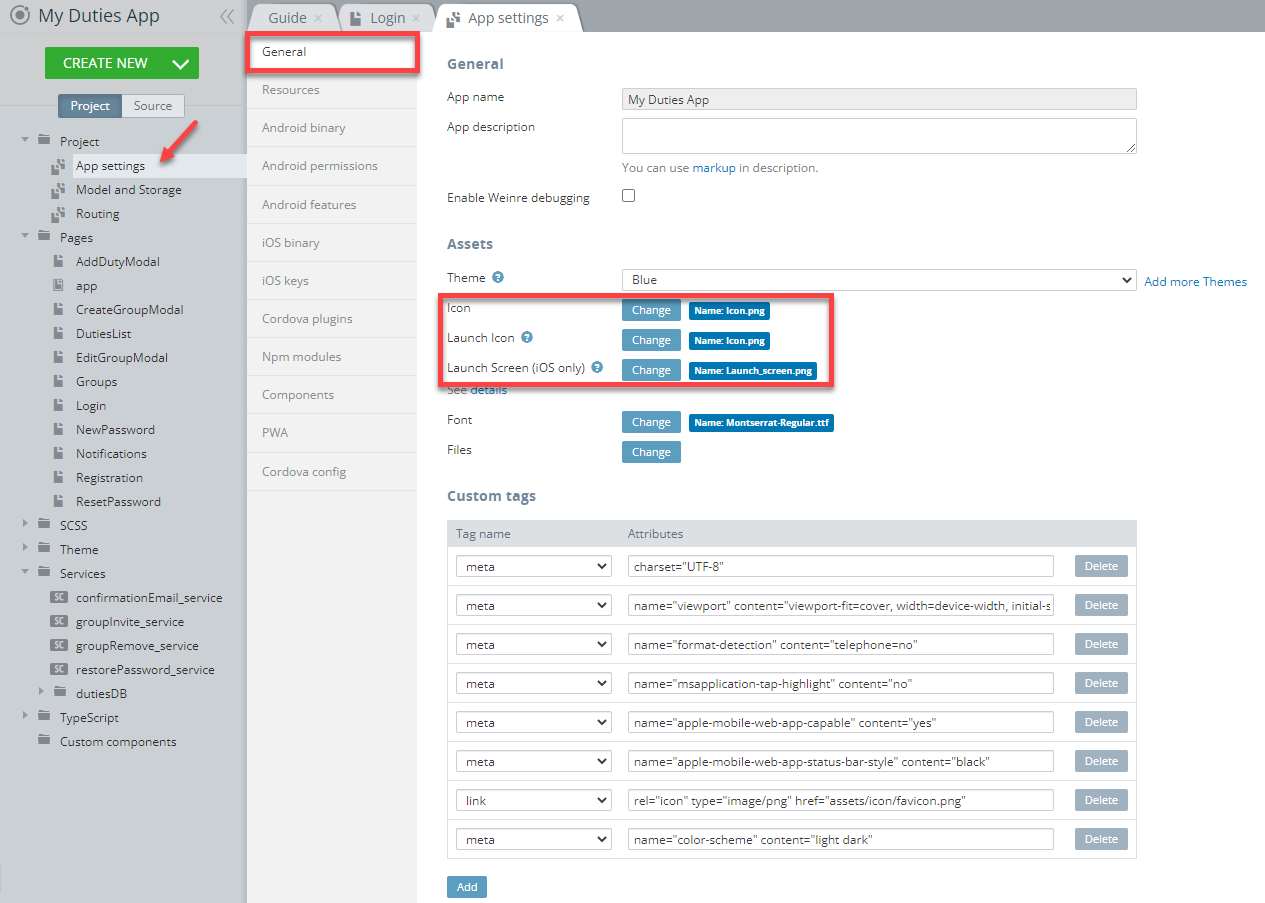
Changing App Logo
Our template has a default logo, but you can replace it with any other image you like.
Applying Predefined Logos
For your convenience, we have created several different logos so that they could be tested right away:
To replace the default logo image, you need to select the corresponding themefrom the Theme drop-down under App settings > General > Assets:

The image will be replaced with the new one that is associated with the selected theme.
Uploading Custom Logos
However, if you are rather interested in adding your custom logo, please follow the below instructions:
- To change the logo image, select it and click the Change button on the PROPERTIES panel.
- The Media Manager window will open where you can either select one of the available images or upload a needed file from your drive:
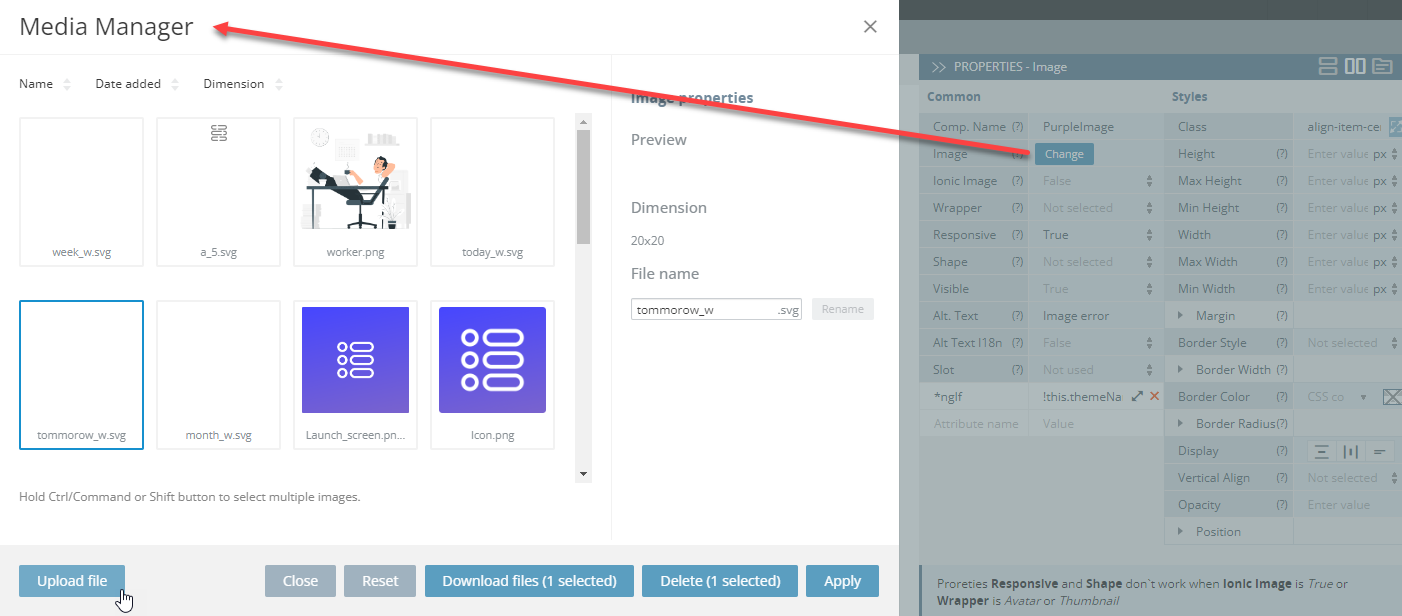
- When uploaded, the image file should appear on the images list and can be selected and then applied as a new app logo.
Customizing App Color Themes
Another great way to make your application stand out from a plethora of other apps is by changing the app color theme. You will be surprised to see how easy it is to completely change the looks of your app using our Theme Generator option.
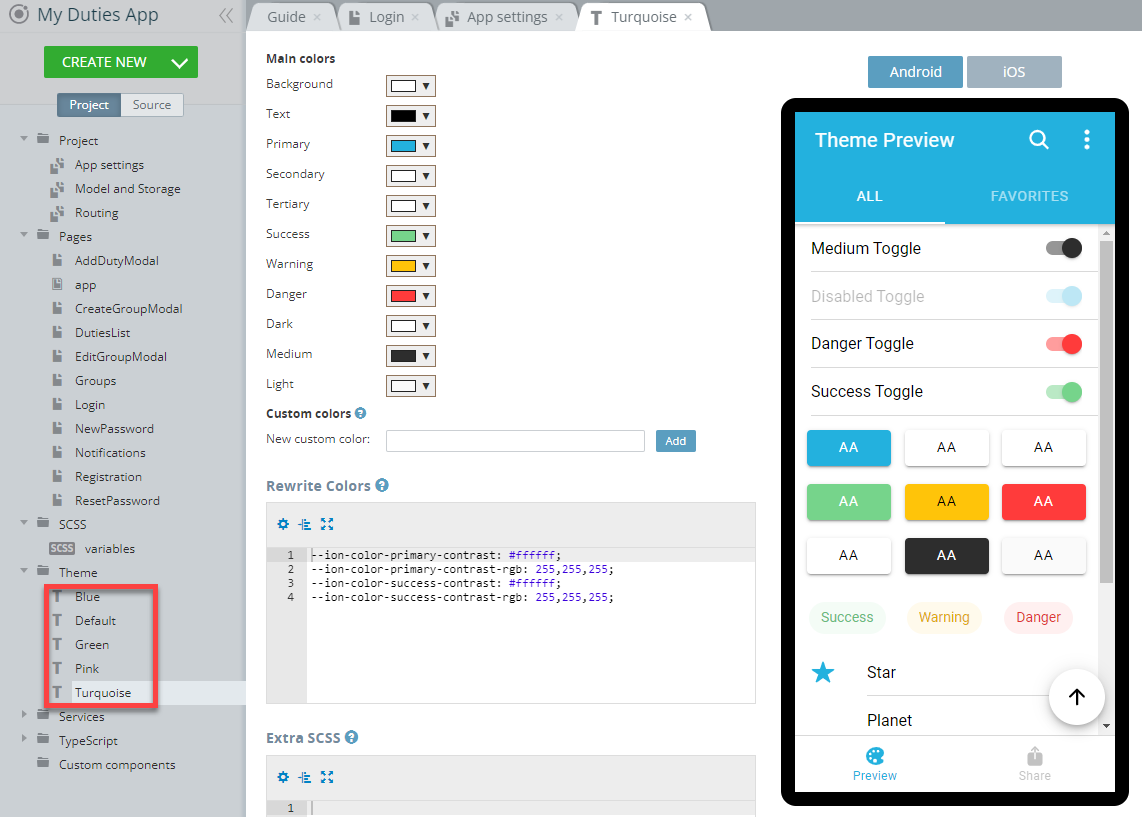
Each of our templates has its unique design. What it also has is called Themes that are created under the Theme folder.
Our Duties app template offers five different color themes to select from: Blue, Green, Pink, Turquoise, and the default one:
Creating Custom ThemesIf you would like to create your custom theme, you can do it using the CREATE NEW > Theme drop-down and following the instructions in this document.
Every app page has a Theme dropdown. The default app theme is applied here but you can try selecting other theme options from the dropdown to see what this specific page will look like under a different theme:
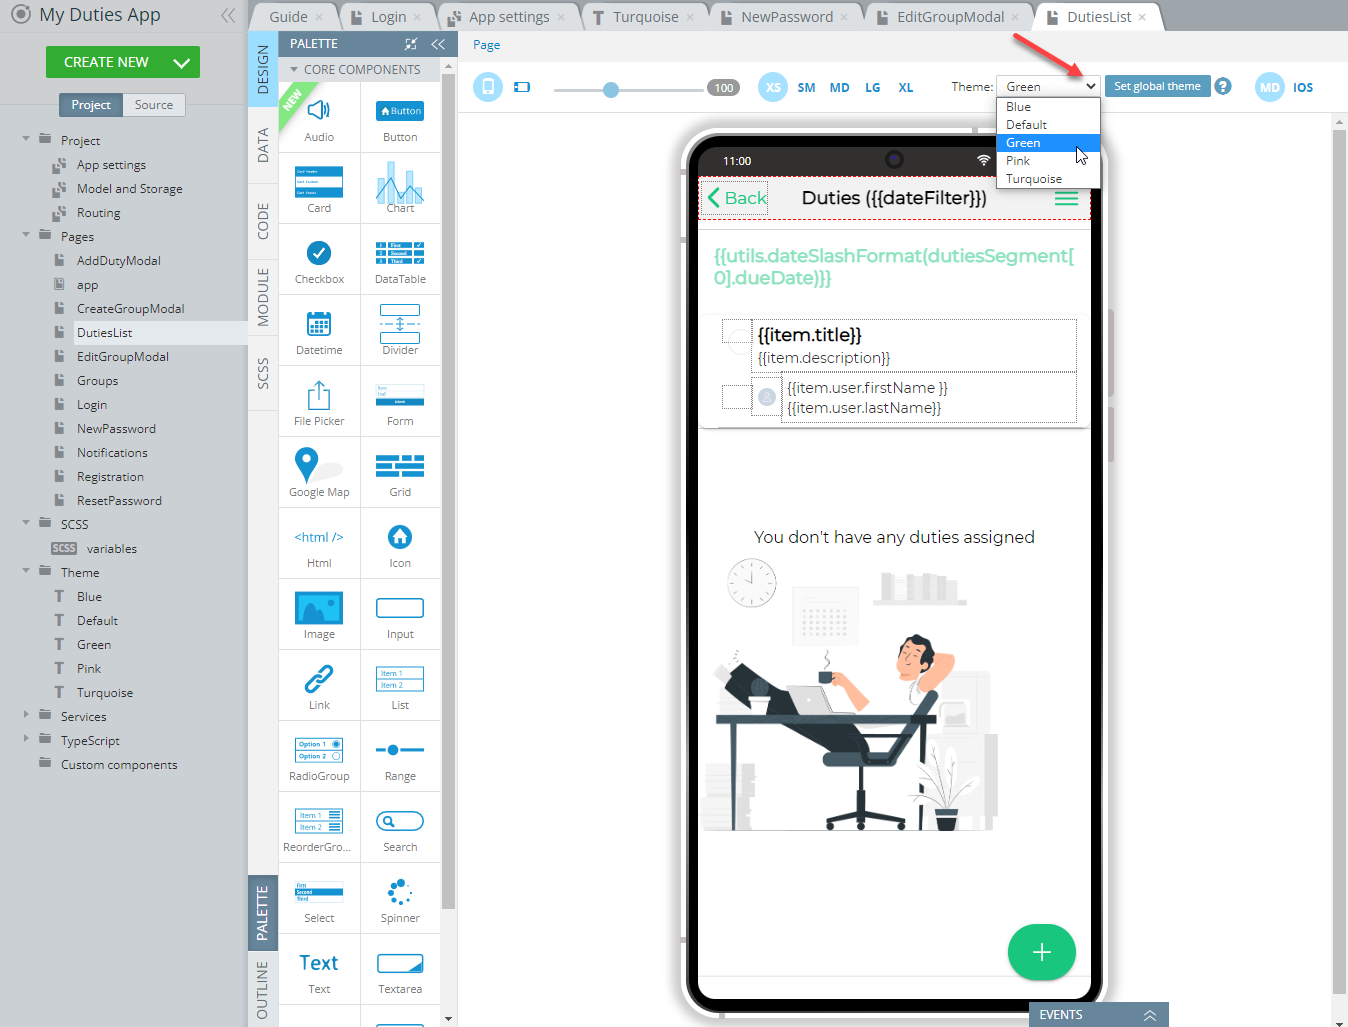
Important!This dropdown works for preview purposes only and if you decide to apply the selected theme to the entire application, go to Project > App Settings > General and select the needed theme from the dropdown:

Now, save the app and click TEST again to see how the application looks like with the newly selected theme:
Customizing App Launch Icons and Screens
In addition to modifying the appearance of the app pages, you are also free to replace the default launch icons and screens (iOS only) by using our Launch Icons and Screens generator (or upload your custom fonts by using the Files Manager).
It works similar to what was demonstrated in the Changing App Logo section: by clicking the Change button and using the Media Manager:
Testing Customized App
Testing the app is fast and simple. Simply click the TEST button in the top App BuilderToolbar.
The browser will launch with the app that you have just built.
Testing on Device
When your app version is ready, you might also like to test it on the device.
Appery.io Tester AppA great option to quickly test the app on the device is to use our Appery.io Tester app.
The app is free and available for both iOS and Android.
You can check out this page to learn more about using the Appery.io Tester app.
Exporting App
When your final app version is ready, you might like to proceed with exporting your app for
Android or iOS with further installing it on a device.
Selecting Build TypeBefore you can proceed with exporting your app, go to Project view > Project > App settings > Android binary/iOS binary to select the Release build type (Debug is the default type for both and can be used for testing purposes only):
If the Release and Publish type is selected under the iOS binary tab, building the release app version will be performed together with publishing it to the App Store.
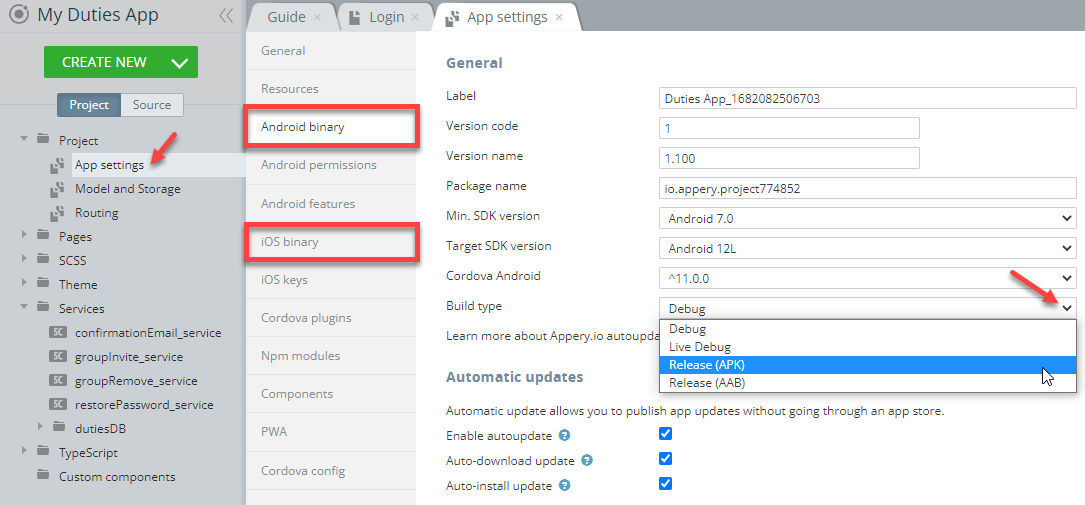
Selecting iOS binary build type
Important Note!Please, note that before you can export the app, the app certificates must be imported or automatically generated (in the case of Android).
You can check this document in case you need help with exporting your application for iOS.
Here, you will find information on generating certificates for Android.
Note as well that starting from August 2021, new apps are required to publish with the Android App Bundle (.aab) on Google Play.
Please read more here.
You can also check this Appery.io Community video that shows how to create Android and iOS certificates:
-
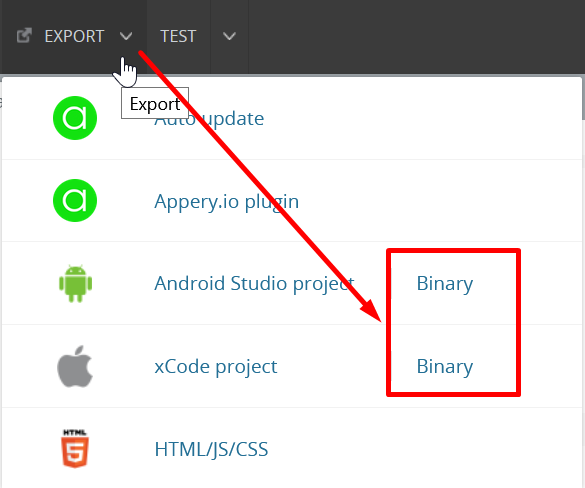
After the needed certificates have been added to your app all you need to do is to wait for the bundle to be created.
-
Now, you need to select the format you prefer (you are also free to build both if you need):
.apk/.aabor.ipato start building your project:
Managing Build Error The certificate file is not setIf this is your first app created with Appery you will most likely get the error signifying about missing certificates that will prevent you from successfully finishing the build process.
The error reads similar for both binary types and indicates that you should set the corresponding certificate before starting a new build.
If this notification is what you see after starting your build, please check out the this document about the certificate management that explains how to add the needed certificate to your project:
- Once your project is generated, you will see the QR-Code that you can use to upload the application to your device (or save the
.apk/.aabor.ipafile for further use):
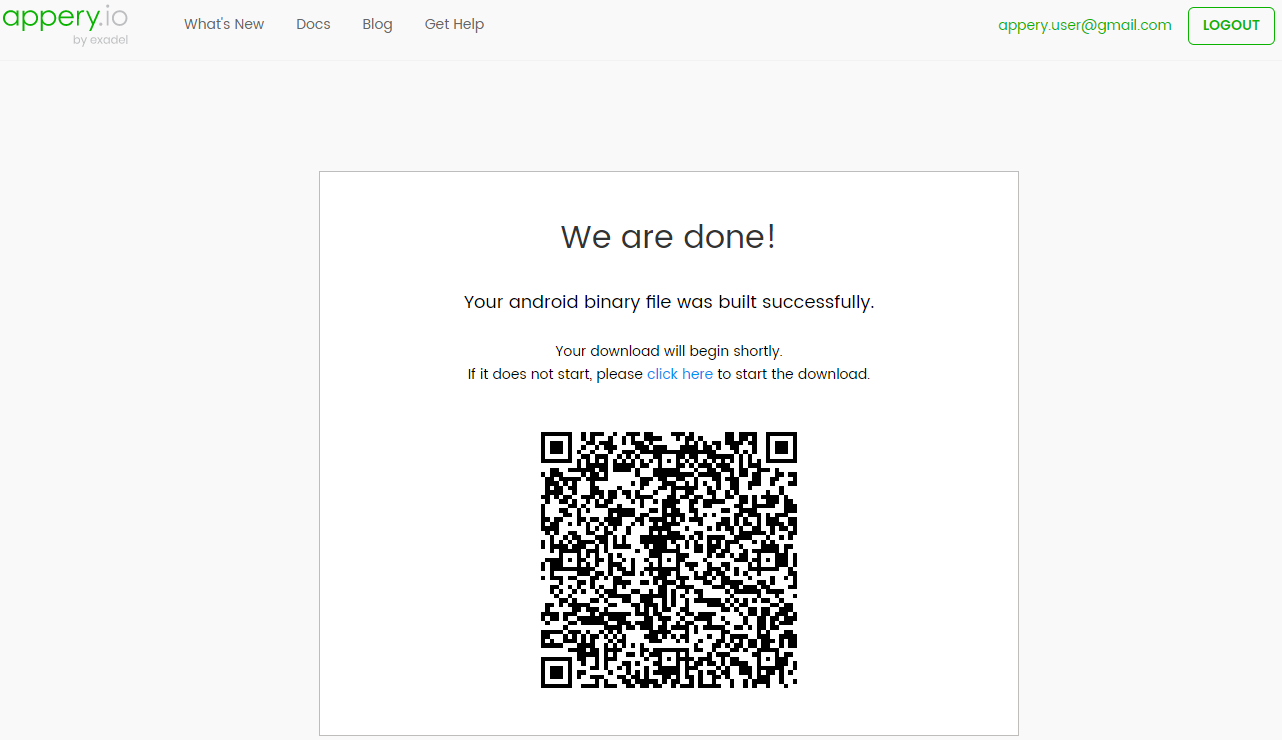
- Then, install the app on your device and enjoy the result of your customization efforts:

My Duties App installed on an iOS device
Publishing App
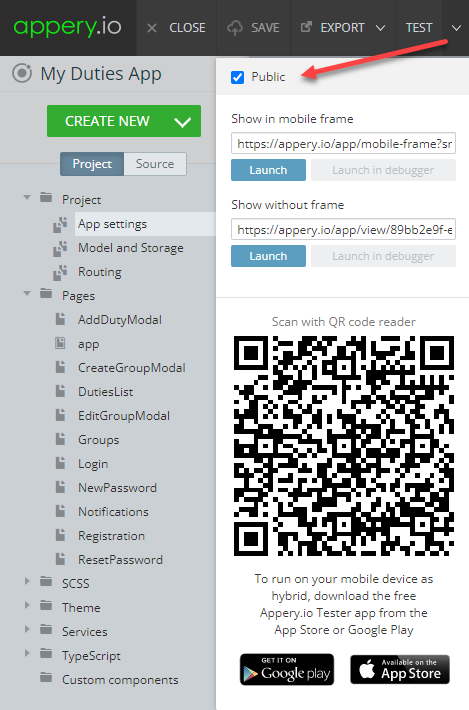
Any app that you build in Appery.io can be published as a mobile web app. This means the app will be hosted on a server and can be accessed from any browser on a mobile device:
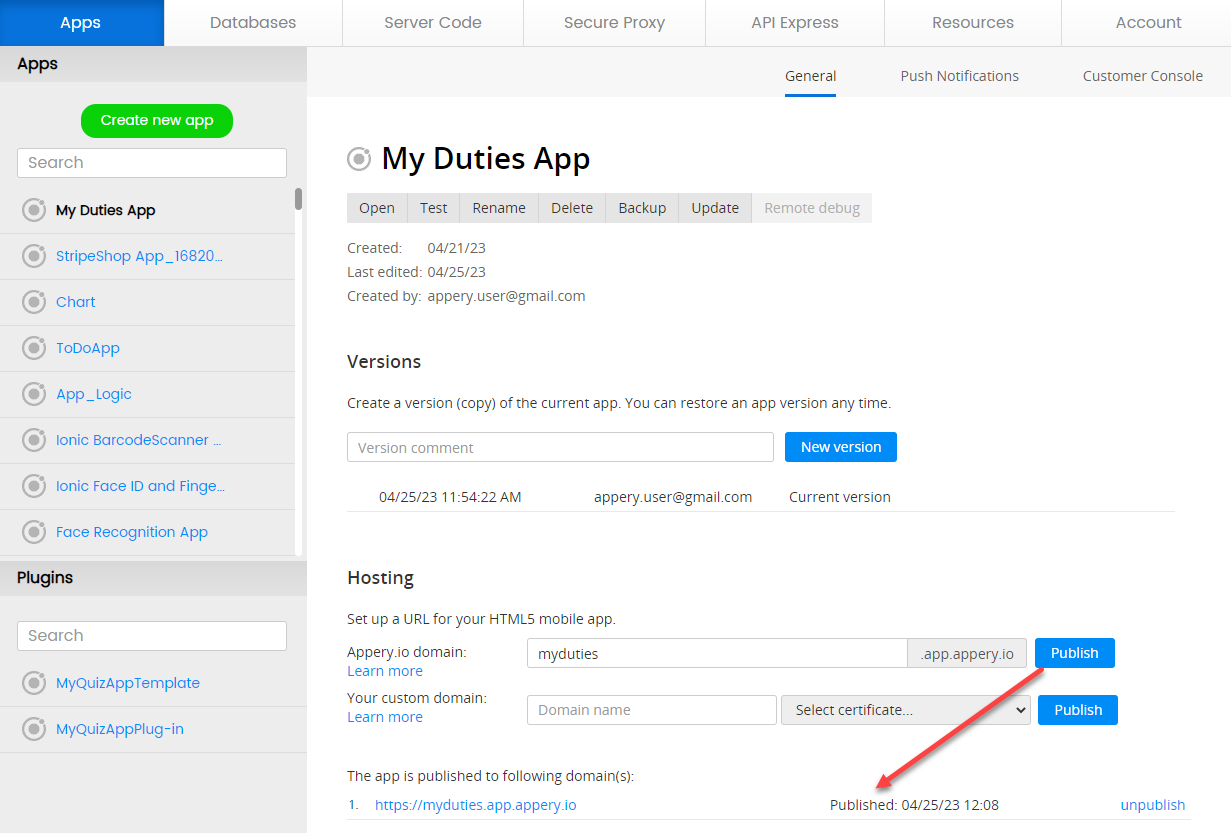
Also, you are free to add the published app to any site of your choice as a widget.
Please check this link to see what it will look like.
Below is the sample code you can use for embedding the app published on Appery.io as a widget:
<script>
  var script = document.createElement('script');
  script.type = 'text/javascript';
  script.src = 'https://app.appery.io/aio_myduties_widget.js';
  script.onload = function() {
    window.aioChatWidget.init({
      frameUrl: "https://myduties.app.appery.io/",
      // buttonColor: "blue",
      // buttonTextColor: "red",
      // buttonImgUrl: "https://appery.io/app/resources/img/mobileframe/favicon-192x192.png",
      preload: true,
      // autoOpen: 5000,
      // position: "top_right",
    });
  }
  document.head.appendChild(script);
</script>
where:
frameUrl: '', // the iframe url;buttonColor: '#4DC95B', // css color. The button color for the chat button (if set to default, the button image is used) and close button;buttonTextColor: '#FFFFFF', // css color. The button text color for the chat button (if set to default, the button image is used) and close button;buttonImgUrl: '', // custom image for the button, if not set, then the default.svgimage is used;preload: false, // if set to true - add iframesrcon init (load frameUrl immediately), otherwise, the iframe will be loaded only after opening;autoOpen: 0, // ms. If 0 - do not open;position: "bottom_right" // bottom_right, bottom_left, top_right, top_left.
Updated about 1 year ago