Barcode Scanner with Database Sample jQM App
Sample Warehouse app (jQuery Mobile) with barcode scanner.
Important Note!The option of creating new apps with thejQuery Mobile framework was removed but we still support the projects that were created with it earlier.
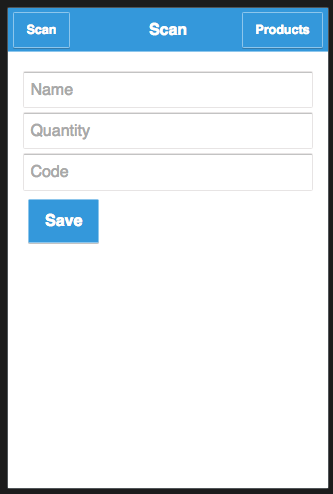
This sample app demonstrates a Warehouse app. The app uses the Cordova Barcode Scanner to scan a product via its QR code. You can save a new product into the database, or if such a product already exists, edit it.
The sample app uses and demonstrates:
- jQuery Mobile.
- Apache Cordova Barcode Scanner.
- Server Code.
- Database.
To run this sample app, complete the following steps:
- Create a database to store the products.
- Add Server Code scripts for app logic (saving, searching).
- Add jQuery Mobile app that uses the backend and invokes the Barcode Scanner.

Warehouse app.
Ionic Scanner TutorialsYou can also check our detailed Ionic QR Code Generator App that shows how to create an Ionic app that can generate a QR Code on a button click.
Also, the Ionic Barcode Scanner Plug-in Sample App can be of interest.
Setting up the Database
The first step is to set up the database. The database will store warehouse products.
- From the Databases tab, create a new database. Name the database: Warehouse_DB.
- Inside this database, create a new collection named: Products.
- Inside the collection you have just created, add the following three columns:
- Name (string type).
- Code (string type).
- Quantity (number type).
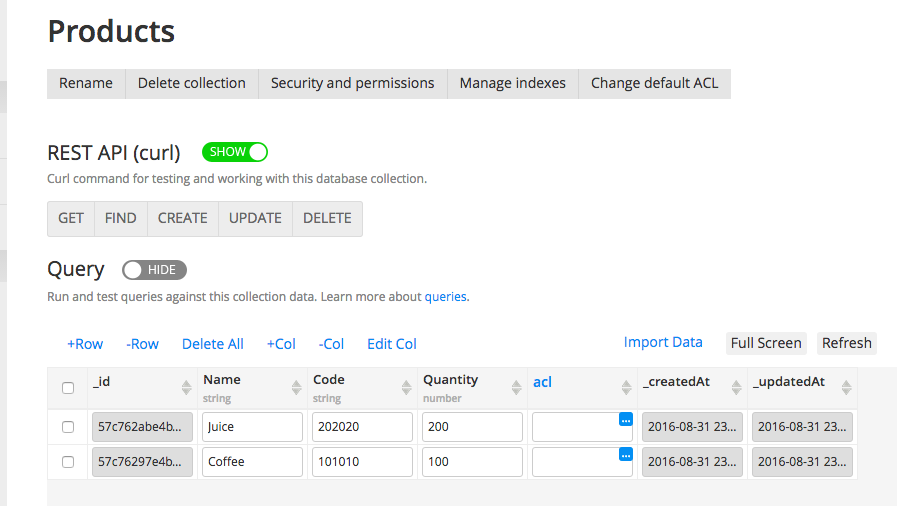
- It's easy to enter sample data into the collection. Click +Row and enter any sample data. In the screenshot below, you will see two sample products in the collection.
That's it for the database. Your collection should look like this:

Database collection.
Next you are going to work on the Server Code scripts.
Server Code Scripts
There are three scripts that provide the app logic for saving, searching and listing. Let's start with the simplest one that displaysall the products from the database.
Creating a Script to List All Products
To create a new Server Code script:
- Go to the Server Code page.
- Click to create a new script. This will take you to the editor page.
- Name the script: Warehouse_Product_list and click the Save button.
- Now copy and paste the following code:
var dbApiKey = "your-database-api-key";
var result = Collection.query(dbApiKey, "Products");
Apperyio.response.success(result, "application/json");- You need to set the database API key. To find the API key, go back to the database you have just created and open the Settings tab. There you will see the database API key (ID). Set it in the script.
Testing the Script
It's always a good idea to test the script.
- Inside the script editor, switch to the Run tab (right-hand side).
- Click the Save and run button to invoke the script. You should see the product that you entered when creating the database collection.
You are ready to create the second script.
Creating a Script to Search the Database
The search script is used to search the database by its code (QR). If such a product is found then it will be loaded in the app and you can edit it. For example, you can change product quantity.
- Create a new Server Code script and name it: Warehouse_Product_search.
- Copy and paste the following code:
var dbApiKey = "your-database-api-key";
var code = request.get("code");

var params = {};
params.criteria = {
  "Code": {
    "$eq": code
  }
};
var search = Collection.query(dbApiKey, "Products", params);

if (search.length > 0) {
  Apperyio.response.success(search[0], "application/json");
} else {
  Apperyio.response.error({"msg": "Product not found"}, 404);
}- As with the first script, set its database API key.
- Click the Save button to save all changes.
The script searches the database. If a particular product is found, then the script response will include that product. If such product is not found in the database then only a message is returned (and 404 response code).
Testing
This script expects one parameter code. To test this script:
- Open the Script parameter tab.
- Create a parameter called code.
- If you want the script to find a product then enter a code that you entered in the database. Or enter a code that is not in the database to test the script returning a different response.
The last script is for saving or updating a product in the database.
Creating a Script to Save or Update a Product
The third script will create a new product in the database or will update an existing one.
- Create a new Server Code script and name it: Warehouse_Product_save.
- Copy and paste the following code:
var dbApiKey = "your-database-api-key";
var name = request.get("name");
var code = request.get("code");
var quantity = request.get("quantity");
var result;

var search = ScriptCall.call("Warehouse_Product_search_ID", {"code": code});

var searchResponse = JSON.parse(search.body);

if (search.status === "200") {
  // update product
  result = Collection.updateObject(dbApiKey, "Products", searchResponse._id, {
    "Name": name,
    "Quantity": quantity
  });
} else {
  // save new product
  result = Collection.createObject(dbApiKey, "Products", {
    "Name": name,
    "Code": code,
    "Quantity": quantity
  });
}
Apperyio.response.success(result, "application/json");- Set the database API key as in previous scripts.
There is one additional update you need to make. Look at this line:
var search = ScriptCall.call("Warehouse_Product_search_ID", {"code": code});

// should look something like this:
//
// var search = ScriptCall.call("14b5678b-xxxx-xxxx-xxxx-ed93fc543211", {"code": code});
This function invokes the search script you created in the previous step. This script first searches for a product already existing in the database. If such product already exists, then you are going to update it. If it's a new product, then a new product will be saved in the database. Instead of writing the search code portion you are reusing the existing script via ScriptCall method.
This requires setting the ID of the Warehouse_Product_search script. To get the ID:
- Open the Warehouse_Product_search script.
- Open the API information tab.
- There you will see a URL to invoke this script. Part of the URL is the script ID. Copy that ID and paste it into the script above.
That's it.
Testing the Script
To test the script, add three parameters:
- name
- quantity
- code
If you enter a product code that is already in the database, then this product will be updated with the test data. If you enter a product that is not yet in the database, then a new product will be saved in the database.
Now it's time to get the app.
Getting the App
The app is available as a plugin inside the App Builder.
- From the Apps page, click the Create new app button.
- For the app name, enter WarehouseApp.
- Select the jQuery Mobile tab, then select Blank. Click the Create button.
- When the visual editor loads, click Create new > From plugin > Barcode Scanner with Database App.
- Click the Import selected plugins button.
- On the next screen, select Scan as the start page and click Apply settings.
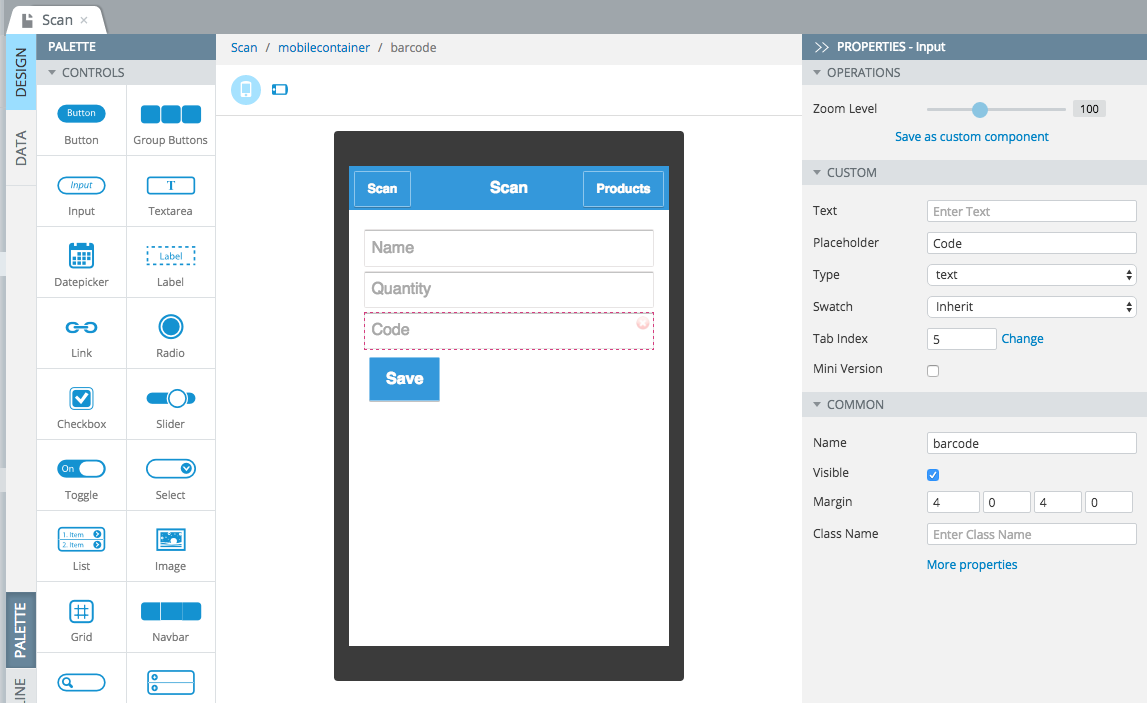
The app is now imported. The app has all the pages and services pre-configured. The only step that is left is to connect the app to the backend.

Scan page.
Connecting the App to the Backend
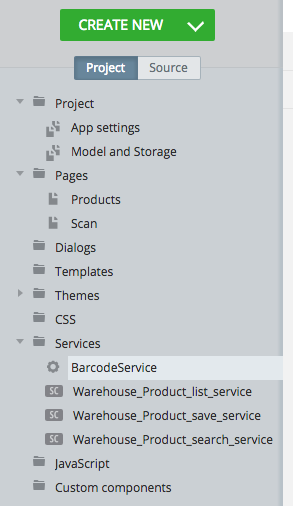
The app has three services:
- Warehouse_Product_list_service
- Warehouse_Product_save_service
- Warehouse_Product_search_service
When you open a service you will see that the URL has {server code} placeholder. This placeholder should be replaced by the script ID. To find the script ID, open the script and go to API information tab. Set the ID for all three scripts. Make sure you set the correct ID for each script.

App project tree.
You are ready to test the app.
Testing the App
As this app uses a native (Cordova) barcode scanner feature, the app has to be tested on the device.
You can scan any QR code. Some examples:
- Water bottle.
- Soda.
- Use http://www.barcode-generator.org/ to generate any code you wish.
You can also easily test the app directly on the device.
To test the app on the device: inside an app, go to Project > App settings > Cordova plugins. To enable the plugin for the current app, check the box for the BarcodeScanner.
Go to Export, select the device, and test on the device.
Updated 7 months ago
