Ionic SweetAlert Plugin App
The tutorial demonstrates how to use the SweetAlert2 external module to display modal windows in your Ionic app.
Using the SweetAlert2 module, you can create custom popups: success messages, error messages, warning modals, confirm modals, custom notifications, and prompt windows.
Also, your SweetAlert2 modules can be easily customized.
SweetAlert Module
You can learn how to add an external npm module to the app from this guide.
For more information on how to customize modal's content, visit the SweetAlert docs page.
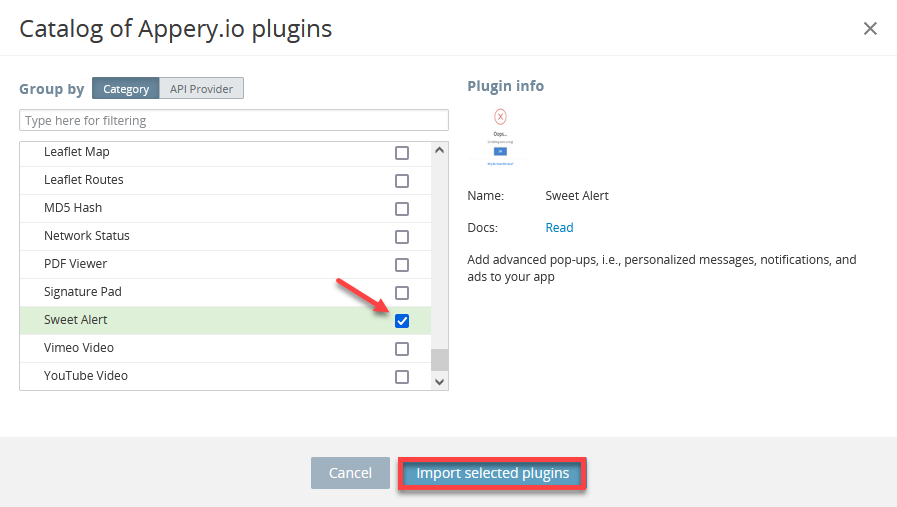
Getting the Ionic Sweet Alert App
Getting the Ionic app is really fast and easy as the app is available as a Sweet Alert plugin inside the App Builder.
- From the Apps tab, click Create new app.
- Select Ionic Blank for the application type, enter the app name, and click the Create button.
- When the visual App Builder loads, click CREATE NEW > From Plugin.
- Under Utilities, select SweetAlert.
- Click Import selected plugins:
The app is almost ready for testing and there is one thing you need to do before you can test: set the SweetAlertScreen as the default route in Routing and save the changes:
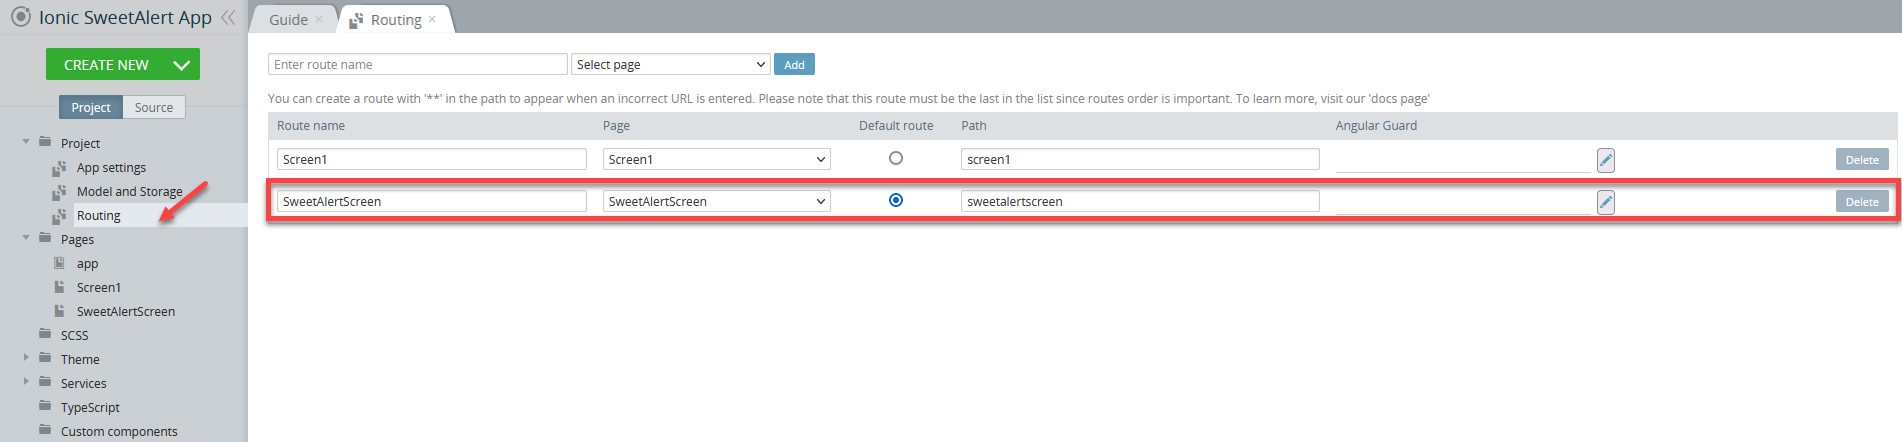
Important!If you skip the above step, the starting page of the app will be the default Screen1 page and not SweetAlertScreen so, you will not be able to test the alerts!
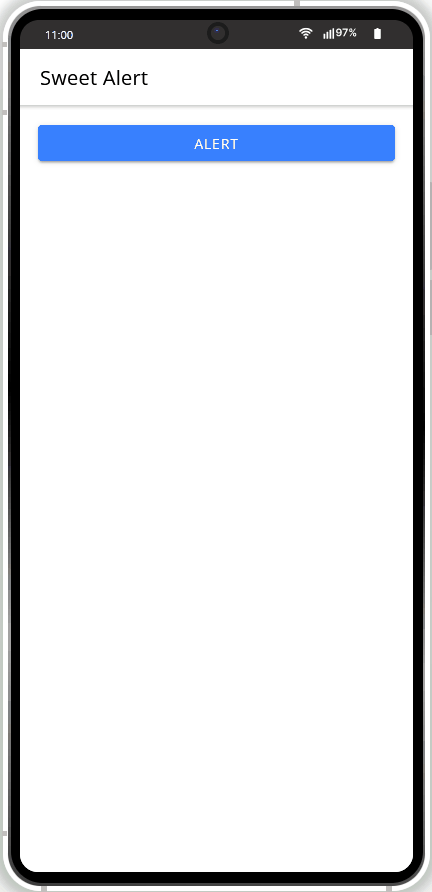
To launch the app in the browser, click the TEST button in the App Builder Toolbar:
But if you are interested in how the plugin was created, please check out the steps below.
Creating New App
- From the Apps tab, click Create new app.
- Select Ionic Blank for the application type, enter, enter an app name, and click Create.
Adding Dependencies
- On the left side, unfold the Project Tab folder and go to App Settings >Npm modules.
- Add
sweetalert2as an app Dependency and set11.7.3for its version:

Adding Dependency
- Then, choose SweetAlertScreen page from the Pages folder and open its CODE panel.
- In the Custom includes block, add an include with Name =
Swalandsweetalert2for its path:

Custom Includes
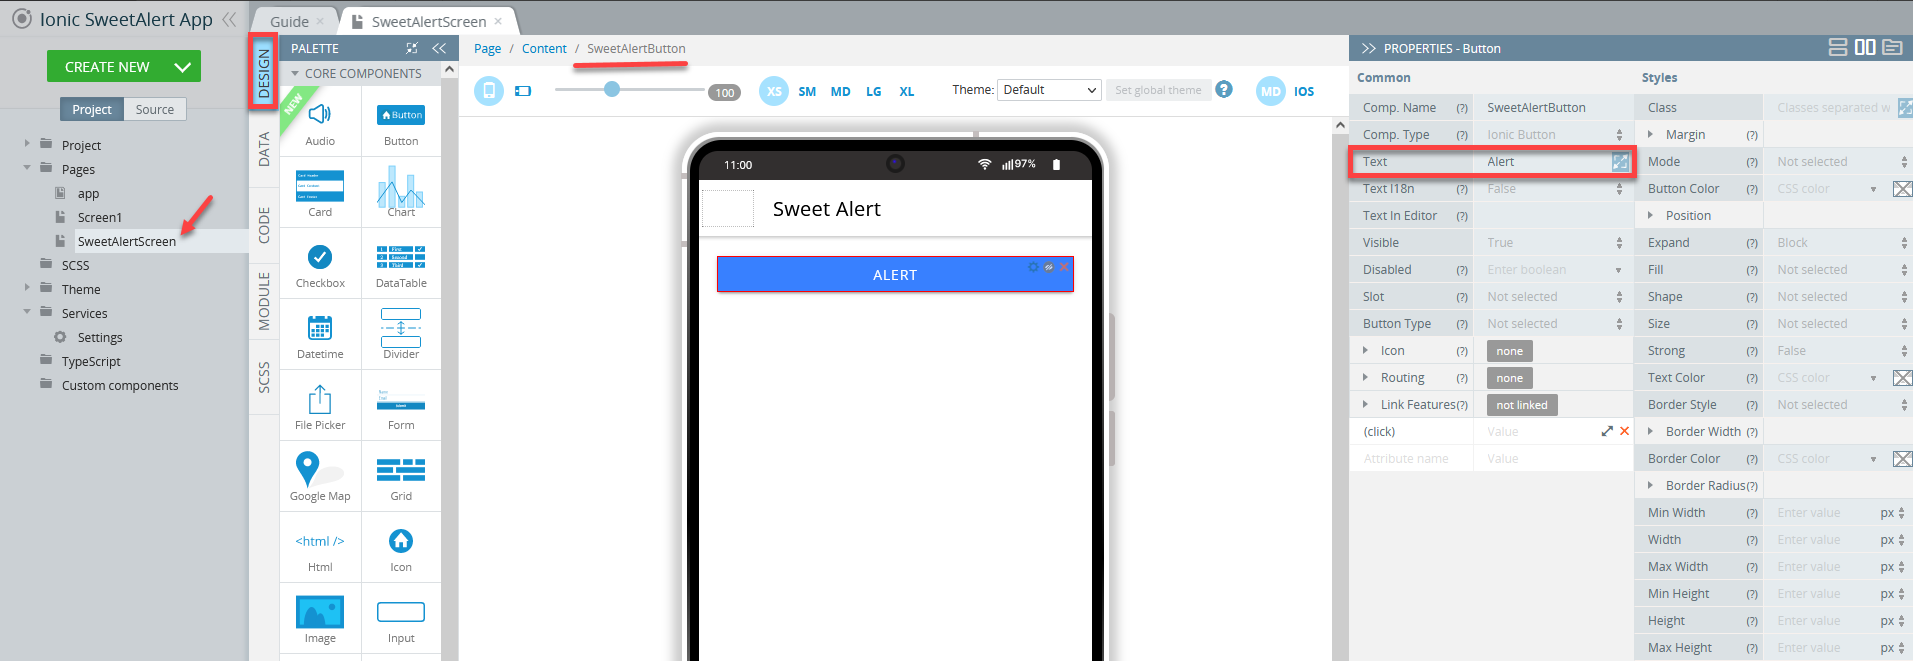
Creating App UI
- Now, navigate to the page DESIGN panel. Click on the Toolbar title in the app screen and change it to Sweet Alert by changing the Common > Text property on the right menu of the PROPERTIES panel:

App View
- Drag the Button component and drop it to the screen, then change its Text property to Alert.
The resulting app UI is very simple:
Application Logic
- Expand the EVENTS tab from the bottom.
- There, for the *Button1 component, select the Click event, and for action, set Run TypeScript with inserting the following code:
Swal.fire({
  title: "Good job!",
  text: "You've found out how to use Sweet Alerts module!",
  icon: 'info',
  confirmButtonText: 'Cool',
  heightAuto:false
});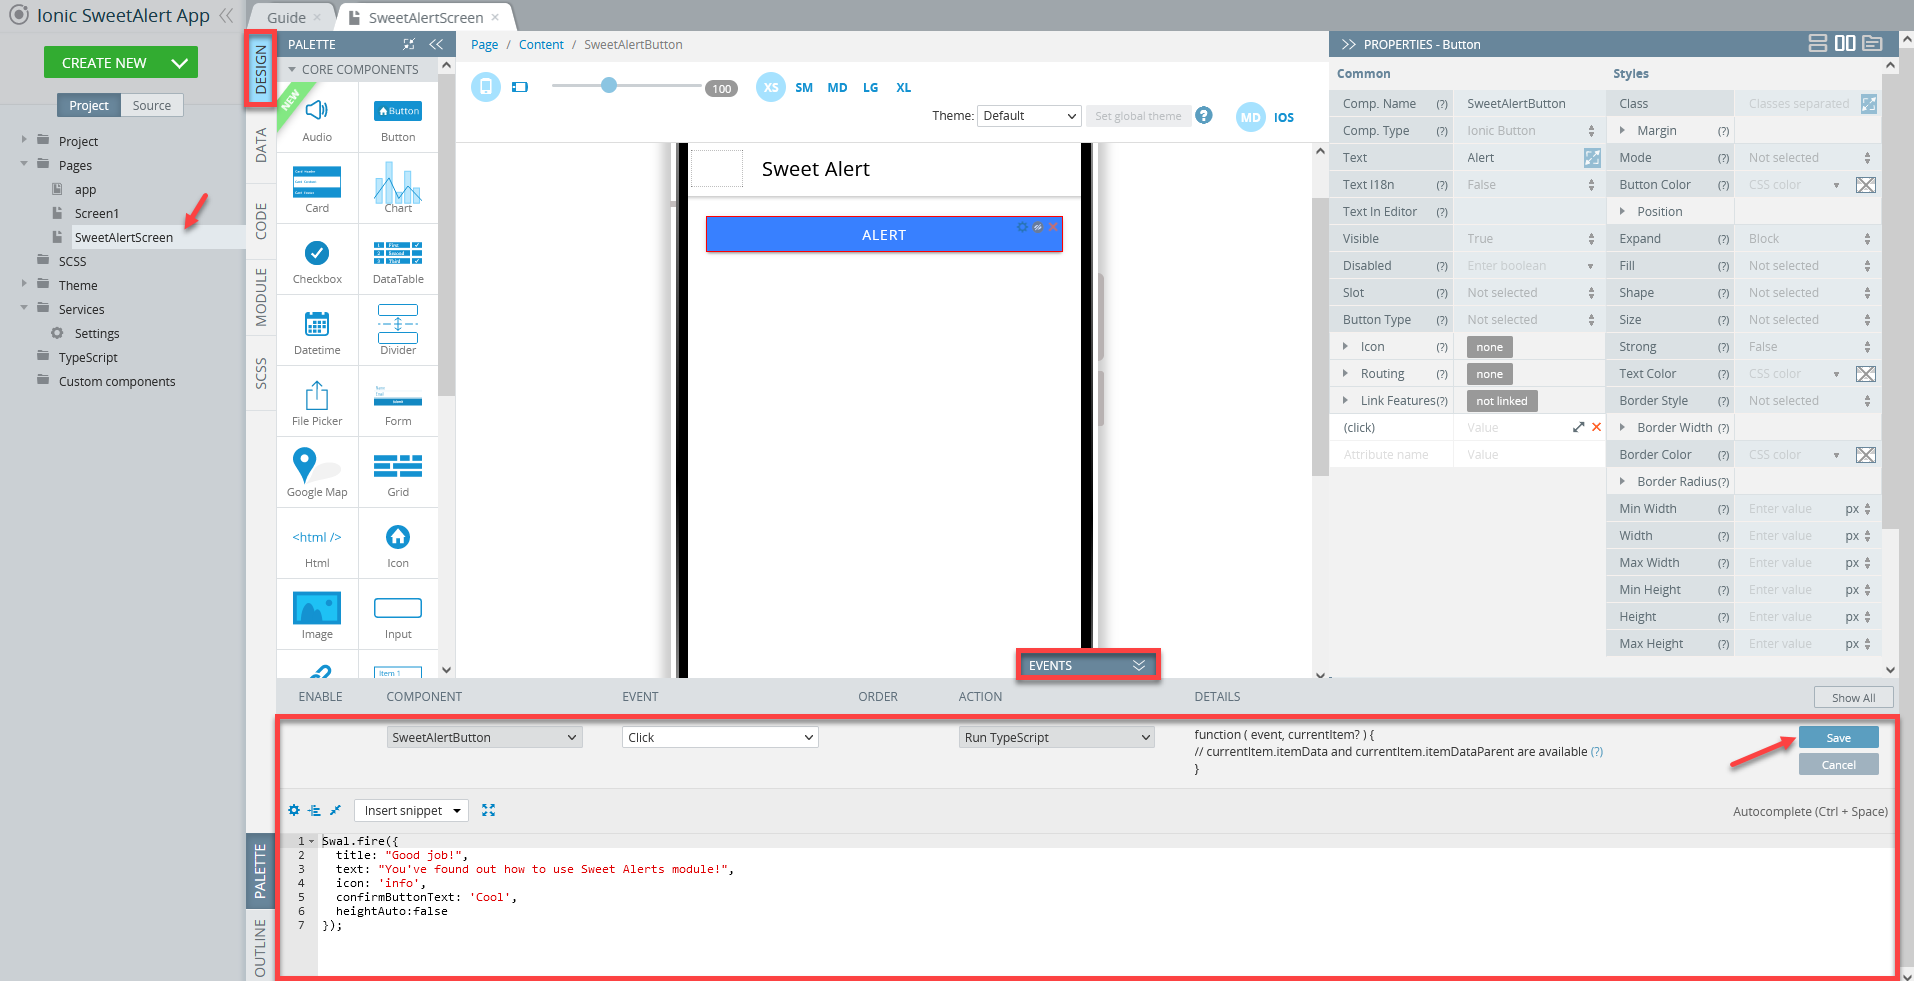
Important: heightAuto:false!You are free to use any code you like (can look for samples at https://sweetalert2.github.io/) but make sure you add the line
heightAuto:falseto your code.
App Testing
Now, you are ready to test your app. Сlick the TEST button in the App BuilderToolbar to launch your app in the browser.
After the app starts in the web browser, click the Alert button to see the alert:

Testing App
When your app version is ready, you might also like to test it on the device.
Appery.io Tester AppA great option to quickly test the app on the device is to use our Appery.io Tester app.
The app is free and available for both iOS and Android.
You can check out this page to learn more about using the Appery.io Tester app.
Updated about 1 year ago