Using with Appery.io Database
Introduction
The Appery.io database can be used with AppClient in one of two ways.
-
The first and the easiest way is to generate Appery.io Database
dbmodels within your API Express project and use AppClient with API Express, as described in the previous section. In this case, you can generate services for every database collection via the API Express Generator tool. This is a preferable way if you want to follow a low-code development approach. -
The second way is to use AppClient with Appery.io database directly (without API Express), and this is what this section is about.
At the moment, the API Express Generator tool doesn’t support services generation for direct access to the Appery.io database, but the Appery.io platform provides the special Appery.io plug-in to perform AppClient initial setup for your Appery.io database.
Using AppClient Apperyio Database Plugin
To learn more about how to work with the AppClient Appery.io plugin, let's review a simple example in detail.
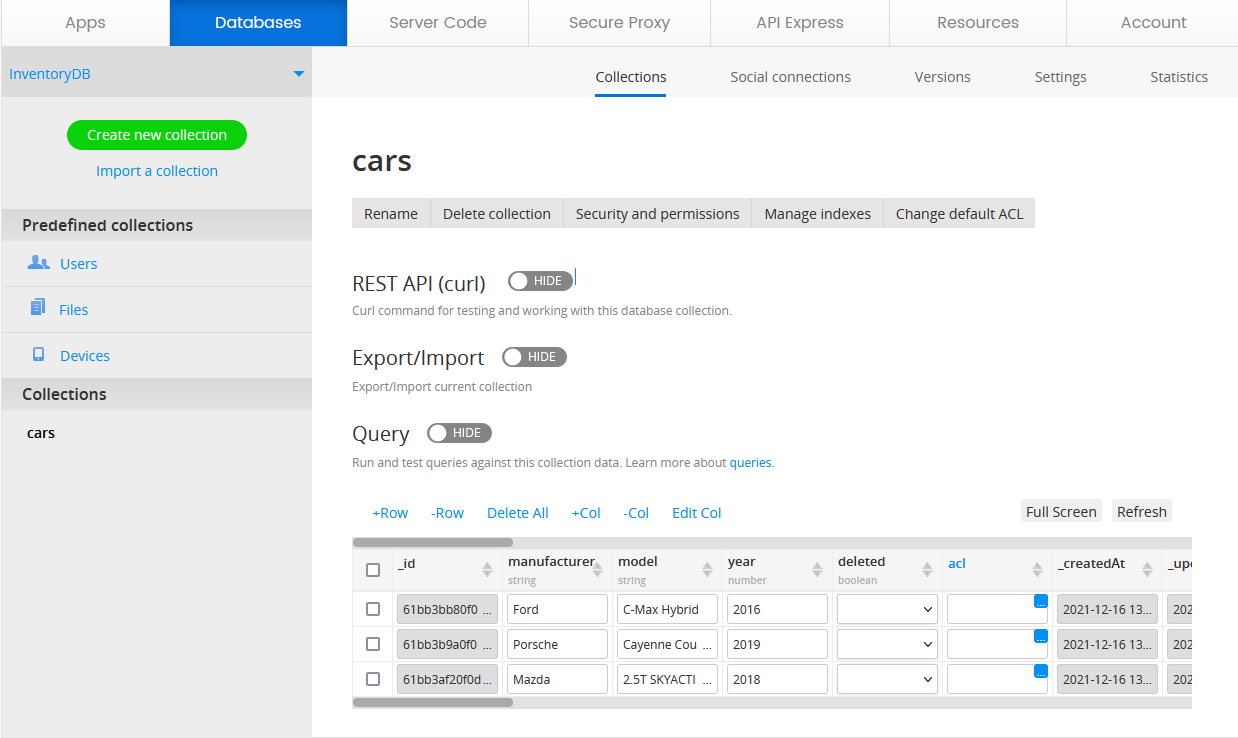
Preparing Database.
Create an Appery.io database and name a collection to cars, then add some sample data to it:
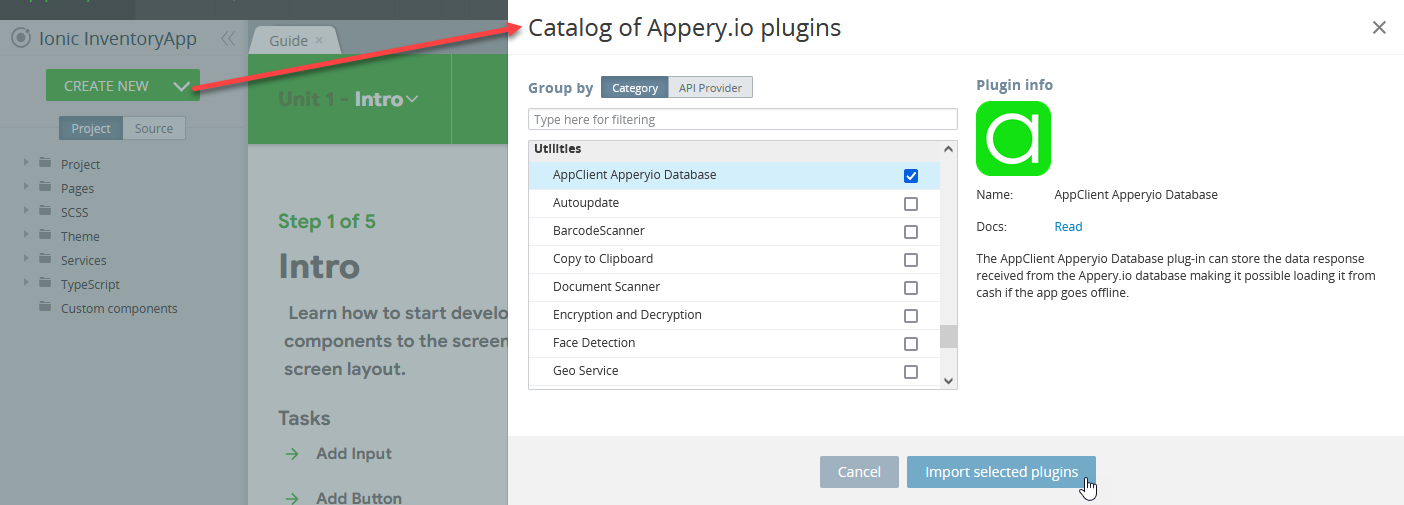
Importing Appery.io AppClient Plugin
- In the app, from the CREATE NEW drop-down menu, select From Plugin and import the AppClient Apperyio Database plugin:
After import, you can see AppClient services in the project tree:
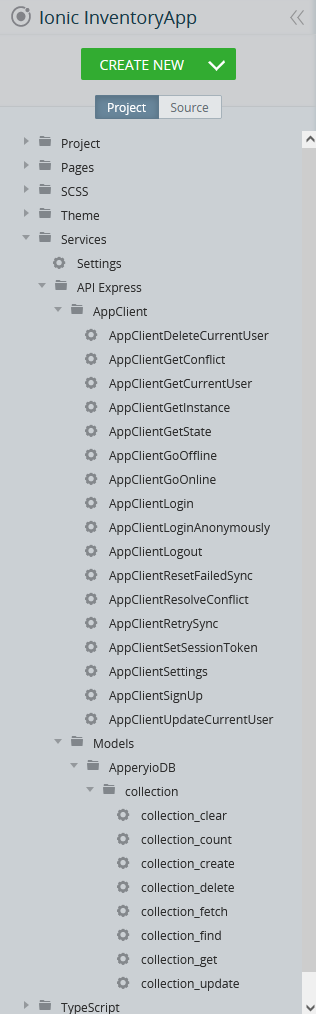
The services grouped under the Services > API Express > AppClient folder are the general AppClient app services and are described in detail on the AppClient App Services page.
The Services > API Express >Models > ApperyioDB folder contains the services that are of interest now:
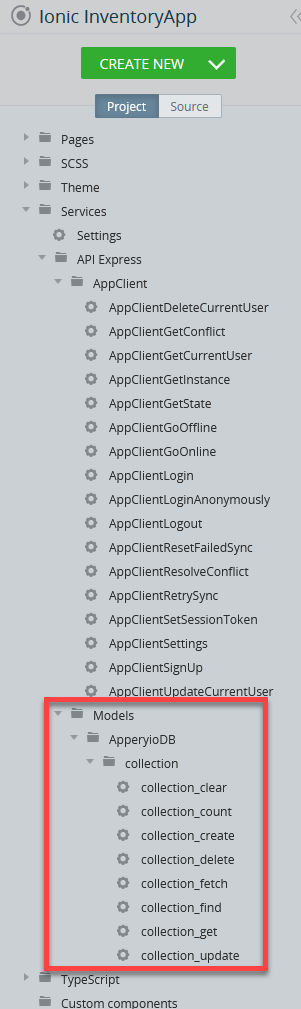
Using the collection services provided by the plug-in, operations on any database collection can be performed.
Every collection service is universal, which means that it doesn't rely on a specific database collection (unlike the services generated with the API Express Generator tool). So, to invoke the collection service, we will need to manually pass some additional data, like collection name and other required data for every service before calling it.
Binding AppClient to Database
Open Services >API Express > AppClient >AppClientSettings and set your database API key. Also, define the autoLogin parameter as false:
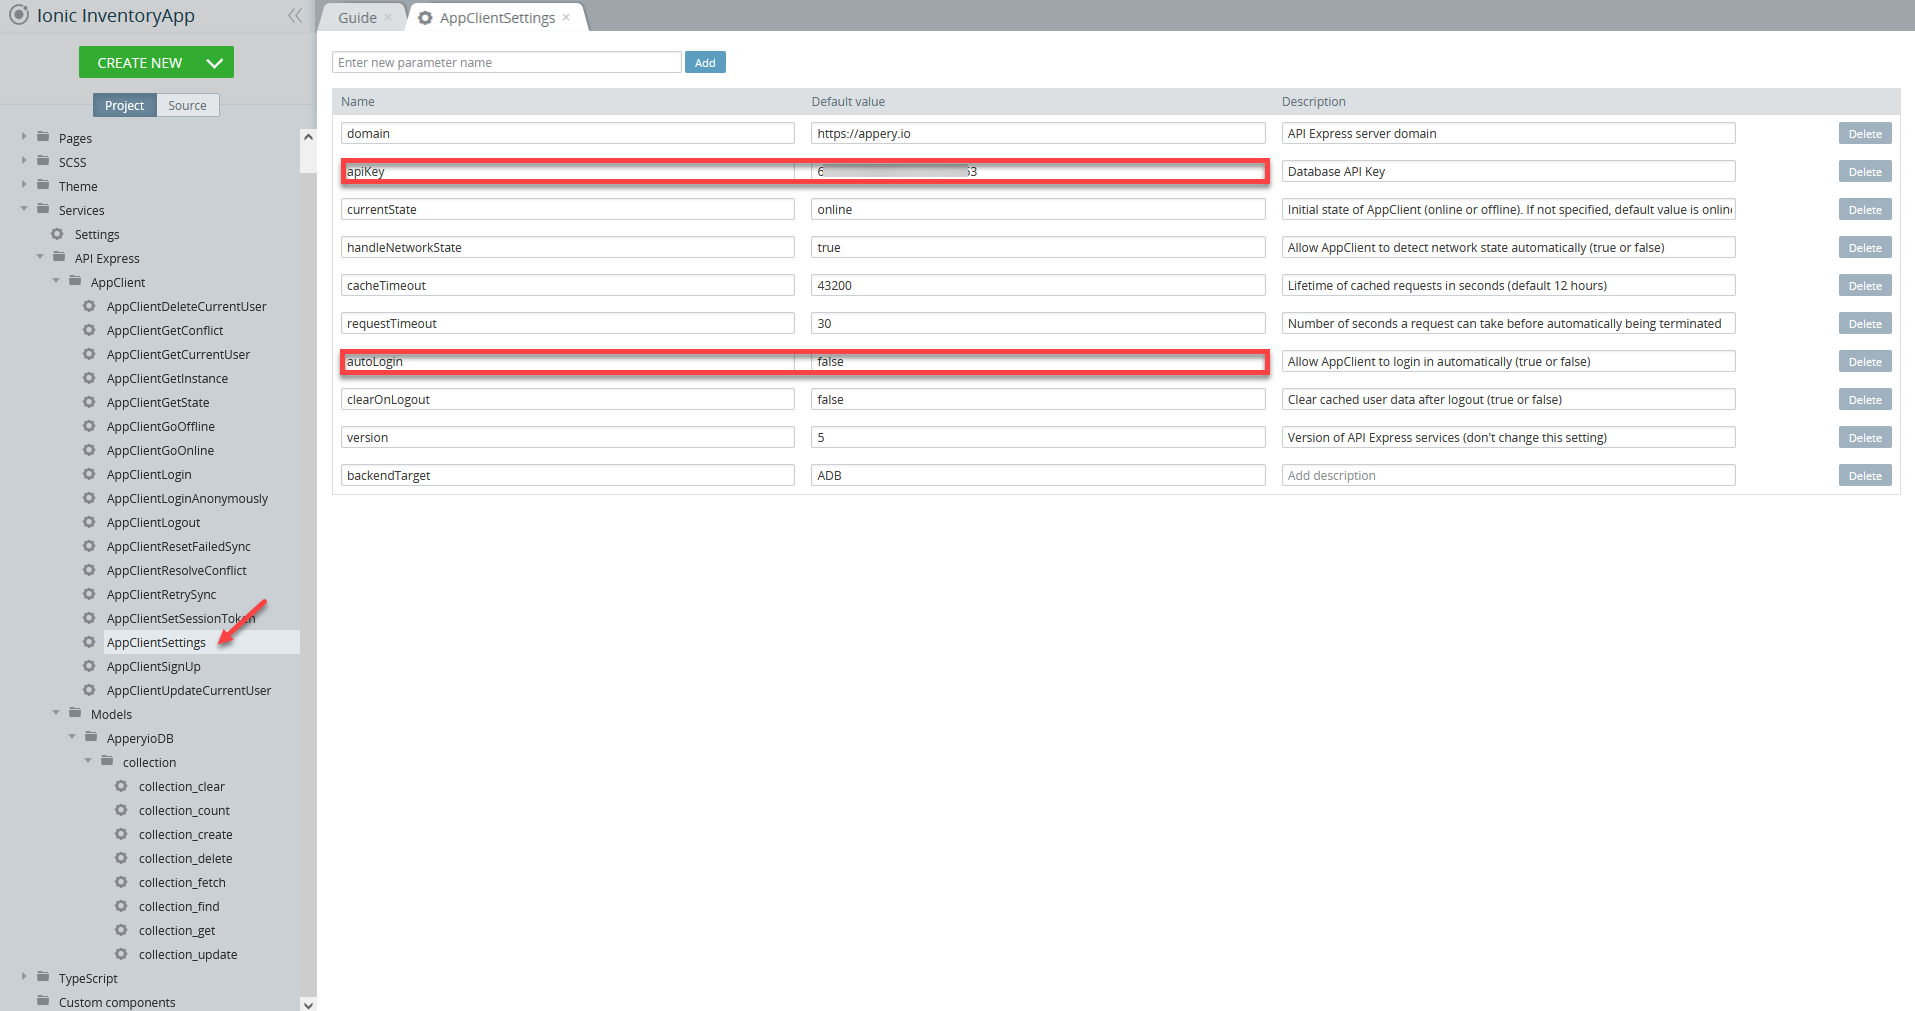
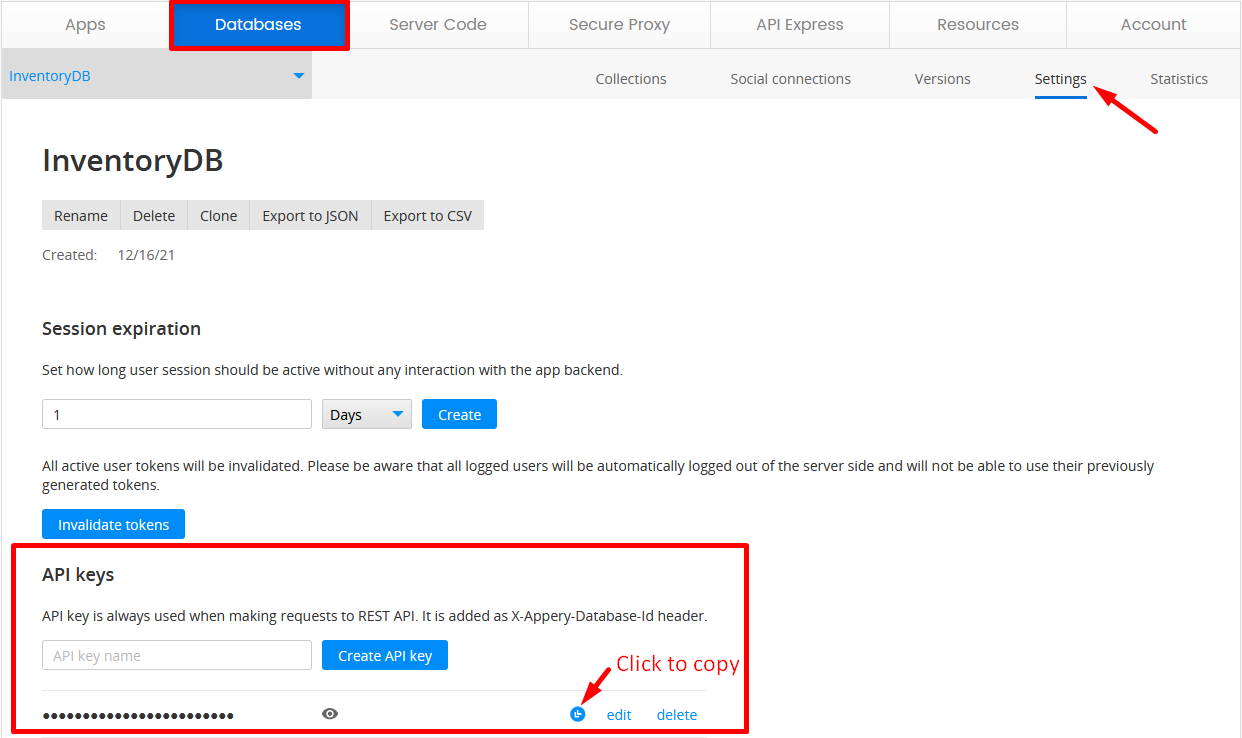
Note!You can find the database API key on the Database Settings page:
Defining Collection Data Format
In order to use the AppBuilder's visual data mapping feature, AppBuilder should know what data in our cars collection looks like (and this needs to be done manually because the collection services are universal, so the response data format is unknown).
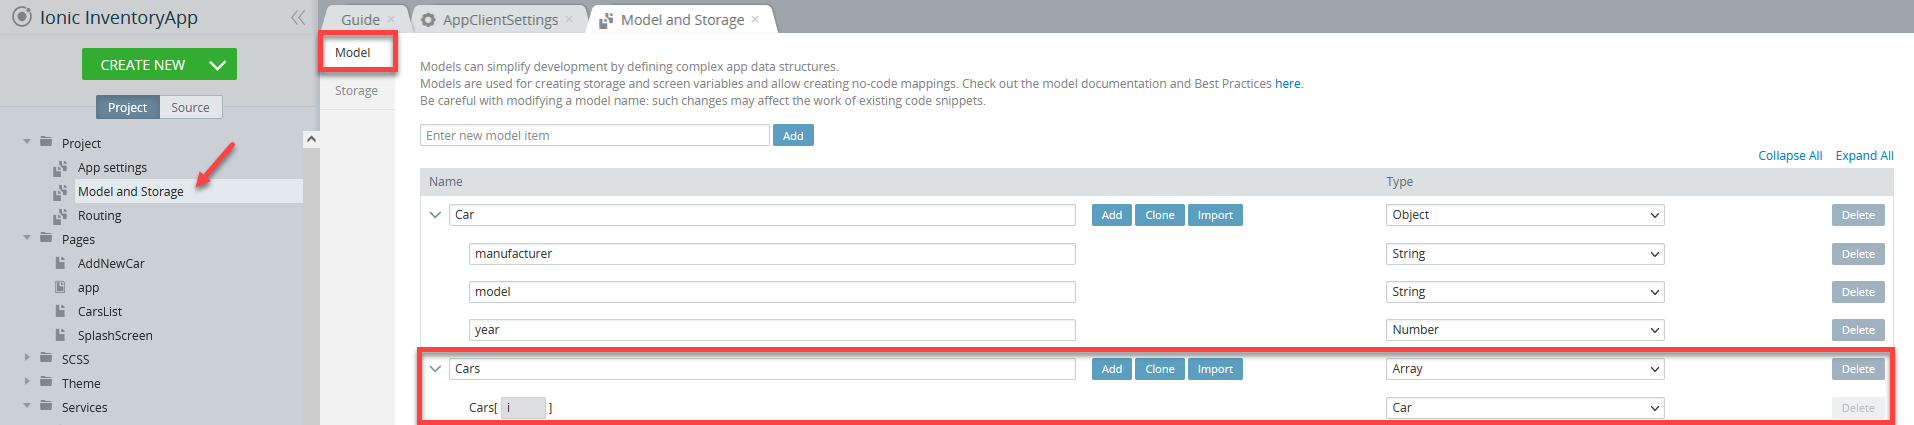
Open the Project > Model and Storage project tab and define the new model, Car, like shown in the picture below:

This model will be used for collection services that return a single-car object.
Also, we need to take into account the related service, like collection_find. In the case of the find service, we have an array of cars, so we need to add another model, Cars of Car type:
Creating App UI
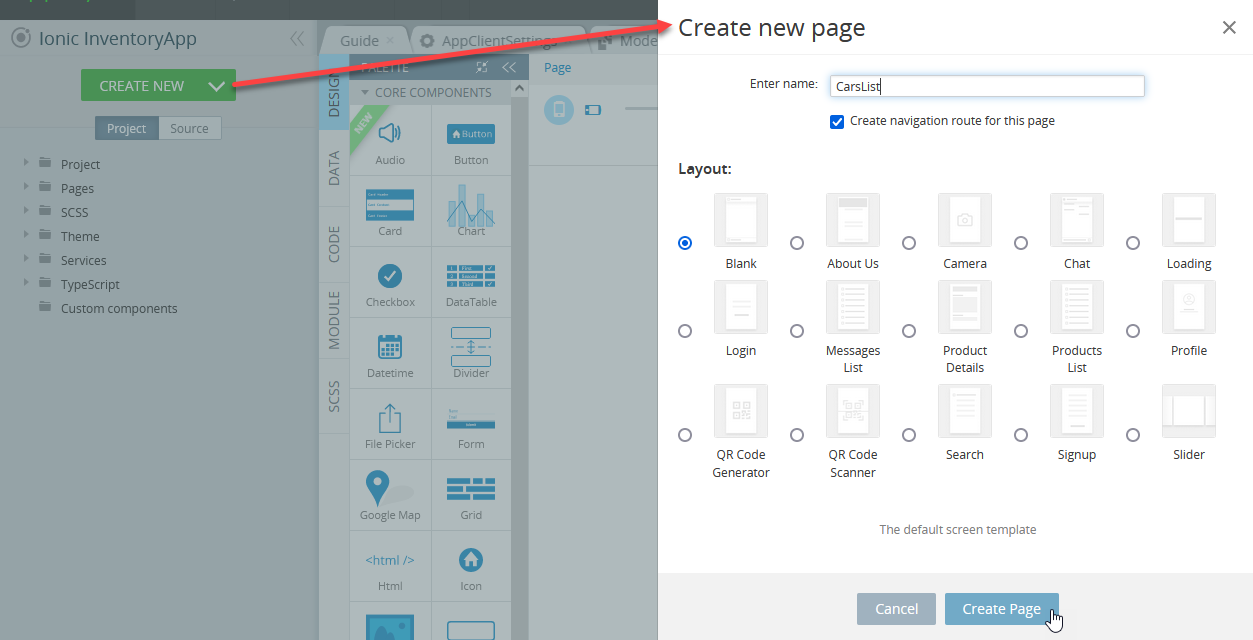
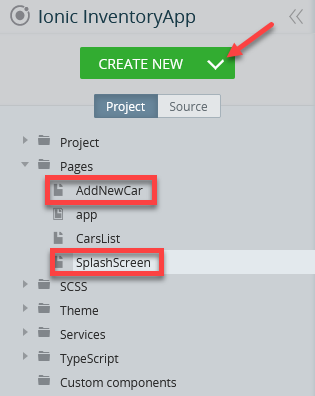
- From the CREATE NEW drop-down menu, create a new page: CarsList (you can also rename the Screen1 page):
- Then, create two more pages: AddNewCar and SplashScreen:
CarsList Page UI
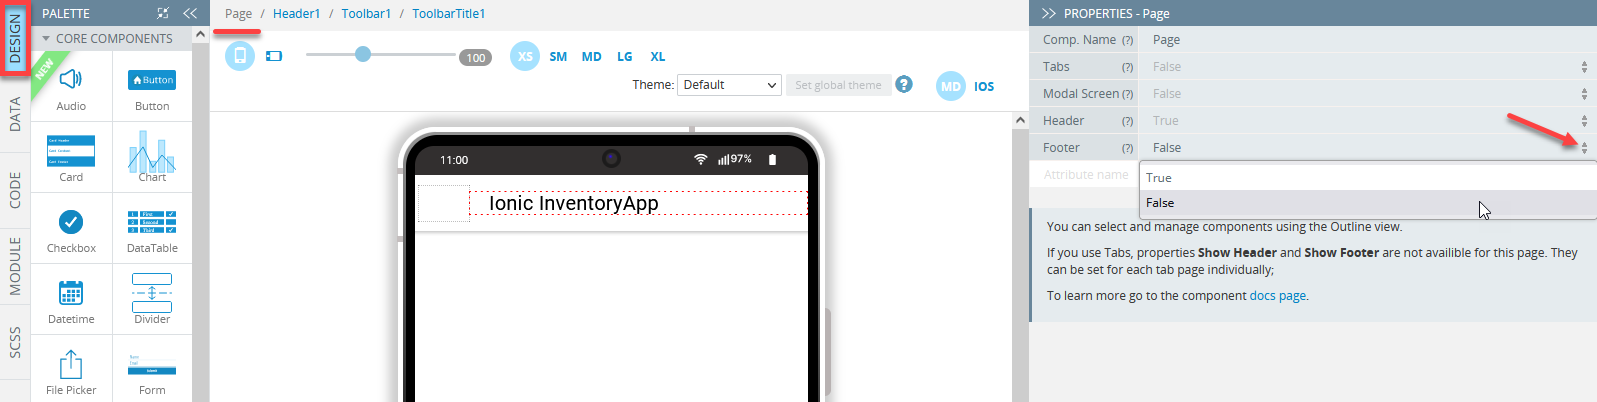
- First, select the CarsList page and click its Header. Then, under the PROPERTIES view, set the Toolbar Title component's Text property as Ionic InventoryApp.
- You can also disable the page Footer property as it will not be used (this can be done for all three app pages):
- Add a Button component to the page and set its Component Name property as FindCarsButton and its Text property as Find cars.
- Now, drag a List UI component to the to the Content area.
A list with two default List Items each having a child Item Label component will be created. - Delete the second List Item.
Using OUTLINE viewIf you click the OUTLINE view (bottom left corner), the needed component can get selected and its properties list will be shown on the PROPERTIES view on the right. It will also be selected on the breadcrumbs chain on top of the mobile frame so that you can see its nesting and easily switch between the other related page components.
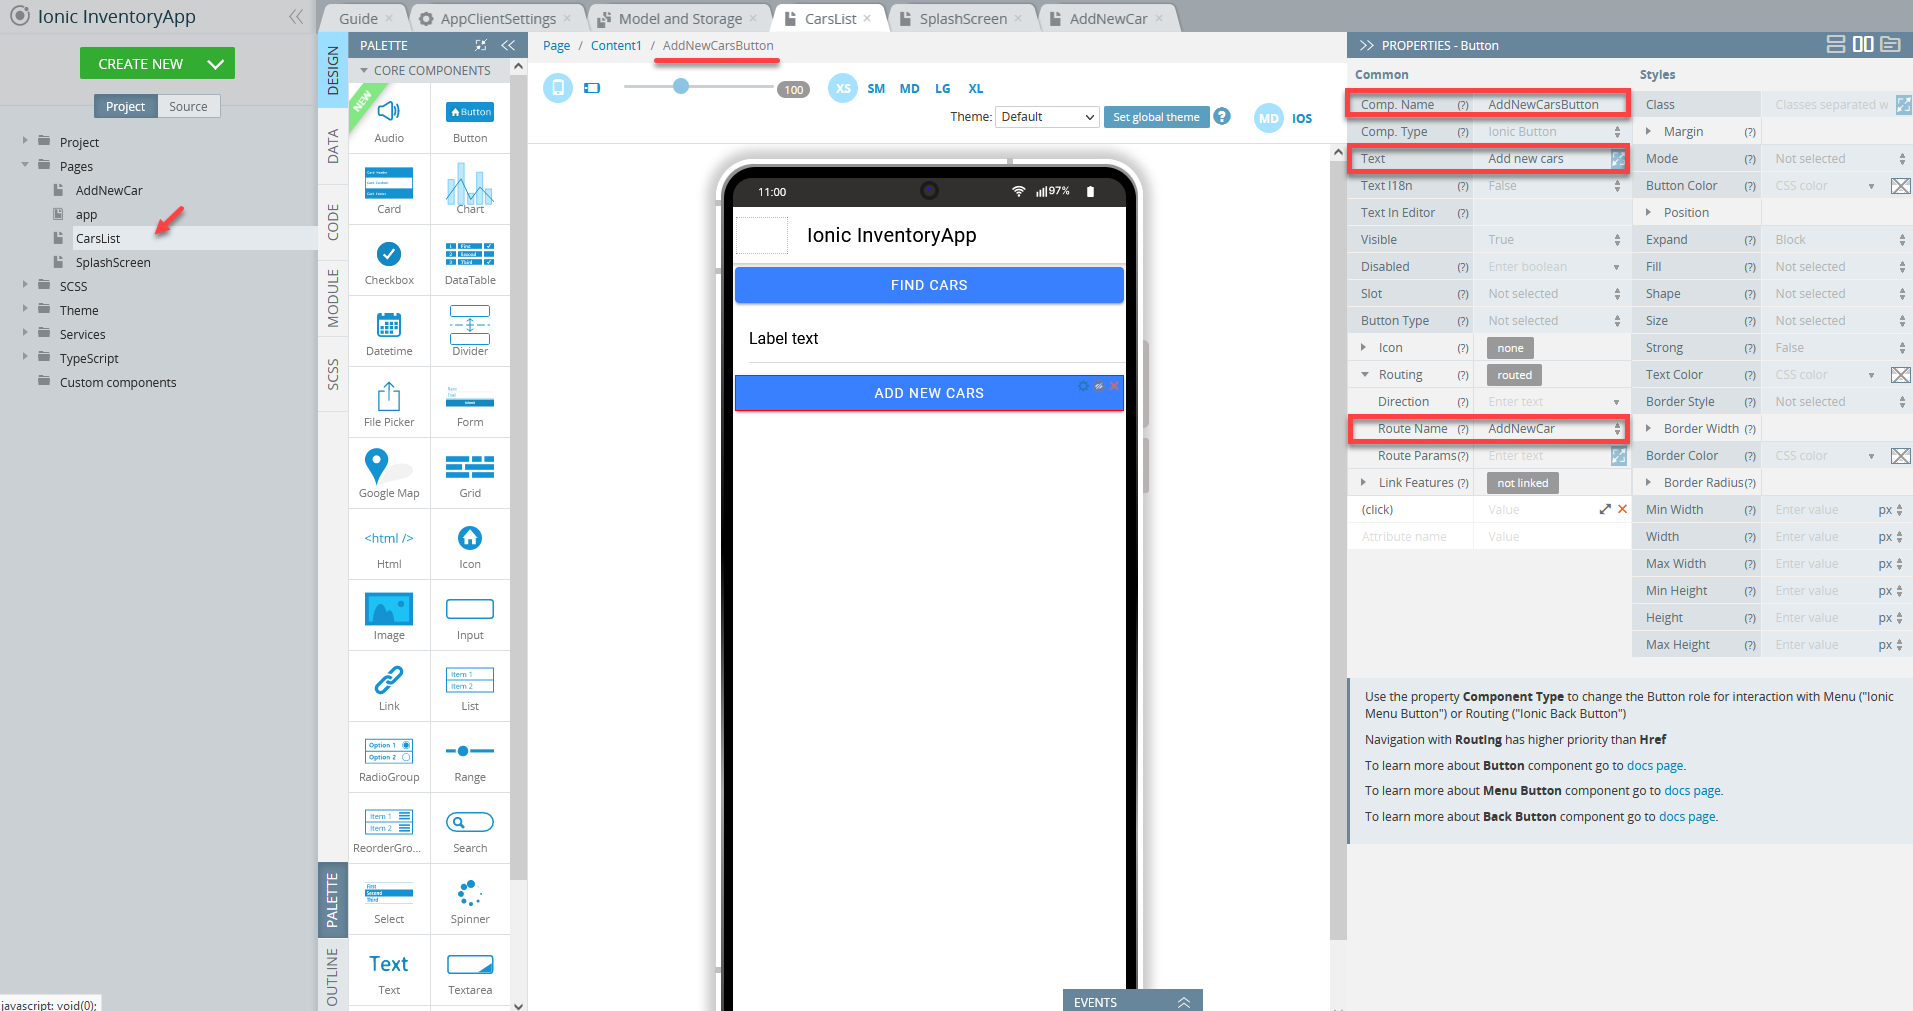
- Now, add one more Button component to the page and set its Component Name property as AddNewCarsButton and its Text property as Add new cars then unfold the Routing folder and set the Route Name parameter to AddNewCar:
AddNewCar Page UI
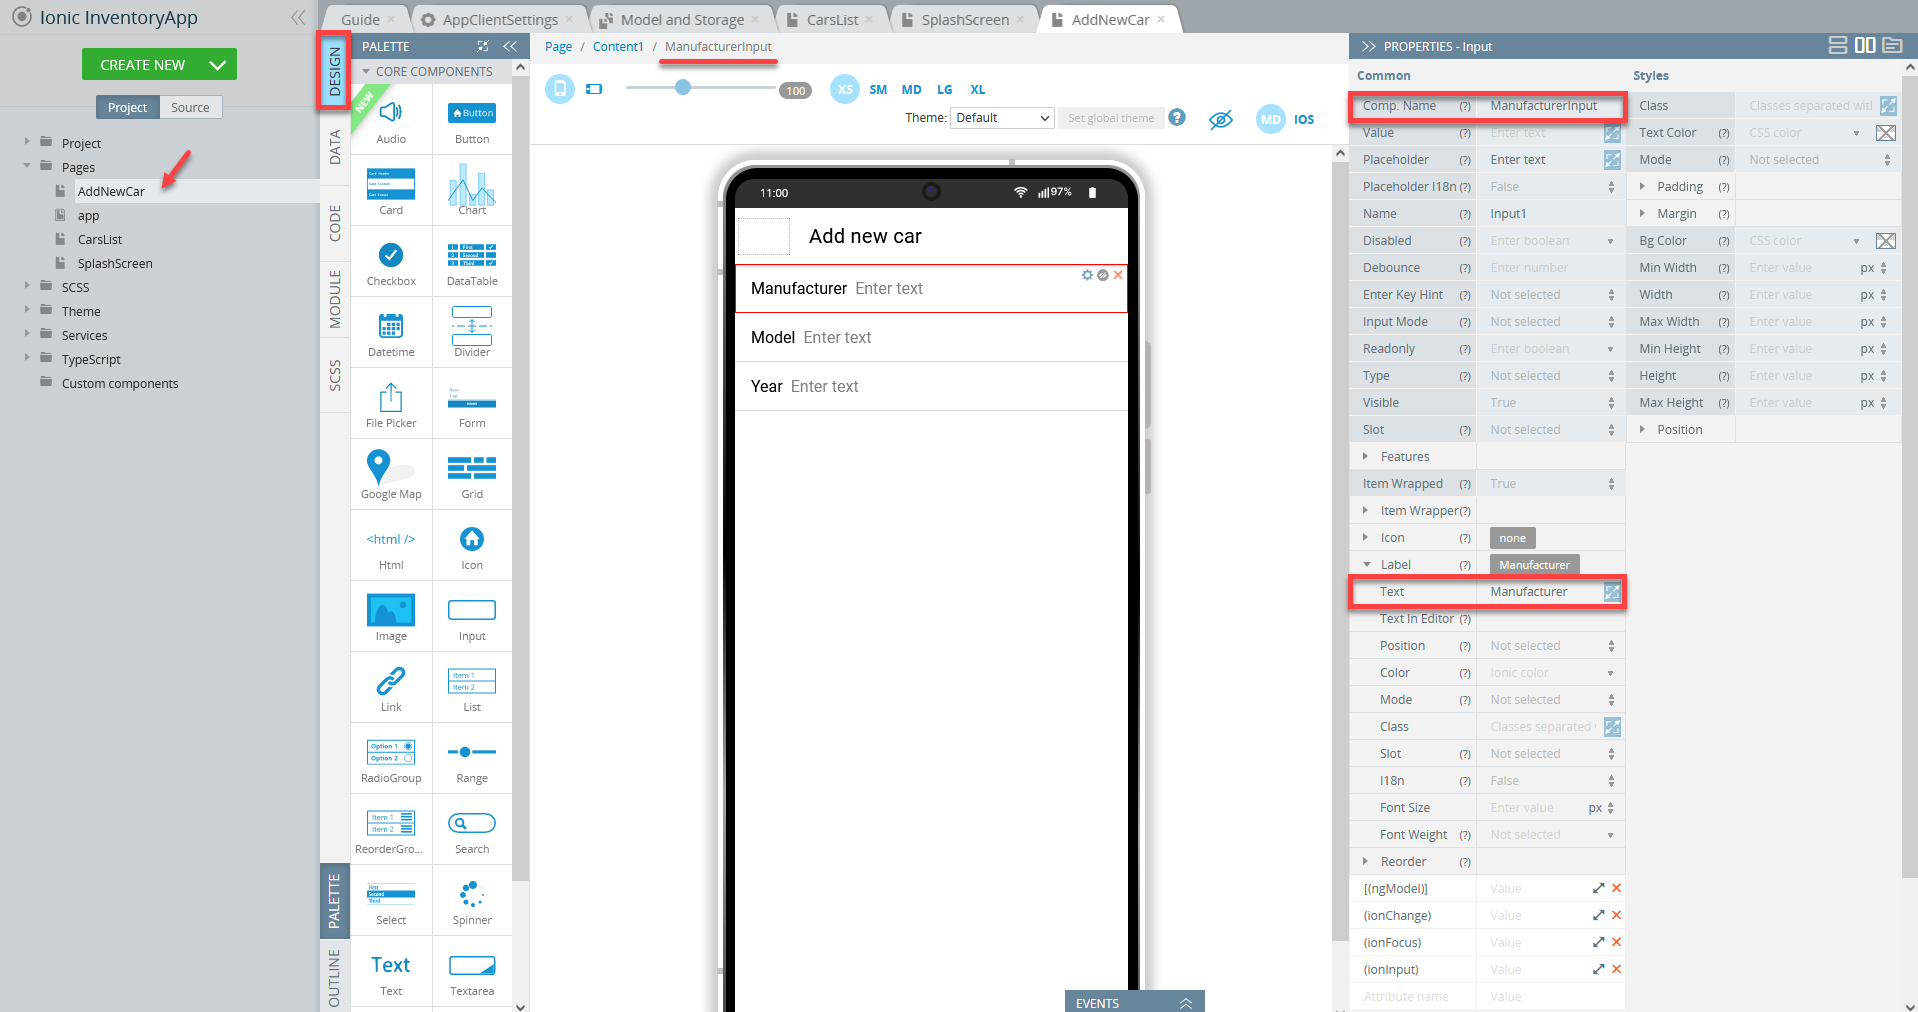
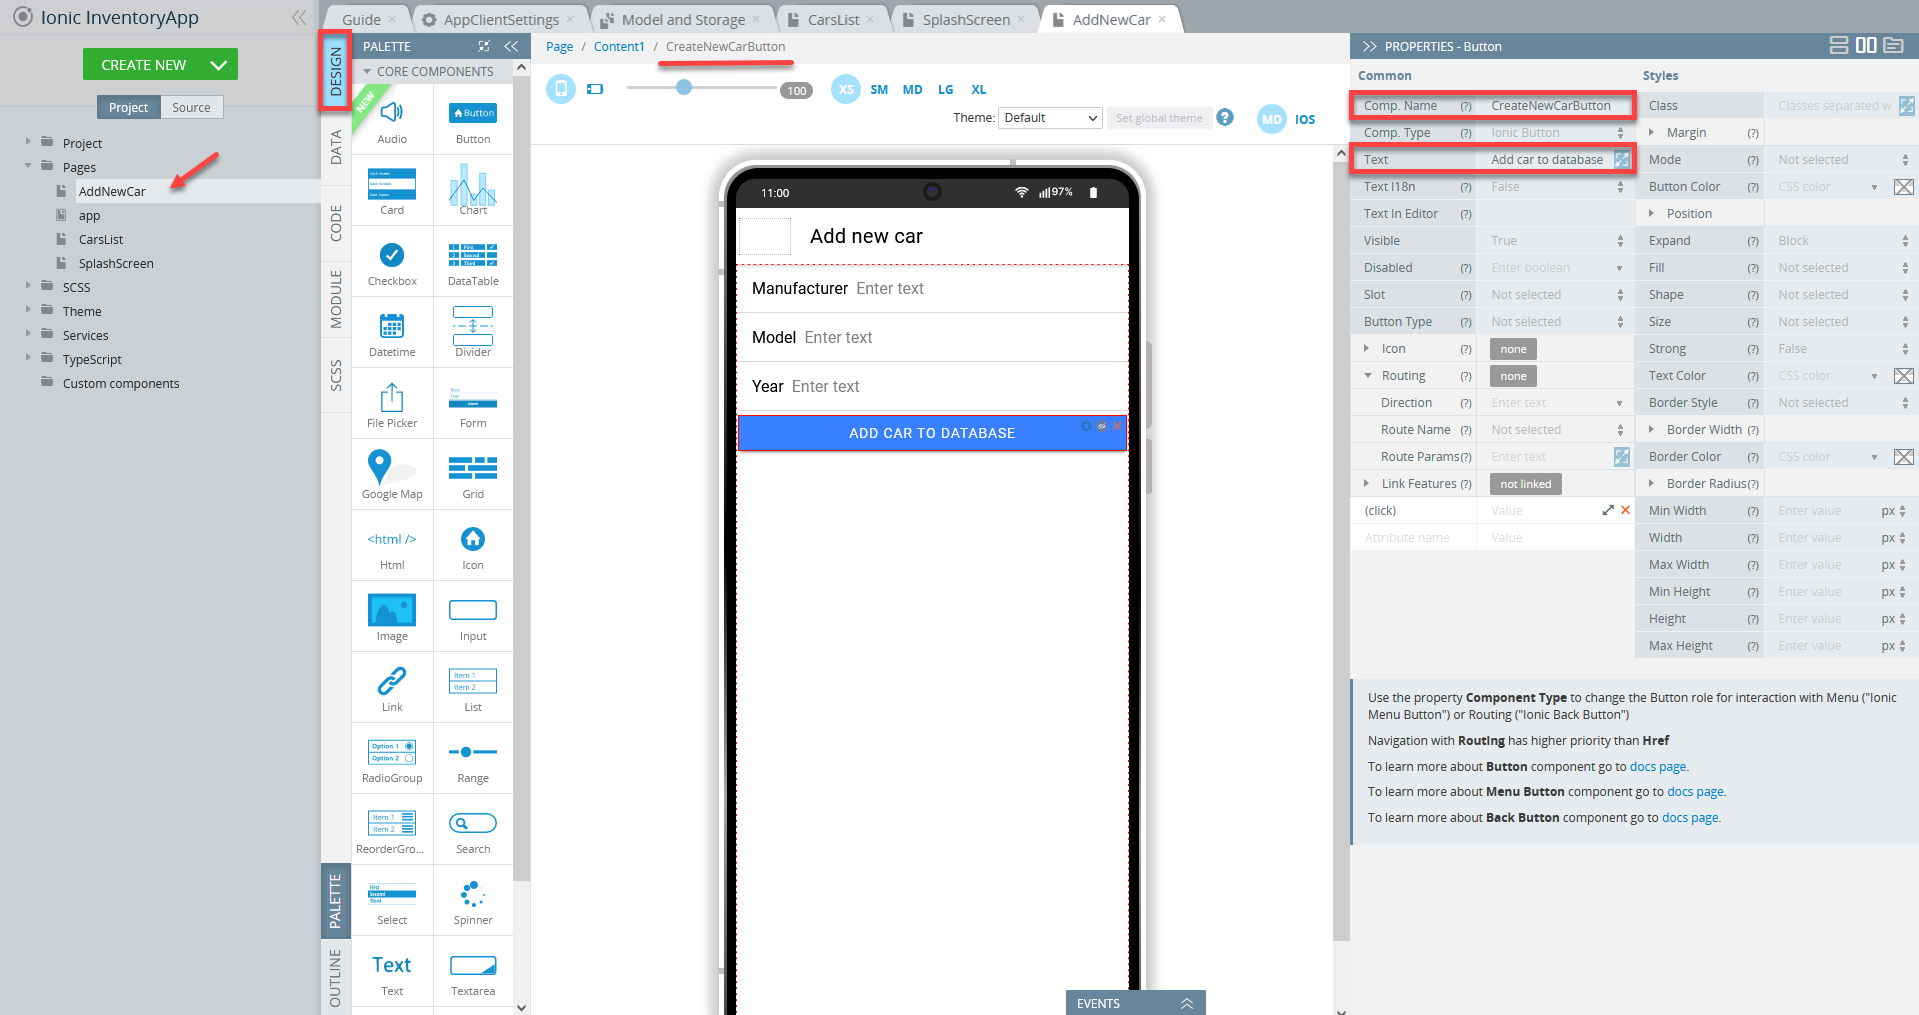
- Switch to the AddNewCar page and click its Header. Then, under the PROPERTIES view, set the Toolbar Title component's Text property as Add new car.
- Drag & drop three Input UI components to the to the Content area and define their Components Name and Label > Text properties accordingly:
- Now, add the Button component to the page and set its Components Name property as CreateNewCarButton and its Text property as Add car to database:
That's it for the app UI.
Defining App Logic
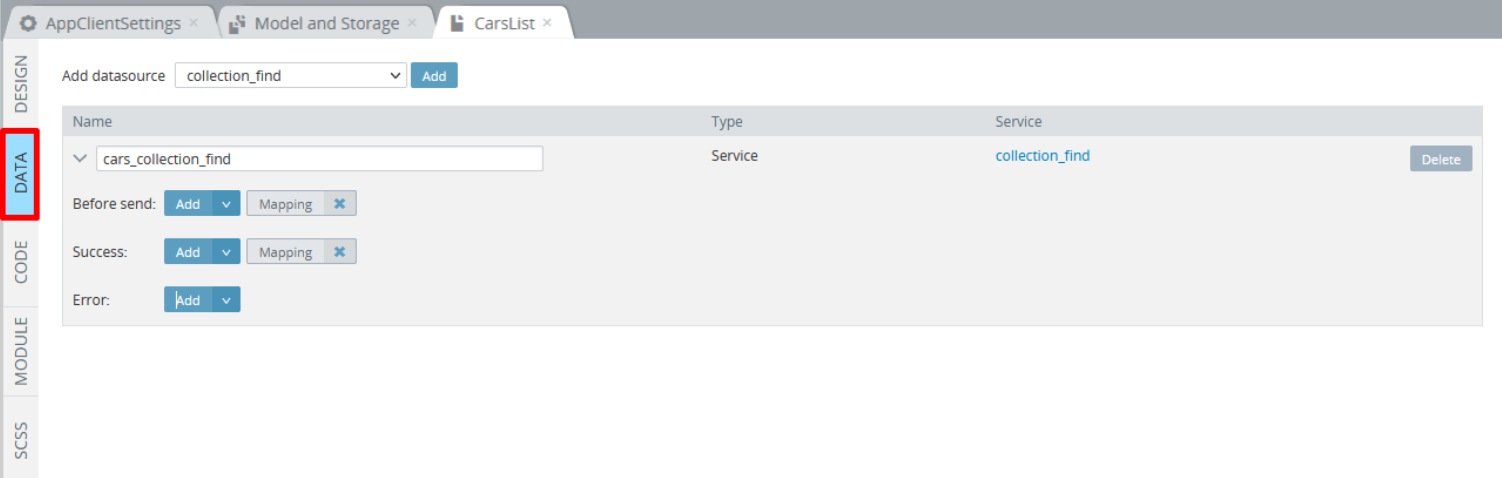
- First, go to the CarsList page DATA panel, select collection_find from the drop-down and click the Add button, then rename the datasource cars_collection_find:
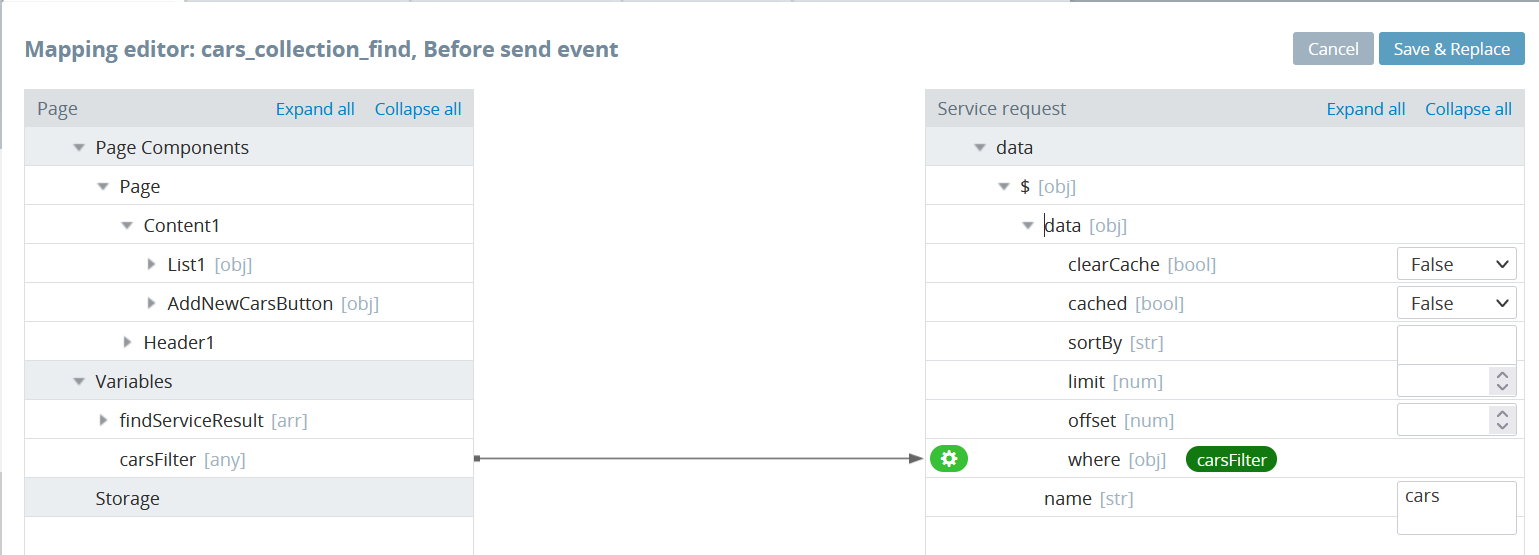
- Now, click the Mapping button for the Before send event, set the collection name for the find operation and save:
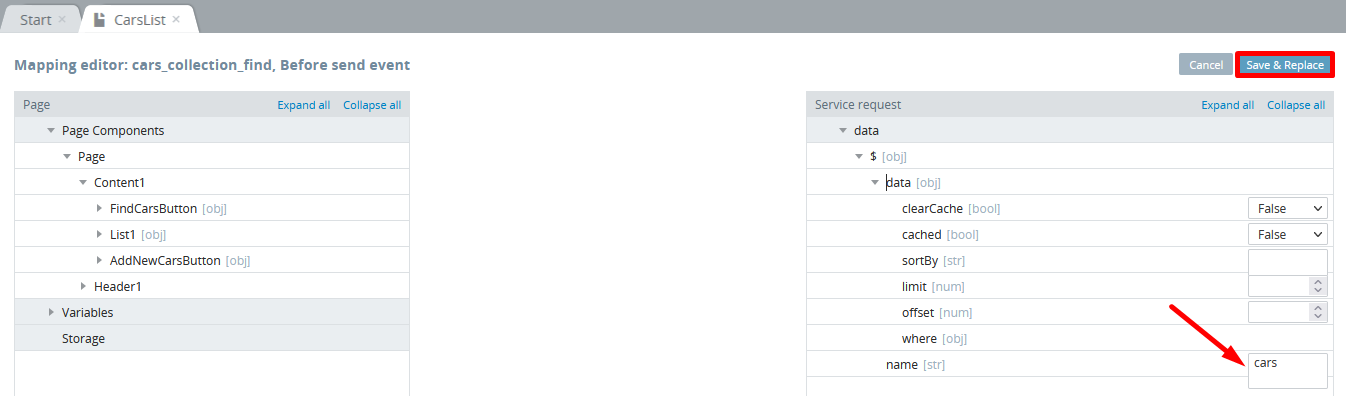
In this case, the cars_collection_find service will return all the database cars collection items, because the where clause is empty.
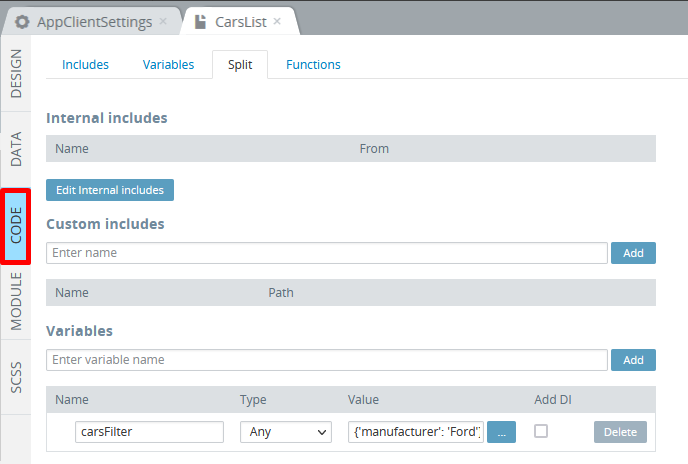
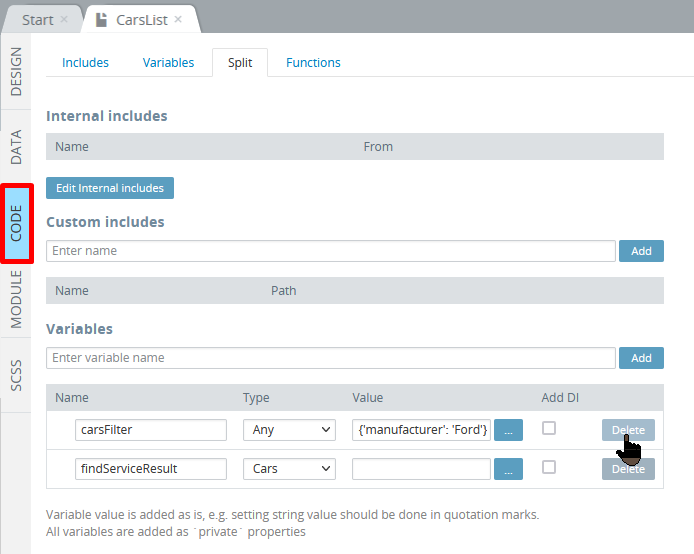
Adding Cars Filter
If you need to return the cars list of a particular manufacturer, for example, only Ford cars, the variable carsFilter with a required clause value should be added under the CODE panel of the page:
Also, you will need to go back to the DATA panel and update the cars_collection_find request mapping:
Do not forget to save your work!
But if you are not interested in adding a cars filter now, proceed to the below step where the cars_collection_find service response is mapped to the UI elements.
- First of all, open the CODE panel and create a variable
findServiceResultof Cars type that will hold the service response:
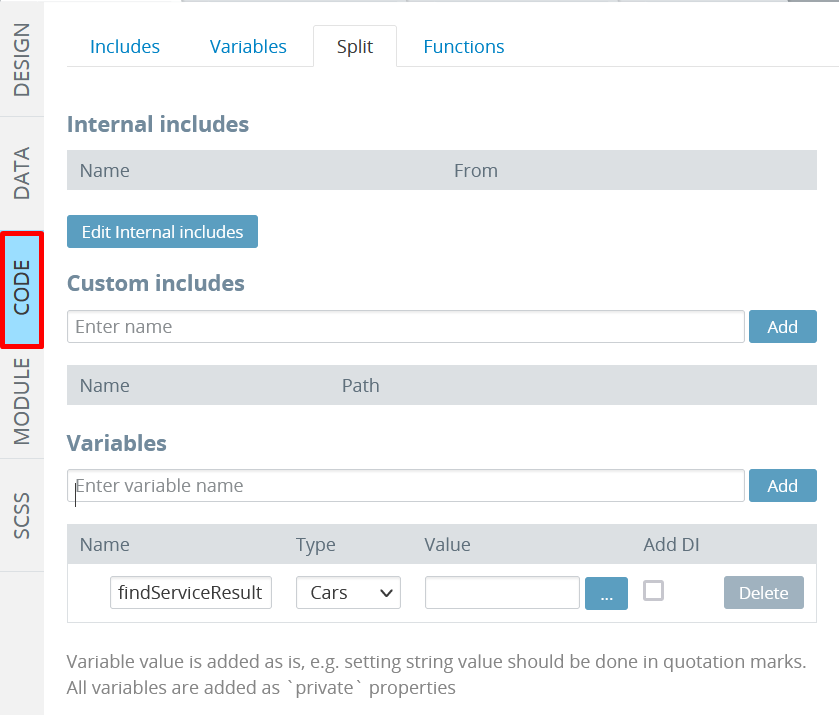
If you later decide to add a cars filter functionality, you will need to add the
carsFilterof Any type with specifying the needed manufacturer as its value.
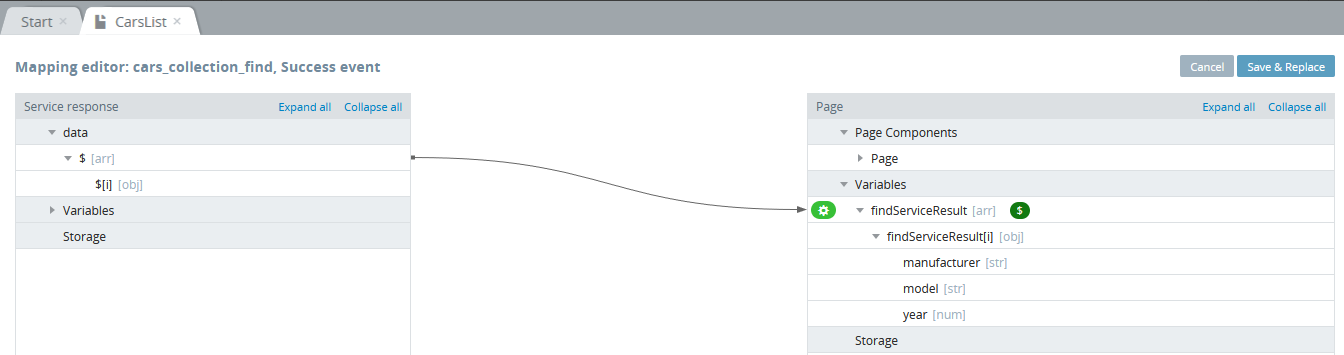
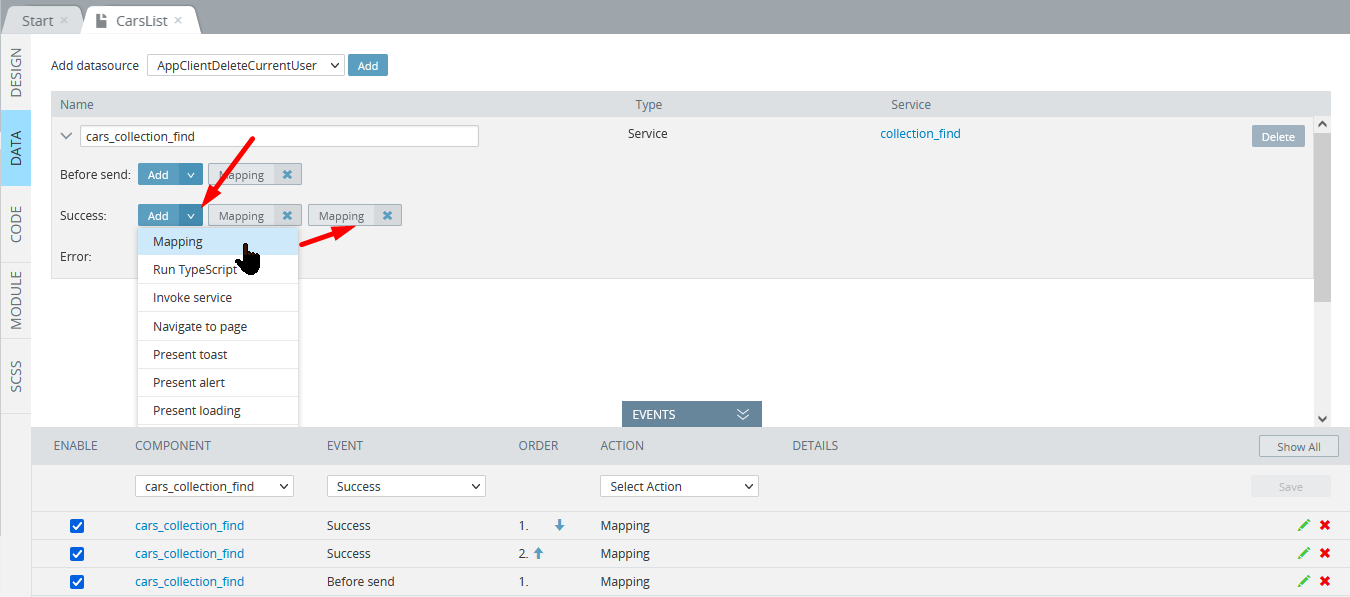
- Then, switch back to the DATA panel and create the following two mappings for the cars_collection_find Success service:
- First, map the service response to the
findServiceResultvariable:
- Then add another mapping to connect the
findServiceResultvariable to the UI:
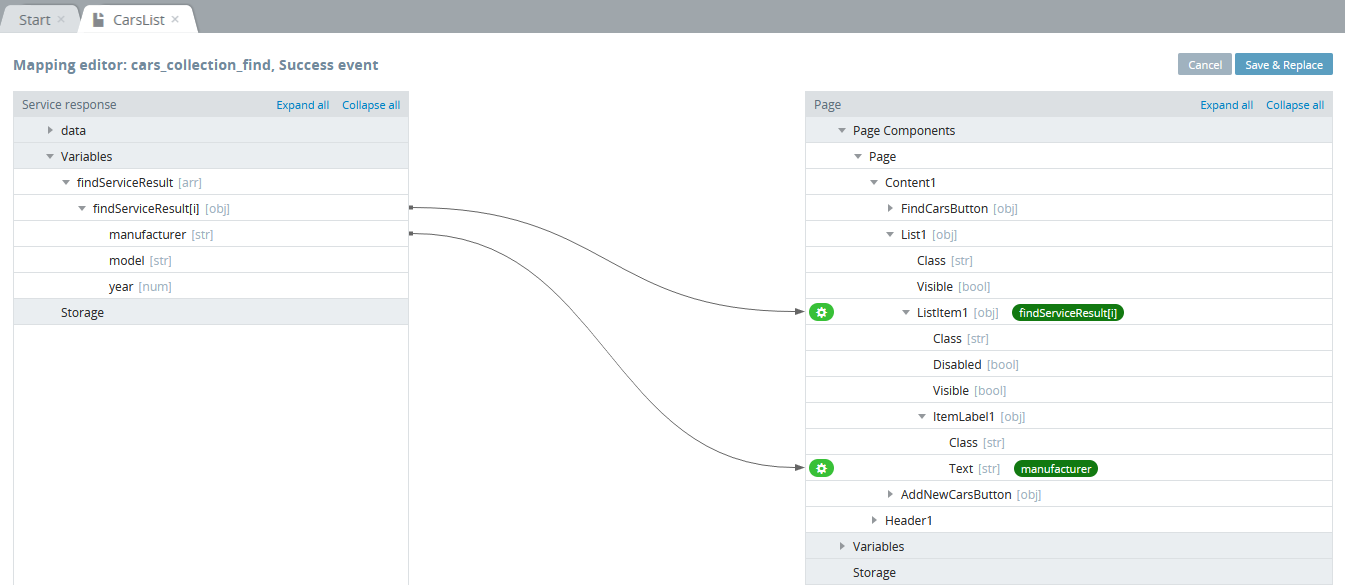
To create another [mapping]https://docs.appery.io/docs/5-event-handling#mapping) for the same event, click Add arrow button to the right of the Success event and, from the drop-down list, select Mapping:
Do not forget to save your work by clicking Save & Replace for every mapping you create!
Note!At the moment, the second mapping is required in cases, when converting some "unknown" service response to the known type, like the Cars type in our case is needed. The reason is that without this type of conversion you will not be able to see (and work with) the car fields on the AppBuilder visual mapping tool.
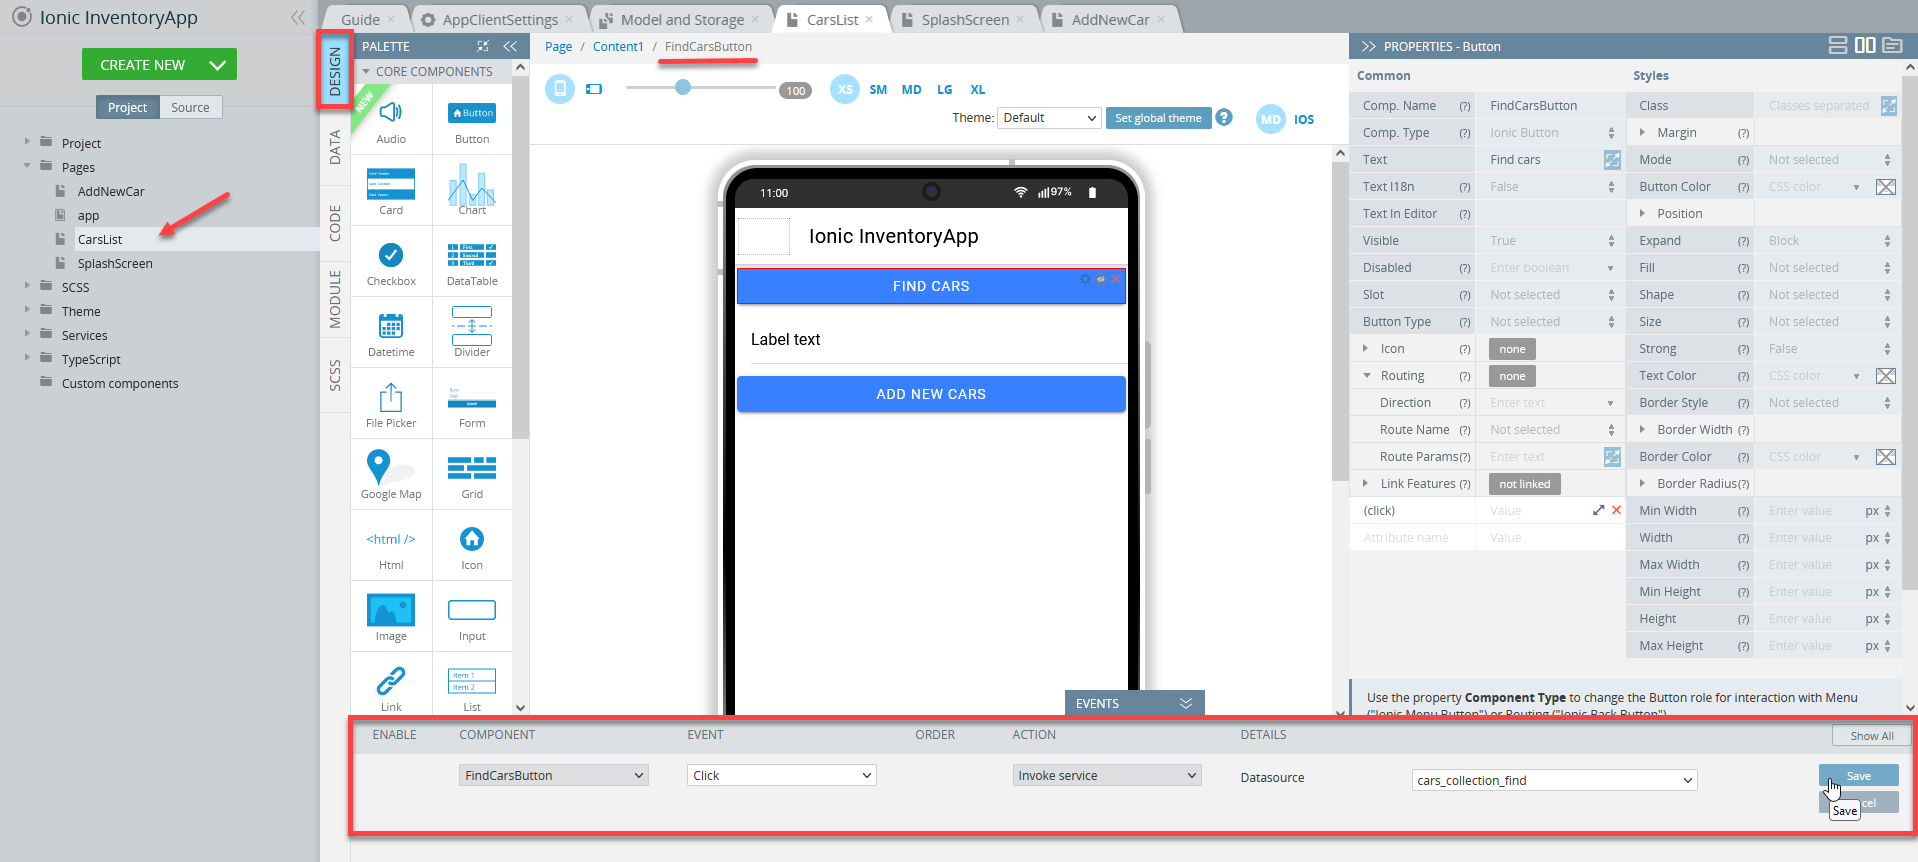
- Open the DESIGN panel and unfold the EVENTS tab from the bottom.
- Select the Find Cars button and for its Click event, add the cars_collection_find Invoke service action:
Setting Database Login
Collection services work only with secured databases, so, before performing any collection operation, we need to log in to the database. As an example, we can use the appclient_login_anonymously service:
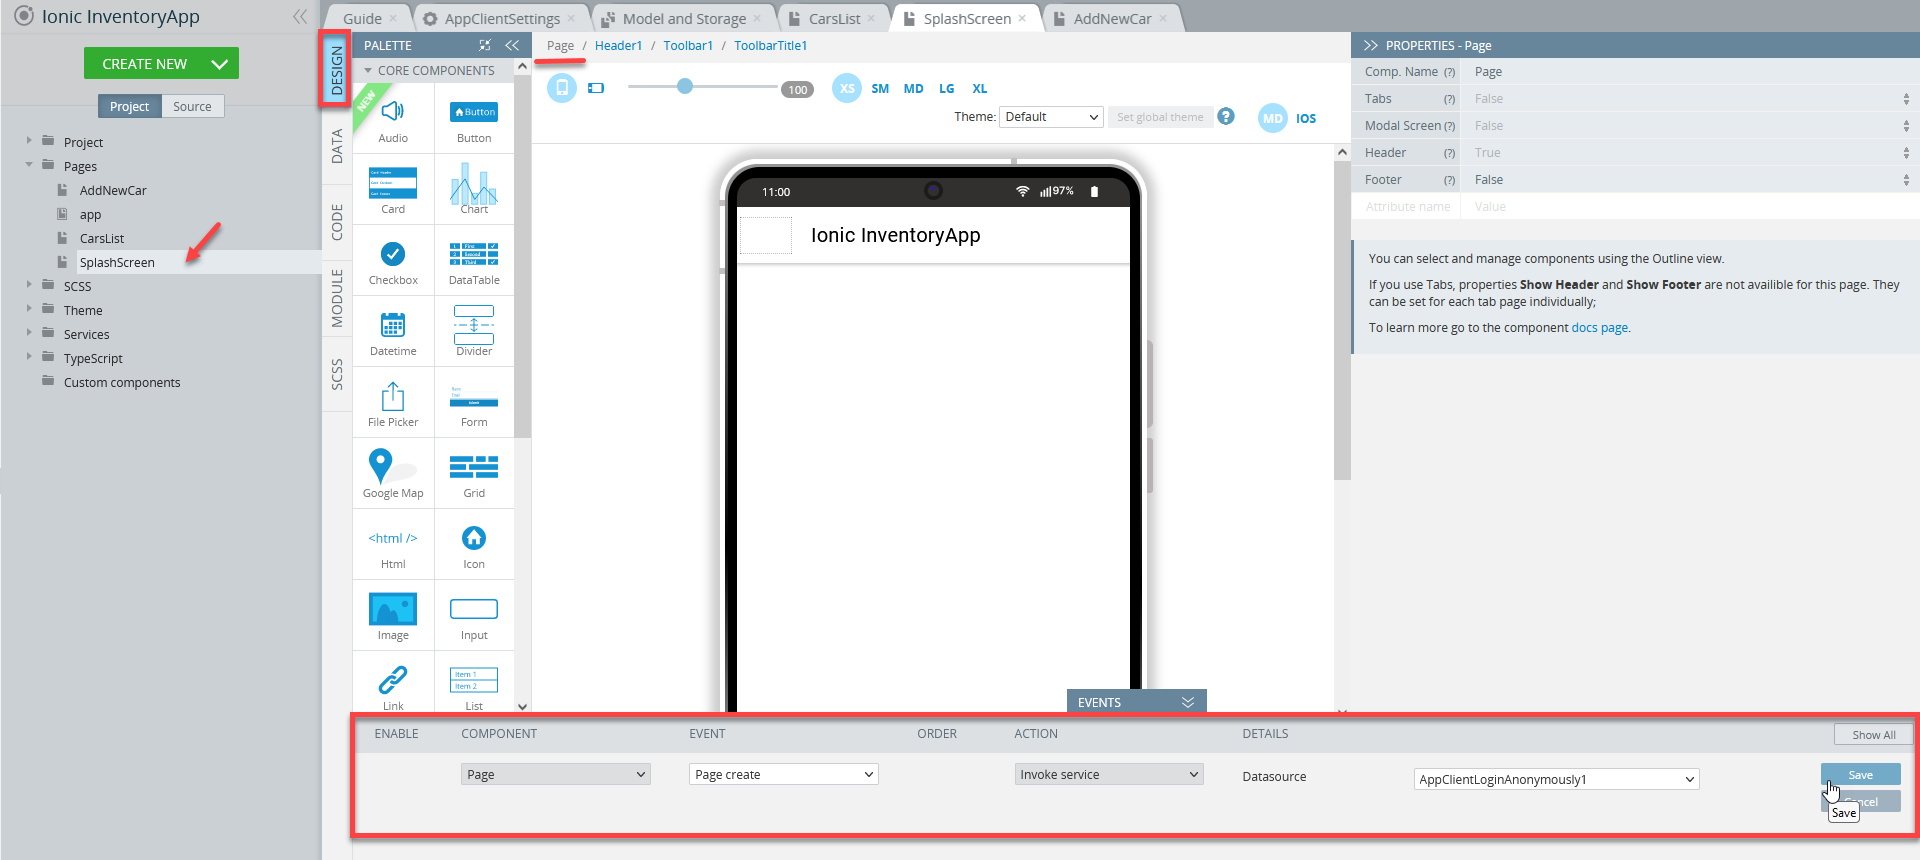
- Go to the SplashScreen page DATA panel, select AppClientLoginAnonymously from the drop-down and click Add.
- It will be automatically renamed to AppClientLoginAnonymously1 (you can later rename it to what you need).
- Unfold the EVENTS tab from the bottom, select the Page component from the drop-down, then define the AppClientLoginAnonymously1 datasource for its Page create event:
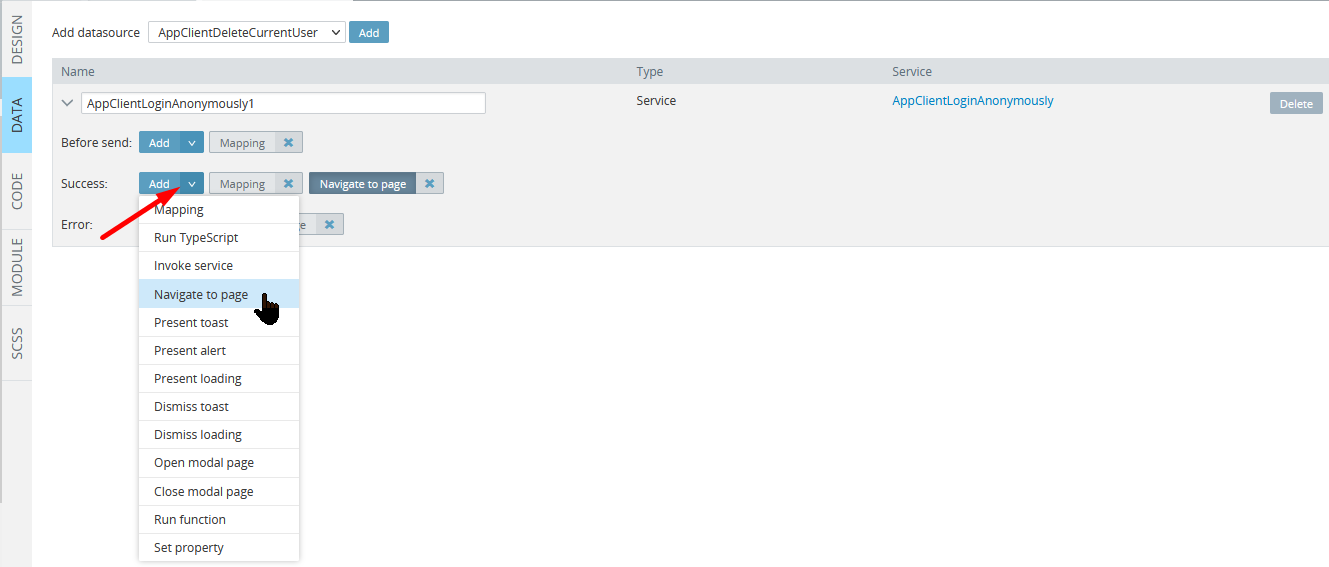
- Then, for the datasource Success event, select the Navigate to page action from the Add drop-down list:
- Now, in the EVENTS tab, select the CarsList page as the service Route name. Save your event.

- You can also add an Error event that will navigate to the same page:

App Testing
The app is ready for testing.
Now, run TEST and click on the FIND CARS button to see that all available database cars collection items are returned after secure loading:

Only Ford cars list will be returned with a variable
[carsFilter](https://docs.appery.io/docs/appclient-using-with-apperyio-database#adding-cars-filter)(with a required clause value) added under the CODE panel of the CarsList page and updated cars_collection_find request mapping.
Check how the requested cars items (in this case, only one Ford is on the database list) from the database should are shown on the page:
Therefore, if you want the cars_collection_find service to return all the database cars collection items, this filter should be deleted to make the where clause empty:
collection_create Service Mapping Example
Any other collection service can be called in the same way. Basically, the collection name parameter and any other request data if needed should be provided for every collection service.
Let's review the example with the collection_create service mapping and that is where the AddNewCar page comes into play.
We already have the page UI defined that will allow for the cars collection input data, so, let's proceed with the creation of the service.
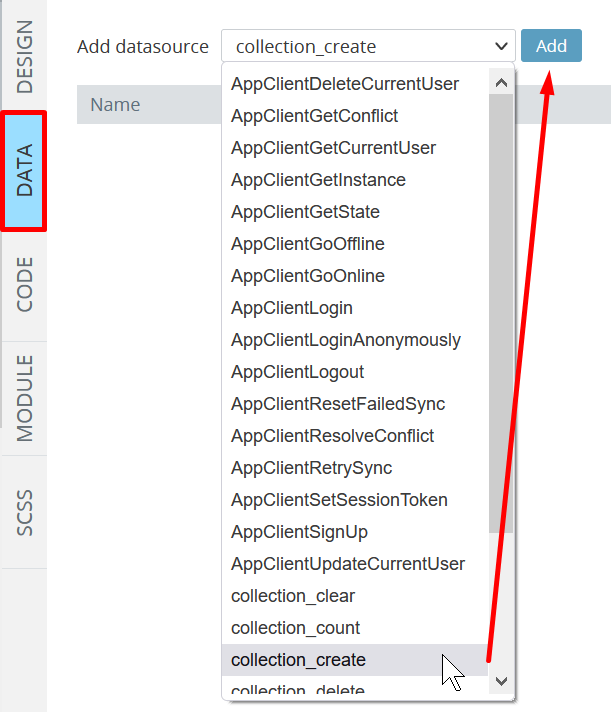
- To start, go to the AddNewCar page DATA panel, select the collection_create datasource, click the Add button to add it to the page:
- Rename the service to cars_collection_create:

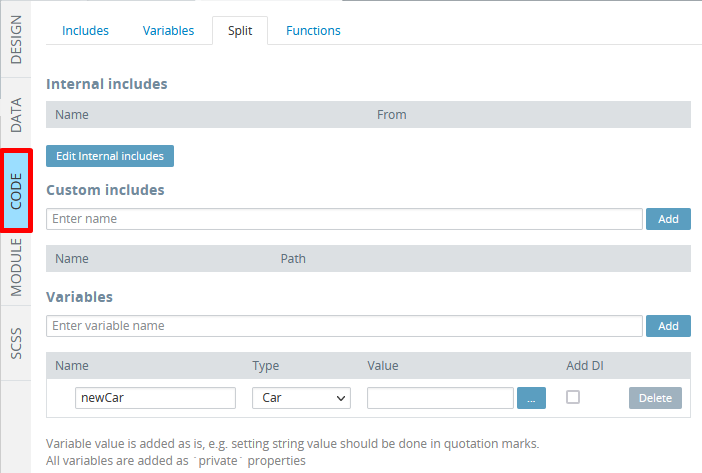
- Under the page CODE tab, create a variable that will hold data from the UI input components, for example,
newCarof the Car type:
- Then, go back to the DATA panel and for the service Before send event, create the following mapping and save it:
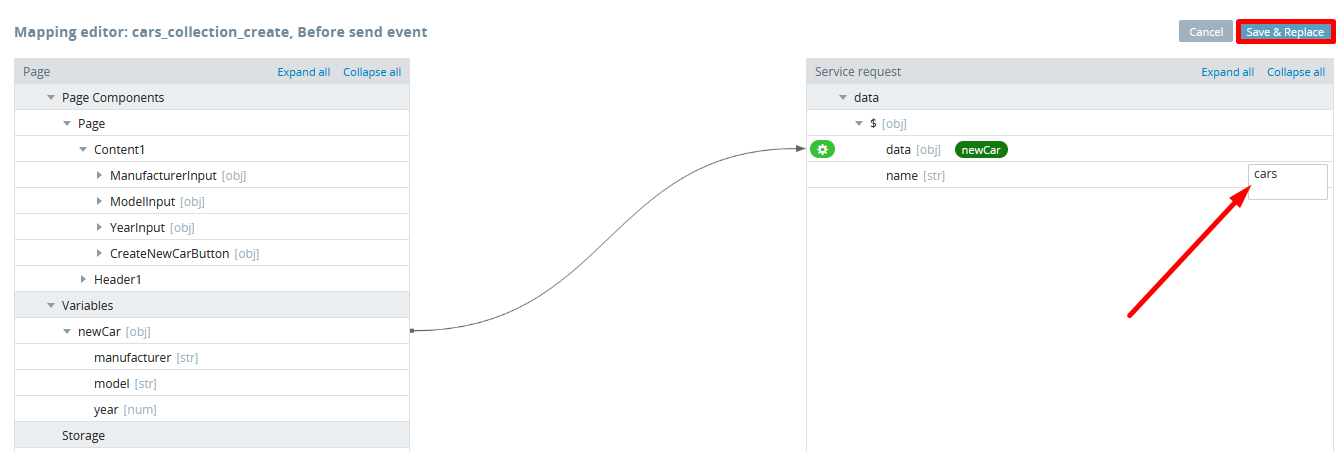
Note!Make sure you provide the collection name (here, it is cars)!
If you now click the collection_create service link and open its Request tab, you will see the collection name parameter and some data that is acceptable for the given collection should be provided:

So, to use visual mapping for the collection_create service, let's take the next steps:
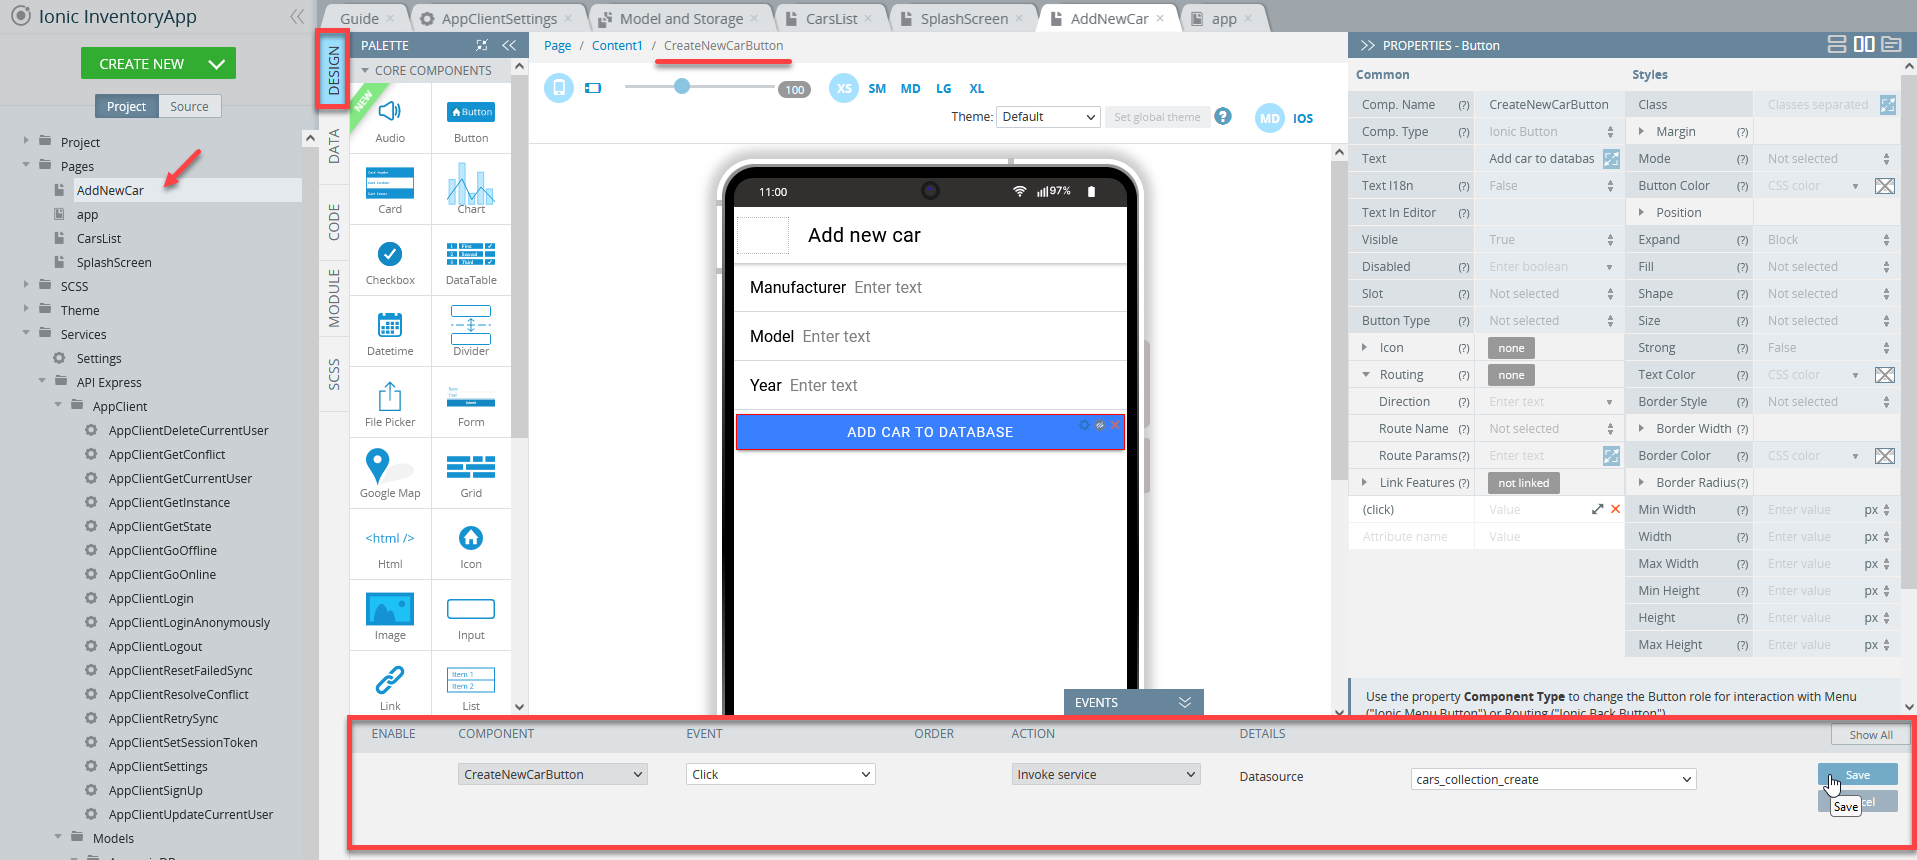
- Go to the AddNewCar page DESIGN panel and unfold the EVENTS tab from the bottom.
- Select the CreateNewCar button and for its Click event, add the cars_collection_create datasource Invoke service action:
- Then, add one more Click event but this time, select Mapping from the ACTION drop-down. Make it map all values from input elements to the
newCarvariable:
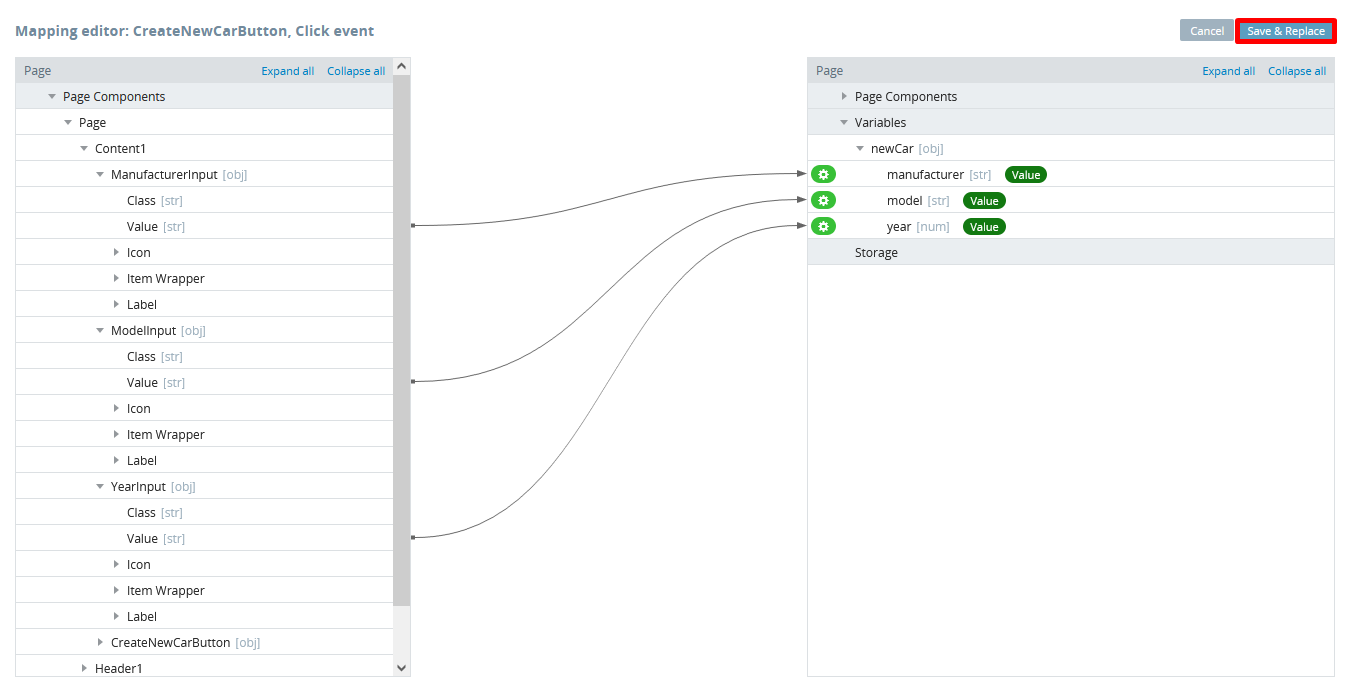
So, the main idea is 2-step mapping UI Inputs > newCar variable > collection_create service request data.
Service Testing
We are done and it's time to test the service!
In the preview, to add a new car record to the database, click the ADD NEW CARS button to open the Add new car page, where enter the new car data and confirm by clicking the ADD CAR TO DATABASE button:
And if you refresh your cars database now, the new record will be on the list:

To return the updated cars list, go back to the preview and click FIND CARS again:

Updated about 1 year ago