Using Appery Backend APIs in an App
Connecting to API backend from the app.
Introduction
Every mobile app has a backend or a server which it connects to. The app uses APIs to connect to this backend to view, edit, and store data. The Appery.io platform provides a complete backend or MBaaS (mobile backend as a service) for your app.
This page explains how to create and connect to an API backend, including 3rd party REST APIs.
Backend Services
The Appery.io platform provides the following backend services for your app:
Every service listed above is exposed via REST APIs and that's how the app connects/talks to the backend.
Why Invoke API from the Server?
There are a number of benefits to invoking a 3rd party API from the server:
- Service API key or any other sensitive information is not exposed to the app.
- Easy to update the service, or change to different services without impacting the app. For example, you can reset the API key used without making any changes to the client. You can also switch the service provider without making any changes to the client.
- Apply logic to the response before sending it back to the app. For example, sorting data on the server before returning it to the app.
- Apply custom logic before and/or after the service invocation. For example, invoke two or more APIs, combine the response, and return it to the app.
- No cross-domain issues as the service is always invoked from the service.
Importing Backend API Services
As all these services are part of a unified platform, you can quickly import any of these services inside the Visual App Builder.
Adding Push NotificationsPush Notifications are added to the app another way - via the EVENTS tab.
You can import REST API services into your app easily regardless of what backend service you use: Database, Server Code, or API Express.
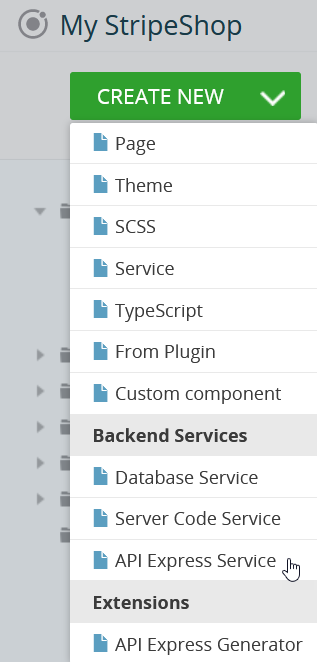
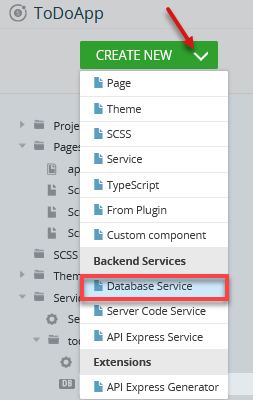
No matter what app you are working with, to import a service inside the Visual App Builder, select CREATE NEW and select the service you want to import..

Backend Services import menu.
Watch this short video to learn how to import Backend Services APIs:
Testing Services
When importing the service double-check that the service was imported correctly. As the service is imported automatically you shouldn't need to make any changes. But it's always a good idea to test the service before importing it into the app. You should get the same output testing the corresponding service as you get when testing the app in work.
Editing Services
If you need to modify the service, you can make changes to the service in the Visual App Builder or remove and re-import the services. The general recommendation is to re-import the service (after deleting them). This way you can go back to the backend services (Database, Server Code, or API Express;), make any changes to the service, and then re-import it. However, be careful with this option as any mappings you set for this service will be removed as well.
Deleting Service Used on a PageIf you remove a service used on the page, all its mappings will be removed as well.
Using Imported Service on Page
After a service is imported, you can add it and use it from a page. To learn how to do this, jump over to the Visual App Builder section:
The following sections cover each service type in more detail.
Importing API Express Services (API Express projects)
After you create one or more APIs using API Express, you can quickly and easily import (add) those services to your app.
Testing services before using them in an appBefore importing and using an API Express service in your app, we recommend that you test it in the API Express dashboard. After you make sure the service works correctly then start using the service in your app. This approach will save you time debugging and testing your app.
To import the API Express services:
- Inside the App Builder, click CREATE NEW.
- In the Backend Services section, select API Express Service:
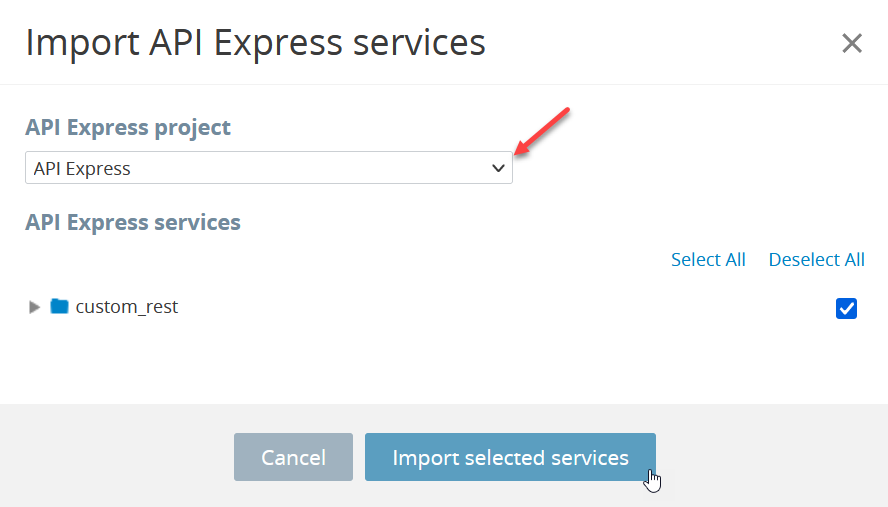
- In the next popup, select the API Express project from which you want to add services to.
- After a project is selected you should see the same folder/service structure as in the API Express project. Select one or more services or a folder to import. When you select a folder all services inside the folder will be checked and imported.
- After you have selected what you need, click the Import selected services button:
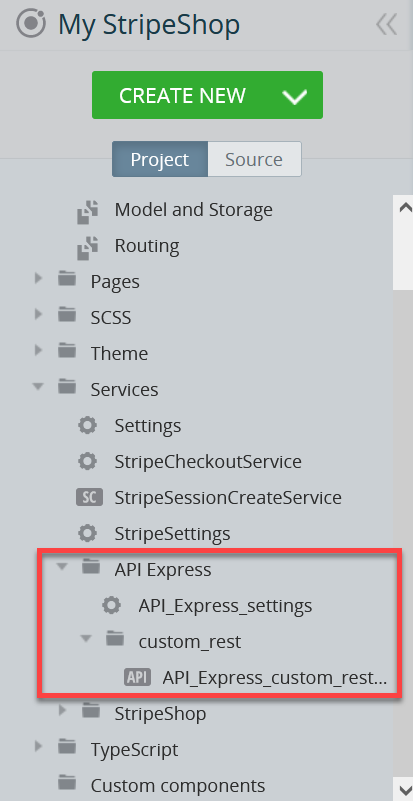
- The services that you selected will be imported under the Services folder inside the App Builder:
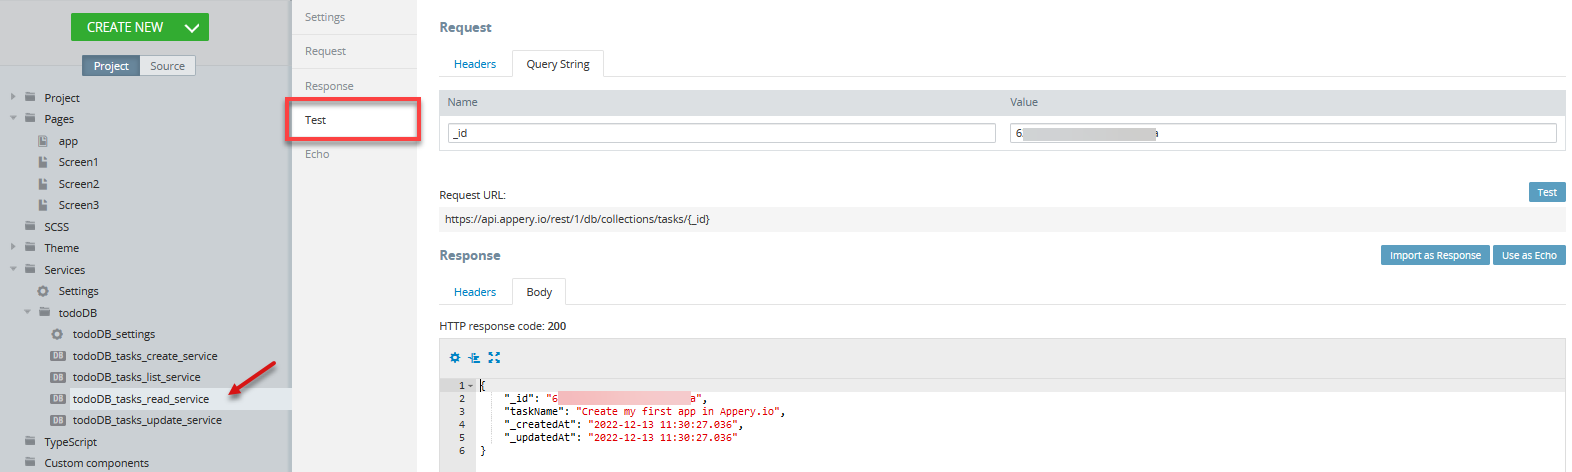
You can now test the service. To do it:
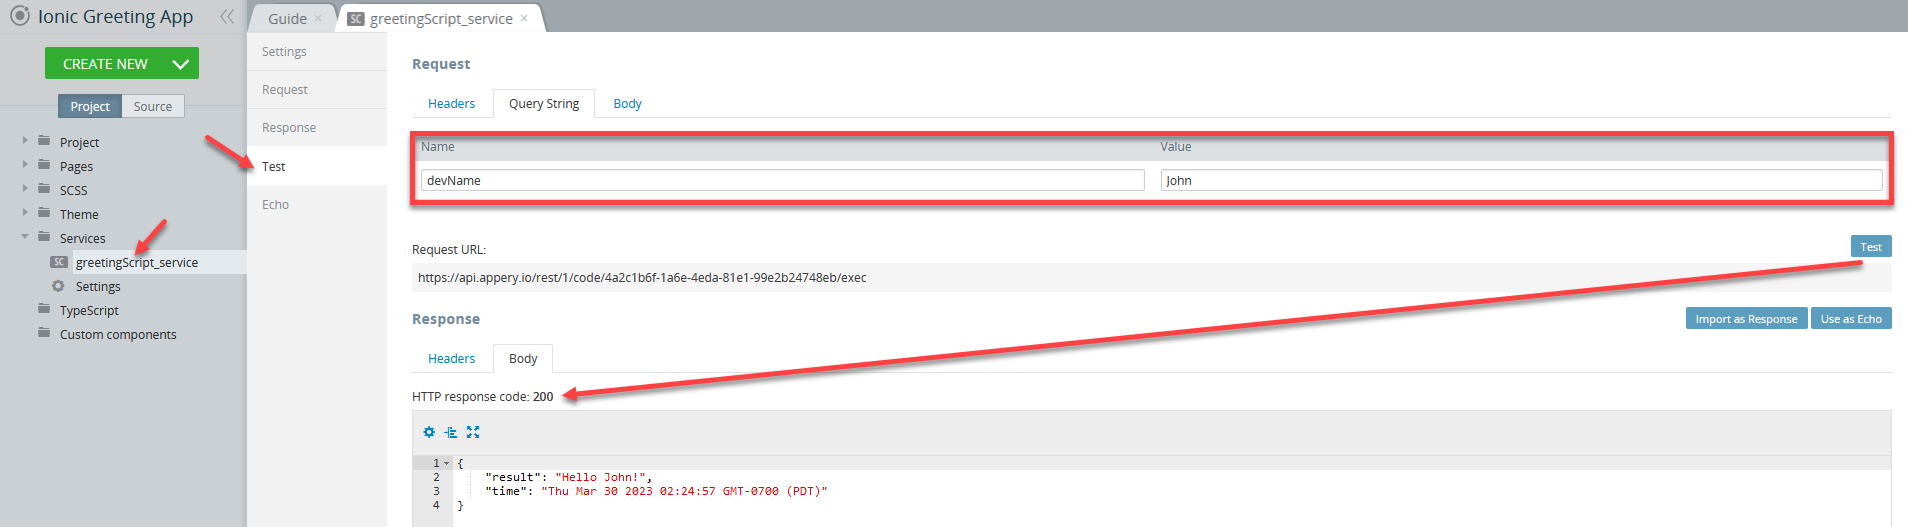
- Select the service, then go to its Test tab.
- Open the Query String tab and click Test to test the service. You should see the response in the Response section:

Want to know more?You can also check out this step-by-step tutorial that shows how to connect to a 3rd party REST API using API Express and make it work in an Ionic application.
Importing Auto-generated API Services
If you want to auto-generate API services for a relational database, you need the API Express Generator extension to import the services into an app.
The API Express Generator extension is an extension that allows you to generate multiple REST API services for a database table. You can quickly generate the following REST APIs to work with the database:
- Create - to add a new record;
- Find - to find one or more records;
- Get - to retrieve a record;
- Update - to update an object;
- Delete - to delete a record.
With this extension, the services and JavaScript files are created automatically and can be used in the app as usual to perform CRUD operations.
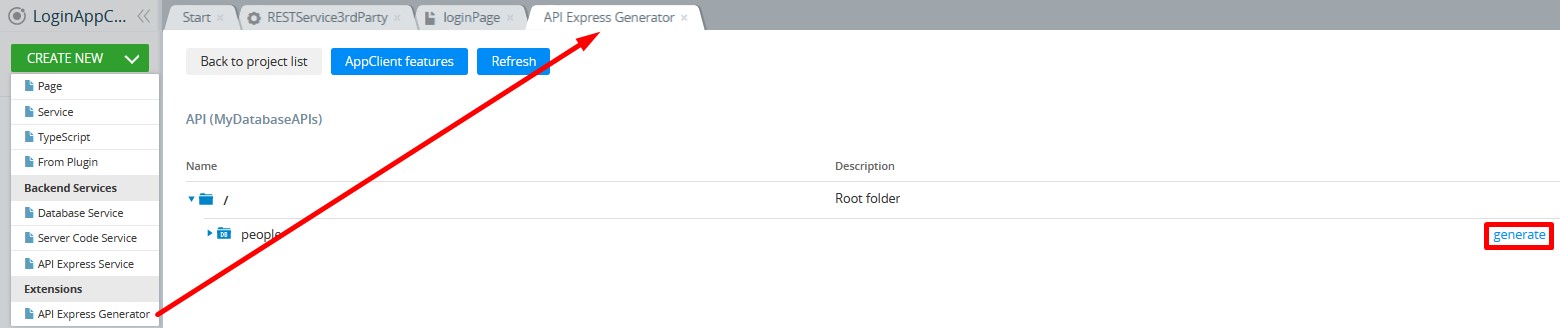
- Open an app, then click CREATE NEW > Extensions > API Express Generator.
- You will see a domain selection screen. Keep the default Appery.io domain selected and click Next.
- On the next screen, select the API Express project and click Select.
- On the next screen, you will see the services inside this API Express project. Locate the service folder which you want to import and click the generate link for it:
- Enter a name under which the services will be imported in the App Builder or keep the default value and click Generate.
- Click Save and refresh the App Builder browser page to see the newly generated services in the Services folder.
All the basic operations services, as well as the JavaScript, have been successfully generated.
The API Express Generator has created an AppClientSettings service file with the data on the domain where the project is located and its apiKey.
Another way to locate the project API key is to go to API Express > Project >Settings.
Editing API Express ServicesIf you edit the services in API Express, you should regenerate the appropriate services inside the Appery.io App Builder.
Importing Server Code Services
After you create one or more Server Code scripts, you can quickly and easily import (add) those services to your app.
Tip: Testing services before using them in an appBefore importing and using a Server Code service in your app, we recommend that you test the Server Code script. After you make sure the service works correctly you can securely add the service to your app. This approach will save you time debugging and testing your app.
To import a Server Code service:
- Inside the App Builder, click CREATE NEW.
- In the Backend Services section, select Server Code.
- In the next popup, select the Server Code script you want to import the service for.
- After you select the script, click the Import selected services button.
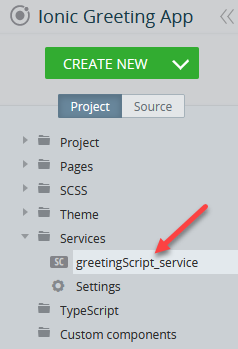
- The service that you selected will be imported under the Services folder inside the App Builder:
You can now test the service:
More details can be found in the this section.
Ionic Quickstart Server Code TutorialIf you are new to Server Code, this Ionic Quickstart Server Code Tutorial will help you start.
Importing Database Services
After you created a database, you can quickly and easily import (add) services to work with the database to your app.
To import a database service:
- Inside the App Builder, click CREATE NEW.
- In the Backend Services section, select Database Service:
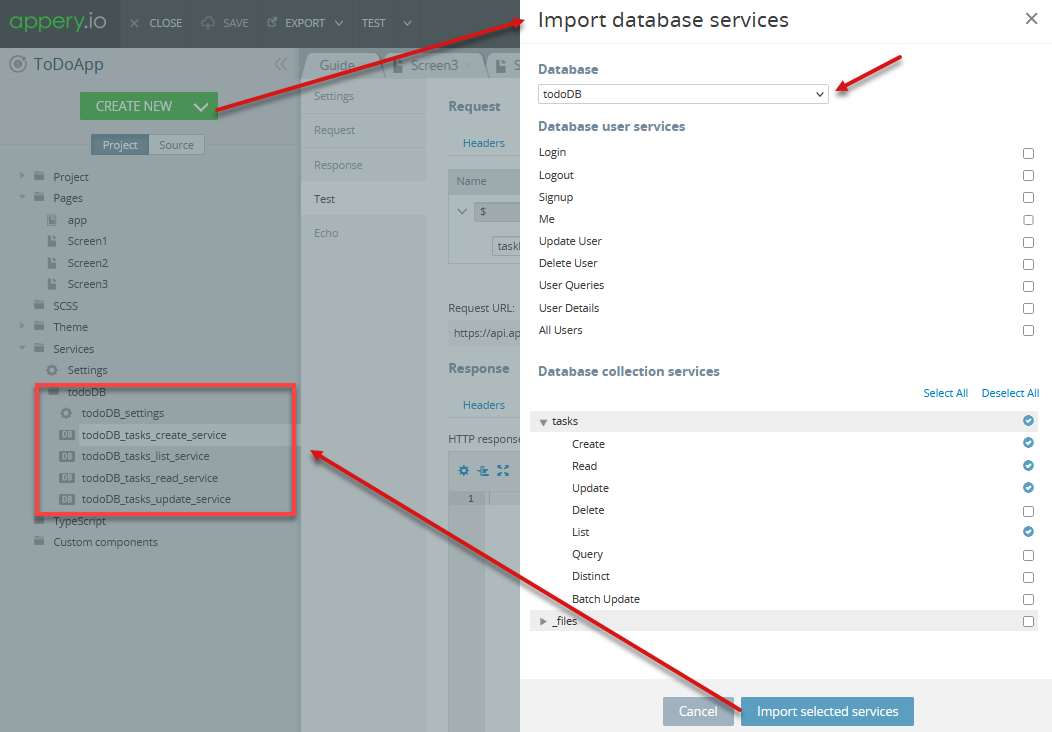
- In the next popup, select the database for which you want to import the services.
- After you select the services, click the Import selected services button. (Check the next section for the explanation on the various services).
- The service you selected will be imported under the Services folder inside the App Builder:
You can now select the service to test it:
You can also use it to create a new datasource:

Ionic Quickstart Database TutorialIf you are new to Appery.io Database, this Ionic Quickstart Database Tutorial will help you start.
Database Service Types
In the import window, there are two groups of services you can import.
In the Database user services section, you can import the services to work with the Users collection:
- Login;
- Logout;
- Signup;
- Me;
- Update User;
- Delete User;
- User Queries;
- User Details;
- All Users.

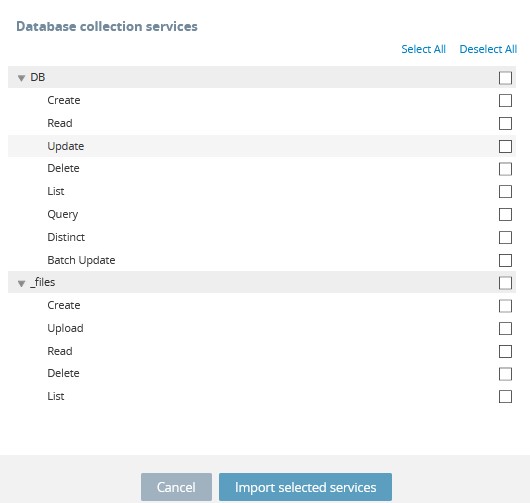
In the Database collection services section, you can import the services for any custom collection and for the Files collection (_files).
For a custom collection, you can import any of the following services:
- Create - to create a new object;
- Read - to read one object;
- Update - to update an object;
- Delete - to delete an object;
- List - to list all objects in the collection;
- Query - to query (search) for objects;
- Distinct - to retrieve all distinct values;
- Batch Update - to perform batch update.
For the Files collection, you can import any of the following services:
- Create - to create a file;
- Upload - to upload a file;
- Read - to get the file (data);
- Delete - to remove the file;
- List - to retrieve a files list.
Want to know more?Please check out this link to learn more about adding security to your Appery.io Database.
Using Database in App
The Appery.io Database is exposed via REST APIs, which you can import and then use in an app as described in the section above. Connecting to the database directly from the app works okay for very simple or small apps. For example, if your app only needs to load the entire list of objects and display them on a page.
If your app does more than just this (and that's most apps), we recommend using the following approach. Create a Server Code script that will access the database. This allows writing any logic in the script which you don't have to do on the client. For example, you can:
- Sort the database results;
- Filter the database results;
- Query the database two or more times;
- Run any custom logic before or after querying the database.
We recommend this as invoking app logic is better on the server. This approach allows you to write as simple or as complicated logic using server-side JavaScript. After you developed the script, it's very simple to test it. After the script is tested, use it in your app. If you need to make changes to the script, you can make changes without impacting the app.
You can check our detailed tutorial on working with Appery.io Database and Server Code here: https://docs.appery.io/docs/working-with-apperyio-database-and-server-code.
Here are two more examples that demonstrate the benefits of using Server Code to access the database:
- Moving App Logic to the Server: How to Save and Query an Appery.io Database from Server Code Script.
- Moving App Logic to the Server: How to Query the Database From Appery.io Server Code Script
In addition to accessing the database, you can also send Push Notifications and invoke any 3rd party API from the Server Code script. For more details, please check this post.
Updated about 1 year ago