Ionic QR Code Generator App
In this step-by-step tutorial, we'll demonstrate how to create an Ionic app that can generate a QR or barcode on a button click.
Want to know more?Watch this video to learn how to generate and scan different code types, manage product information, and integrate with a backend database:
You might also like to add our predefined QR Code Generator plugin to your Ionic app.
Creating App
- From the Apps tab, click Create new app.
- Select Ionic Blank, for the application name, enter QRCodeGenerator, and click Create.
Creating App UI
- After the App Builder loads, open Pages >Screen1 in the Project view tree.
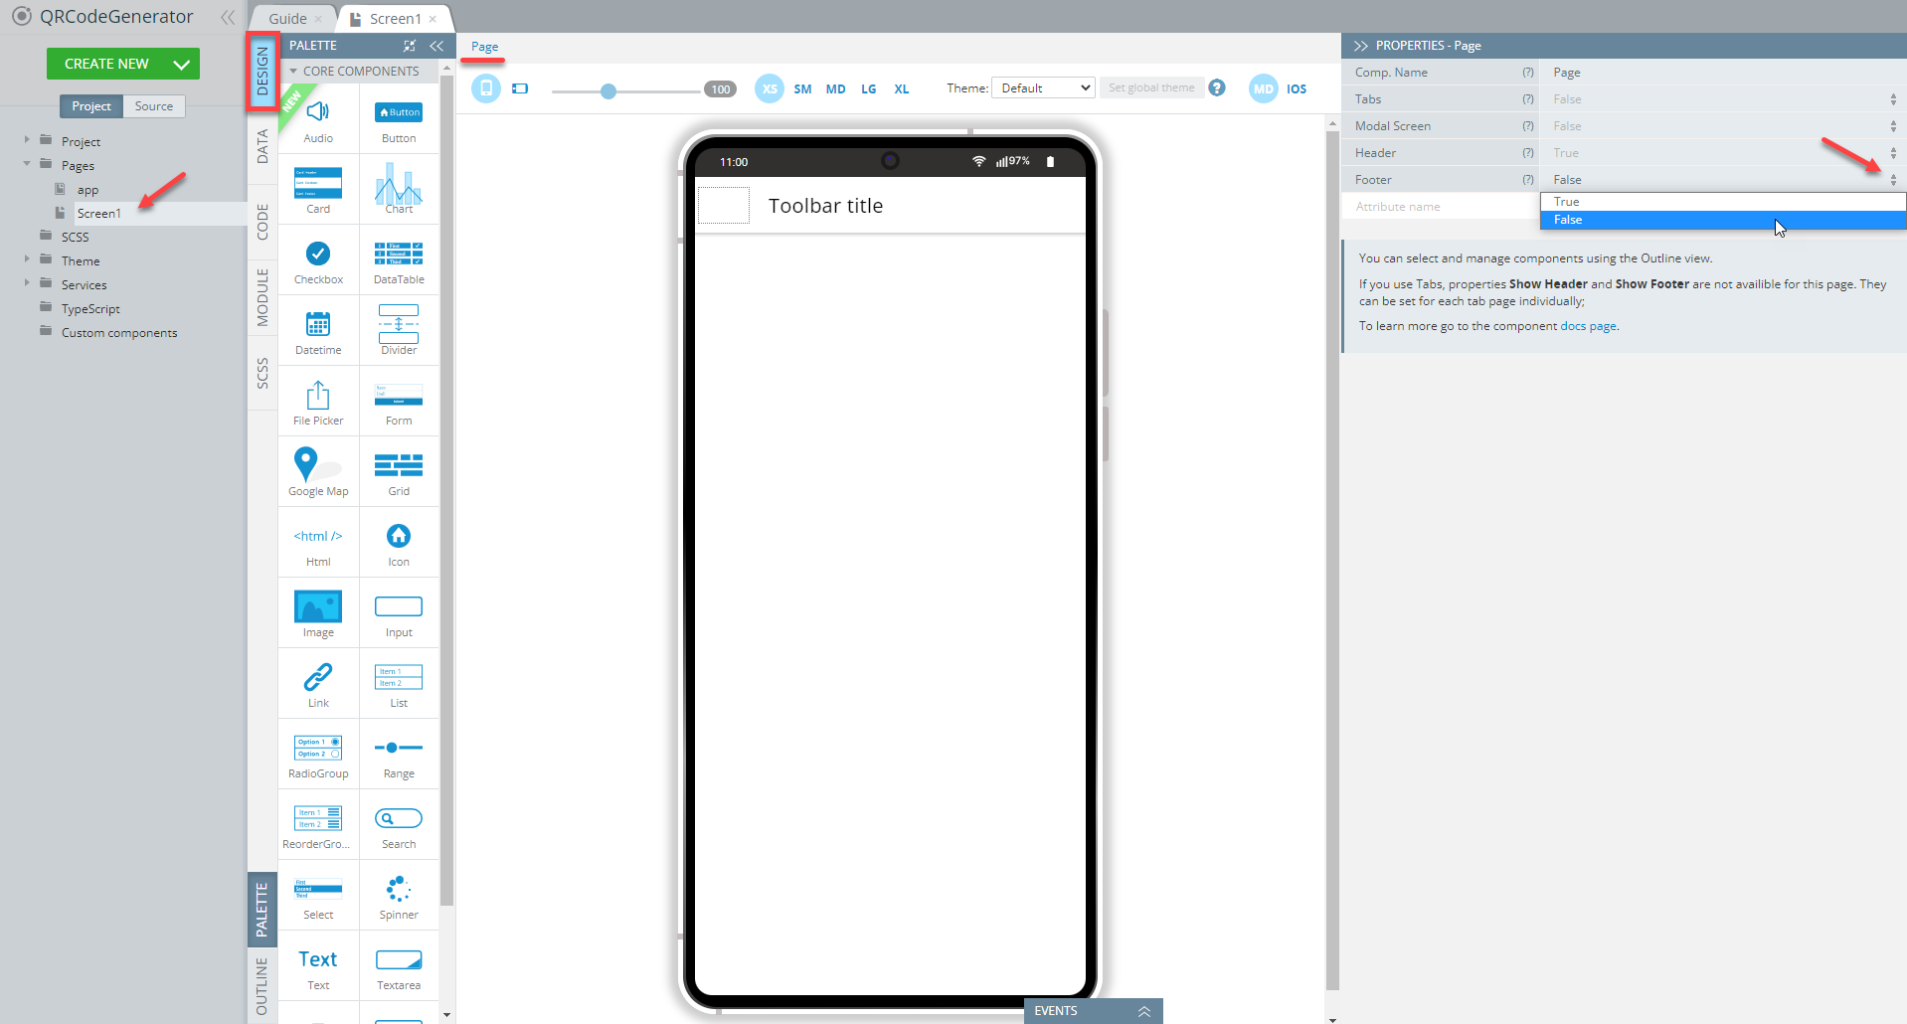
- Now, select the Page component from the breadcrumbs (you can also use the OUTLINE view to locate the needed component) and set the page Footer property to False as we will not use it in the app (you will also be asked to confirm changing the property):
- Select ToolbarTitle of the screen header and under the Common tab, change its Text property to QR Code Generator.
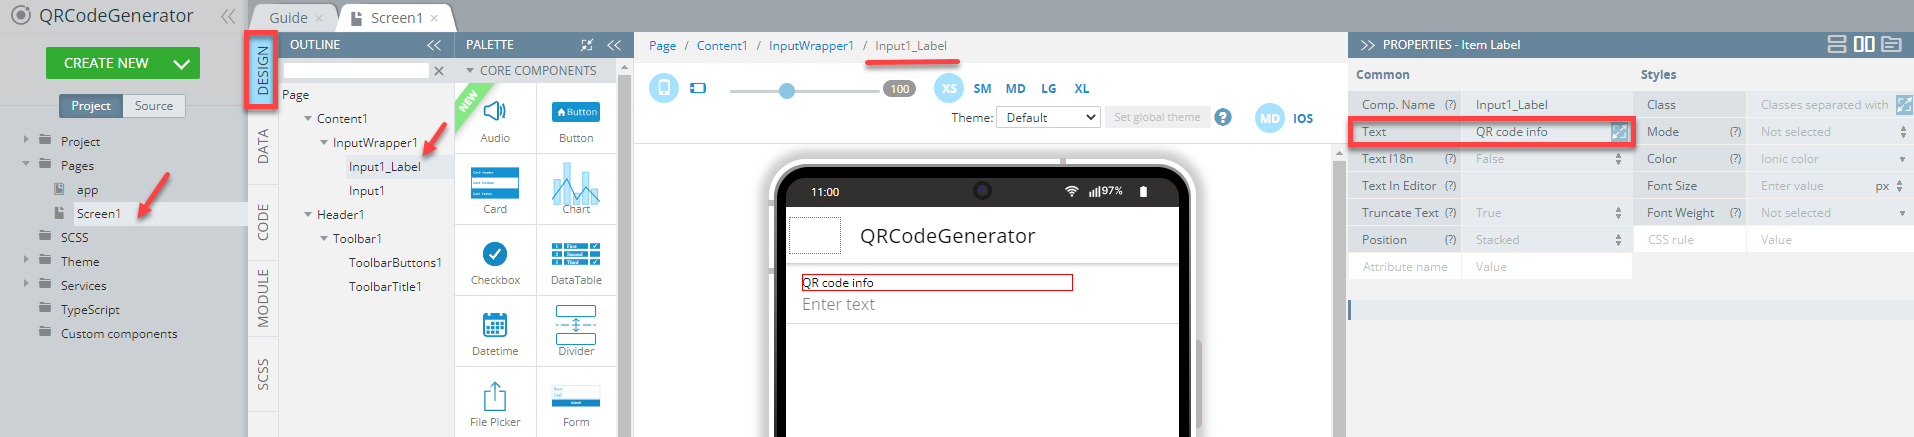
- From PALETTE, drag the Input component and drop it to the page.
- Replace the default InputWrapper1 ItemLabel > Text property with QR code info:
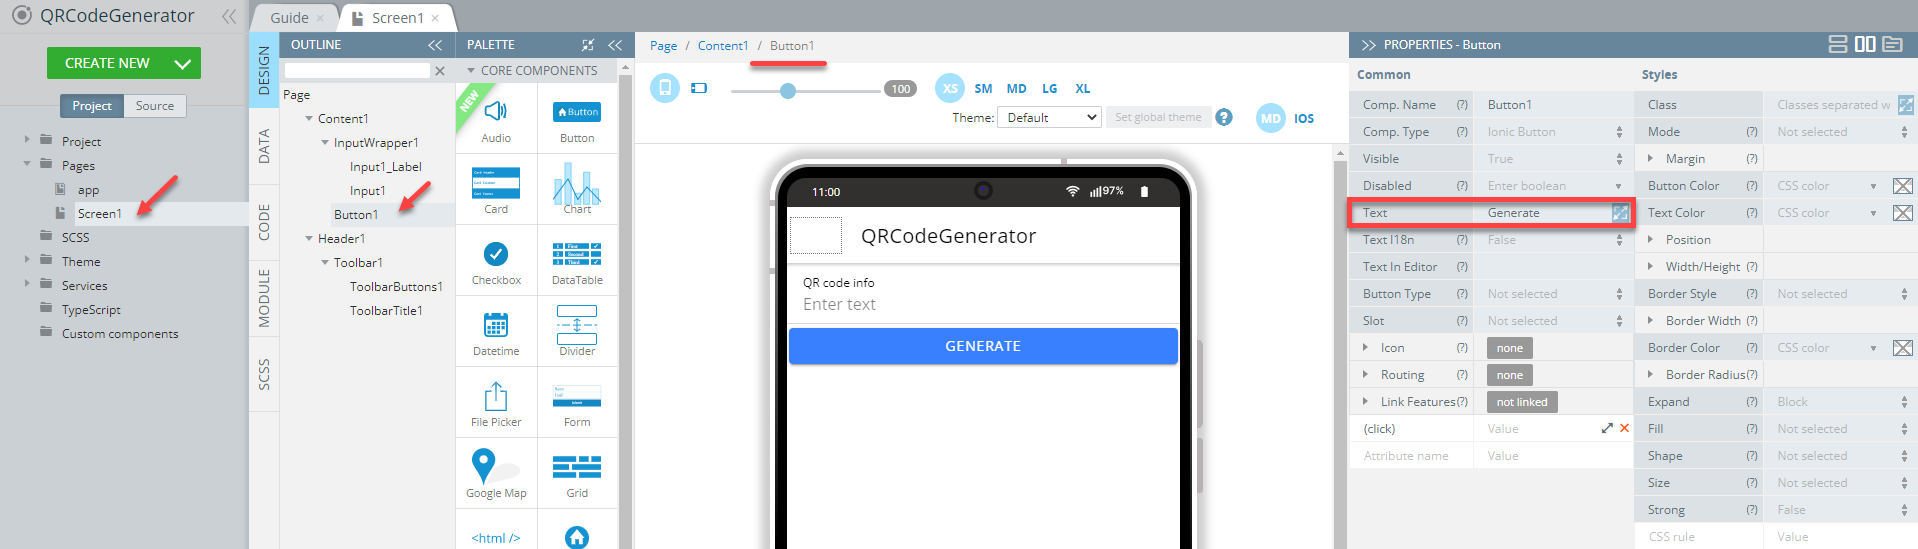
- Now, drag the Button component from PALETTE to the page.
- Change the button Common > Text property to Generate:
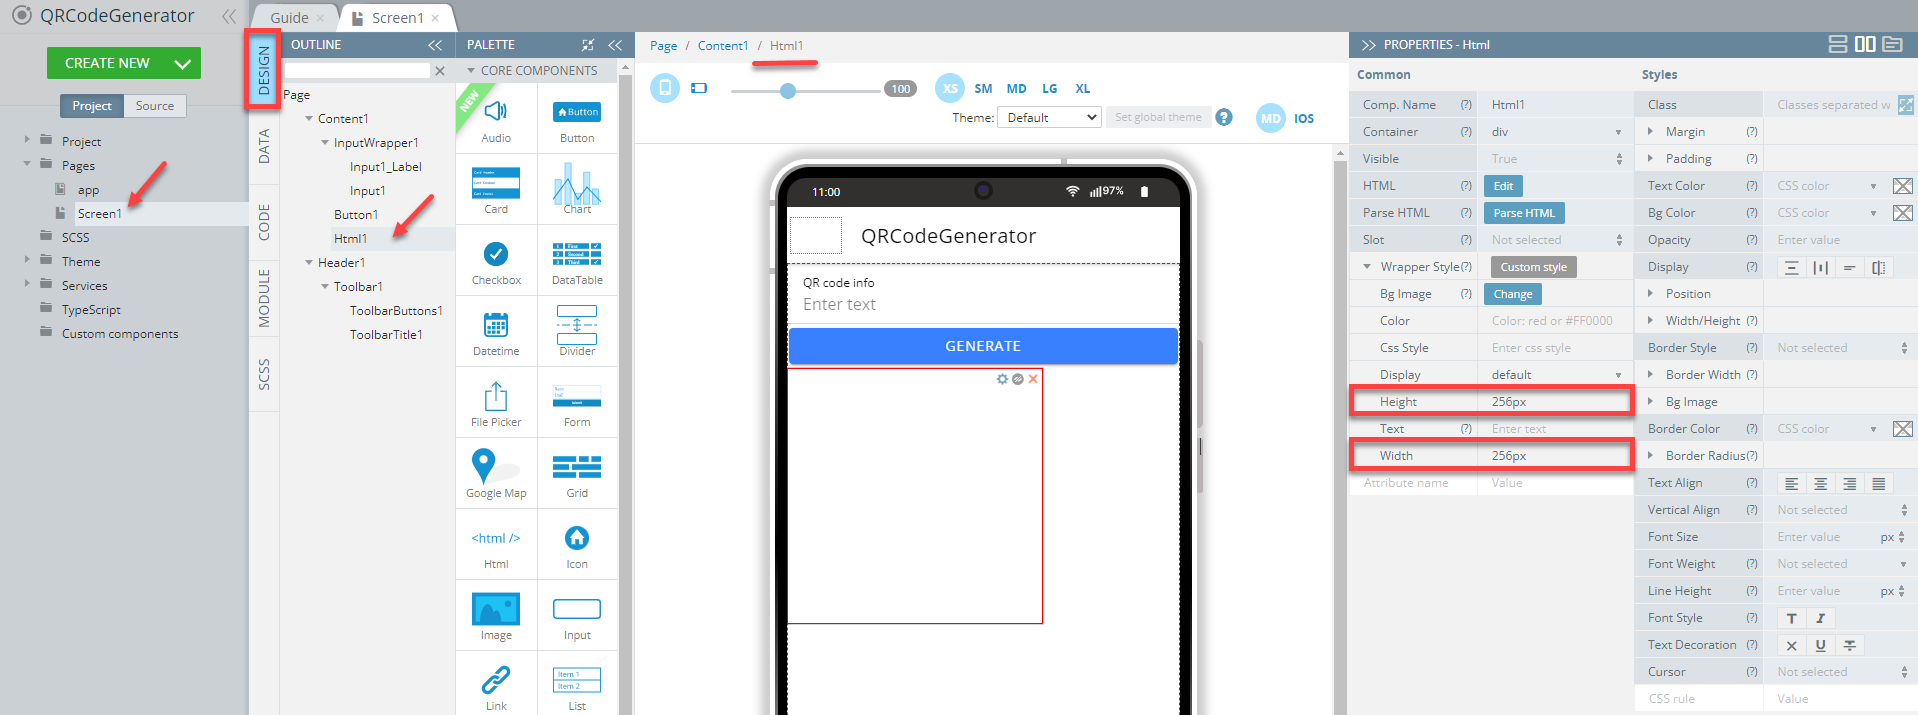
- Finally, drag the HTML component from PALETTE, drop it to the page, and set its Wrapper Style > Height and Wrapper Style > Width properties to 256px under the Common tab. This will be the size of our QR code:
That’s all for the app UI and you can save your work by clicking the SAVE button in the App Builder Toolbar.
Now we can start creating the app logic.
Defining App Logic
To generate the QR code, we will use the Angular X QR code library available on GitHub.
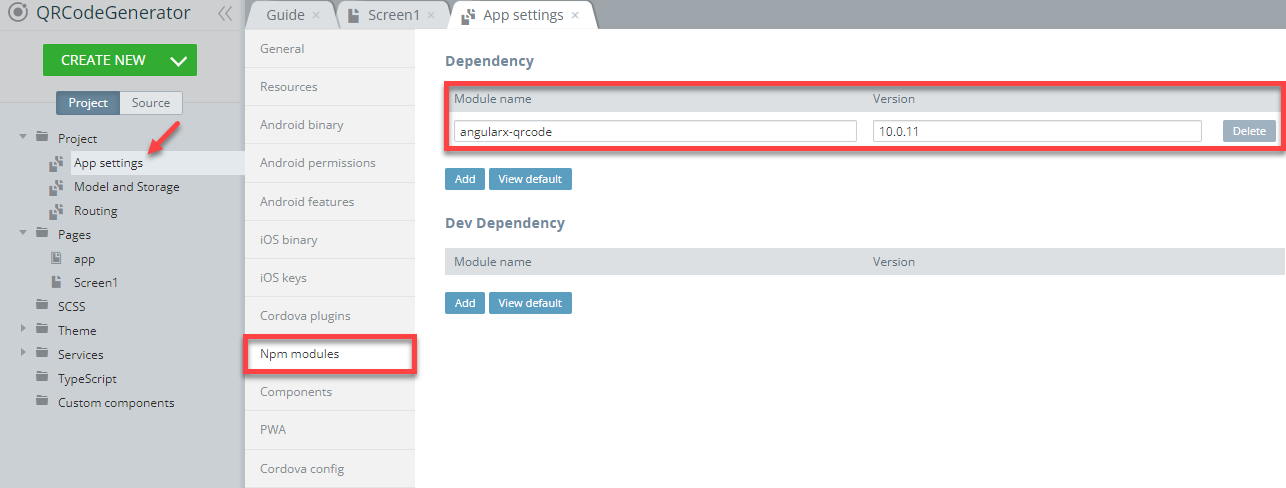
- First of all, we need to install the Angular X QR code library using Npm modules. Go to the Project > App settings > Npm modules tab. Click on the Add button under the Dependency section and insert the following for the module name:
angularx-qrcodeof10.0.11version:
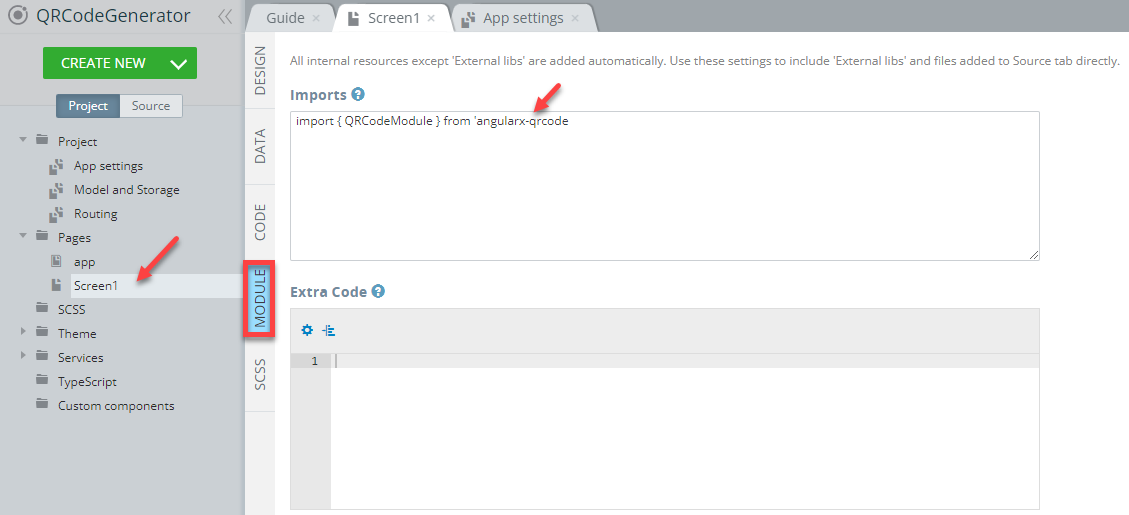
- To import the module, go back to the Screen1 page and open its MODULE panel, then add the following code to the Imports section:
import { QRCodeModule } from 'angularx-qrcode'::
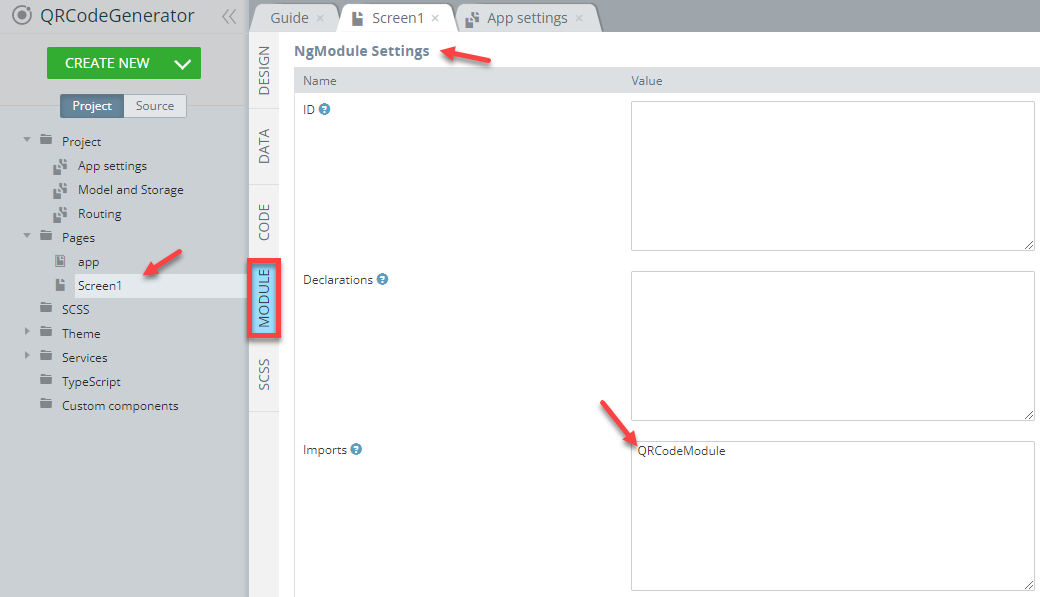
- Then scroll down to locate the NgModule Settings section. Add the following code in
QRCodeModulefor the Imports value:
- Now, let's create a variable that will be used for returning the entered QR code info.
To do it, go to the Screen1 CODE panel and under the Variables section, create a new variable: value of the String type and empty string Value field:

- We will use a custom Angular component, so we need to add the following code to the HTML component that we created on Screen1. In the page DESIGN panel, select the component and click the Edit button for the HTML property located under the Common tab. In the HTML editor that opens, add the following code and save:
<qrcode [qrdata]="value" [width]="256" [errorCorrectionLevel]="'M'"></qrcode>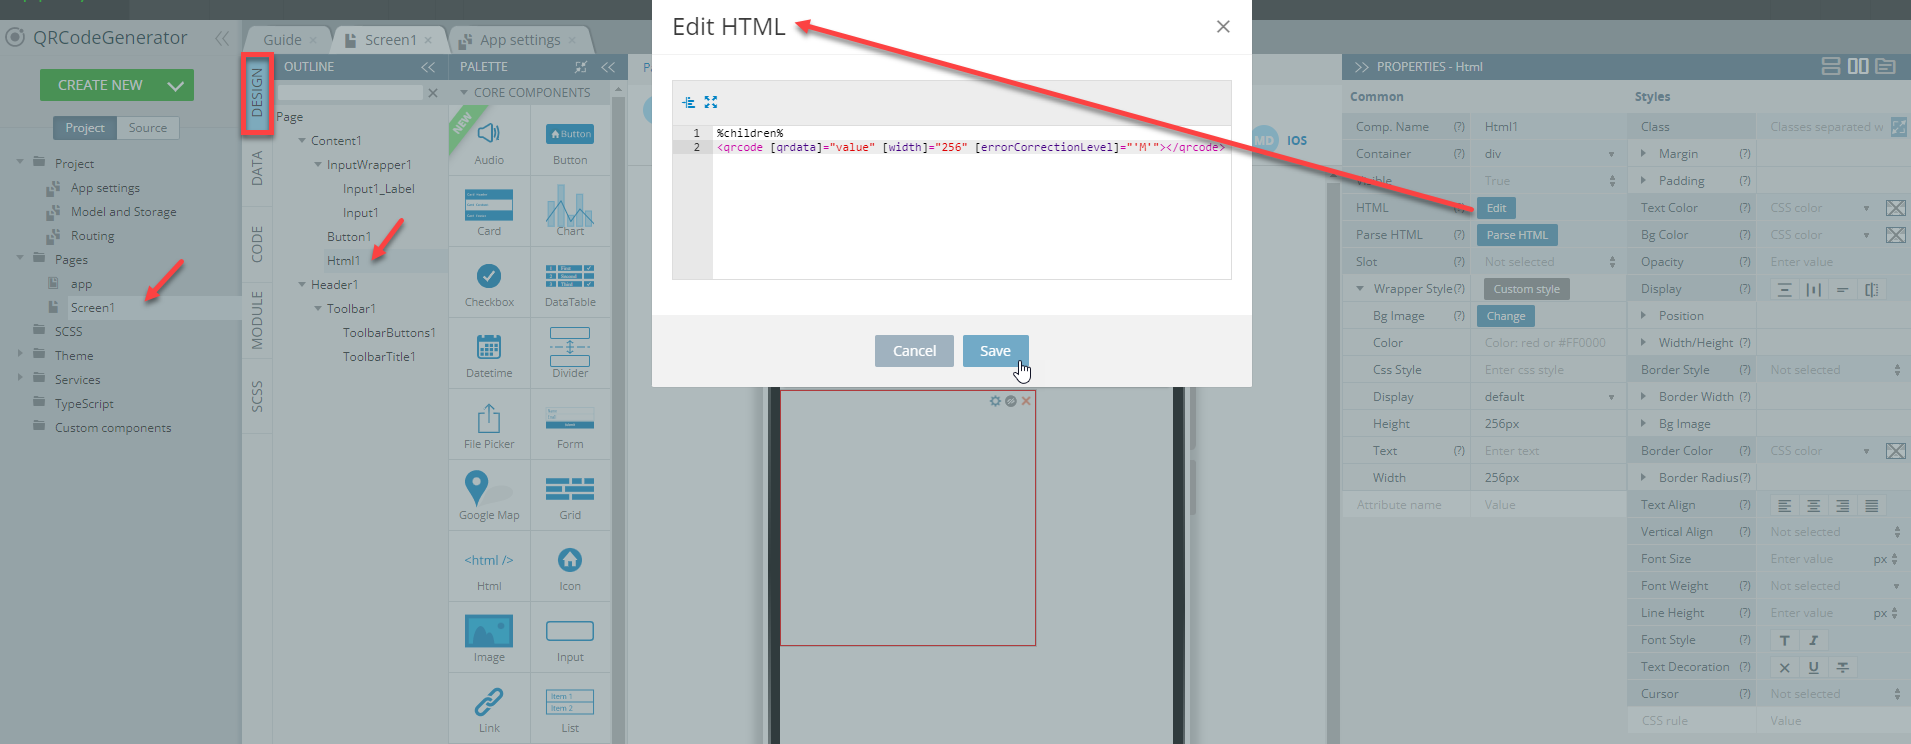
Note that in this code, we specified the value variable created in the previous step as the data source.
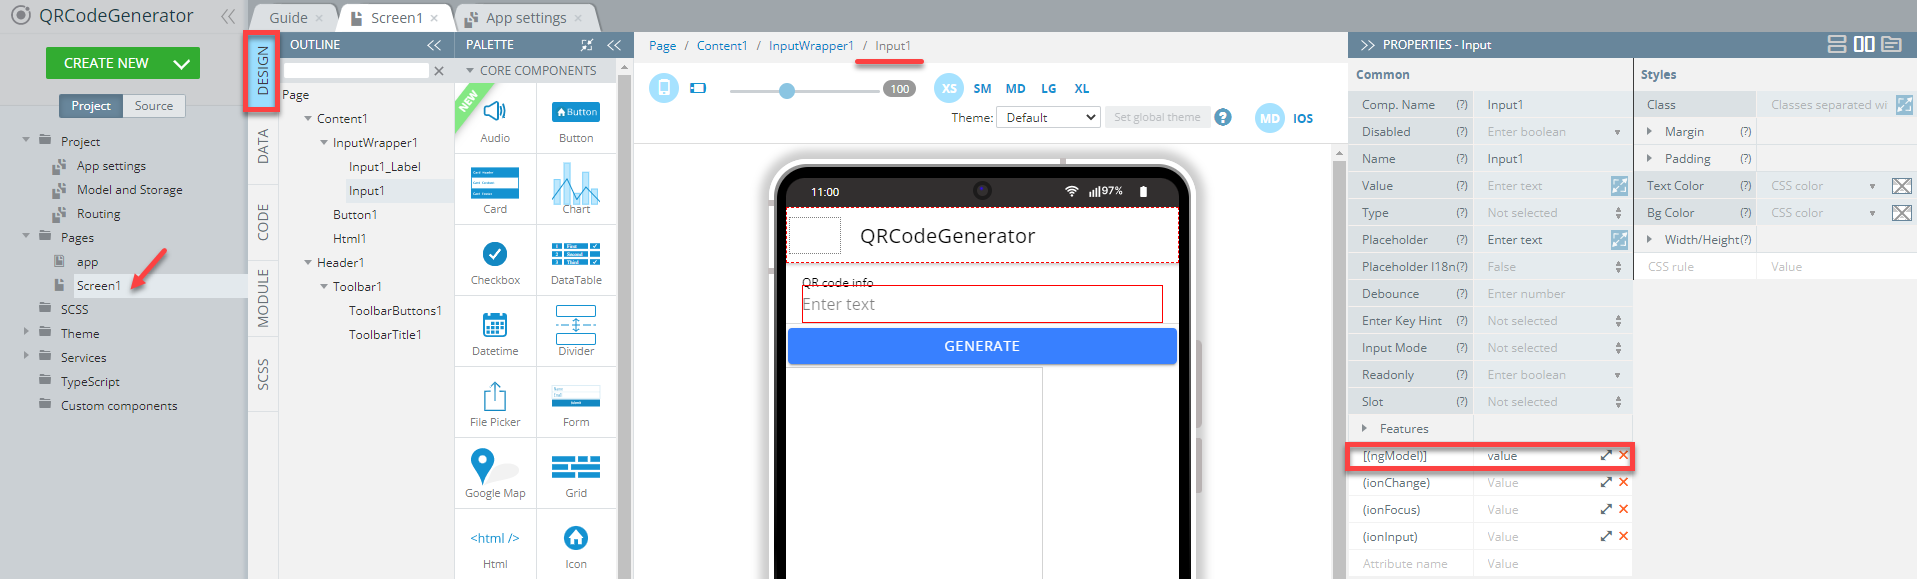
- Also, we need to add the value variable for the Common >[(ngModel)] property of the Input component:
After that, we can add the functionality to show the QR code after the Button click and to hide the QR code after changing the Input value.
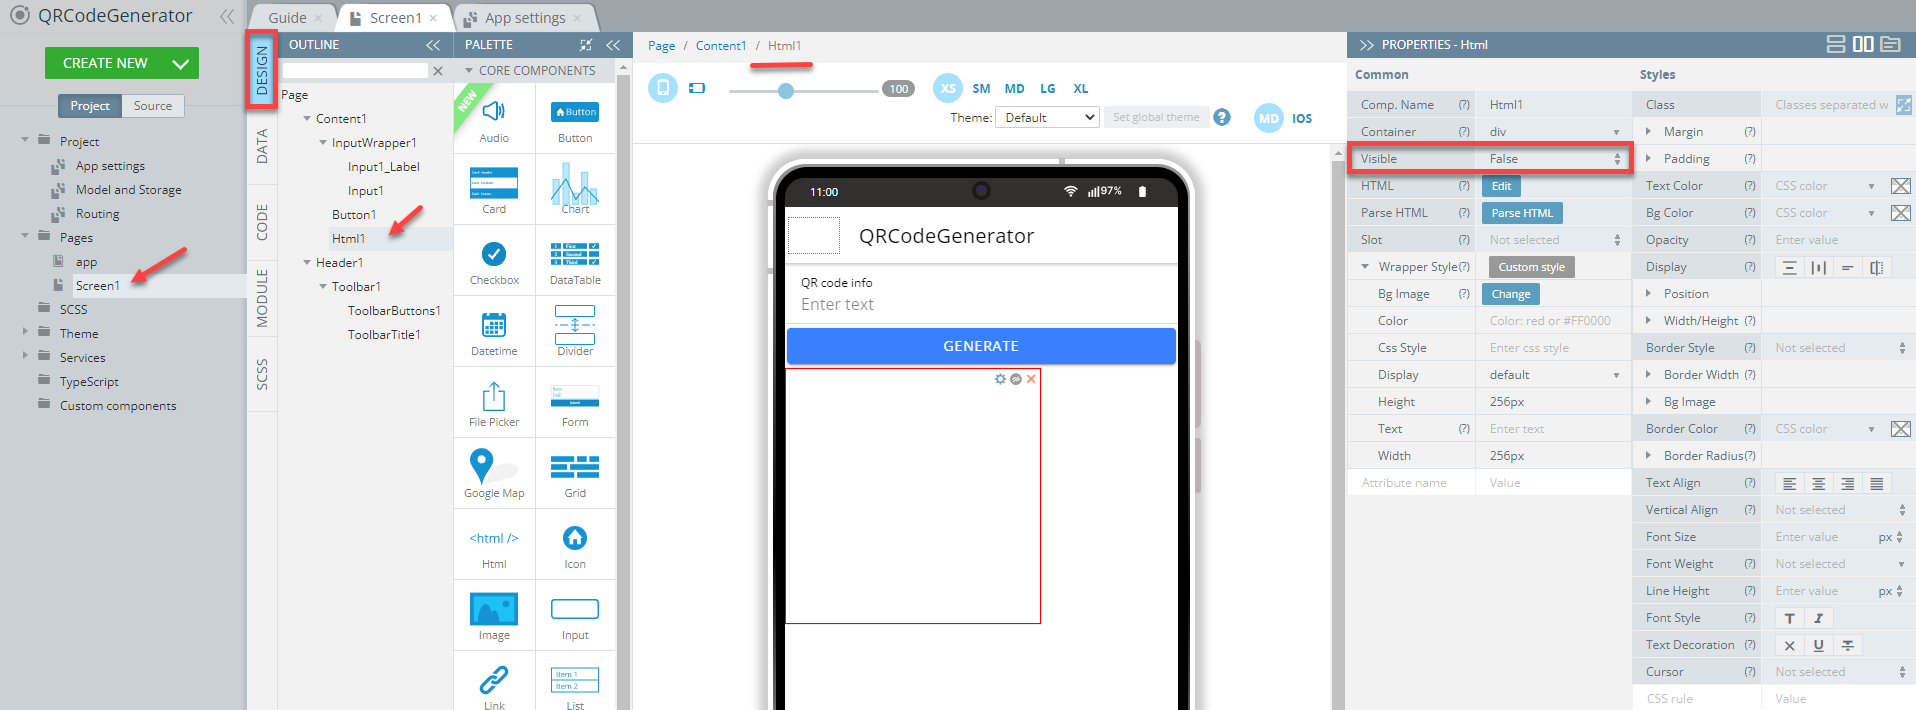
- First, for the HTML component, set the Common > Visible property = False so that the QR code will not be visible until the Generate button is clicked:
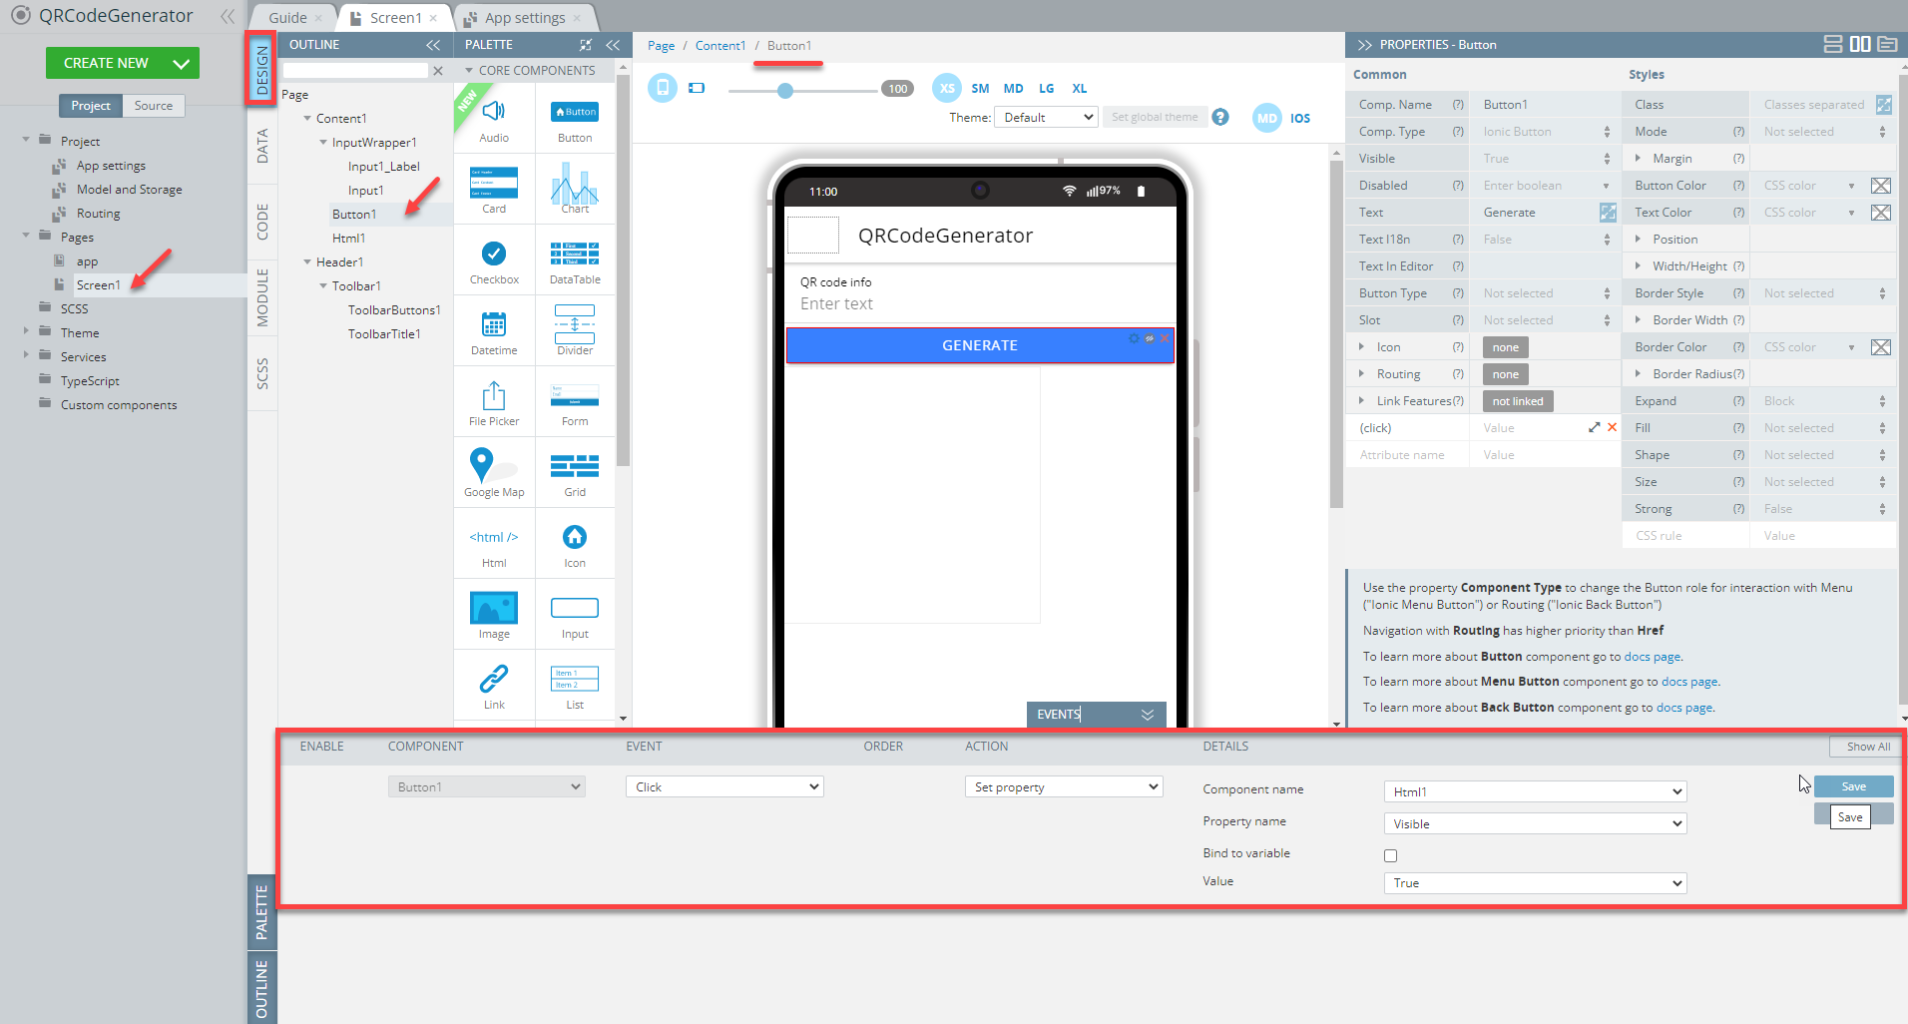
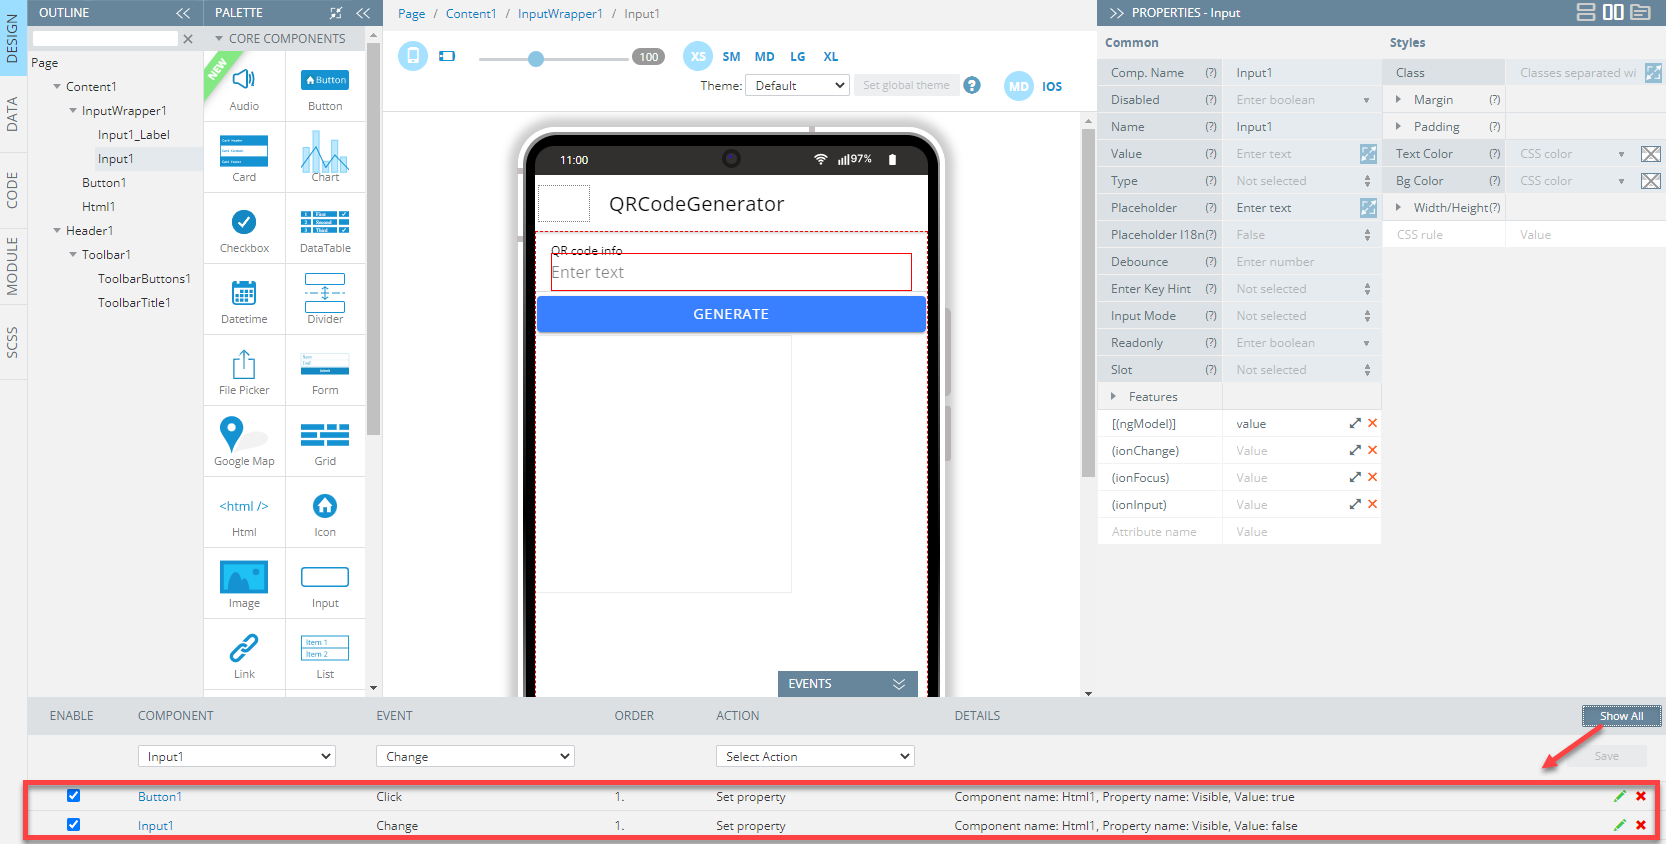
- Now, to show the QR code on the Generate button click, unfold the EVENTS tab from the bottom, and for the Button component, create a new Click event.
This is done by selecting Set property as the Action. Now, define Html1 as a Component Name, leave its Property name as Visible and its Value as True. Save the event:
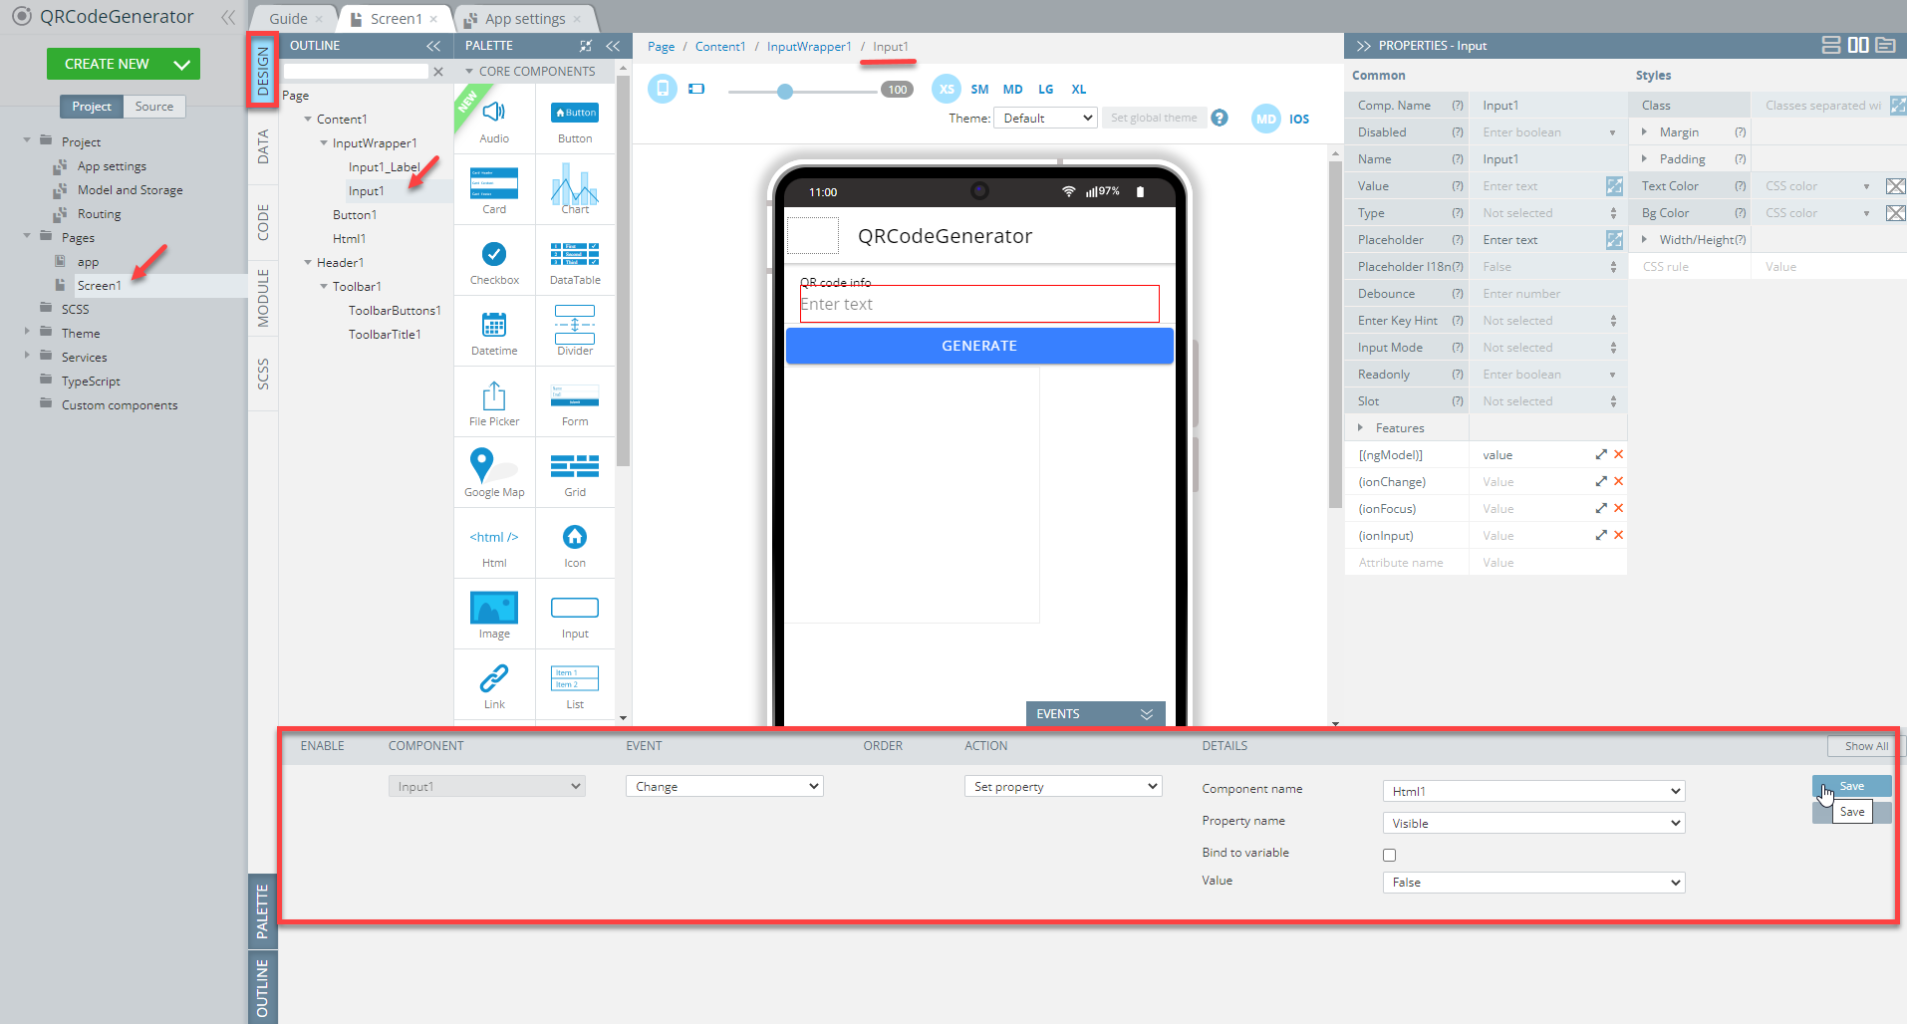
- Finally, to hide the QR code after the input value changes, let's add one more event. Now, this will be a Change event created for the Input component.
For the event, from the drop-down, select Set property as the Action and then select Html for Component Name. Also, leave Property name as Visible and set its Value to False. Save the event:
You can click Show All to review that both events have been added to the page and the EVENTS tab looks like the following:
- Save the app.
App Testing
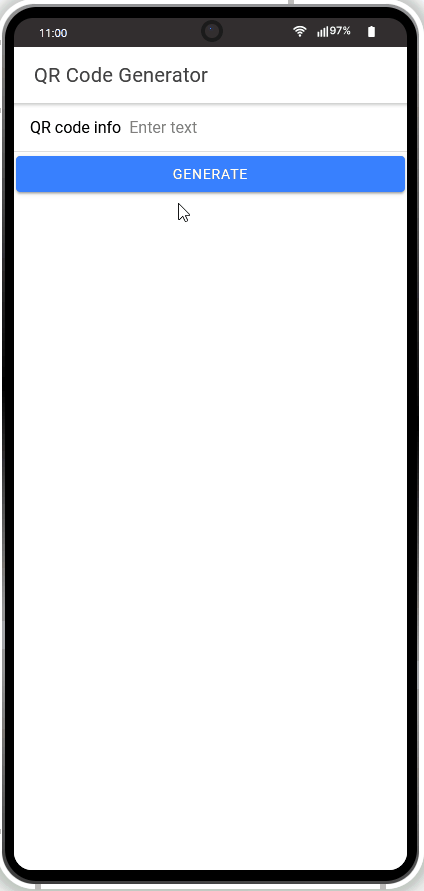
You are now ready to test your app: click the TEST button in the App Builder Toolbar to run the app in the preview to launch the app in the browser and check how it works.
First, enter some test text into the input field, then click the GENERATE button and the QR code will be automatically generated.
When you start typing some new text, the QR code will disappear until you click the GENERATE button again:
Testing on Device
When your app version is ready, you might also like to test it on the device.
Appery.io Tester AppA great option to quickly test the app on the device is to use our Appery.io Tester app.
The app is free and available for both iOS and Android.
You can check out this page to learn more about using the Appery.io Tester app.
Updated 12 months ago