Ionic Sample App with Appery.io Database and Server Code
Sample Ionic app using the Appery.io database and Server Code.
If you are new to Appery.io Database and/or Server Code, start with this simple tutorial. In this tutorial, you’ll learn how to build a mobile Ionic app that displays a list of data from the database.
Every mobile app requires a backend (server) to store data or run some logic. Here, we will use the Appery.io database as our backend and so you will start by creating a new database.
Creating New Database
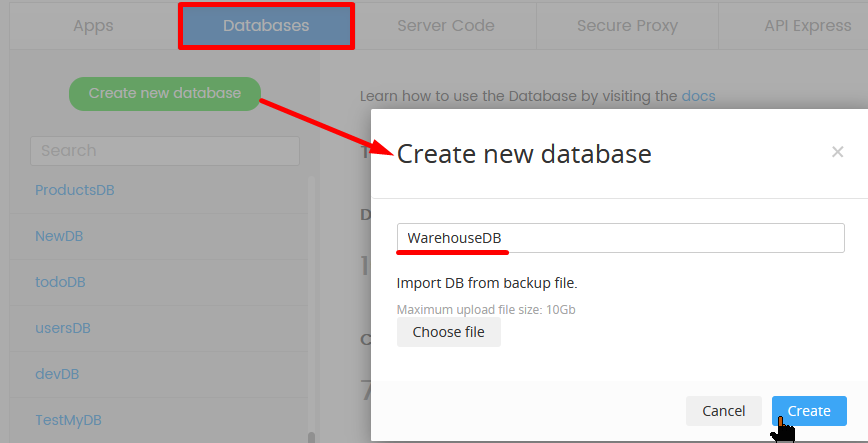
- Go to the Databases tab.
- Click the Create new database button.
- Enter a new database name: WarehouseDB. Then click Create.
The next step is to create a new custom collection.
Creating New Collection
Now, you are going to create a new custom collection to hold the warehouse data.
- Click the Create new collection button.
- Enter the collection name: Goods and click Add.
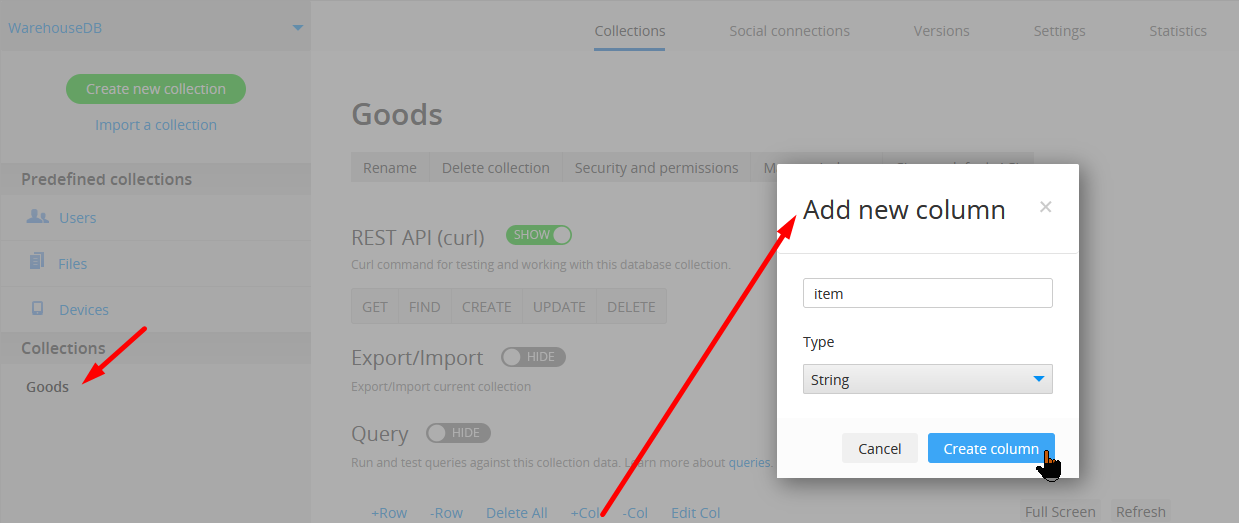
The new collection has a number of default columns. You are going to create a new column to hold the actual items.
- Click +Col.
- Enter the column name: item. Set its Type as String.
- Click Create column:
You should see a new column created.
It's very simple to add sample data into the collection.
- Click +Row to insert a new row into the collection.
- Enter Cold drink as the first item.
- Enter two more items: Tea and Coffee.

Collection data.
That's all you need to do on the database side. The next step is to define Server Code to access the database data.
Want to know more?You can also check this extended document to learn how to access the database and perform all the basic operations with the data stored in a database: reading, creating, editing, and deleting.
Creating Server Code Script to Access the Database
In this section, you are going to create a Server Code script to access the database and make it available for the app (client).
- Go to the Server Code page.
- Click Create script to create a new script. The script editor will load.
- Name the script loadProductsScript and click the Save button:
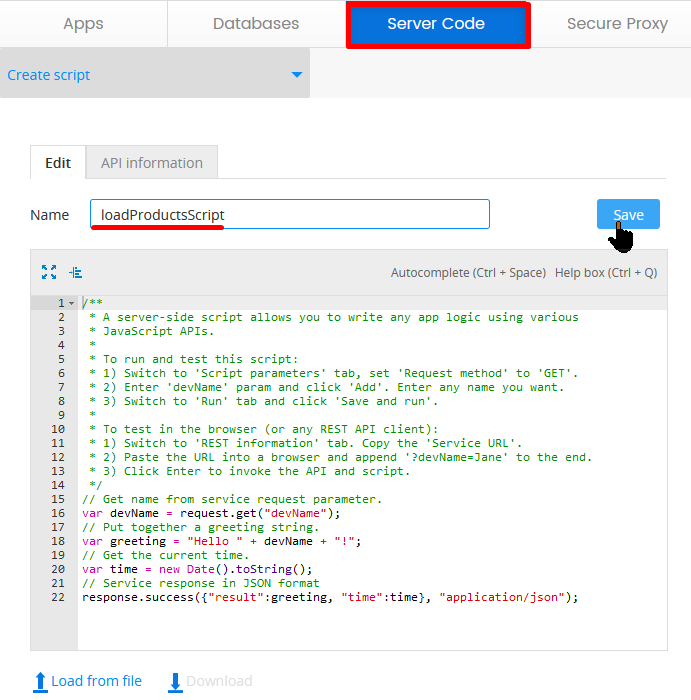
Note!Every new script loads the default sample script to try. Feel free to go ahead and delete this script.
- On the right-hand side, you will see the Snippets tab. Locate a snippet called retrieveAllObjects and click insert to add it into the script editor. It should look like this:
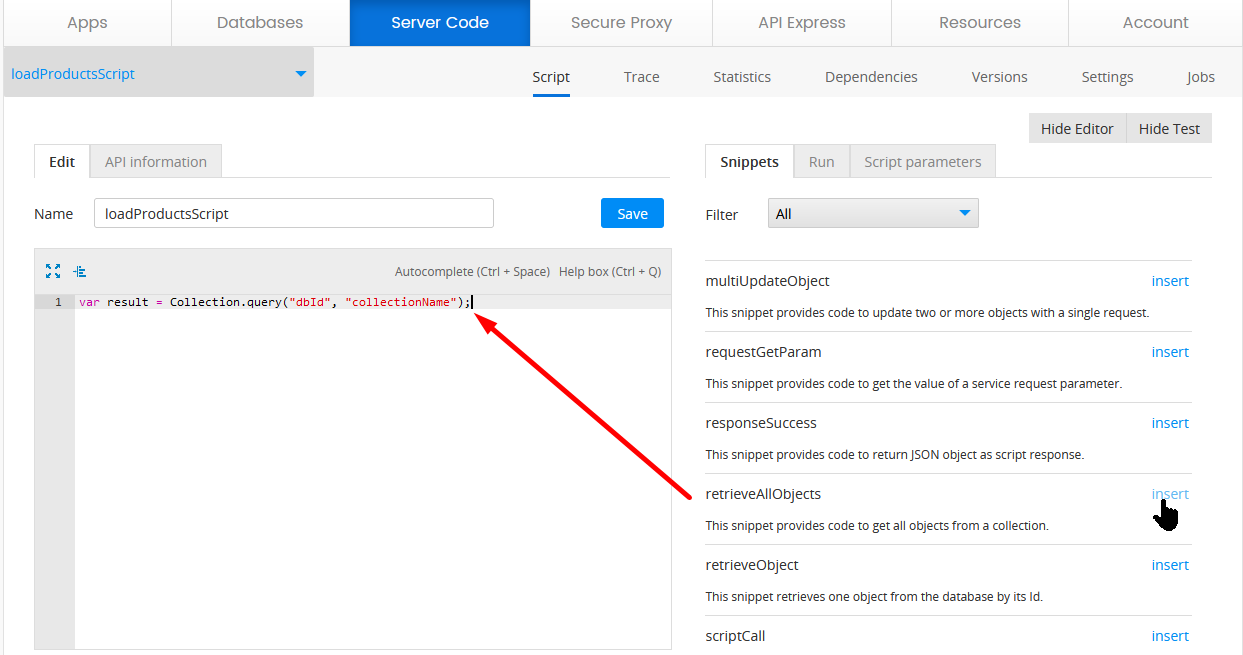
Now, you need to set your dbId and collectionName in this code.
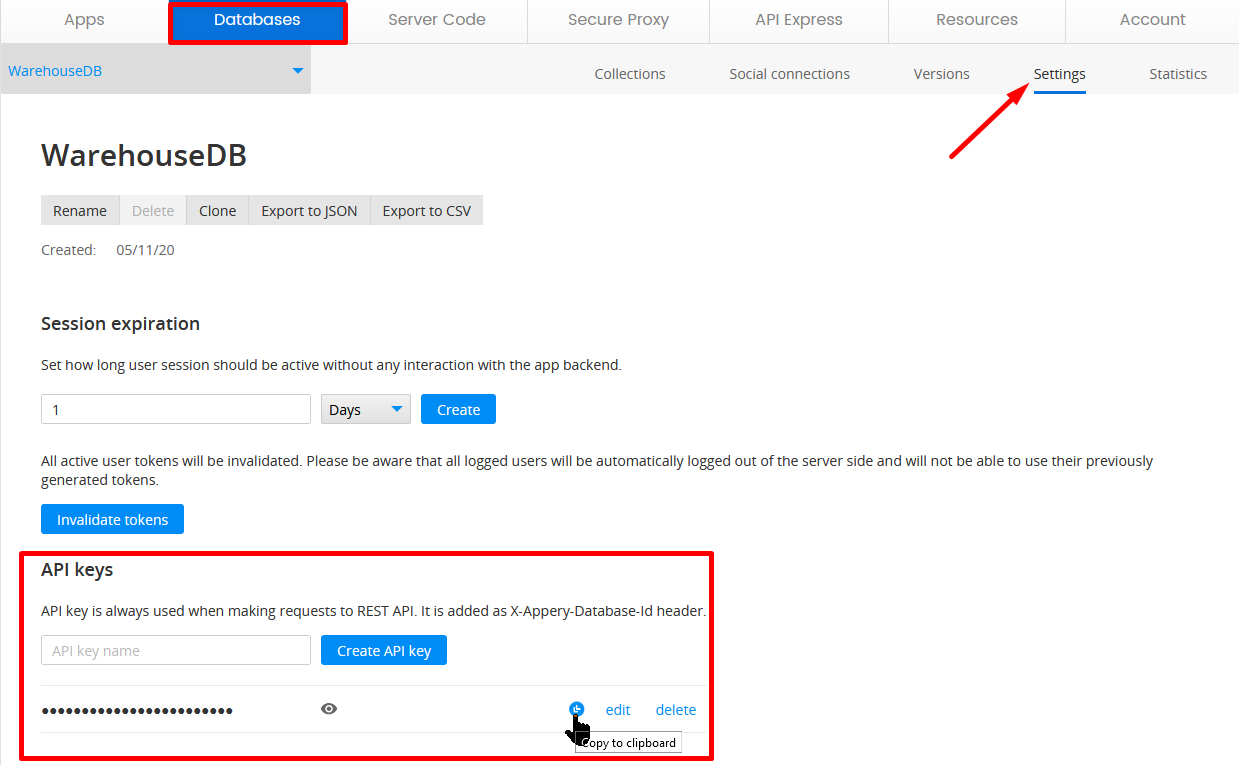
- To set the database ID, go back to the database you have just created and open its Settings tab. There, locate the database ID (API key) and copy it to clipboard:
- Paste the copied key into the script.
- Set the collection name to Goods by replacing
collectionNamebyGoods. - Using the Snippets tab again, find the responseSuccess snippet and insert it below the first snippet.
Note!Place the cursor below the first code line before inserting.
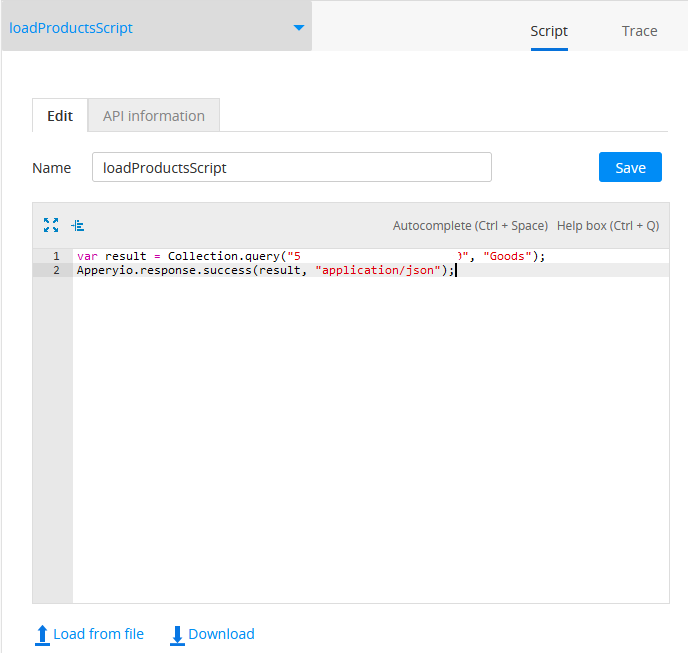
- Replace
{"param1":"value1"}withresultand save the script. Your code should look like this:
Testing Script
This script accesses the database and retrieves all the objects in the Goods collection.
It is always a good idea to test the script before using it in an app.
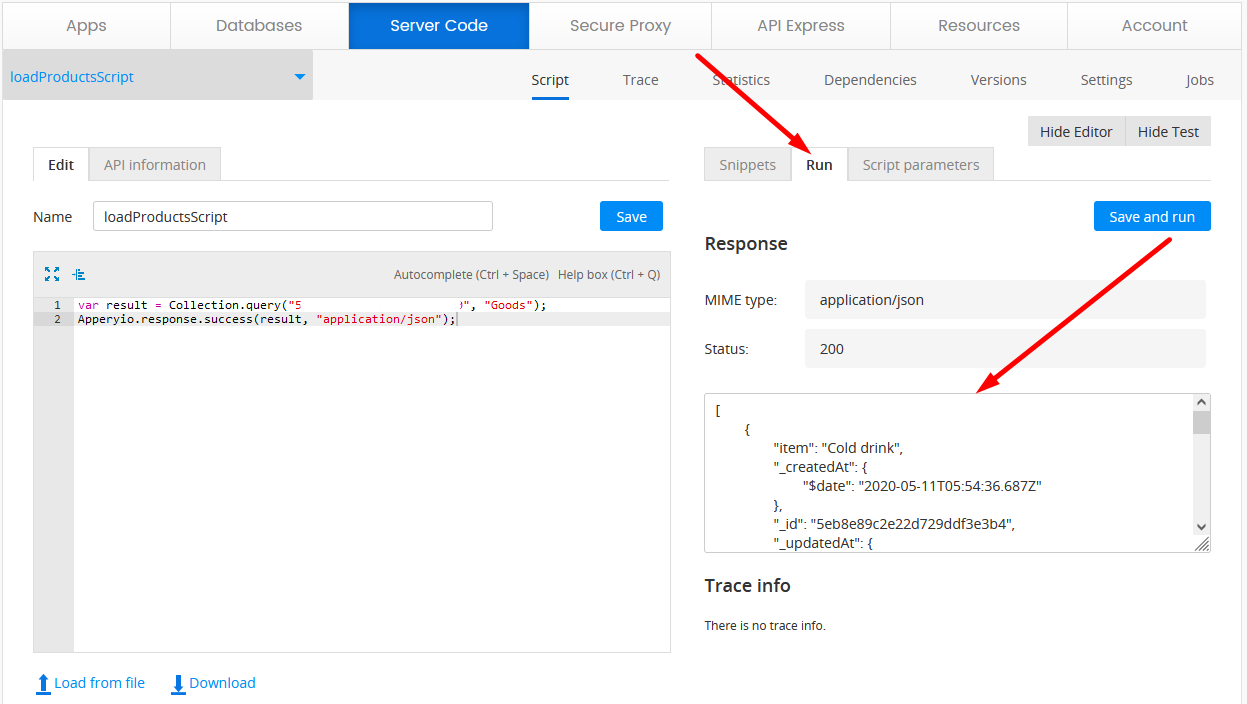
Testing is very easy. On the right-hand side switch to the Run tab and click the Save and run button to invoke the script. You will see the script response showing the items from the database:
Now, when you've made sure it works fine, you can proceed with building the app.
Building App
We have successfully created the app backend and the next step is to create the app UI (client) that will connect to this backend/database.
Want to know more?You can also check more information about how to work with Database using Server Code scripts in Working with Appery.io Database and Server Code extended guide.
Creating New Ionic App
Let's start by creating a new Ionic app.
- From the Apps tab, click Create new app:
- Select Ionic Blank as the application type, enter Ionic Warehouse App for the app name, and click Create.
The next step is to design the app UI.
Designing App UI
- Unfold the Pages folder and select the Screen1 page.
- Choose the Header Toolbar title on the page.
- Under the PROPERTIES panel, set its Text property to My Warehouse App:

Index page.
- From PALETTE on the left, drag the List component and drop it to the page.
- The list has two static items. As you will be loading the data from the database you only need one of them. So, delete the second List item by clicking the red X icon in its upper-right corner:

App design.
That's it for the app UI.
Importing Server Code Script
Now, let's import the created script as a service into the app.
- Click CREATE NEW > Backend Services > Server Code Service.
- Select the script you've just created and click the Import selected services button:

The service will be instantly imported and you can quickly test it:

- Select loadProductsScript_service located under the Services folder, go to its Test tab, and click the Test button to invoke the service. You should see the items you saved into the database:
- There is one step left and it is to set the service response.
After you have tested the script, click the Import as Response button:
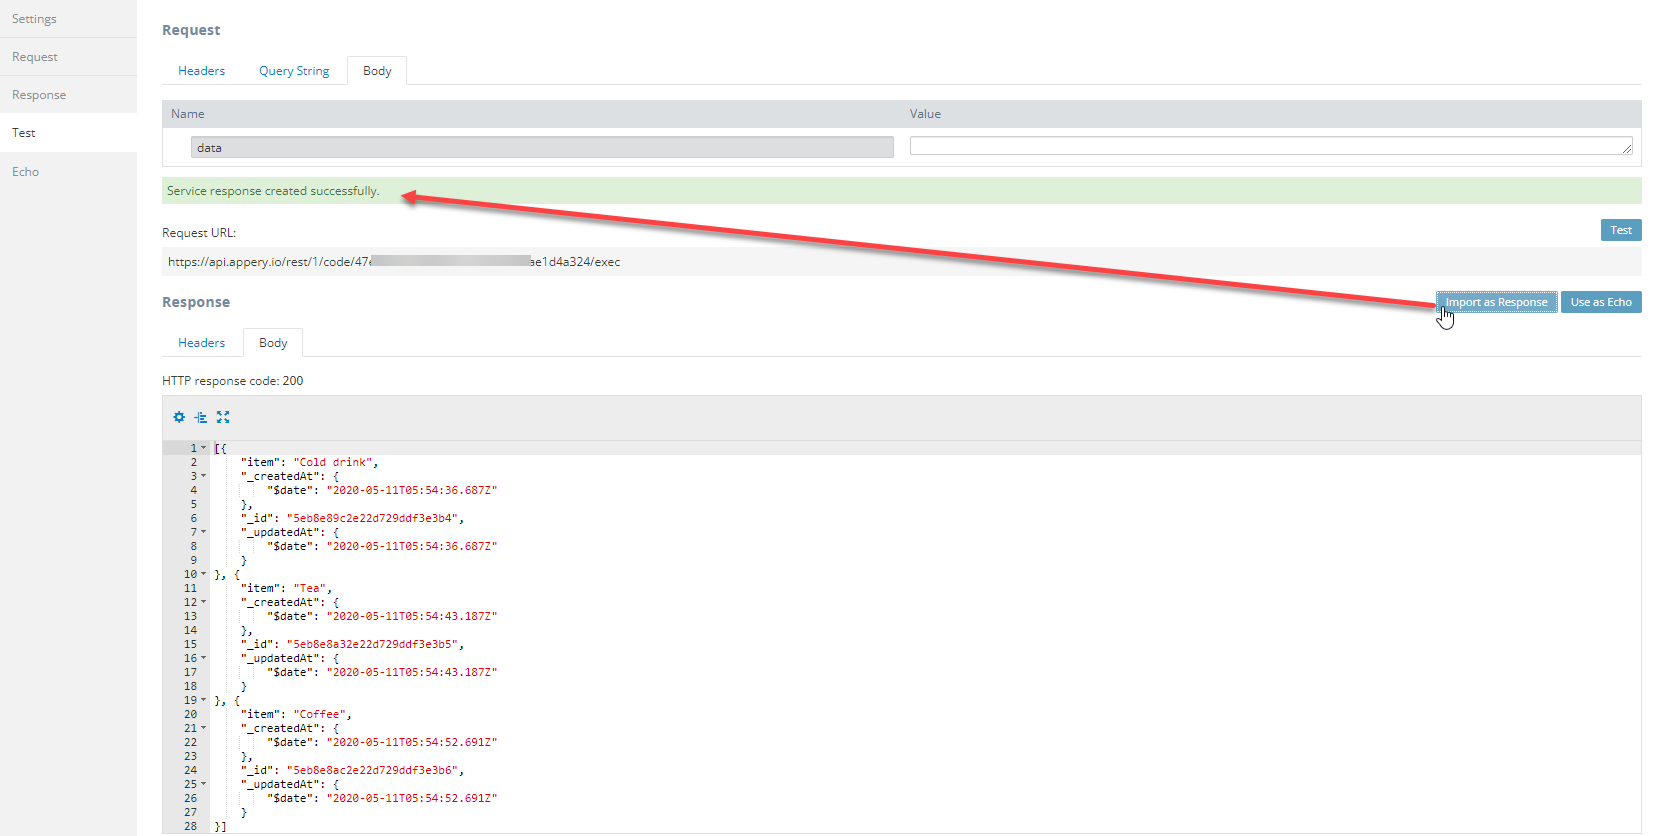
This will use the sample JSON response as the response for the service.
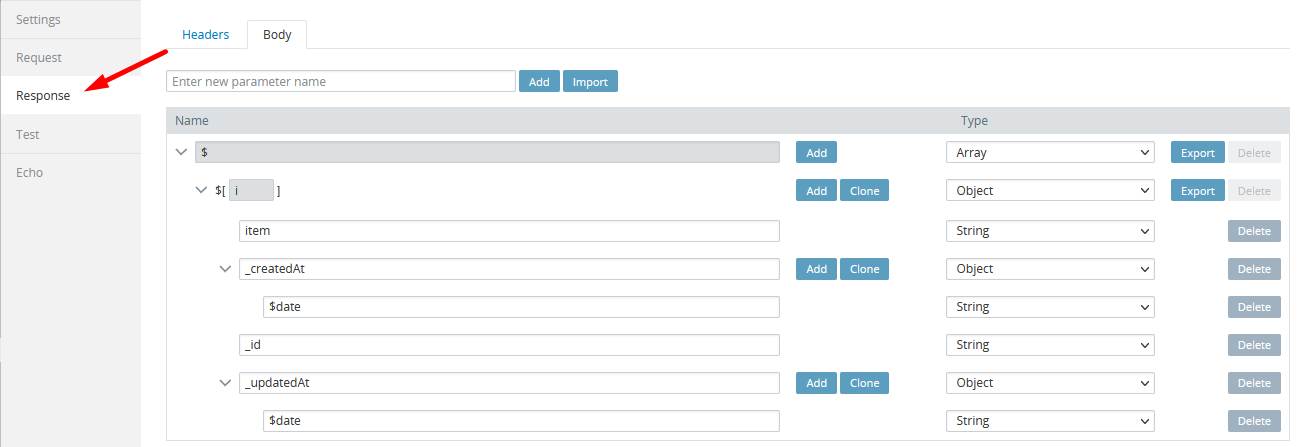
- You can open the Response tab to see how it looks:
Now, let's use the service on the page.
Invoking Service
Now, we need to use the service in our app.
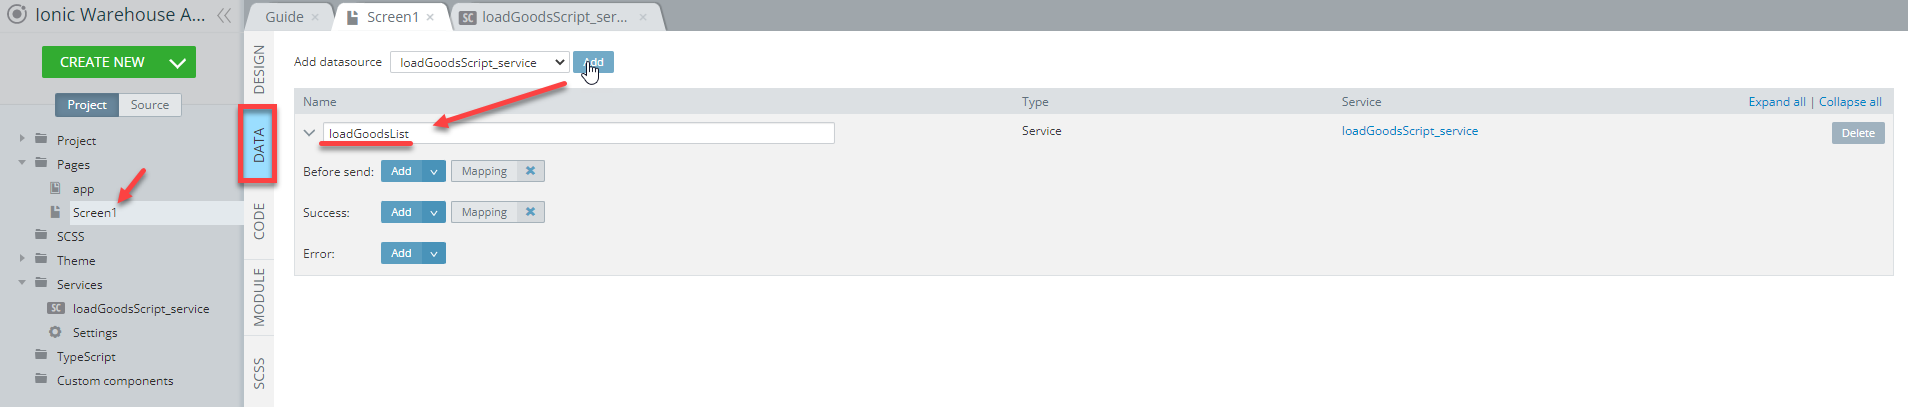
- Under the Pages folder, navigate to the DATA panel of the Screen1 page.
Here, add the loadGoodsScript_service as a datasource and change the service's generated local name to loadGoodsList:
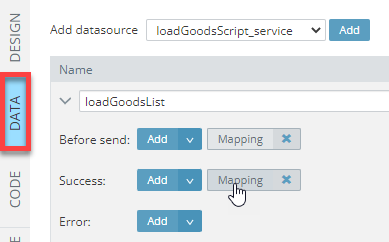
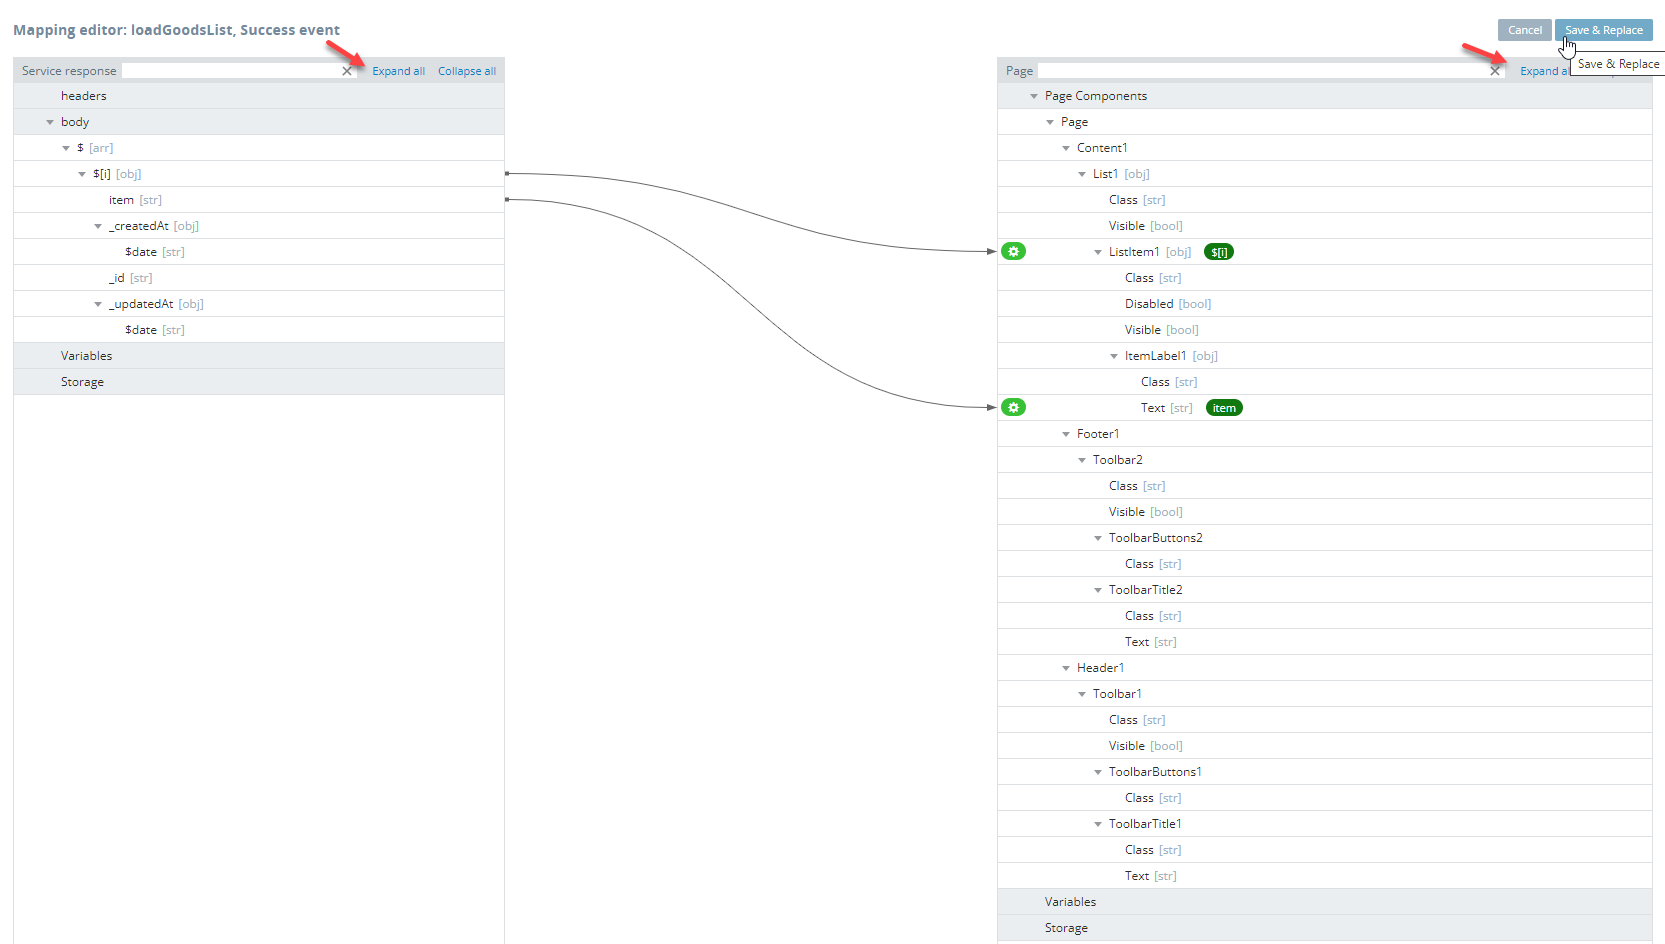
- Then, we need to save the data that is returned from the service. Click the Mapping button next to the service's Success event:
- Click the Expand all links on both sides of the mapping editor.
- Using drag-and-drop, create the mapping as shown in the screenshot below and click the Save & Replace button to save and exit the visual mapping editor:
Binding Page
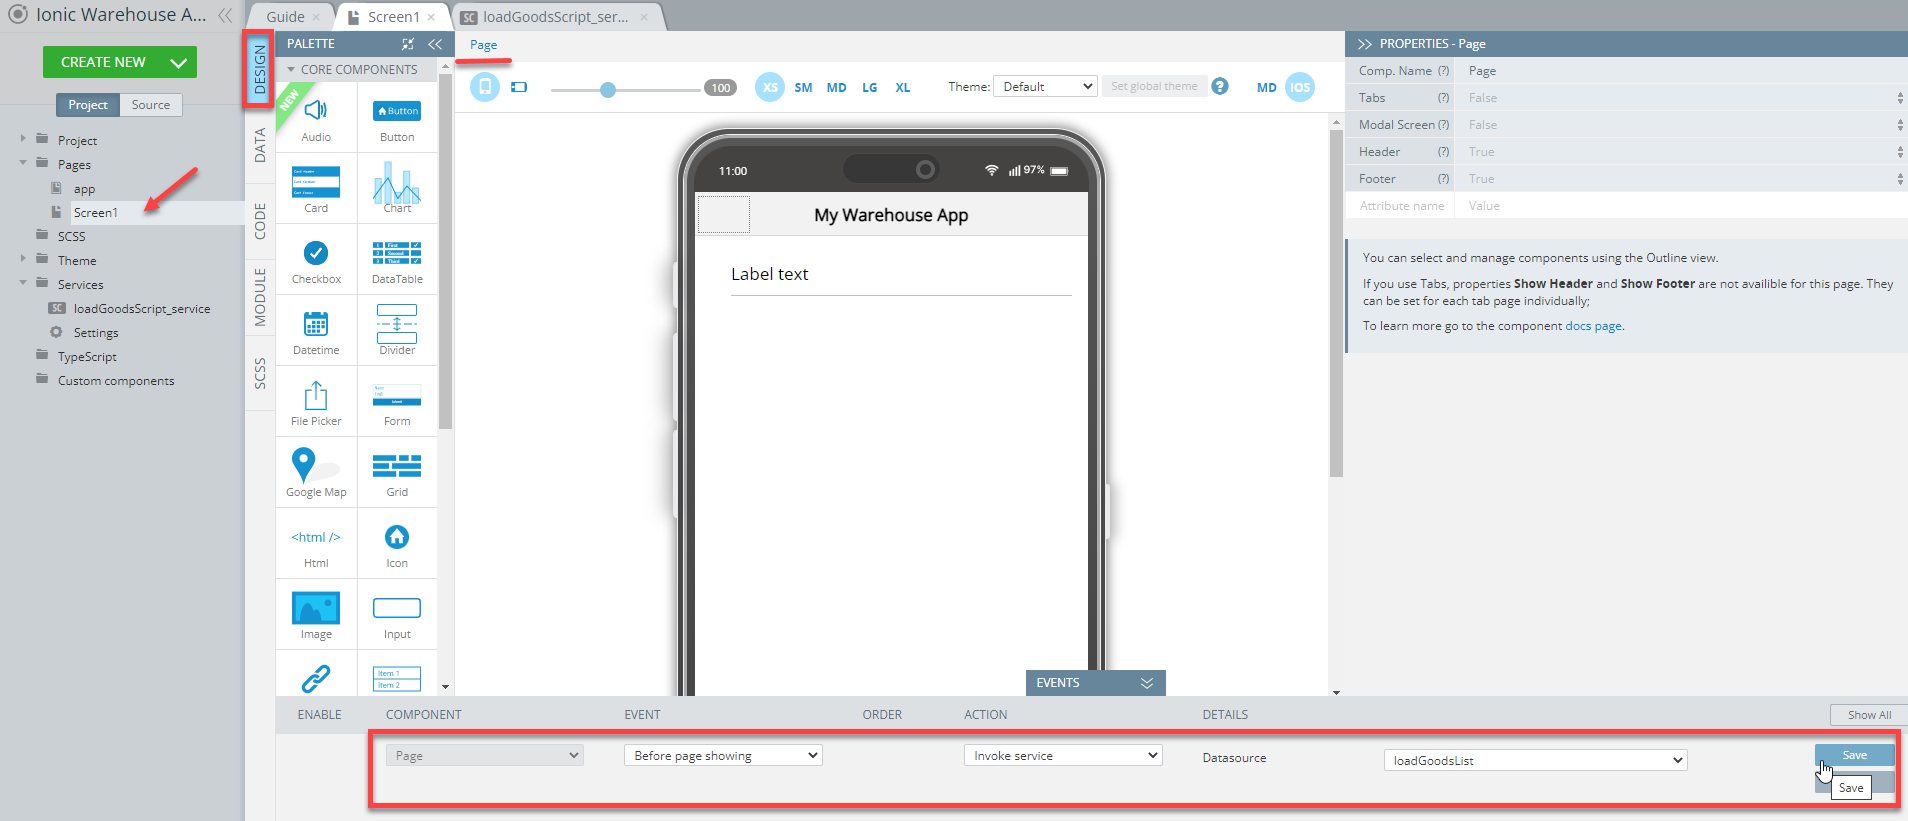
The last step is to bind the page to the scope. As we need to load the list of products on the page load, let's add the required event.
- Go back to the DESIGN panel. In the EVENTS tab, for the Page component, add the Before page showing event. Select Invoke service from the ACTION drop-down and select the loadGoodsList service as the Datasource. Click Save:
You are now ready to test the app.
Testing App
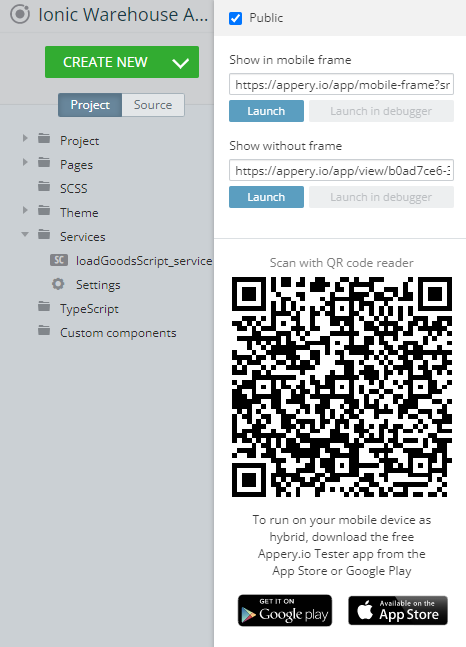
You can now click the TEST button in the App BuilderToolbar to launch your app in the browser:

Testing the app.
Testing on Device
When your app version is ready, you might also like to test it on the device.
Appery.io Tester AppA great option to quickly test the app on the device is to use our Appery.io Tester app.
The app is free and available for both iOS and Android.
You can check out this page to learn more about using the Appery.io Tester app.
Troubleshooting
Tip!If the list items are displayed in the app but without data, double-check that you have the right bindings (Binding the Page to Scope section).
Updated about 1 year ago