App Hosting
Publishing your app as mobile web app.
The app that you build in Appery.io can be published as a mobile web app. This means the app will be hosted on a server and can be accessed from any browser on a mobile device.
The Appery.io platform has the following options:
- Publish on Appery.io app_name.app.appery.io domain.
- Publish with Appery.io using a custom domain.
- Publish to a 3rd party hosting provider of your choice.
Publishing on Appery.io
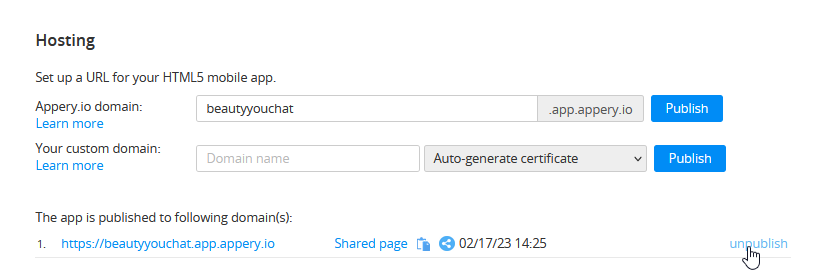
On the app details page go to the Hosting section. There you will see two options:
- Publish using app_name.app.appery.io domain.
- Publish using a custom domain.
- Use only if you completely understand how DNS (Domain Name Service) works and how to configure it. Any changes you make to your DNS are at your own risk.
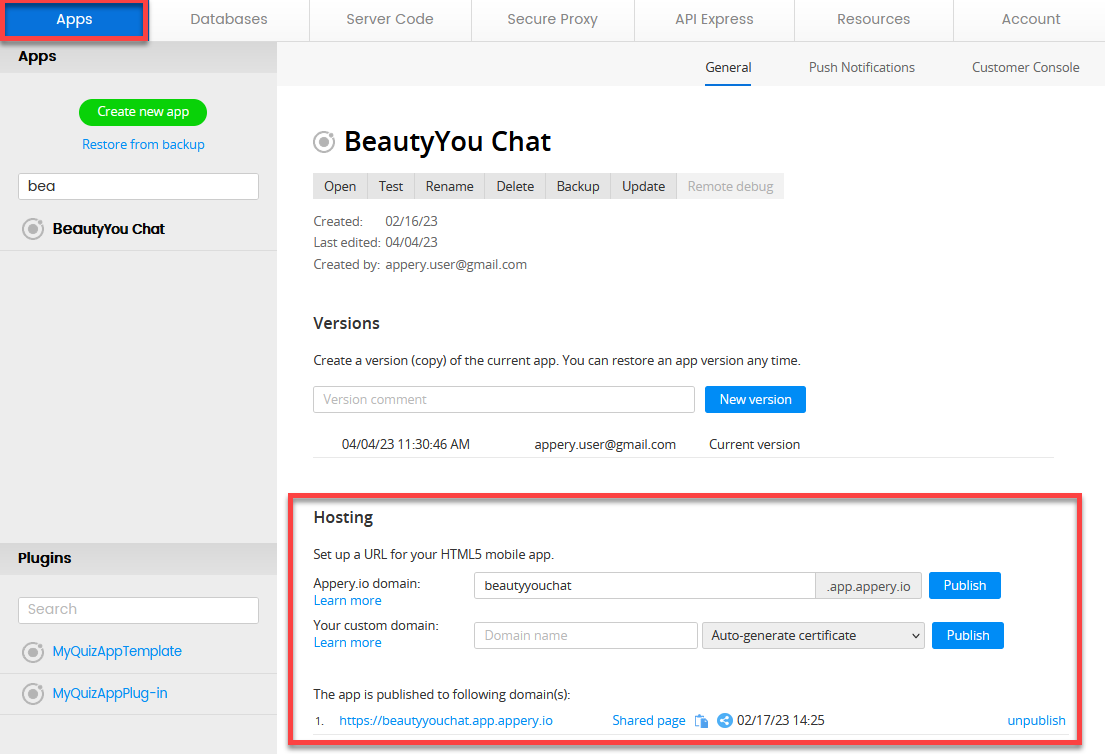
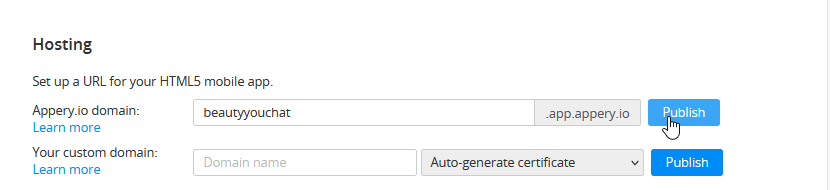
Mobile web app hosting.
Select the first option, enter the domain name, and click the Publish button to start publishing your app:
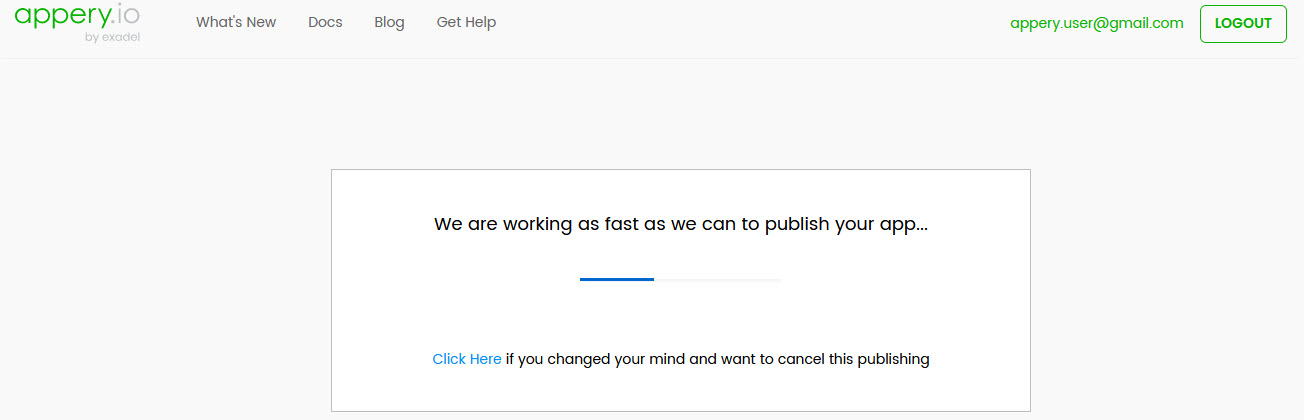
Wait until it's ready:
In a minute or two, the app is published on the Appery.io domain. Note the social share buttons that become available on the page with the generated QR code and can be shared to Facebook, Twitter, LinkedIn, and/or email:
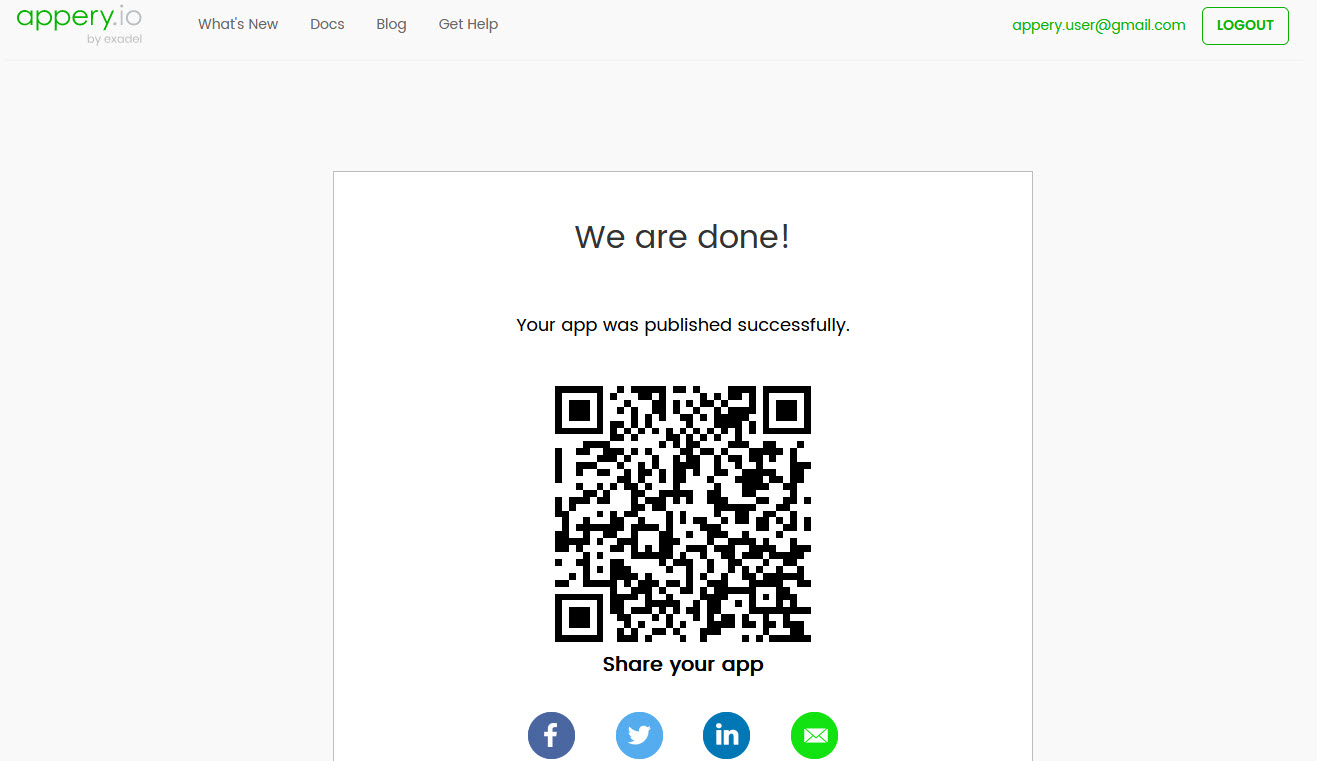
Click the social share button, log in, if needed, change the message of the post, and share the app with your followers:

Sharing on LinkedIn
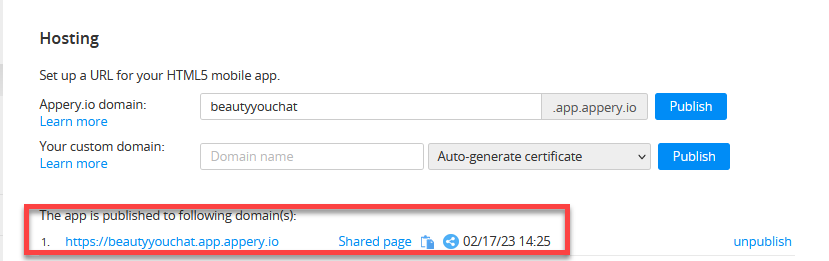
FinishedThe URL of the published app is available after the app had been hosted. Also, you can unpublish the app, if needed:
Also, when done, the link to the published app will be ready and you can share it or simply click the corresponding button to share it over social networks:
Custom Domain Configuration
Appery.io can automatically generate certificates for you, and when you're done, you can share your app by copying the link or selecting from several social sharing options.
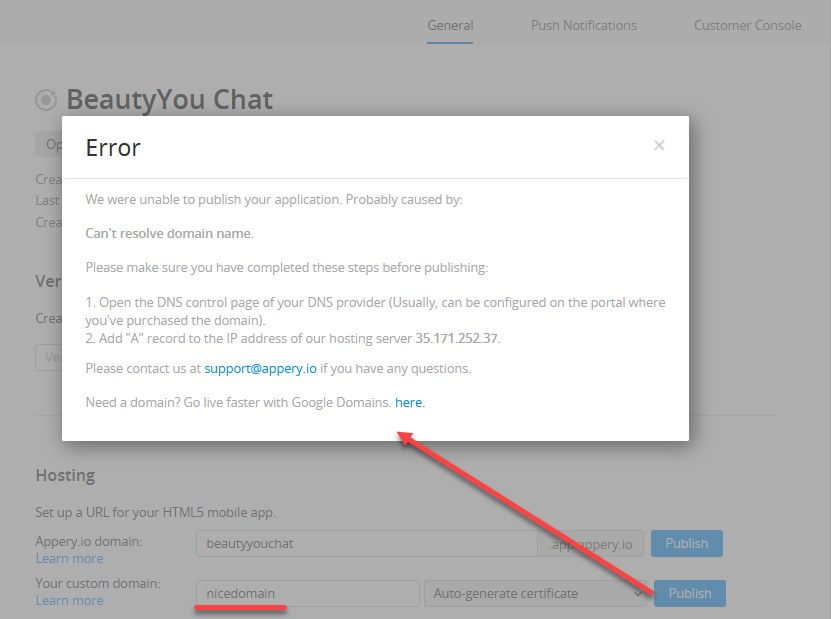
Here is how it works: you only provide your domain name and we will publish your app to it and in a while you will get the correct certificate (we will also check if your domain is defined correctly):
Video Tutorial: Publishing on Custom DomainLearn how to publish an Appery.io application on a custom domain with an automatically generated certificate:
Independent Custom Publishing
Before you Start!Publishing with using a custom domain requires understanding how DNS (Domain Name Service) works and how to configure it. Any changes you make to your DNS are at your own risk.
Change the root A record to the CNAME record of our hosting server: hosting.appery.io.
Or, if adding a new sub-domain, map it so that it points to the same hosting server.
To verify settings, you can try to ping your domain. It should be responding to the ping queries from IP address 35.171.252.37.
App Console HostingPlease define the next settings to host the console app: hosting server: achosting.appery.io, IP address: 54.243.62.172.
Note!Note that DNS propagation could take up to 24 hours, but in most cases, it will be completed sooner.
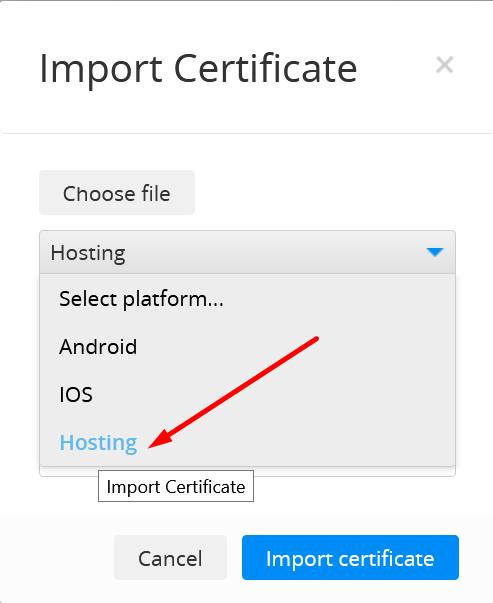
To be able to use your custom SSL certificate for publishing a web app on a custom domain you would need to create a P12 bundle file secured with a password which will contain your certificate file from CA for your custom domain and a private key.
OpenSSL example list of shell commands:
openssl req -x509 -newkey rsa:2048 -keyout <your-domain>.key -out <your-domain>.pem -days <days before key expiration> -nodes

openssl pkcs12 -export -out <your-domain>.p12 -inkey <your-domain>.key -in <your-domain>.pem -password pass:<password for p12 bungle>
After that, upload the final P12 file to Account -> Resources -> Import certificate and choose Hosting platform.
Now, you can use custom domain publishing with a custom SSL certificate for your web app.
Video Tutorial: Build and Publish HTML5 Mobile App with Local Storage in 5 MinutesYou can also like our video tutorial that shows how to build an app with HTML5 local storage and publish the app using Appery.io hosting:
Adding Published App to a Site as a Widget
Also, you are free to add the published app to any site of your choice as a widget.
Please check this link to see what it will look like.
Below is the sample code you can use for embedding the app published on Appery.io as a widget:
<script>
        var script = document.createElement('script');
        script.type = 'text/javascript';
        script.src = 'https://app.appery.io/aio_chat_widget.js';
        script.onload = function() {
            window.aioChatWidget.init({
                frameUrl: "https://chatbot.app.appery.io/",
                // buttonColor: "blue",
                // buttonTextColor: "red",
                // buttonImgUrl: "https://appery.io/app/resources/img/mobileframe/favicon-192x192.png",
                  preload: true,
                // autoOpen: 5000,
                // position: "top_right",
            });
        }
where:
frameUrl: '', // the iframe url;buttonColor: '#4DC95B', // css color. The button color for the chat button (if set to default, the button image is used) and close button;buttonTextColor: '#FFFFFF', // css color. The button text color for the chat button (if set to default, the button image is used) and close button;buttonImgUrl: '', // custom image for the button, if not set, then the default.svgimage is used;preload: false, // if set to true - add iframesrcon init (load frameUrl immediately), otherwise, the iframe will be loaded only after opening;autoOpen: 0, // ms. If 0 - do not open;position: "bottom_right" // bottom_right, bottom_left, top_right, top_left.
Updated about 1 year ago