Ionic File System Plugin App
Ionic app that can manage data using the Appery.io File System plugin.
This sample app is a simplified tool that demonstrates how you can manage the file system of your device and shows the following features:
- Ionic
- Appery.io File System plug-in
- Services based on the file API
- Appery.io Database.
Important Security Issue: Master API keyBefore you can proceed, you will need to create and set up an Appery.io database (you are also free to use an existing database).
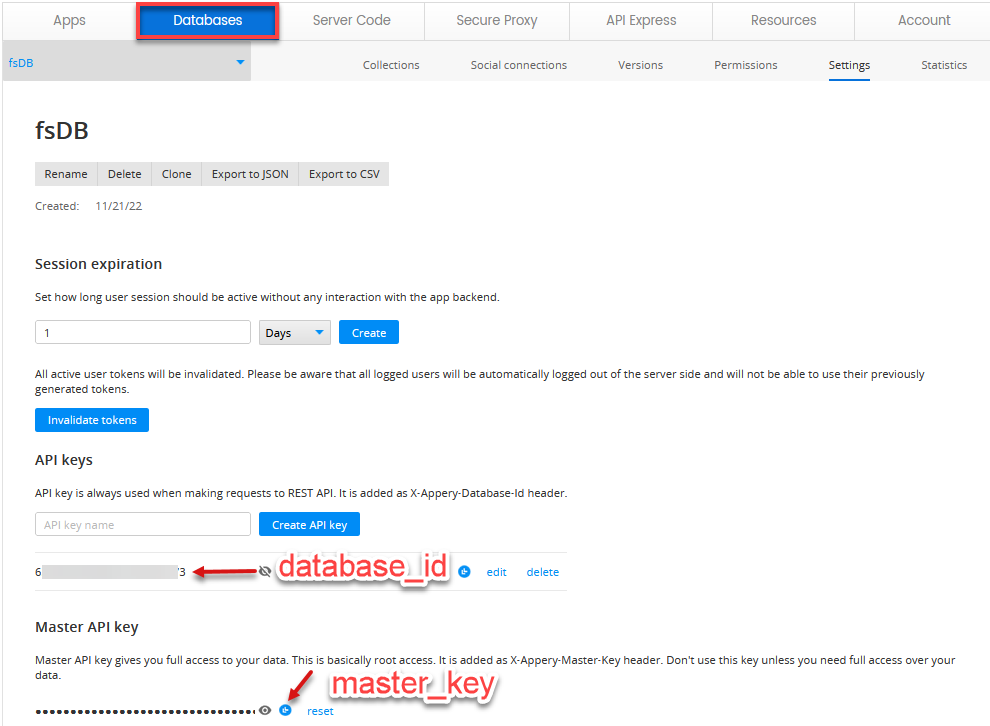
For this sample app, we will use the Master API Key of the created database that can be found under the Databases > Settings tab but please be informed that using it can be insecure as it gives full access to the database.
Therefore, it is recommended that you use X-Appery-Session-Token instead if you need to add extra protection to your data if working with a production app.
The first step is to get the app backend. This app backend consists of the database for storing files.
Want to know more?You might also like to check out this Ionic Camera and File Upload Plugins App document to learn how to build an app where you can use the _Camera _service to run a camera on your device, take a photo, preview this photo in the Image component on screen and upload it to the Appery.io database.
Setting App Database
In this step, you are going to create the app database to store user files.
The first step is to create a new database.
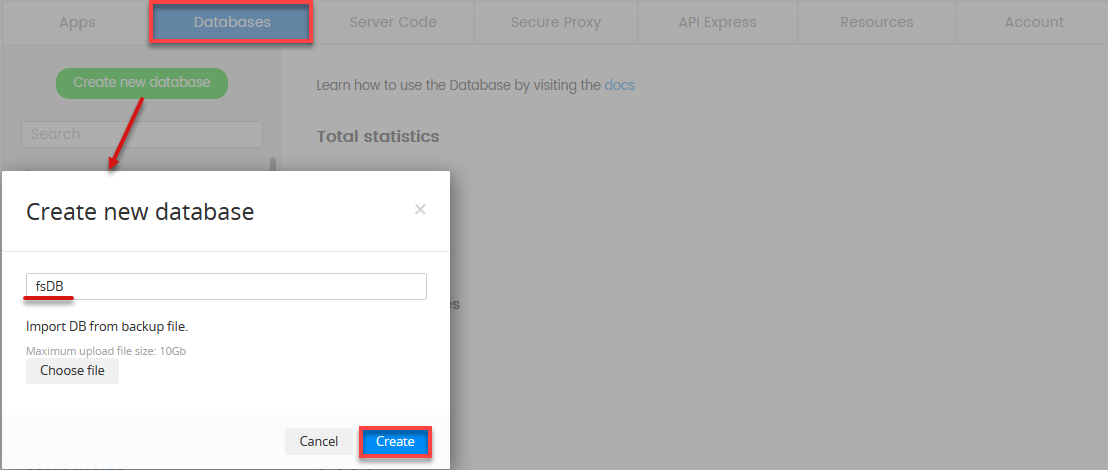
- Go to the Databases page and click the Create new database button.
- Name the database to fsDB and confirm the action:
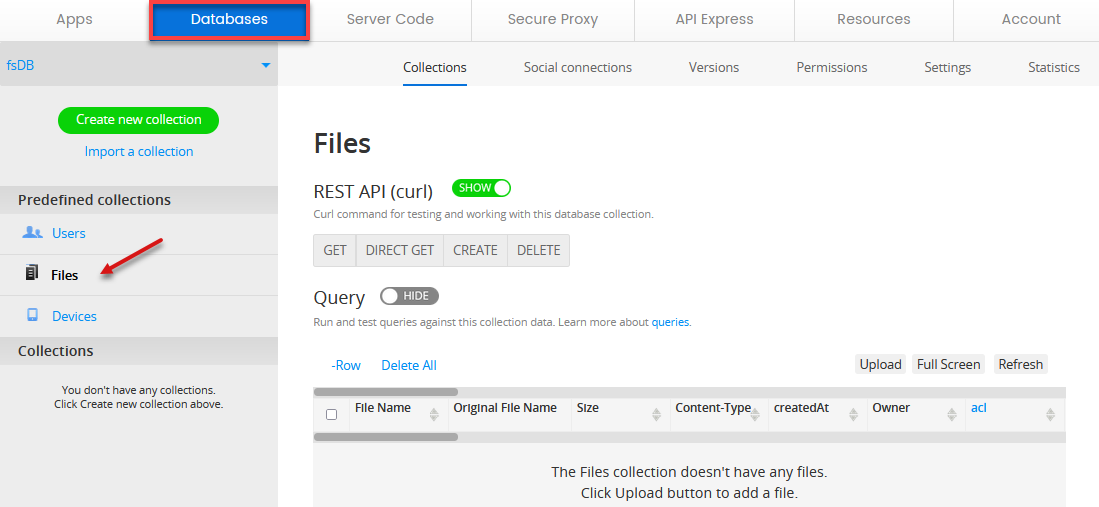
- In a moment, a new database with a default Files collection is created:
Adding Security to Your DatabaseYou can also check this link for information about how you can additionally secure your database.
Getting Ionic App
Getting the Ionic app is really fast and easy as the app is available as a plug-in inside the App Builder.
- Go to the Apps tab.
- Click the Create new app button.
- Select the Ionic Blank template. Name the app and click the Create button.
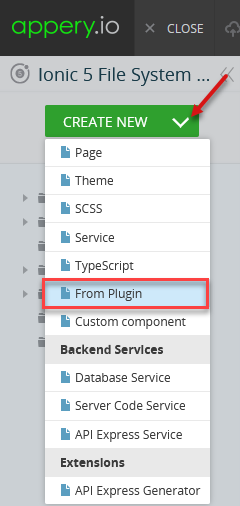
- When the visual App Builder loads, click CREATE NEW > From Plugin:
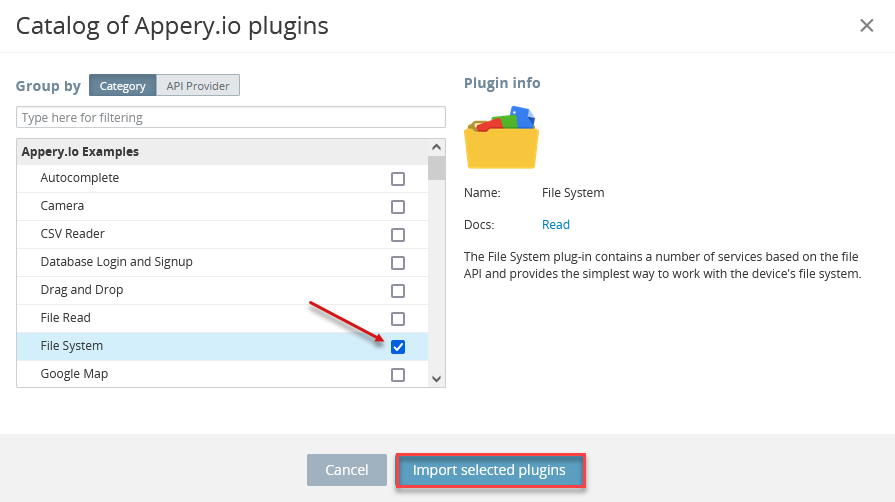
- Under Appery.io Examples, select File System and click Import selected plugins to confirm:
After the plugin is imported, several default pages, needed file system services and TS files are added to the app:
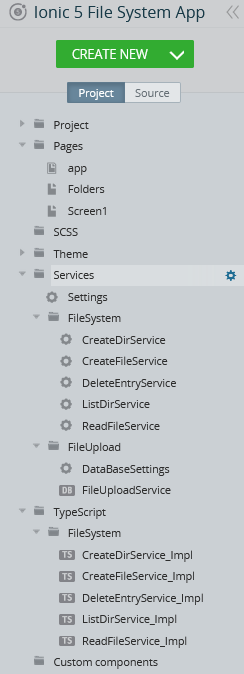
- Now, under the Routing tab, select the Folders page for Default routing:

Now, let's proceed with specifying the database credentials.
Configuring App Logic
The services that talk to the backend are already in the app but you also need to set the database ID and Master API key for these services to be linked.
- Go back to the Databases tab and open the database we created. There, under the Settings tab, locate the two values of the fsDB database we are going to link our app to: database_id (API Keys section (can also be located in the URL )) and master_key (Master API Key section):
- Switch to the app, in the Project view, unfold the Services > FileUpload and locate the DataBaseSettings service.
- Now, one by one, copy the database credentials to the clipboard and insert them into the corresponding Default value fields of the DataBaseSettings service:
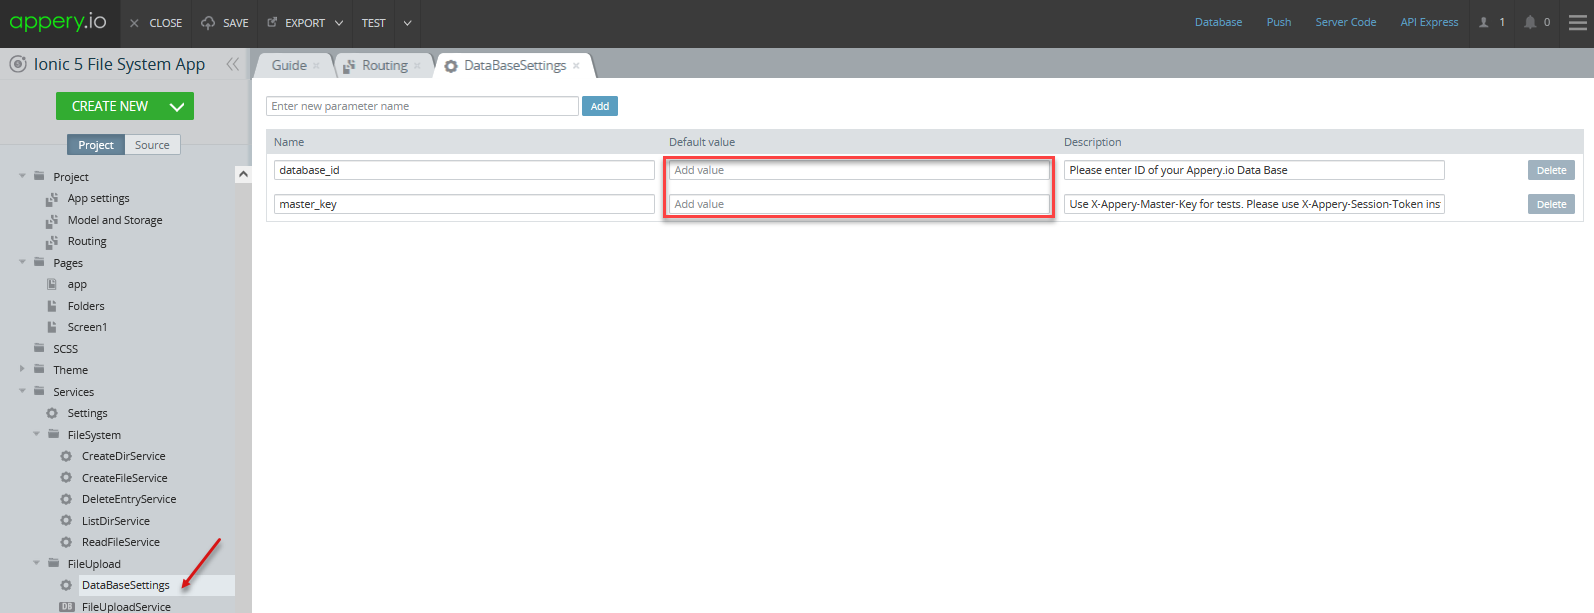
- To save changes, click the SAVE button in the App BuilderToolbar.
App Testing
Since this app is operating with a device file system, the app cannot be tested in the browser. To test the app, you need to build (.apk / .aab for Android or .ipa for iOS) and install it on your device. The plug-in works on both Android 6+ and iOS.
App ExportYou can check below for how to export your app:
- for Android: (https://docs.appery.io/docs/appexport-android)
- for iOS: (https://docs.appery.io/docs/appexport-ios)
When your app version is ready, you can test it on the device.
Appery.io Tester AppA great option to quickly test the app on the device is to use our Appery.io Tester app.
The app is free and available for both iOS and Android.
You can check out this page to learn more about using the Appery.io Tester app.
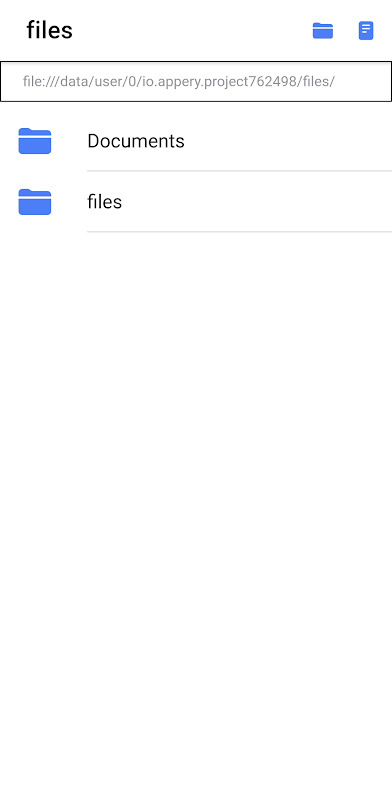
After the app is successfully installed on the test device, two folders can be seen (note, that the file structure can vary among different devices):
Creating Folders
Let's check out the files folder first. So, click it to open, then click the folder icon in the app header to create a new folder (subfolder), name it Cats, and click OK to confirm:
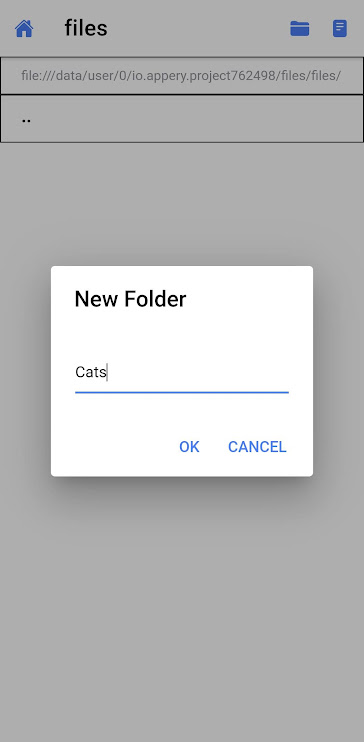
The folder is created:

Adding Files
You can now click on the just created folder to navigate inside it or click on the .. line to go back to the parent folder.
Let's add a new file to this folder, so, select it and click on the file icon in the header. Then enter the direct URL to the external file (e.g. https://icatcare.org/app/uploads/2018/07/Thinking-of-getting-a-cat.png) you would like to upload and click OK:
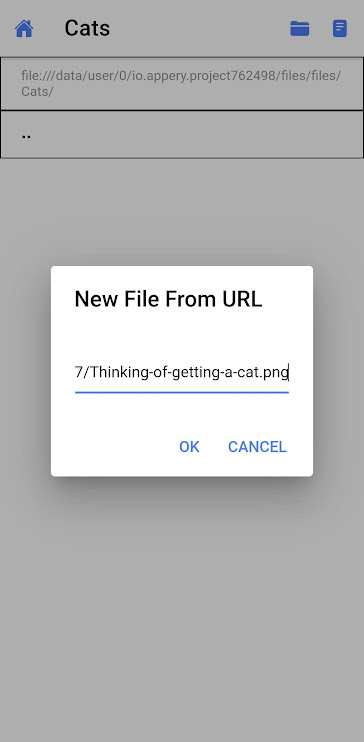
Wait a moment to make sure the file is added to the folder Cats:
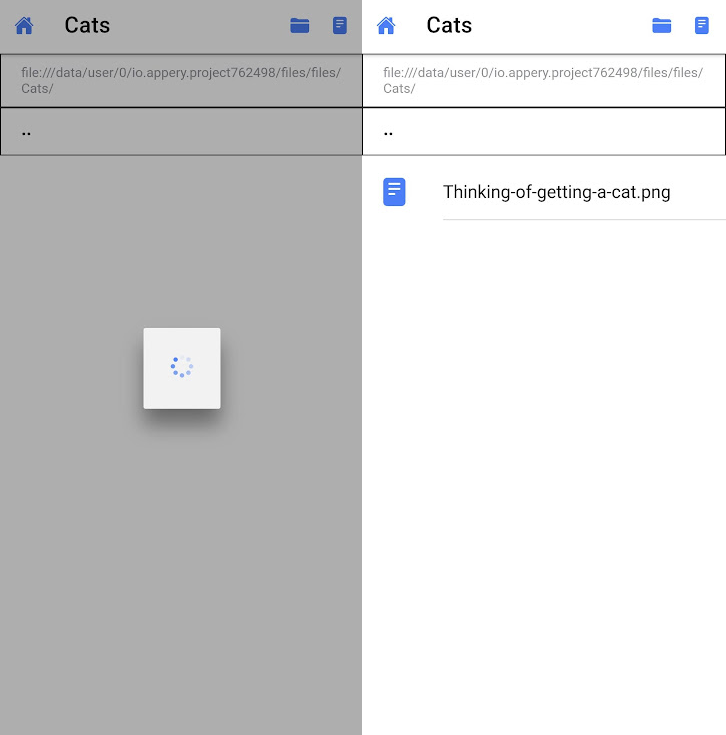
Uploading Files to Database
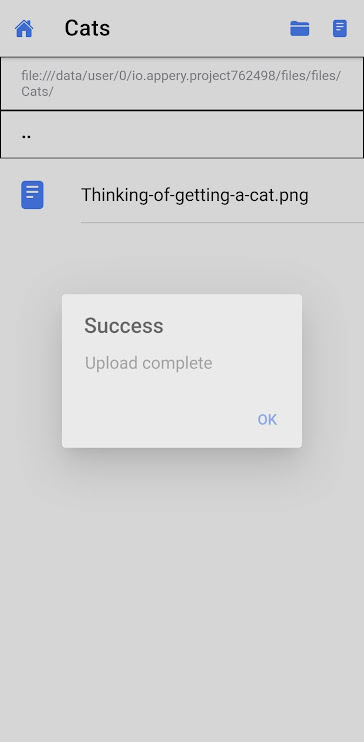
Finally, to upload the file to Appery.io Database, just select the just created file and confirm by clicking OK:
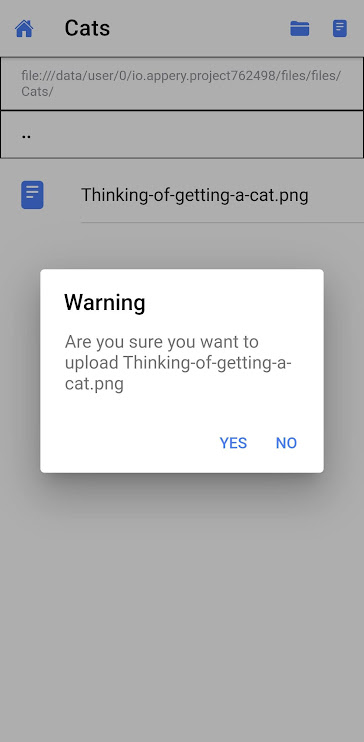
You should see the Success notification:
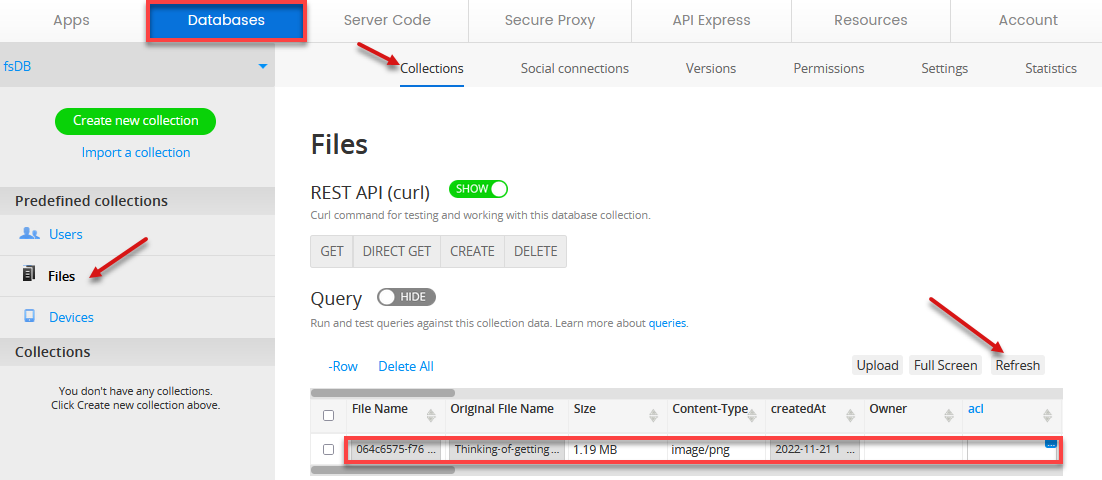
In a moment, you can check your databaseto see that a new file has been uploaded to its Files collection (you may need to click the Refresh button to update it):
Deleting Folders / Files
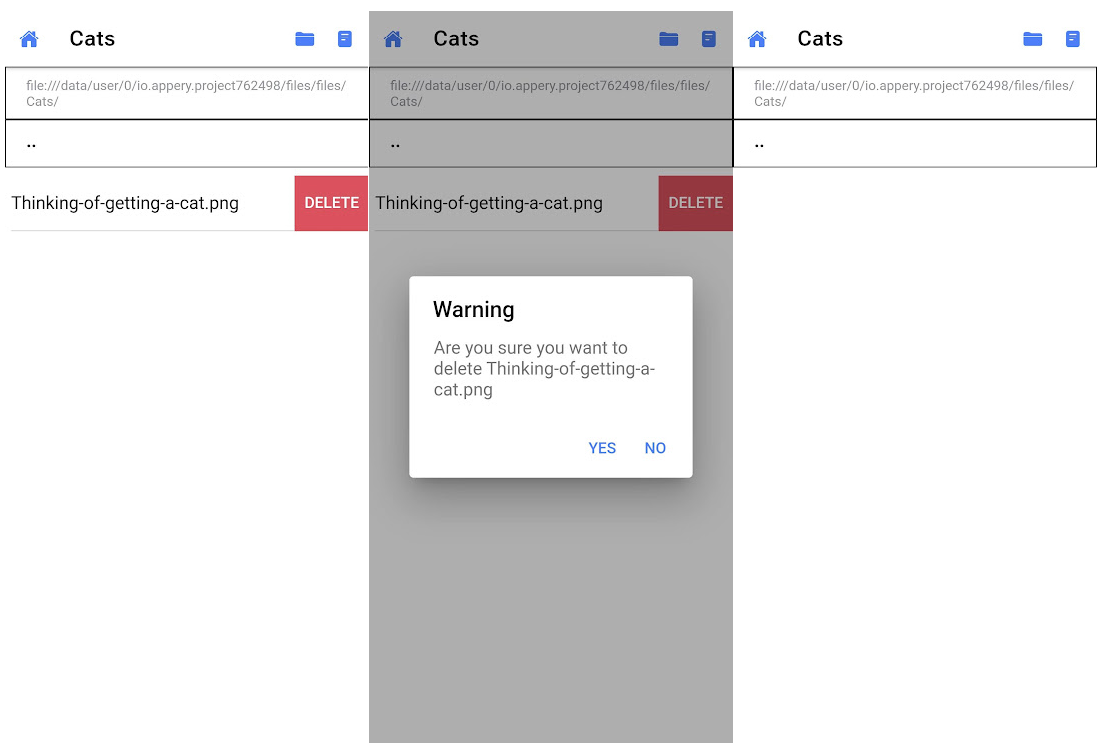
The plug-in also supports deleting files you do not need any more. To delete the file, swipe left and confirm the operation. In a moment, the folder is empty:
Similarly, any folder of your choice can also be deleted from the app:

Managing Database FilesNote, that the files that have been previously uploaded to the Files collection will not be deleted and you will need to manage them separately.
Updated 7 months ago
