jQM UI Themes
Using and creating jQuery Mobile themes.
Important Note!The option of creating new apps with thejQuery Mobile framework was removed but we still support the projects that were created with it earlier.
Using Default Themes
A jQuery Mobile app comes with a theme called flat-ui. It's also very easy to add additional themes. To import themes, click Create New > From Plugin. This will open a window with a list of available themes for importing.
Select the theme(s) to import and click Import selected plugins. As a result, you will see the newly imported themes under the Themes folder in the *Project view. To apply a theme to all the pages in the app, go to Project > App settings. Select the needed Theme and then select a Swatch.
Another way to get new themes is to click Add more Themes from App settings > General. This way, you will also get into the catalog of the Appery.io plugins window.
jQuery Mobile standard themesAll themes in Appery.io, including custom themes, are based on jQuery Mobile themes. Learn more about themes and swatches.
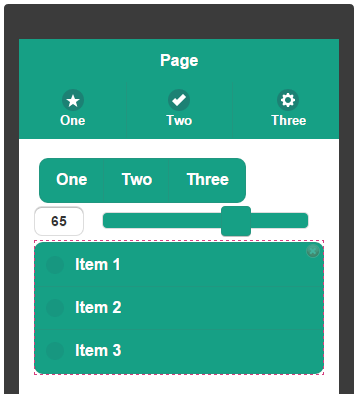
This is how the default flat-ui theme swatch B looks:

flut-ui theme.
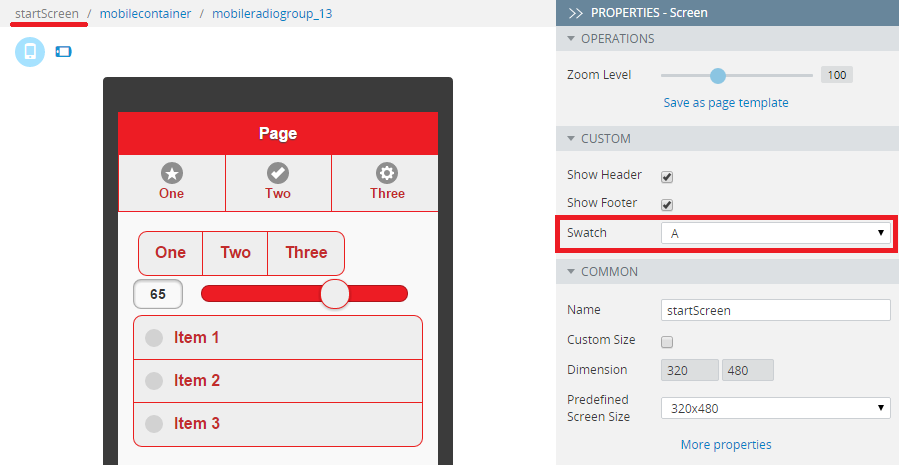
In Project > App settings, changing the theme to Gelato (once it is imported). Changing the theme will update all of the pages. The swatch will then be set to Inherit. To change a swatch within a page, select the page name in breadcrumbs, and then change its swatch in Properties. The theme is set to Gelato and the swatch to A.

Changing a swatch in Properties.
Swatches
A jQuery Mobile theme comes with at least one swatch. A swatch is usually a different color schema for the same theme. The actual number of swatches depends on the theme and its creator. The swatches are usually identified by letters A, B, C, D and so on.
jQuery Mobile ThemeRoller
You can easily create as many custom themes as you need by using the jQuery Mobile ThemeRoller tool, and then uploading them to your app in Appery.io:

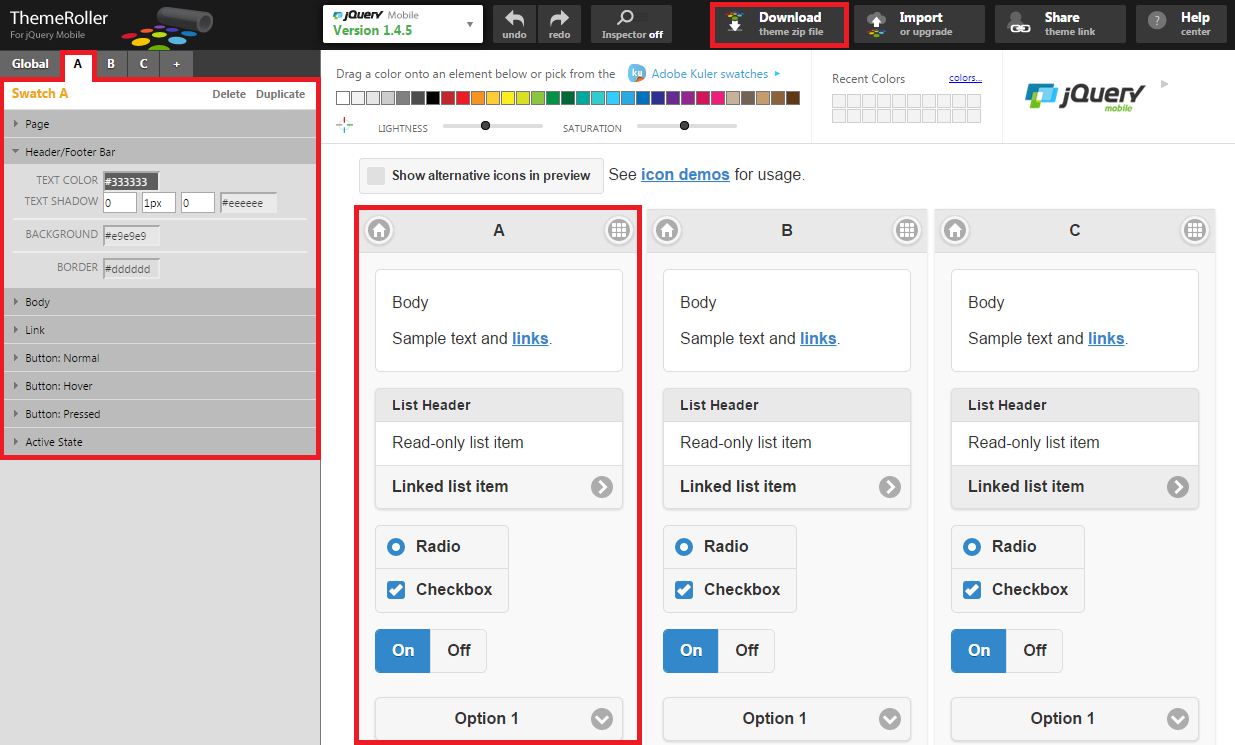
jQuery Mobile ThemeRoller
- Swatches A, B, C are shown in the upper-left corner. You can also add a new swatch (D, E, F…) by clicking +.
- The menu on the left allows you to edit the current swatch. The changes will be instantly shown in the center.
- When done creating a custom theme, click Download (top menu) to download the theme.
Creating Custom Theme
This section shows you how to use the jQuery Mobile ThemeRoller to create a custom theme for your app.
- Create a custom theme with any number of swatches in the ThemeRoller.
- Click Download- you will be prompted to enter a name (for example MyTheme). Then click Download Zip.
- Unzip the download file, and find the file called MyTheme.css.
- In Appery.io, Project > Create New > Theme. For the name, enter: NewTheme. Click Create Theme.
- Open MyTheme.css, copy all its contents, and paste it into the create theme in Appery.io.
- Click Add Image and upload all the images from theme/images folder from the download zip file. You can select multiple images to upload.
- All the images need to be added to the theme one by one. Select each image (currently, they must be selected one at a time) and click Select.
Once all the images are added to the theme, it will look like this:

- Save.
- Go to Project > App settings and select the newly created theme.
- Open the page and select one of the swatches from your new theme.
Adding Custom Icons to Theme
NoteCustom icons cannot be added to an iOS7 theme due to a changed CSS structure.
You may go away from inserting the predefined themeAppery icons and use custom ones. To do this:
- CREATE NEW > Theme, name it and copy the code of the theme you want to make changes to into the space provided.
- Upload images of the the icons you’d like to insert into the builder using Add image button on custom theme page .
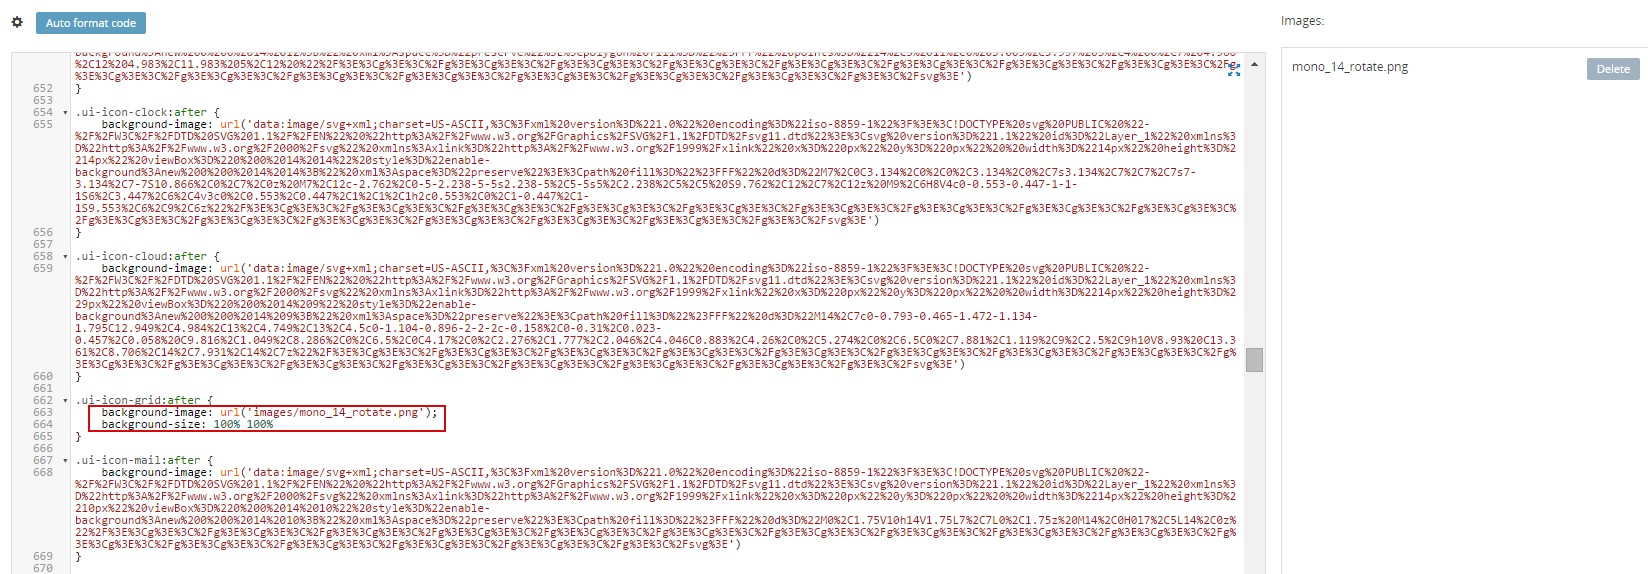
- Find the code positions and apply background-image for the icons, set correct background position for each icon. URL format is
**images/<filename>**. Correct file names can be found on the list to the right.

Correct file names
Watch the size of your images – if it exceeds 22 px, you need to set the background size to 100%. Test the application to see the icons.
NoteAll manipulations can be made for Libraries v2.0 and higher.
Scalable Graphic icons
Default JQM themes support vector icons in .svg format. To use vector icons in .css, open the .svg file with the text editor and copy the source code. The copied source code must be passed through the JavaScript escape() method. The returned result must be complemented with additional meta-data, and it looks like:
.ui-alt-icon.ui-icon-delete:after, .ui-alt-icon .ui-icon-delete:after {
    background-image: url('data:image/svg+xml;charset=US-ASCII,%3C%3Fxml%20version%3D%221.0%22%20encoding%3D%22iso-8859-1%22%3F%3E%3C!DOCTYPE%20svg%20PUBLIC%20%22-%2F%2FW3C%2F%2FDTD%20SVG%201.1%2F%2FEN%22%20%22http%3A%2F%2Fwww.w3.org%2FGraphics%2FSVG%2F1.1%2FDTD%2Fsvg11.dtd%22%3E%3Csvg%20version%3D%221.1%22%20id%3D%22Layer_1%22%20xmlns%3D%22http%3A%2F%2Fwww.w3.org%2F2000%2Fsvg%22%20xmlns%3Axlink%3D%22http%3A%2F%2Fwww.w3.org%2F1999%2Fxlink%22%20x%3D%220px%22%20y%3D%220px%22%20%20width%3D%2214px%22%20height%3D%2214px%22%20viewBox%3D%220%200%2014%2014%22%20style%3D%22enable-background%3Anew%200%200%2014%2014%3B%22%20xml%3Aspace%3D%22preserve%22%3E%3Cpolygon%20points%3D%2214%2C3%2011%2C0%207%2C4%203%2C0%200%2C3%204%2C7%200%2C11%203%2C14%207%2C10%2011%2C14%2014%2C11%2010%2C7%20%22%2F%3E%3Cg%3E%3C%2Fg%3E%3Cg%3E%3C%2Fg%3E%3Cg%3E%3C%2Fg%3E%3Cg%3E%3C%2Fg%3E%3Cg%3E%3C%2Fg%3E%3Cg%3E%3C%2Fg%3E%3Cg%3E%3C%2Fg%3E%3Cg%3E%3C%2Fg%3E%3Cg%3E%3C%2Fg%3E%3Cg%3E%3C%2Fg%3E%3Cg%3E%3C%2Fg%3E%3Cg%3E%3C%2Fg%3E%3Cg%3E%3C%2Fg%3E%3Cg%3E%3C%2Fg%3E%3Cg%3E%3C%2Fg%3E%3C%2Fsvg%3E')
}
NoteNot every
.svgformat can be used in JQM themes.
Updated 7 months ago
