Certificate Management
Certificate management.
There is one important prerequisite for building an app Android or iOS binary file: your account should have at least one certificate file.
Certificate management can be accessed under the Resources > Certificates tab: this is where all of your certificates are stored:
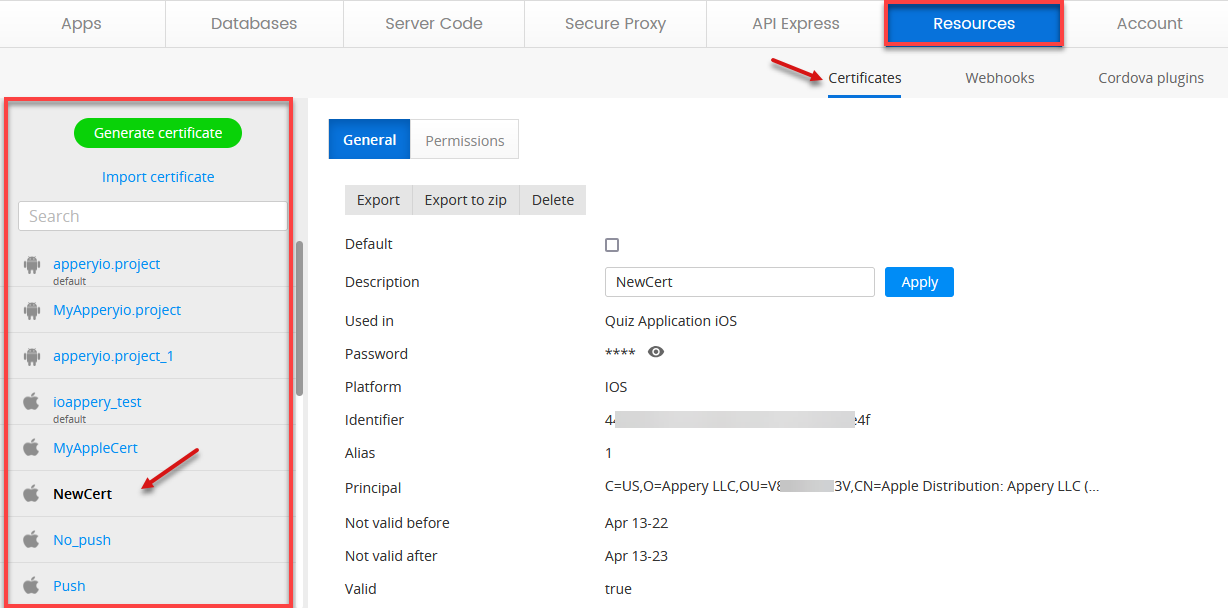
Keeping Track of your CertificatesWe strongly recommend that you store all of your certificates locally and don’t remove them for any reason.
To add certificates to your account, you can import or automatically generate them.
Importing Certificates
- Go to the Resources > Certificates tab:
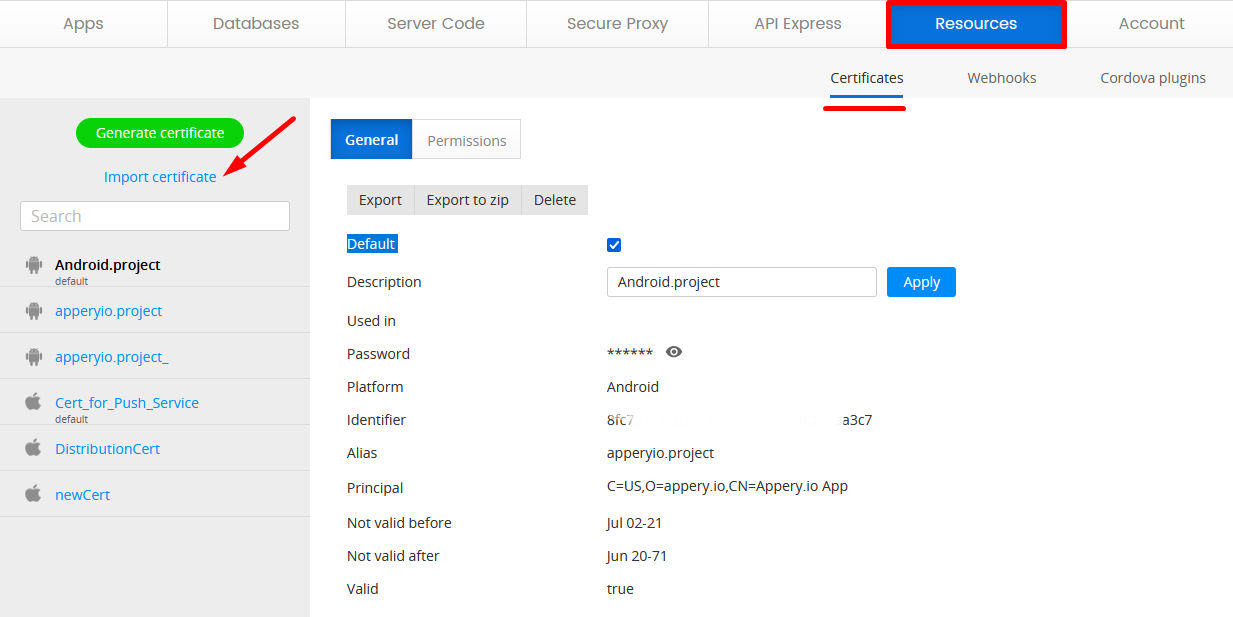
- Click Import Certificates and select the platform you need.
- Then click Choose file and select the certificate file saved on your drive (should be prepared beforehand).
- Type your password for this certificate and click Import certificate:
- After the file and platform are chosen, type the certificate name and its password. Click Import certificate to upload the file:
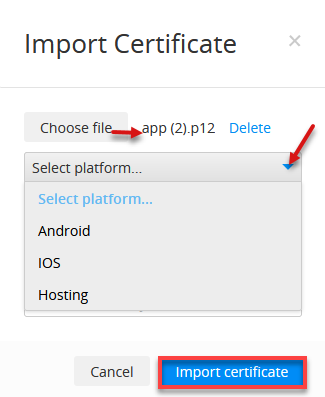
- Make sure, you enter the correct password, otherwise you will get the Password verification failed message.
Importing iOS CertificatesMore details on importing iOS certificates can be found here.
Generating Certificates
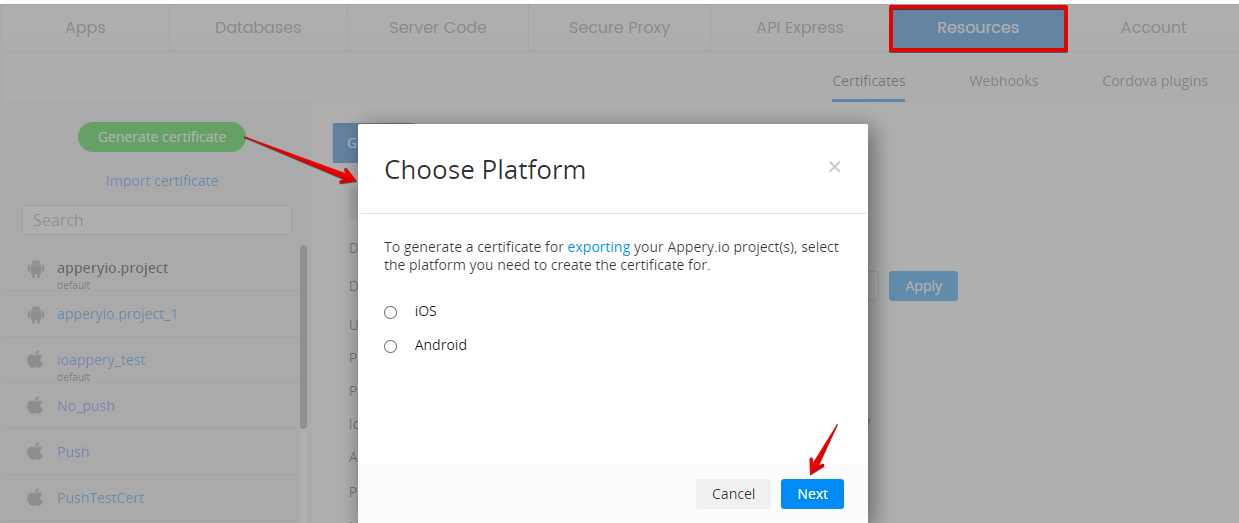
To generate a certificate for exporting your Appery.io project(s), first of all, select the platform you need to create the certificate for: iOS or Android and click Next:
For Android
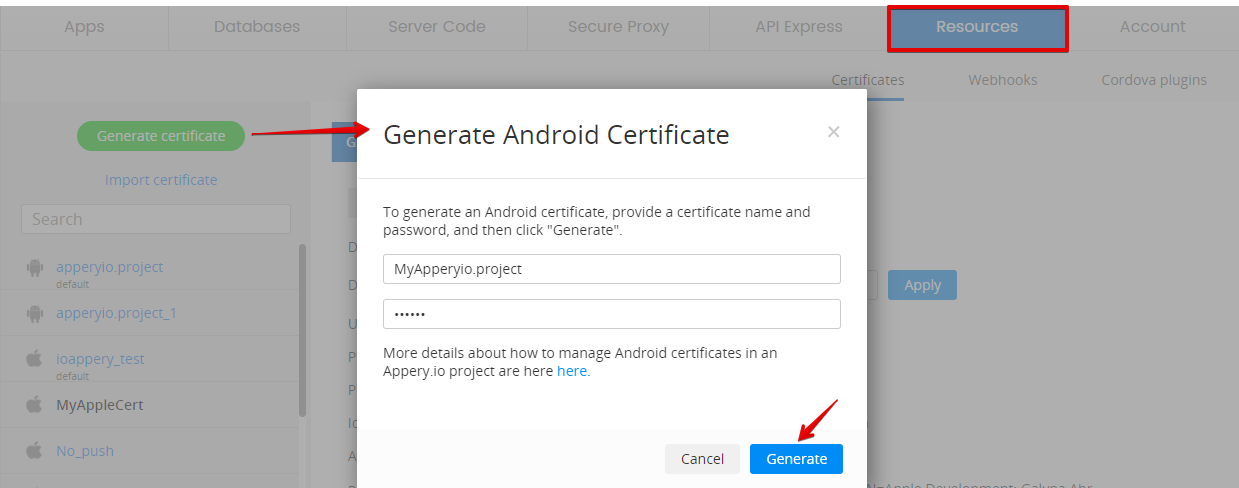
Android certificates can be automatically generated in one step. To do so, after selecting Android, click Next. Type the certificate name and password, and then click Generate:
The generated certificate will be listed with all the others:
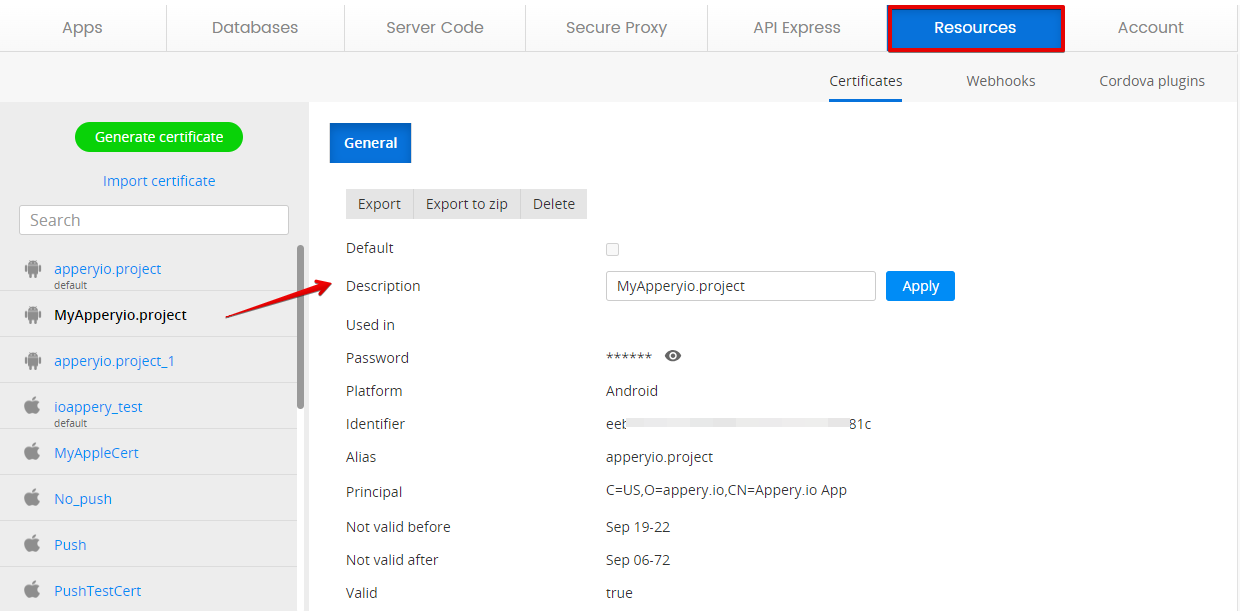
The certificate can be set to default. That means that all applications will use this certificate unless another is specified in App settings. Check Default to make the certificate used by default.
PermissionsIf you are a team member, the Team Admin or Team Lead should give you permission for this action.
You will get the Certificate Become Default message.
For iOS
Before You Get StartedBefore you can build an iOS binary, you need to sign up for the iOS Developer Program and provide all of the developer information and certificates below. If you are new to this, here is a good link to get you started: Managing Your Signing And Provisioning Assets. You also will need a Mac to submit the binary to the App Store.
iOS certificates can be automatically generated in three simple steps.
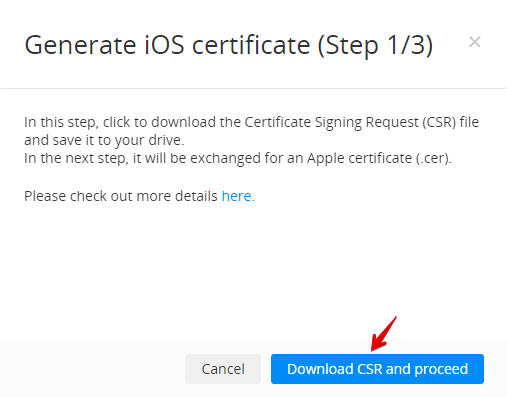
- In the first step, after selecting the iOS platform and clicking Next, click the button to download the Certificate Signing Request (
CSR) file and then save it to your drive:
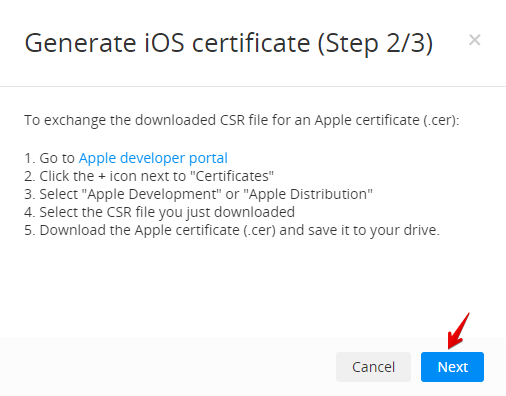
- In the second step, the saved file will be exchanged for a certificate generated by Apple (
.cer):
Important!Note that you will be required to sign up for the iOS Developer Program.
You check out more details here.
So, to exchange the downloaded CSR file for an Apple certificate (.cer):
- Go to Apple developer portal and click the + icon next to Certificates:
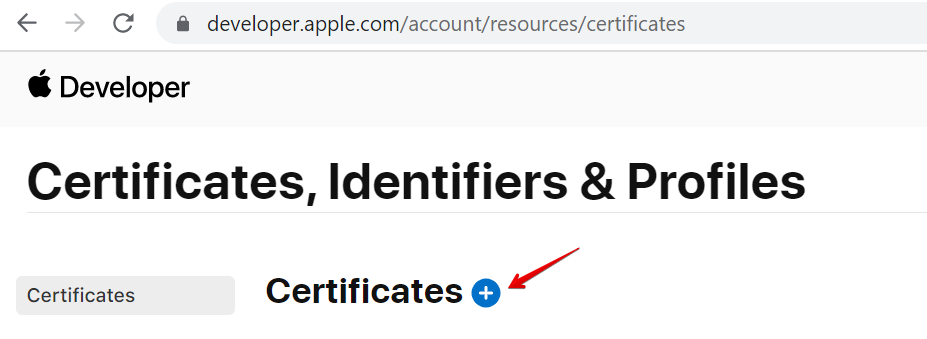
- Select Apple Development or Apple Distribution:
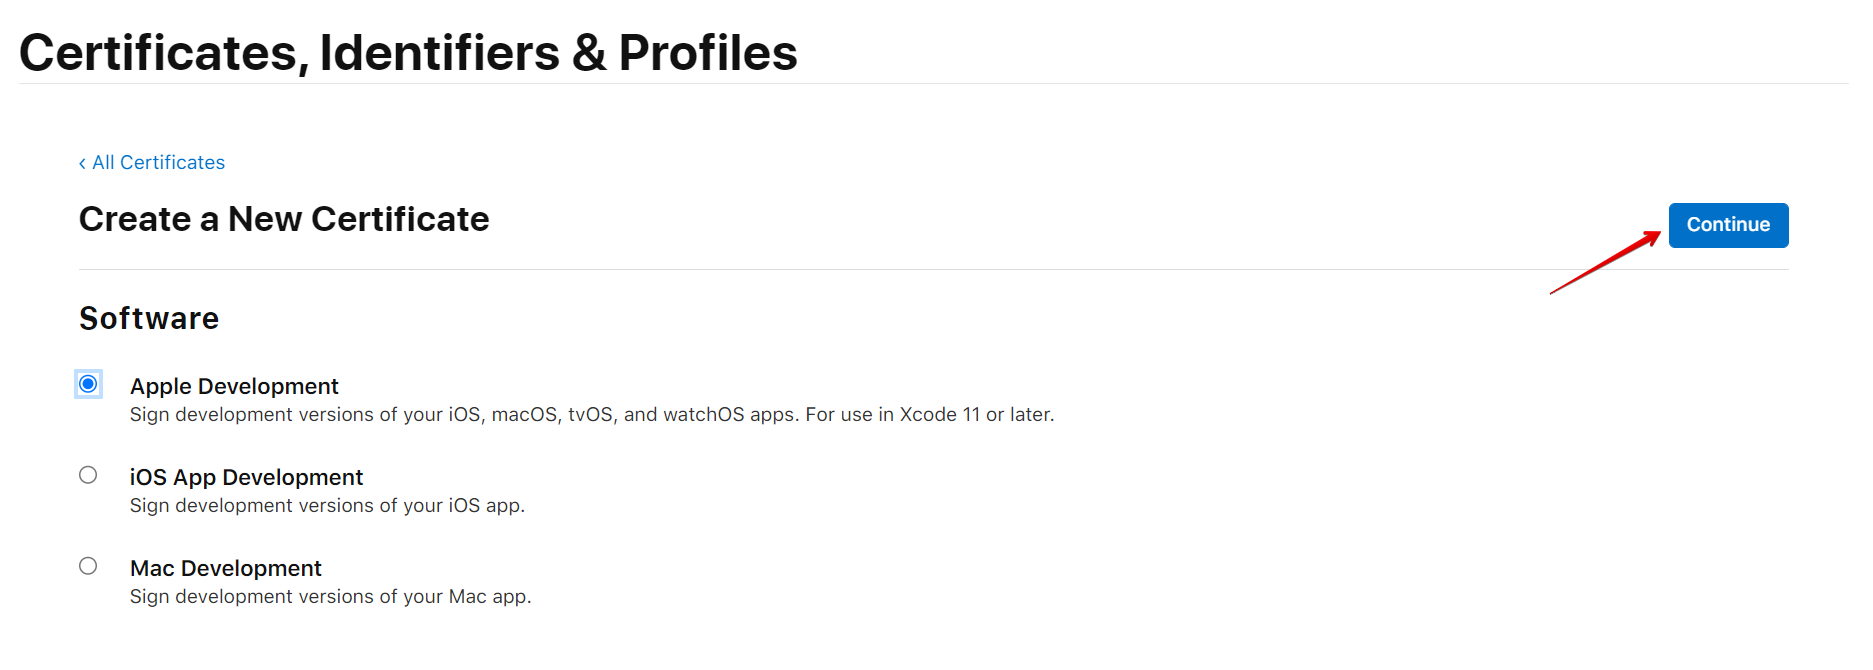
Release and Publish BuildsNote that the Apple Distribution certificate type must be selected if you are generating the certificate for the Release and Publish build type:
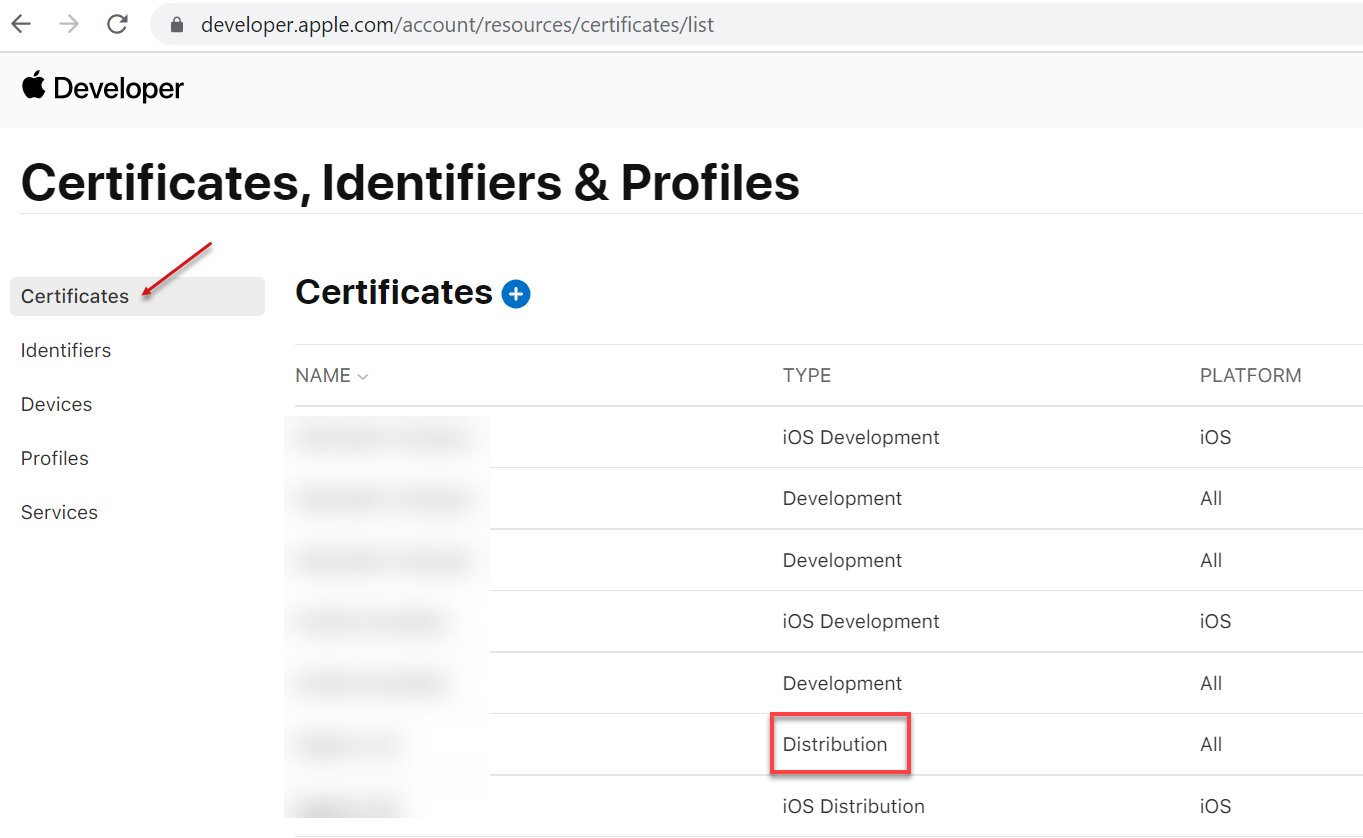
- Select the
CSRfile you just downloaded:

- Download the generated Apple certificate and save it to your drive:

- In the third step, to generate an iOS certificate, go back to the App Builder Resources tab and choose the saved Apple certificate (
.cer).
Then, provide a name for your certificate, enter the password and click Generate:
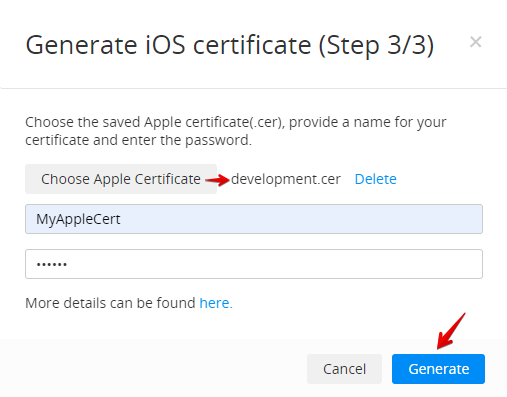
The generated certificate will be listed with all of the others:
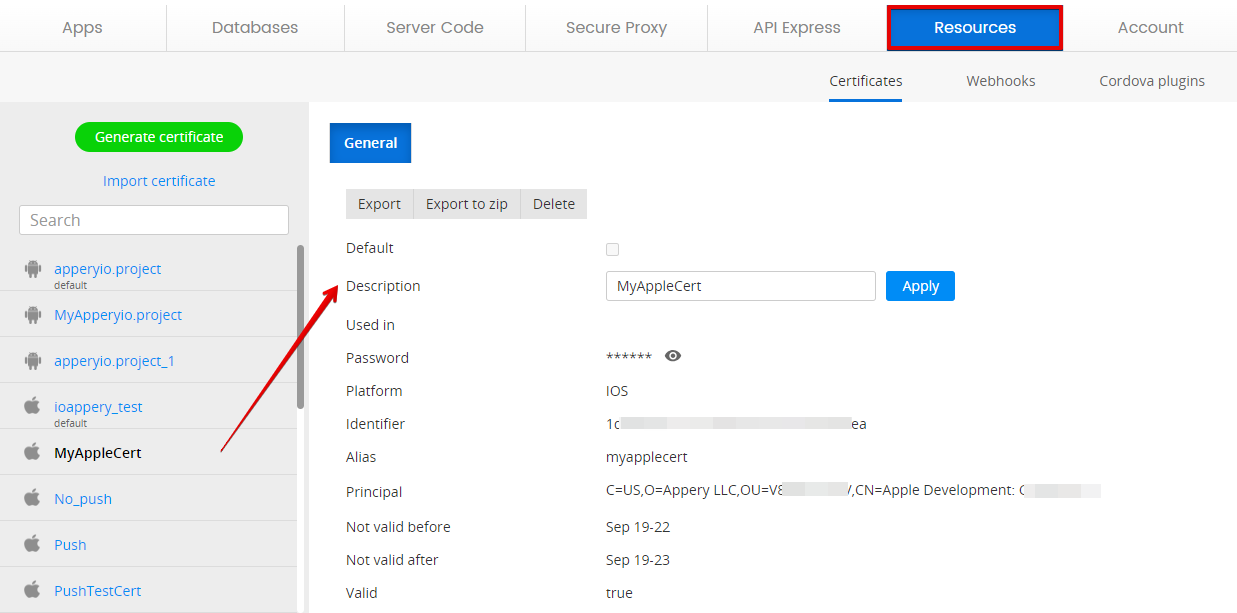
Managing Certificates
Android Certificates
- Type a new name for the certificate, and click Apply to change the certificate name. By clicking Export, the certificate will be downloaded to your desktop.
- By clicking Export to zip the certificate will be downloaded as a ZIP archive. The archive will also contain additional text files with certificate passwords. Click Delete to remove the certificate.
After the certificates are uploaded, they can be chosen from the application settings. To choose a certificate for Android binary, go to App settings > Android binary, scroll down and choose a certificate: AndroidBinaryDefault.
When [use default] is selected, the certificate marked as the default in the Certificates tab will be used:
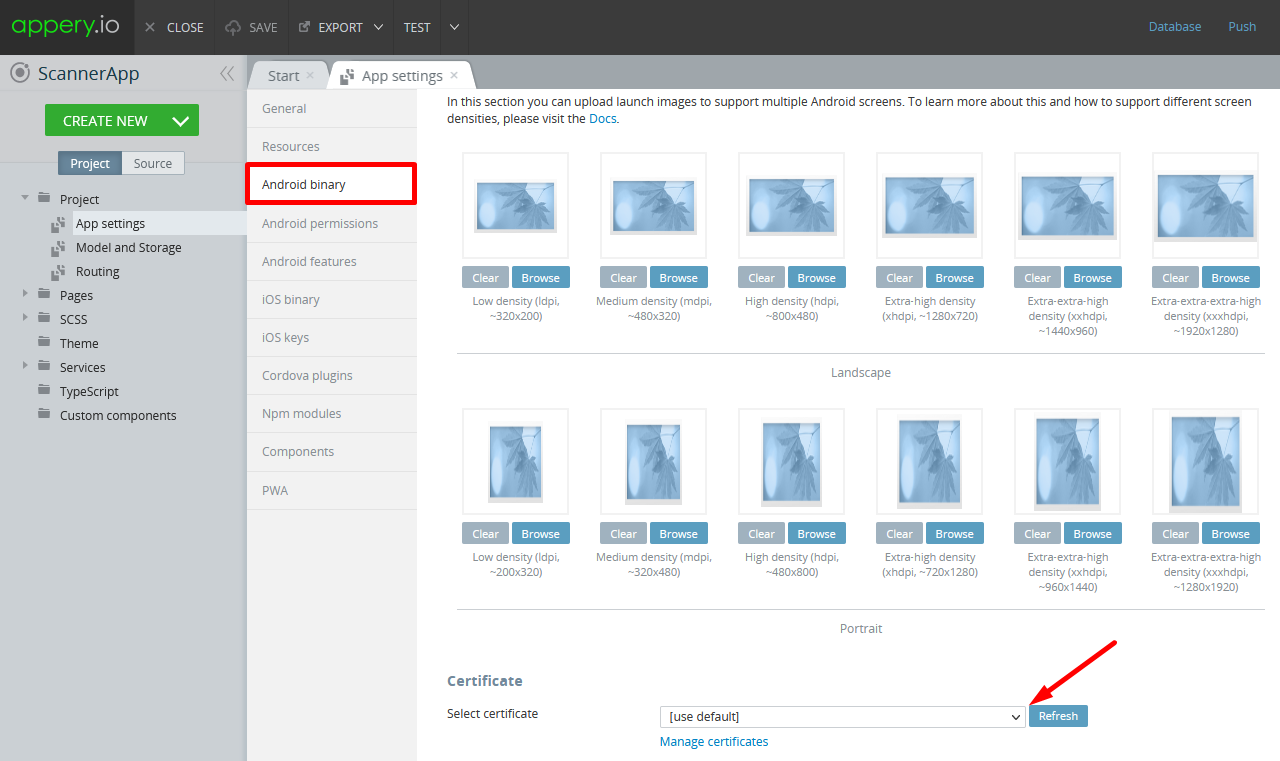
Android Certificate FileMore information about Android certificate files can be found here.
In the same way, certificates can be set for all binaries.
Error MessageIf you delete a certificate that’s used in any application, you’ll get an error.
iOS Certificates
- Switch to the iOS Binary tab in the App Settings and scroll down to select the needed certificate:
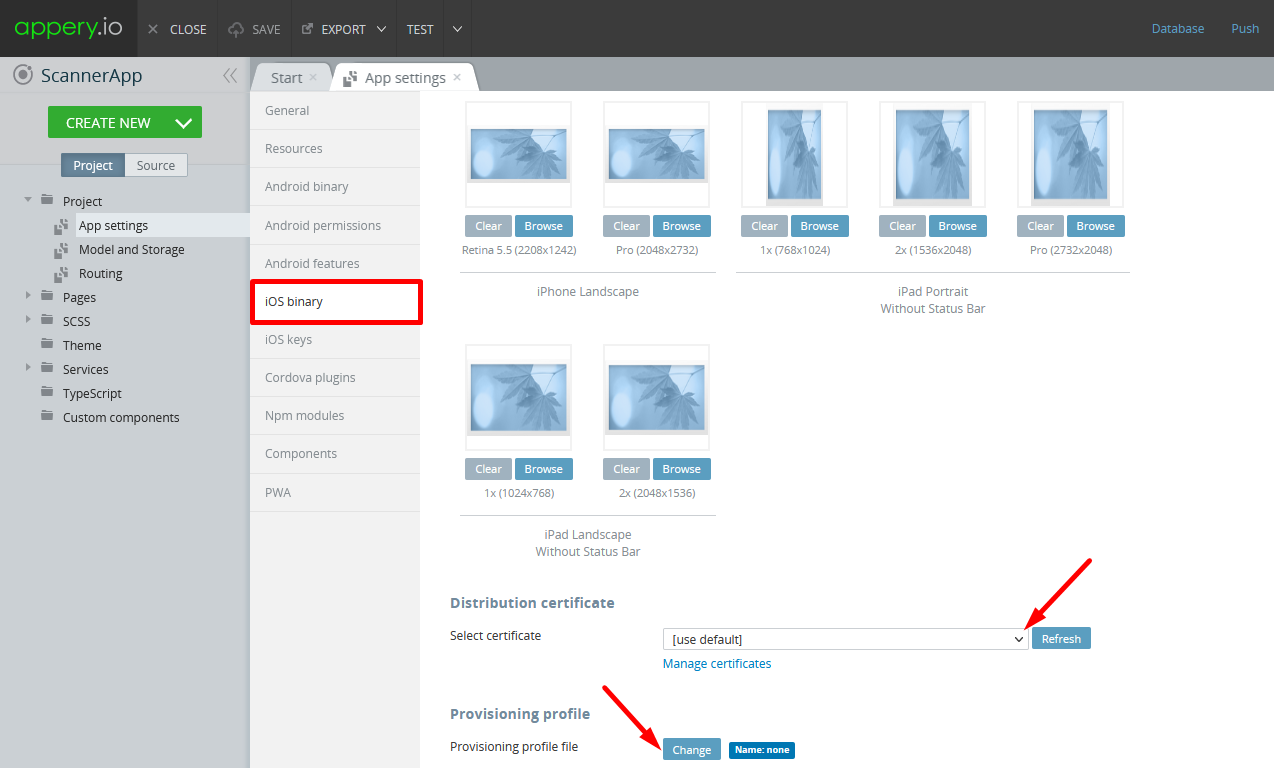
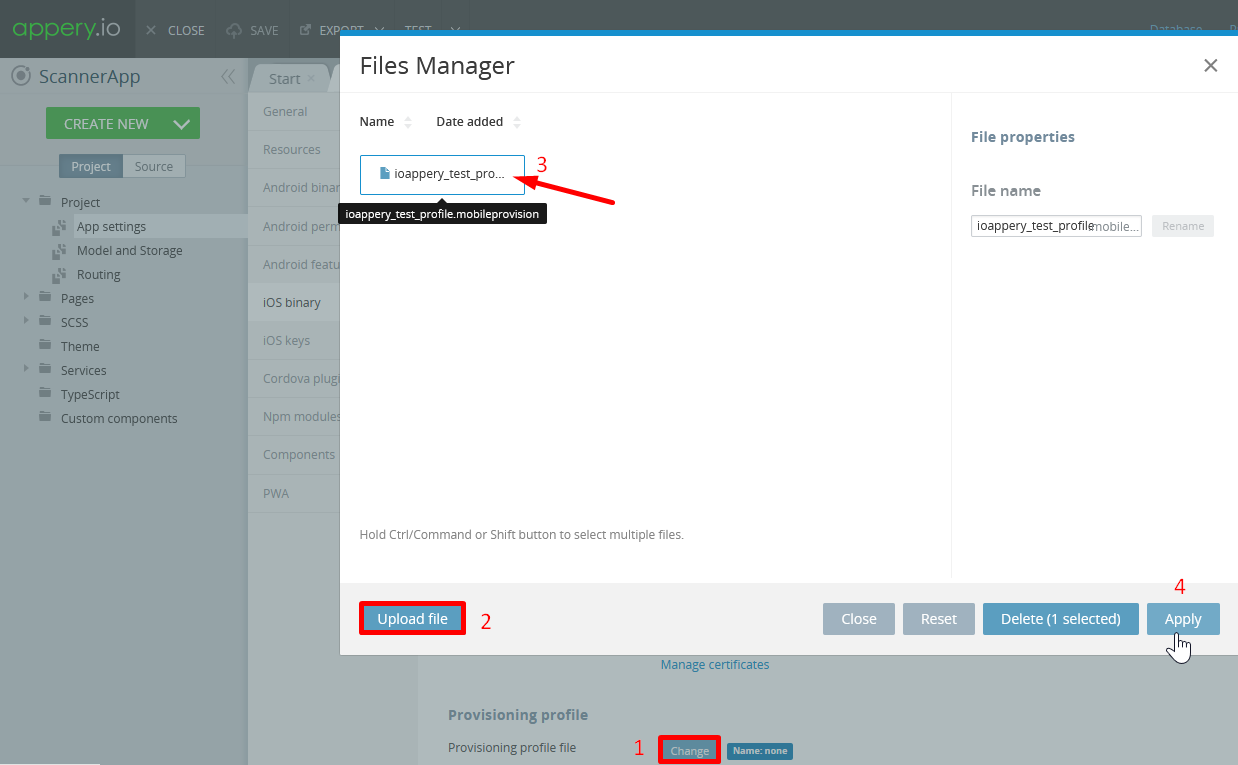
- After registering with Apple as a developer you can get provisioning profile files or generate them. In the App Builder, click Change to open the Files Manager (Step 1).
- Upload your file(s) (Step 2).
At least one certificate must be provided to build a certain binary.
Otherwise, when exporting this binary in the builder you will get an error.
- Select it (Step 3).
- Click Apply (Step 4):
Updated 7 months ago
