Adding Security to Your Database
A tutorial that explains how your can add security to your database
Introduction
Security is needed to:
- Restrict unauthorized access to the database so that the user that is not logged in will not be able to access the database;
- Prevent the data of one user to be exposed to the other user of the same database.
You can add security to both Appery.io Database and an external database connected to your Appery.io mobile application using AppClient.
Below, you will find instructions on how to add security to your Appery.io Database.
Adding Security to your Appery.io Database
First of all, you will need to create a secured DB collection:
- Log in to your Appery.io online account.
- In the Appery.io App Builder, go to the Database tab and open the database you need to add security to.
Note!In this document, we will be using the database we created for the Notes App created with Ionic (more details can be found here).
- Under the database Collections tab, click Create new collection, provide a name (for example, notesSecurity) and confirm the operation:

- Go to the Security and permissions tab, enable the Secure collection check box, and save:
To be able to run the database collection (notesSecurity) operations like FIND, GET and/or CREATE, we need to pass the X-Appery-Session-Token with X-Appery-Master-Key.
To obtain the needed X-Appery-Session-Token, it is necessary to perform the login operation and pass the needed data (Username and Password) from the Users collection.
When done, only the authorized user(s) will be able to access the database data.
Now, you can select two ways to make your database(s) secured:
- Securing collection by setting access options in the ACL Editor dialog;
- Applying default ACL (Access Control List).
Using Access Control List Editor Option
- Open the Users collection, click +Row to add two rows to it and fill in the username and password columns:
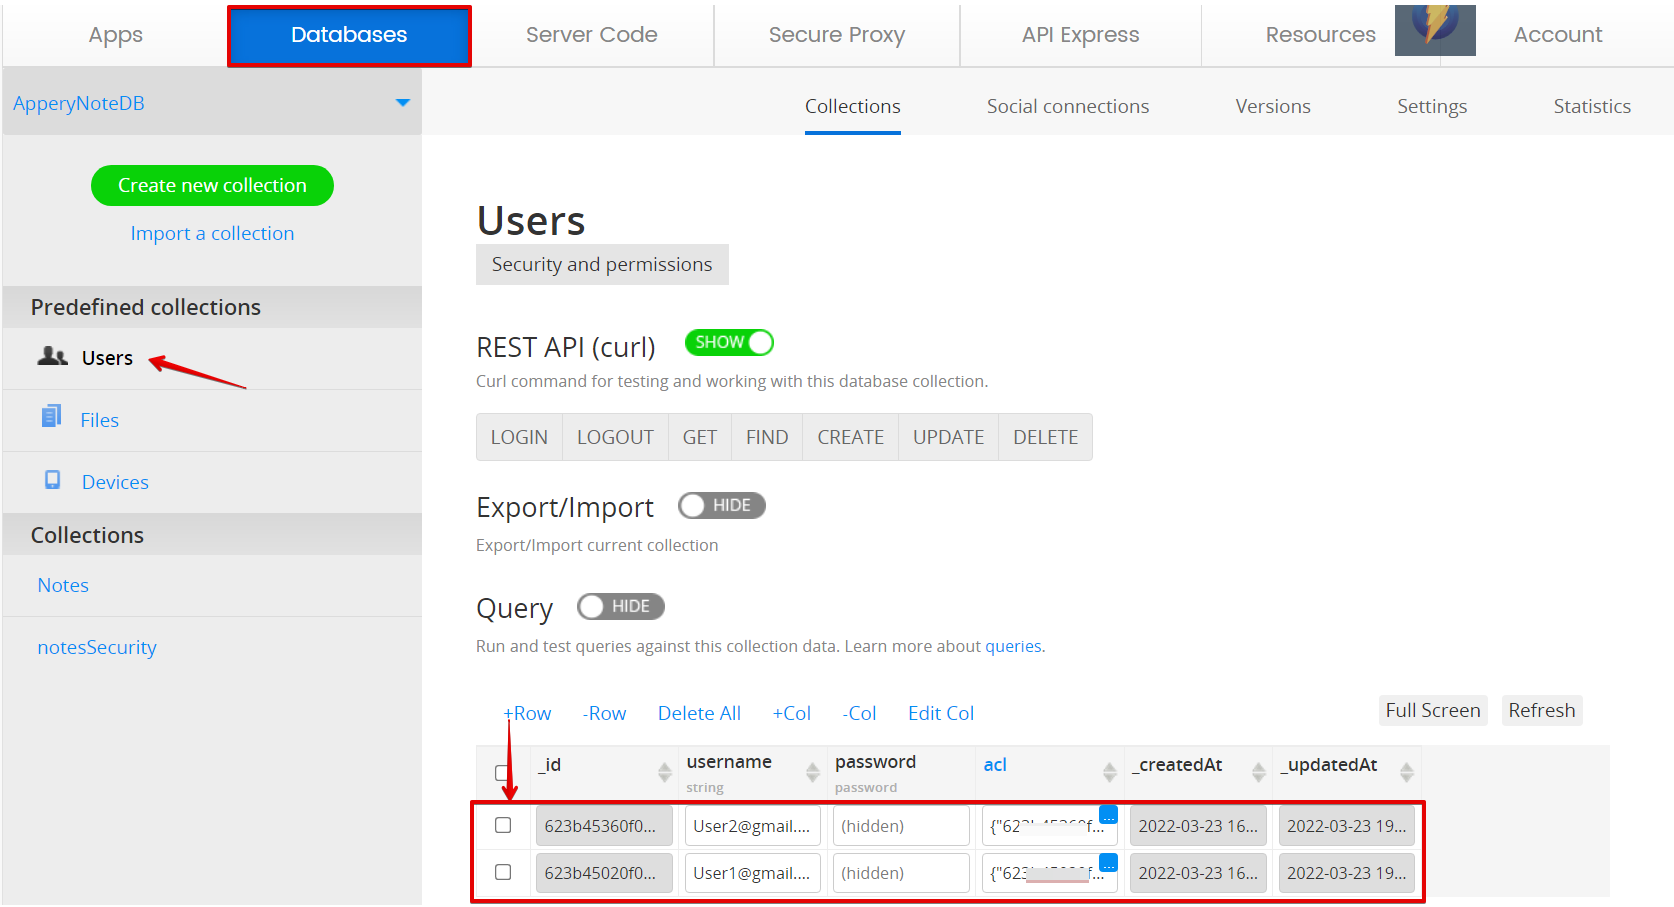
Setting Login CredentialsTo be able to use the integrated login service, make sure you use the valid email address in the [email protected] format.
Also, the password should be 8-30 symbols and should contain Latin symbols, digits and special symbols (.;:_-~+=!@#$%^&*).
To prevent the data of [email protected] from being accessed by [email protected], you can use the mechanism of ACL (Access Control List).
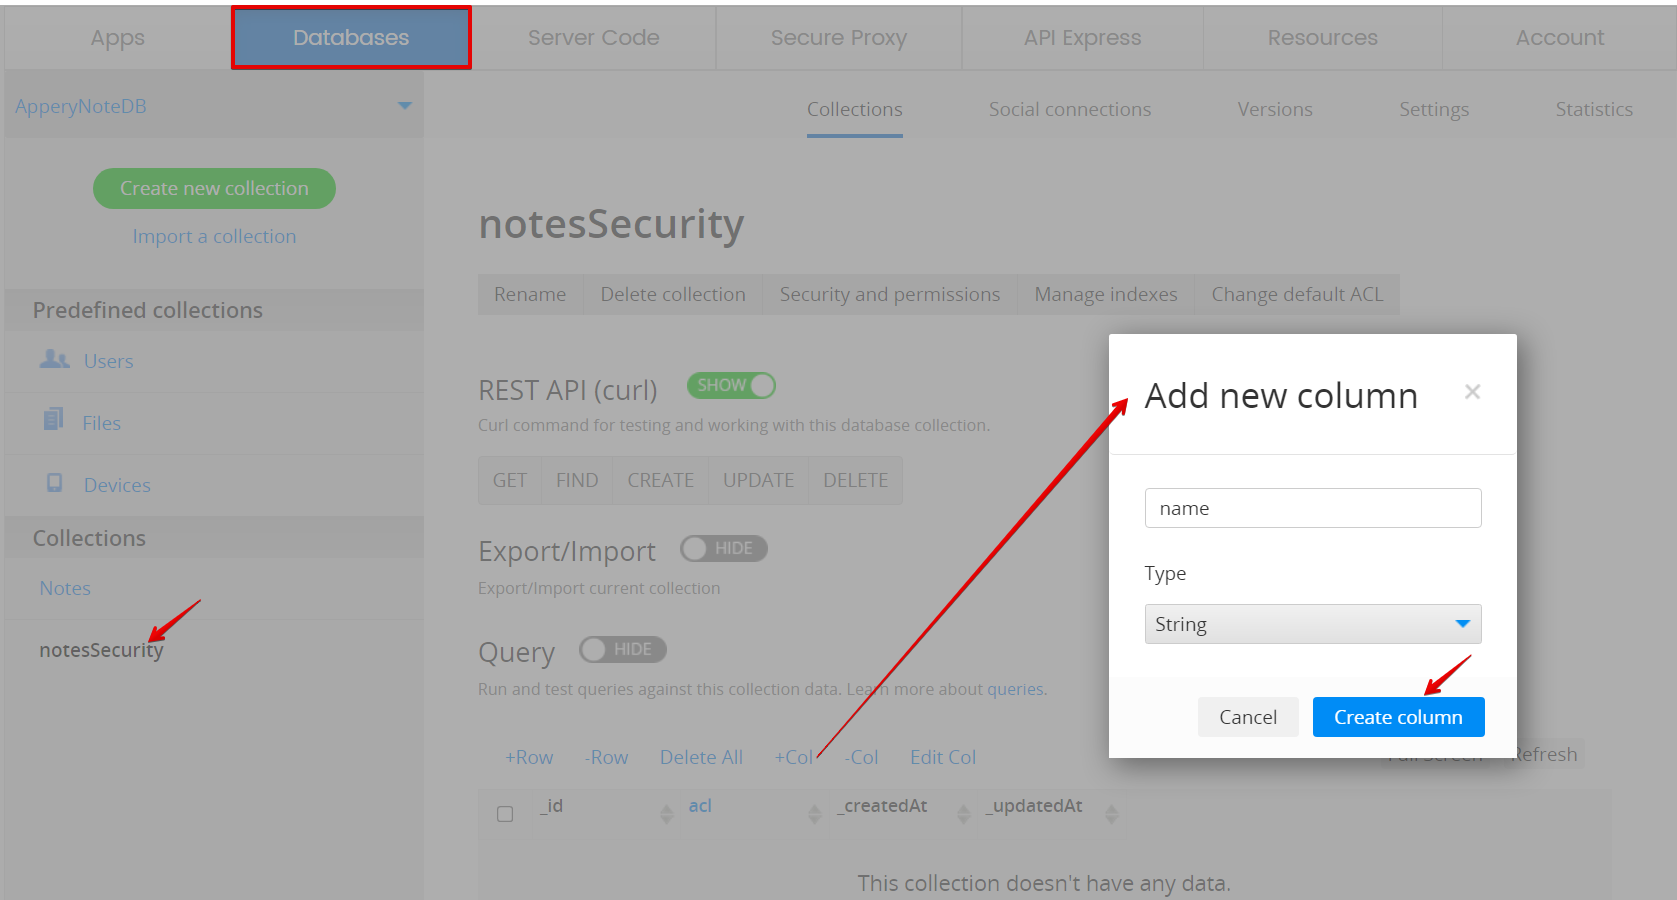
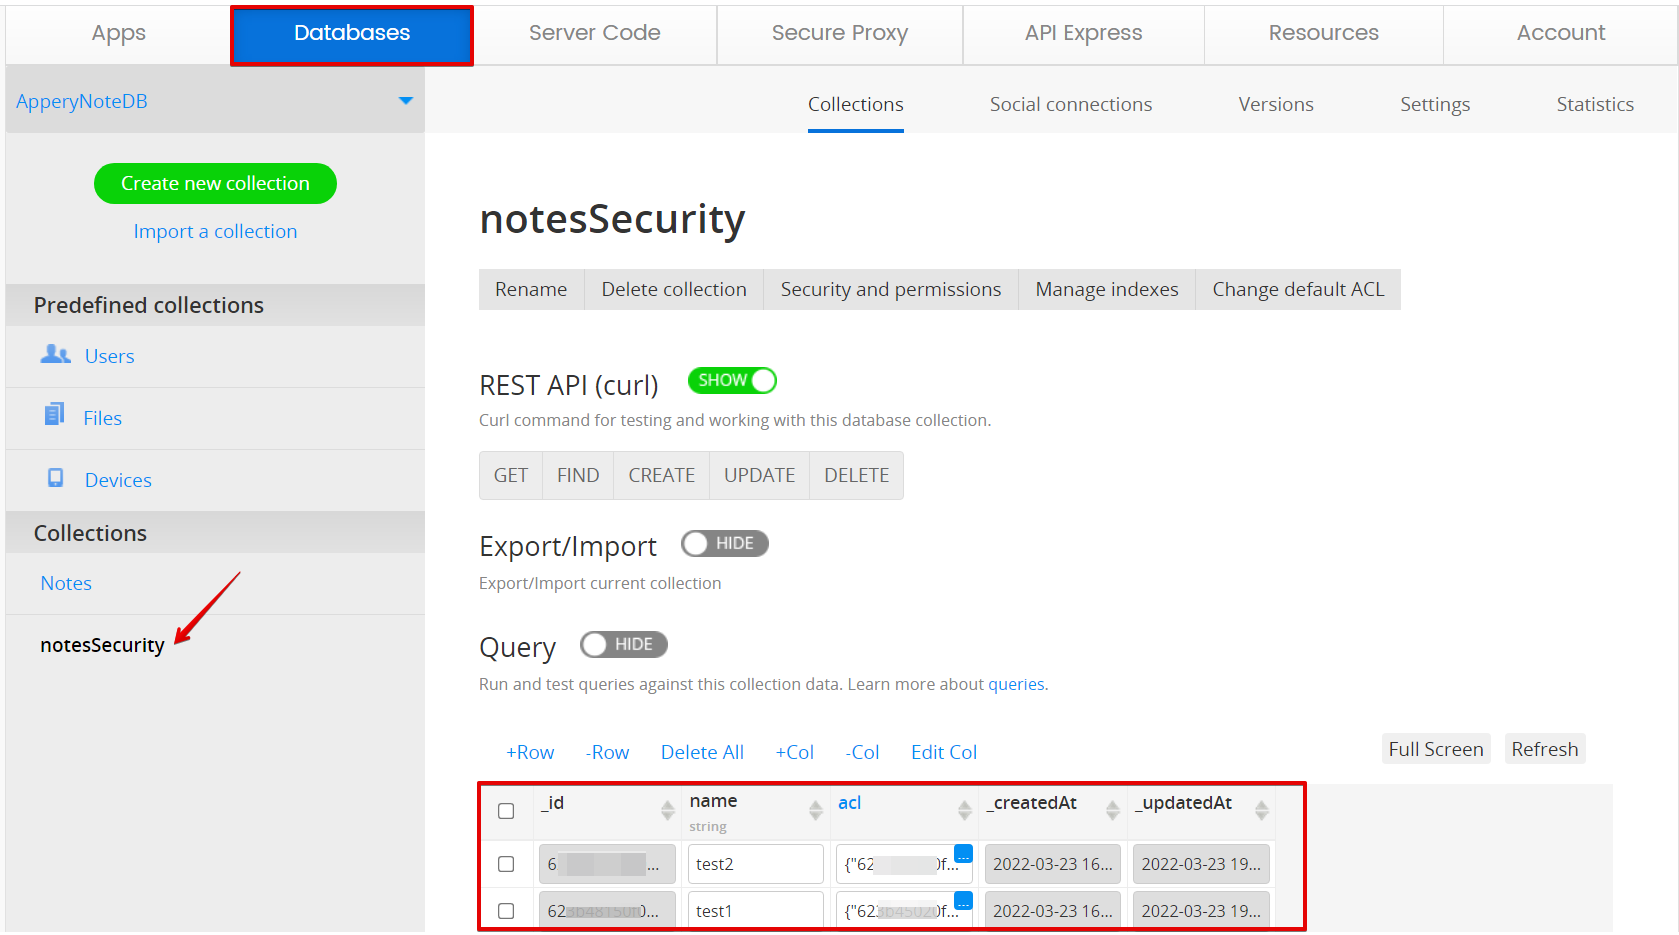
- To see how it works, let's open the notesSecurity collection and click +Col to add a row with the name column of String type:
- Now, press the three-dot button of the blue icon in the acl column of test2 and indicate that only [email protected] will get access to the test2 record:
- To set default ACL, click the Change default ACL button. When you start typing in the input field, you will see the following options:
You can select the existing users ([email protected] or [email protected]) or apply the predefined options ( All users or @Creator).
- Now, go to the API Express tab, which also allows working offline.
Want to know more?You can check this document to learn how to create an Ionic app with offline support.
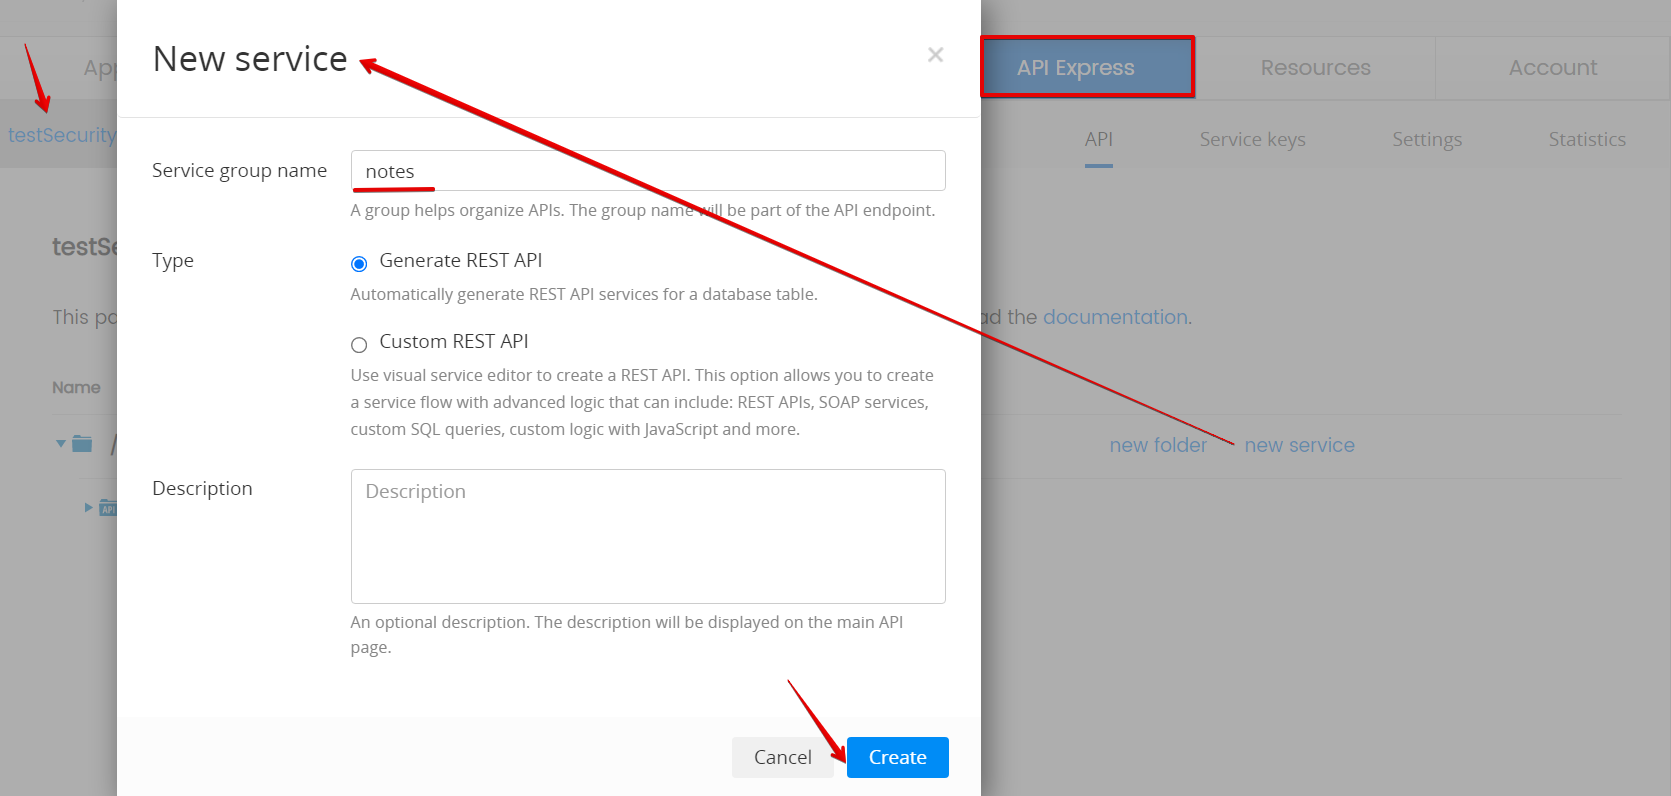
- Create a new testSecurity project and click the new service link to create a new notes service group of the Generate REST API type:
- Fill the Database connection and Table fields and press the Generate service button:
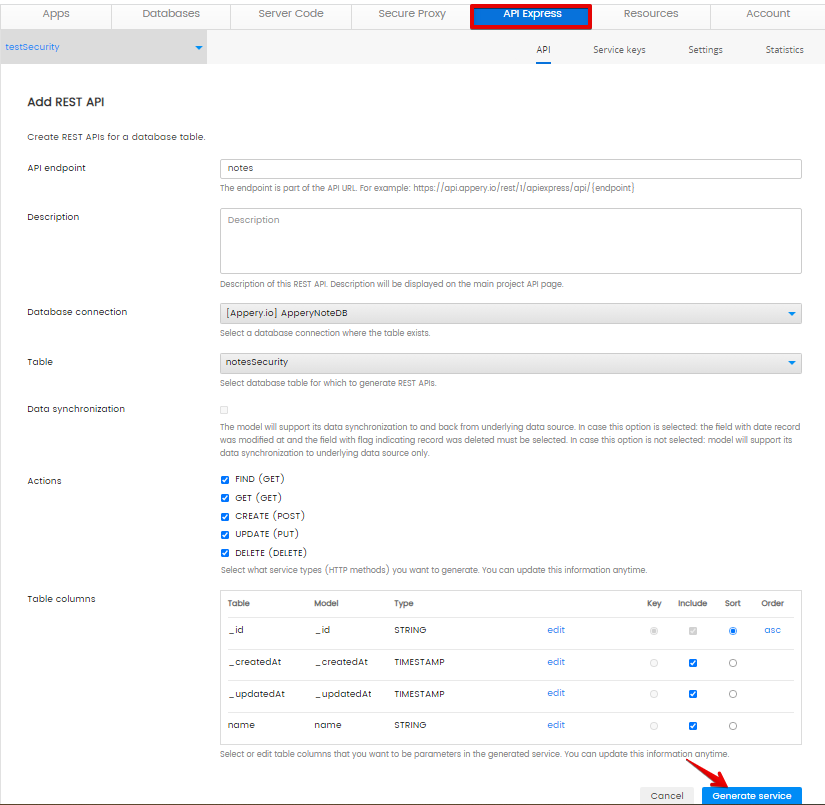
In a moment, the model is created:
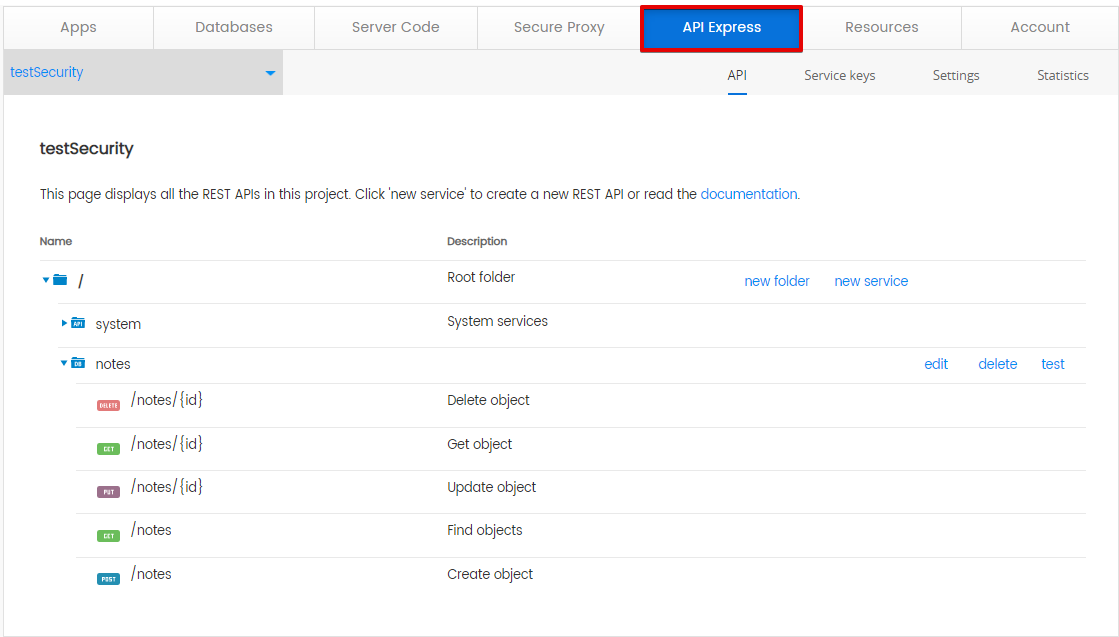
Since the notes service group is secured, we need to pass the X-Appery-Session-Token.
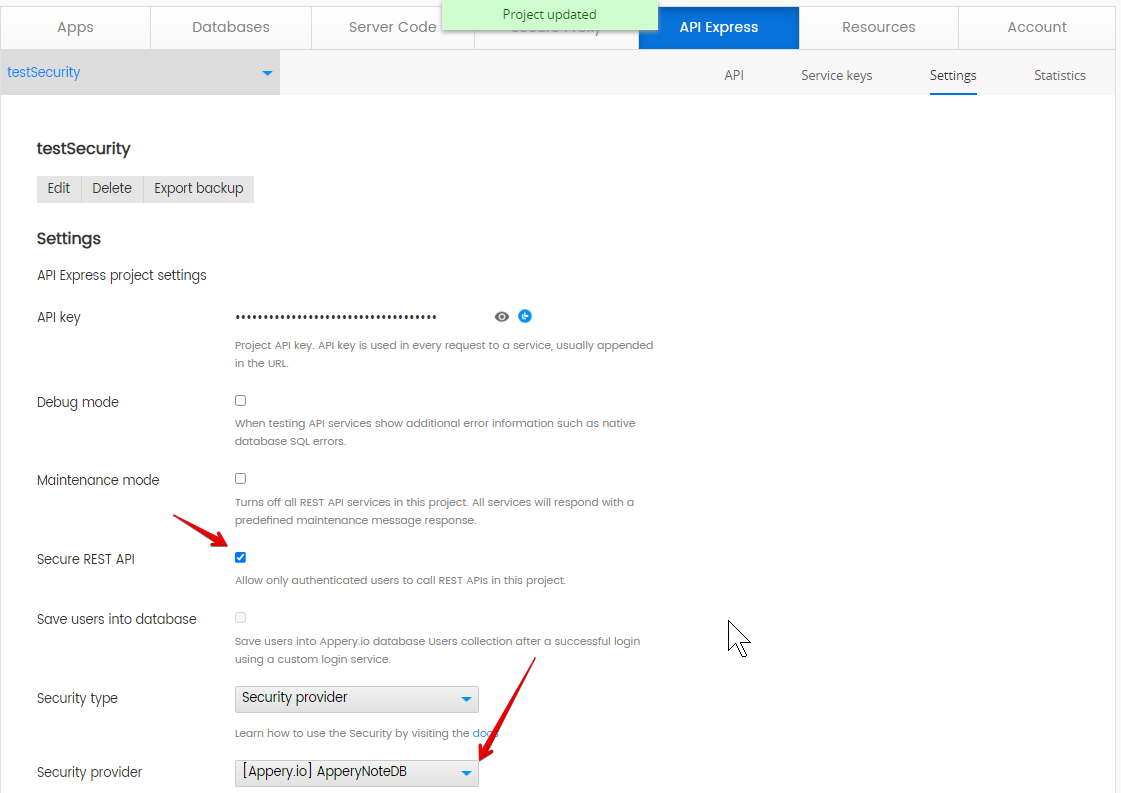
To be able to work with the notesSecurity collection, our API Express project needs to take security into consideration.
- To do this, go to the Settings tab, enable the Secure REST API check box, and fill the Security provider field with the ApperyNoteDB database value:
Want to know more?More information about secure REST API can be found here.
Creating Secured API Express Project
- Under the Apps tab, create a new Ionic application where the secured API Express project will be added.
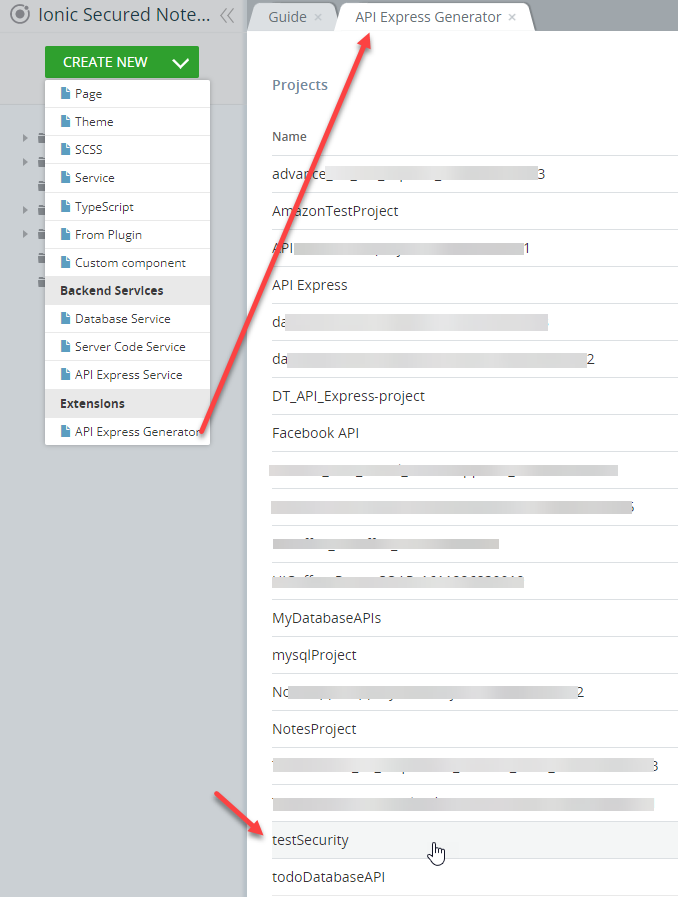
- When in the App Builder , click CREATE NEW and select the API Express Generator option.
- Next, select the API Express domain you want to use (here, it is Appery.io), then select the testSecurity from the project list:
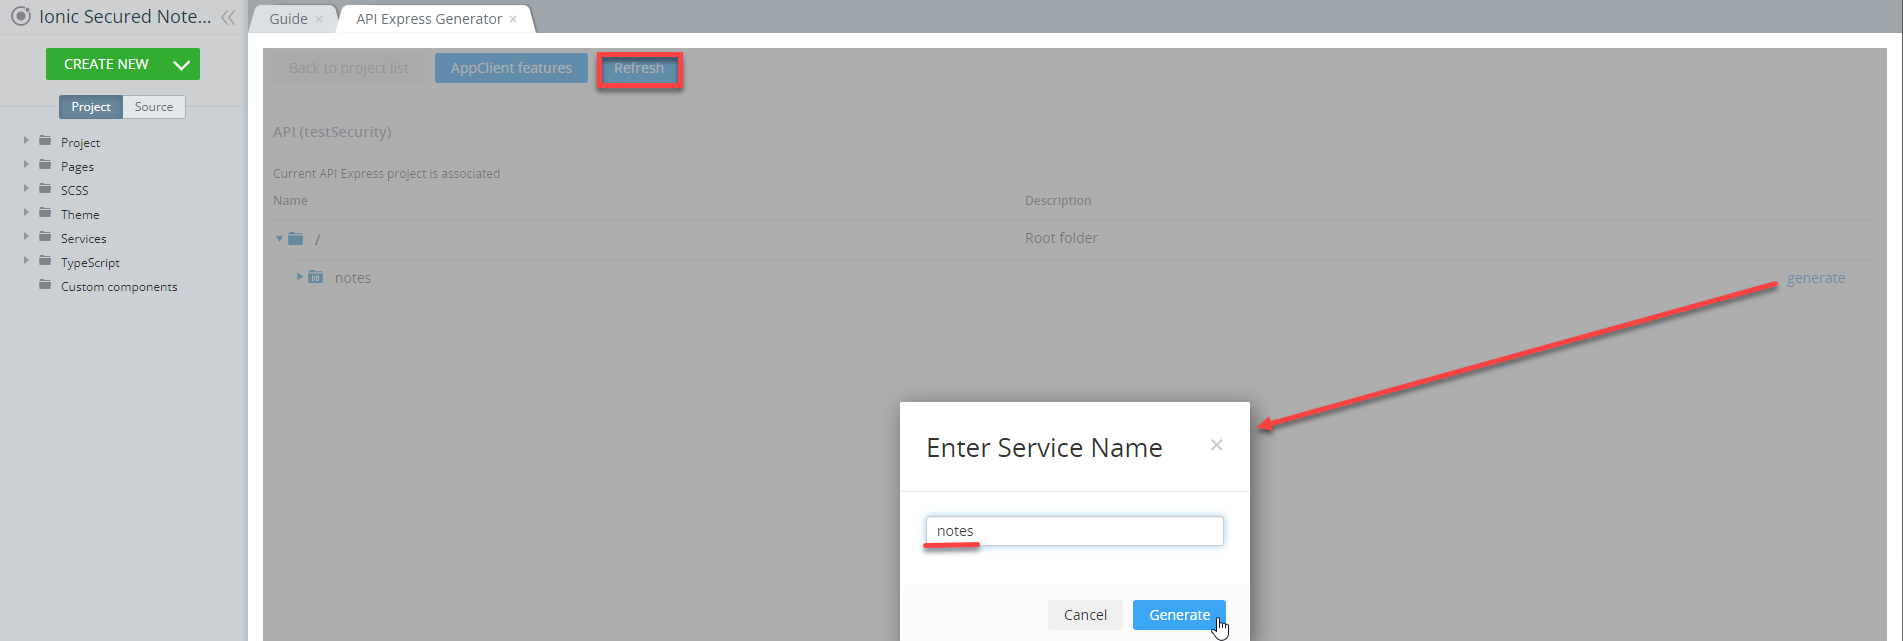
- To generate the needed services for the notes service group, press the generate link and enter the service name: notes.
- After that, press the Refresh button to refresh the App Builder:
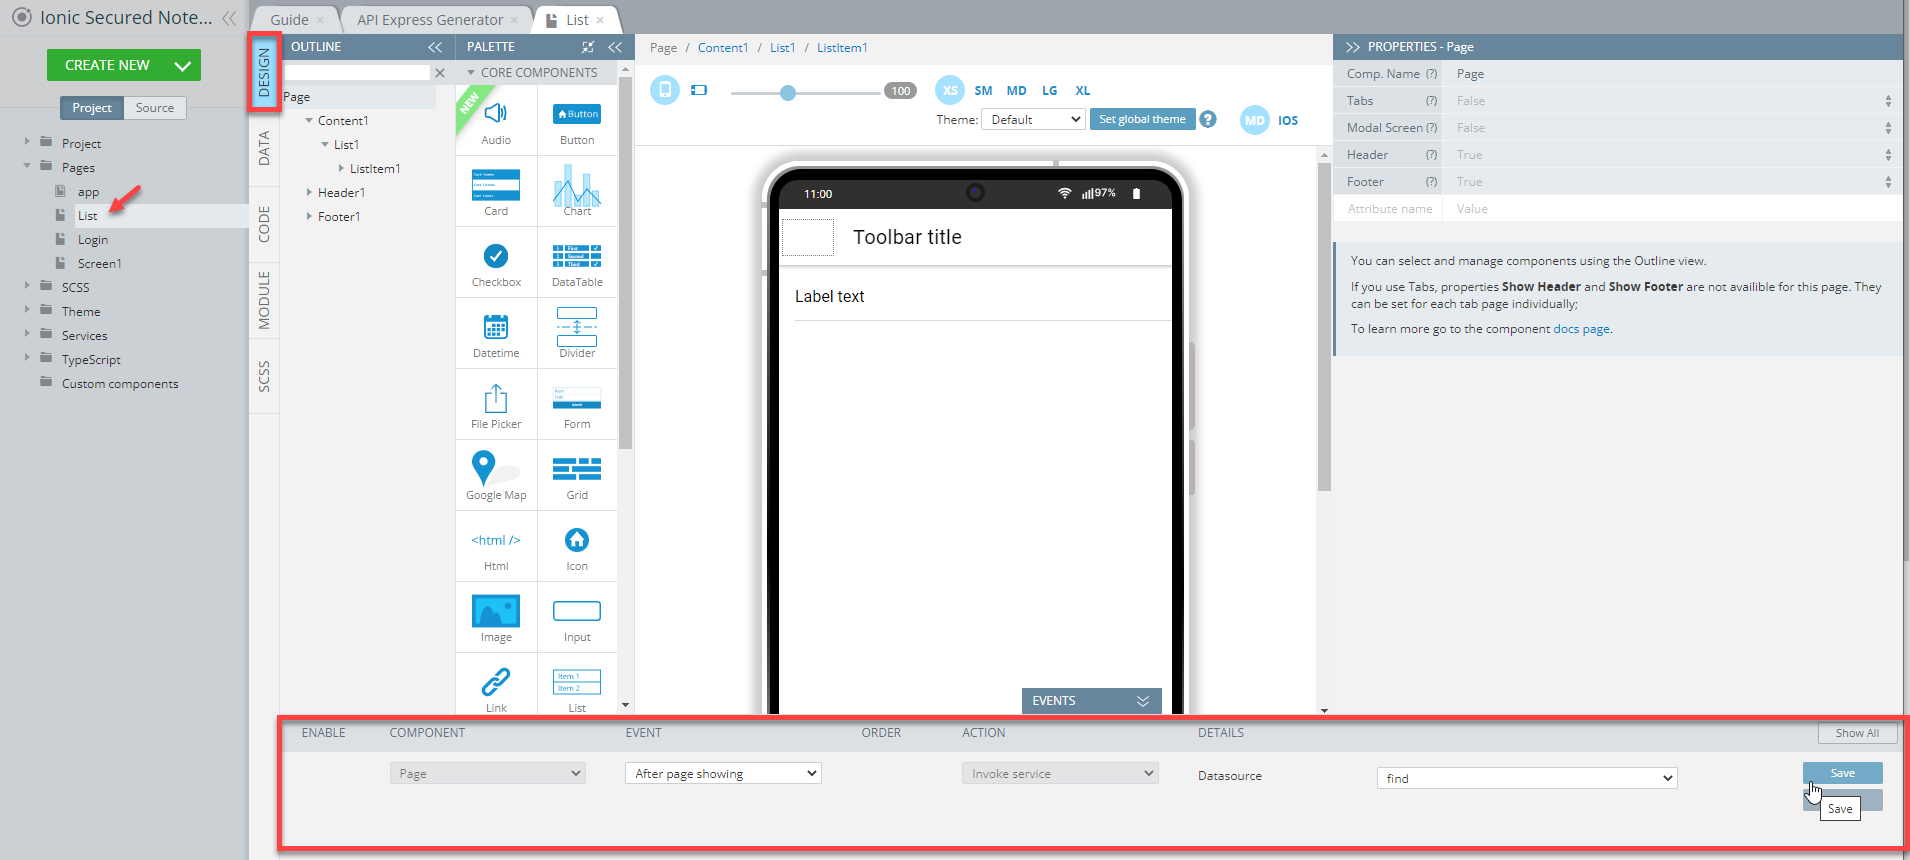
- Create a new page named List and on DESIGN panel, add the List component, then delete the second List item.
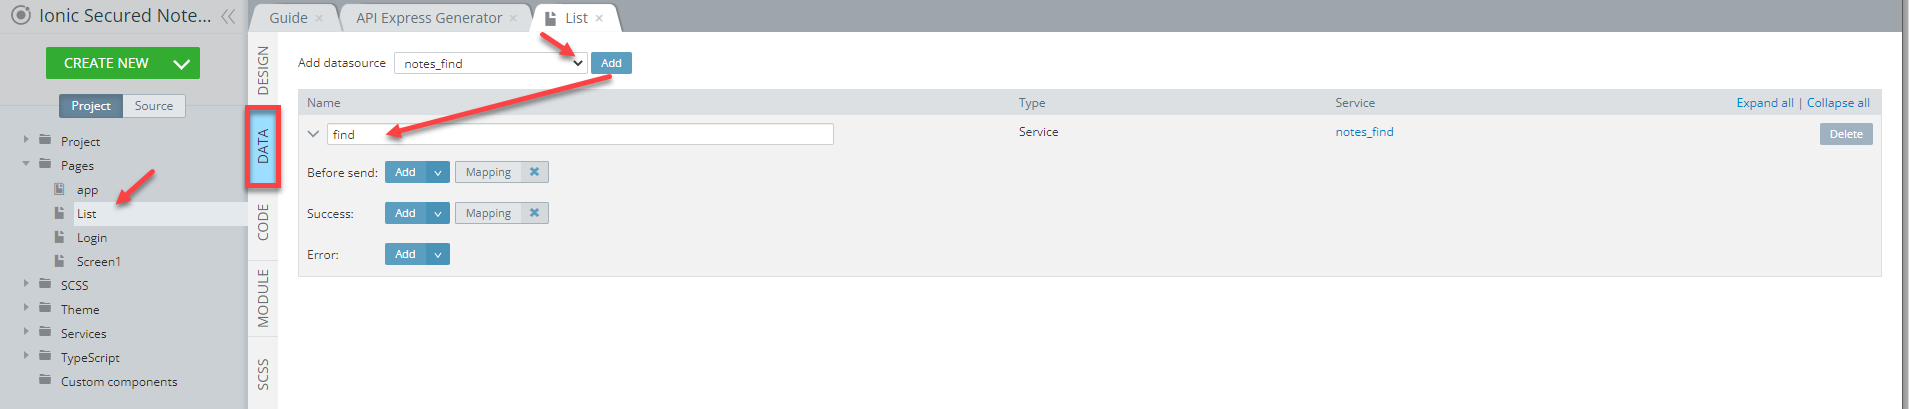
- Open the page DATA panel, select notes_find from the datasource drop-down, click the Add button, and rename it to find:
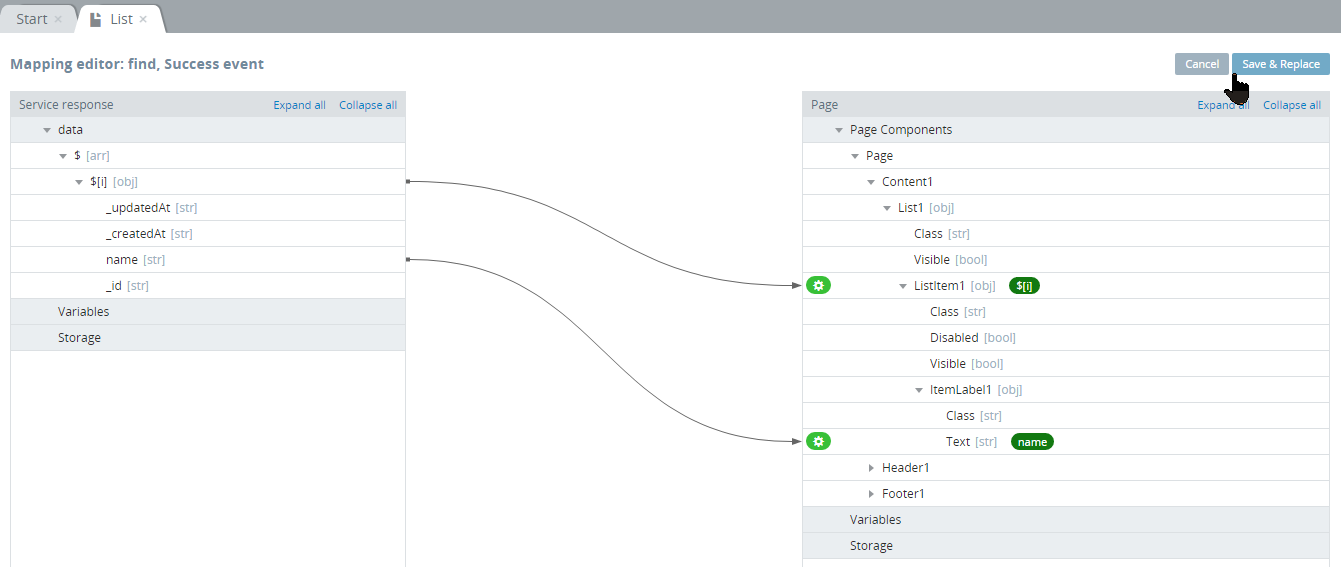
- In the open mapping editor window, click the service Success > Mapping button, create the following mapping, and press the Save & Replace button:
- Go to the page DESIGN panel and unfold the EVENTS tab.
- For the After page showing event of the Page component, select the Invoke service action, select find from the datasource drop-down and save:
- Open the Project > Routing tab and set the Routing default route to the List page:

- Click the SAVE and then TEST buttons in the App BuilderToolbar.
As you can see, the error is fired because we are not logged in:

Adding Login Functionality
To make login possible, we will need to add the corresponding service.
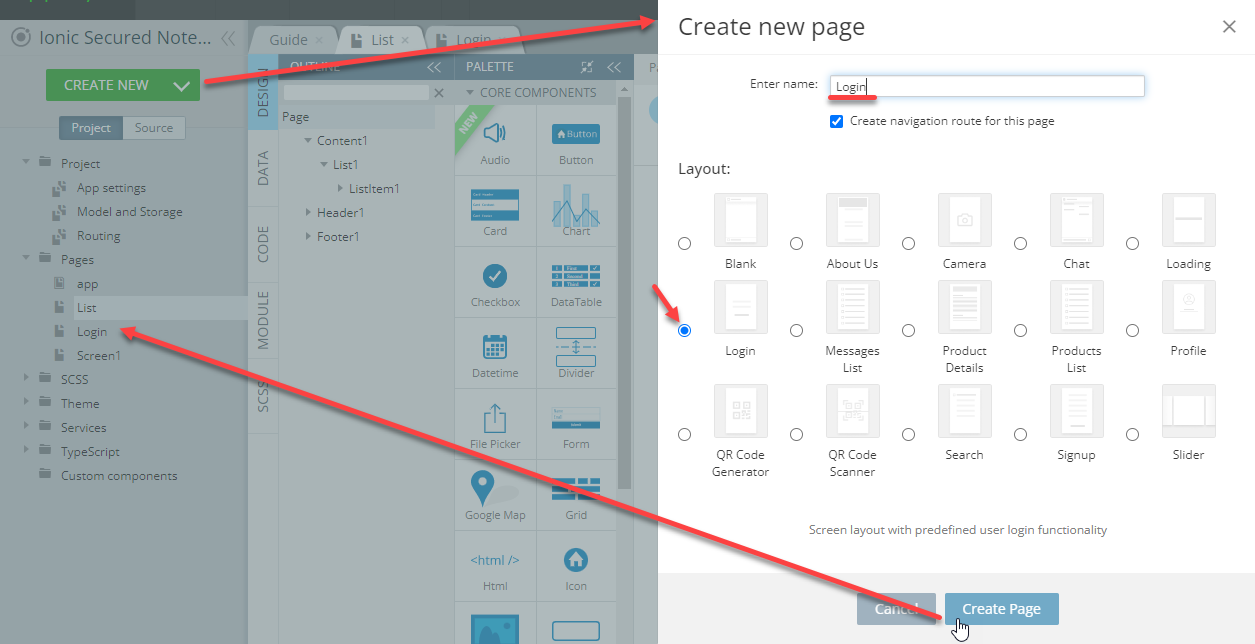
- To do it, let's first create a new page using the predefined Appery.io Screen Login Layout and name it Login:
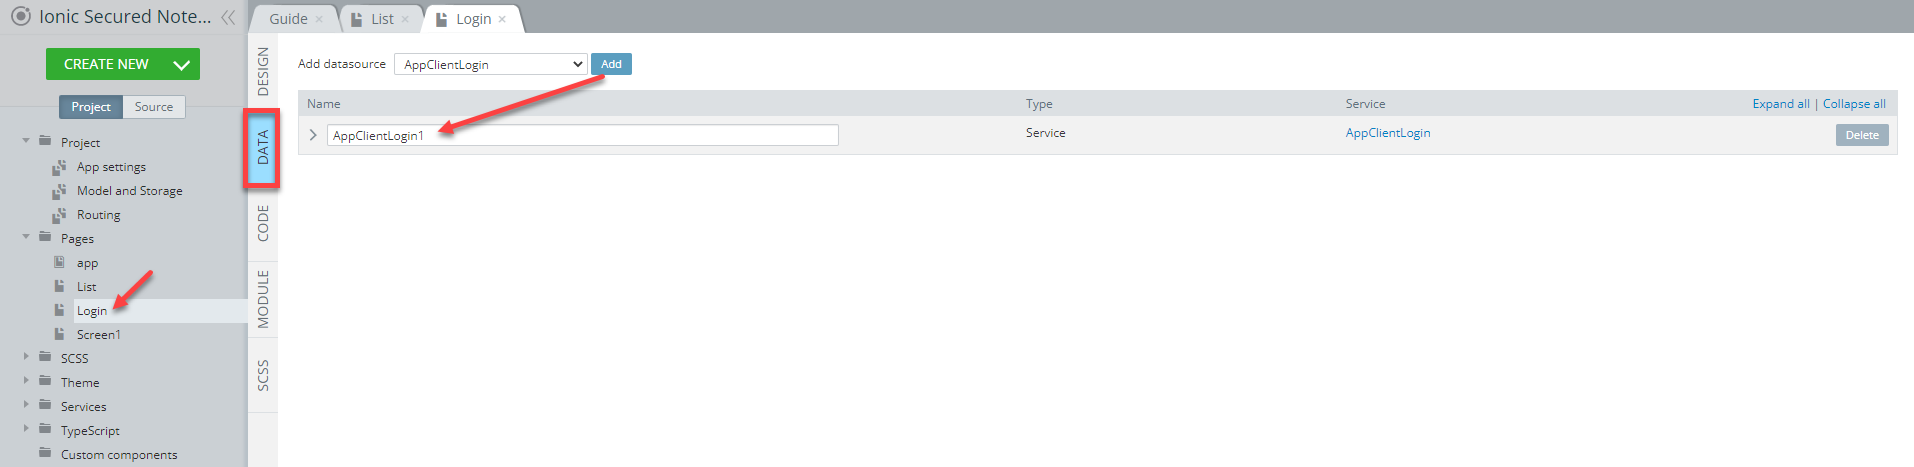
- Open the page DATA panel and add the AppClientLogin datasource selecting it from the drop-down:
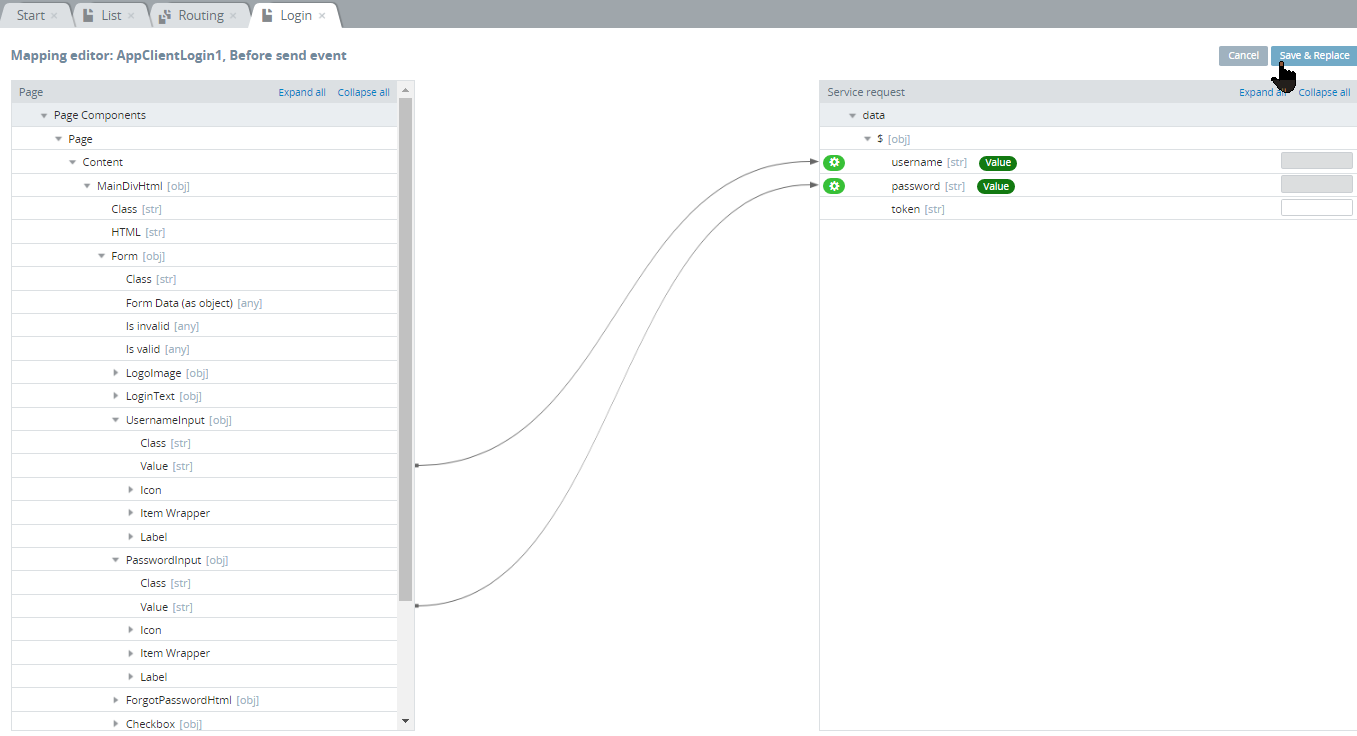
- In the open mapping editor window, click the service Before > Mapping button, create the following mapping, and press the Save & Replace button:
- Click the service Success > Add button, and select Navigate to page. Then, select the List value for the Route name field under the EVENTS tab. Press the Save button.
- Go to Project > Routing and change the Routing default route to the Login page.
- Fill in the Username (here, [email protected]) and Password fields, press the LOGIN button to see the record accessible by [email protected] only.
- Now, refresh the preview and fill in the Username and Password fields (now, for [email protected]), and then press the LOGIN button to see the record accessible by [email protected] only:
The result: only the test2 record can be seen that belongs to [email protected].
Conclusion
As you can see, when AppClient is used, there is no need to pass X-Appery-Session-Token (used when working with databases): The login service is called which allows receiving the needed token, saving it and passing when the corresponding query is made (FIND, CREATE, etc.).
Want to know more?You can also check out our Creating Development Environment for Ionic projects document to learn how to create development environments in Appery.io apps.
Updated about 1 year ago