Building Ionic Login Sample App. Part 1
Introduction
This sample app demonstrates how you can create Login form in an Ionic project that will validate user credentials stored in the Appery.io database.
This is the first part and we will demonstrate how to set up the app and create its UI.
Want to know more?You can also check this document that explains how to quickly create a ready-to-go login page by using our predefined Login Screen Layout with further modifying it according to your needs.
Downloads and Resources
You can also try it yourself by creating from the backup:
- Download the app backup file.
- Click From backup and select the project backup file on your drive.
- Type in the app name.
- Click Create.
But if you are interested in the detailed tutorial, please follow the tutorial steps below.
Creating UI
- Navigate to the Appery.io dashboard. Here, from the Apps tab, click Create new app.
- Select Blank as a template. Name it Ionic Login App and confirm by clicking Create.
- Unfold the Pages folder. Clicking the cog icon, rename Screen1 to loginPage:
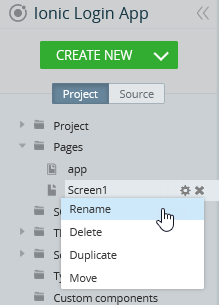
Renaming Screen1 to loginPage
- Click CREATE NEW > Page and name it Welcome:
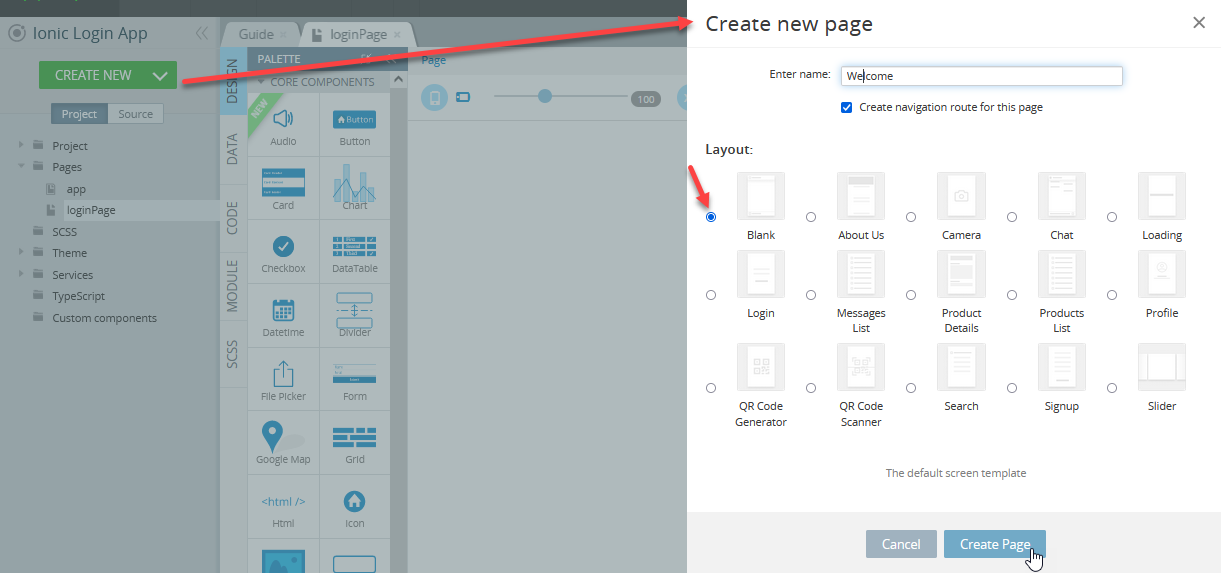
Creating a new page - welcome
It's time that we can proceed to define both pages' appearance.
Defining loginPage UI
- Open the loginPage DESIGN panel.
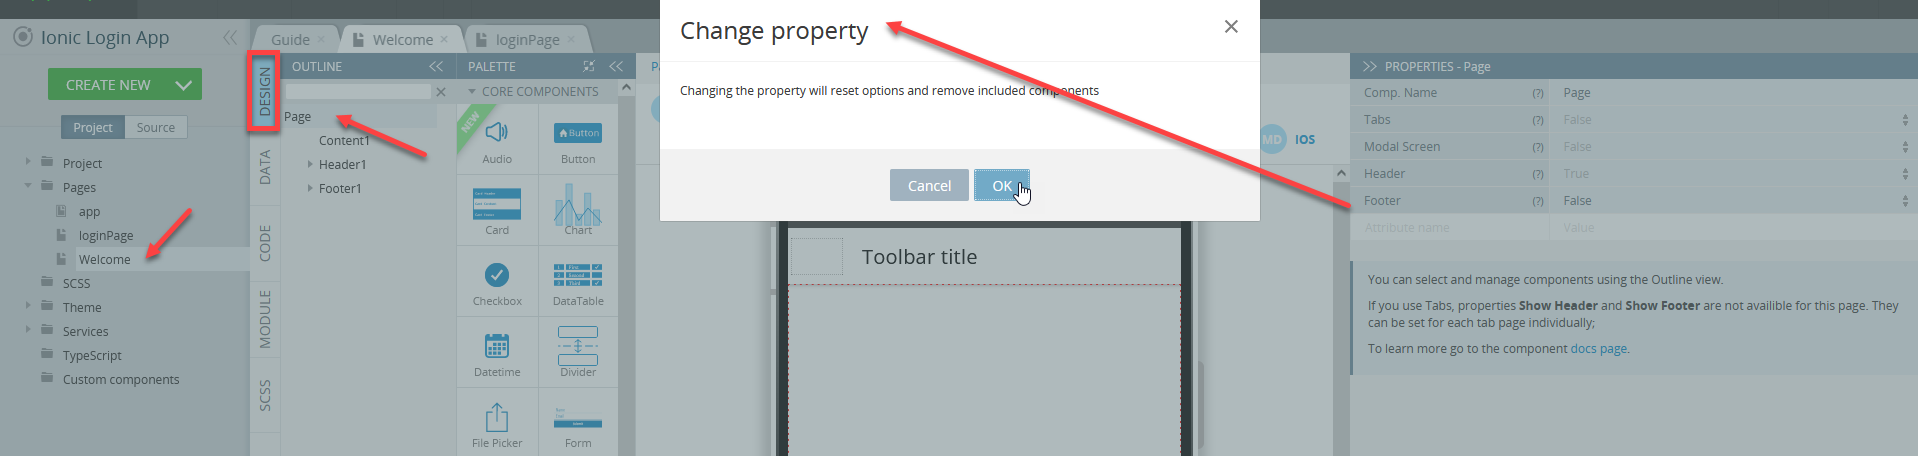
- Expand the OUTLINE view (on the left), select the Page component, then, under the PROPERTIES panel, set the Header and Footer properties to False:
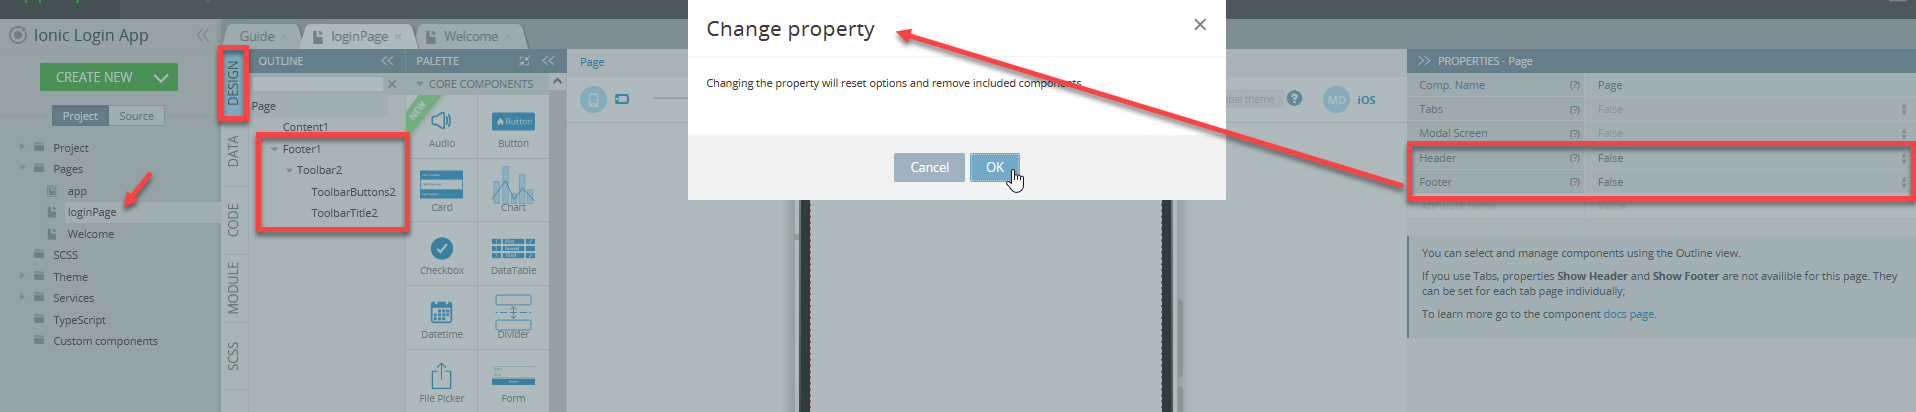
Disabling Header and Footer
Defining App Logo
- Collapse the page OUTLINE view, then select the Image component and, under the PROPERTIES panel, define it as follows:
- Class: login-logo;
- Responsive: True:
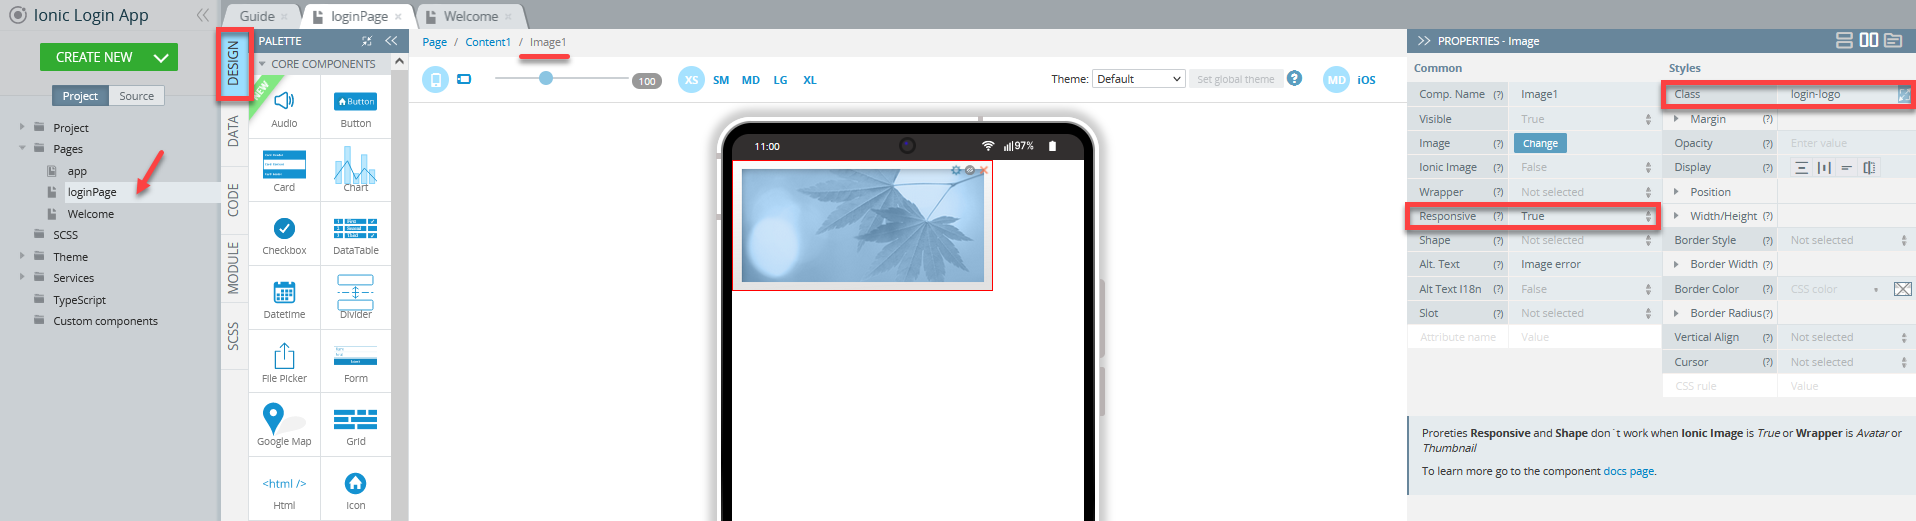
Image component
- Then, for the Image property, click the Change button: this will open the Media Manager. Click Upload file and upload your own logo (it should be prepared beforehand). Go back to the list, select the uploaded image, and click Apply:
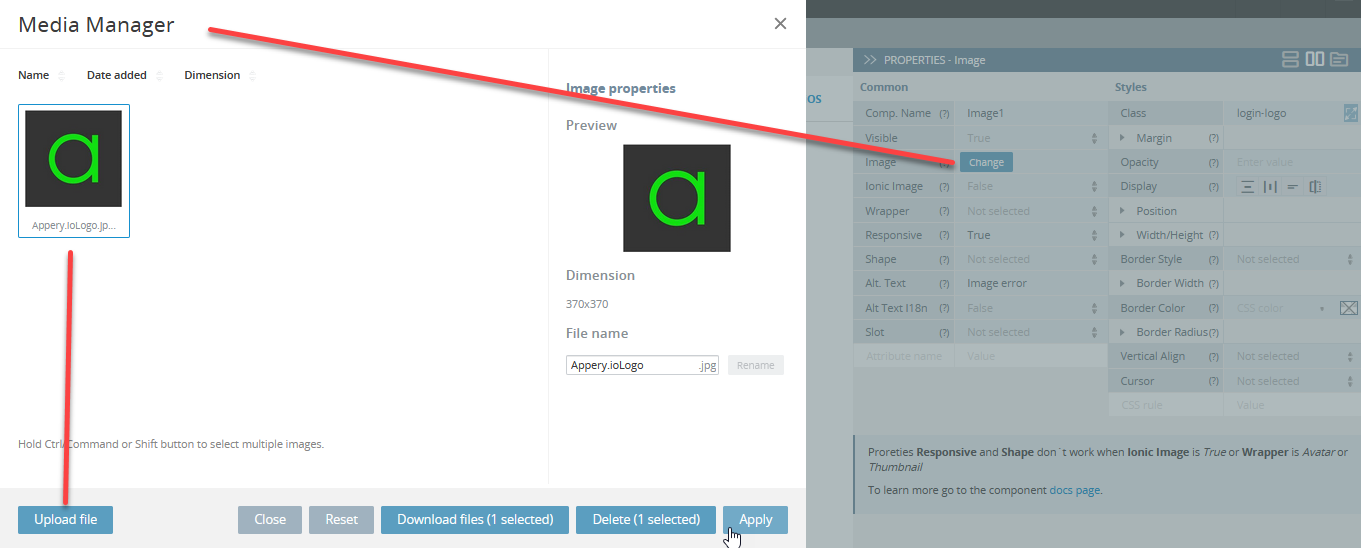
Working with Media Manager
- Next, drag the Card component and drop it under the logo, that is to be defined as the Login form.
- Finally, place the Text component inside Card Item Title, set its Container property to h1 and replace the default text of the Text property with Log In to Your Account!:
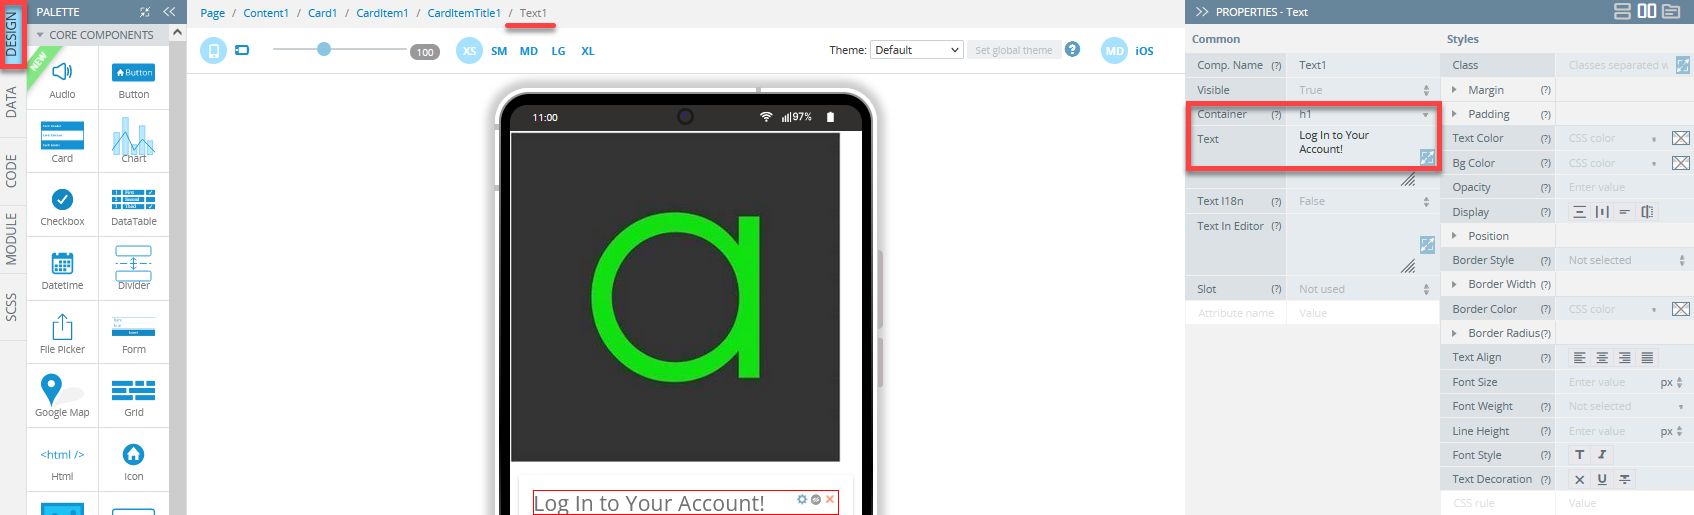
- For the Card Item, clear the Text field.
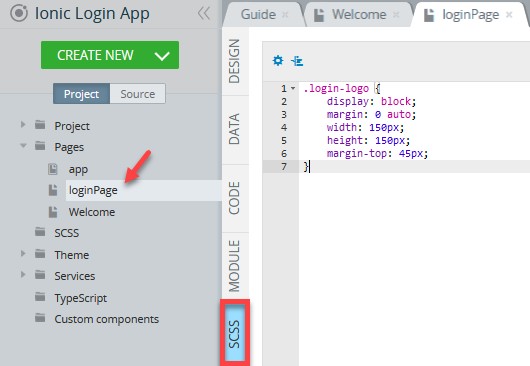
- Open the SCSS panel panel (on the left) and add the class for your logo by inserting the following code:
.login-logo {
	display: block;
	margin: 0 auto;
	width: 150px;
	height: 150px;
	margin-top: 45px;
}
Here is how it should look like:
Defining Form
- Now, go back to the loginPage DESIGN panel; locate the Form component in the PALETTE and place it into the Card1 under the heading:
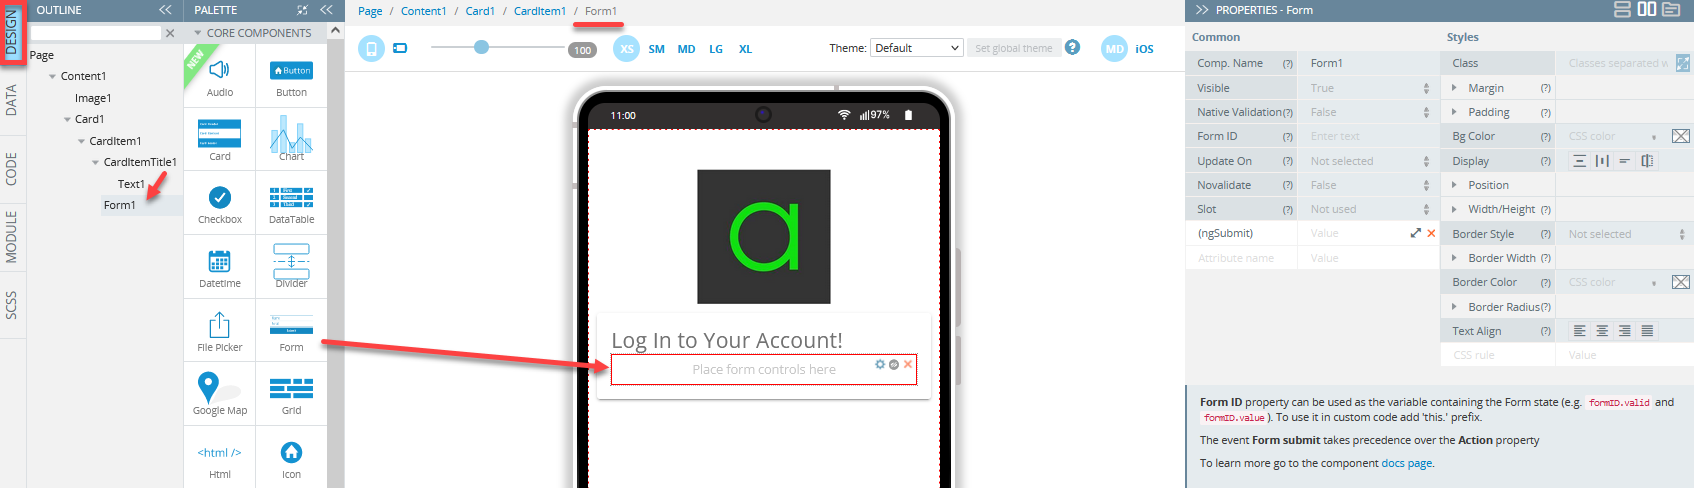
- Drop two Input components and one Button inside the previously added Form component (you can check it under the OUTLINE view):
Defining Card component
- Select the first InputWrapper and set its Show Icon property toTrue:
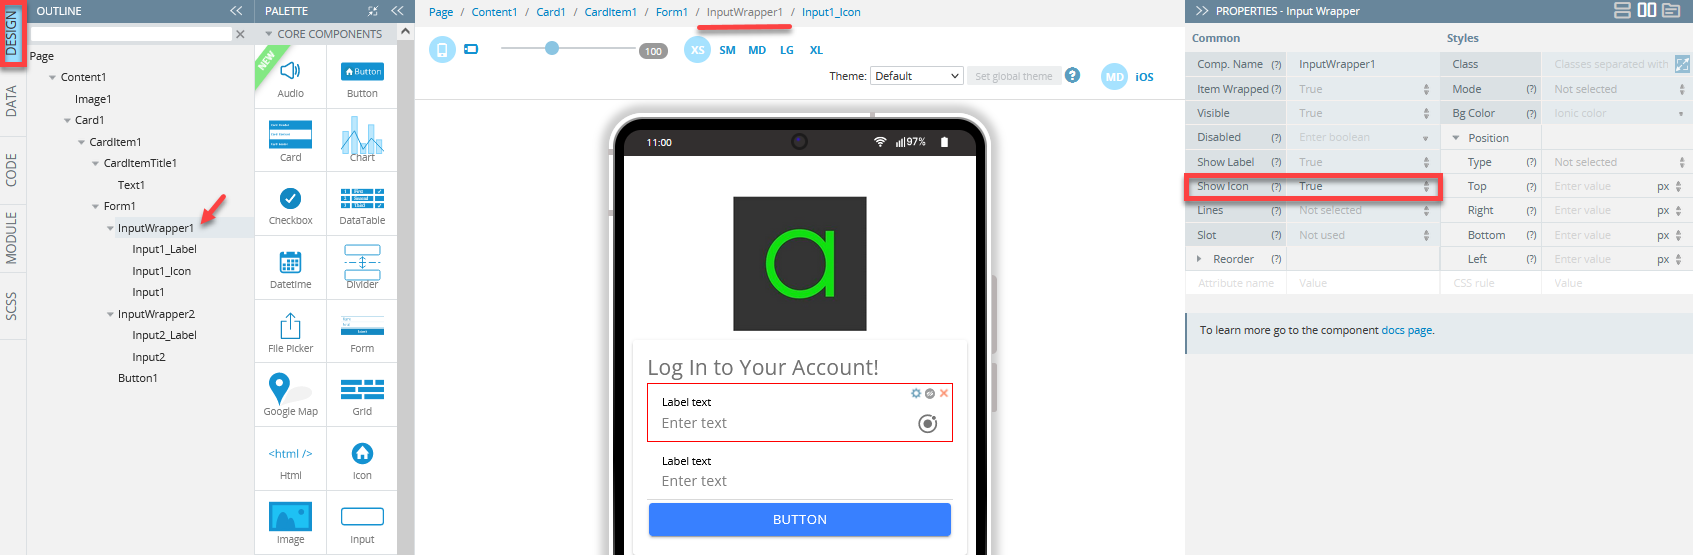
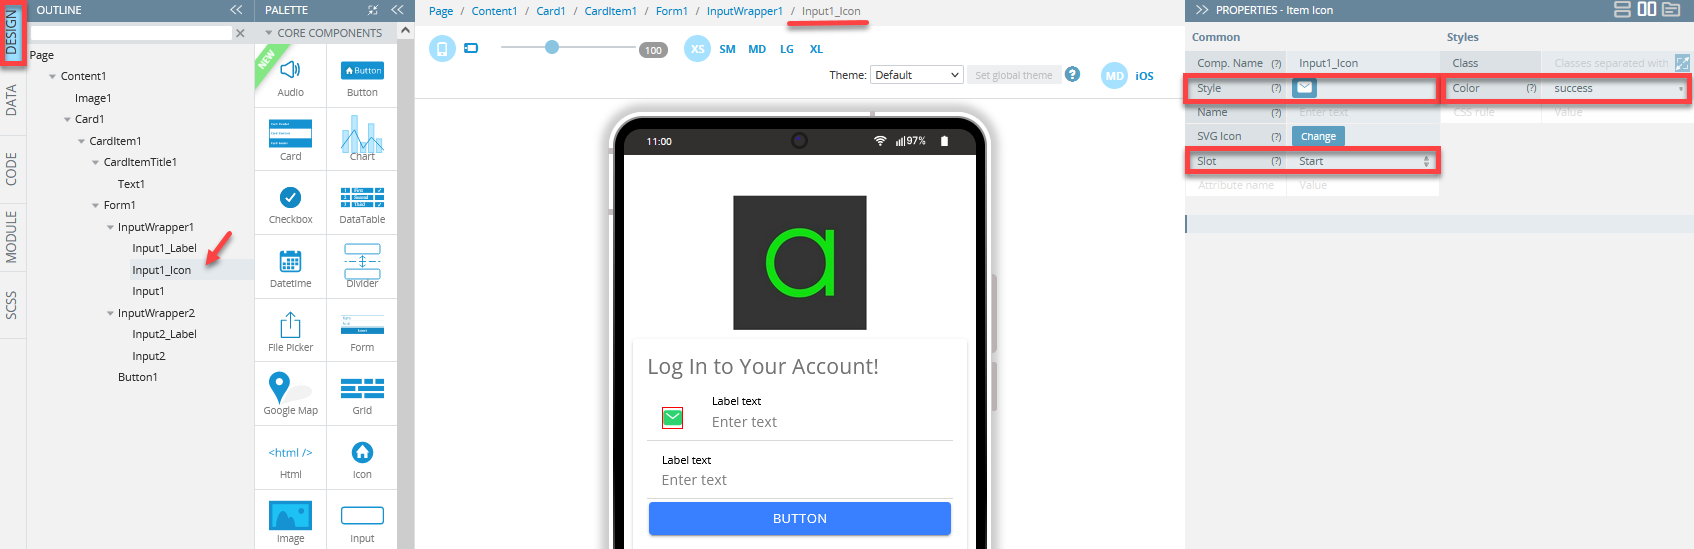
- Now, select the icon and set its properties under the PROPERTIES panel like the following: success = Color, Slot = Start; then click the No icon button and select the mail icon for Style:
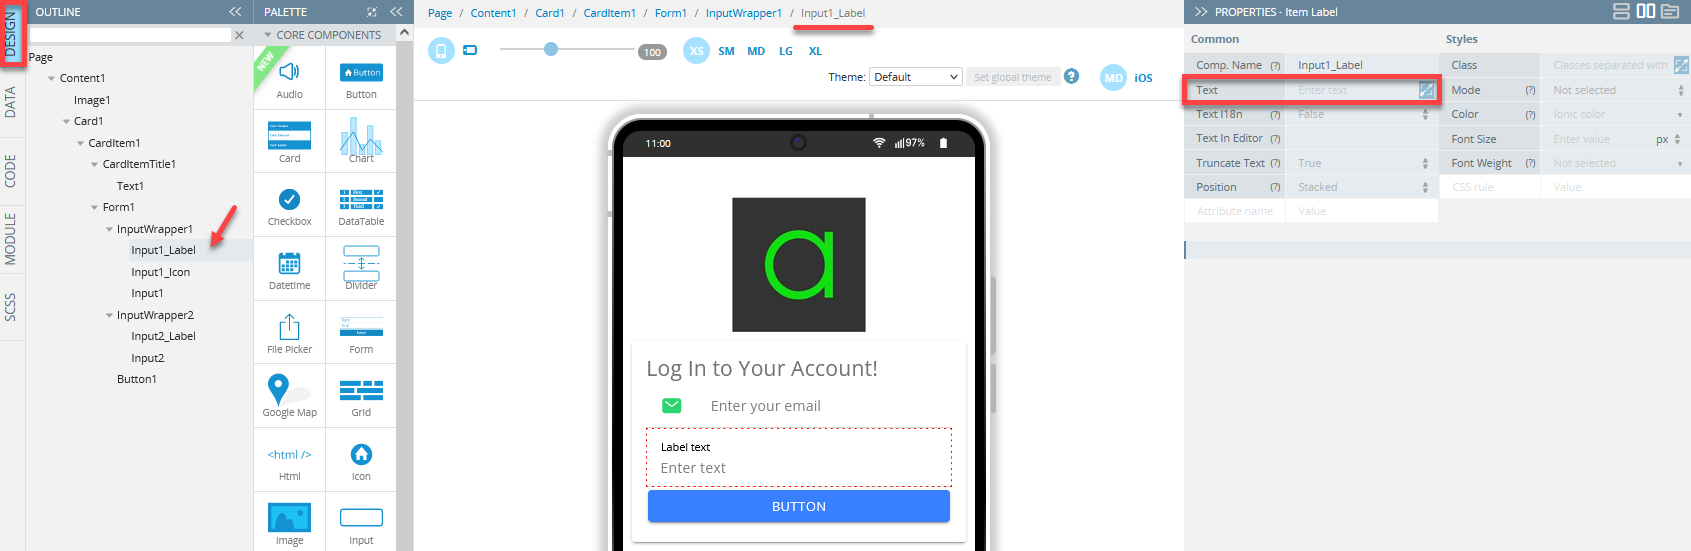
- Now, select the the child Input component, and insert Enter your email for its Placeholder property and set the Type property to Email.
- Also, select the Item Label component and to clear its Text property field:
- Then, for the Input component, unfold the Form Control section and set Validation > Required to true, also, define the [(ngModel)] as email:
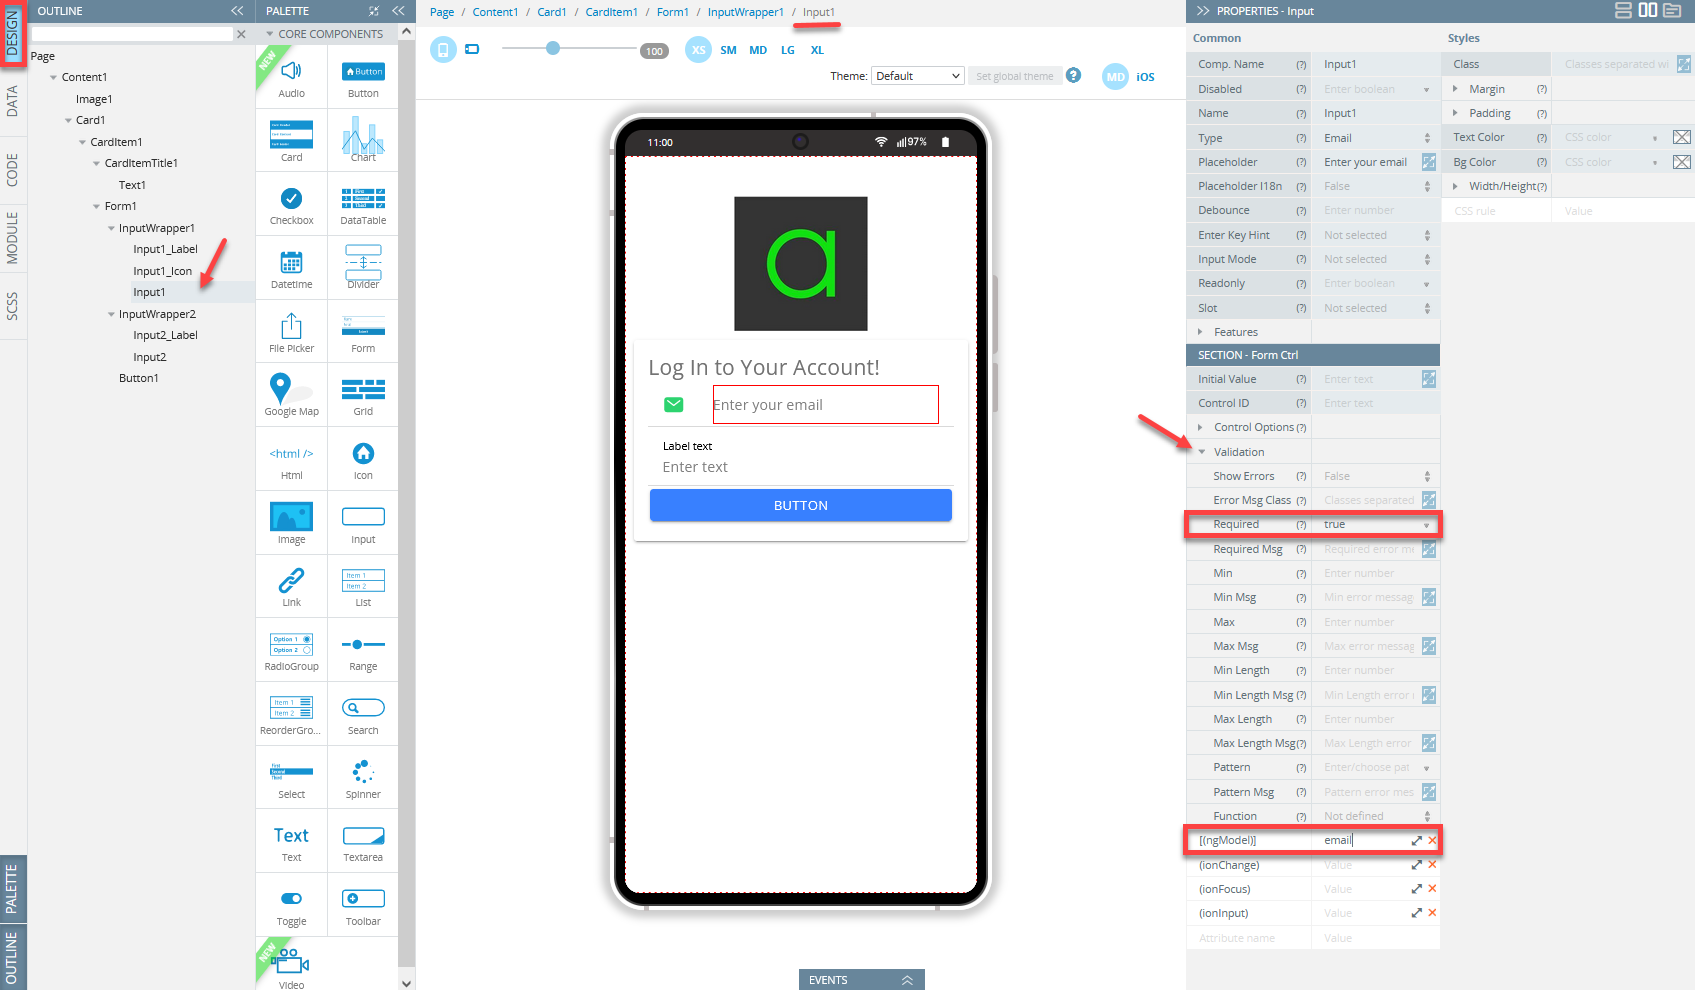
Defining Input1
- Now, select the second InputWrapper and set its Show Icon property toTrue. Then select the icon and set its properties under the PROPERTIES panel like the following: success = Color, Slot = Start; then click the No icon button and select the lock-closed icon for Style.
- Now, select the child Input component, and insert Enter your password for its Placeholder property, set the Type property to Password, and add an [(ngModel)] = password.
- Also, select the Item Label component and to clear its Text property field:
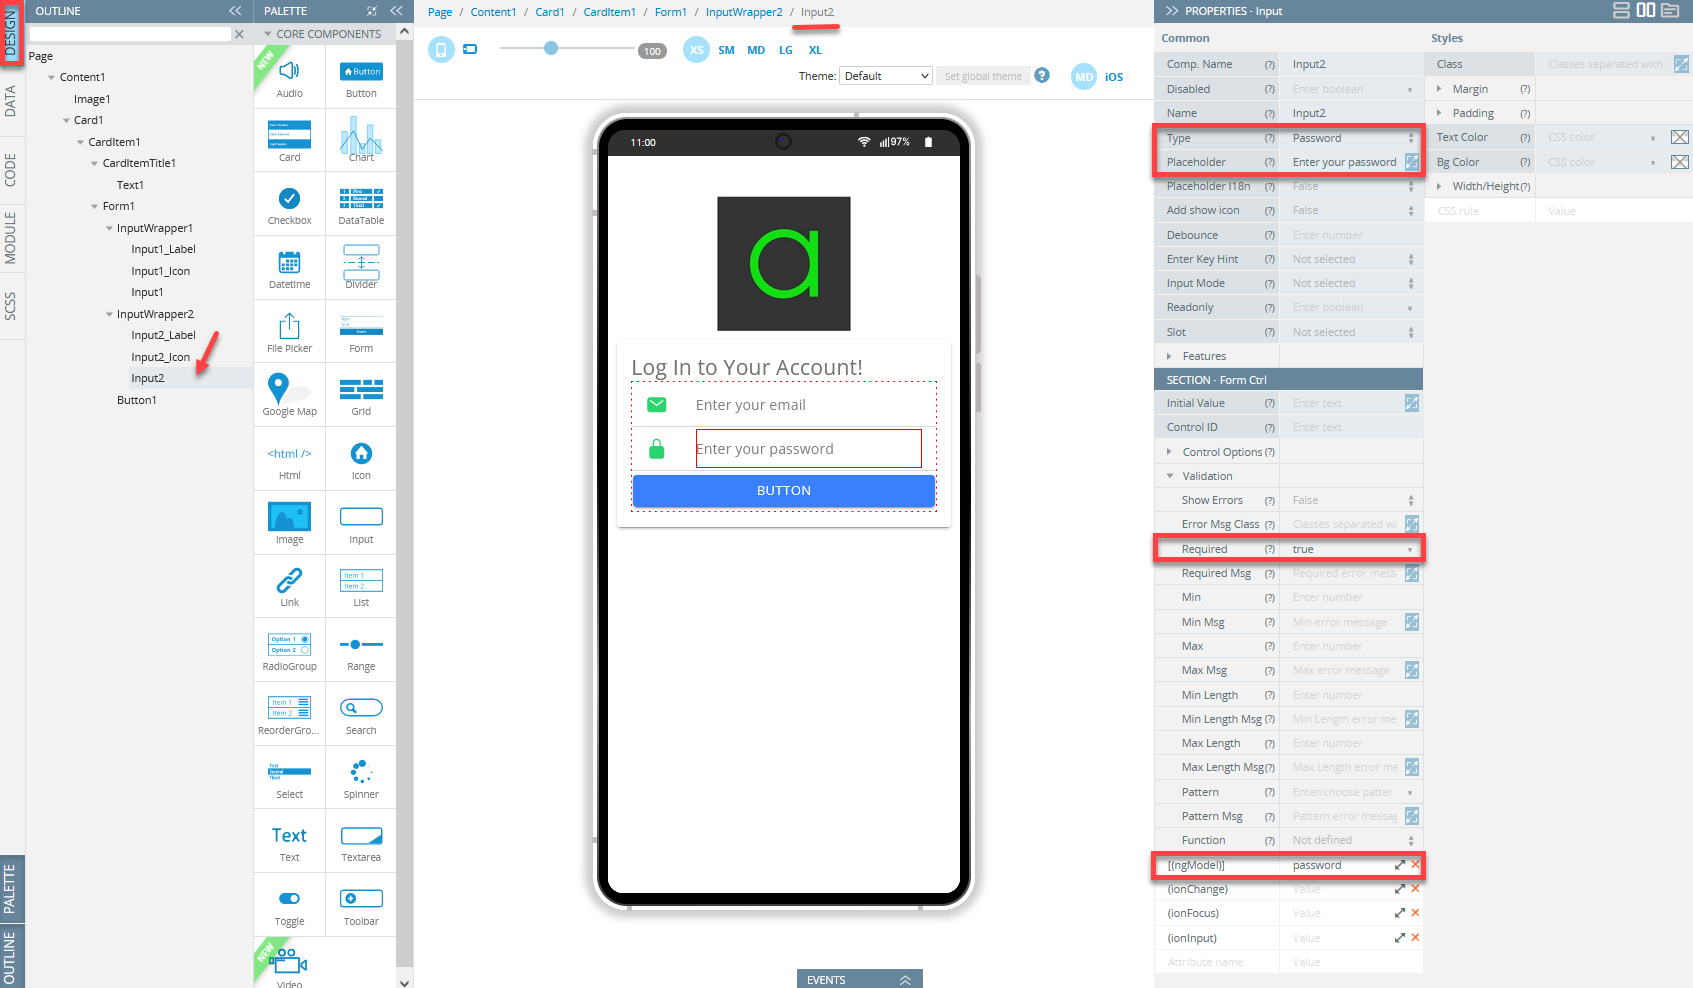
Defining Input2
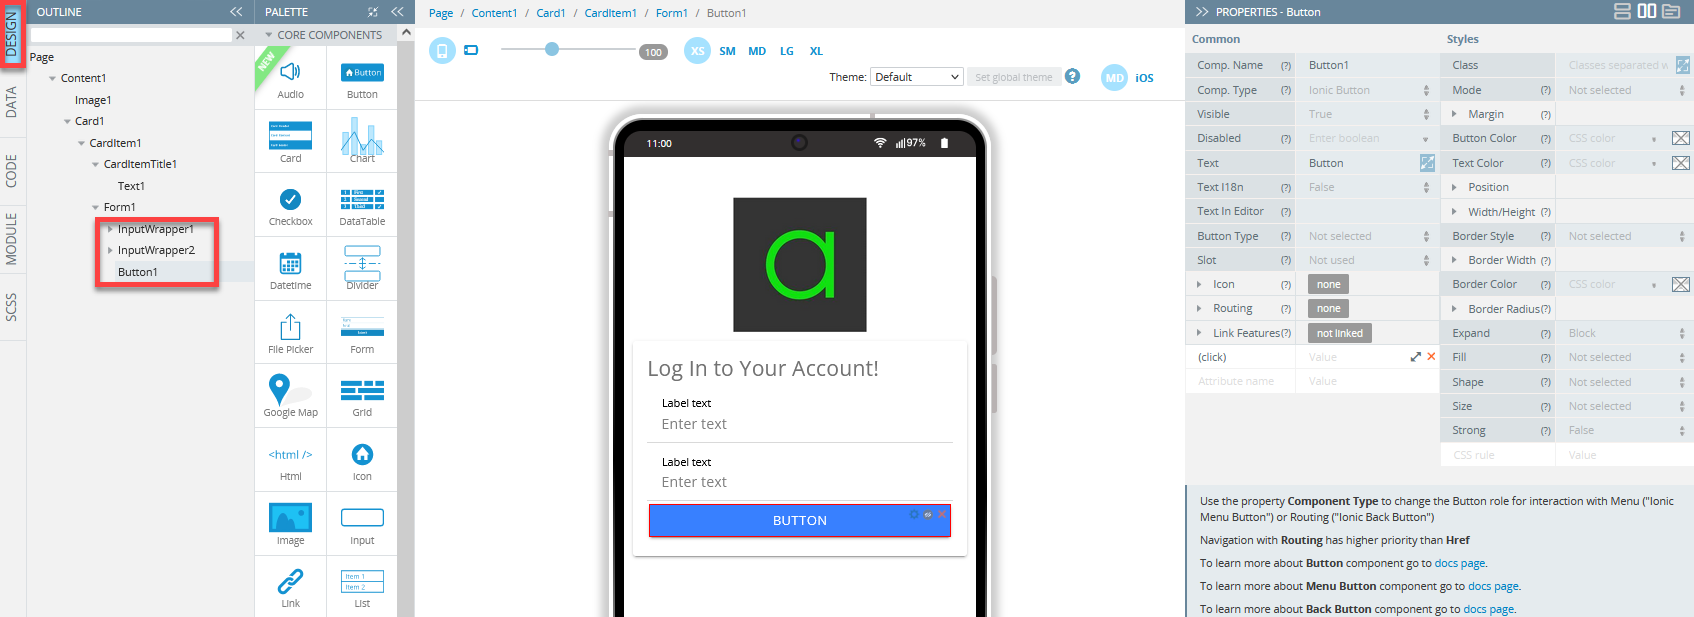
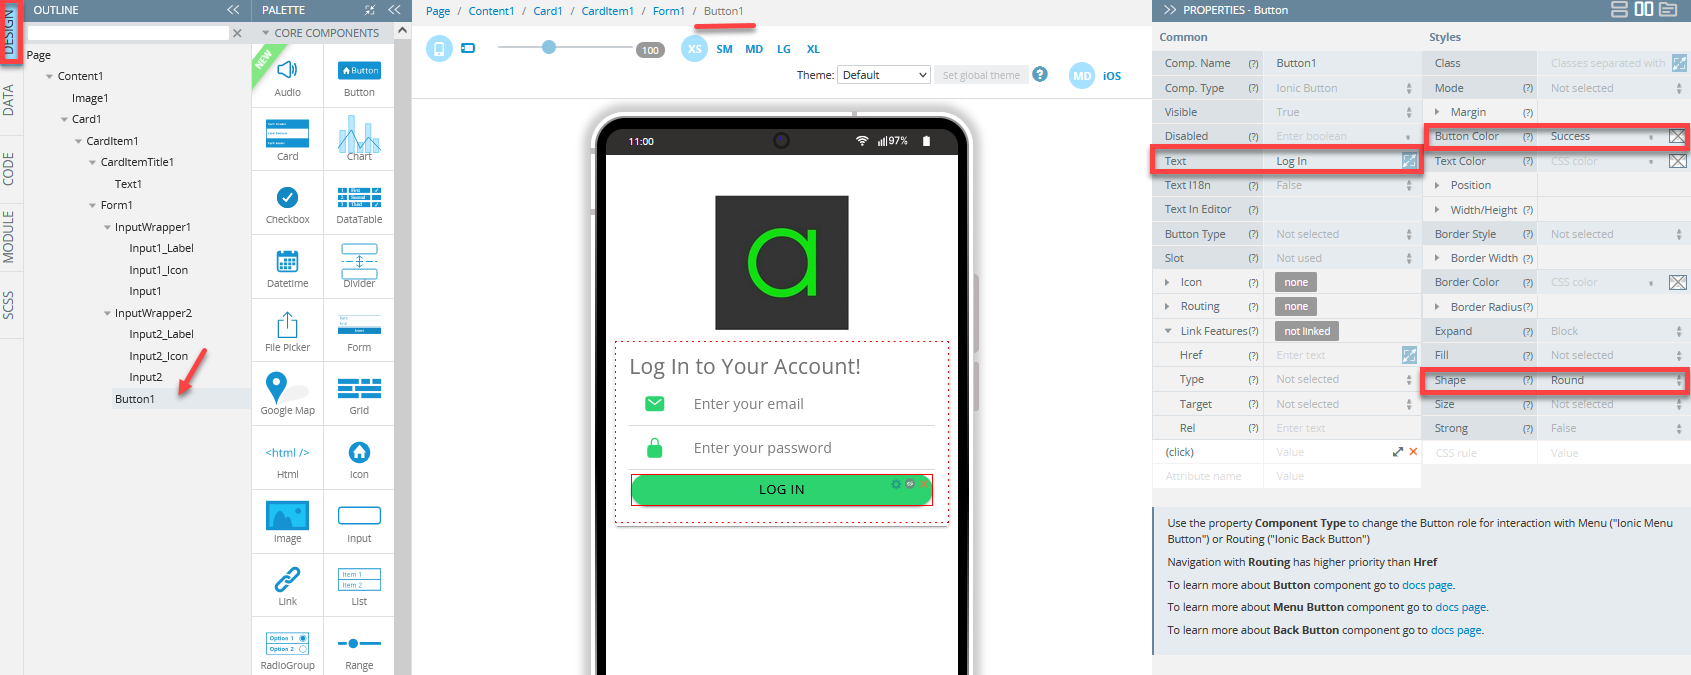
- Select the Button component and go to its Styles properties tab. There, select success for Button Color and then set its Shape property to Round.
- Then, under the Common tab, set the Text property to Log In:
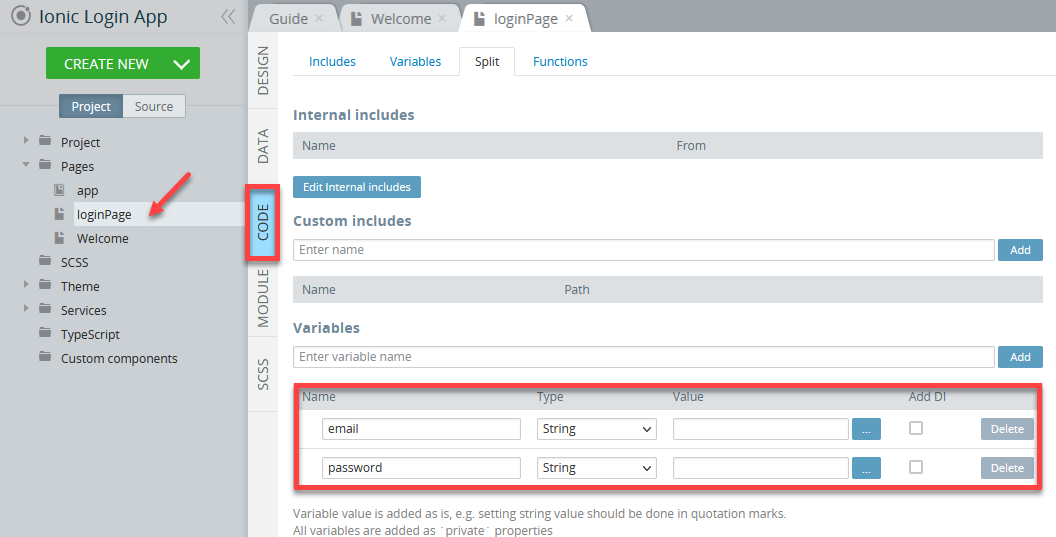
- Now, navigate to the page CODE panel and create two variables there:
emailandpassword, both of String type:
Defining Welcome Page UI
- Switch to the Welcome page, expand the OUTLINE view and select the Page component. Under its PROPERTIES panel, set Footer to False and confirm:
- Then, in the header, select the Toolbar title component and insert Welcome! for its Text property.
- Drrop another Button inside the Toolbar buttons area (on the left) and set its Component property to Ionic Menu Button and Button Color to success (to access this property, open the Styles tab):
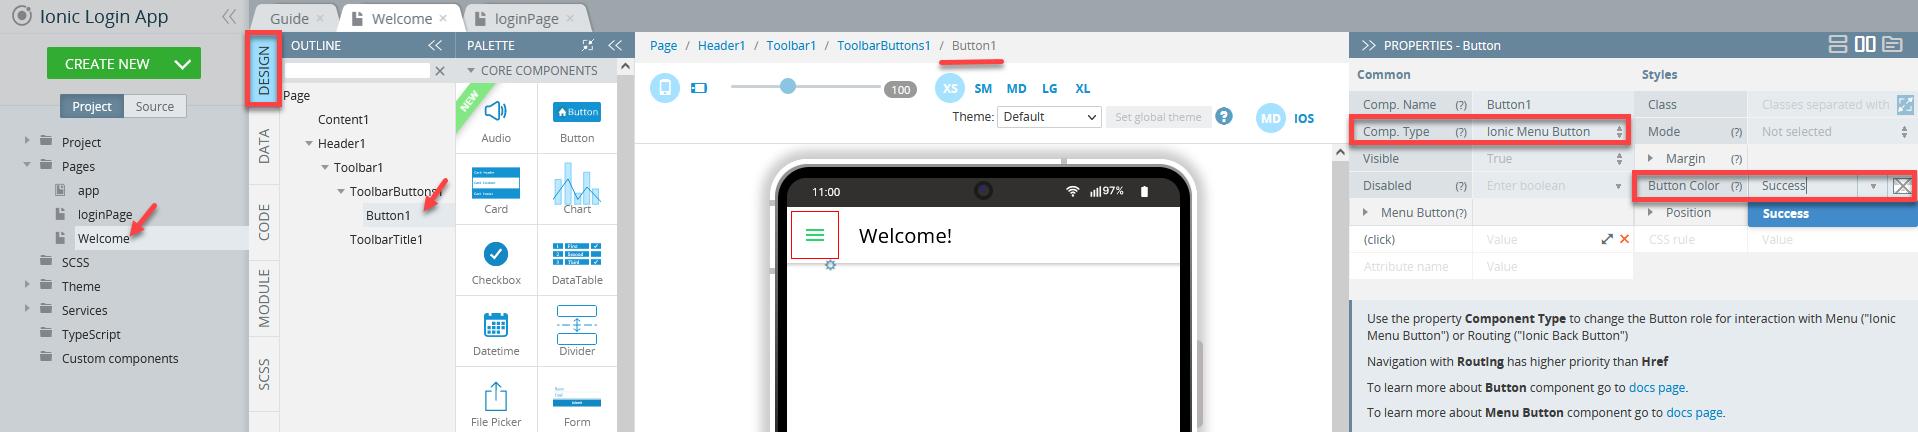
Defining Header Toolbar Button
- Now, to create a logout button, drag another Button to the Toolbar. This should be defined as follows:
- Button Color: success (to access this property, open the Styles tab);
- Comp. Type: Ionic Button;
- Slot: Primary;
- clear the Text field.
- Now, expand the Icon property and select the log-out icon for its Style property and set Slot to Icon Only:
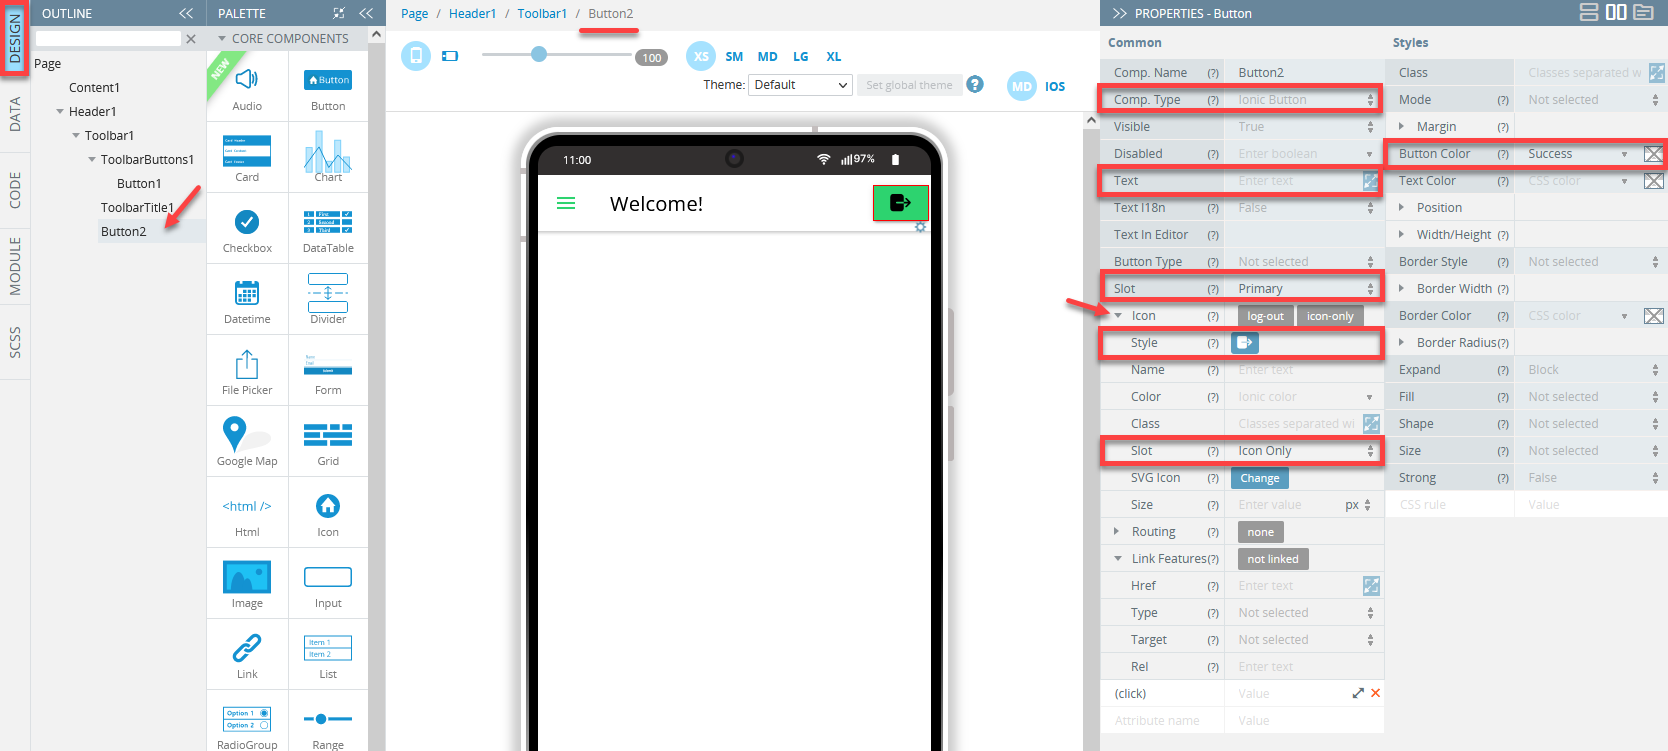
Defining Sign Out button
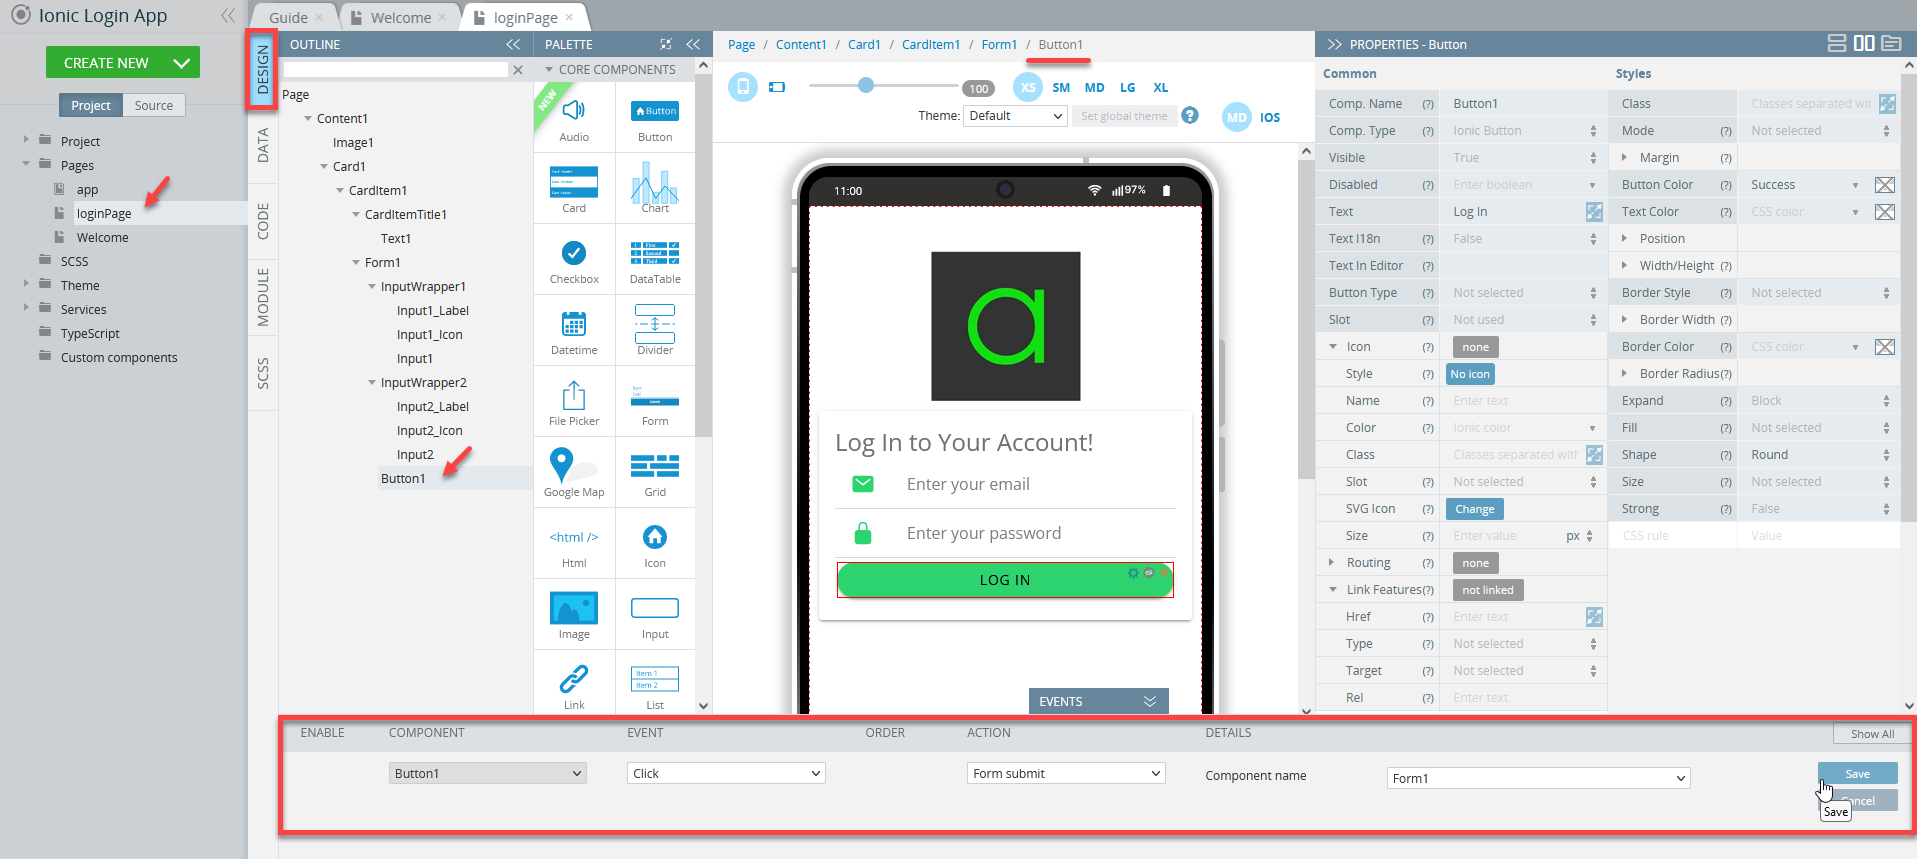
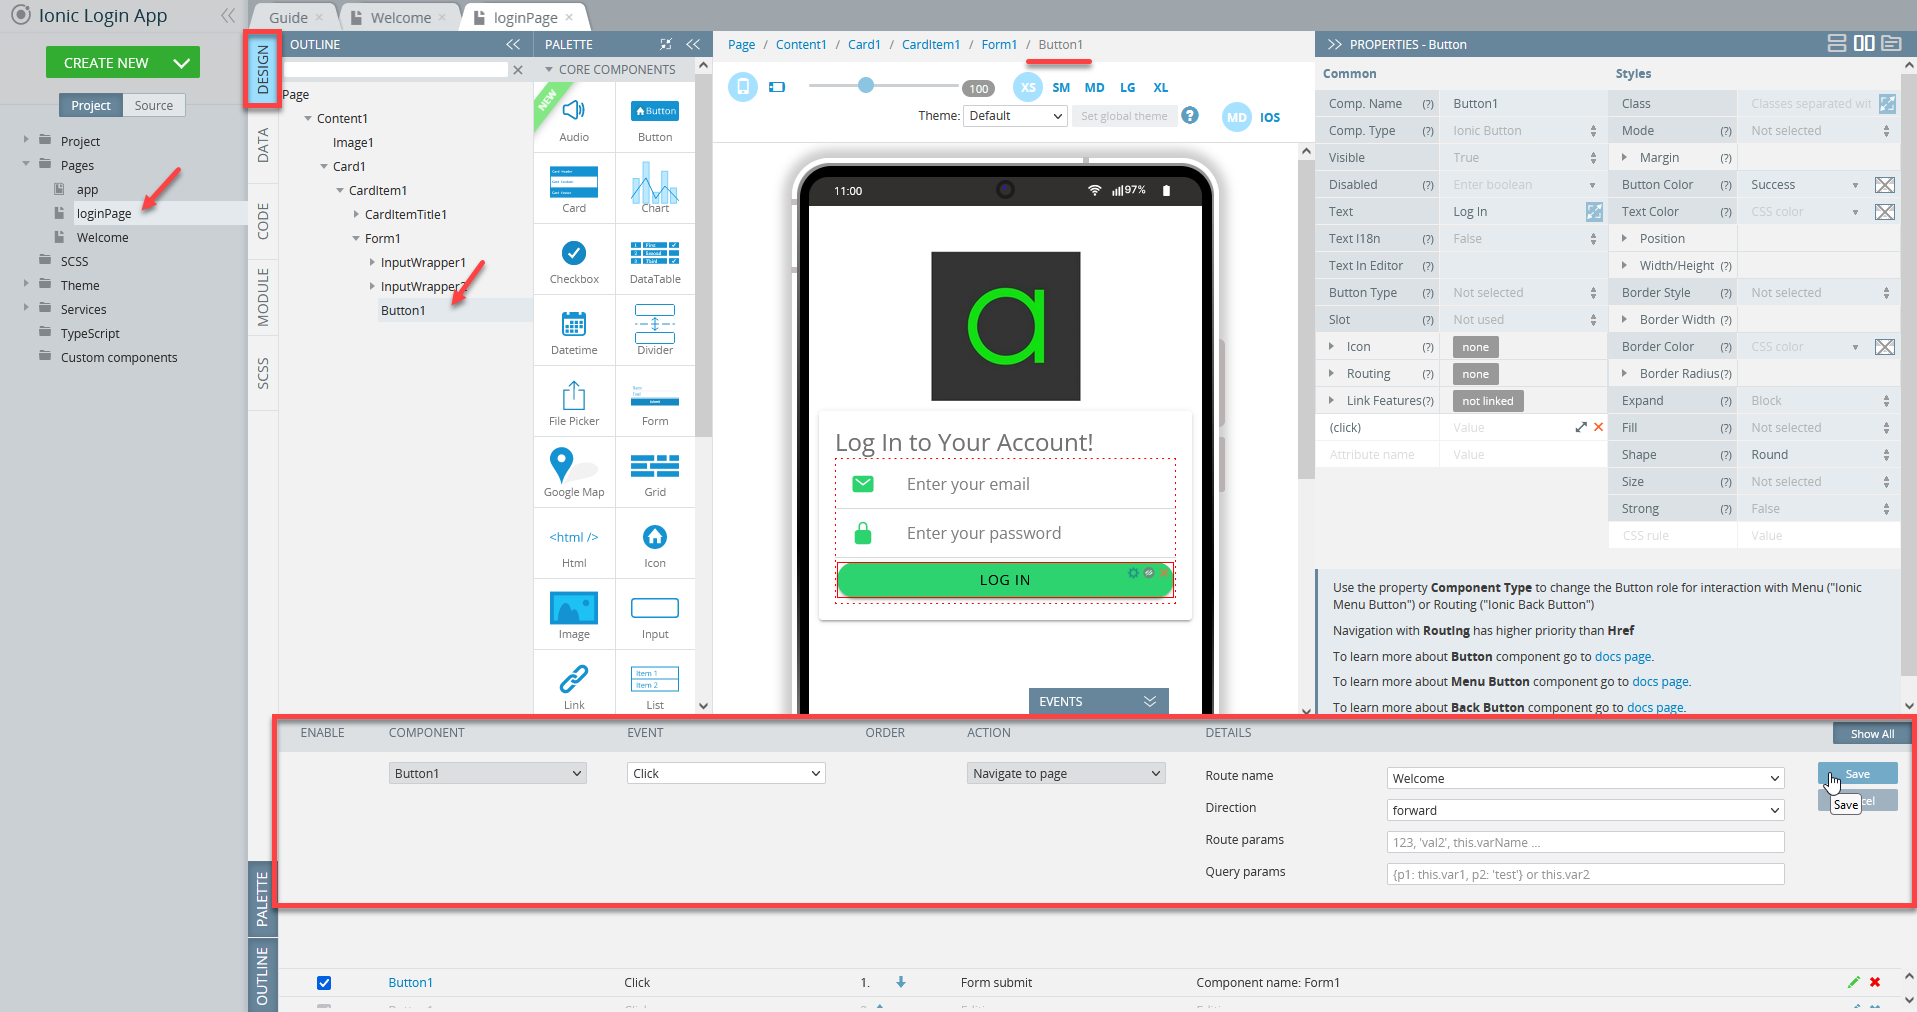
- Then we need to connect these two pages. Navigate to the DESIGN panel of the loginPage and expand the EVENTS tab below. For the Button1 component, select Click as an event, and Form submit as an ACTION.
- Then, select the Form1 component for the Component name. Save the changes:
- After that, add one more button event in the EVENTS tab to redirect user to the Welcome page after a successful login. For this, select the Navigate to page as ACTION with
Welcomefor its route and save:
Don't forget to save all the app changes.
Finishing Touches
You might also like to beautify your app UI. To do it, add the below code to the SCSS panel panel of loginPage:
ion-content {
  --background: no-repeat center/cover url("http://youthconnekt.in/logo/bkimg12.jpg");
}
The tab should look like this:
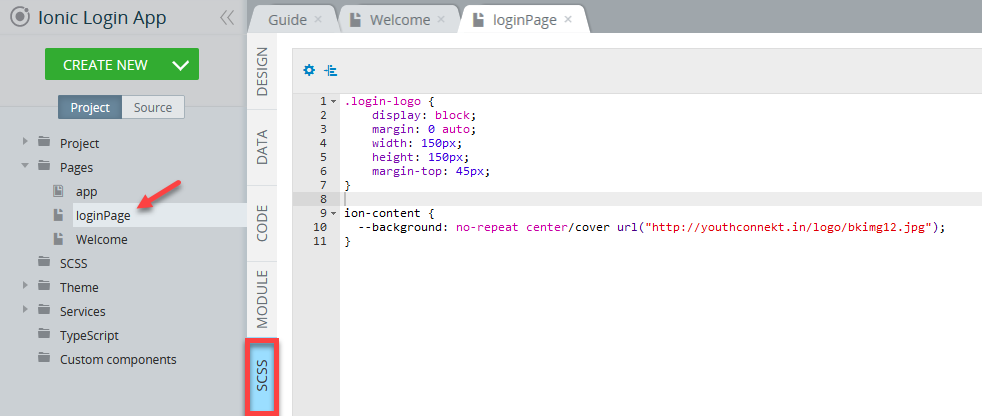
Modifying SCSS of loginPage
Similarly, add the same code to the SCSS panel panel of the Welcome page:
ion-content {
   --background: no-repeat center/cover url("http://youthconnekt.in/logo/bkimg12.jpg");
}
App Testing
You can now click the TEST button in the App BuilderToolbar to test how your app works on this step.
Enter any email and password in the form fields and click the Log In button. You will be navigated to the Welcome page:
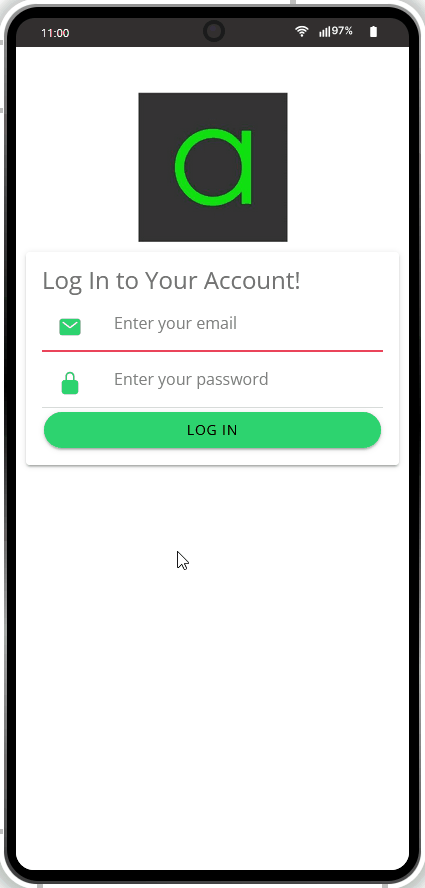
App testing
Updated about 1 year ago
What’s Next
Now, let's proceed with Part 2 which shows how to import the database services into the app and use it for handling user login and logout.