Part 1. Adding File Upload Service
Part 1. Adding File Upload Service
In this part, we will demonstrate how to add the Appery.io FileRead service to your app that will enable the File Upload service used to upload files, preview them in the Image component and then upload them to the Appery.io Database.
Adding File Select Option
- Drop an Input component from PALETTE to the Content area of the Screen1 page and modify its properties under the Common tab as follows:
- Type = File;
- Label > Text = Select file;
- Label > Color = secondary:

Input component in Mozilla Firefox
Then switch to the Styles tab and set Text Color to medium:
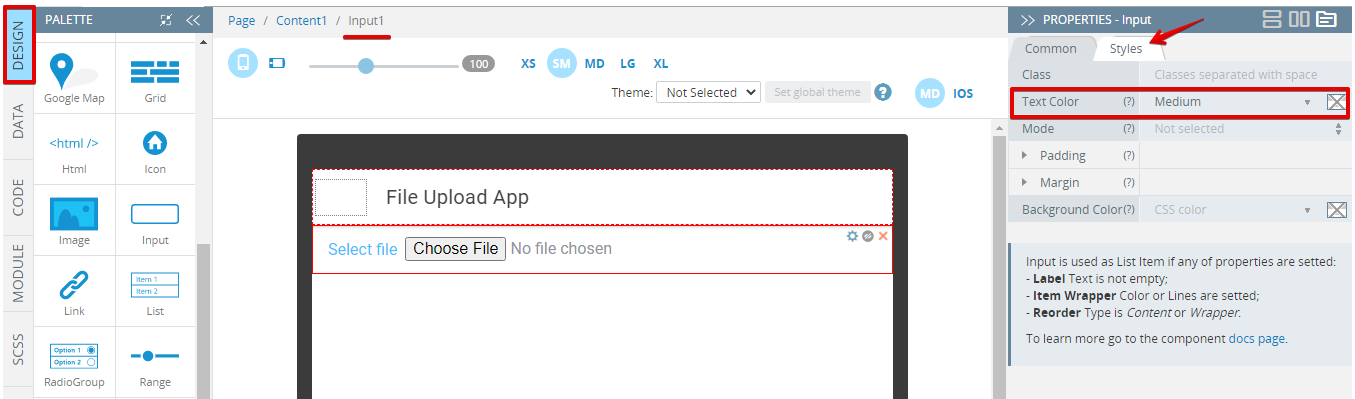
That's it for the Input component.
Note!In different browsers, page components might look slightly different. For example, if you work in Google Chrome you will notice that the predefined selection button text is Choose File, not Browse...:

Input component in Google Chrome
- In this step, you can already test your app: click the TEST button in the App Builder Toolbar to run the app in the preview and then click the Browse.../Choose File to select the needed file on your drive and the corresponding entry will be instantly shown:

But since we are working with a web app, the opened file cannot be read for preview without having a linked full path to it.
So, first of all, let's add the option of previewing files before they can be uploaded to the database.
Adding File Preview Option
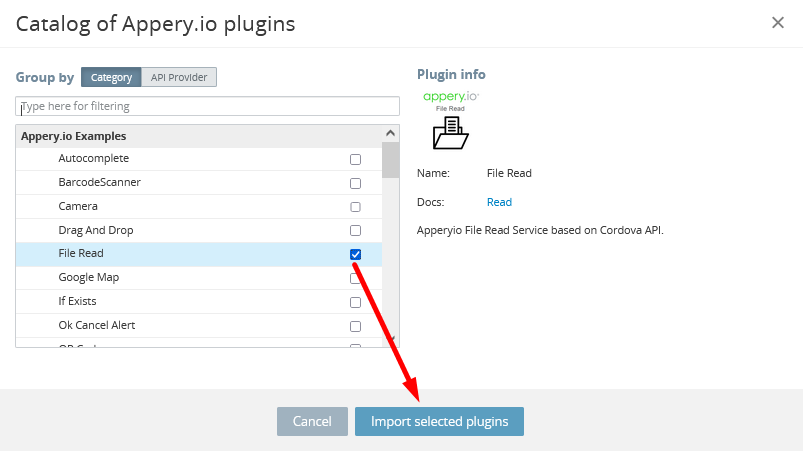
- Now, click CREATE NEW > From Plugin to select the FileRead plugin from the preconfigured Appery.io plug-ins list.
- Then, select the corresponding check box and confirm import:
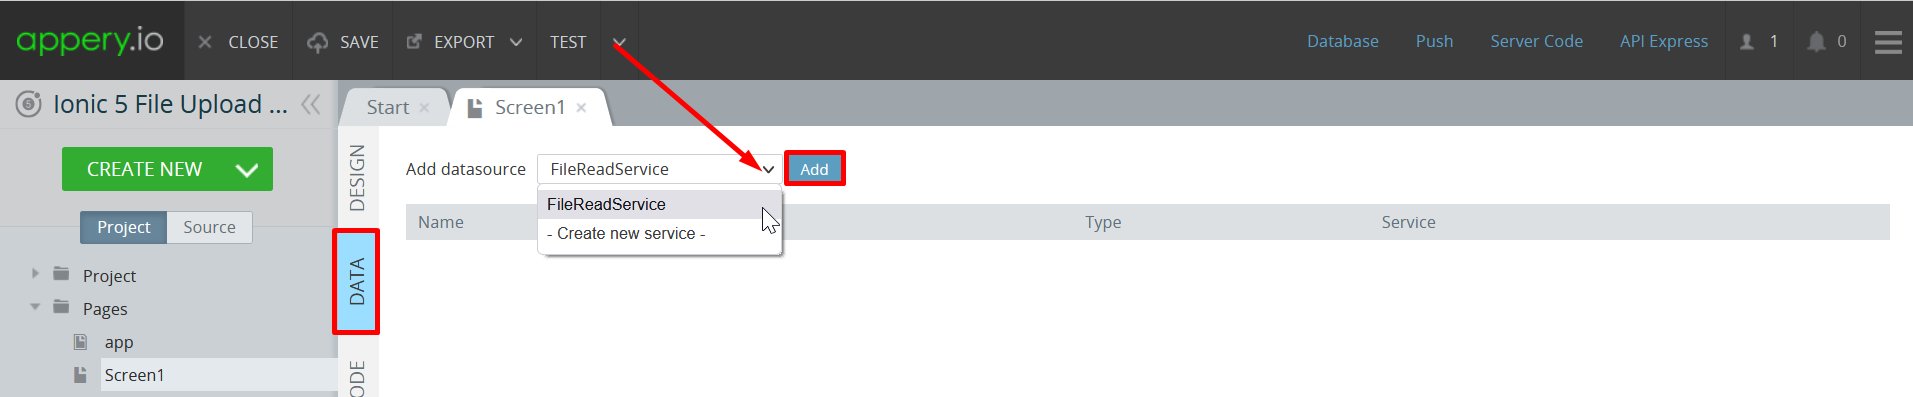
- Now, let's open the page DATA panel and define the added service.
- First of all, add a datasource for the FileReadService. To do it, select FileReadService in the Add datasource drop-down, click Add:
- Rename the service, for example, to filePreviewSrv and click the corresponding button to edit the Before send mapping:
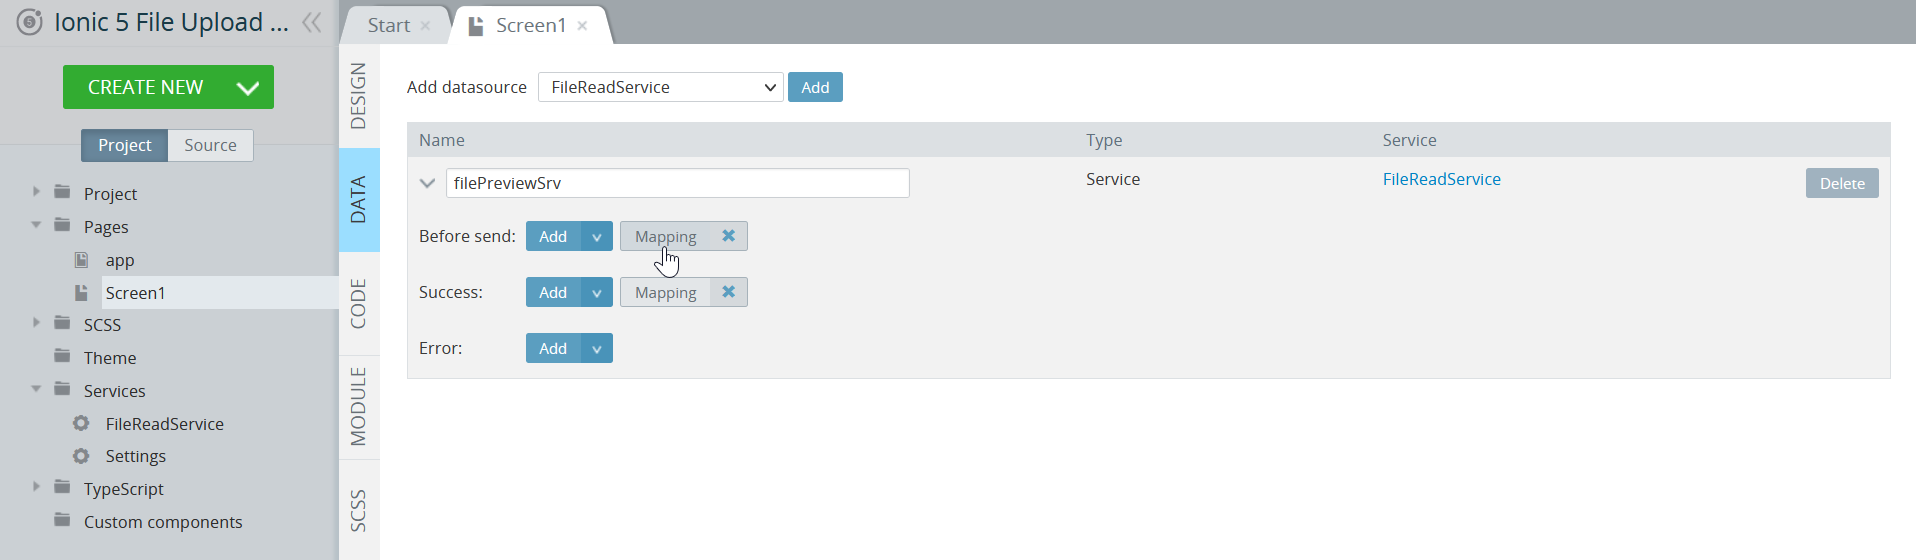
- In the mapping editor, map the Input1 object to the fileInput service request. And make sure that the resultFormat service request has the DataURL value:

filePreviewSrv Before Send mapping
resultFormat ValuesThe resultFormat service request values are to be specified to read different file formats:
- String - to be used for reading text files;
- ArrayBuffer and Blob- to be used if some further specific processing is needed;
- FormData - to be used if we need to send it;
- DataURL - to be used to show file in the picture;
- When done, click Save & Replace to go back to the datasource components and select the Success mapping of the filePreviewSrv service:

- Create the following mapping to allow previewing file on the screen and click Save & Replace:

filePreviewSrv Success mapping
- To finish, we need to go back to the DESIGN panel and select the input to define its Change event: select the Invoke service action with indicating the filePreviewSrv datasource. Then click Save:

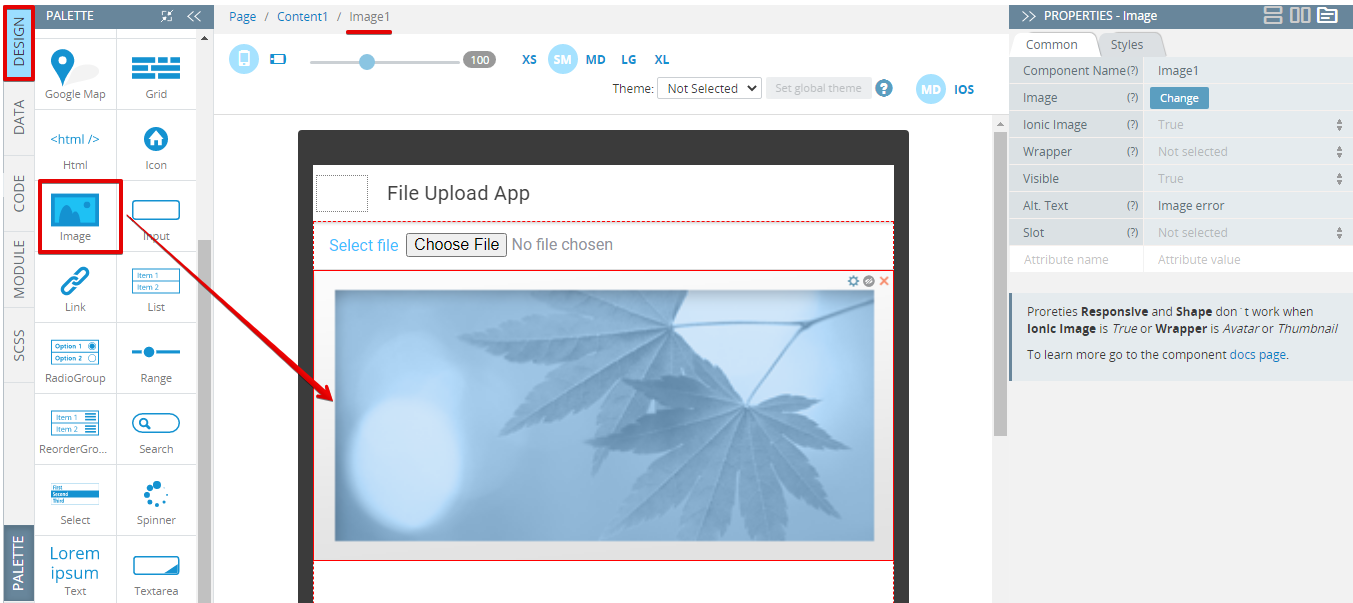
- It's time for testing how the preview option works:

Adding File Upload Option
Actually, when you have got a needed file, you would naturally like to store it in the Appery.io database that we created in the very beginning (in this case, it's myDB).
- So, first of all, let's add a button that will be used for activating the file upload service:
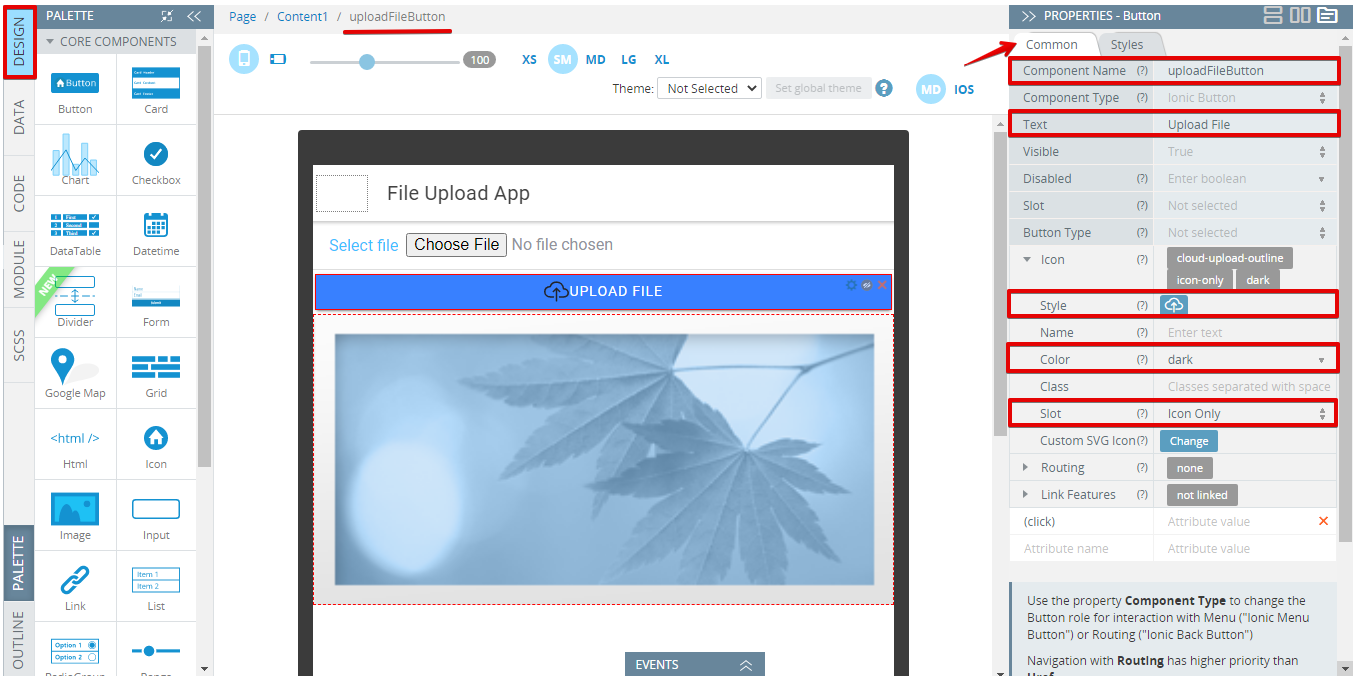
Drag & drop the Button component from PALETTE to the Content area and modify its properties under the Common tab:
- Component Name = uploadFileButton;
- Text = Upload File;
- Icon > Style = cloud-upload-outline (to open the icon selection window click the No icon button);
- Icon > Color = Dark;
- Icon > Slot = Icon Only:
- To upload files to the database, we will need to link this database by importing the corresponding service.
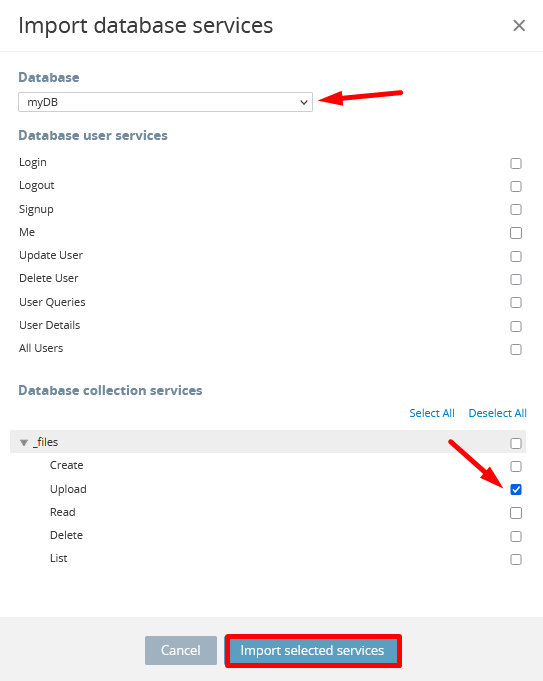
To import the needed database service (here, upload) click CREATE NEW > Database Service, select the needed database from the list (here, myDB) select the upload option and confirm by clicking Import selected services:
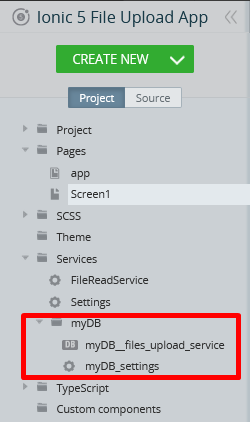
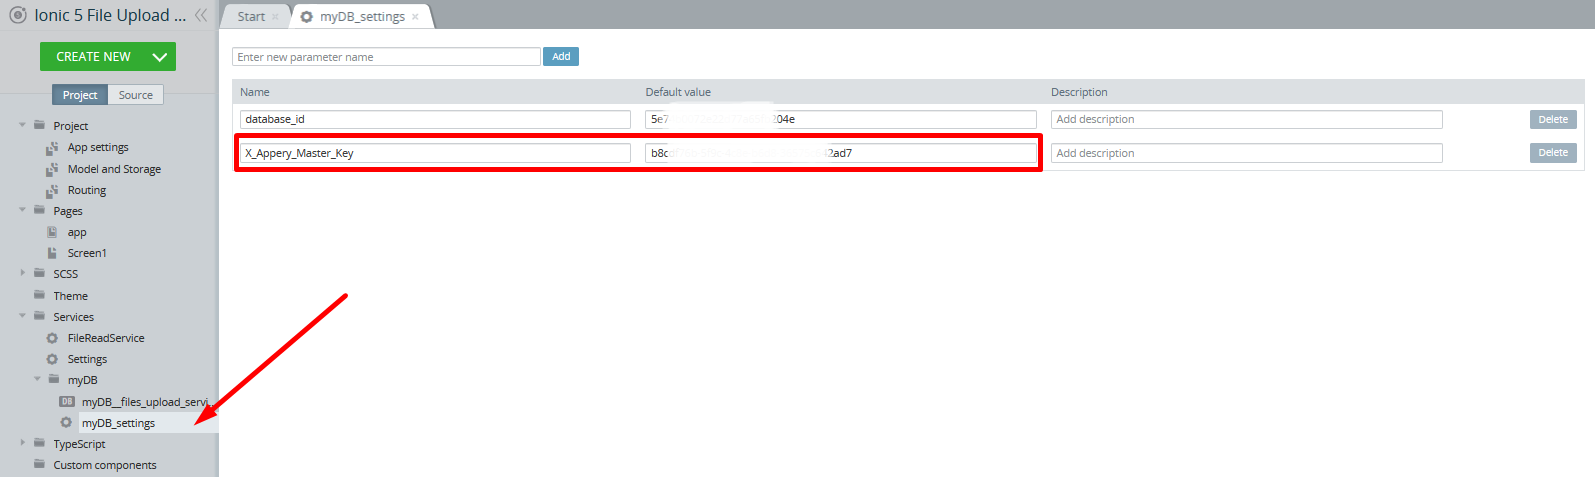
- Two database services will be instantly imported into the Services folder under the App Builder Project view tree: myDB__files_upload_service and myDB_settings:
Since we are not planning to integrate any login functionality into this particular app, we will use the database X-Appery-Master-Key.
Important Security IssuePlease be informed that using the database X-Appery-Master-Key can be insecure as it gives full access to the database, so it is recommended that you use X-Appery-Session-Token instead if you need to add extra protection to your data.
- First, open the myDB_settings file, add the X_Appery_Master_Key parameter and define it with the X-Appery-Master-Key value of your database (can be found on the Databases > Settings page):
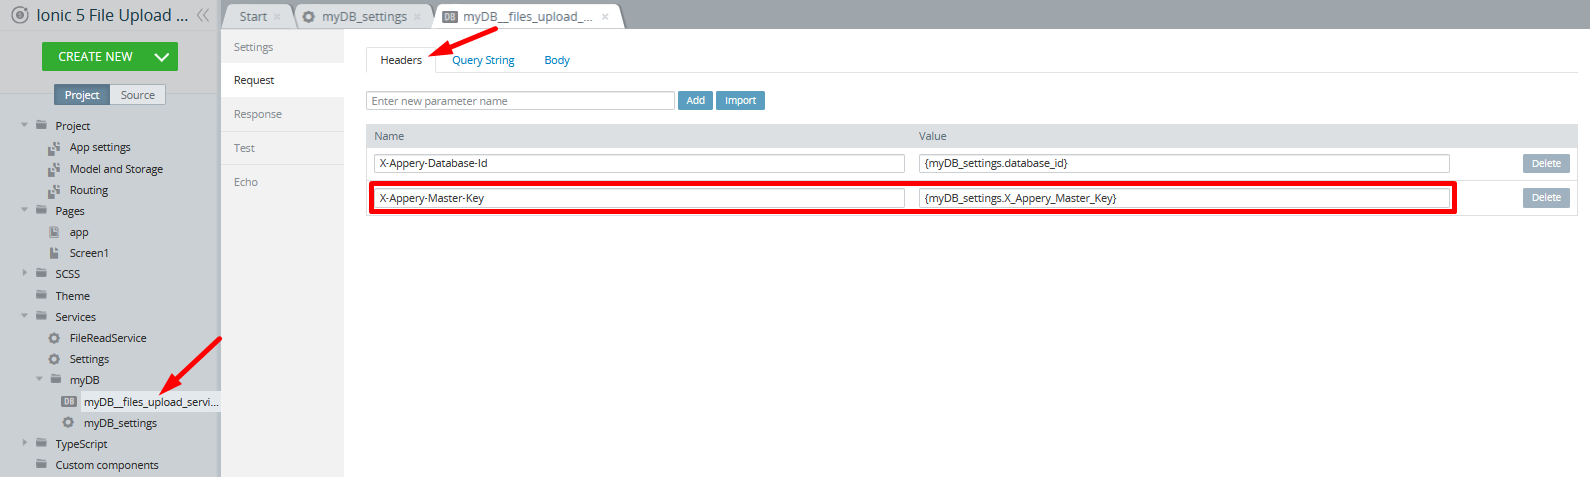
- Now, go to myDB__files_upload_service and edit its X-Appery-Session-Token request header name by replacing it with X-Appery-Master-Key.
- Now, provide the service X-Appery-Master-Key value as {myDB_settings.X_Appery_Master_Key}:
To be uploaded to the database, your files will need to be read again but their format should be different now since they are to be uploaded via the network.
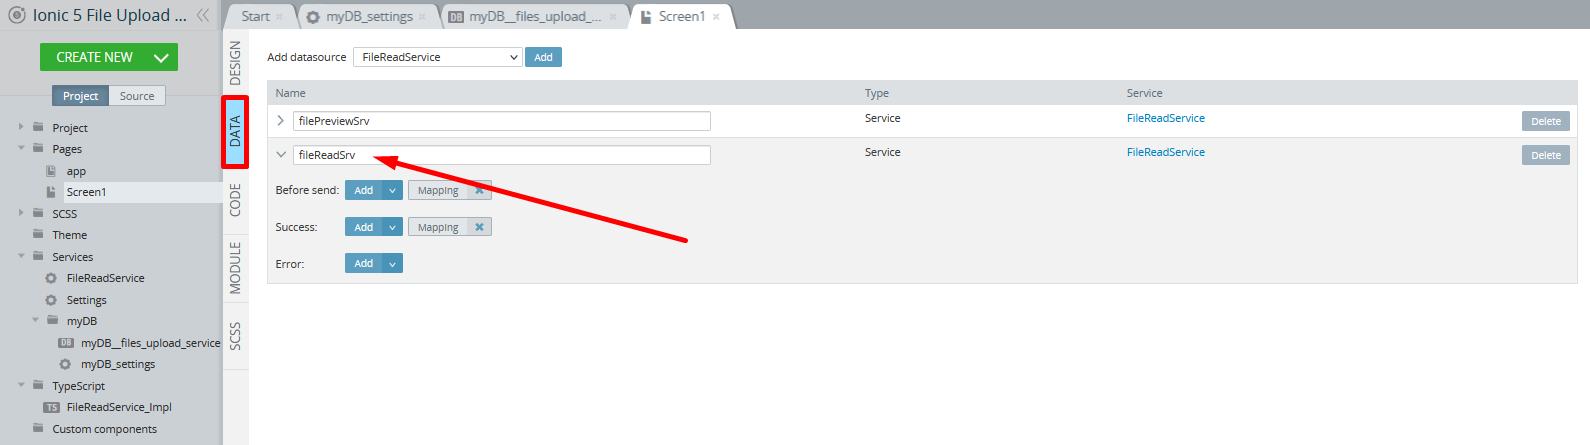
- To arrange for that, let's create a new datasource, fileReadSrv: go to the Screen 1DATA panel and add another FileReadSrv datasource by selecting it on the list and clicking Add, then name it to fileReadSrv:
- Click the Before send service mapping button to open the mapping editor and define it like the following (this is similar to what was done with the filePreviewSrv mapping here (Step 7) with the only difference in the resultFormat service request value: in this case, it's left to the default FormData value:

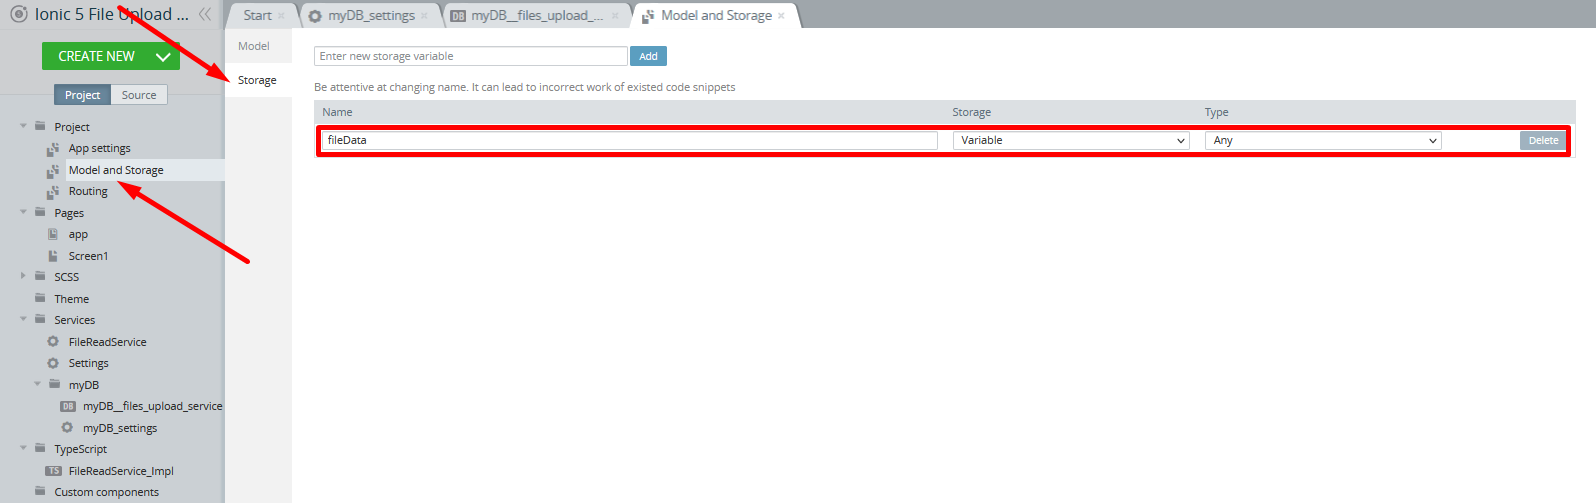
- To temporarily save data from the filePreviewSrv service and then pass it to the fileReadSrv service, a storage variable
fileDataof type Any under Project > Model and Storage> Storage should be created (for Storage, select Variable):
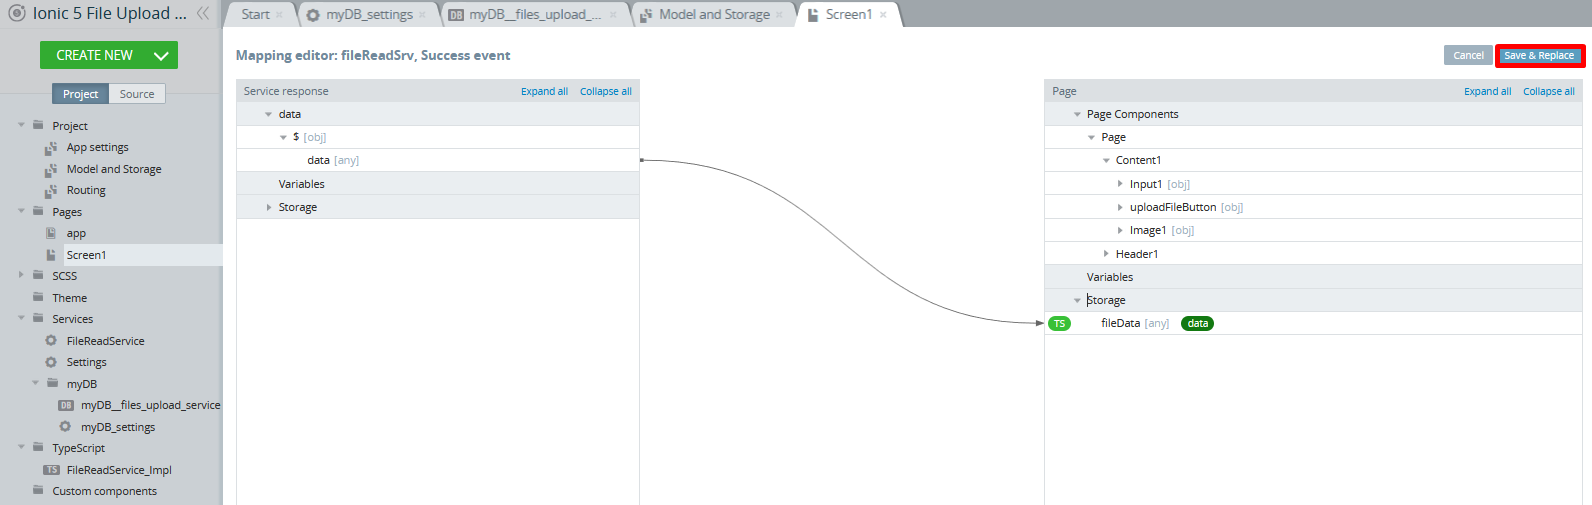
- Now, go back to the DATA panel, open the Success mapping editor of the fileReadSrv service, and define it as follows:
- Click Save & Replace to go back to the datasource components and add one more service; for the datasource, select myDB__files_upload_service and click Add:

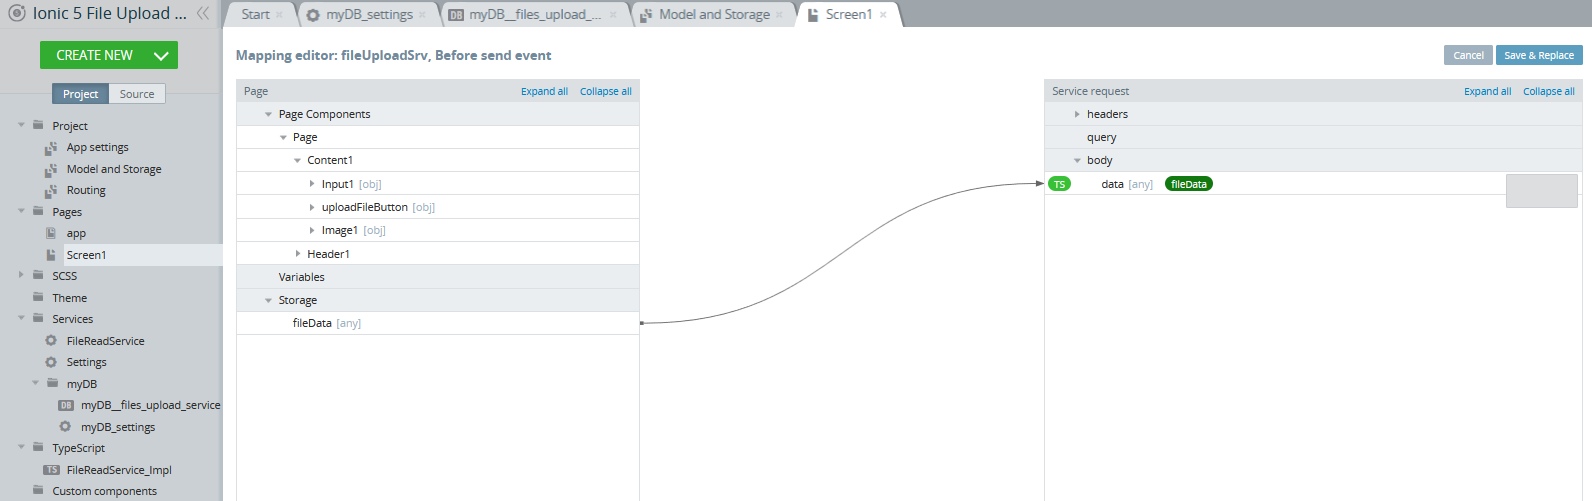
- Now, rename the service to fileUploadSrv and define its Before send mapping as follows:
- Click Save & Replace, delete the Success mapping button since it will not be used in the app, but let's add some success toasts instead.
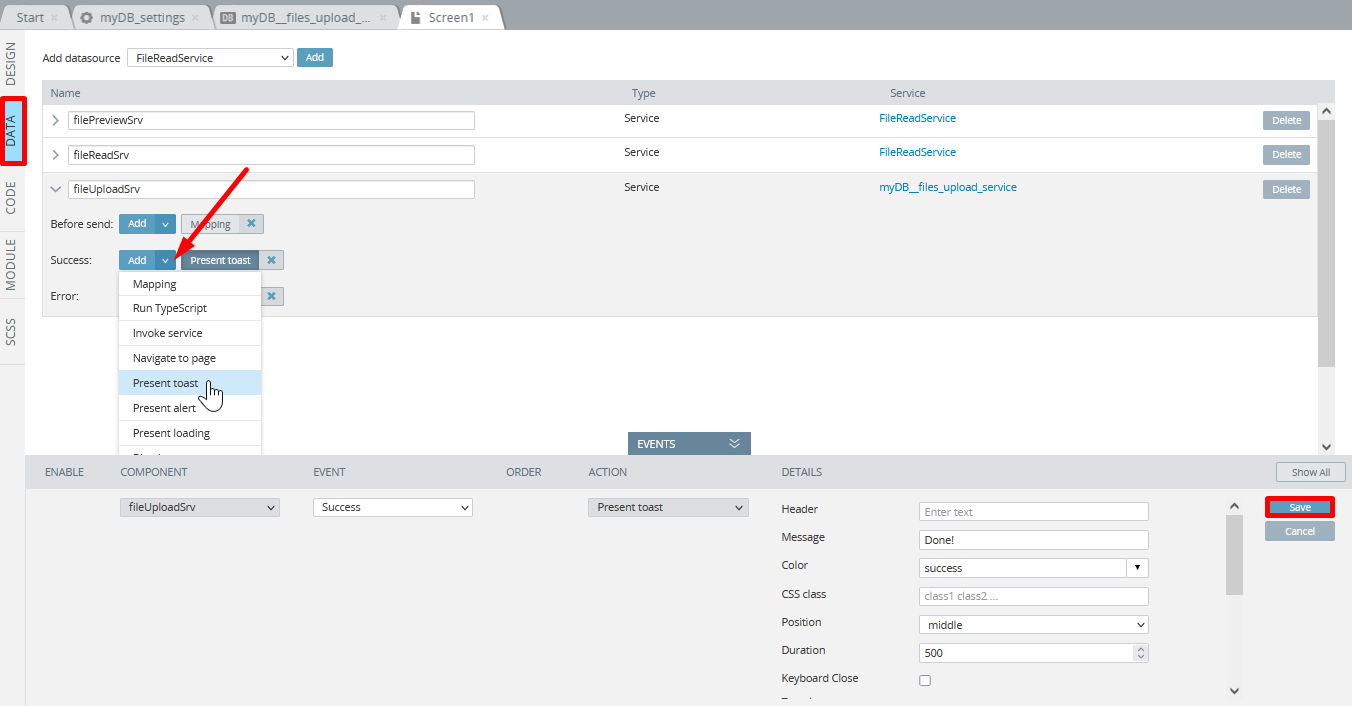
- To add the toast indicating the successful file upload, click the arrow button next to the service Success event and select the Present toast action from the list. Then define the action like the following:
- Message = Done!;
- Color = success;
- Position = middle;
- Duration = 500:
- Similarly, add the Present toast action to the Error event to show an error message about an unsuccessful upload defined like this:
- Message = Sorry, some error occurred;
- Color = danger;
- Position = middle;
- Duration = 500:
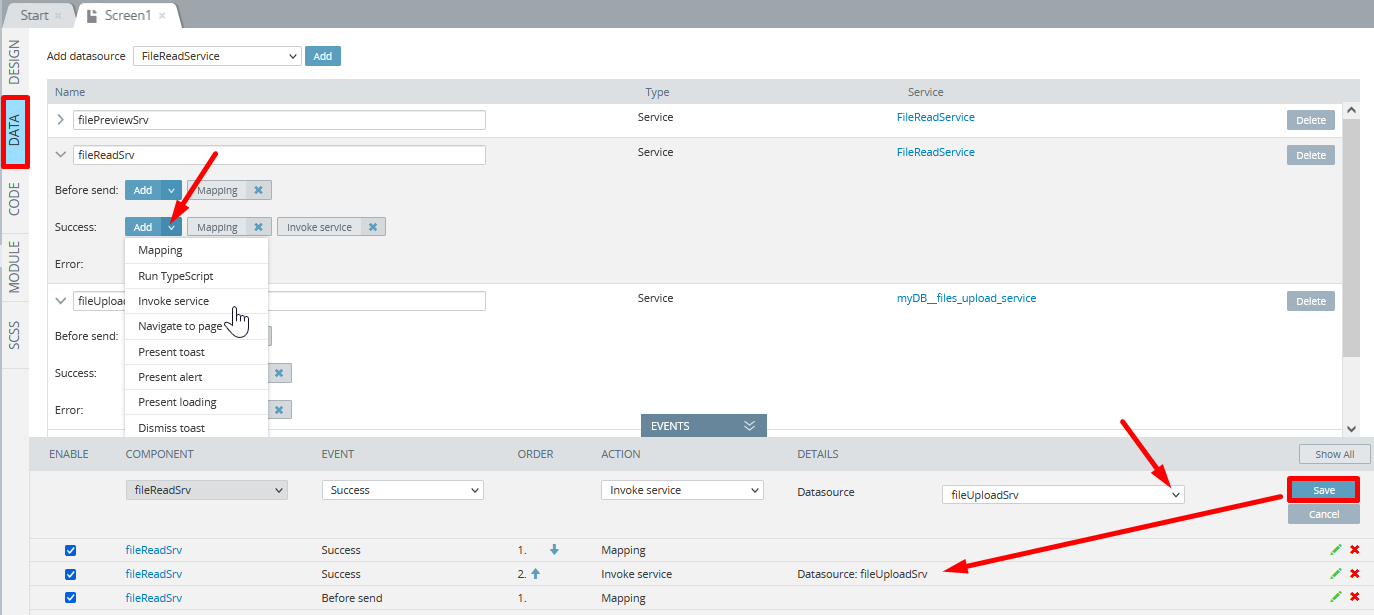
- After the file is read, the upload service needs to be invoked, so, for the fileReadSrv service Success event, select the Invoke service action with the fileUploadSrv as its datasource:
- Finally, select the UPLOAD FILE button and for its Click event select the Invoke service action defined with the fileReadSrv service:
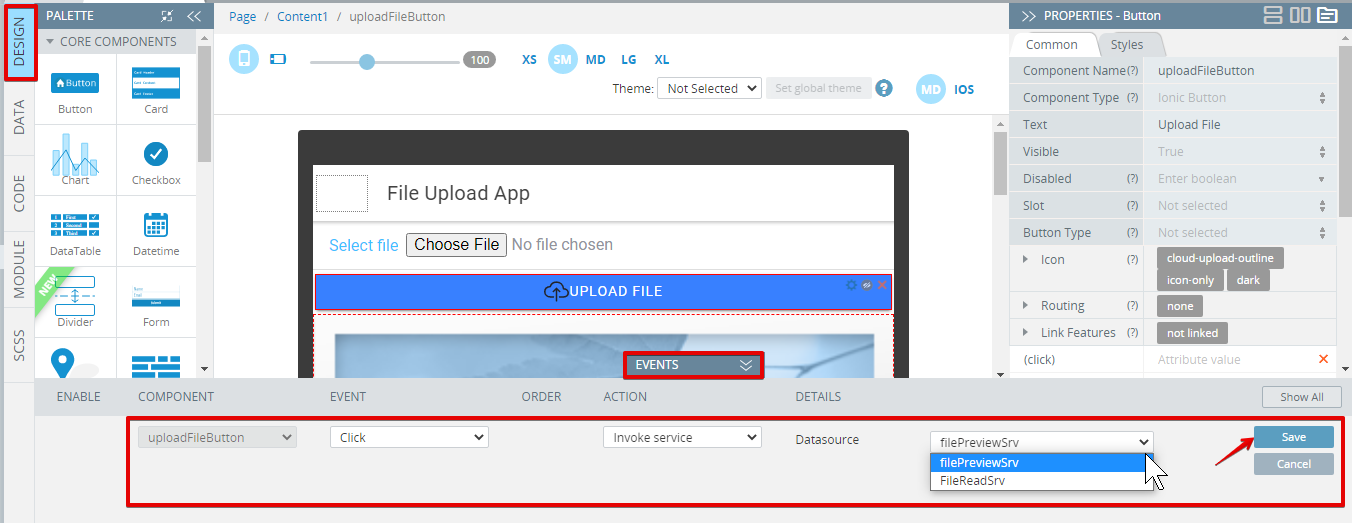
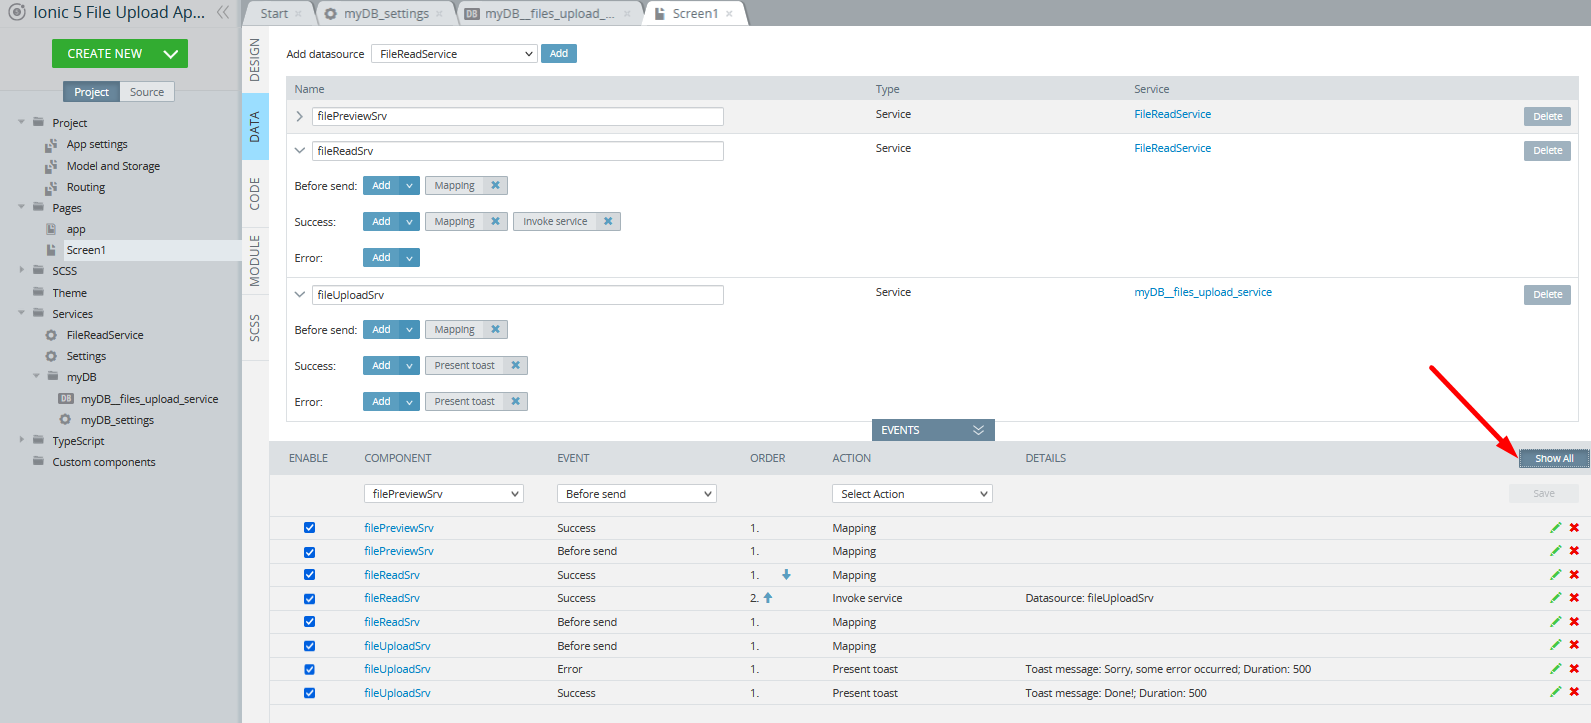
Here is how the DATA panel with all the events defined should look like (click Show all):
Now, when you have defined the service that can upload files to your database and doesn't need authentication, you can test the app in preview: select the file, preview it and then click the UPLOAD FILE button:
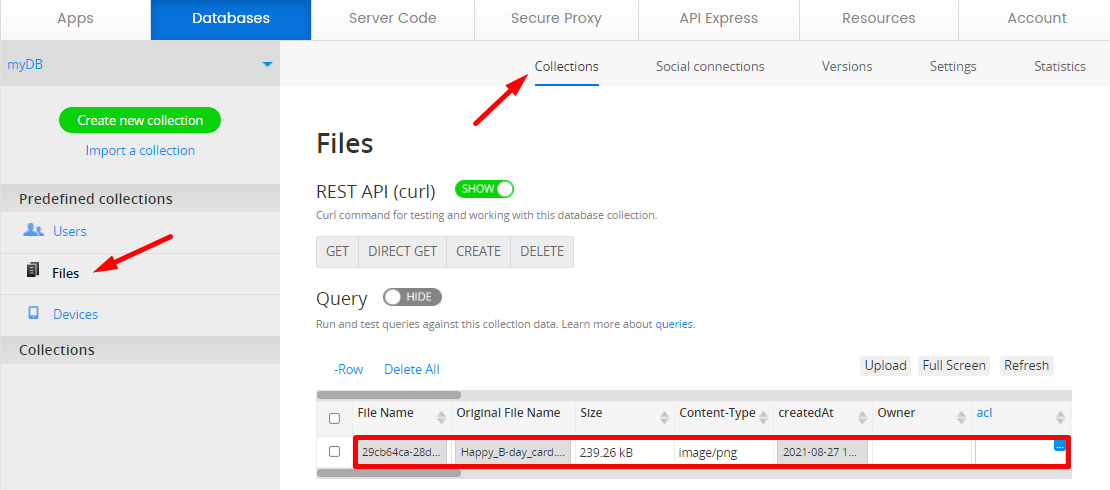
In a moment, you can open your database (here, it's myDB) to check its Files collection and make sure that a new file entry is already there (you may need to click the Refresh button to update the list):
Note that this app is specifically configured to preview certain image file types, but can be modified to be used for uploading (and previewing) other file formats.
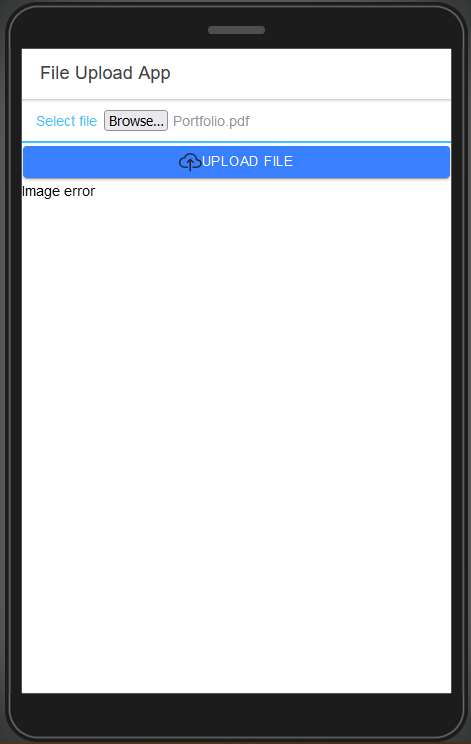
For example, if you now try uploading a .pdf file, you will get the image error message in preview:
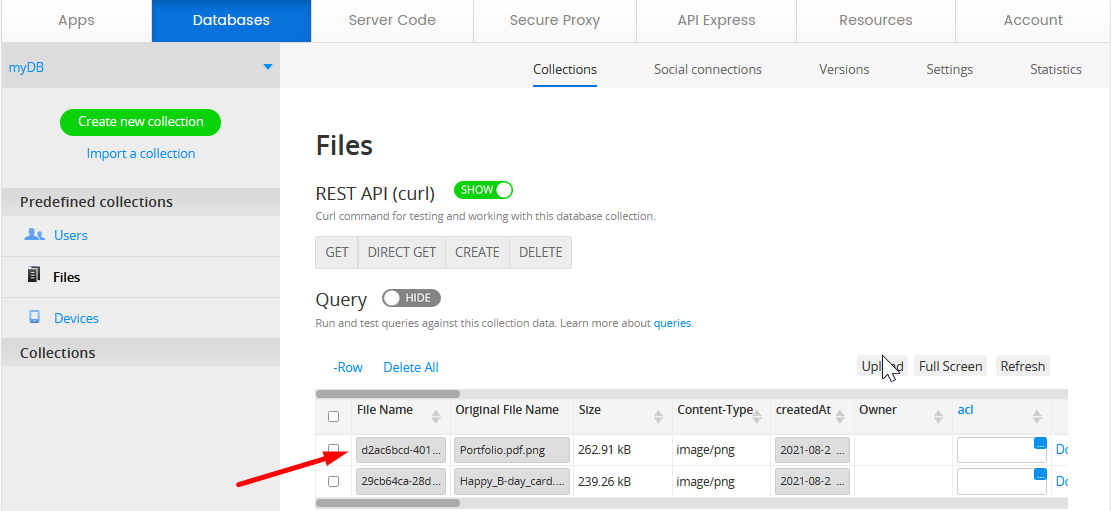
However, if you proceed with uploading it to the database and then go back to check the database Files collection (you may need to click the Refresh button to update the files list), the file will be there:
In the next section, we will demonstrate how you can add the camera service to the app.
Updated about 1 year ago